Part 2: Blueprint
What Will You Do
- Create an external-dns namespace and publish to your cluster
- Create and configure a repository to dynamically pull the desired version of the External DNS Helm chart
- Create a custom catalog that dynamically syncs the versions from the External DNS Helm repo
- Create an External DNS add-on
- Create a blueprint containing the External DNS add-on
- Apply the newly created blueprint to the EKS cluster
Step 1: Create Namespace
We will deploy the External DNS controller to the external-dns namespace. We will create this in our project and take over management of the external-dns namespace on the EKS cluster.
- Click on Infrastructure -> Namespaces
- Click New Namespace
- Enter "external-dns" in the "Name" section
- For "Type" Select "Wizard" from the dropdown
- Click "SAVE"
- Click "SAVE & GO TO PLACEMENT"
- Select the specific cluster
- Click "SAVE & GO TO PUBLISH"
- Select "PUBLISH"
- Select "EXIT" once namespace has published

Step 2: Create External DNS Helm Repo
Configure the repo endpoint so that the controller can automatically retrieve the required Helm chart directly from the public repository.
- Click on Integrations -> Repository
- Create New Repository -> Provide a name such as "external-dns" and Select "Helm" for Type
- Enter "https://kubernetes-sigs.github.io/external-dns/" for Endpoint and Select "Internet" for Reachability.
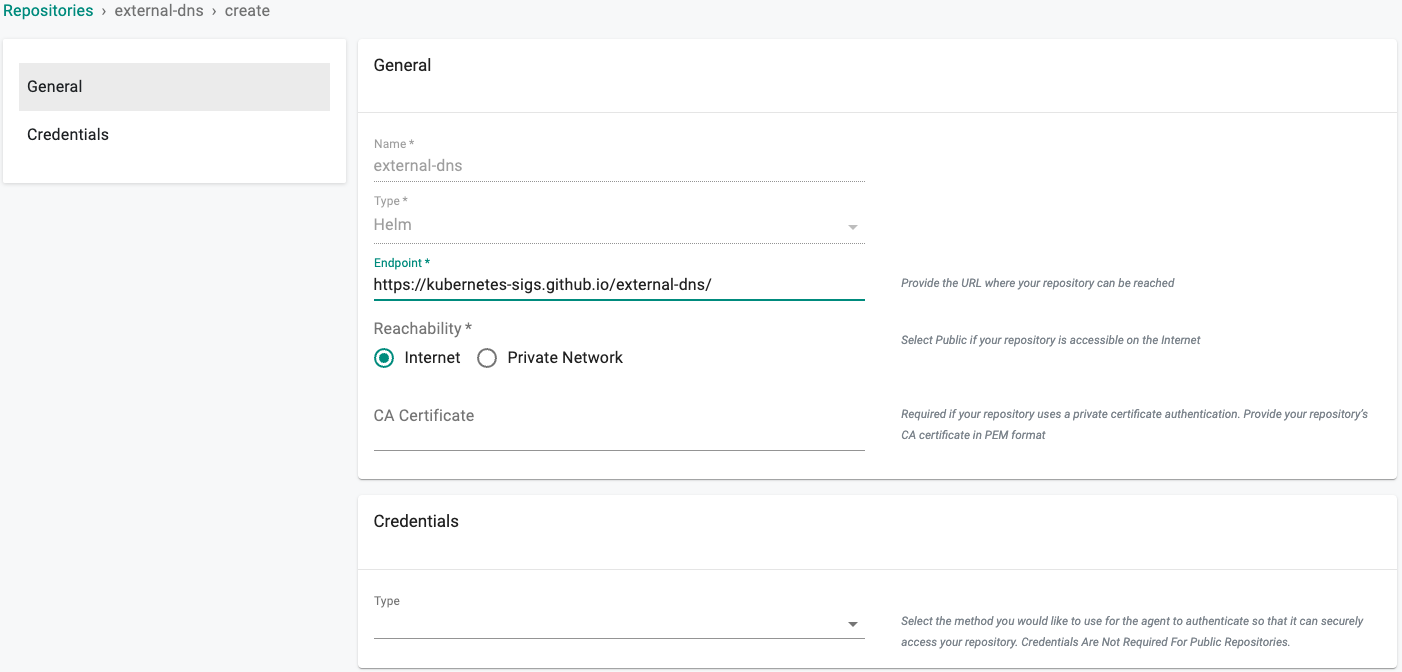
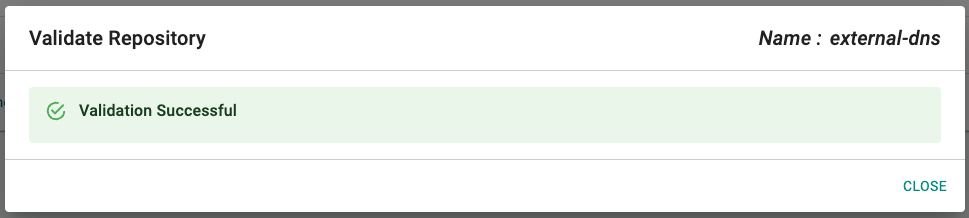
- Optionally, you can validate the correct configuration of the repository by clicking on the validate option
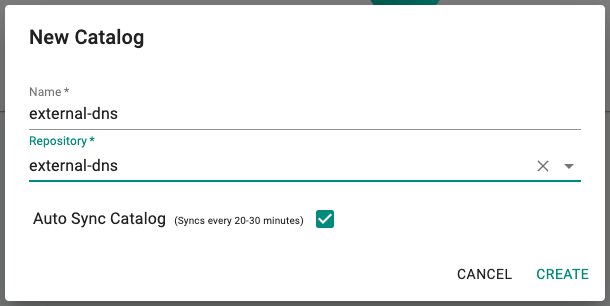
Step 3: Create Catalog
We will now create a custom catalog using the previously created repository.
- Click on "Catalog"
- Click on "MANAGE CATALOGS"
- Click on the "CUSTOM CATALOGS" tab
- Click on ""+ New Catalog"
- In the Name section enter "external-dns"
- Select "external-dns" for the repository
- Enable "Auto Sync Catalog"
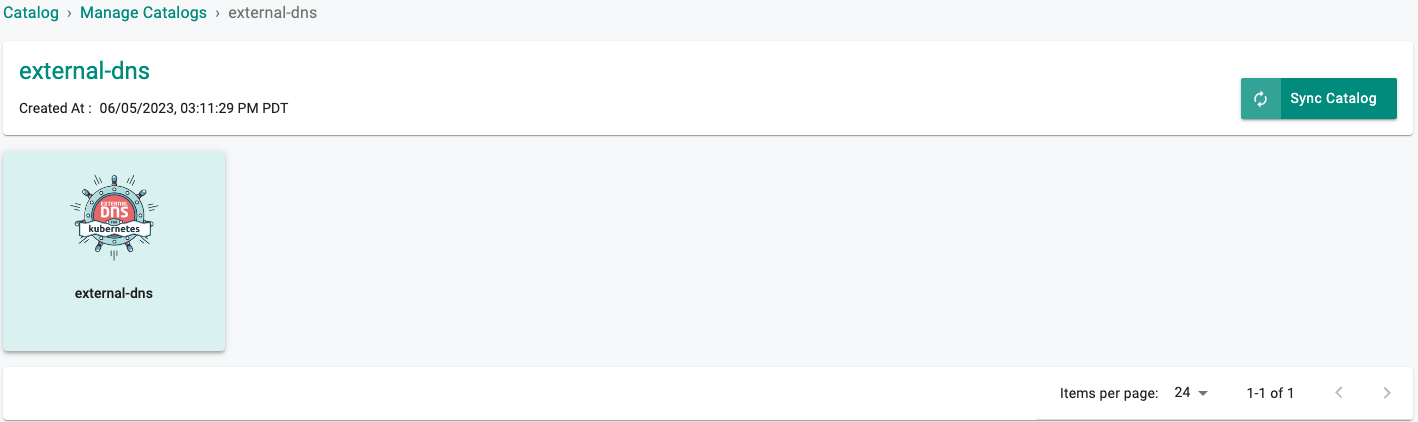
- Click on "Sync Catalog" and refresh the page, the external-dns helm chart and versions will populate
Step 4: Create Add-on
In this step we will create a custom add-on from our External DNS catalog.
- Click on Infrastructure -> Add-Ons
- Click on "Create New Add-on from Catalog"
- Select the "external-dns" add-on
- Select the latest version
- Select "Create Add-on"
- Enter "external-dns" for the name
- Enter "external-dns" for the namespace
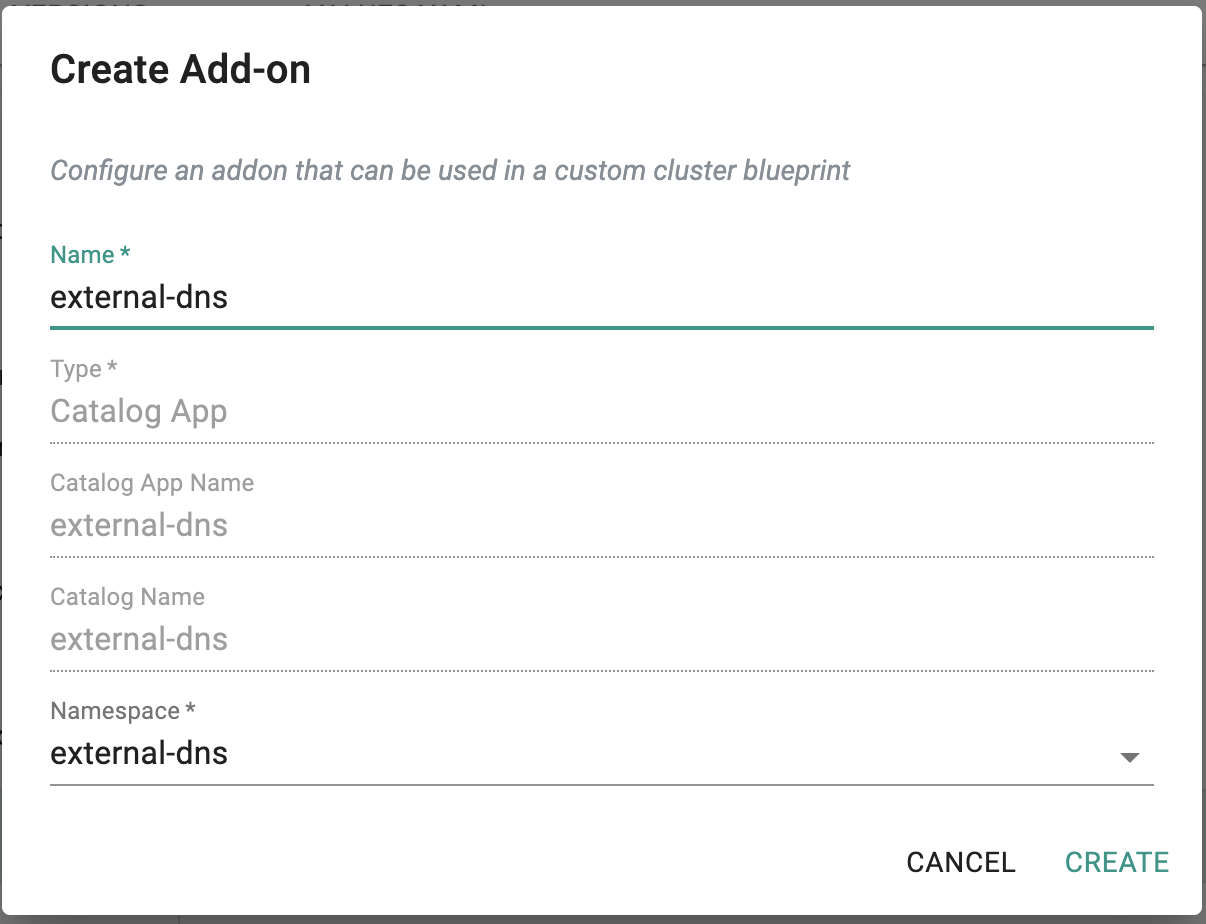
- Click on "CREATE"
Custom Values
External DNS supports many providers and options that can be enabled in a custom values file. For this exercise we will use the following file.
- Copy the following contents to a file called "external-dns-values.yaml"
sources:
  - service
  - ingress

policy: sync

registry: txt
txtOwnerId: "kubernetes"
txtPrefix: ""
txtSuffix: ""

domainFilters: []

provider: aws

extraArgs:
  - --aws-zone-type=public
New Version
- Click on "New Version"
- Enter a version name, for this add-on we will user "v0.0.1"
- Upload the file "external-dns-values.yaml" we created earlier
- Click on "Save Changes"

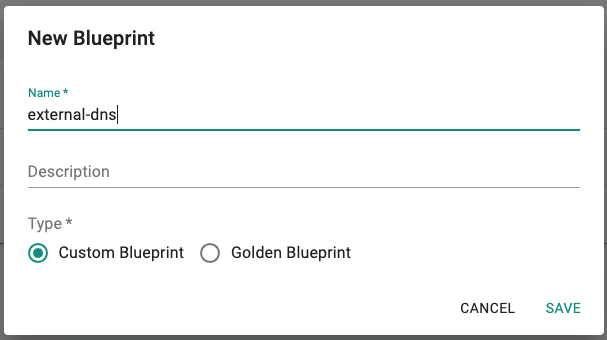
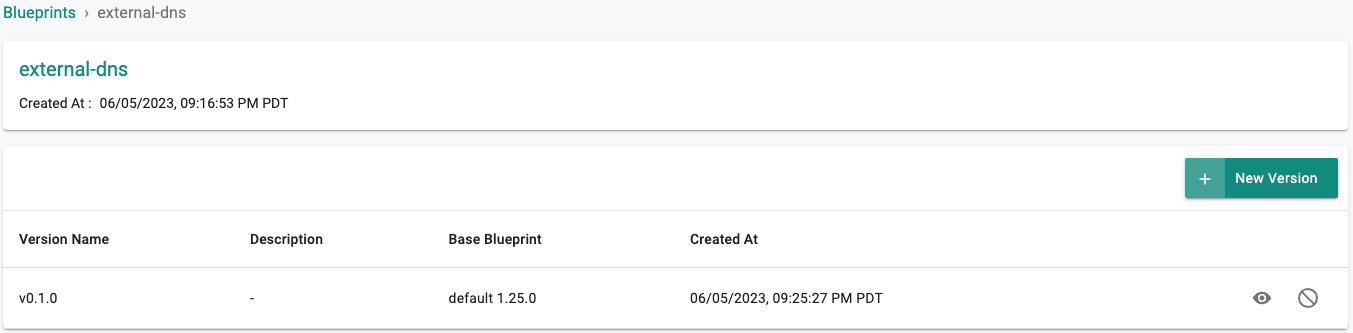
Step 5: Create Blueprint
In this step, you will create a custom cluster blueprint with the External DNS add-on.
- Click on Infrastructure -> Blueprints
- Select "New Blueprint"
- Enter "external-dns" for the Name
- Select "Custom Blueprint" for the Type
- Click on "SAVE"
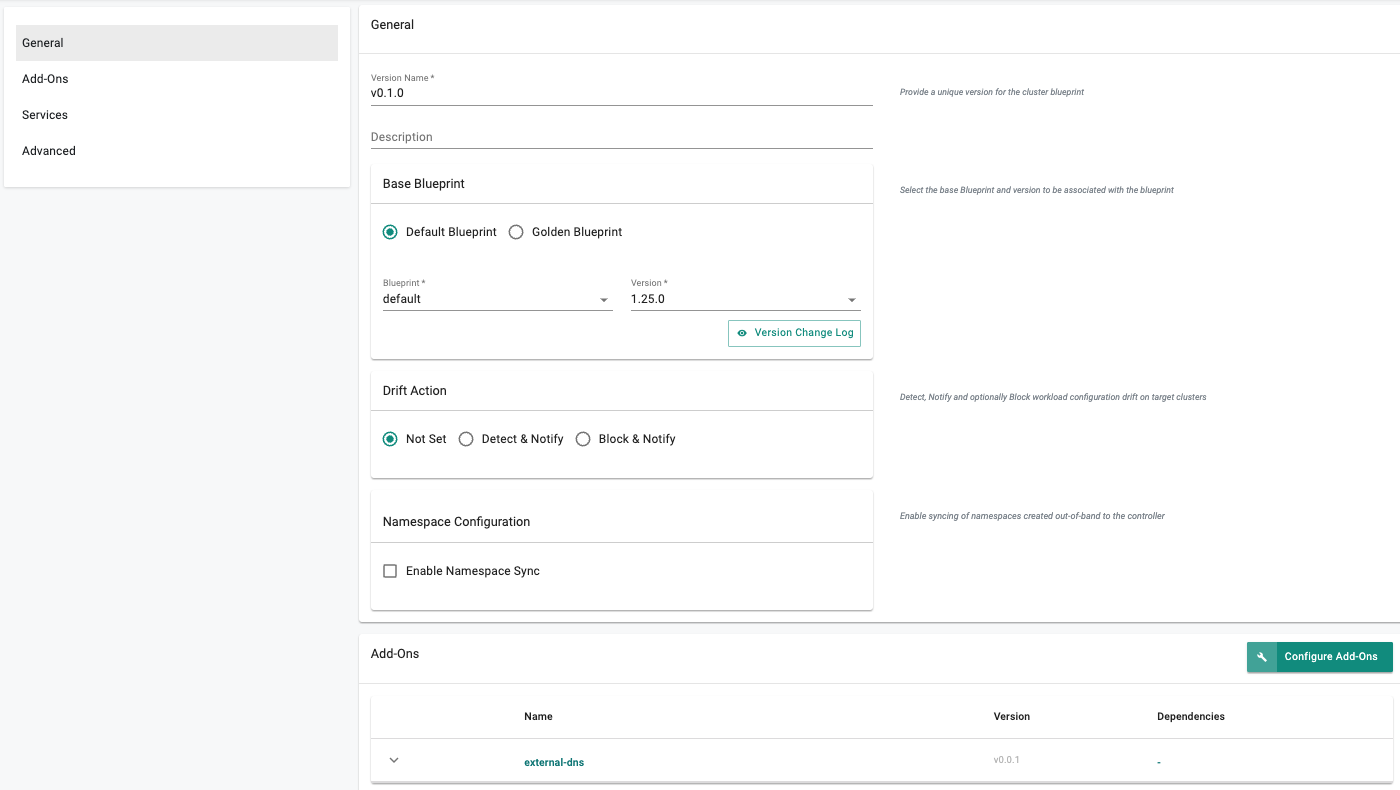
- Enter a Version Name such as "v0.1.0"
- Set the "Base Blueprint" to the latest Version
- Set "Drift Action" to "BlockAndNotify"
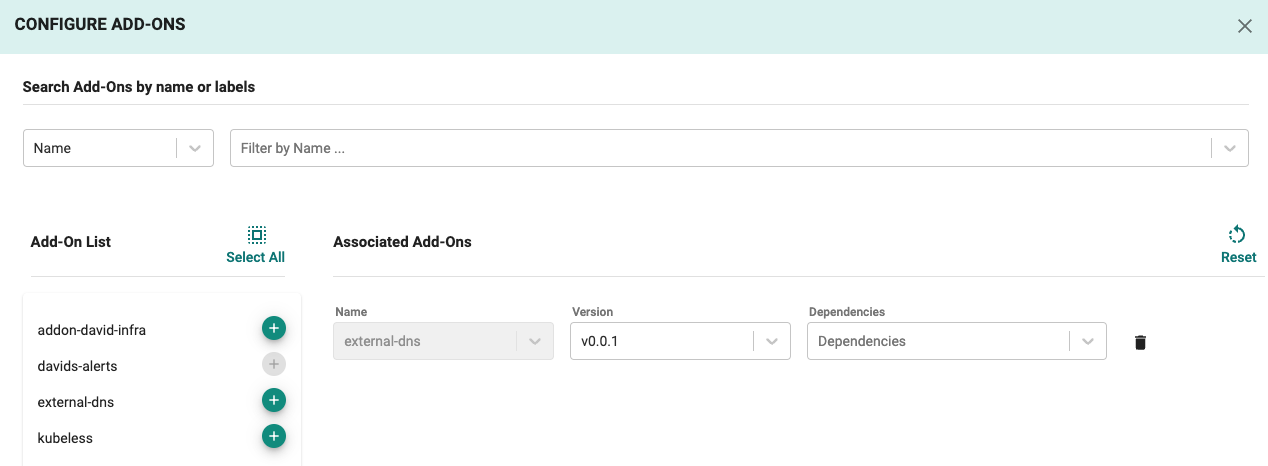
- Click on "Configure Add-ons"
- Add the add-on created in the previous step
- Click on "SAVE CHANGES"
- Click on "SAVE CHANGES"
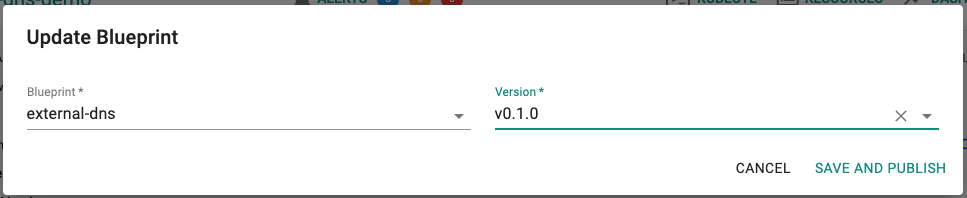
Step 6: Apply Blueprint
Now, we are ready to apply the newly created custom blueprint to our MKS cluster.
- Select Infrastructure -> Clusters
- Click on the gear icon on the far right of the EKS cluster
- Update blueprint and select the new blueprint and version
- Select "SAVE AND PUBLISH"
In a few minutes, all the k8s resources matching the custom cluster blueprint will become operational on the cluster.
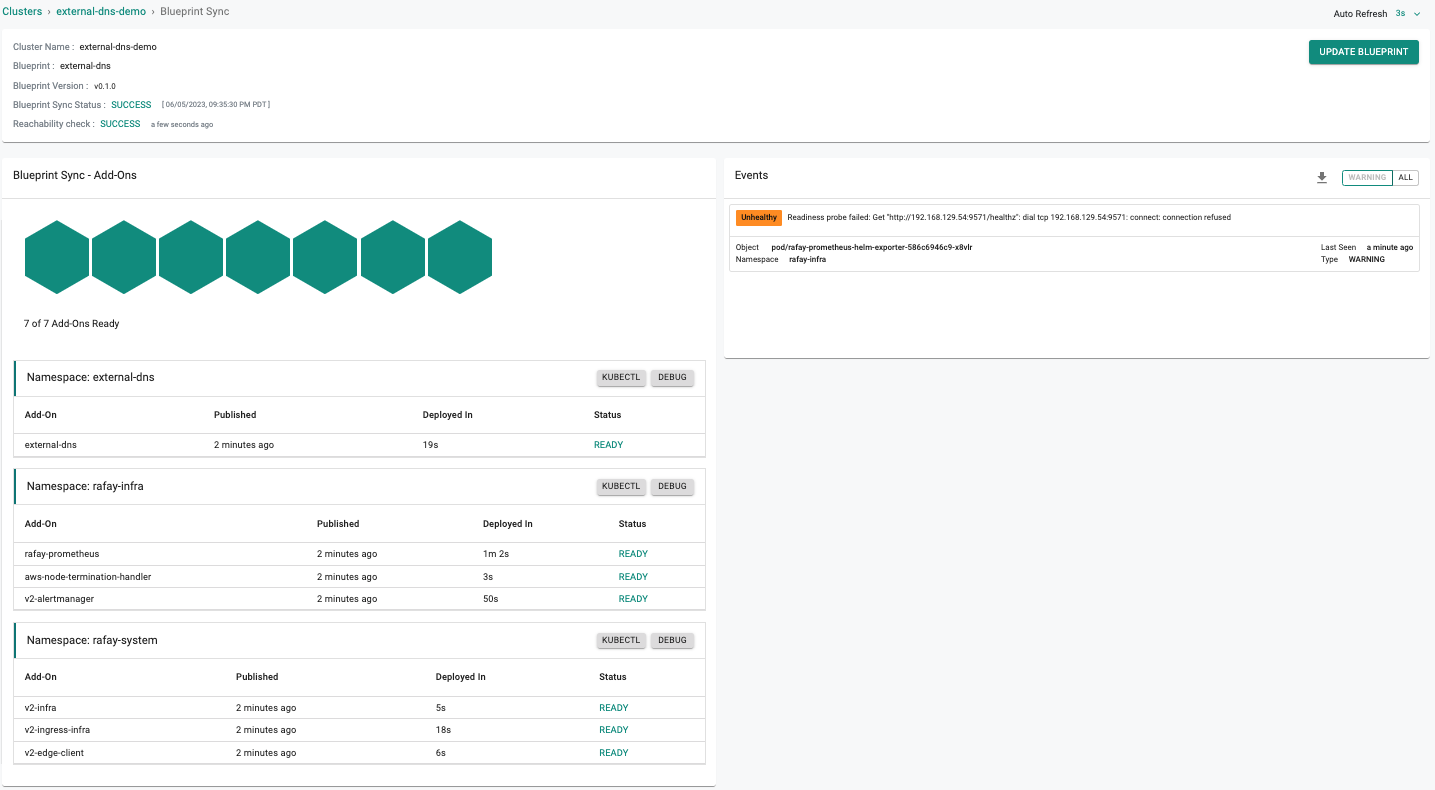
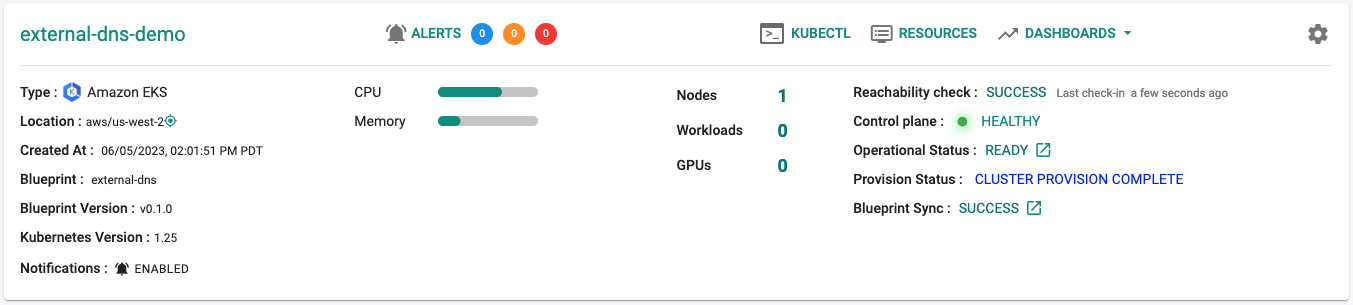
Notice that the cluster's blueprint name and version match what you created in the prior step.
Next Steps
You are now ready to move on to the next part of the recipe where you will create a workload and provision a Load Balancer.