Azure Setup
To create and manage AKS clusters, the following data will be required to configure credentials for Azure:
- Subscription ID (The subscription ID for the Azure account)
- Tenant ID (The application's Directory ID)
- Client ID (The application's ID)
- Client Secret (The secret value for the newly registered application)
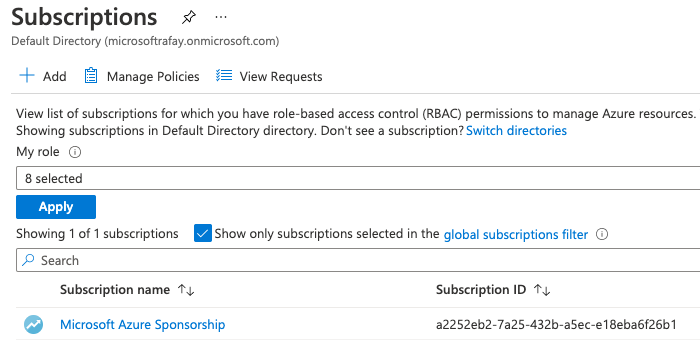
Subscription ID
- Login to the Azure Portal
- Click on Subscriptions under the Azure Services
- Note the value of the Subscription ID
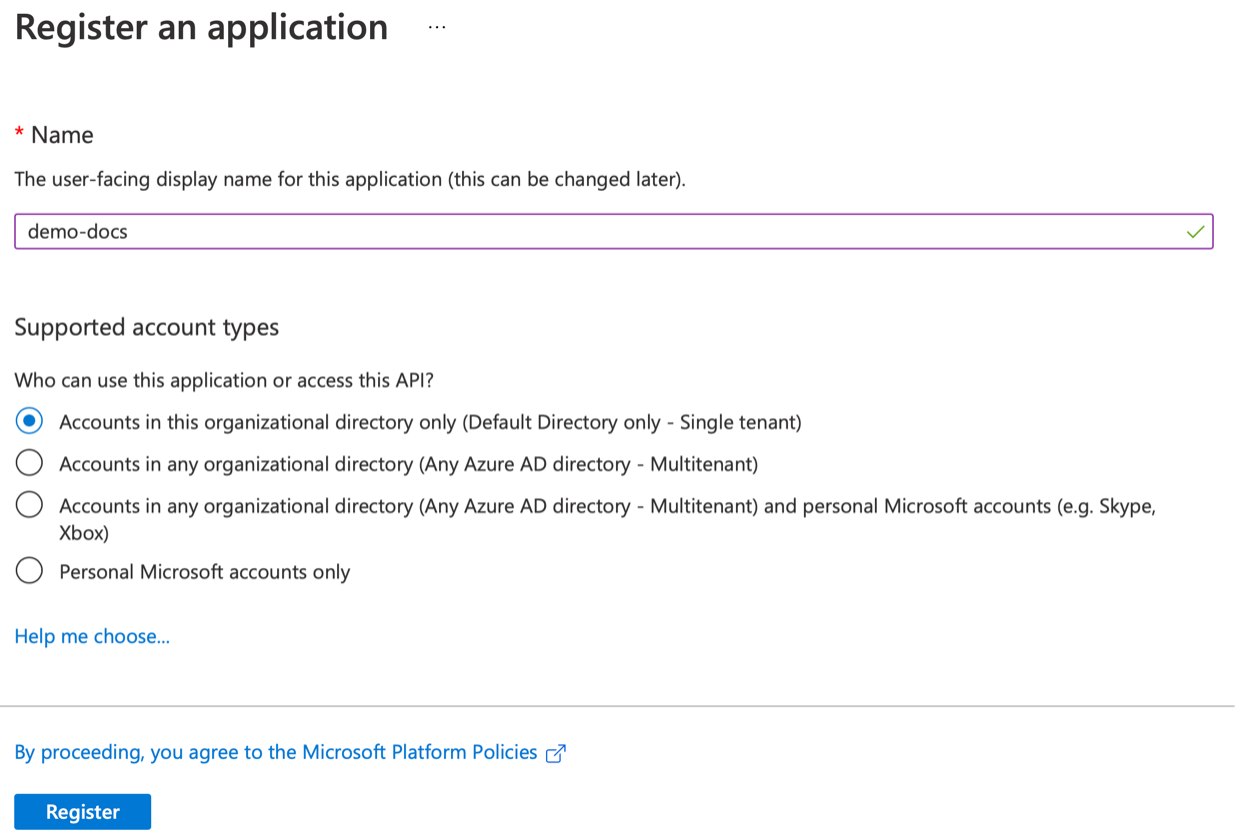
Application and Tenant ID
- Login to the Azure Portal
- Navigate to Microsoft Entra ID -> App registrations under the "Azure Services"
- Click New registration to create a new Application (client) ID
- Provide a name for the application (Rafay) and click Register
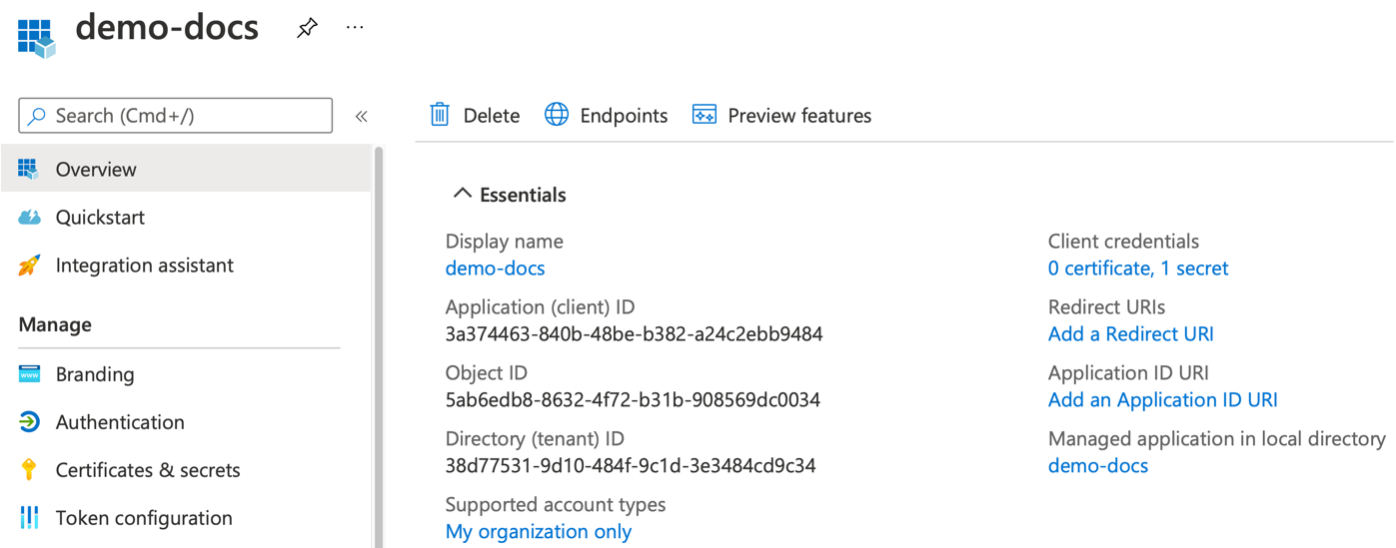
Application (client) ID and Directory (tenant) ID is available now.
Generate Secret Value
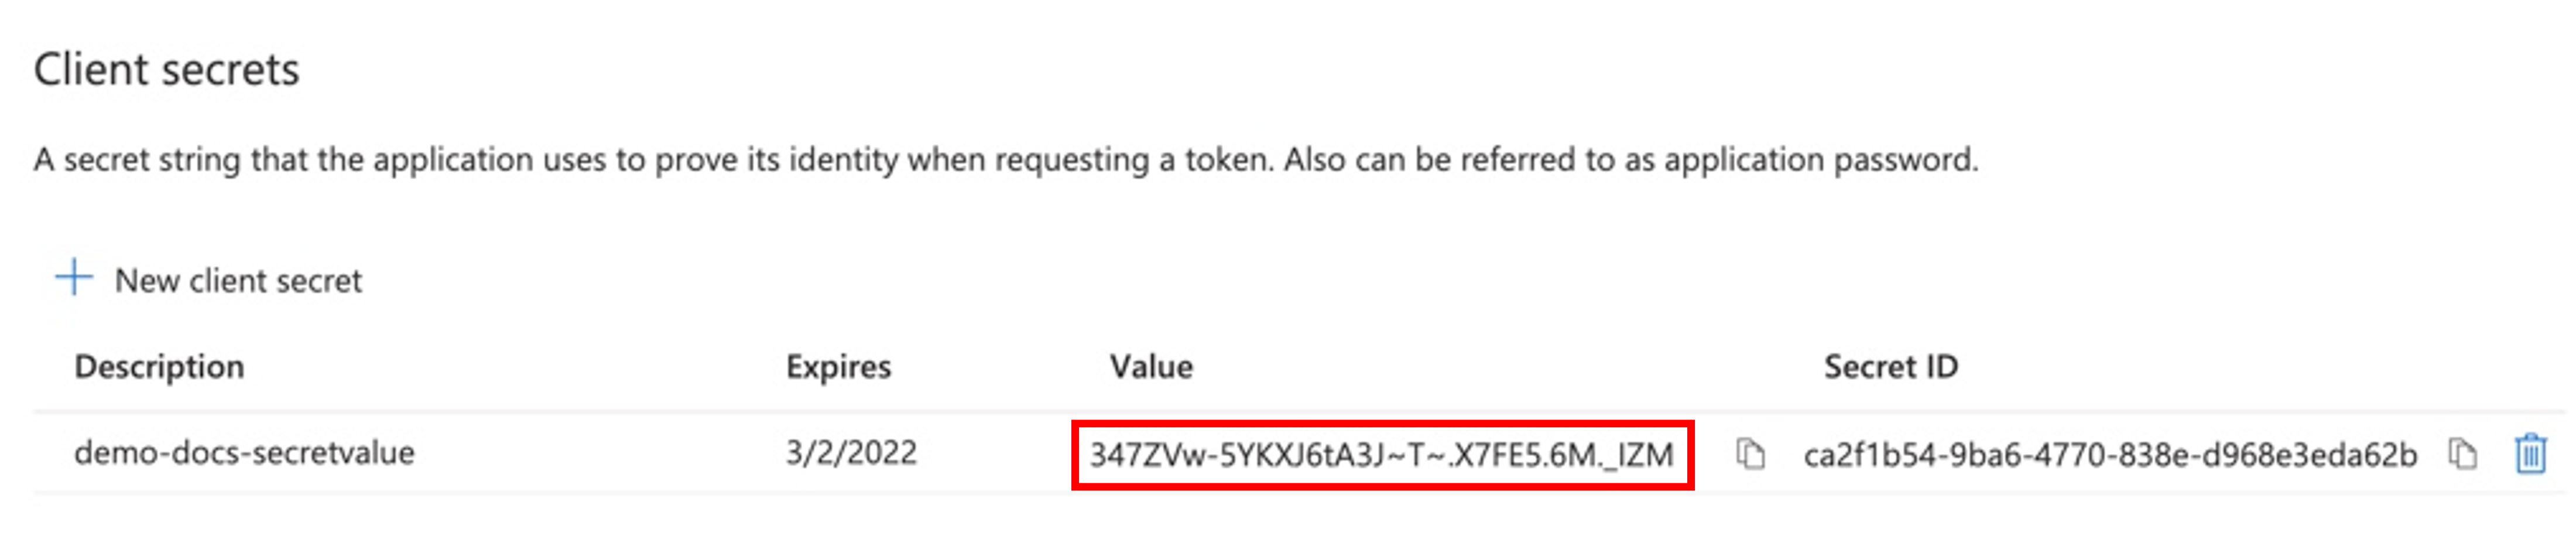
Once the registration is successful, perform the below steps to generate the client secret value
- Click Add a certificate or secret link
- Click + New client secret
- Provide a Description (AKS Lifecycle Management)
- Set Expires to 6 months or more (24 months) and click Add
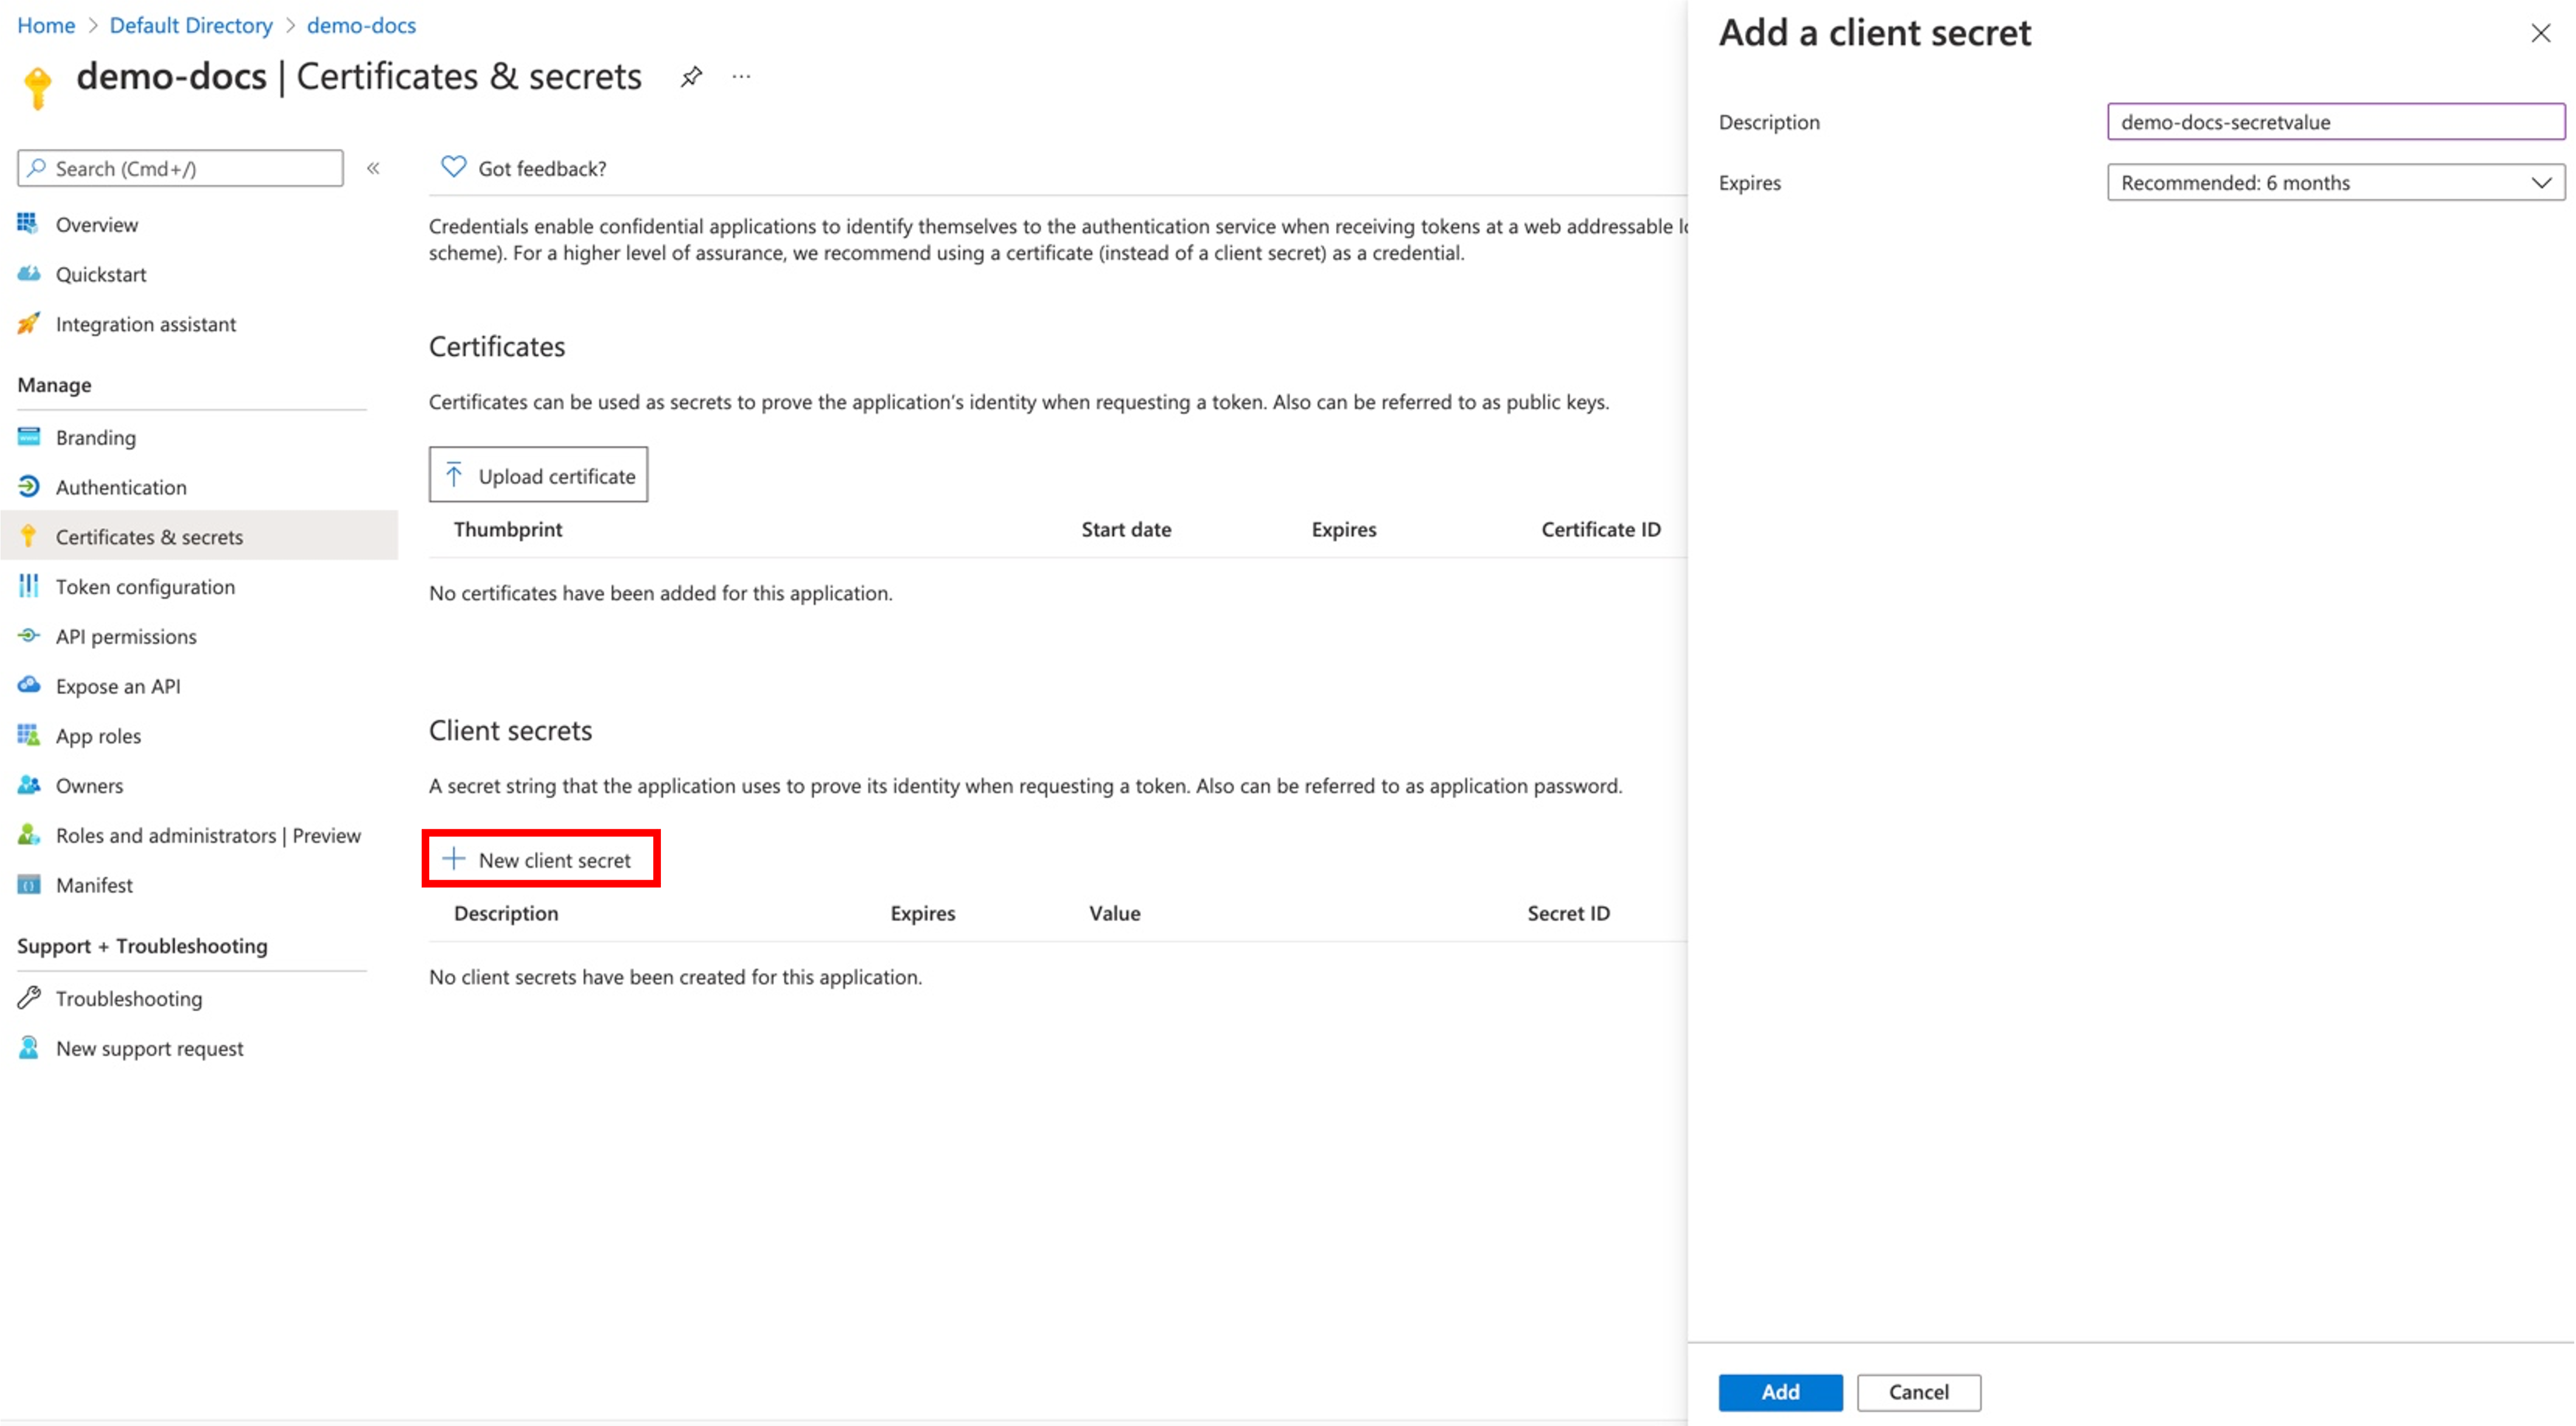
Copy the generated Secret Value.
Note: In case of not copying the client secret value at this moment, user can delete it and create a new secret value. The "Secret ID" is not required.
Add a Contributor Role to the Subscription
Assign the Contributor Role to the newly created application ID in the subscription selected above. To do so, follow the below steps:
- Click Subscriptions under the "Azure Services" and get into the subscription
- Click Access control (IAM) in the navigation menu
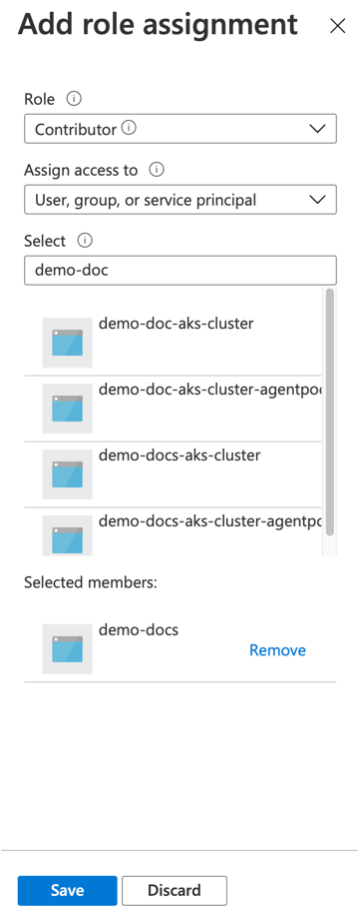
- Click Add -> Add role assignment
- Select Contributor from the Role drop-down. Contributor role is a basic role allowed to manage all resources but not authorized to assign roles in Azure RBAC
- Select User, group, or service Principal from the "Assign access to" drop-down
- Select the newly created Application Name (example: demo-docs) under the "Select" drop-down
- Click Save
Role Assignments
If you are using a Contributor role, note that it doesn't include permission to assign roles in Azure RBAC. Users should create a custom role with Microsoft.Authorization/roleAssignments/write permission and then assign this role to the resource groups or applications.
This enables the execution of operations on Azure services/modules such as Custom Vnet, ACR (Azure Container Registry), Storage, etc. If this role is not added, you may encounter permission issues (403 forbidden) for the action.
Custom Role
Users can create their own Azure custom roles if the Azure built-in roles is not upto the specific needs of the organization. Similar to built-in roles, assign custom roles to users, groups, and service principals at subscription and resource group scopes. Custom roles are stored in a Microsoft Entra ID directory and can be shared across subscriptions. Each directory can have up to 5000 custom roles. Custom roles can be created using the Azure portal, Azure PowerShell, Azure CLI, or the REST API
Following permissions are required when using custom roles for the cloud credentials to provision AKS clusters.
- Microsoft.Resources/subscriptions/resourcegroups/read
- Microsoft.ContainerService/managedClusters/write
- Microsoft.ContainerService/managedClusters/read
- Microsoft.ContainerService/managedClusters/delete
- Microsoft.ContainerService/managedClusters/agentPools/write
- Microsoft.ContainerService/managedClusters/agentPools/read
- Microsoft.ContainerService/managedClusters/agentPools/delete
- Microsoft.ContainerService/managedClusters/listClusterAdminCredential/action
- Microsoft.ContainerService/managedClusters/listClusterUserCredential/action
- Microsoft.Resources/subscriptions/resourcegroups/read
- Microsoft.Network/virtualNetworks/subnets/join/action
- Microsoft.Network/networkInterfaces/join/action
- Microsoft.Resources/deployments/write
- Microsoft.Resources/deployments/delete
- Microsoft.Resources/deployments/operationStatuses/read
- Microsoft.Compute/virtualMachines/read
- Microsoft.Compute/virtualMachines/write
- Microsoft.Compute/virtualMachines/delete
- Microsoft.Network/virtualNetworks/subnets/read
- Microsoft.Network/virtualNetworks/read
- Microsoft.Network/networkInterfaces/write
- Microsoft.Network/networkInterfaces/read
- Microsoft.Network/networkInterfaces/delete
- Microsoft.Authorization/roleAssignments/write
- Microsoft.Compute/disks/delete"
Note
All the above permissions needs to be setup at the subscription scope.
The cluster identity used by the AKS cluster must have Network Contributor permissions on the subnet within the virtual network. To define a custom role instead of using the built-in Network Contributor role, the following permissions are required:
- Microsoft.Network/virtualNetworks/subnets/join/action
- Microsoft.Network/virtualNetworks/subnets/read
The subnet assigned to the AKS node pool cannot be a delegated subnet. If the user providing their own subnet, user have to manage the Network Security Groups (NSG) associated with that subnet. AKS will not modify any of the NSGs associated with that subnet. Also, ensure the security rules in the NSGs allow traffic between the node and pod CIDR ranges
For more information on Create/Update Custom roles using the Azure portal, visit Azure Custom Roles
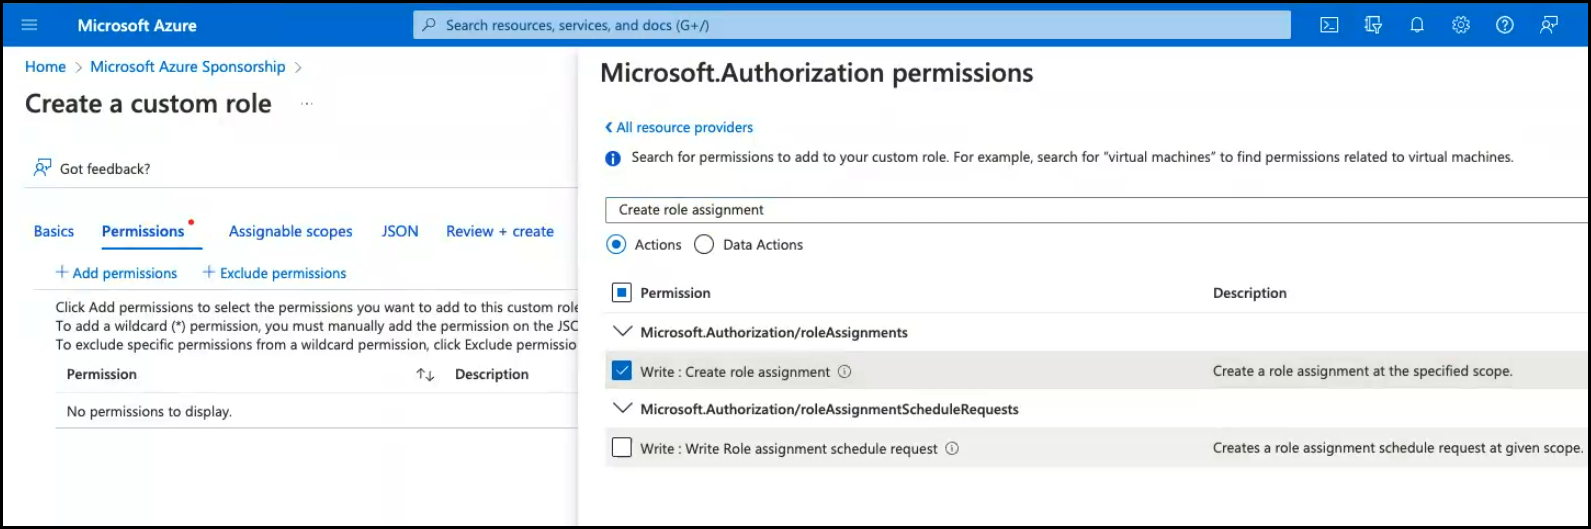
Azure CNI
If an Azure Container Networking Interface (Azure CNI) is used, then an additional role must be created with the Write: Create role assignment permission enabled.
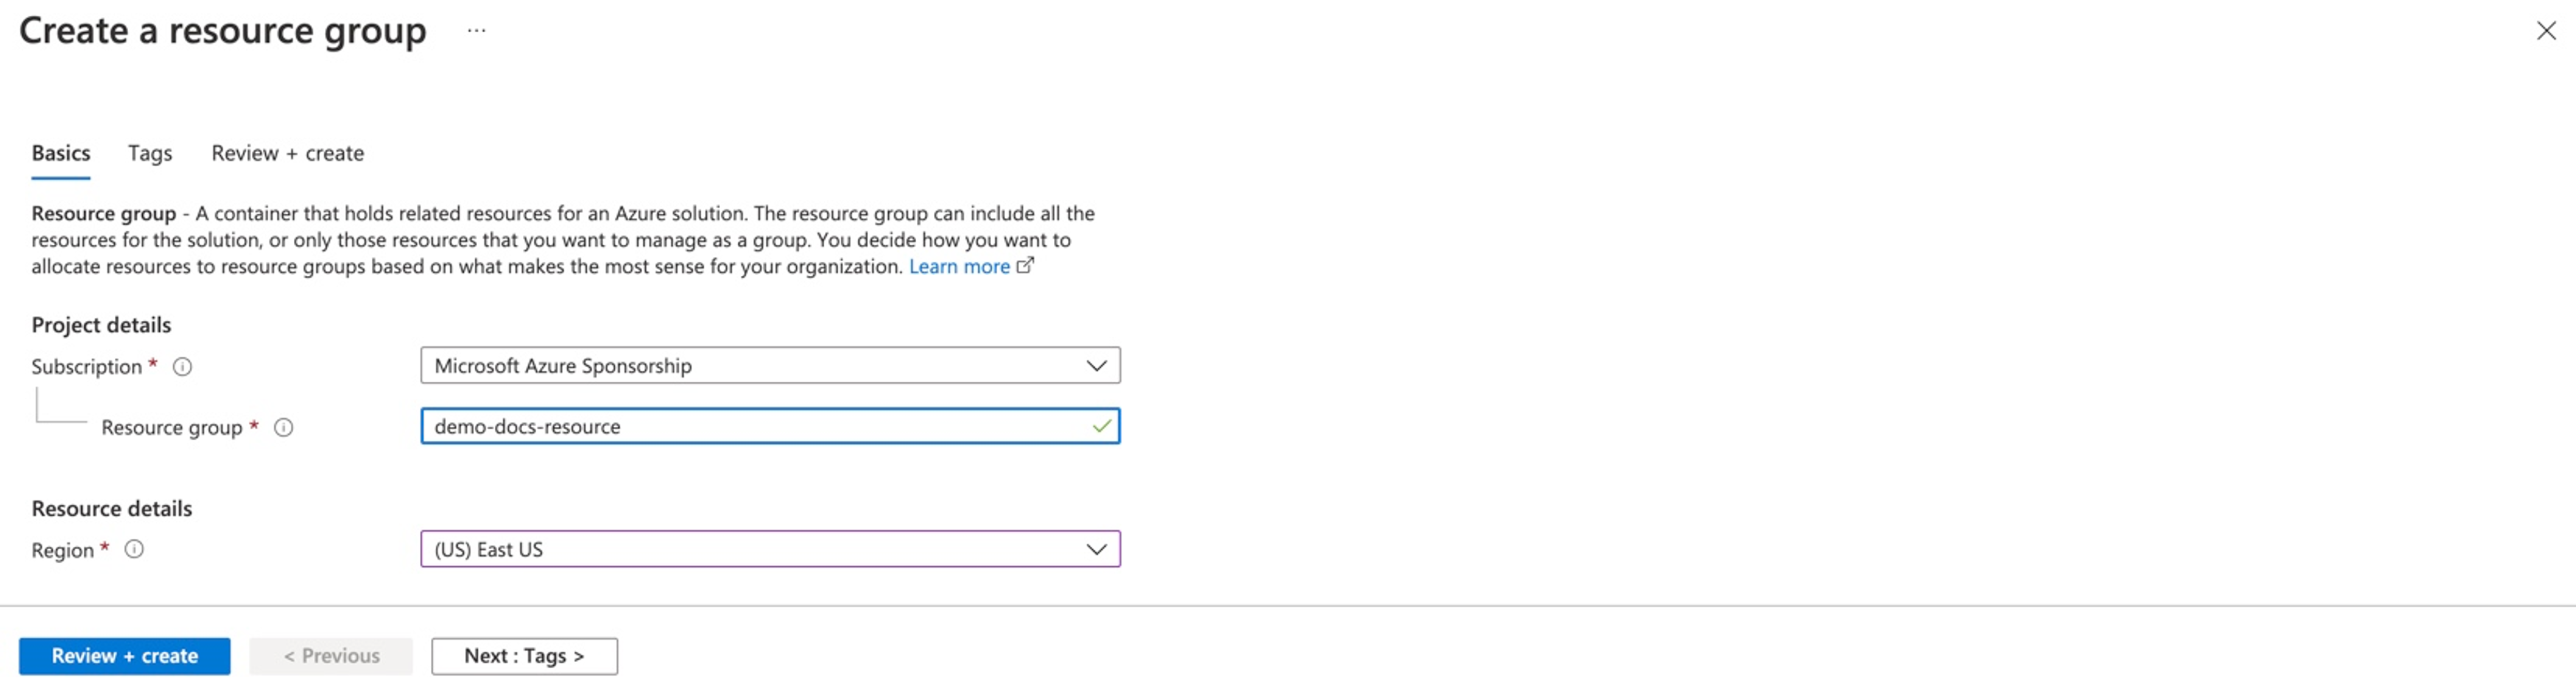
Create a Resource Group
Ensure a Resource Group is available for provisioning AKS clusters into. Either use an existing resource group or create a new resource group.
- Click Resource Groups under the "Azure Services"
- Click Create and provide a resource group name
- Select a region and click Review + create to create the Resource Group
Users can now provision and manage AKS clusters
Disk & Snapshot Management
Once the Resource Group is created, set the permissions on Resource Group where the disk/snapshots will be located
- Select your Resource Group and click Access Control (IAM)
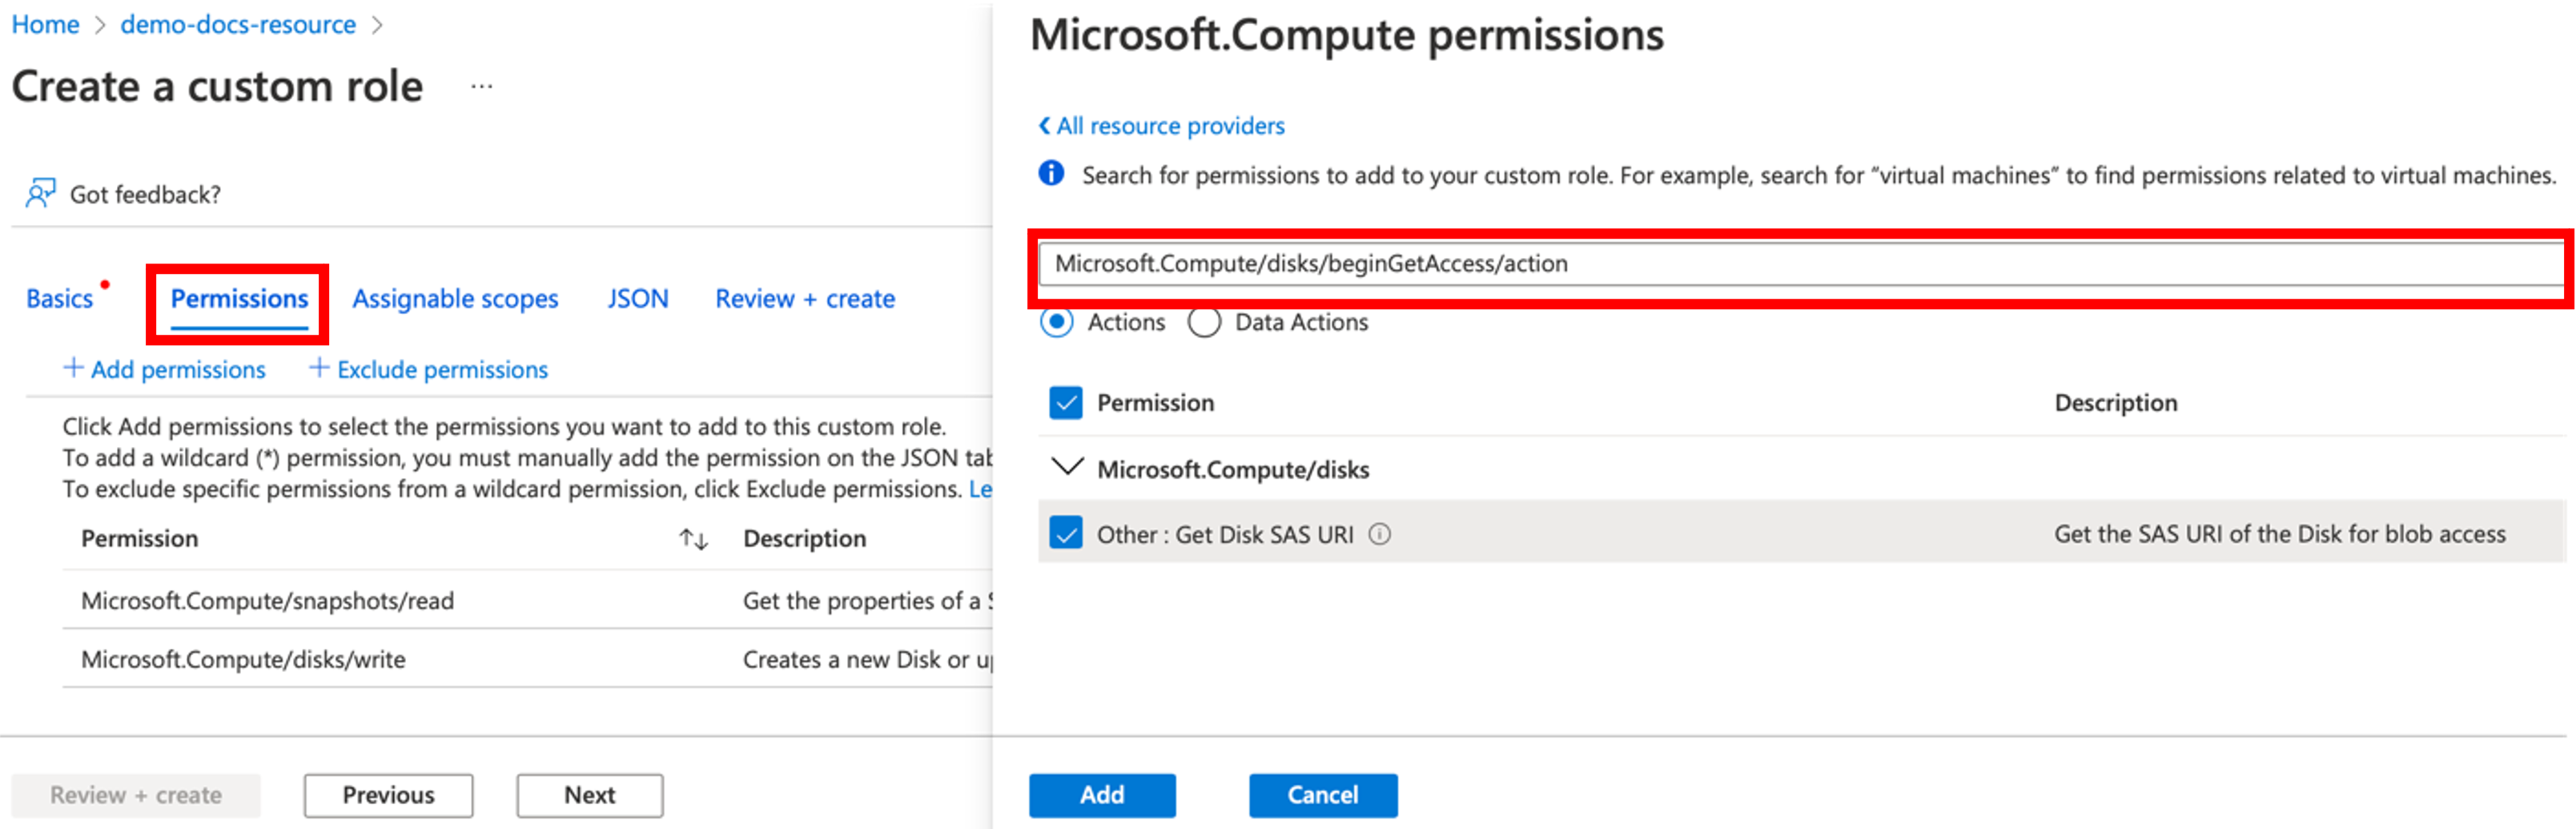
- Click Add under Create a custom role
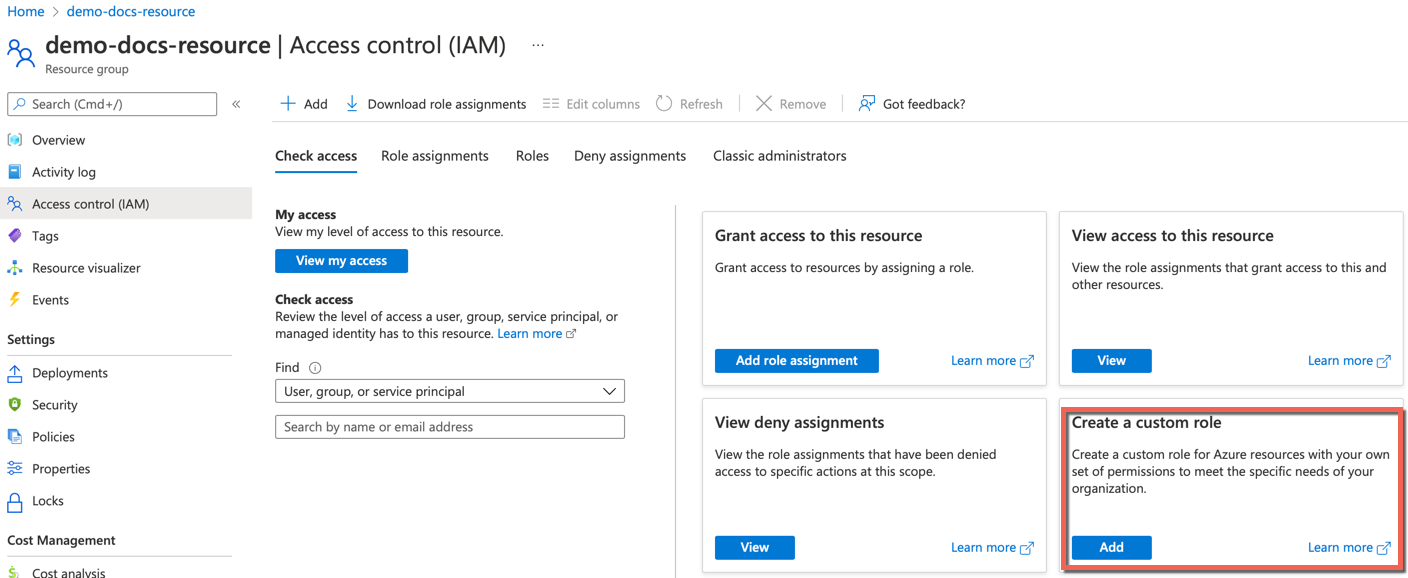
- Select Permissions tab to add the permission(s)
- Enter or search for the required permission(s), select the checkbox, and click Add. You can view the added permission(s) under Permissions
Create Storage Account
An Azure storage account contains all of your Azure Storage data objects, including blobs, file shares, queues, tables, and disks.
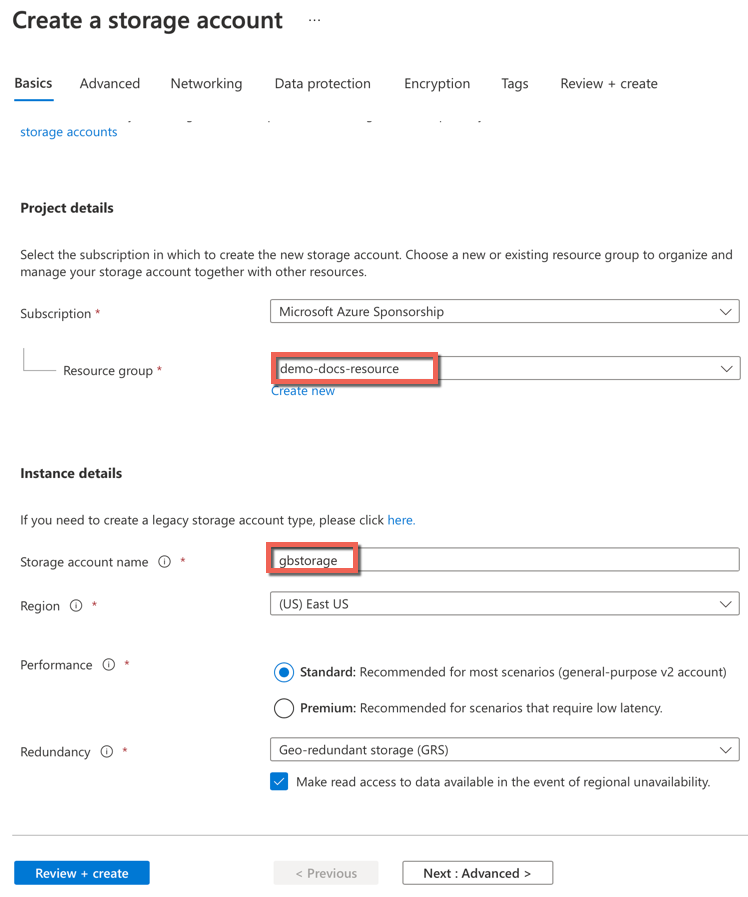
To create a Storage Account in the Resource Group, perform the below steps:
- Click Storage Account under the Azure Services and click Create
- Select the mandatory details and provide a Storage account name
- Click Review + create
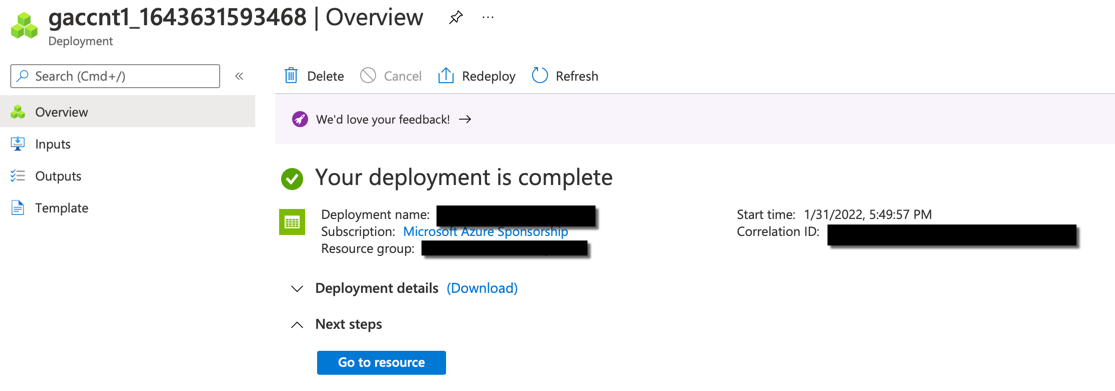
- Once the validation is a success, click Create

Once the deployment is complete, you will see a completion message as shown below
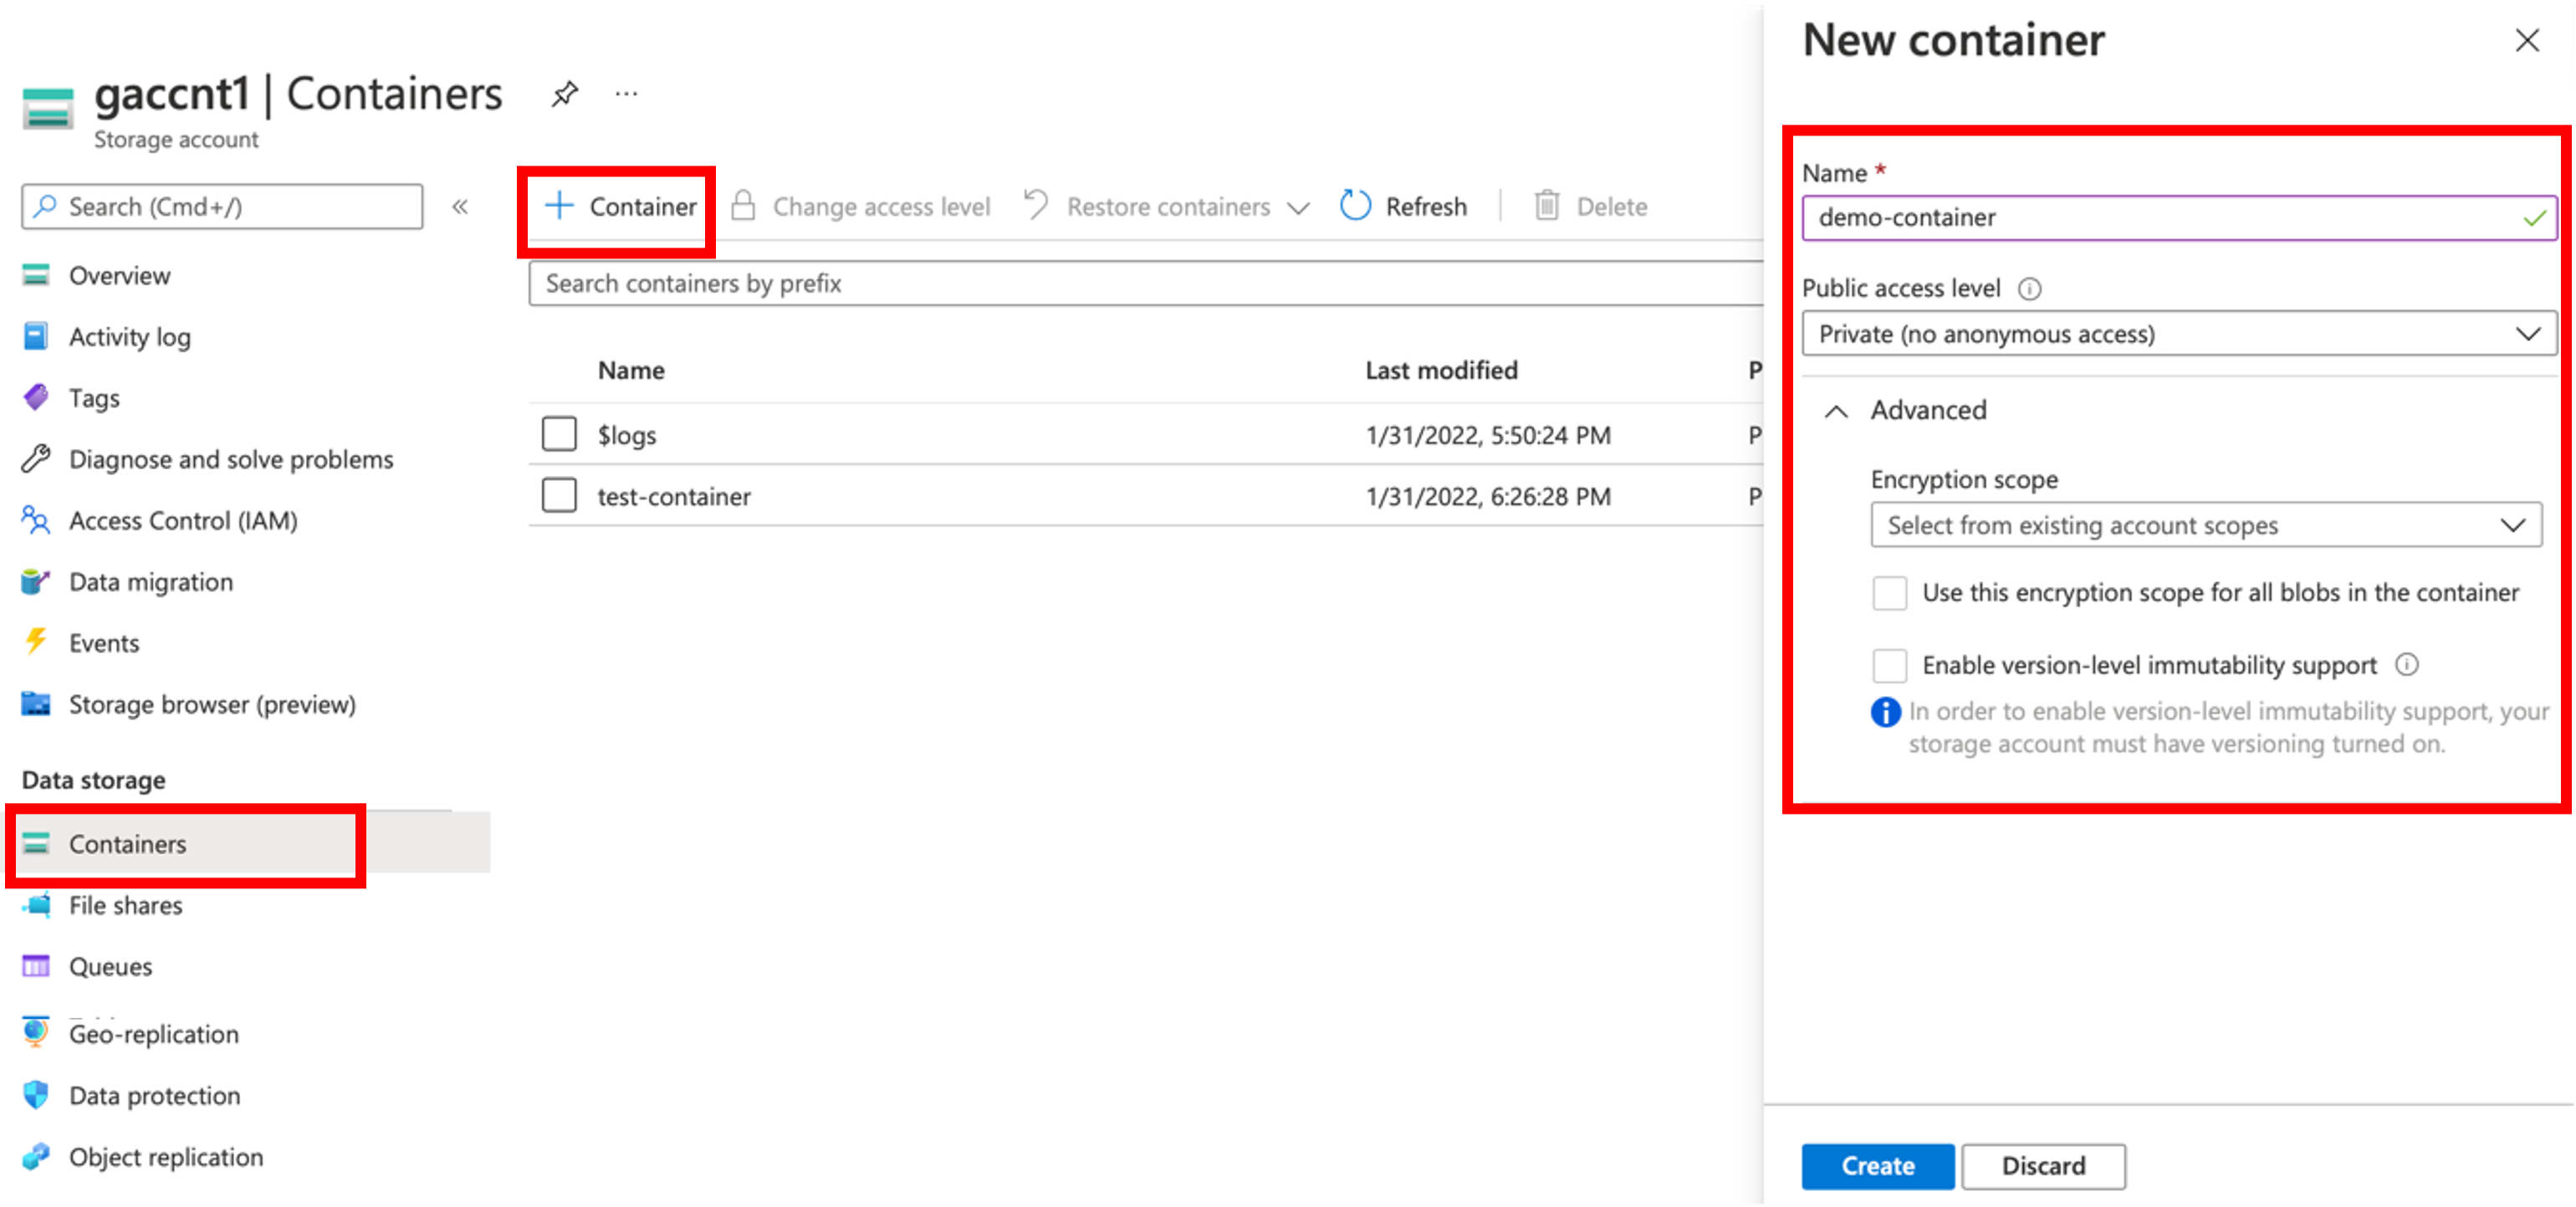
Create Containers
On successful Storage Account creation, users can create Containers
- Select the required Storage Account and click Container. Containers page appears
- Click + Container and the New Container appears in the right pane
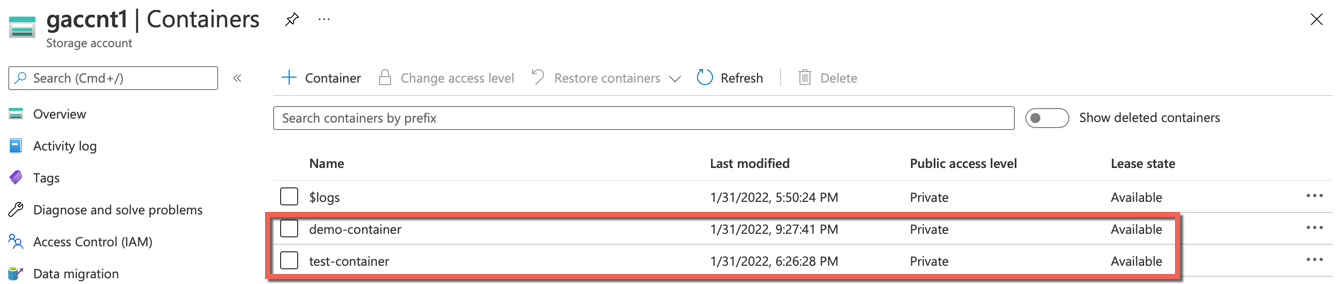
- Provide a Container Name, select the other required details and click Create
- On successful creation, the containers are listed in the table as shown below
You can use all the above credentials when creating an AKS cluster in the controller, wherever applicable