Part 2: Provision
What Will You Do
In this part of the self-paced exercise, you will provision an Azure AKS cluster with a GPU node pool based on a declarative cluster specification.
Step 1: Cluster Spec
- Open Terminal (on macOS/Linux) or Command Prompt (Windows) and navigate to the folder where you forked the Git repository
- Navigate to the folder "
/getstarted/gpuaks/cluster"
The "aks-gpu.yaml" file contains the declarative specification for our Azure AKS Cluster.
Cluster Details
Update the following values in the spec file to match the correct values in your environment.
- project: defaultproject
- cloudprovider: azure-cc
- location: centralindia
- resourceGroupName: Resource-Group
apiVersion: infra.k8smgmt.io/v3
kind: Cluster
metadata:
  # The name of the cluster
  name: demo-gpu-aks
  # The name of the project the cluster will be created in
  project: defaultproject
spec:
  blueprintConfig:
    # The name of the blueprint the cluster will use
    name: default-aks
  # The name of the cloud credential that will be used to create the cluster
  cloudCredentials: azure-cc
  config:
    kind: aksClusterConfig
    metadata:
      # The name of the cluster
      name: demo-gpu-aks
    spec:
      managedCluster:
        apiVersion: "2022-07-01"
        identity:
          # The identity type the AKS cluster will use to access Azure resources
          type: SystemAssigned
        # The Azure geo-location where the resources will reside
        location: centralindia
        properties:
          apiServerAccessProfile:
            # Make network traffic between the API server and node pools on a private network
            enablePrivateCluster: true
          # DNS name prefix of the Kubernetes API server FQDN
          dnsPrefix: demo-gpu-aks-dns
          # The Kubernetes version that will be installed on the cluster
          kubernetesVersion: 1.29.4
          networkProfile:
            loadBalancerSku: standard
            # Network plugin used for building the Kubernetes network. Valid values are azure, kubenet, none
            networkPlugin: kubenet
        sku:
          # The name of a managed cluster SKU
          name: Basic
          # If not specified, the default is Free. See uptime SLA for more details. Valid values are Paid, Free
          tier: Free
        type: Microsoft.ContainerService/managedClusters
      nodePools:
      - apiVersion: "2022-07-01"
        # The Azure geo-location where the node pools will reside
        location: centralindia
        # The name of the  node pool
        name: primary
        properties:
          # The desired number of nodes that can run in the node pool
          count: 1
          # Whether to enable auto-scaler
          enableAutoScaling: true
          # The maximum number of nodes that can run in the node pool
          maxCount: 1
          # The maximum number of pods that can run on a node
          maxPods: 110
          # The minimum number of nodes that can run in the node pool
          minCount: 1
          mode: System
          # The kubernetes version that will run on the node pool
          orchestratorVersion: 1.29.4
          # The operating system type that the nodes in the node pool will run
          osType: Linux
          # Valid values are VirtualMachineScaleSets, AvailabilitySet
          type: VirtualMachineScaleSets
          # The size of the VMs that the nodes will run on
          vmSize: Standard_NC4as_T4_v3
        type: Microsoft.ContainerService/managedClusters/agentPools
        # The resource group where the cluster will be created
      resourceGroupName: Resource-Group
  proxyConfig: {}
  type: aks
Step 2: Provision Cluster
- On your command line, navigate to the cluster sub folder
- Type the command
rctl apply -f aks-gpu.yaml
If there are no errors, you will be presented with a "Task ID" that you can use to check progress/status. Note that this step requires creation of infrastructure in your Azure account and can take ~20-30 minutes to complete.
{
  "taskset_id": "x28y6ek",
  "operations": [
    {
      "operation": "ClusterCreation",
      "resource_name": "demo-gpu-aks",
      "status": "PROVISION_TASK_STATUS_PENDING"
    },
    {
      "operation": "NodegroupCreation",
      "resource_name": "primary",
      "status": "PROVISION_TASK_STATUS_PENDING"
    },
    {
      "operation": "BlueprintSync",
      "resource_name": "demo-gpu-aks",
      "status": "PROVISION_TASK_STATUS_PENDING"
    }
  ],
  "comments": "The status of the operations can be fetched using taskset_id",
  "status": "PROVISION_TASKSET_STATUS_PENDING"
}
- Navigate to the project in your Org
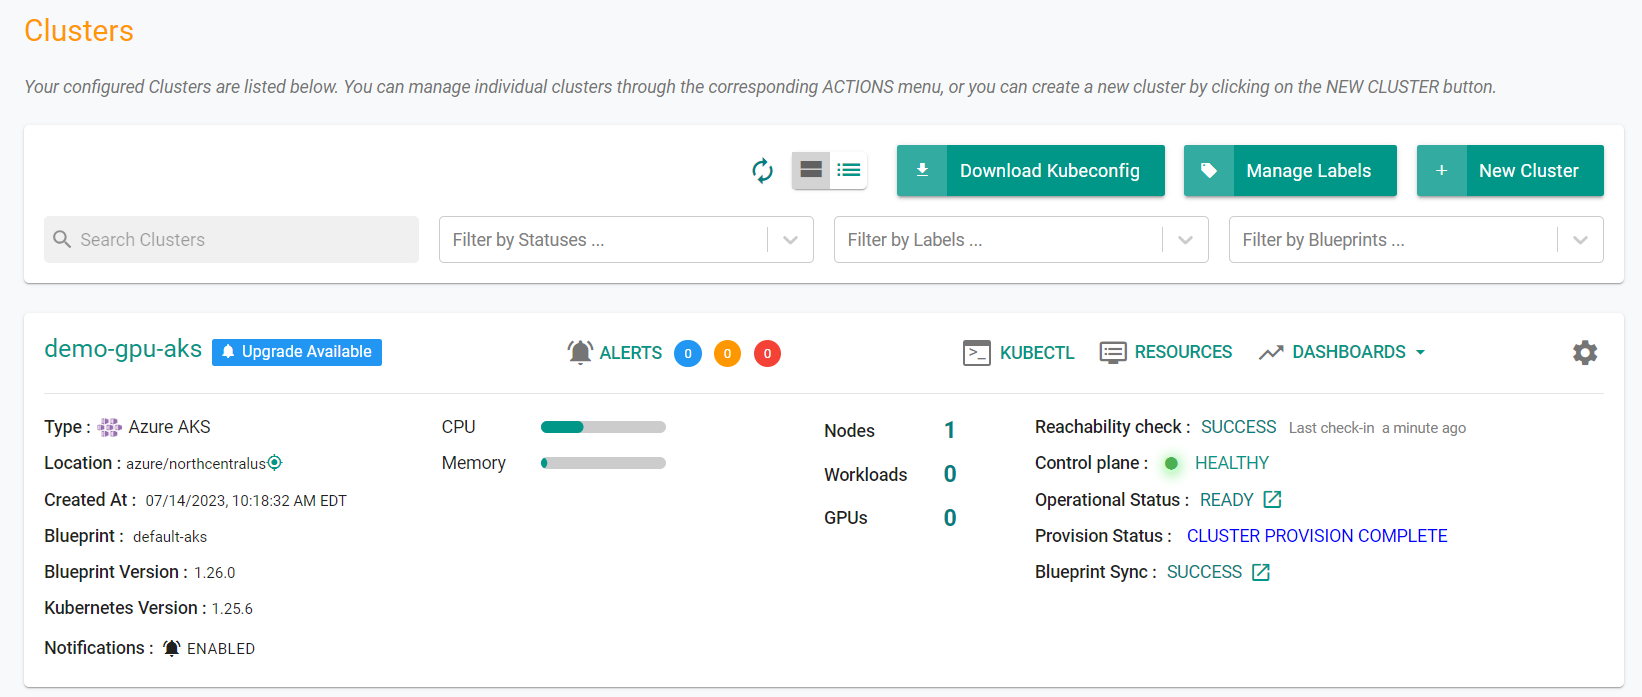
- Click on Infrastructure -> Clusters. You should see something like the following

- Click on the cluster name to monitor progress
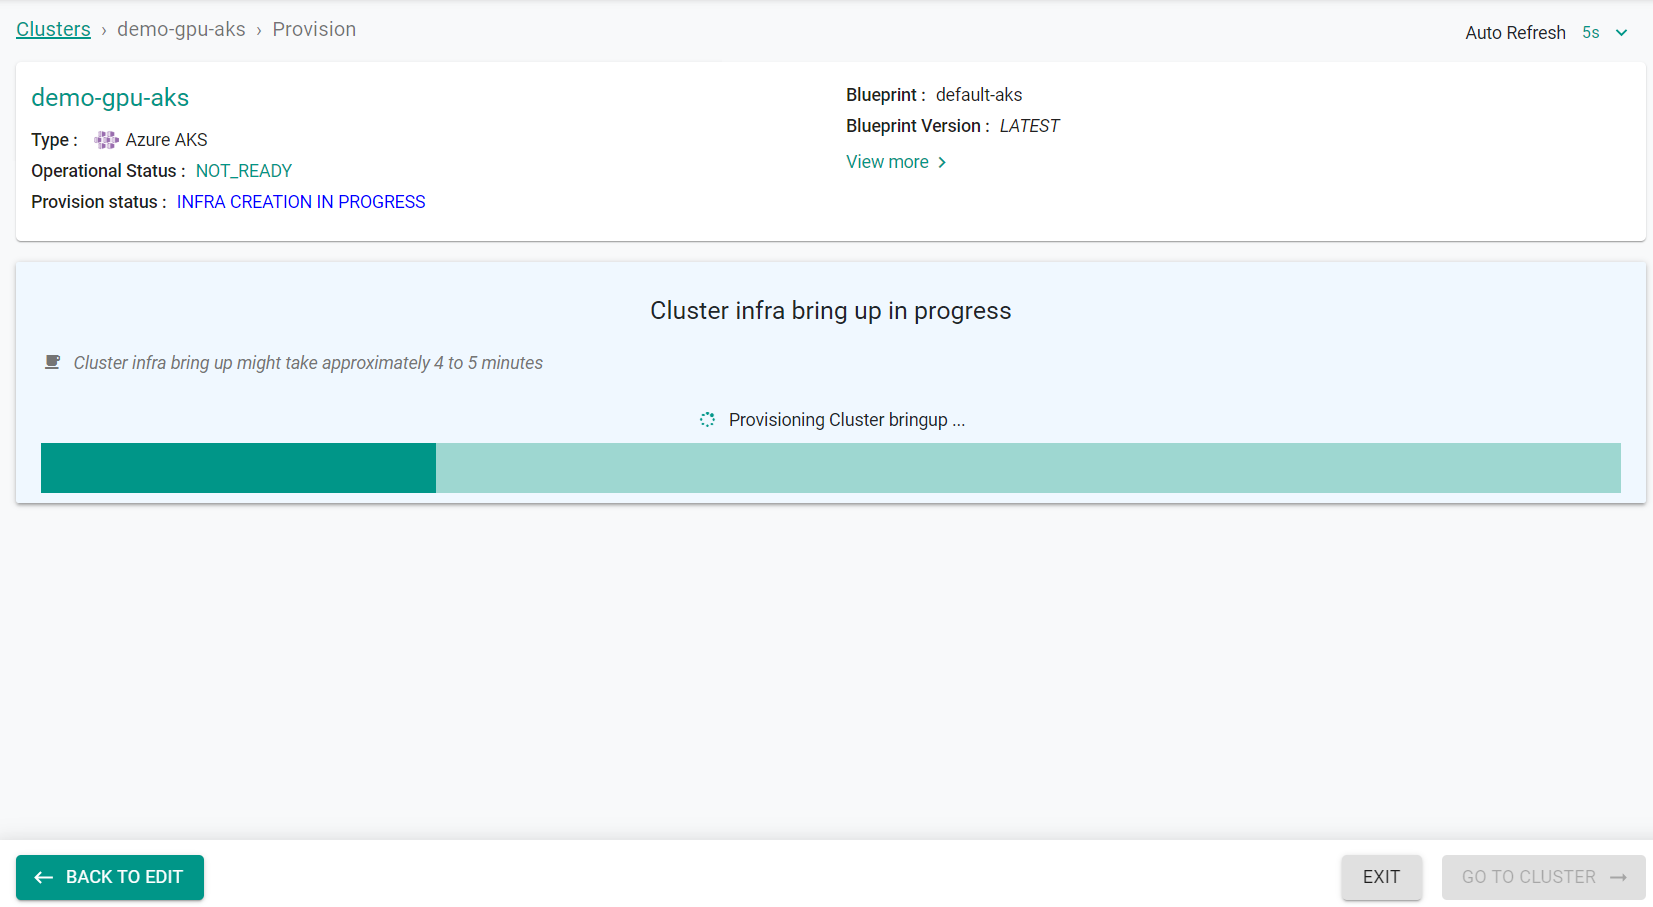
Step 3: Verify Cluster
Once provisioning is complete, you should see a healthy cluster in the web console
- Click on the kubectl link and type the following command
kubectl get nodes -o wide
You should see something like the following
NAME                              STATUS   ROLES   AGE     VERSION   INTERNAL-IP   EXTERNAL-IP   OS-IMAGE             KERNEL-VERSION      CONTAINER-RUNTIME
aks-primary-14718340-vmss000002   Ready    agent   8m38s   v1.25.6   10.224.0.4    <none>        Ubuntu 22.04.2 LTS   5.15.0-1041-azure   containerd://1.7.1+a
Recap
Congratulations! At this point, you have successfully configured and provisioned an Azure AKS cluster with a GPU node pool in your account using the RCTL CLI. You are now ready to move on to the next step where you will create a deploy a custom cluster blueprint that contains the GPU Operator as an addon.