Provision Kubernetes
Follow the steps described below to provision a controller managed, upstream Kubernetes cluster on Equinix Metal bare metal servers.
Important
The steps below describe an Imperative process for cluster provisioning. Use the RCTL CLI or the REST APIs for end-to-end automation.
STEP 1: Select Cluster Configuration
Review the supported cluster configurations and select your desired cluster configuration. The cluster configuration will determine the number of servers you need to prepare before you can provision a Kubernetes cluster.
| Type | Number of Initial Nodes |
|---|---|
| Converged, Single Master | 1 Nodes (1 Master/Worker) |
| Dedicated, Single Master | 2 Nodes (1 Master + 1 Worker) |
| Converged, Multi Master | 3 Nodes (3 Masters + 1 Worker) |
| Dedicated, Multi Master | 4 Nodes (3 Masters + 1 Worker) |
STEP 2: Prepare Servers
Create bare metal server nodes in your Equinix Metal account.
- Ensure that these are compatible with the infrastructure requirements.
- Ensure that you have SSH access to all the bare metal servers
STEP 3: Create Cluster
- Login into the Console
- Navigate to the project where you would like the cluster provisioned
- Click New Cluster
- Select Create a New Cluster and click Continue
- Select the Environment Data center / Edge
- Select Package Type "Linux Installer"
- Select Kubernetes Distribution "Upstream Kubernetes"
- Enter the Cluster Name and click Continue
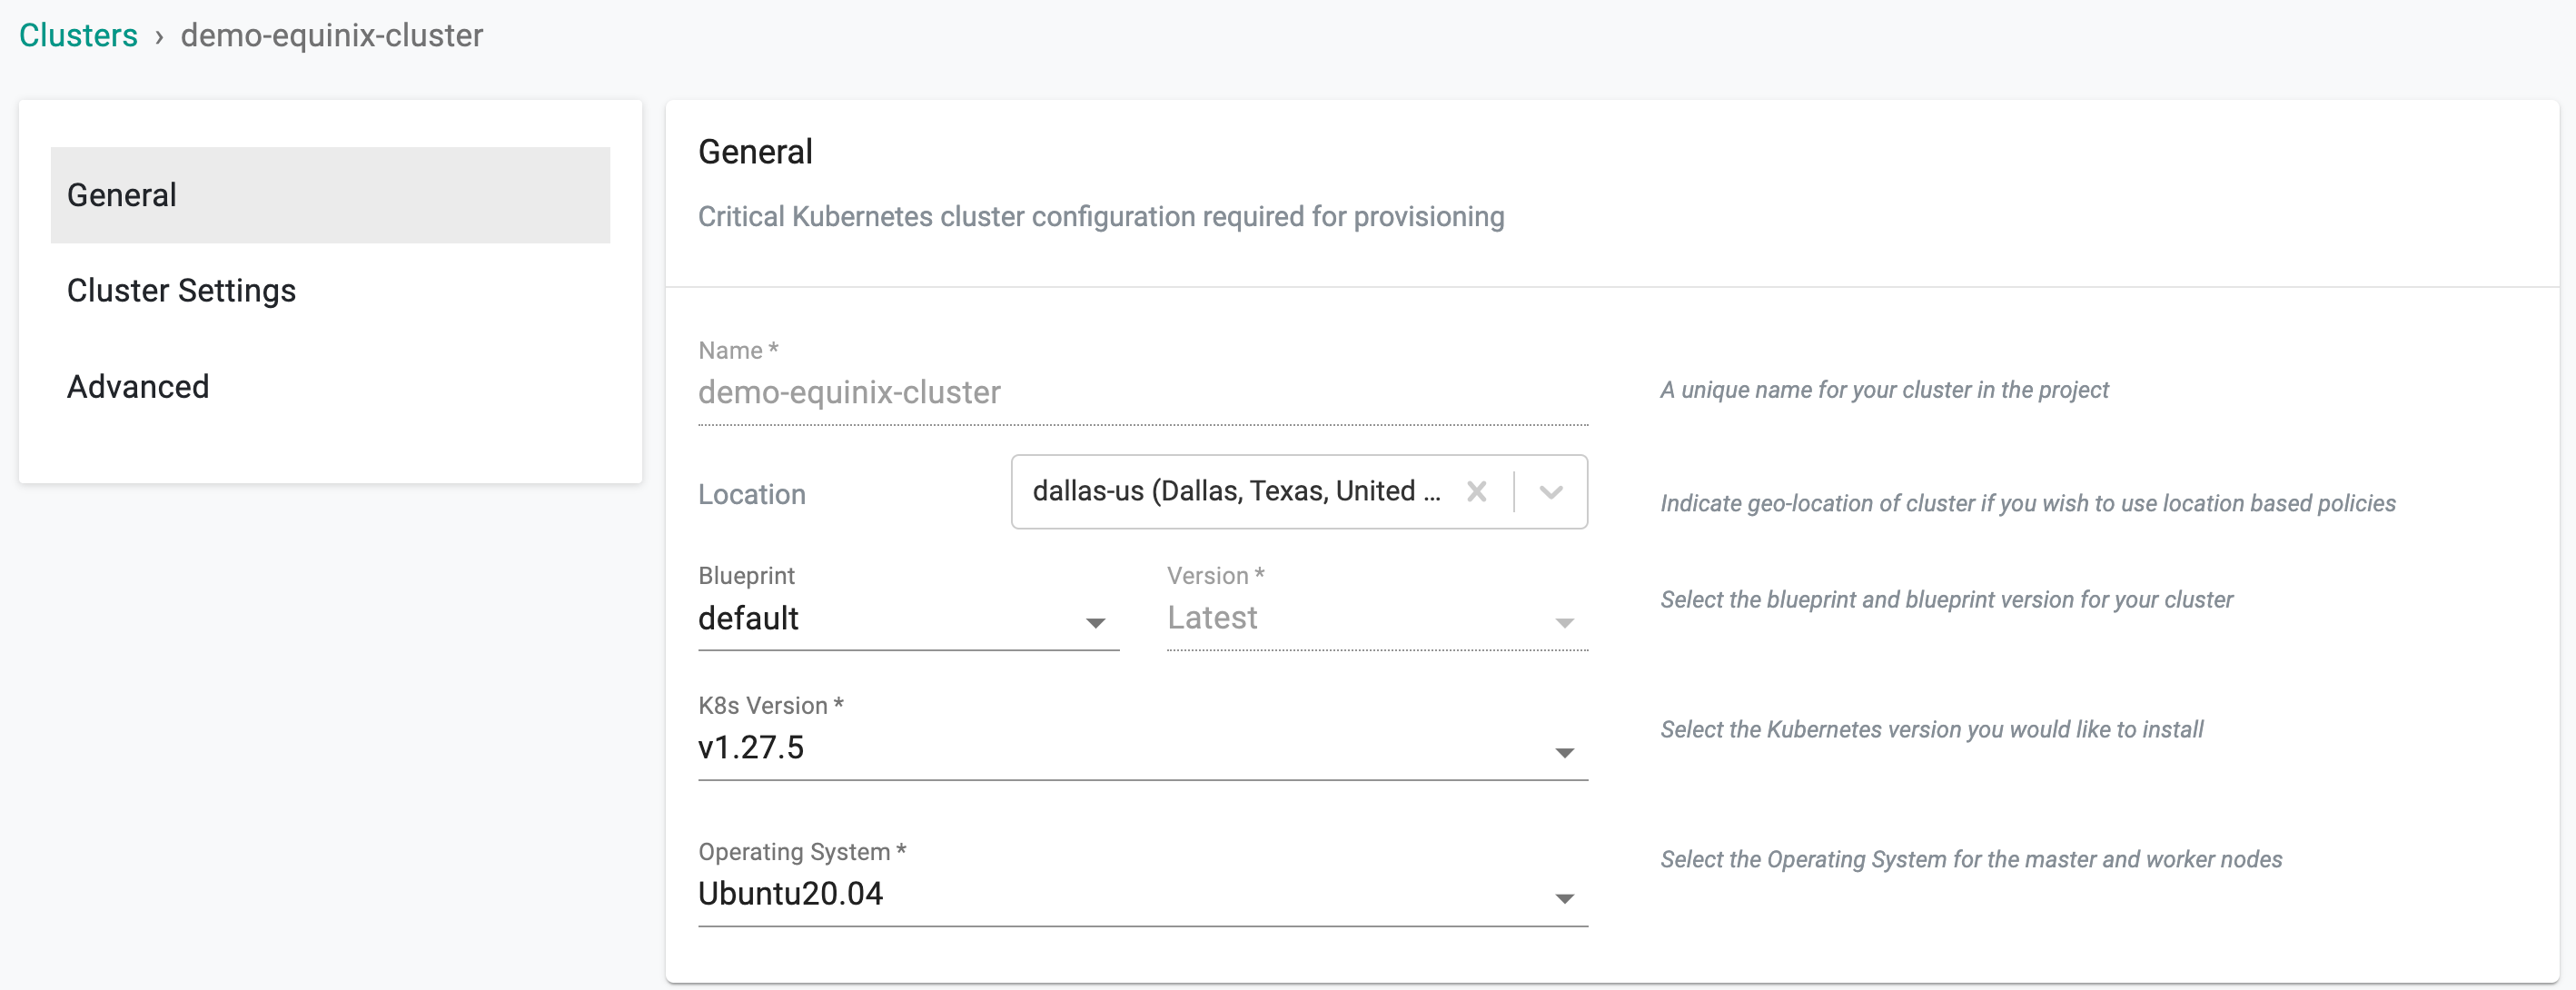
General
A number of defaults are automatically selected and presented. A number of options are available for customization
Geo Location
- Specify a location for the cluster (for multi cluster workflows)
Cluster Blueprint
- Select cluster blueprint and version. Users can select the default-upstream blueprint based on the requirement. To use the default-upstream blueprint, a storage node is mandatory
Note: On Day 1 operation, you can select any blueprint other than default-upstream if storage node is not available
Kubernetes Version
- Select the Kubernetes version required to deploy. For arm worker nodes, the supported k8s version is always 1.20 onwards and the supported Operating System is Ubuntu
- On upgrading k8s version to v1.26, containerd version is upgraded to 1.6.10
Operating System
- Select the OS and Version you used for the nodes
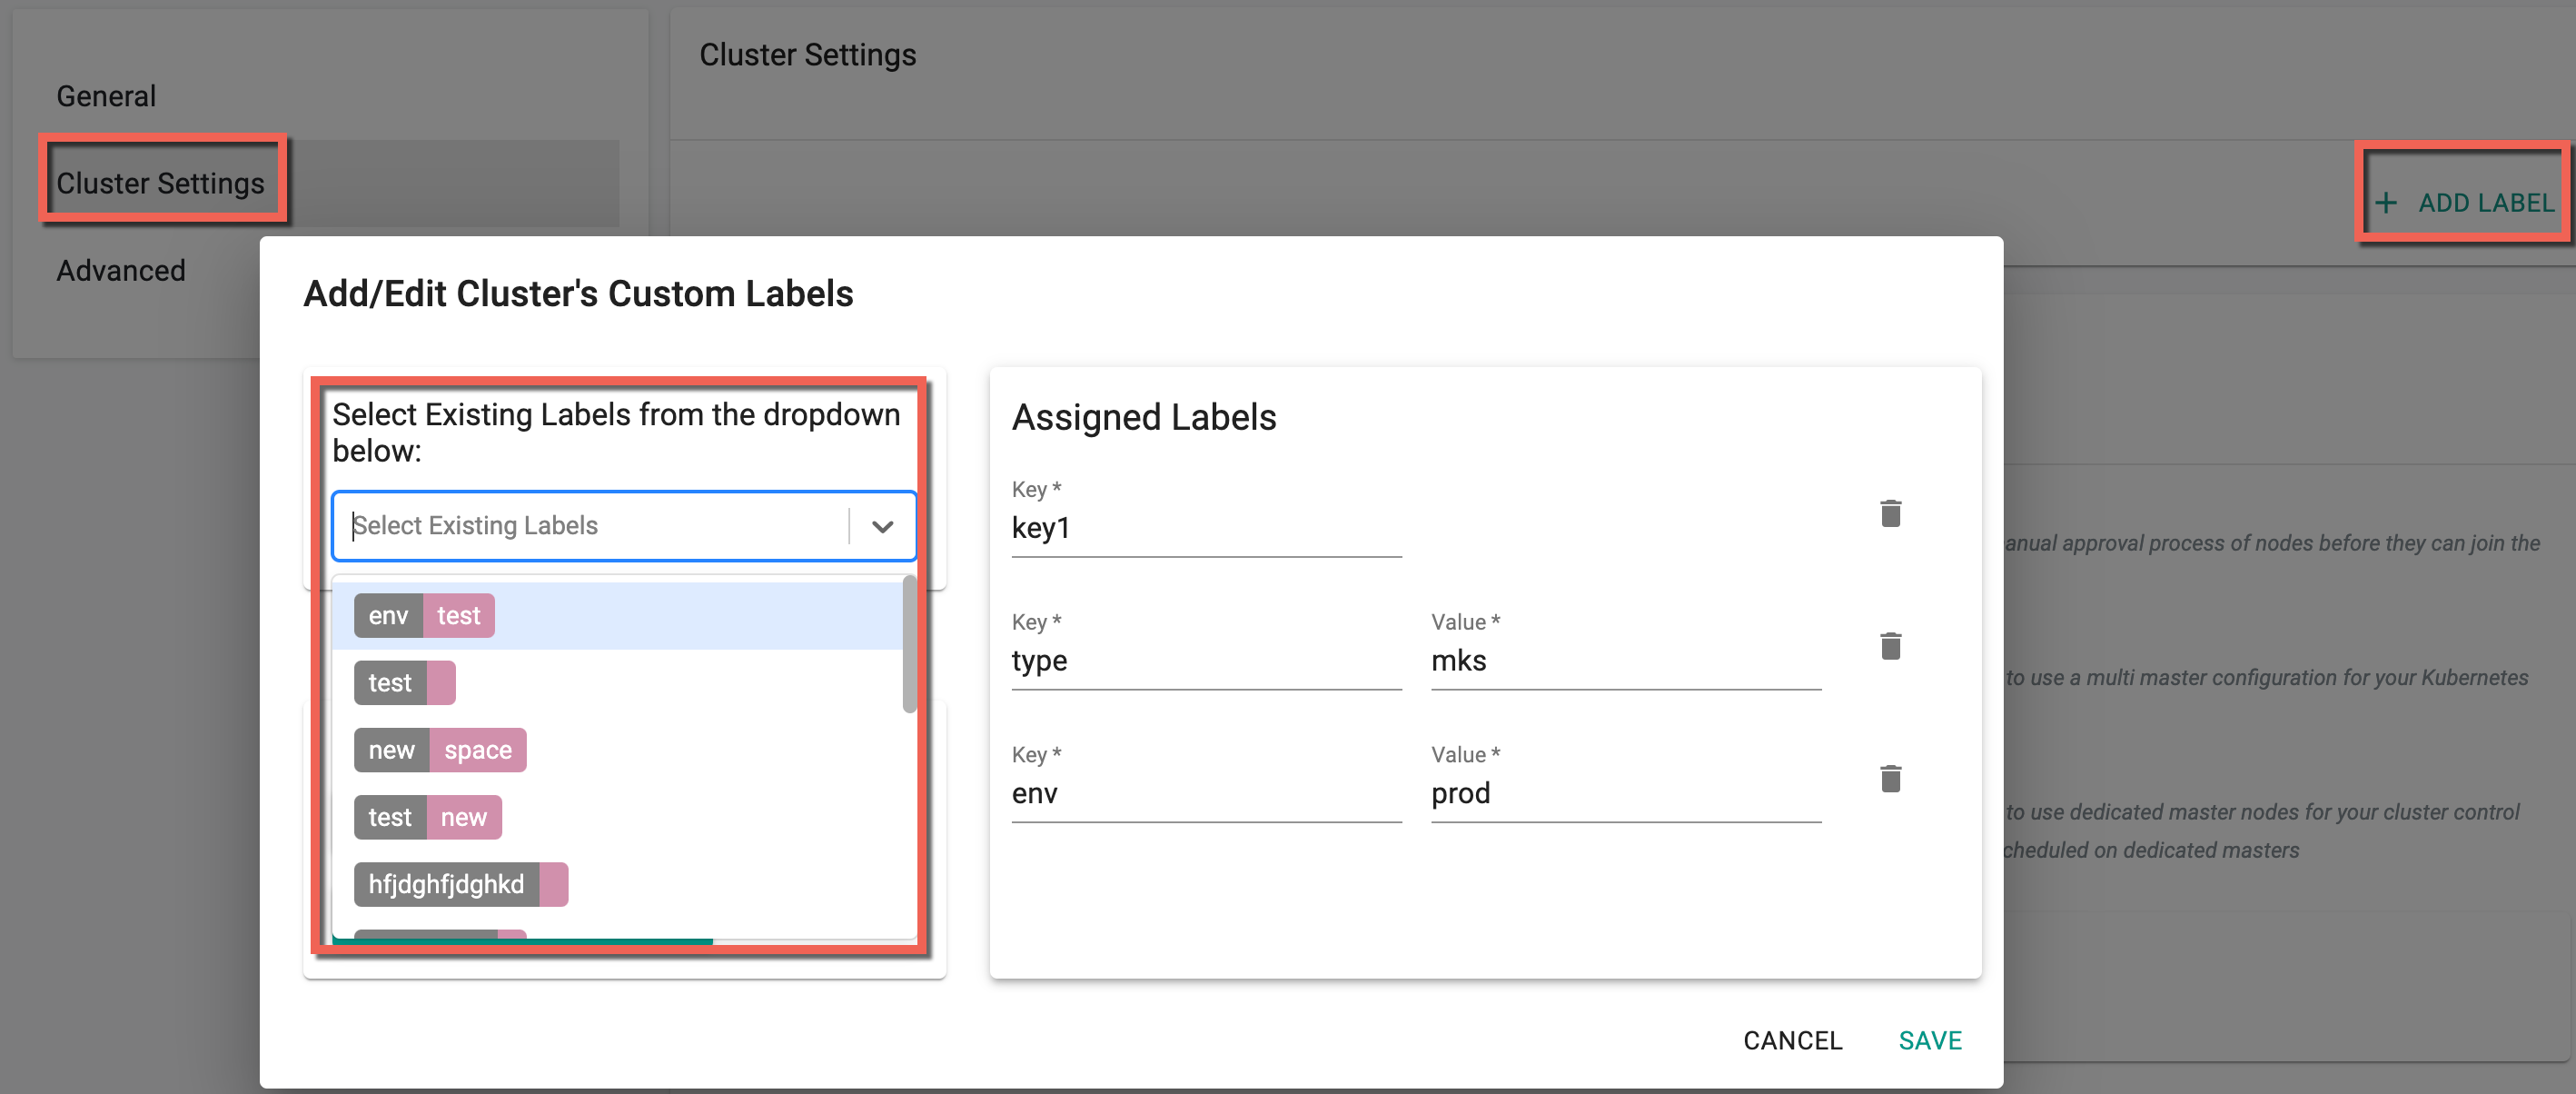
Cluster Settings
The Cluster Settings let users add their custom Cluster Labels needed during cluster provisioning. Include either Key-Value Labels or simply Key-Only Labels. You can also select the existing labels from the drop-down as shown below
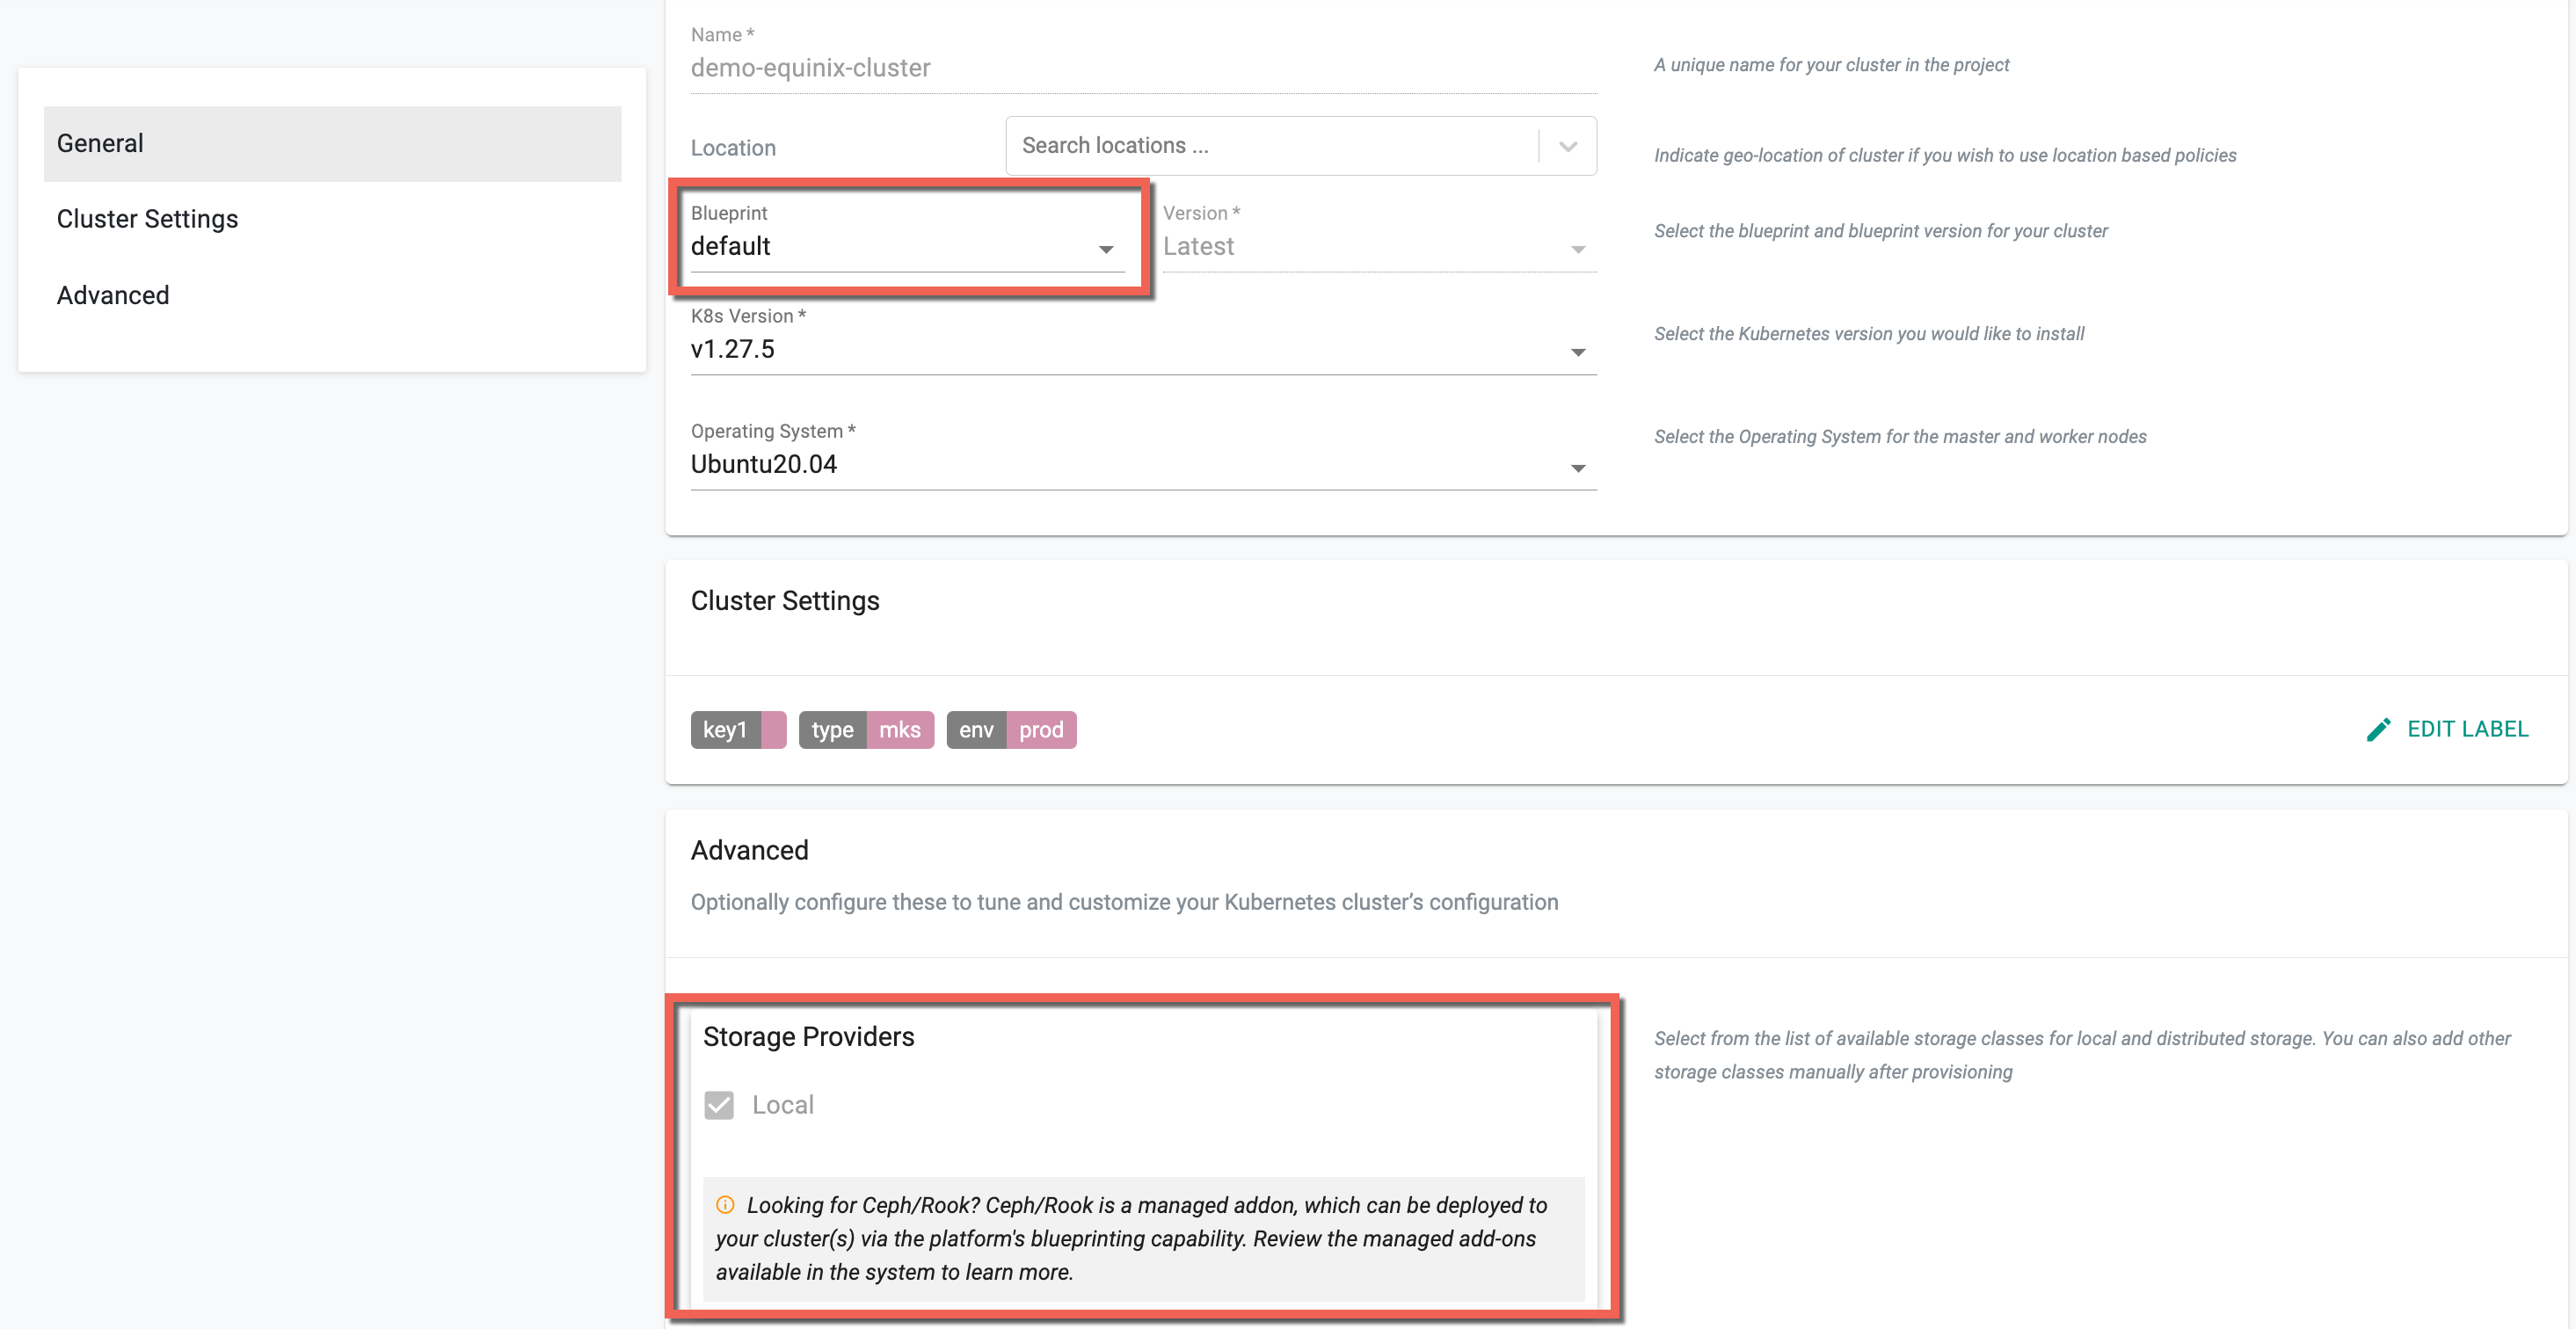
Advanced
Integrated Storage
Users can set the storage provider details along with the cluster creation process only when selecting a blueprint other than default-upstream. This is because no storage providers are integrated to those blueprint options.
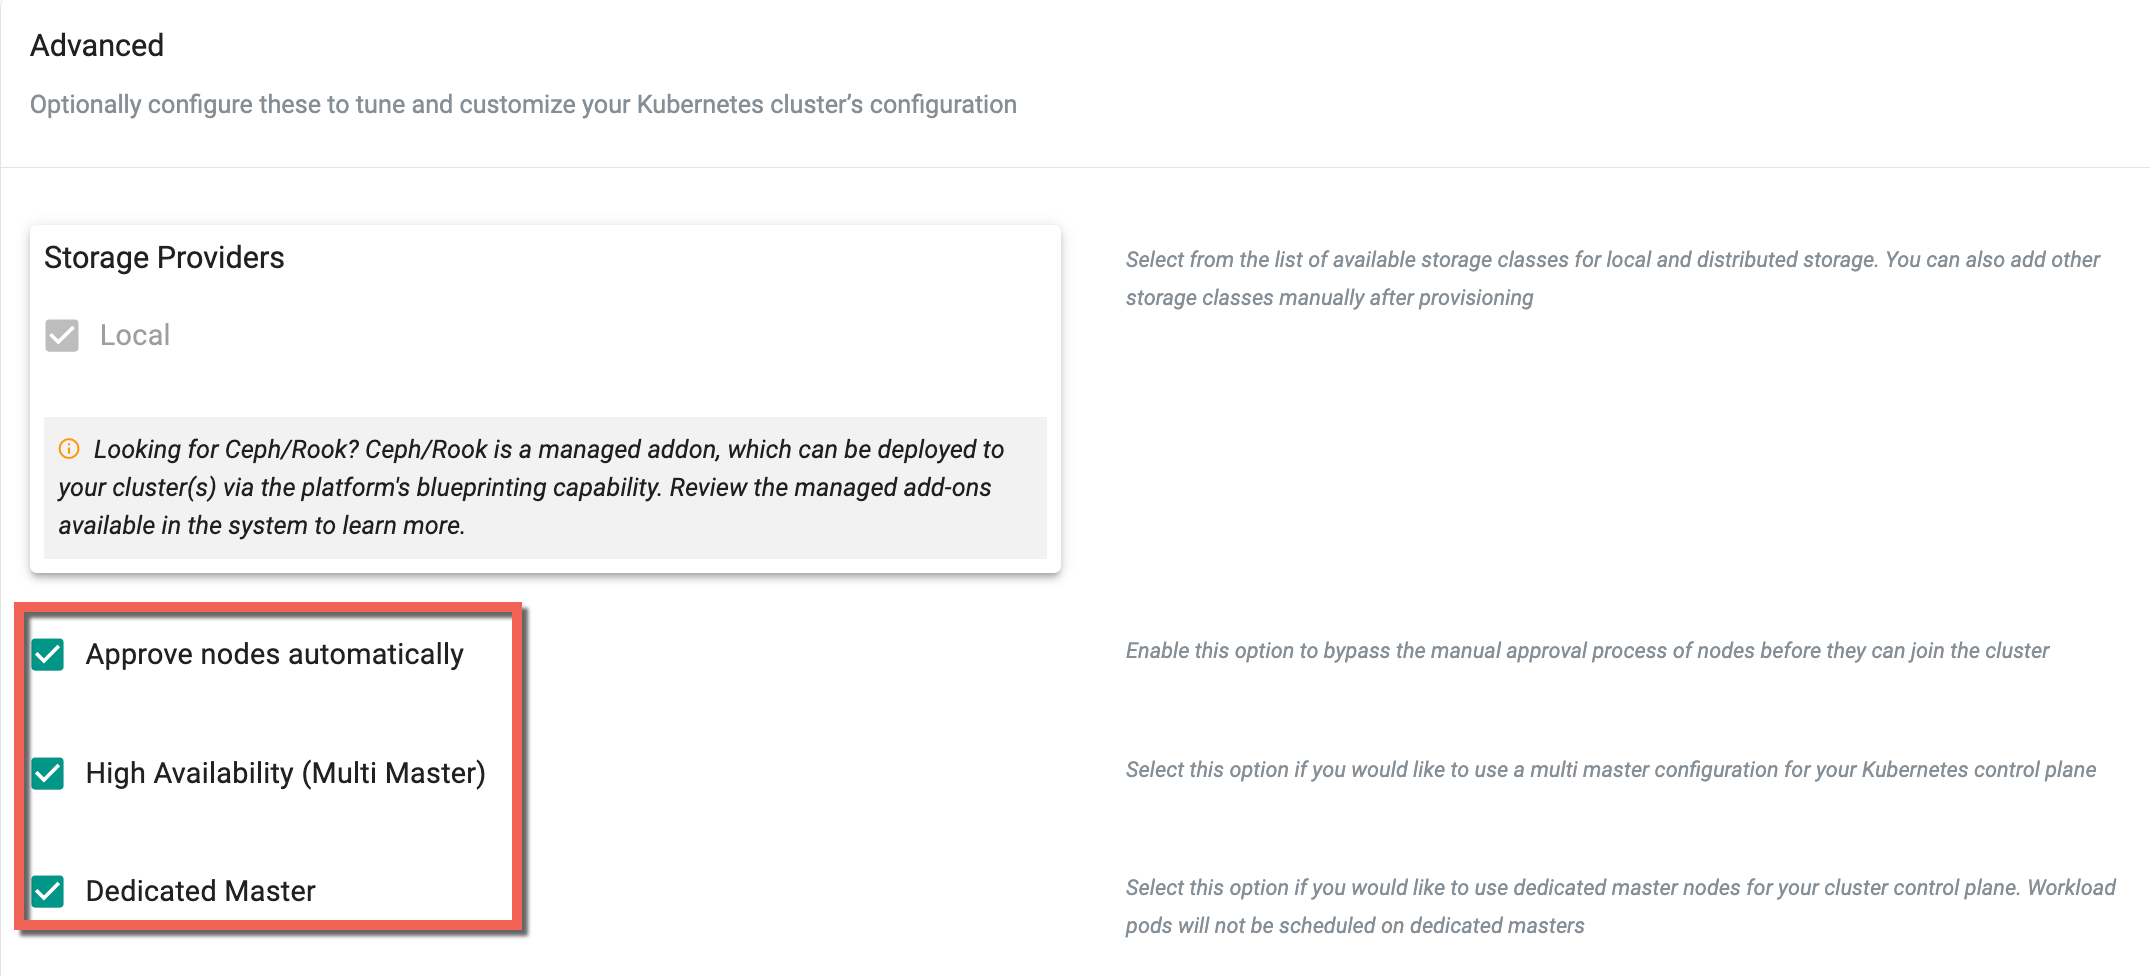
Security
By default, as a security precaution, nodes need to be approved before it is allowed to join a cluster. Auto Approval of nodes is available and this can help streamline the cluster provisioning and expansion workflows.
- Enable "Approve Nodes Automatically" if you do not require an approval gate for nodes to join the cluster
Kubernetes Masters
- Select Multi Master if you need a highly available k8s master configuration
- Select Dedicated Master if want the k8s masters to be tainted to not allow workload pods
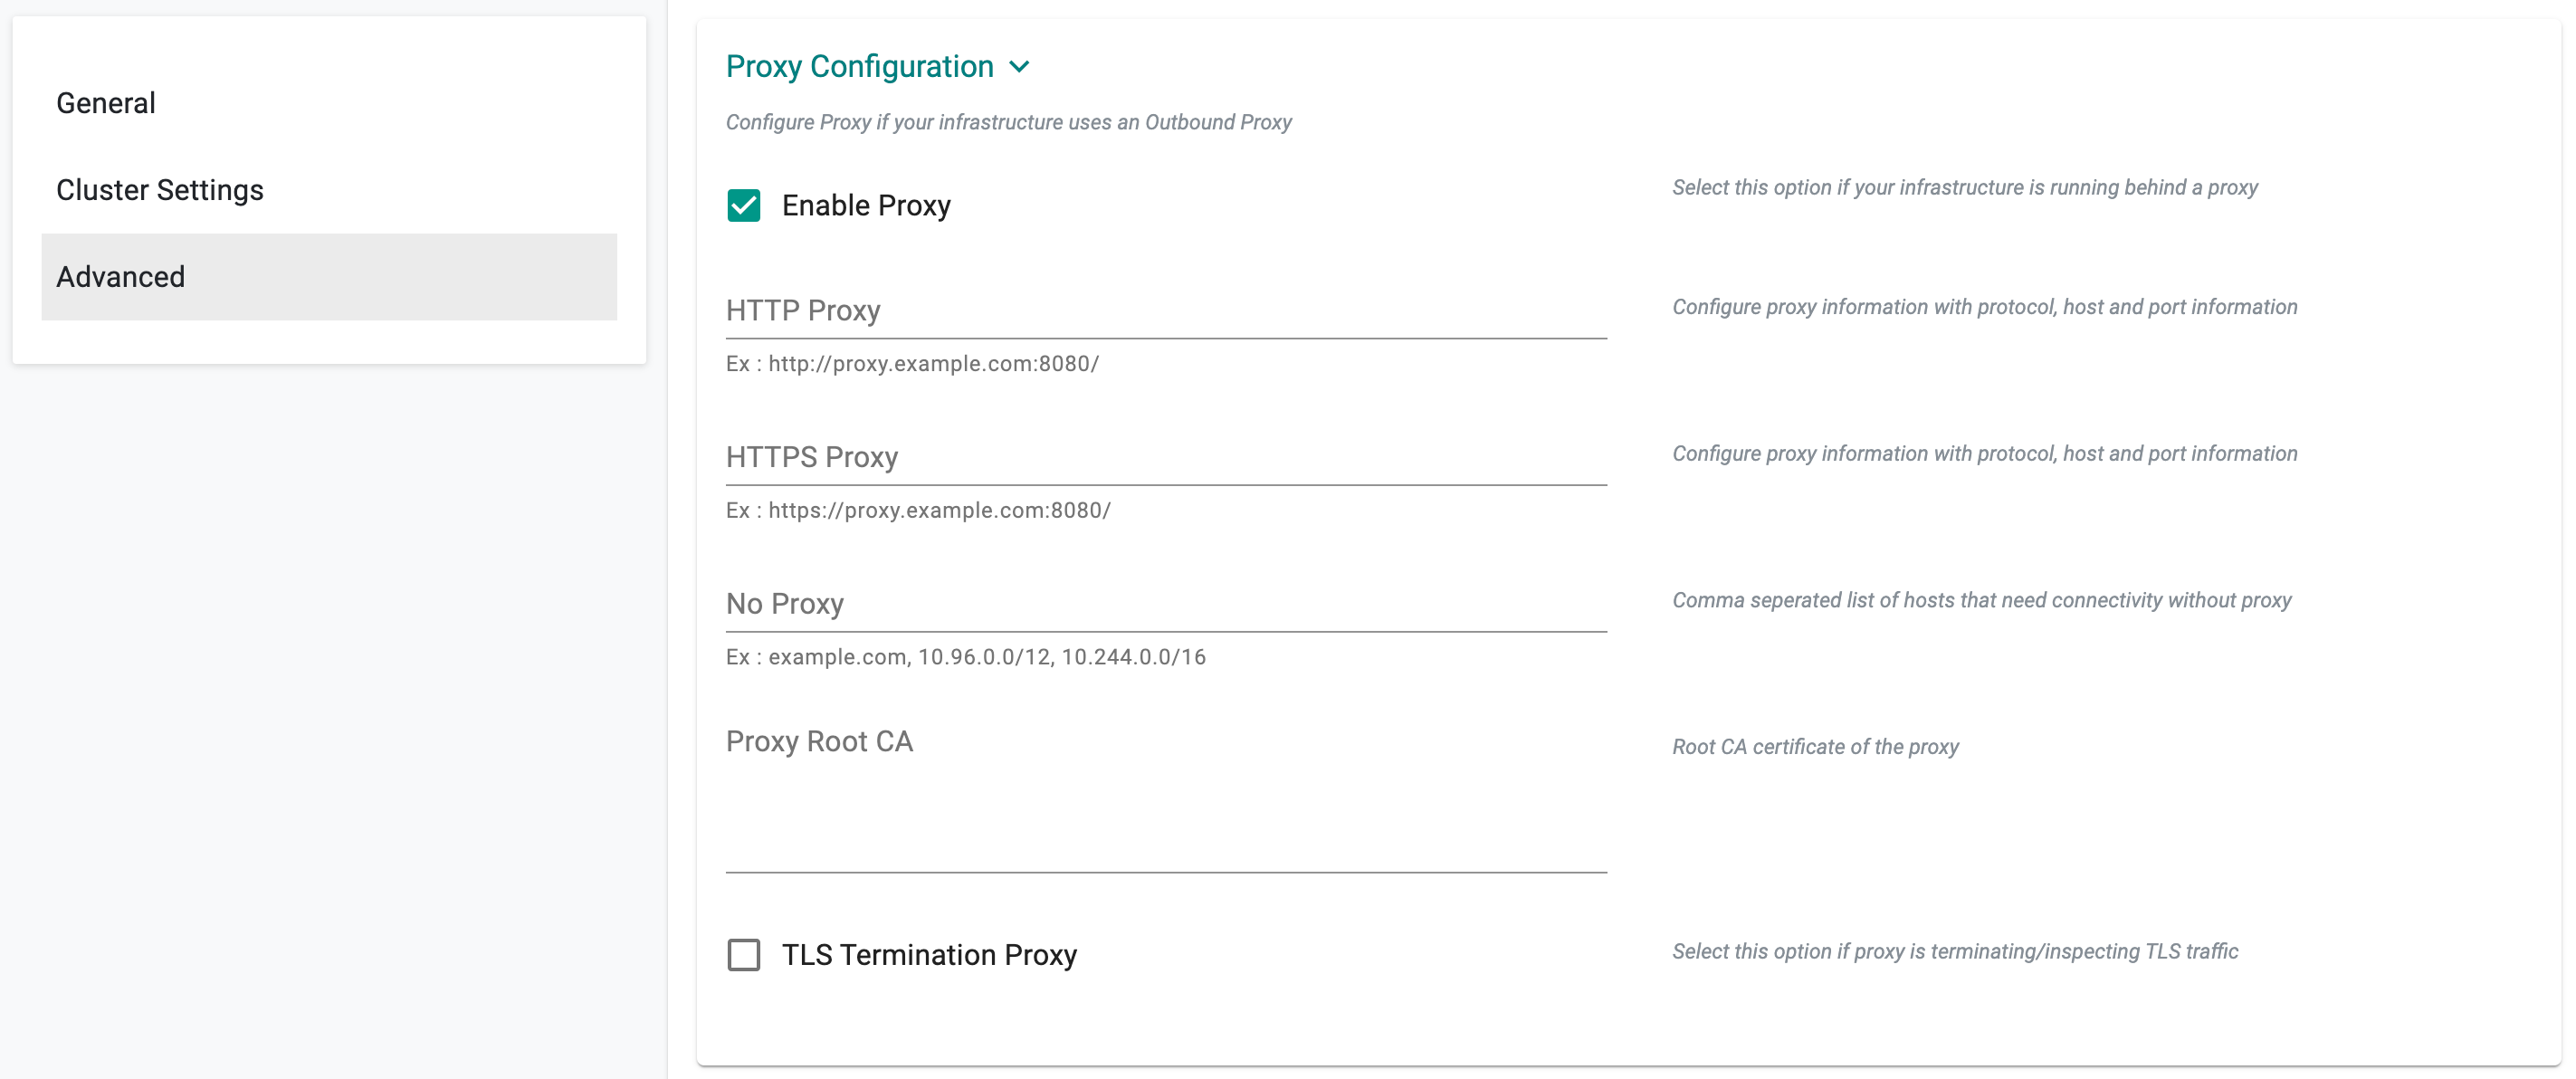
HTTP Proxy
-
Select "Enable Proxy" if the infrastructure being used to provision the cluster is behind a forward proxy.
-
Configure the http proxy with the proxy information (ex: http://proxy.example.com:8080)
- Configure the https proxy with the proxy information (ex: http://proxy.example.com:8080)
- Configure No Proxy with Comma separated list of hosts that need connectivity without proxy
- Configure the Root CA certificate of the proxy if proxy is listening on https
- Enable "TLS Termination Proxy" if proxy is listening on https and cannot provide the Root CA certificate of the proxy.
Important
Proxy configuration cannot be changed once the cluster is created.
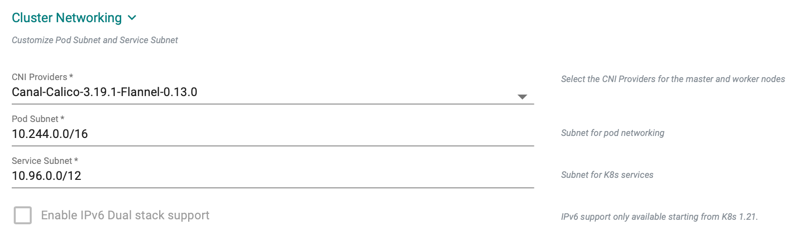
Cluster Networking
Default subnet used for pod networking is "10.244.0.0/16" Default subnet used for k8s services is "10.96.0.0/12"
If you want to customize the subnets used for Pod Networking and K8s Services:
- Configure the "Pod Subnet" with the subnet that you want to use.
- Configure the "Service Subnet" with the subnet that you want to use.
Important
Cluster Networking cannot be changed once the cluster is created.
STEP 4: Download Conjurer and Secrets
- Review the Node Installation Instructions section on the Console
- Download the cluster bootstrap binary (i.e. Conjurer)
- Download the cluster activation secrets (i.e. passphrase and credential files)
- SCP the three (3) files to the nodes you created in the previous step
Important
Note that the activation secrets (passphrase and credentials) are unique per cluster. You cannot reuse this for other clusters.
An illustrative example is provided below. This assumes that you have the three downloaded files in the current working directory. The three files will be securely uploaded to the “/tmp” folder on the instance.
$ scp -i <keypairfile.pem> * ubuntu@<Node's External IP Address>:/tmp
STEP 5: Preflight Checks
It is strongly recommended to perform the automated preflight tests on every node to ensure that the node has "compatible" hardware, software and configuration. View the detailed list of preflight checks.
- SSH into the node and run the installer using the provided passphrase and credentials.
- From the node installation instructions, copy the preflight check command and run it
- If there are no errors, proceed to the next step
- If there are warnings or errors, fix the issues, run the preflight check before proceeding to the next step
STEP 6: Run Conjurer
- From the node installation instructions, copy the provided command to run the conjurer binary
- SSH into the nodes and run the installer using the provided passphrase and credentials.
An illustrative example provided below
sudo ./conjurer -edge-name="equinix-cluster" -passphrase-file="equinix-cluster-passphrase.txt" -creds-file="equinix-cluster.pem -t

[+]  Initiating edge node install

[+] Provisioning node
      [+] Step 1. Installing node-agent
      [+] Step 2. Setting hostname to node-72djl2g-192-168-0-20-equinix-cluster
      [+] Step 3. Installing credentials on node
      [+] Step 4. Configuring node-agent
      [+] Step 5. Starting node-agent

[+] Successfully provisioned node
Conjurer is a “cluster bootstrap agent” that connects and registers the nodes with the Controller. Information about the Controller and authentication credentials for registration is available in the activation secrets files.
- Once this step is complete, the node will show up on the Web Console as DISCOVERED.
STEP 7: Approve Node
This is an optional step that acts as a security control to ensure that administrators can review and approve a node before it can become part of the cluster.
- Click on Approve button to approve the node to this cluster
- In a few seconds, you will see the status of the node being updated to “Approved" in the Web Console
- Once approved, the node is automatically probed and all information about the node is presented to the administrator on the Web Console.
STEP 8: Configure Node
This is a mandatory configuration step that allows the infrastructure administrator to specify the “role” for the node.
Important
Without the configuration step, cluster provisioning cannot be initiated.
- Click on Configure
- If the node is meant to be a k8s master, select "master" role
- If the node is meant to handle storage, select the storage location from the automatically detected list
- Select the network interface that will be used for cluster networking from the automatically detected list of interfaces
- Click Save
STEP 9: Provisioning
At this point, we have provided everything necessary where the Controller can start provisioning Kubernetes and all required software add-ons. These will be automatically provisioned and configured to operationalize the cluster.
- Click on Provision
- A progress bar is displayed showing progress as the software is downloaded, installed and configured on all the nodes.
Important
The end-to-end provisioning process can take ~10 minutes and is dependent on the number of nodes you are provisioning and the Internet bandwidth available to your nodes to download necessary software.
Troubleshooting
Once the "minion/node agent" installed on the node by conjurer successfully and is registered with the controller, it establishes a "long running" web socket with the controller providing "continuous updates" to the controller about progress and status. This information is then presented to authorized administrators via the Console for insights. Optionally, administrators can also view the logs generated by the minion/node agent for detailed visibility.
tail -f /var/log/salt/minion
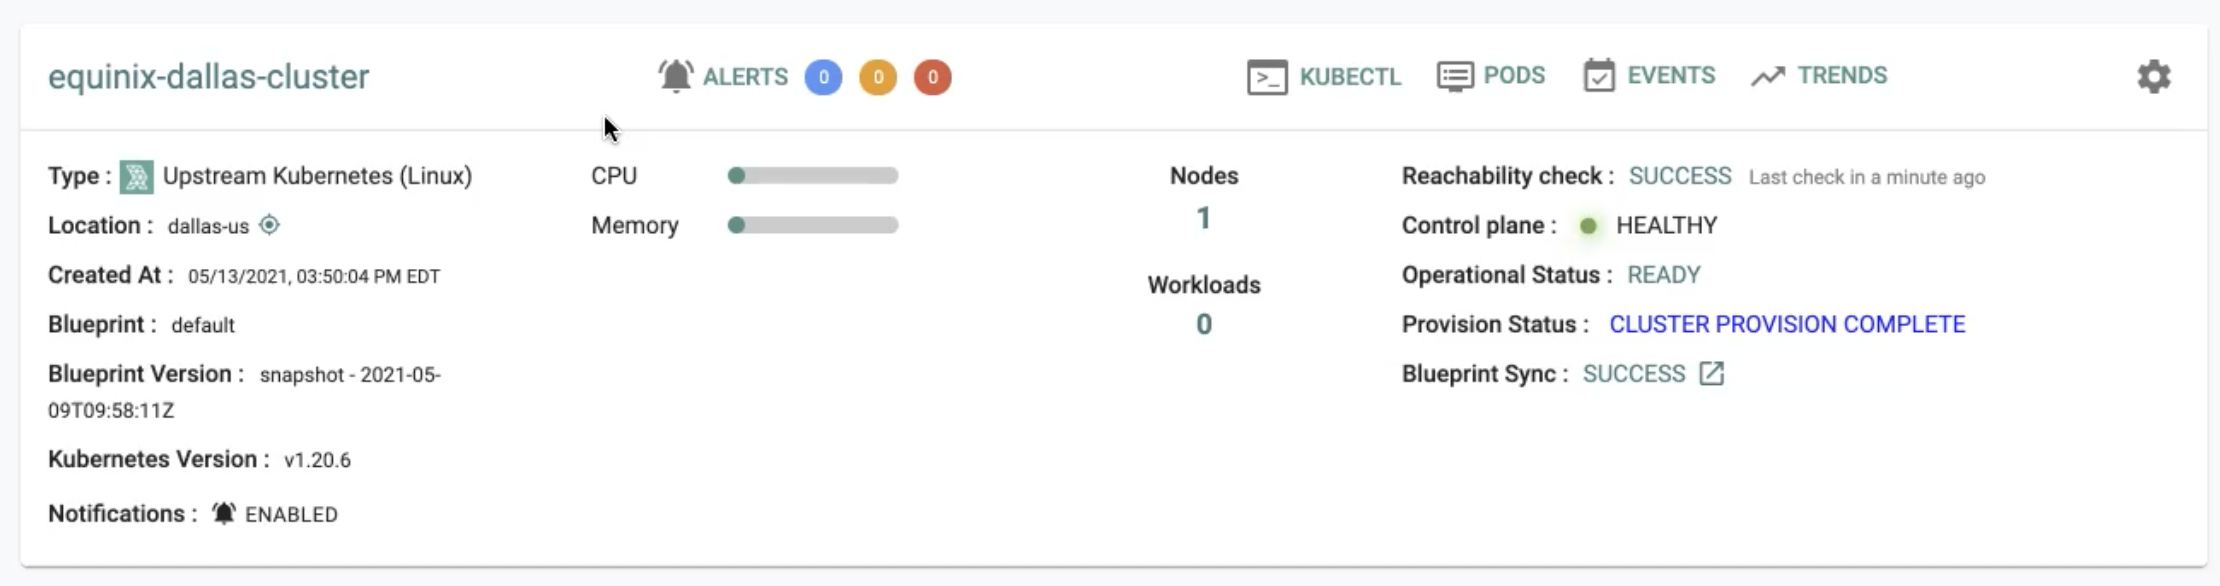
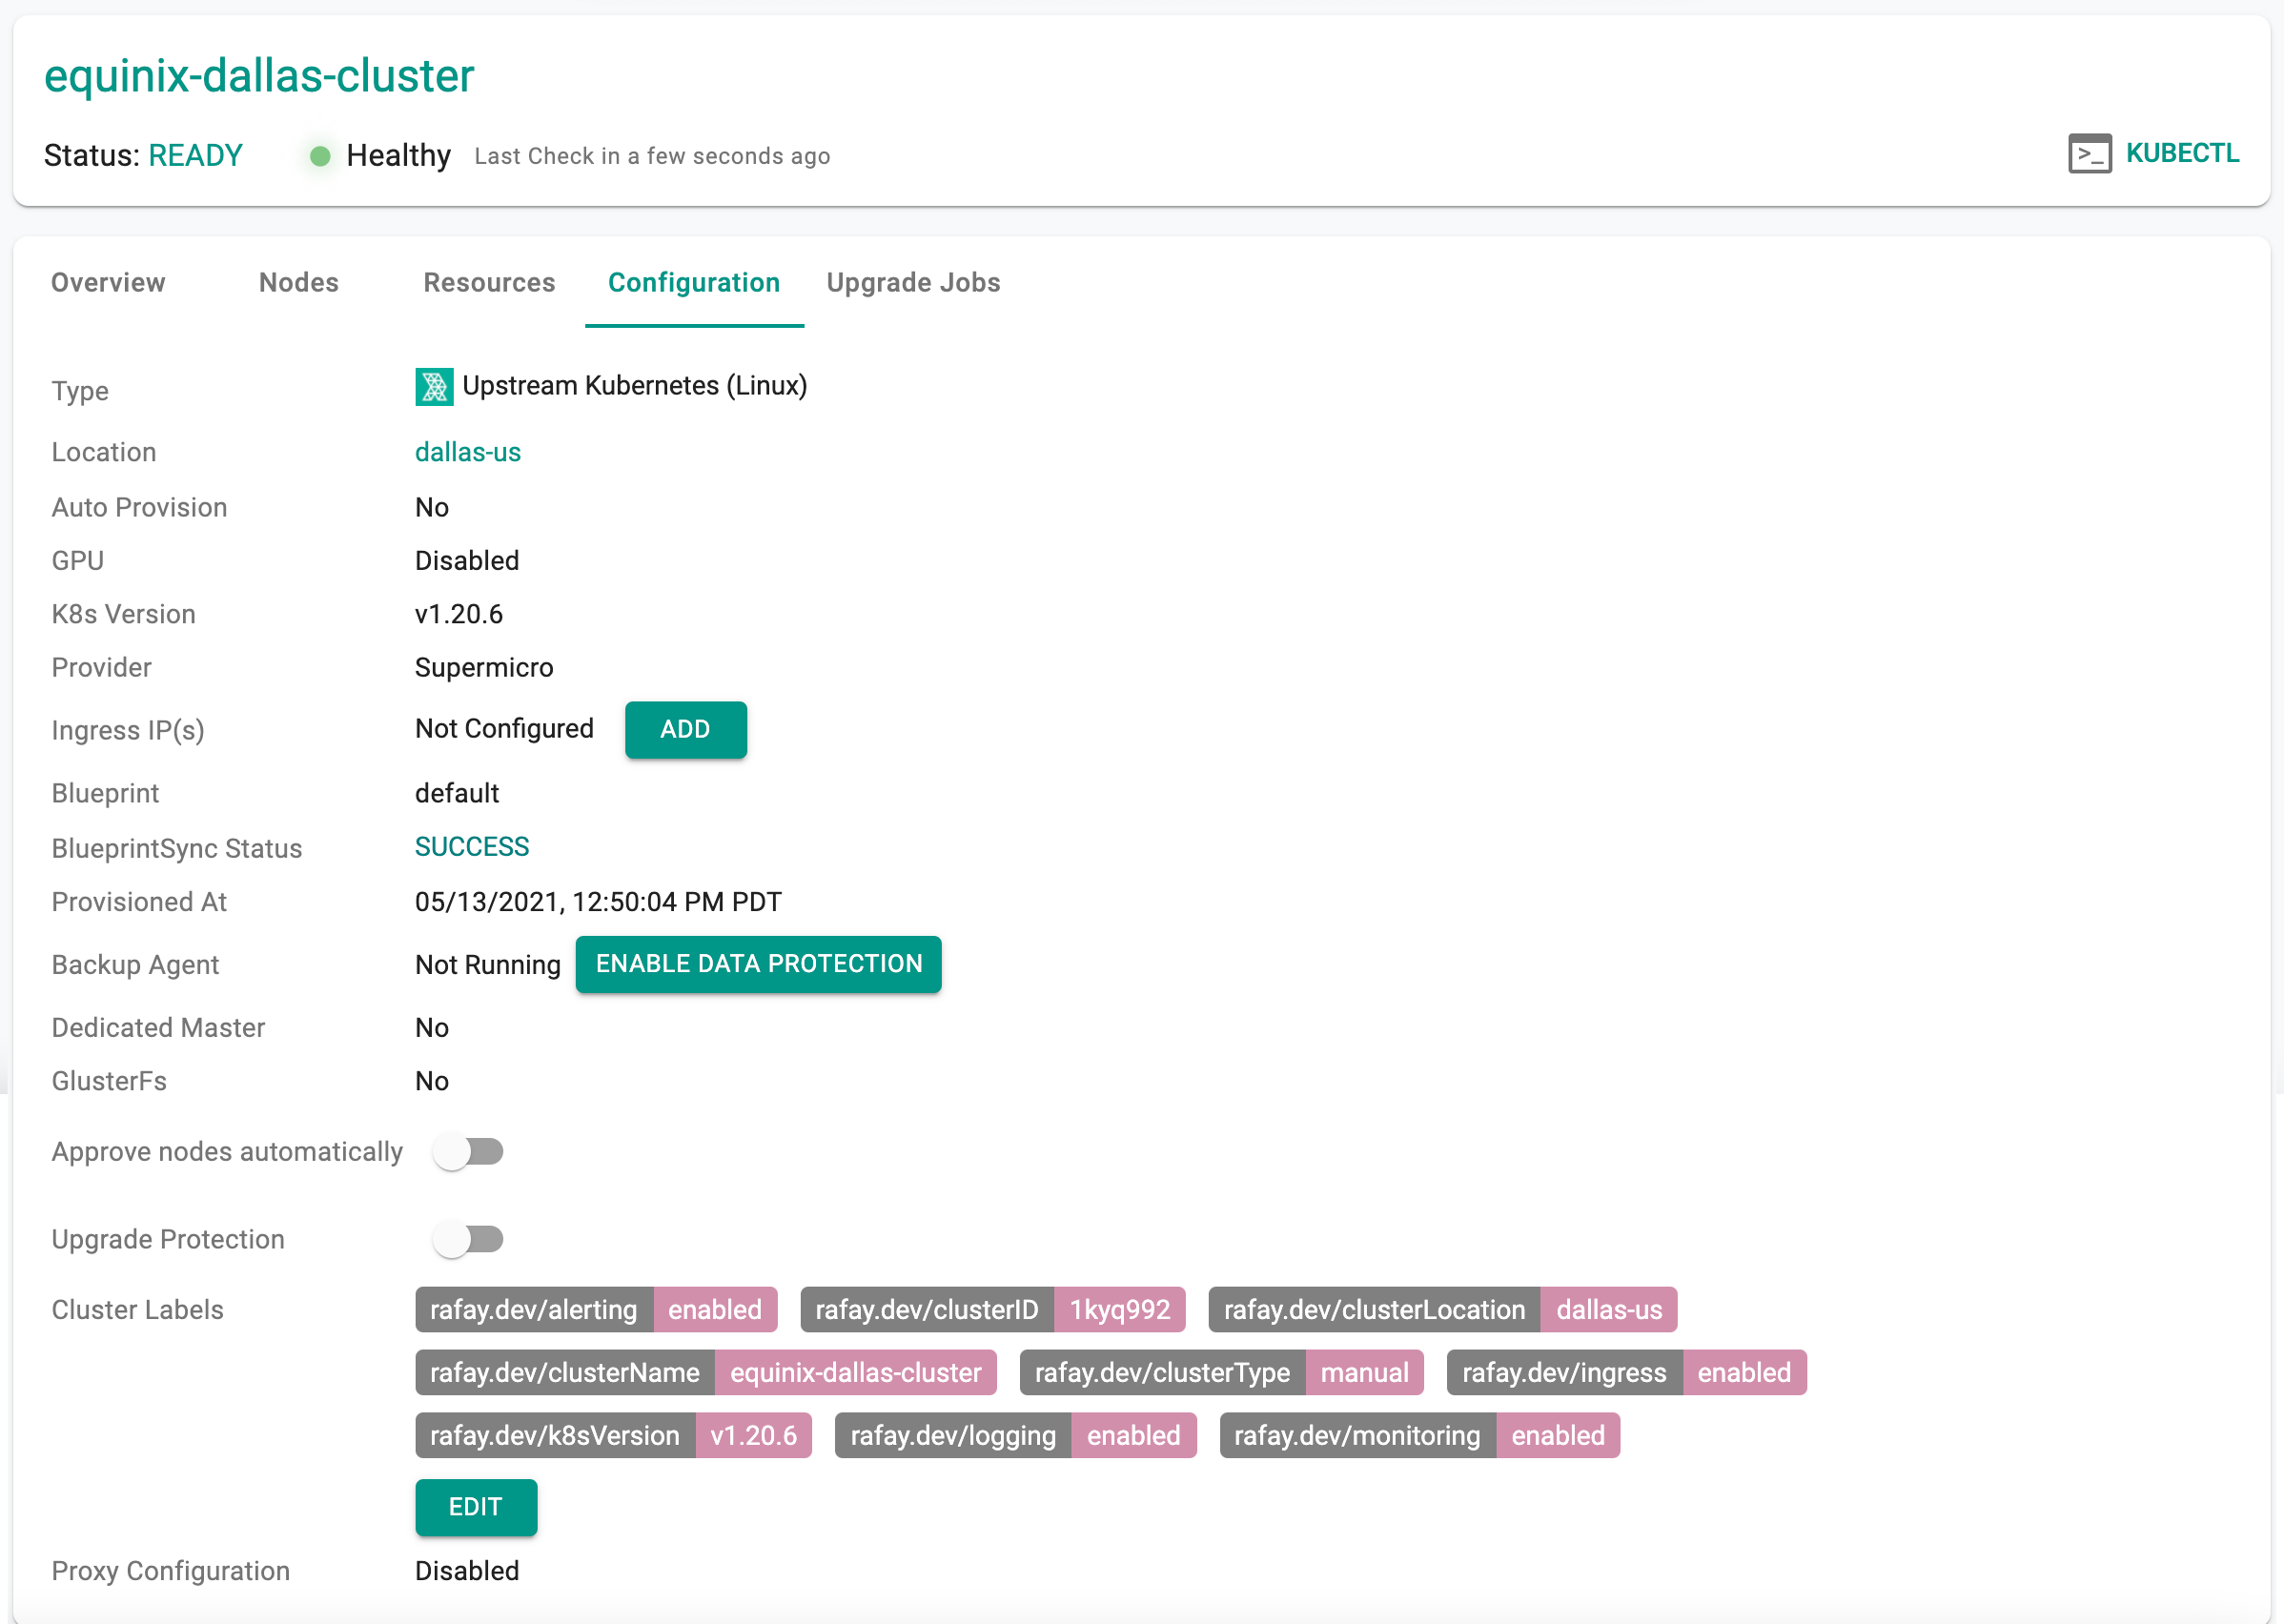
View Cluster Configuration
Administrators can view the provisioned cluster's configuration by clicking on the cluster and selecting the "Configuration" tab.
Common Issues
Althought "conjurer" provides a built in battery of "preflight tests" that can be used to verify the environment and configuration, there are some scenarios where provisioning can fail.
Host Firewall
If your instances (for the nodes) have a host firewall such as firewalld or iptables rules, it may be silently dropping all packets destined for the Controller. This will result in provisioning failure. Ensure that the host firewall is configured to allow outbound communications on tcp/443 to the controller.
MTU
The Maximum Transmission Unit (MTU) is the largest block of data that can be handled at Layer-3 (IP). MTU usually refers to the maximum size a packet can be. Certain MTU/MSS settings can result in fragmentation related issues with mTLS connections between the agents and the controller.
Unstable Network
Unstable or unreliable network connectivity. Remote cluster provisioning in remote, low bandwidth locations with unstable networks can be very challenging. Please review how the retry and backoff mechanisms work by default and how they can be customized to suit your requirements.