Pipelines
Integrated GitOps pipelines in the Controller can comprise multiple stages. The stages in the pipeline are then executed sequentially one after another.
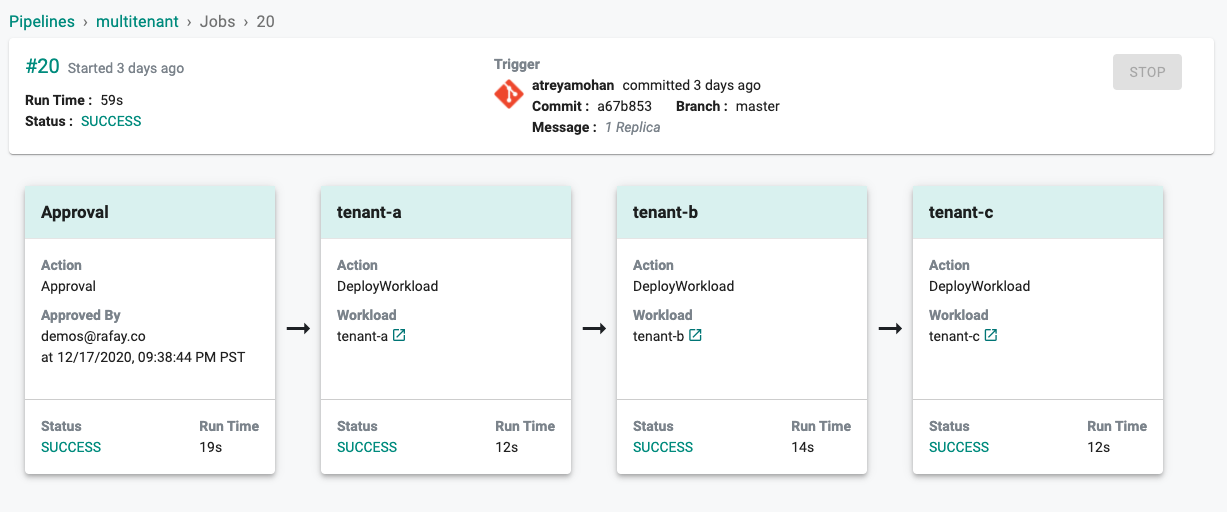
In the example below, the pipeline has "four stages". It can either be manually run or triggered by updates to a Git repository which will send a webhook to the Controller. Once the manual approval stage is initiated and approval performed by an authorized user, three workloads are deployed in a sequence
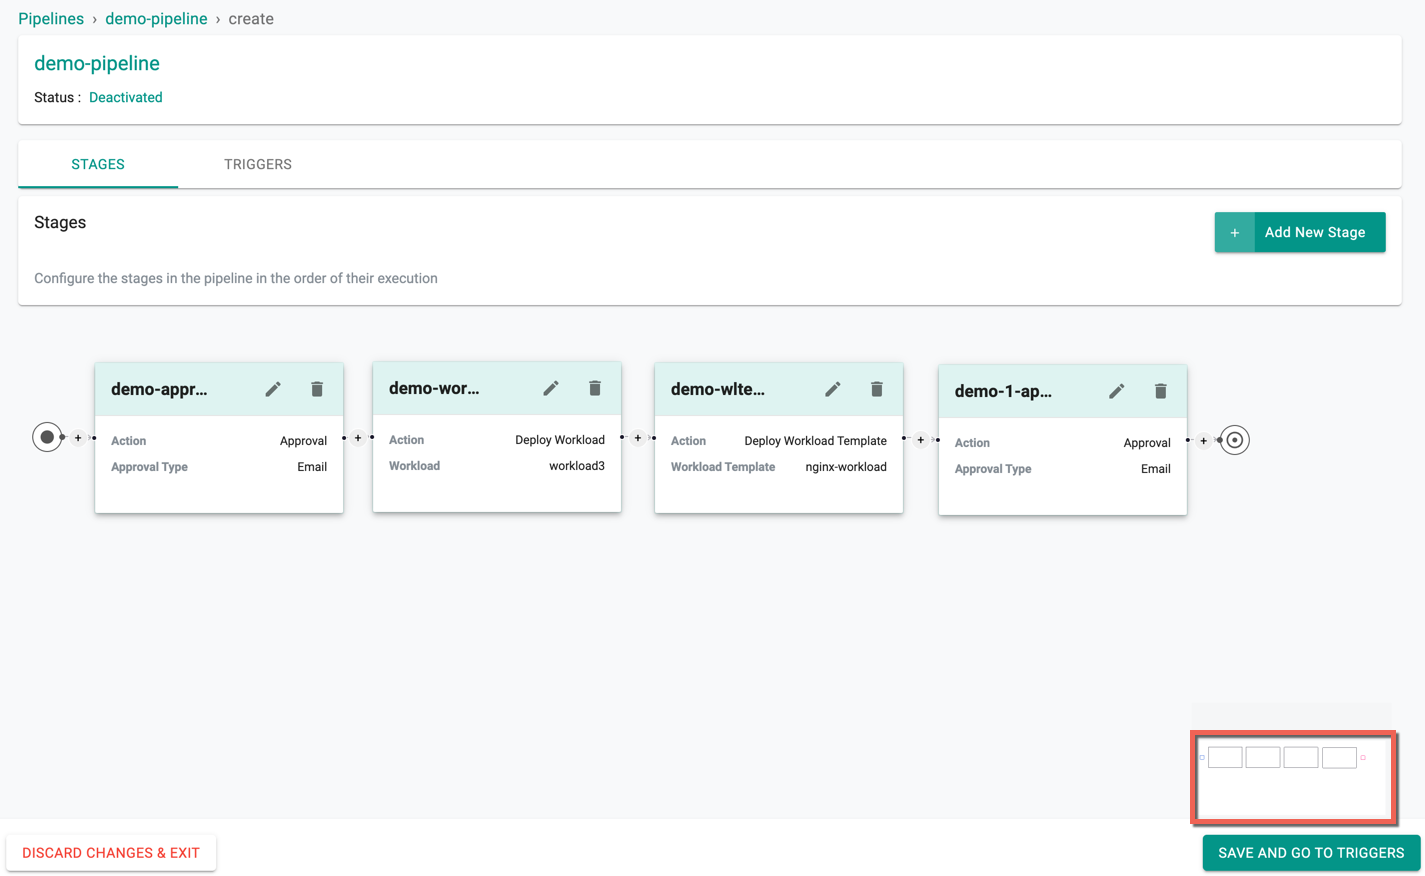
To add a stage in-between the two existing stages/at the end of pipeline/ at the beginning of the pipeline, use the + icon available next to/before each stage. User can either use the + icon or click Add New Stage to add a stage at the end of the pipeline. A map is available at the bottom right of the screen to show the spot of the existing stages
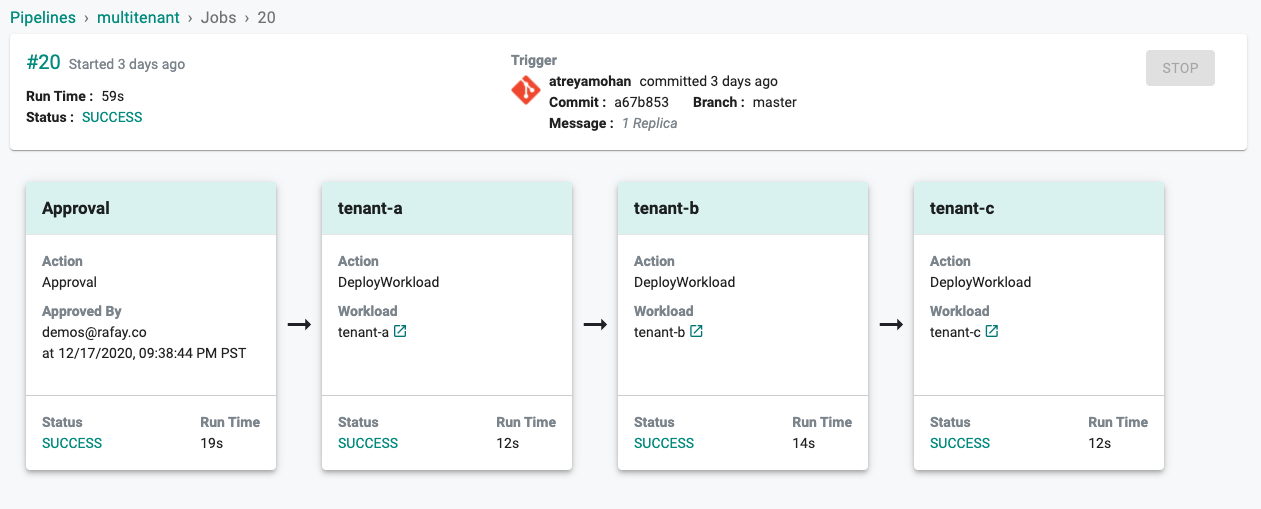
The image below shows the job details for the multi-stage pipeline that was
- Approved by "[email protected]" on 17/Dec/2020 at 9:38 PM
- The first workload deployment took 12 seconds
- The second workload deployment took 14 seconds
- The third workload deployment took 12 seconds
Supported Interfaces
This feature is supported via UI, API, RCTL, Terraform, and GitOps.
Parallel Stage Execution
GitOps pipelines support parallel execution of multiple stages within the same pipeline, enabling faster deployments and efficient utilization of resources. This flexibility allows users to configure stages to run sequentially, in parallel, or in a combination of both, based on workload dependencies.
With this capability, users can define whether stages should run one after another or simultaneously to optimize deployment time and streamline large-scale rollouts.
💡 Defining Stage Execution Flow
To design how stages run, use the black connector dots on each stage card in the Stages tab of the pipeline.
Click and drag from one stage’s dot to another stage’s dot to define the execution order. The connection line represents a dependency, which means the source stage must complete before the target stage begins.
If stages are not connected, they will run in parallel. To remove a connection, click the ✕ icon on the connector line. This provides full flexibility to mix sequential and parallel execution paths in a single pipeline.
Tip: Use stage connections to control dependencies. If certain workloads can run independently, leave them unconnected for parallel execution. If one workload must complete before another begins, connect the stages accordingly.
Example 1: Mixed Sequential and Parallel Execution
In this pipeline, there are four stages: Stage 1, Stage 2, Stage 3, and Stage 4.
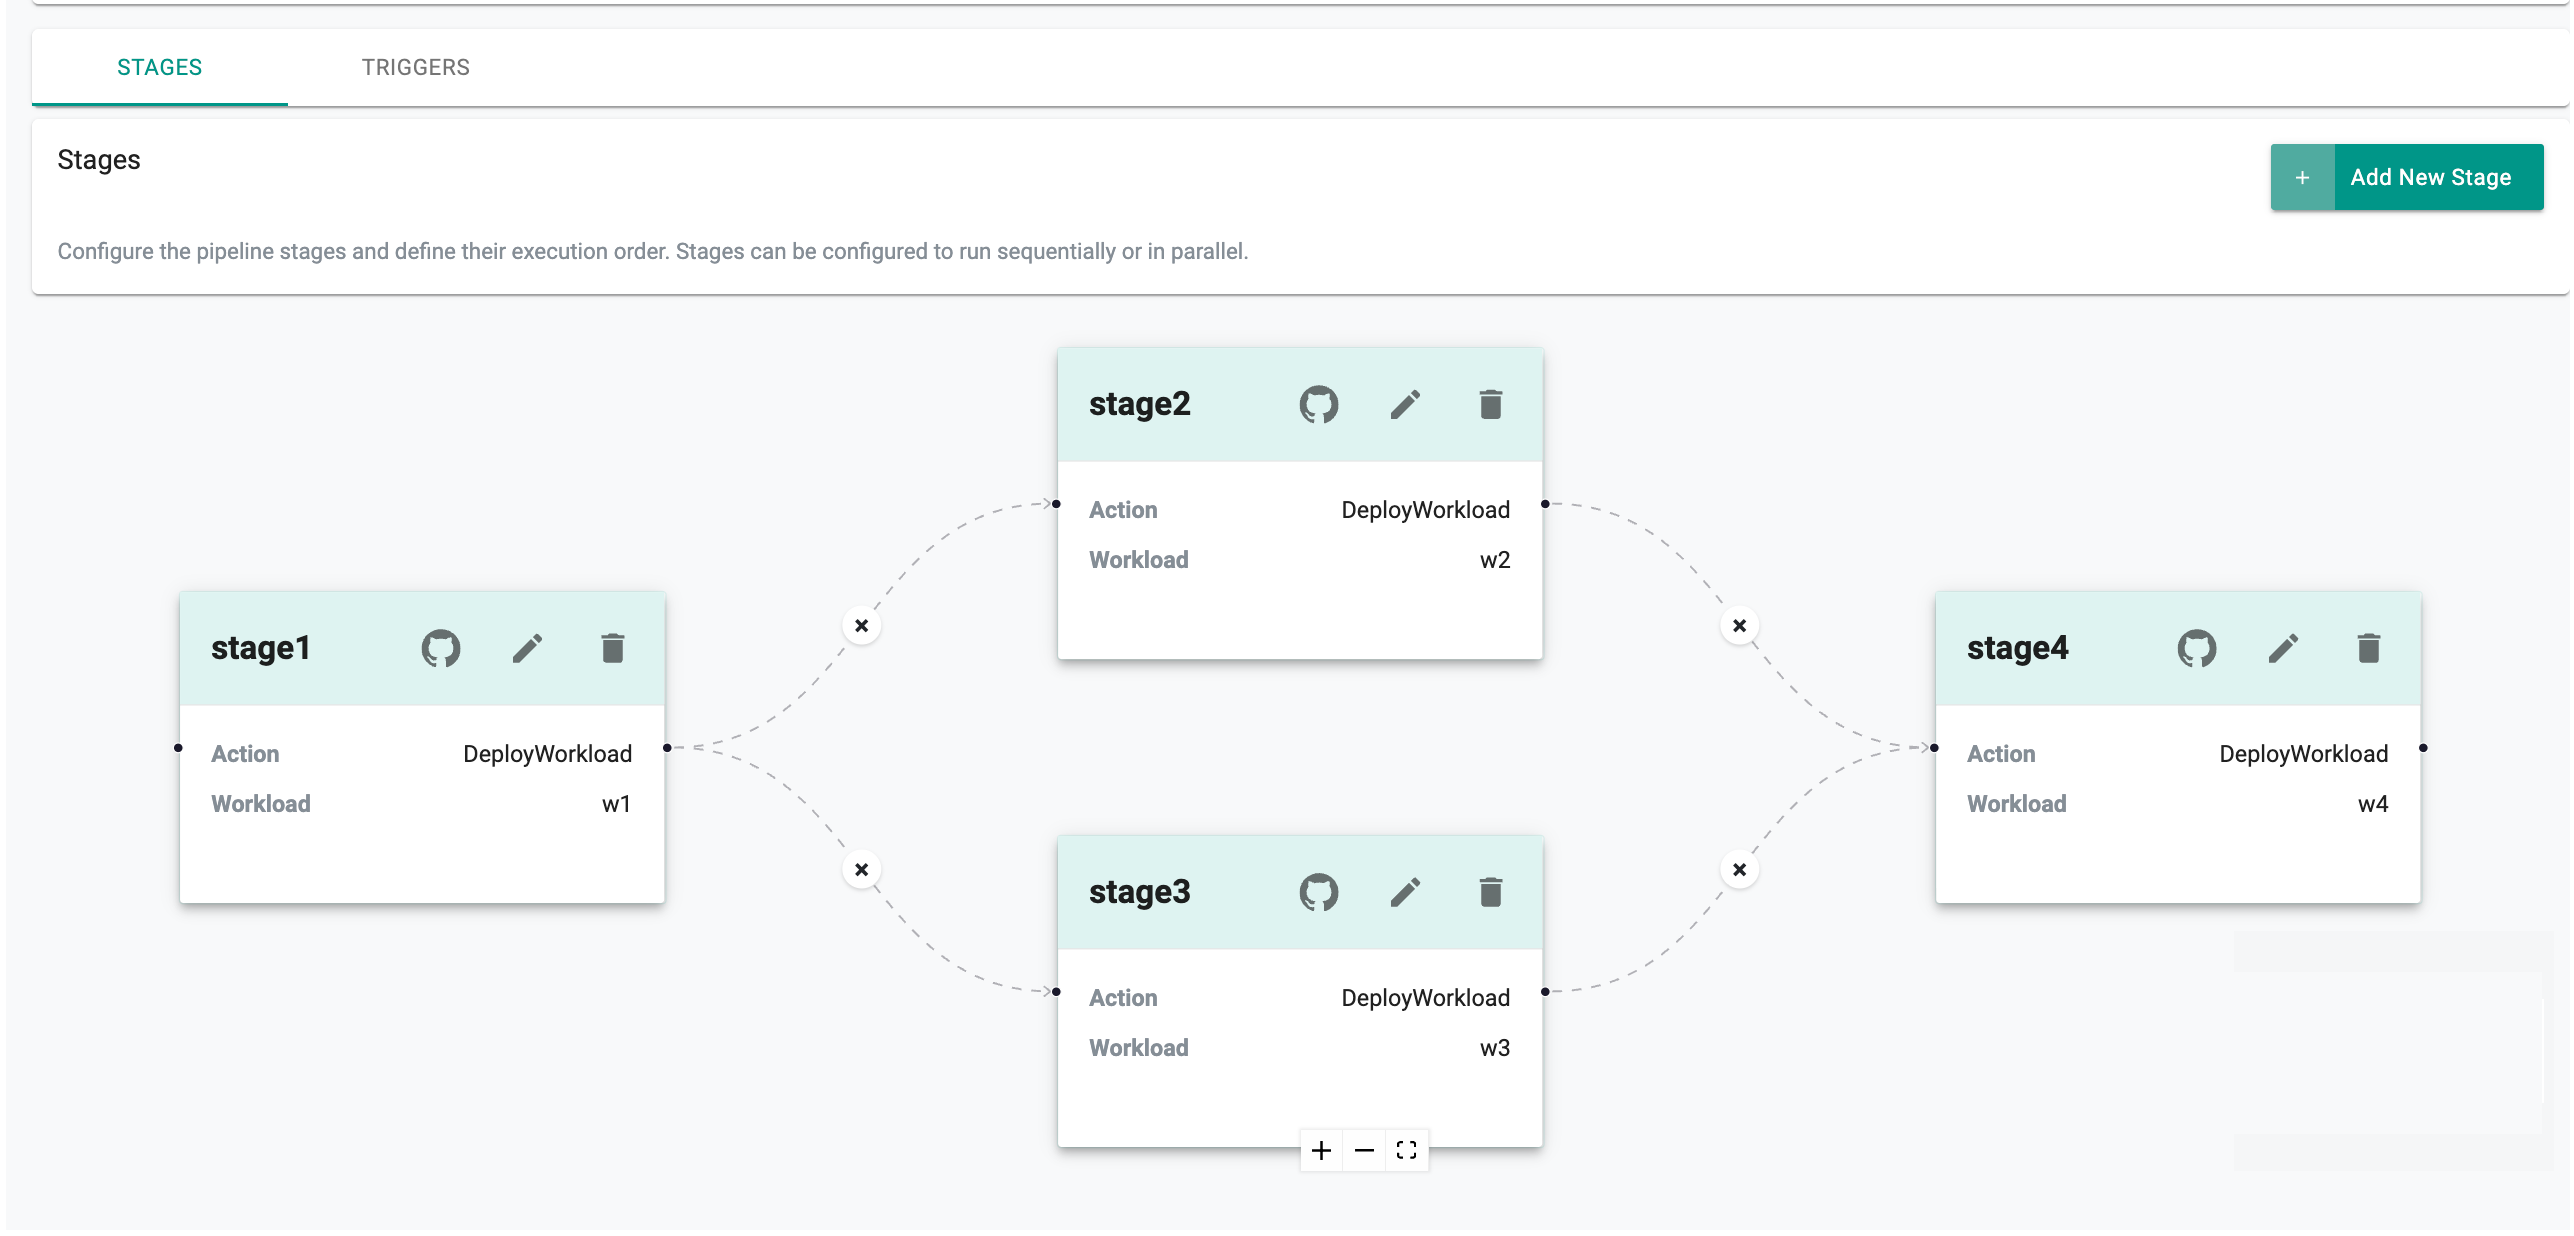
How it works: Stage 1 runs first. After Stage 1 completes, Stage 2 and Stage 3 start simultaneously in parallel. Once both Stage 2 and Stage 3 finish, Stage 4 begins. Stage 4 will wait until both preceding stages are completed.
Key Takeaway: Stages 2 and 3 run in parallel to save time. Stage 4 depends on the successful completion of both, providing an efficient mix of sequential and parallel orchestration.
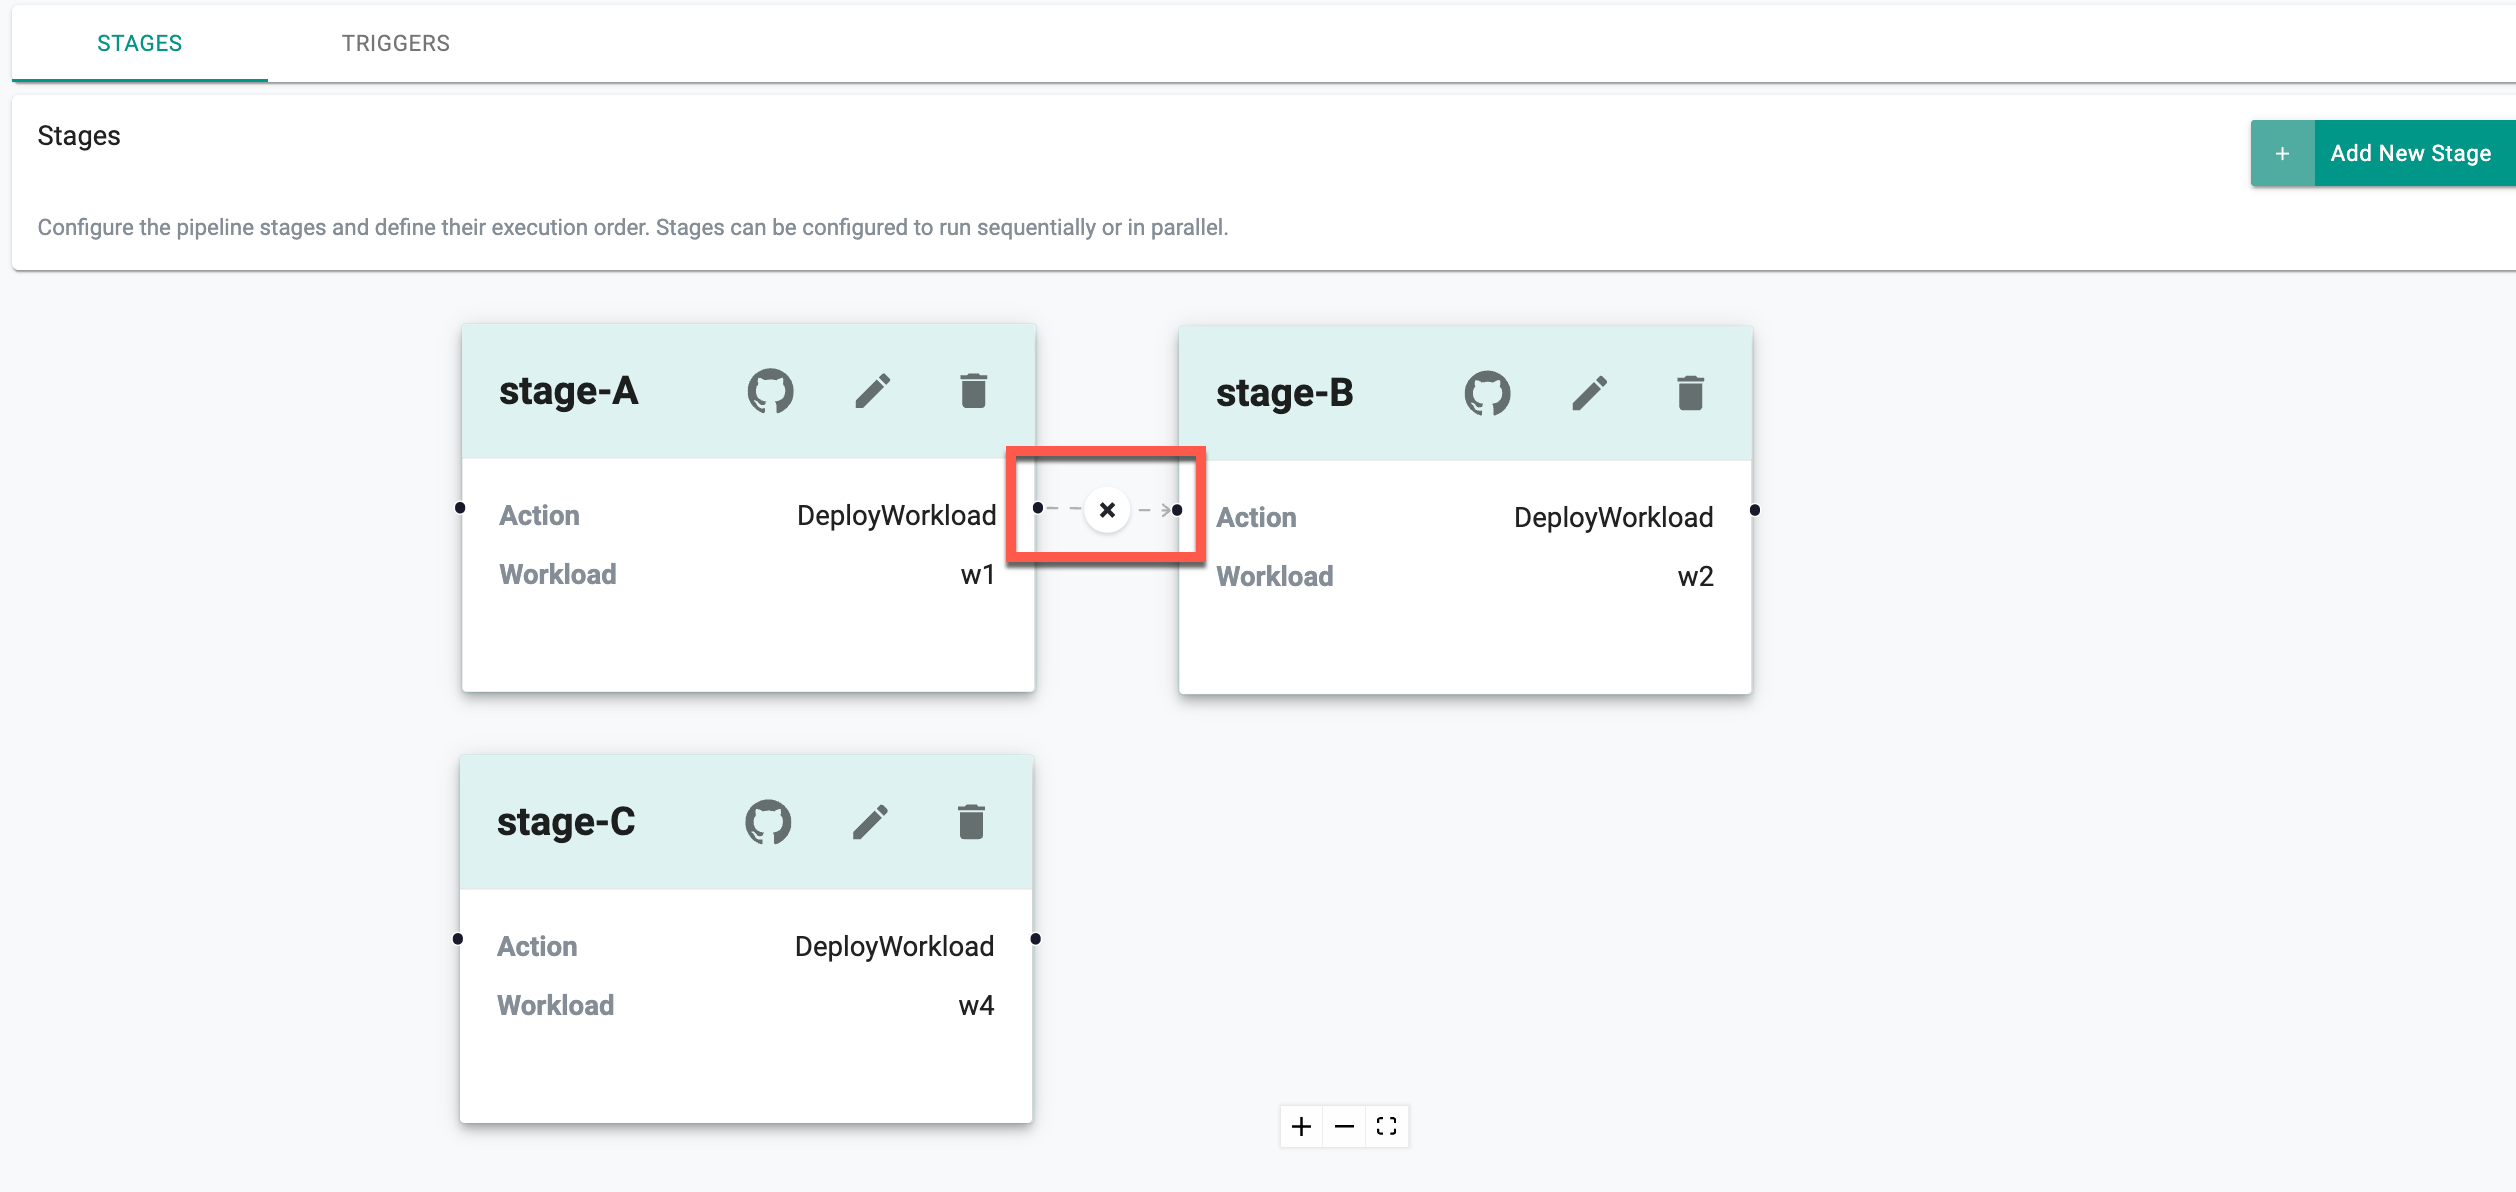
Example 2: Fully Parallel Execution
In this example, the pipeline includes Stage A, Stage B, and Stage C, none of which are connected.
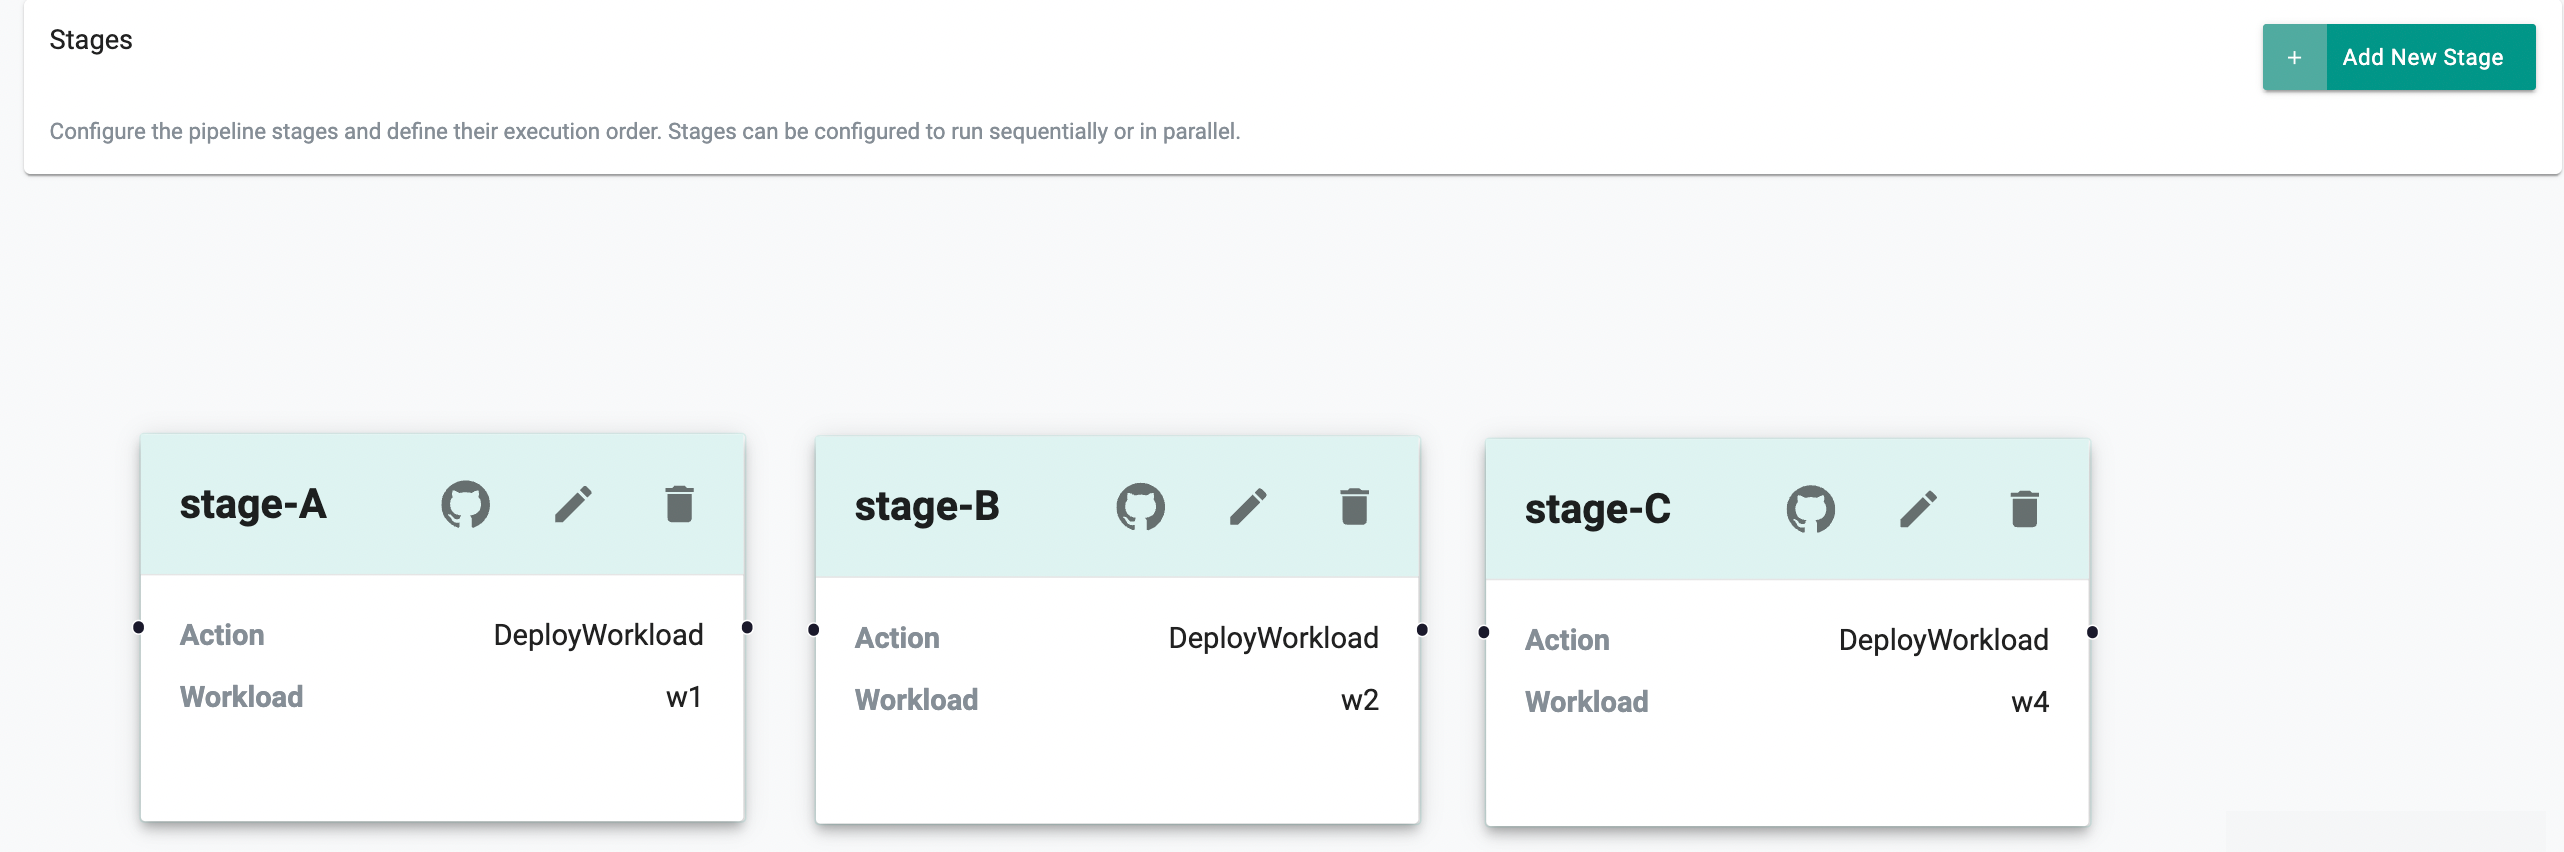
How it works: Because there are no connectors between the stages, all stages run at the same time. Each workload executes independently without any dependency on others.
Key Takeaway: Ideal for running unrelated workloads or deployments concurrently, this setup maximizes deployment speed and resource utilization.
Example 3: Hybrid Parallel Execution
This example demonstrates a mix of both sequential and parallel behavior.
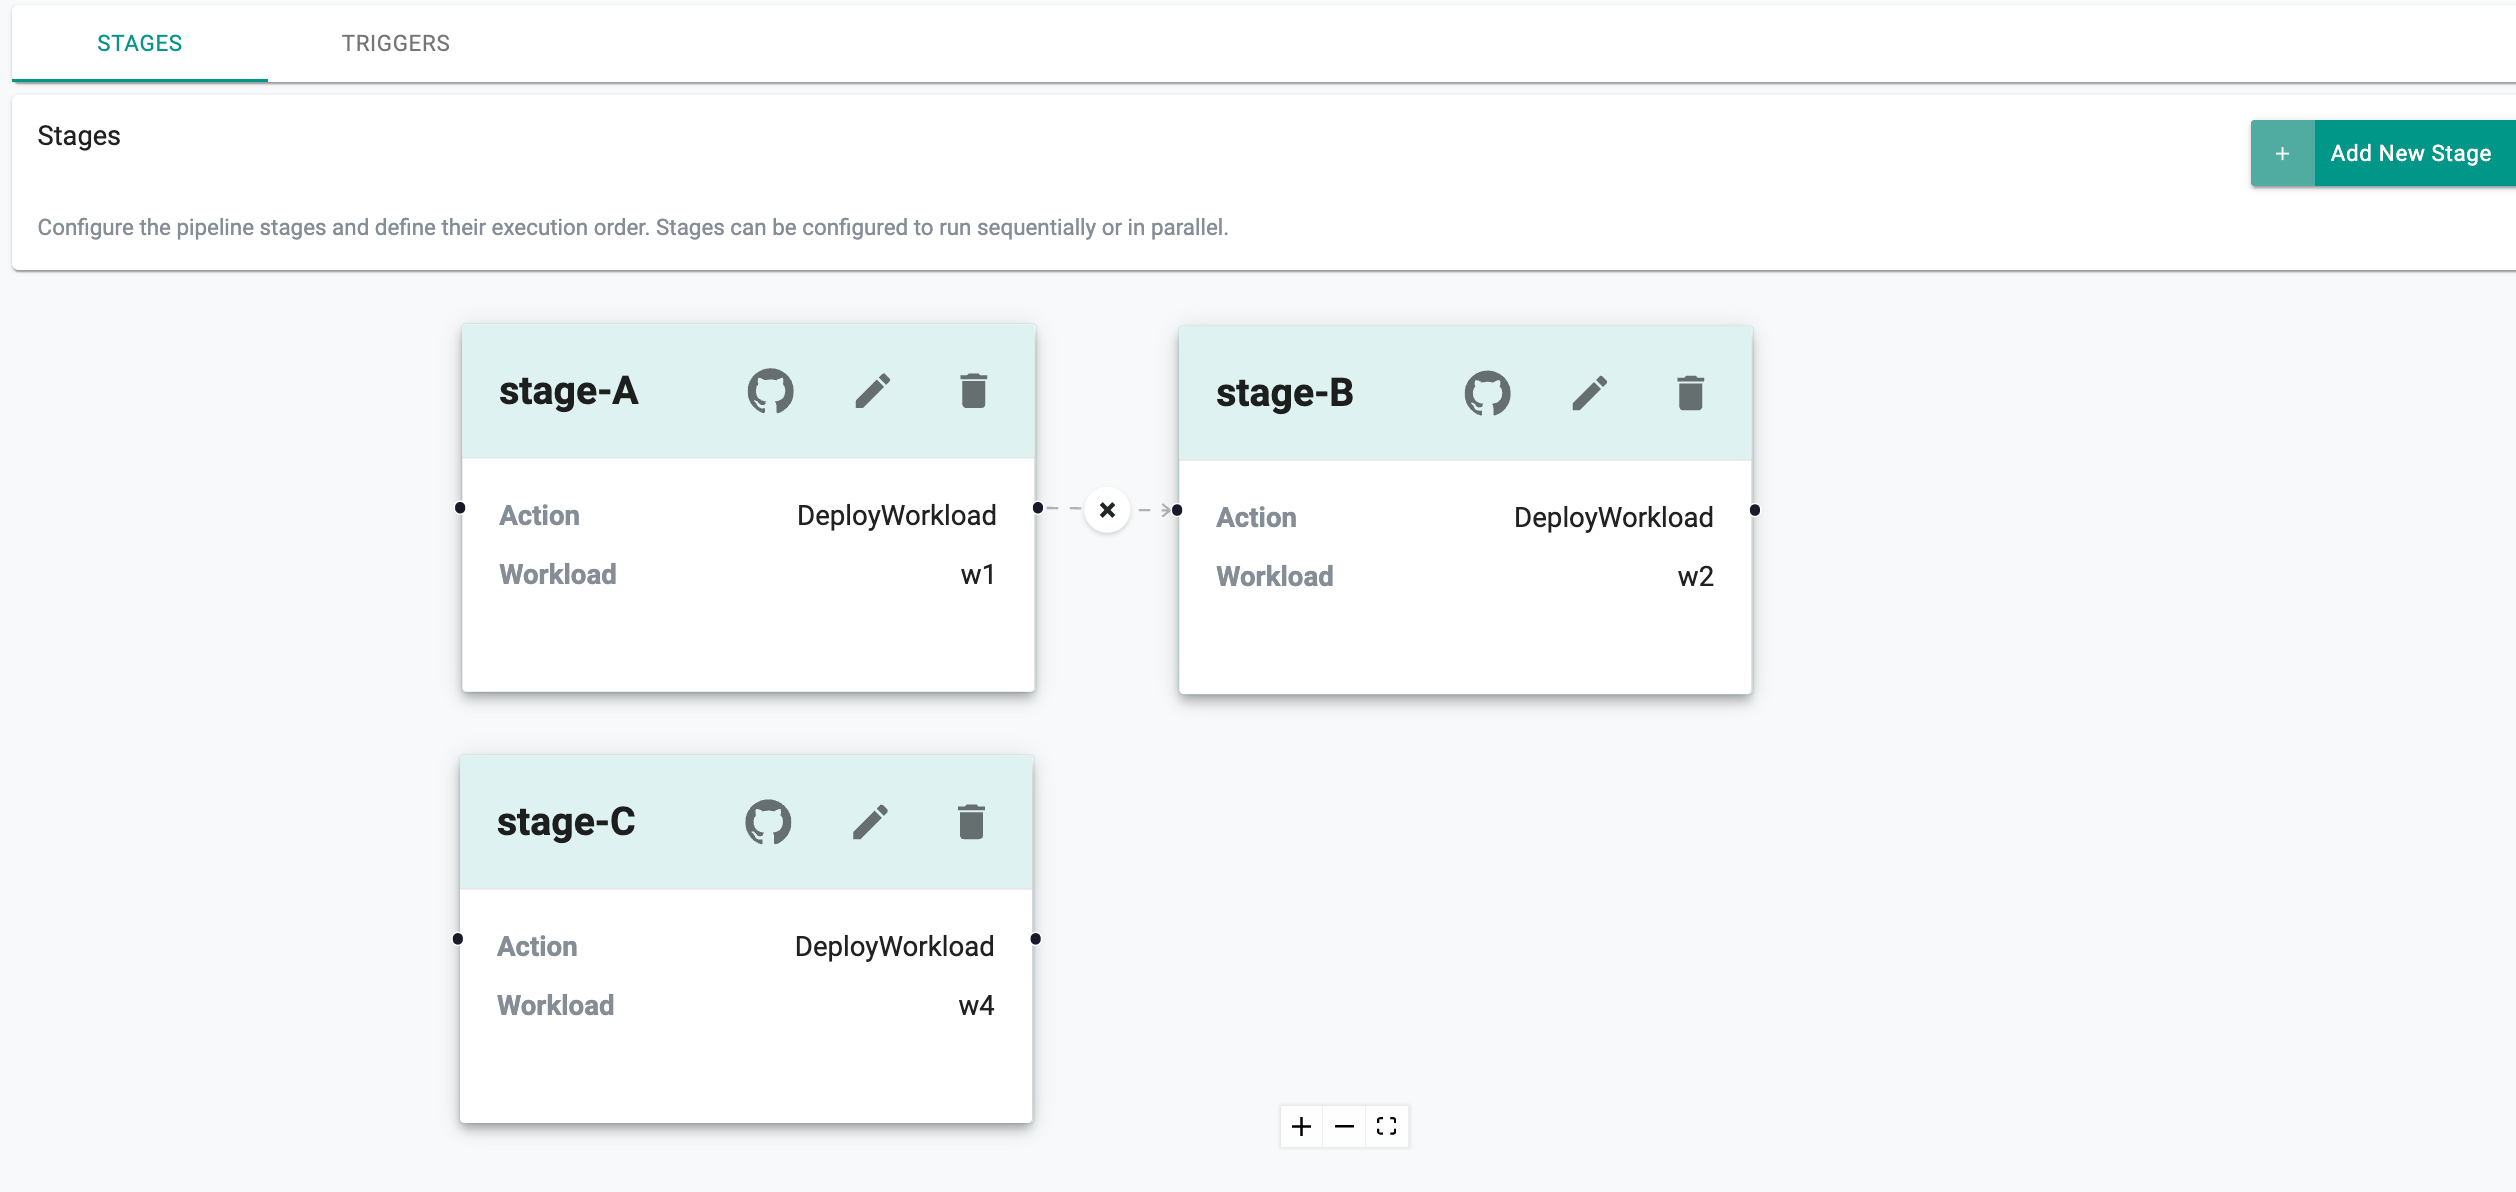
How it works: Stage A and Stage C start in parallel. Stage B depends on Stage A, so it begins only after Stage A completes. This creates a combination of sequential and parallel paths within a single pipeline.
Key Takeaway: This configuration provides flexibility to design hybrid pipelines where dependent actions are properly sequenced while independent workloads still run concurrently.
Key Benefits
| Benefit | Description |
|---|---|
| Faster Execution | Multiple stages or workloads can run in parallel, significantly reducing total runtime. |
| Optimized Resource Usage | Independent actions can utilize resources simultaneously, increasing throughput. |
| Flexibility | Combine sequential and parallel execution to fit specific deployment strategies. |
✅ Best Practice Tip: Always verify the connection lines between stages before activation. These define whether your stages will run in sequence or in parallel, and a single connection can alter how the entire pipeline executes.
Security Model
Integrated GitOps pipelines in the Controller closely follow the Projects based hard security isolation model. This means that RBAC'ed users that belong to just "Project A" cannot access/view the pipelines in "Project B".
Organization Admin and Project Admin roles have the privilege to create, read, update and delete pipelines.
Number of Pipelines
There are no constraints or limitations (both scale and licensing related) to the number of pipelines that can be used by an organization.
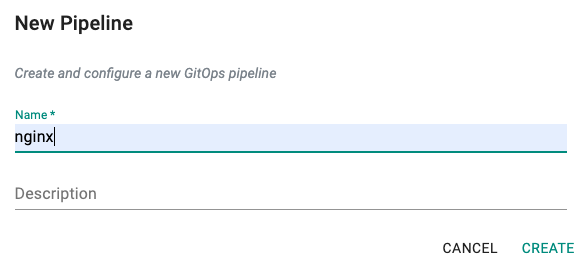
Create Pipeline
To create a new pipeline,
- Navigate to your Project
- Select GitOps Pipelines
- Click on "New Pipeline", provide a friendly name and Save
Add Stages
Every pipeline contains at least one stage. To add a new stage
- Click Add New Stage and provide a name
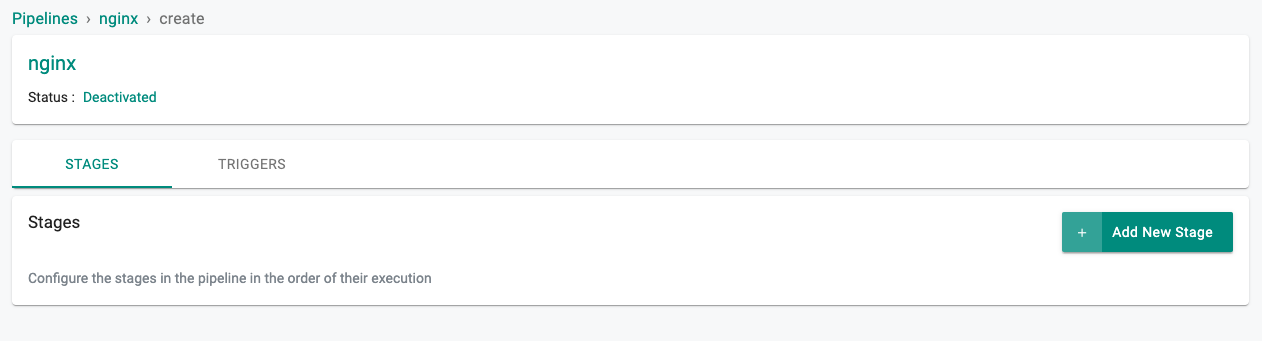
- Select the action based on the requirement. Refer stages for more info on each action
Important
User must select only Deploy Workload Template action to deploy applications in wavelength zone
- Select the workload template, namespace, clusters, and other options as per the requirement
Note: To deploy an application on the wavelength zone, select alpha.rafay.io/wl-zone Node Grouping Keys from the Advanced drop-down
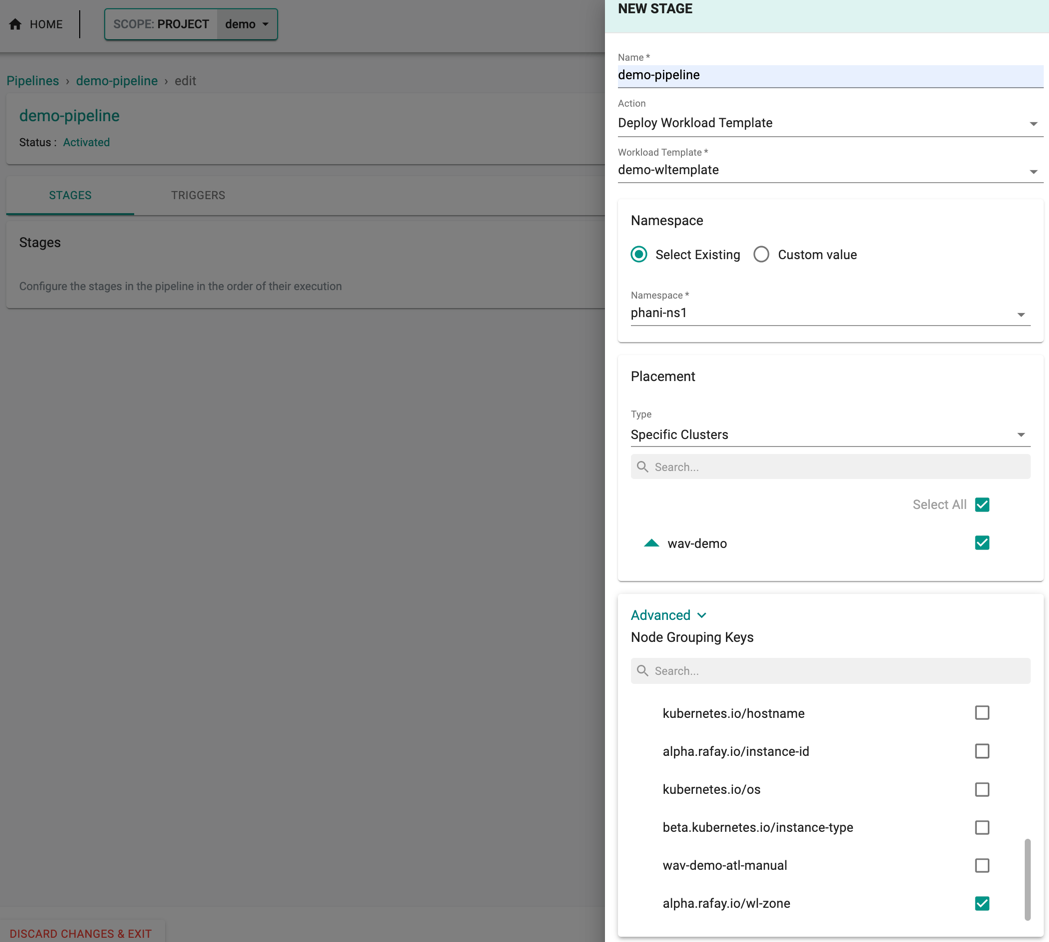
- Click Save
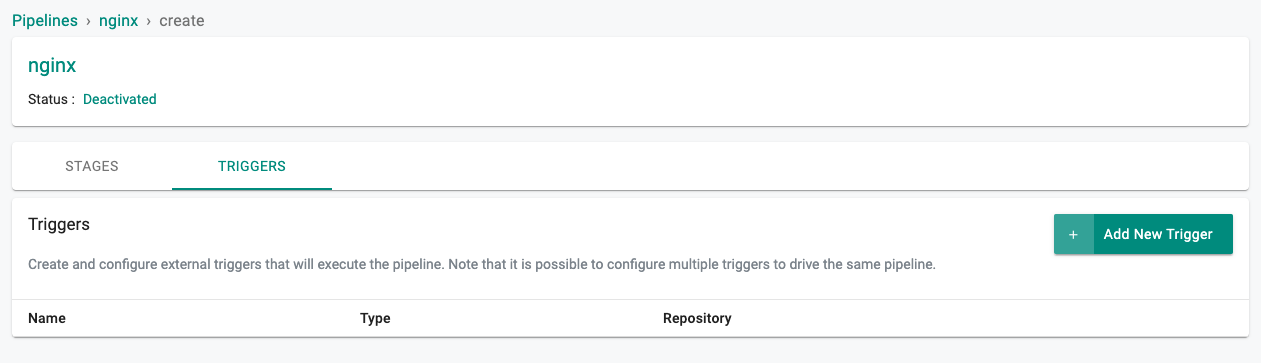
Add Triggers
Every pipeline contains at least one trigger. To add a new trigger
- Click on Add New Trigger
- Follow the directions for types of triggers
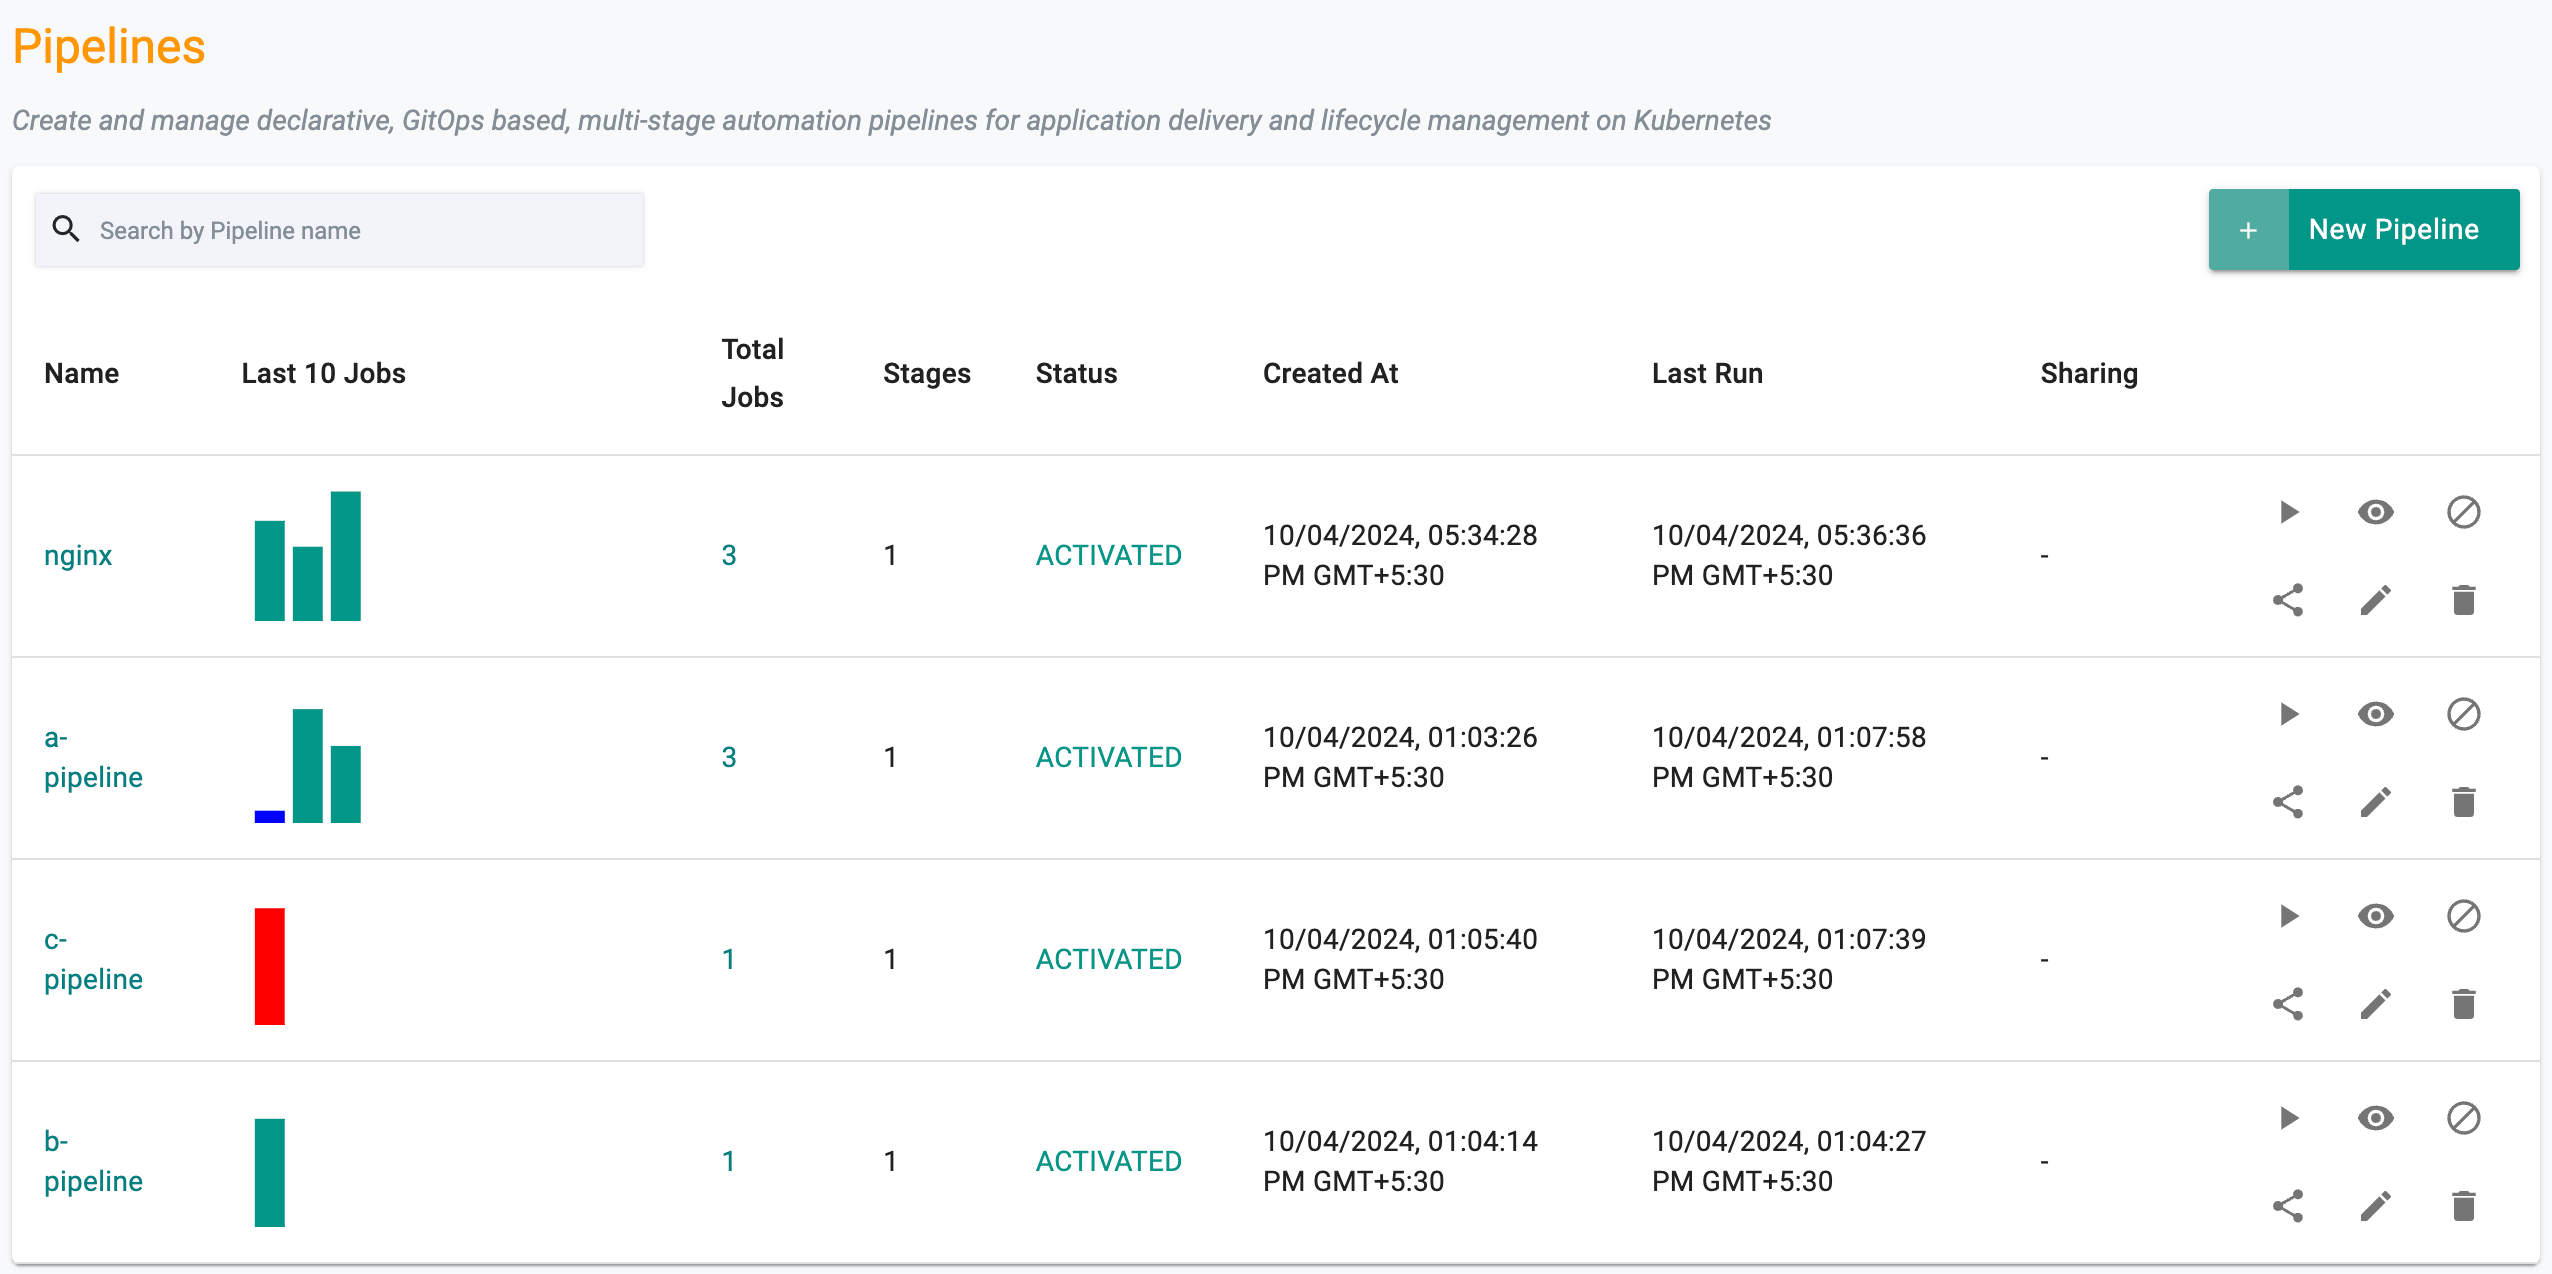
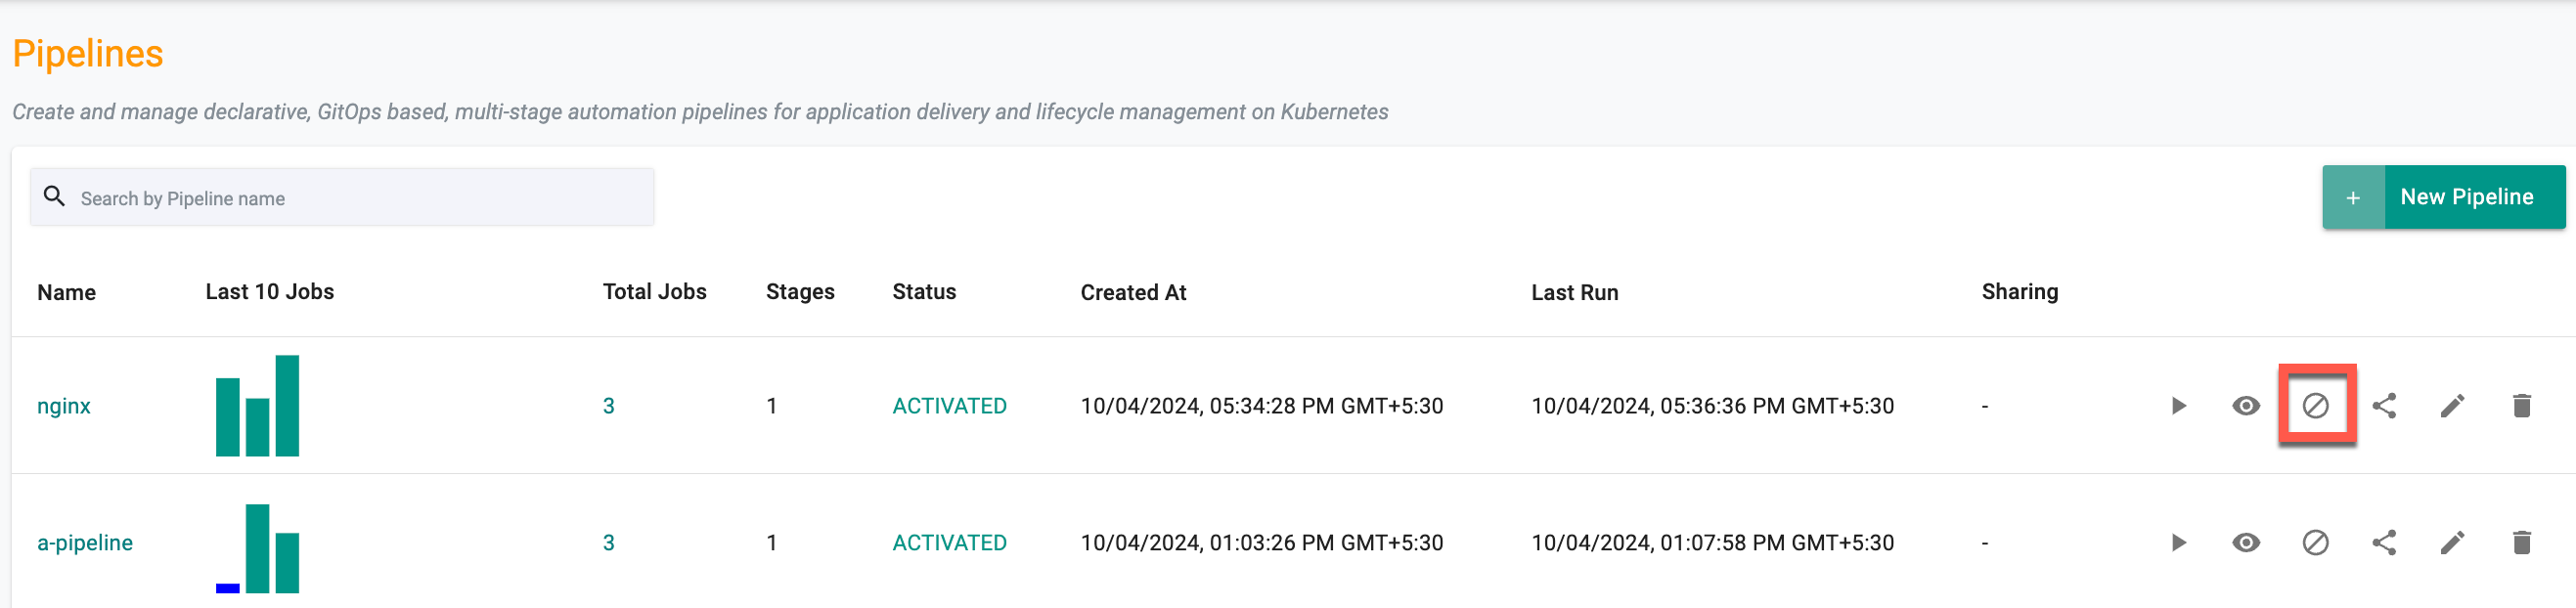
View Pipelines
To view the list of all pipelines in a project
- Navigate to your Project
- Click on GitOps pipelines
In the example shown below, there are four active pipelines. The "nginx-gitops" pipeline has been triggered and run 87 times.
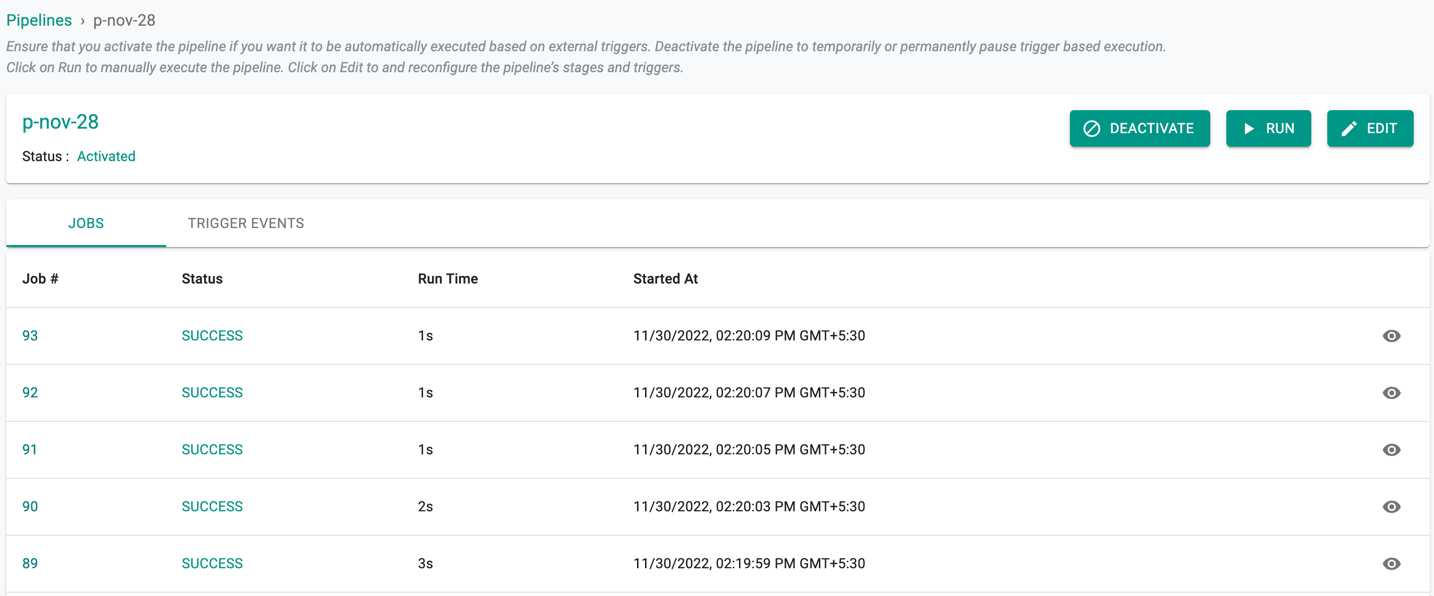
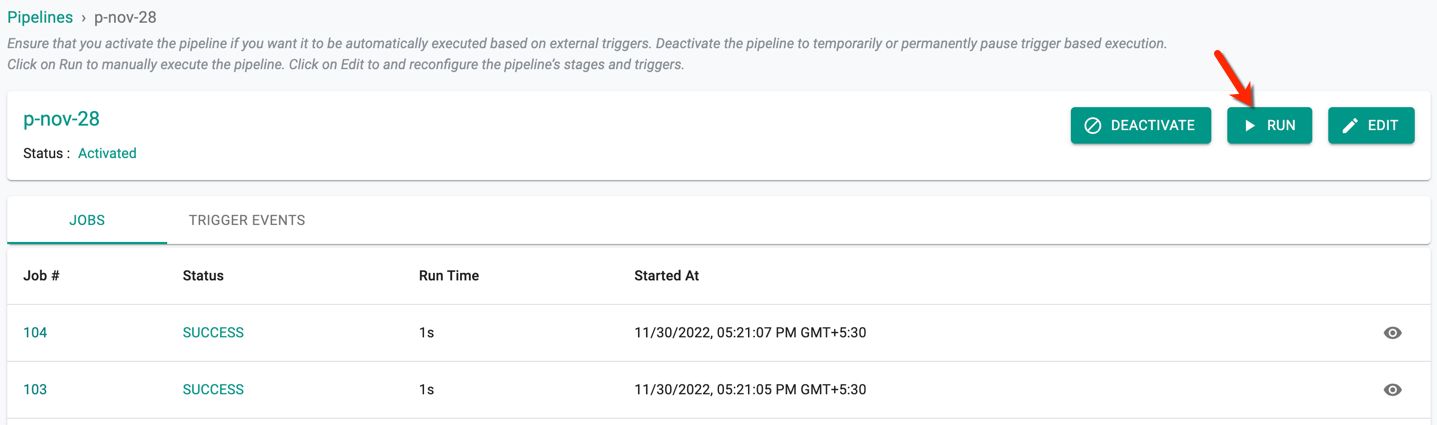
Activate/Deactivate Pipeline
Administrators can deactivate a pipeline either temporarily or permanently. When a pipeline is deactivated, triggers received are ignored. However, it is still possible to manually run the pipeline.
Click on Activate to make the pipeline active. The current activation status of a pipeline can be viewed for every pipeline.
Important
Pipelines triggered via the API (V2) using curl might result in errors. The issue arises when the Require console login before kubectl access option is enabled in user settings, which mandates API authentication before granting kubectl access. To resolve this, users should disable this option to ensure seamless pipeline execution
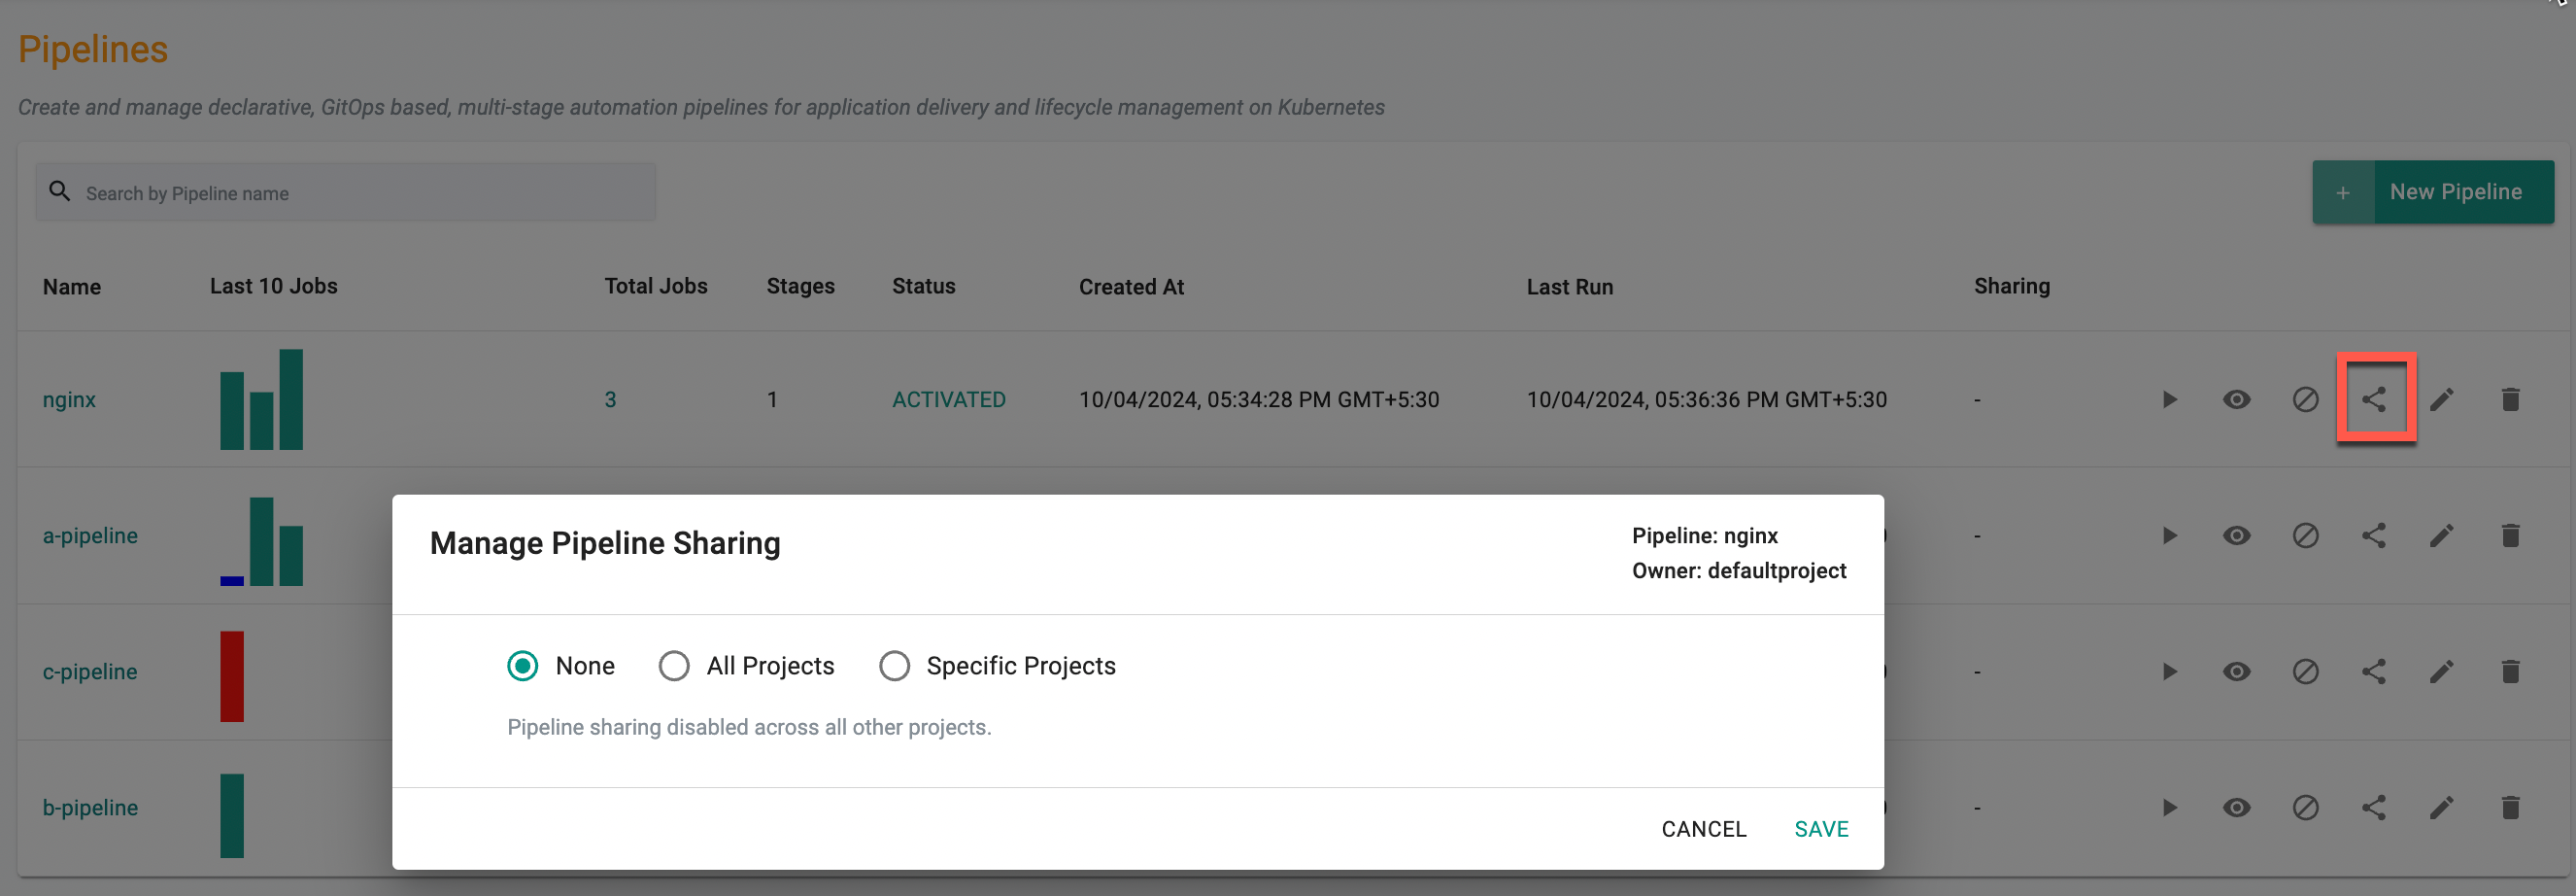
Manage Sharing Pipelines
The existing pipeline can be shared to All/Specific/None projects. This helps to use the configured resource specs to infuse to the new pipeline if required or change the required resources
Edit Pipeline
Authorized users can edit and update existing pipelines anytime.
- Click on the pipeline
- Click on Edit
- The user can now add/remove/update stages and triggers
Delete Pipeline
Click on Delete, acknowledge the prompt to permanently delete the pipeline. Note that this action is destructive and cannot be undone.
Manual Jobs
If required, authorized users can launch a pipeline job "manually" by clicking on "Run"
Trigger Events
Trigger Events shows the pending events in queue and helps to debug the status of the event. Every time a job is triggered, initially, the events gets into pending status.
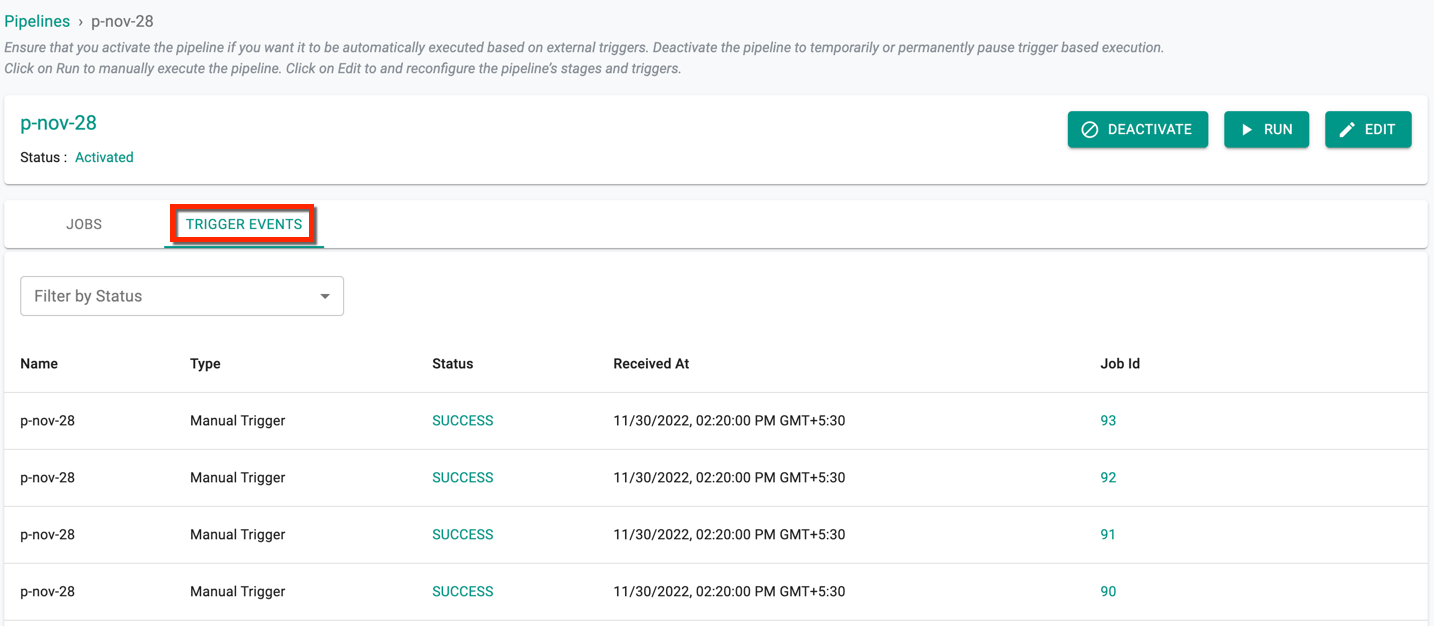
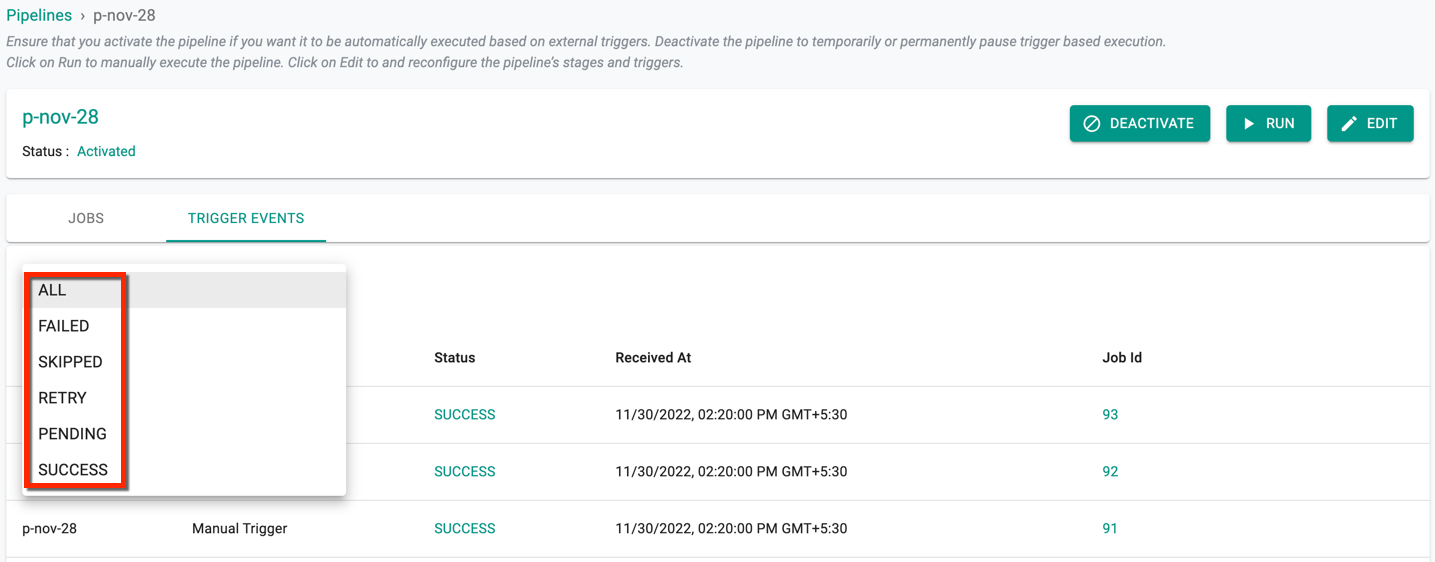
Users can filter the events by different statuses. Failed, Skipped, Retry, Pending, and Success are the five (5) statuses of Trigger events.
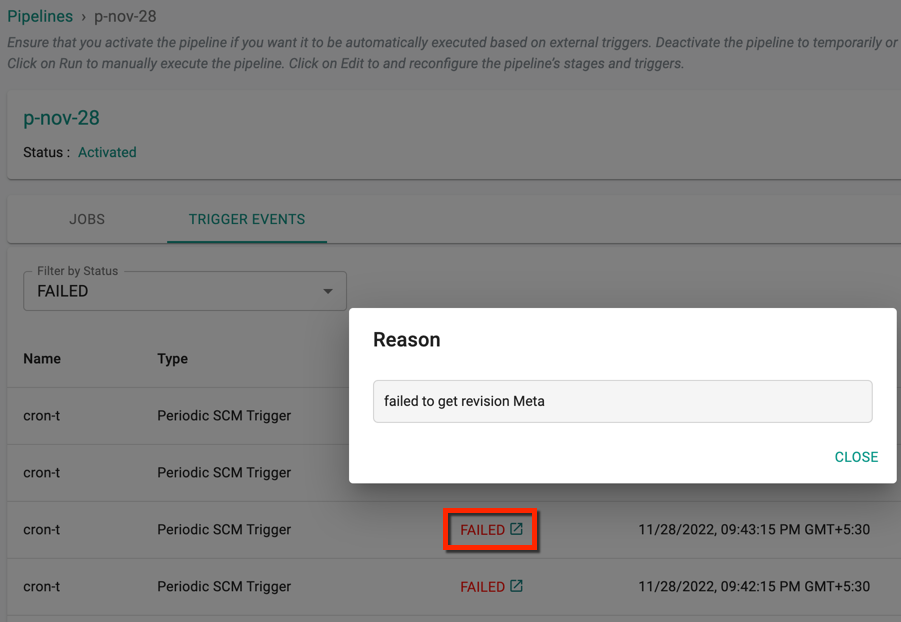
Once an event is moved to success state, it is converted to a job. Click the job id to view the job details. To view the reason for failed/skipped events, click the status icon
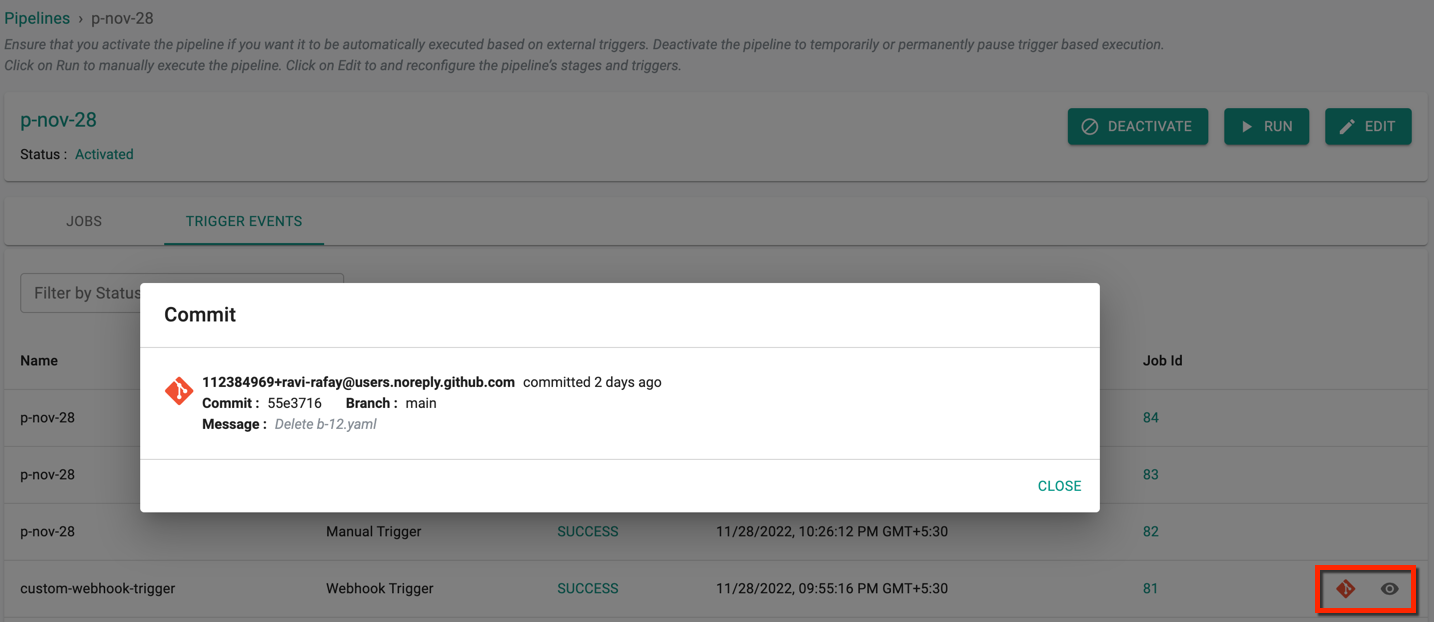
Events that are triggered externally via webhook will have a red icon as shown below. Click the icon to view the changes committed in the repository and the eye icon to view the payload received from Git platform
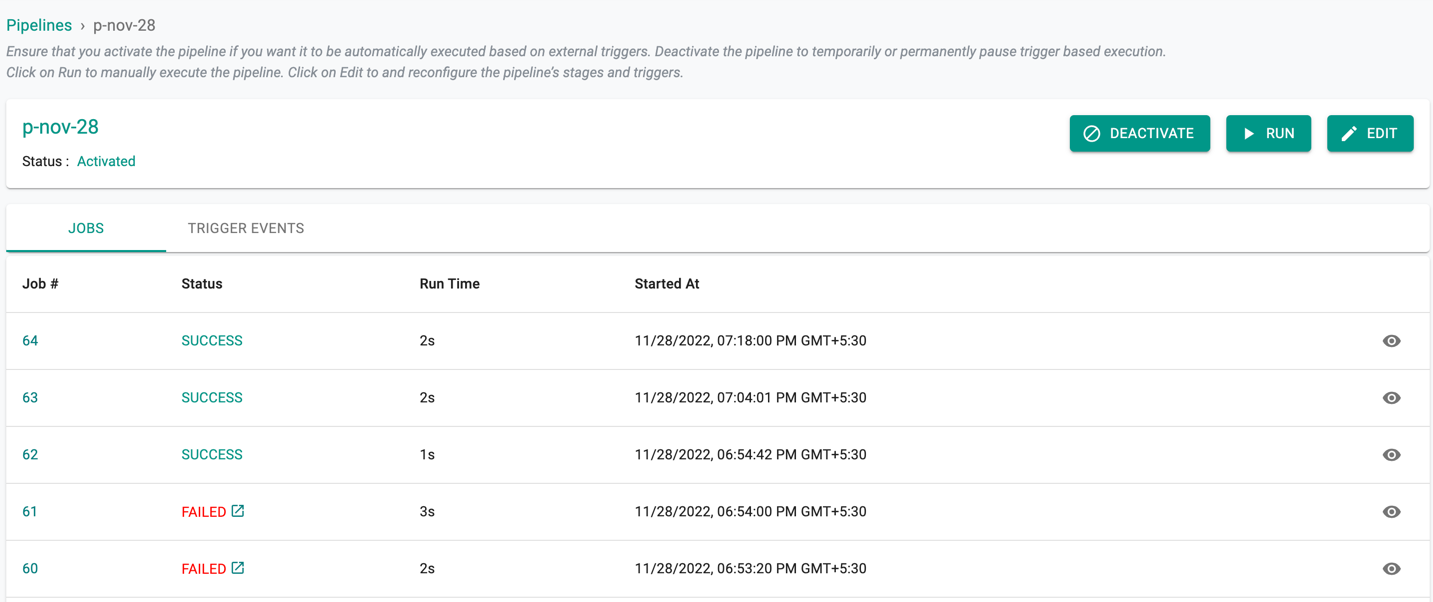
View Pipeline Jobs
Every pipeline job's details (i.e. run) are visualized for users. Just select and click on your pipeline name. In the example below, the reverse chronological list of jobs, their status, total run time and start time are presented for quick comparison.
To view detailed information about a job, click on the "Job #". In the example below, clicking on "Job 20" provides the user detailed information about the pipeline
Explore our blog for deeper insights on Create Git Pipeline in 3 easy steps, available here!
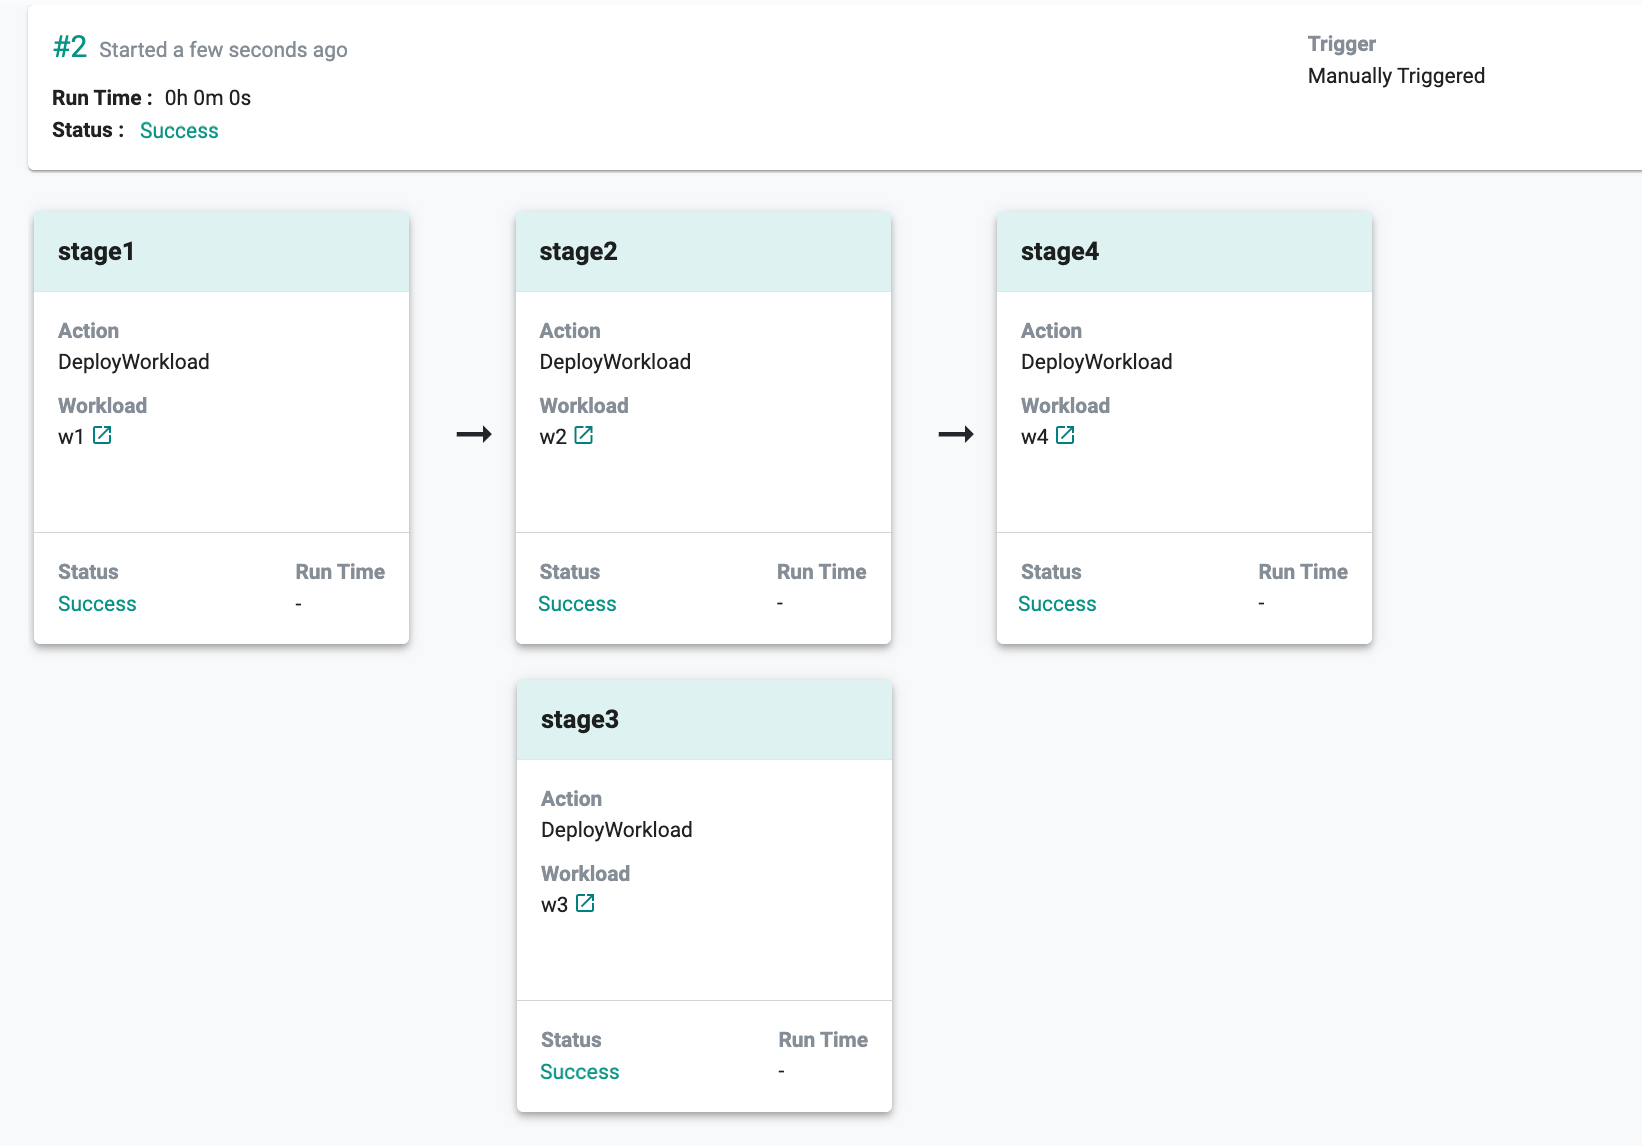
View Sequential and Parallel Stage Execution
The Job Details page displays how stages within a pipeline were executed based on their configured sequence and dependencies.
In this example, the pipeline includes Stage1, Stage2, Stage3, and Stage4, each performing the DeployWorkload action for their respective workloads.
Execution summary:
- Stage1 executed first and deployed Workload w1. After completion, it triggered Stage2 and Stage3.
- Stage2 and Stage3 executed in parallel.
- Stage2 deployed Workload w2.
- Stage3 deployed Workload w3. Both stages ran independently without waiting on each other.
- Once Stage2 completed successfully, it triggered Stage4, which deployed Workload w4.
- All stages completed successfully, and the overall job status is displayed as Success.