k8s Upgrades
Performing upgrades of Amazon EKS Clusters by yourself can be a complex, nuanced, time-consuming, manual activity. We have made this entire process simple and straightfoward for our customers. Depending on the nature and criticality of their workloads, different strategies can be employed for upgrades of Amazon EKS Clusters.
Upgrade Notification
The administrator is shown a notification when an upgrade is available for a cluster. Clicking on the notification will provide the administrator with additional information on what is available.
- A red banner indicates that the cluster is multiple versions behind the latest version.
- A blue banner indicates that the cluster is one version behind the latest version.

Scope of Upgrade
There are three components that need to be upgraded during an EKS Cluster upgrade.
- EKS Control Plane
- Attached Node Groups (both Managed and Self Managed)
- Critical Add Ons (coredns, kube-proxy and aws-node)
The Control plane always needs to be upgraded first before the node groups and the critical addons. Note that the Controller automatically upgrades the critical cluster addons as part of the upgrade process reducing the manual, operational burden for administrators.
Important
EKS Cluster upgrades performed by the controller are always performed in a manner where the cluster and resident workloads never encounter any downtime.
Upgrade Everything
This is the default option. When selected, it upgrades everything to the new version of k8s i.e.
- EKS Control Plane
- All Node Groups (Both Managed and Self Managed)
- Critical Cluster Addons
Tip
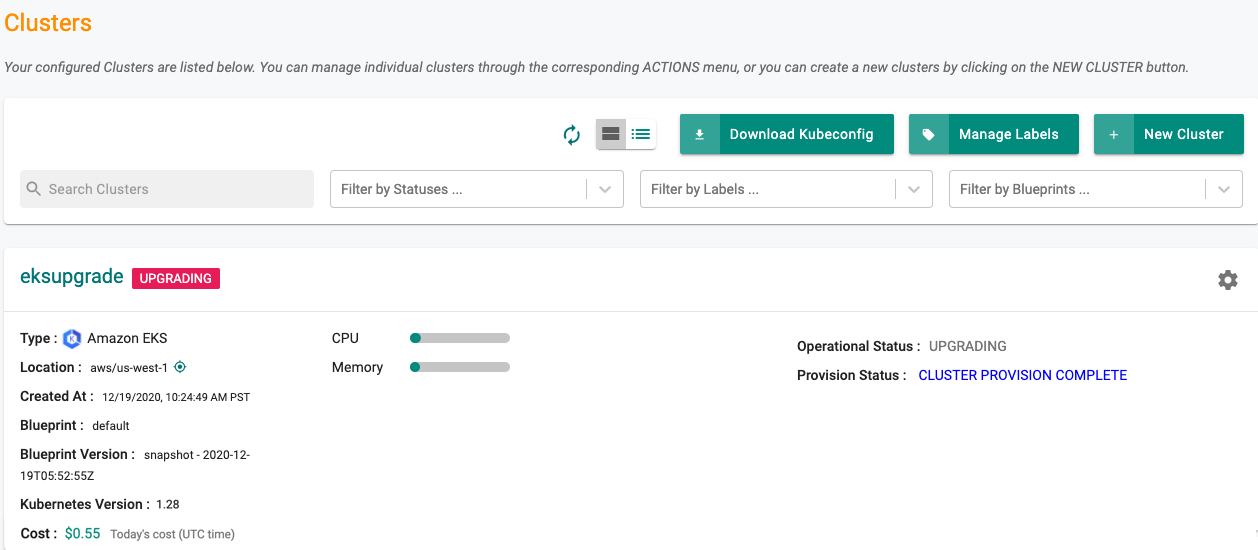
Upgrading the entire EKS cluster can take ~40 minutes.
During the upgrade, an indication is provided to administrators on the main cluster list page. An illustrative example is shown below.
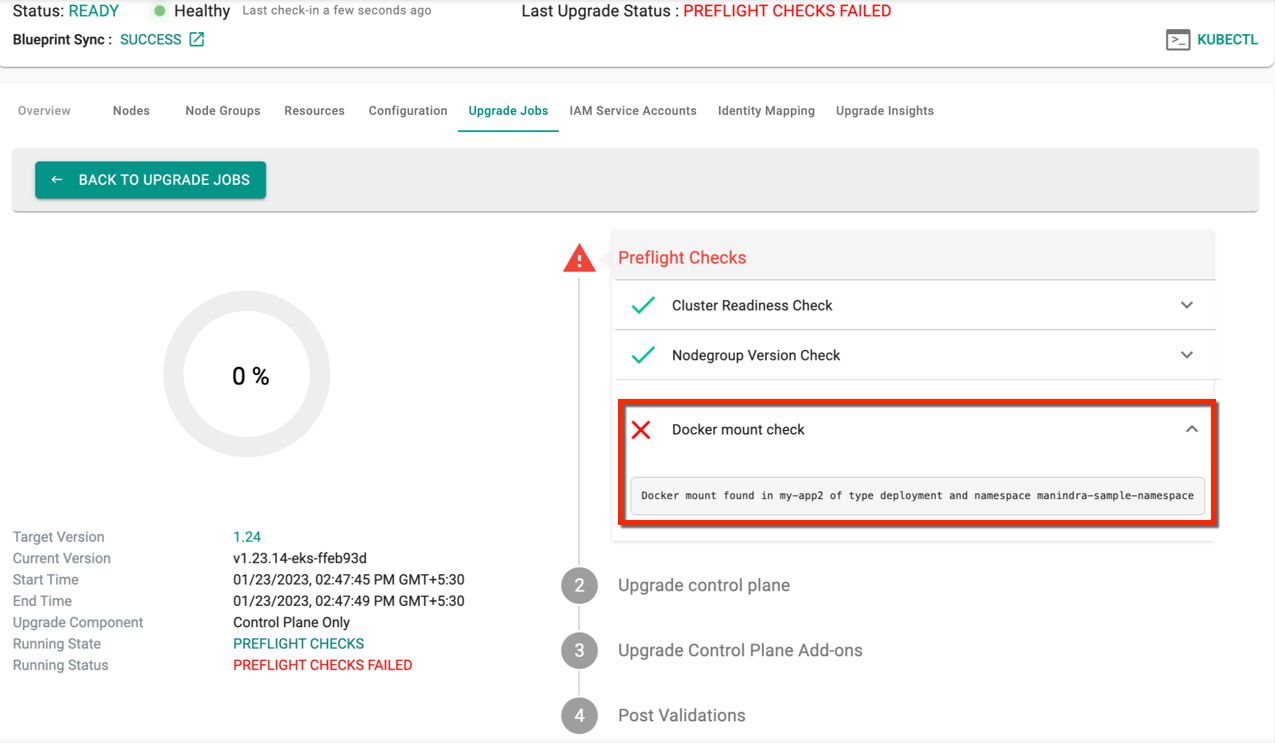
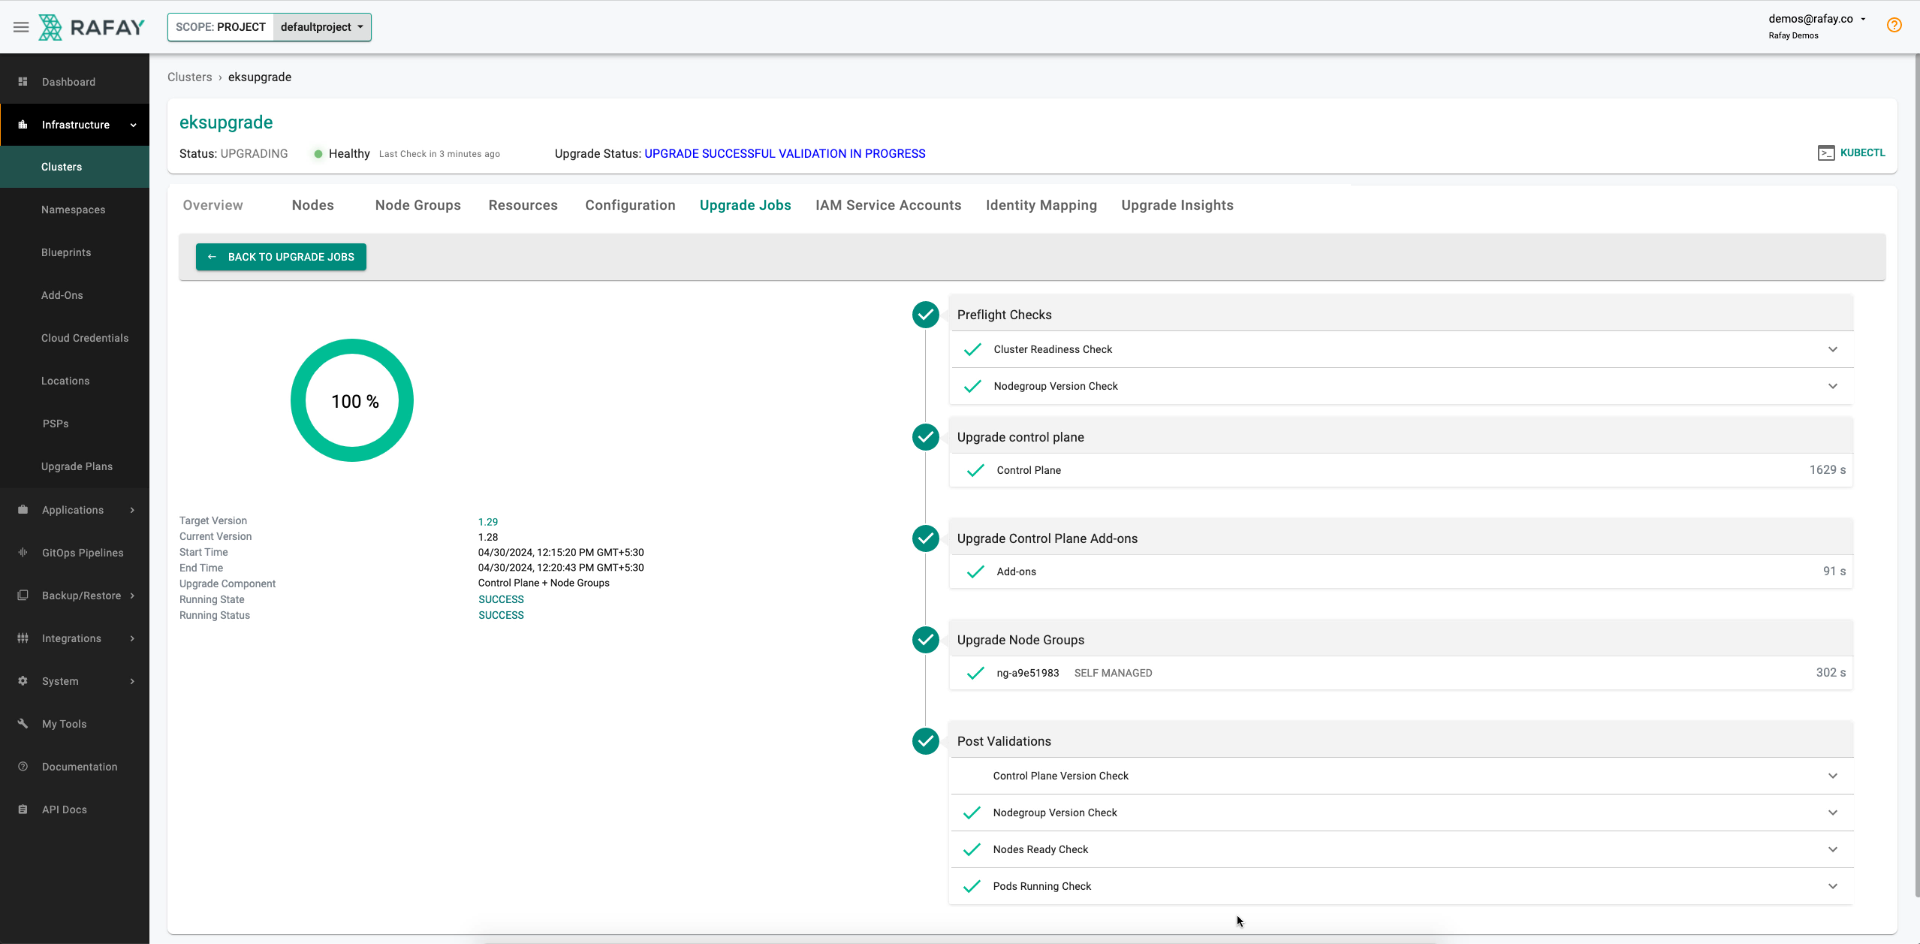
Preflight Checks
A number of preflight checks are first performed before the upgrade is attempted.

Upgrade Insights
During the preflight check, the API Deprecation Check is conducted. Users can obtain details about API deprecation through Upgrade Insights. EKS Upgrade Insights offer users valuable insights into deprecated APIs, thereby facilitating smoother cluster upgrades. By identifying issues and providing version-specific guidance, it aids in pre-upgrade planning and ensures a successful upgrade process by highlighting necessary actions and replacements. To learn more about EKS Upgrade Insights and their role in effectively managing Kubernetes clusters, please refer to this page.
EKS Control Plane
The EKS control plane is upgraded next. This can be a time-consuming step.
Critical Cluster Addons
Critical addons for the cluster such as "core-dns", "kube-proxy" and "aws-node" addons are then upgraded to the required versions.
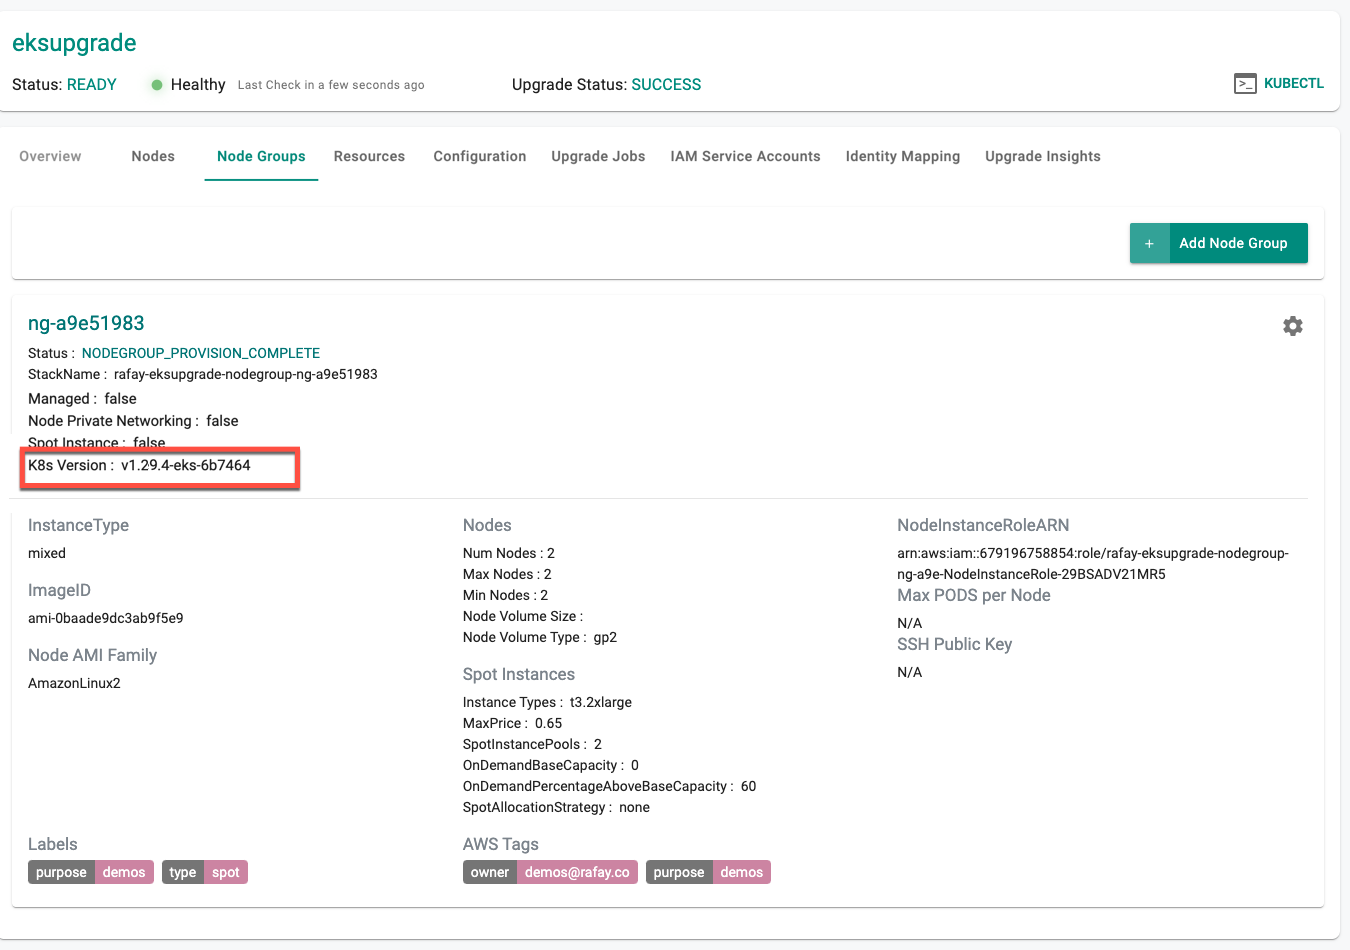
Node Groups
Node Groups are then upgraded to the selected version of k8s. Shown below is an example of an EKS Cluster's node group that was upgraded from v1.28.x to v1.29.x
Post Upgrade Checks
Once upgrades is complete, a round of post upgrade tests are performed to ensure that there are no loose ends and everything is as expected.
Control Plane Only Upgrade
If selected, only the EKS Control Plane is upgraded. The attached node groups are left untouched. The administrator can then upgrade the node groups individually one by one when needed.
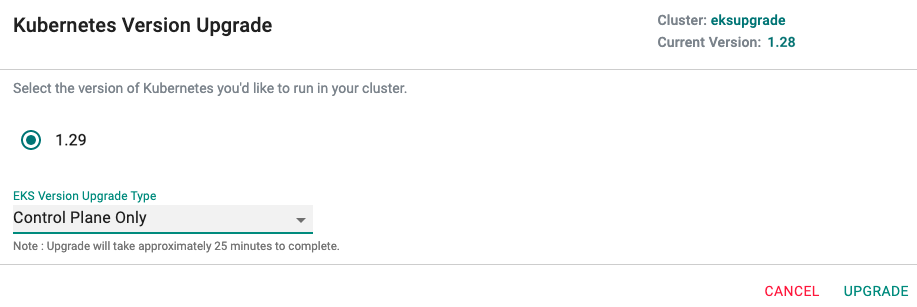
Tip
Upgrading the EKS Control Plane can take ~25-30 minutes.

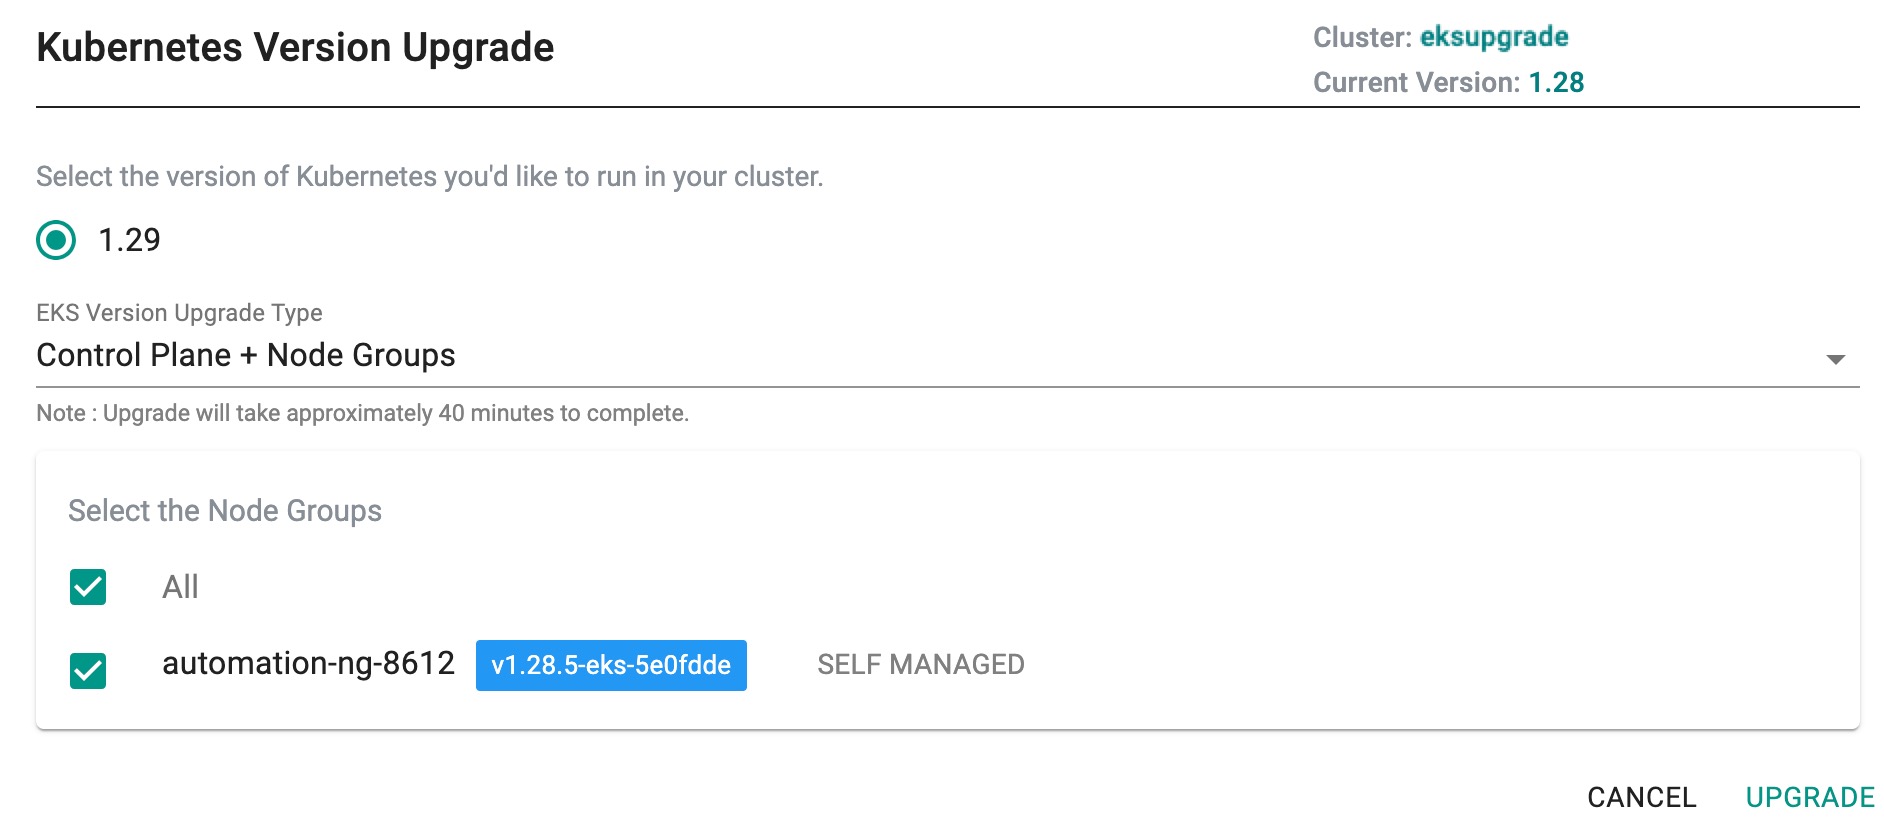
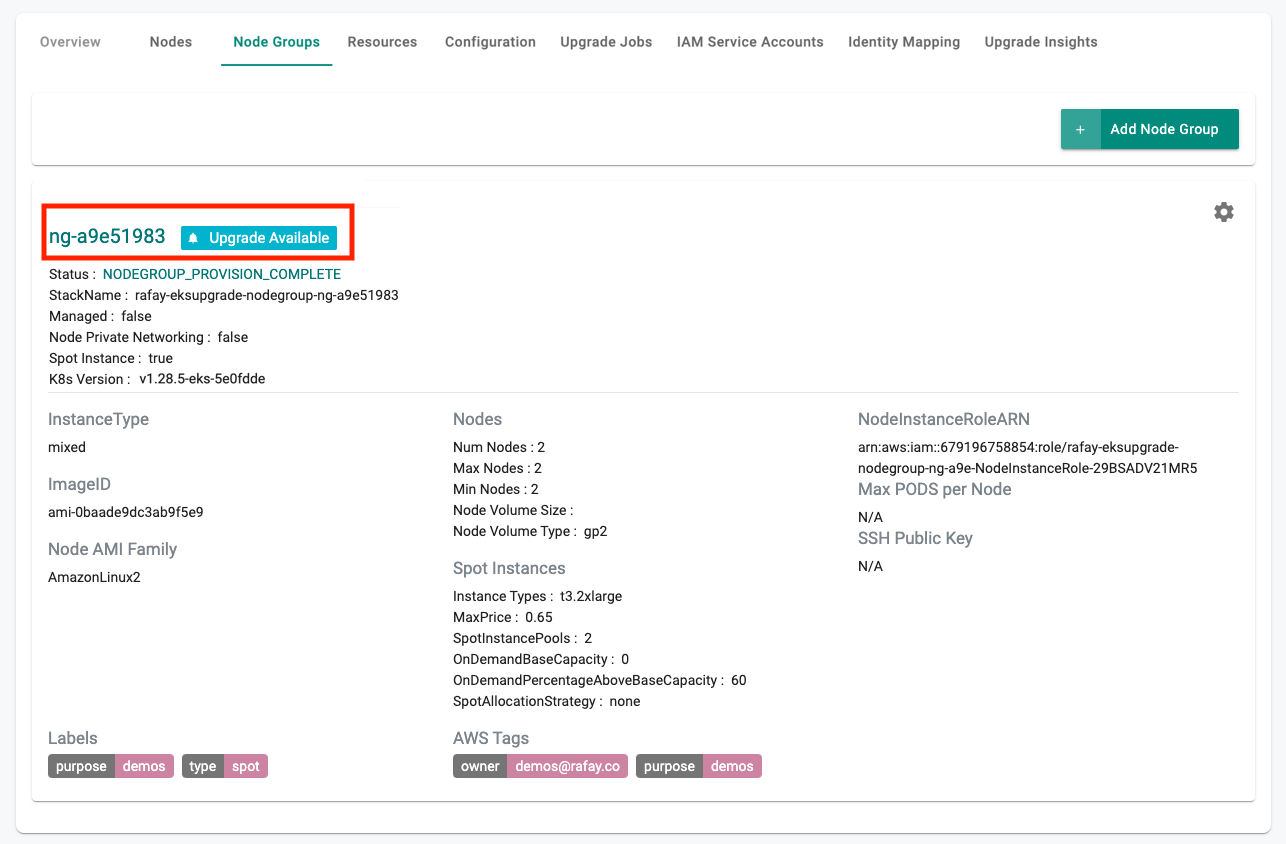
Node Group Upgrade
This option is displayed to the administrator only if the controller detects that the node group is behind the EKS Control Plane from a Kubernetes version perspective.
- Click on cluster name
- Select Node Groups
- Click on upgrade notification for available node groups.
Proceed with the instructions presented. An illustrative screenshot of the administrative experience is shown below.
Cluster label updates with upgrades
Users can combine cluster label updates with either a nodegroup AMI update or a Kubernetes version upgrade in a single operation. Only these combinations are supported when cluster label updates are included. No other combinations are allowed in a single update flow.
- Cluster label updates + Nodegroup AMI update
- Cluster label updates + Kubernetes version upgrade
Note: This capability is available via RCTL, Terraform, System Sync, and API.
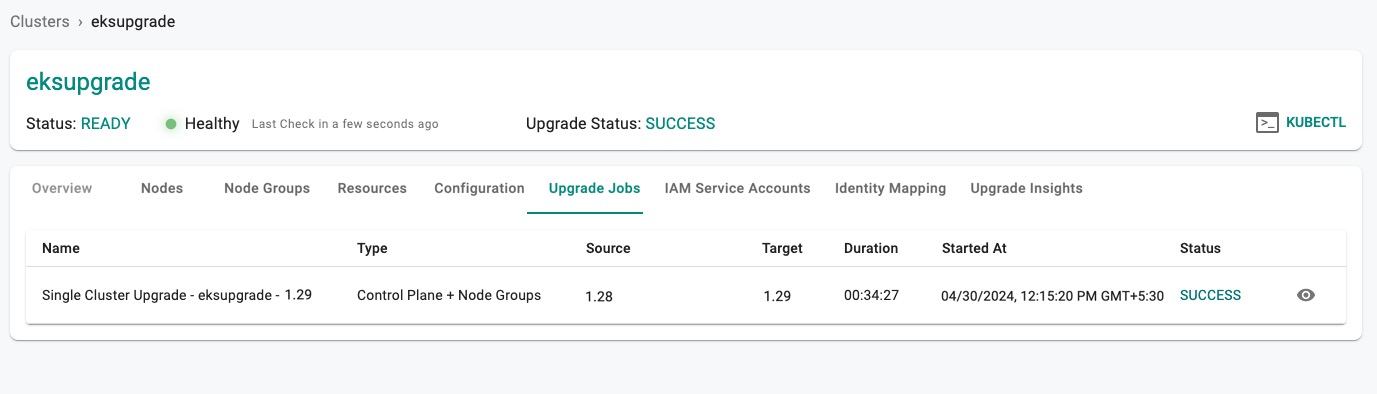
Upgrade History
The Controller maintains the upgrade history associated with every upgrade action whether it was successful or not. Administrators can view the entire history by
- Clicking on the cluster name
- Click on the Upgrade History tab
This will display the entire history of upgrades for the cluster.
Upgrade Details
Clicking on a specific row will provide detailed information about the specific upgrade. An illustrative example is shown below.
Important
Upon cluster upgrade, the addons (vpc-cni, kubeproxy and coredns) will be converted to managed addons. Although these three (3) are initially self-managed add-ons, they will become managed add-ons after the upgrade
Post Upgrade Procedure
- For Terraform users, this upgrade may lead to differences between the cluster configuration in the resource file and the cloud object concerning addons, as a result of the creation or updating of EKS managed addons.
To overcome this scenario, perform the below steps:
- Execute the command
terraform apply --refresh-only. This synchronizes the state file - Use
terraform showto output the resource file, which should now align with the new state file - Update the resource file with the newly created addons to prevent further differences in state files
- Execute the command
- For Git/RCTL users, the source file may not include the needed changes for addons, which can happen when EKS managed addons are created or updated. To overcome this scenario, manually update the addon section to reflect the current cluster configuration.
K8s Version Upgrade Pre-requisites
Prior to upgrading to the desired K8s version, users must ensure that they have met the following prerequisites:
v1.26
VPC CNI plugin version
For a successful Kubernetes v1.26 upgrade, it is essential to upgrade the VPC CNI plugin version to 1.12 or higher. The success or failure of the Kubernetes upgrade will be determined by particular circumstances. While upgrading, auto upgrade of CNI happens while retaining any custom configuration. Here are some of the scenarios where the upgrade fails at preflight check
Managed Addon CNI
- If the current version of the CNI plugin is less than or pinned to 1.11 for the specified addon version (as demonstrated in the example snippet below), the EKS upgrade will fail at the preflight check step with an error message
Example
addons:
- name: vpc-cni
  version: v1.12.2-eksbuild.2
- If the addon version is set to latest or default, the addon will be upgraded to the next minor version. However, if the addon version is two versions less than the required version i.e 1.12.x, the upgrade will fail at preflight
Example
addons:
- name: vpc-cni
  version: latest
For the failure cases, update CNI manually and retry upgrade
Containerd version
- Upgrade the containerd version to 1.6.0 or higher
v1.25
- Update the aws-load-balancer-controller to version v2.4.7
- Remove PSPs before upgrading as PSPs are no longer supported in v1.25
1.24
The dockershim component of Kubernetes is not supported on v1.24. Refer dockershim removal affects for more information
During the K8s upgrade from 1.23 to 1.24, user might receive the below docker mount warning. In that case, remove the docker mount from the workload to complete the upgrade. For more info, visit here