Part 4: Update
What Will You Do
In this section you will
- Update the YAML workload manifest in Git
- Approve the pipeline stage to initiate the YAML workload update
- Update the Helm workload values file in Git
- Approve the pipeline stage to initiate the YAML workload update
Step 1: Update YAML Workload
In this step, you will update the YAML workload manifest in Git and see that the updates are applied to the application by the GitOps pipeline.
First, you will verify the number of pods running for the workload.
- Run the following command on the cluster
kubectl get pods -n gitops-workloads
You should see output similar to the following showing one pod running for each workload type
NAME                                              READY   STATUS    RESTARTS   AGE
helm-gitops-workload-webserver-5884bbbdf6-cx5rn   2/2     Running   0          23m
nginx-yaml-5978fbc565-hnsj4                       1/1     Running   0          37m
Now, you will update the workload manifest of the YAML workload in the repository and see that the YAML workload is updated on the cluster.
- In your Github repository, navigate to /gitops-workload/YAML/yaml-workload.yaml
- Update line number 9 to replicas: 2
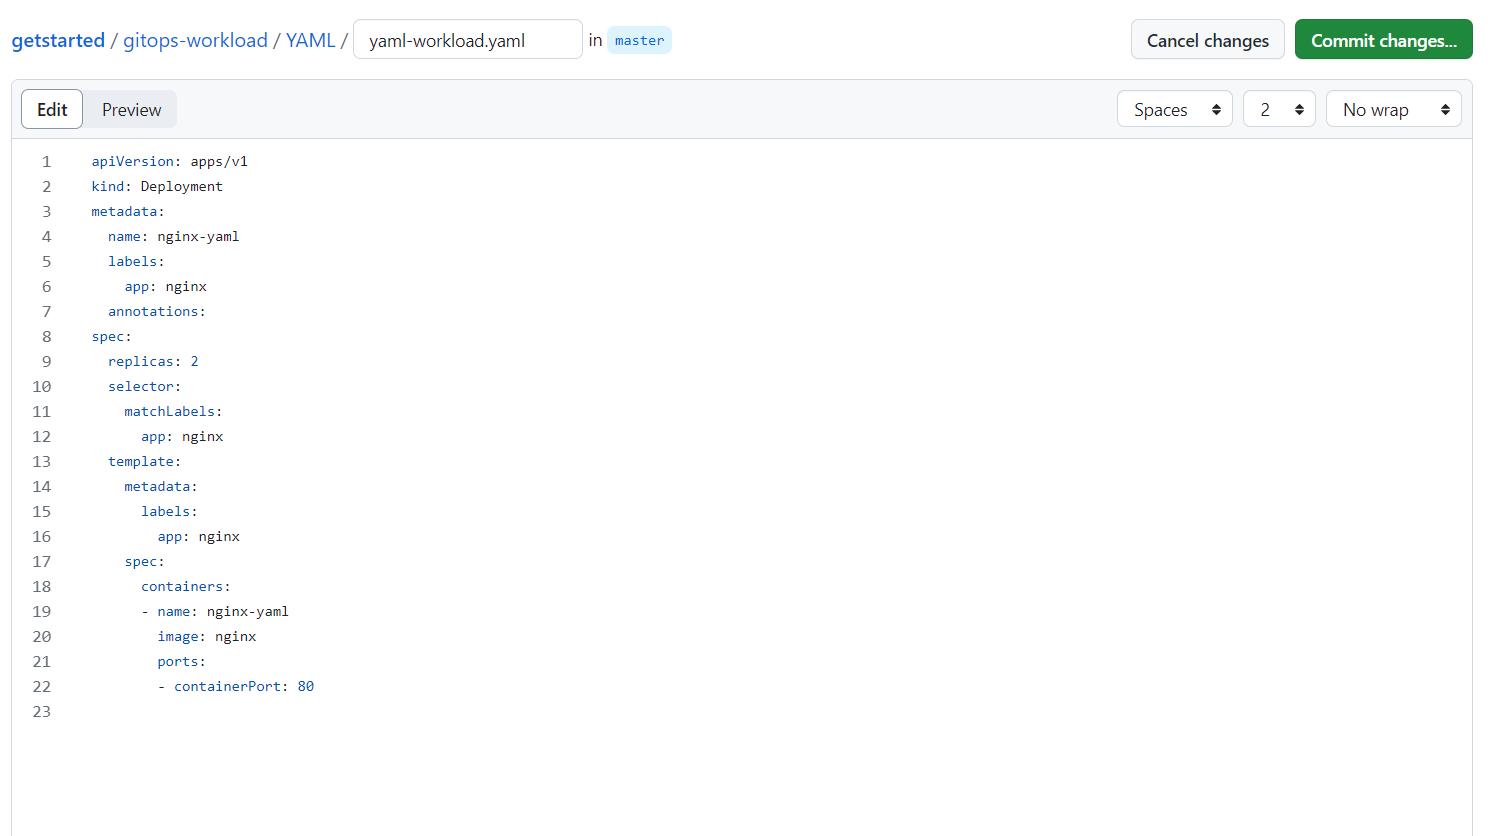
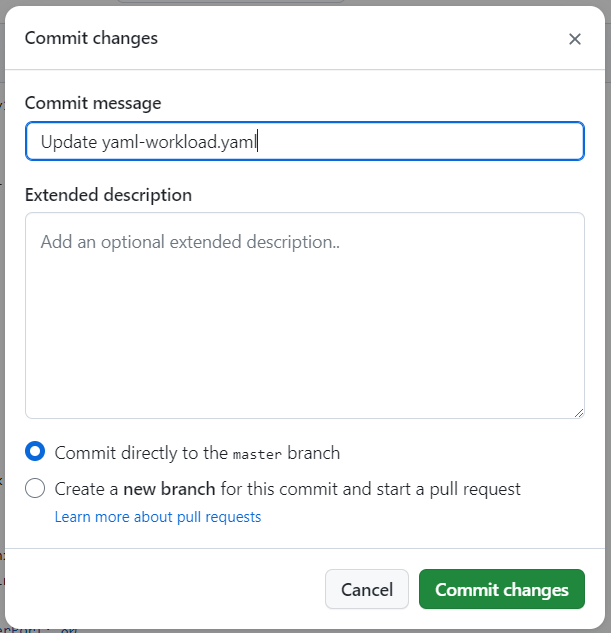
- Click Commit changes...
- Click Commit changes
Step 2: Approve Pipeline
In this step, you will approve the manifest update in the pipeline. Since the first stage of the pipeline is an approval stage, approving the update in the pipeline will allow the pipeline to progress to the next stages of applying the update to the workload. In this case, only the second stage, updating the YAML workload, will have any action, as the helm workload was not updated in Git.
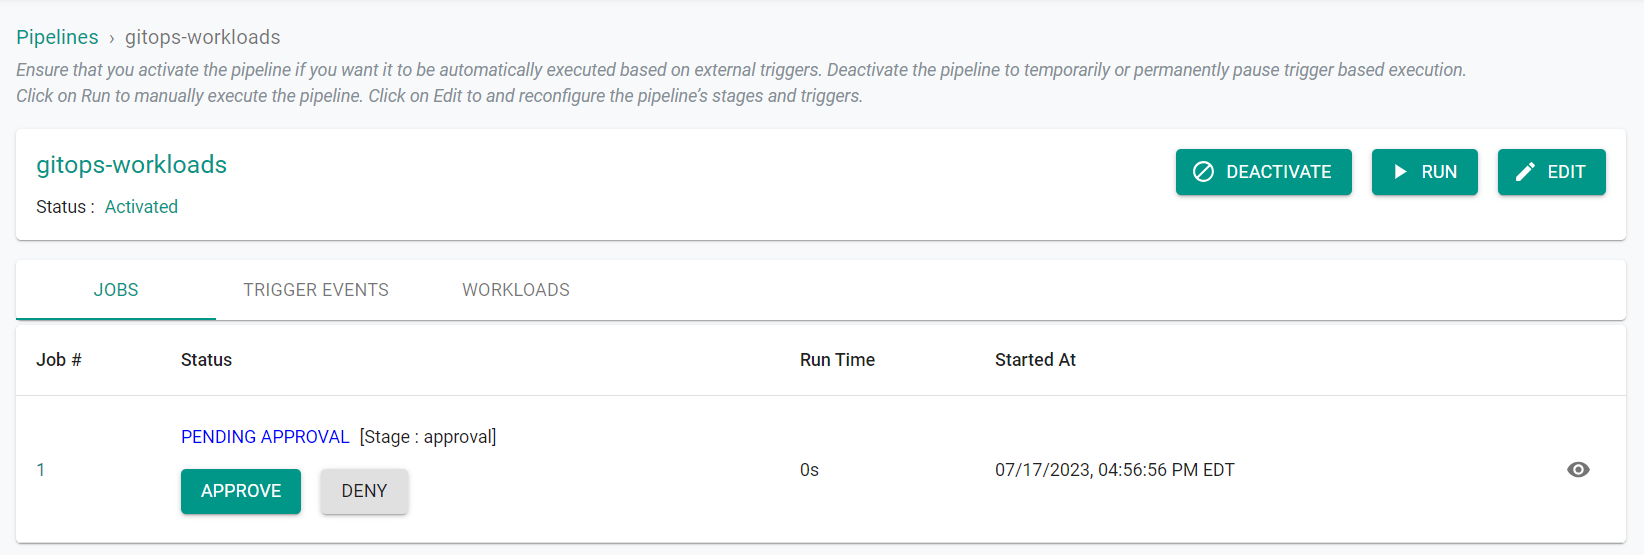
- In your project, navigate to GitOps -> Pipelines
- Click on the gitops-workloads pipeline
You will see the pending approval.
- Click Approve
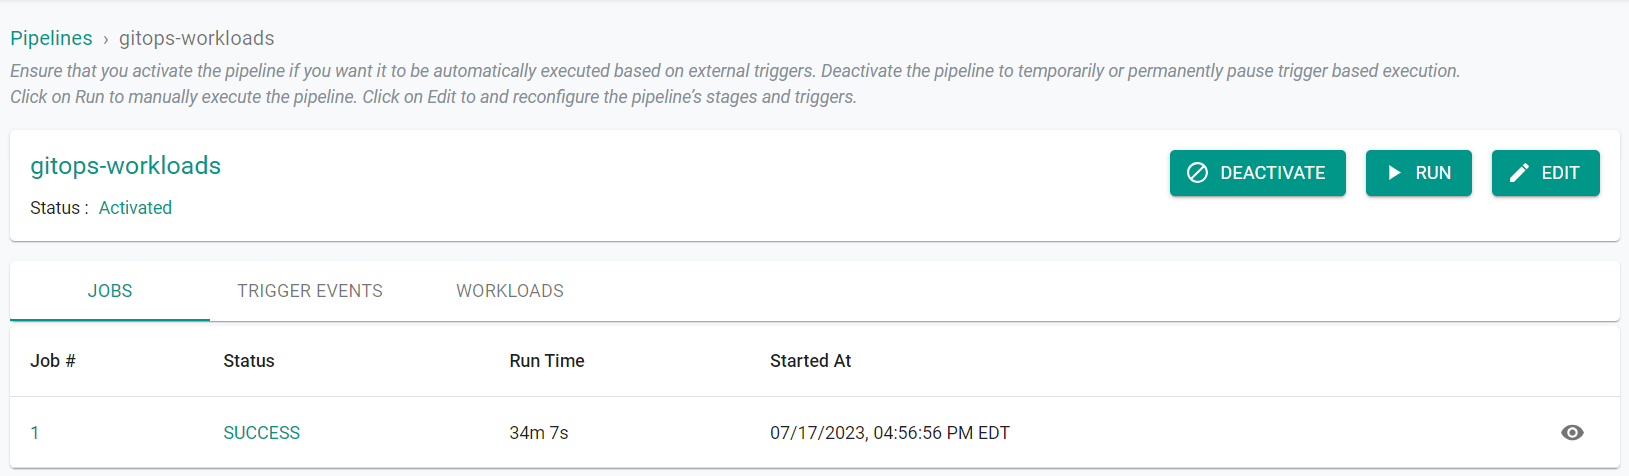
After a few seconds, you will see the pipeline job has completed.
Next, you will verify the number of pods running for the workload has increased to two.
- Run the following command on the cluster
kubectl get pods -n gitops-workloads
You should see output similar to the following showing two pods running for the YAML workload.
NAME                                              READY   STATUS    RESTARTS   AGE
helm-gitops-workload-webserver-5884bbbdf6-cx5rn   2/2     Running   0          29m
nginx-yaml-5978fbc565-j45j7                       1/1     Running   0          43m
nginx-yaml-5978fbc565-zsb4p                       1/1     Running   0          73s
Step 3: Update Helm Workload
In this step, you will update the Helm workload vlaues file in Git and see that the updates are applied to the application by the GitOps pipeline.
First, you will verify the number of pods running for the workload.
- Run the following command on the cluster
kubectl get pods -n gitops-workloads
You should see output similar to the following showing one pod running for the Helm workload.
NAME                                              READY   STATUS    RESTARTS   AGE
helm-gitops-workload-webserver-5884bbbdf6-cx5rn   2/2     Running   0          62m
nginx-yaml-5978fbc565-j45j7                       1/1     Running   0          76m
nginx-yaml-5978fbc565-zsb4p                       1/1     Running   0          34m
Now, you will update the custom values file of the Helm workload in the repository and see that the Helm workload is updated on the cluster.
- In your Github repository, navigate to /gitops-workload/Helm/webserver/custom-values.yaml
- Update line number 5 to replicaCount: 2
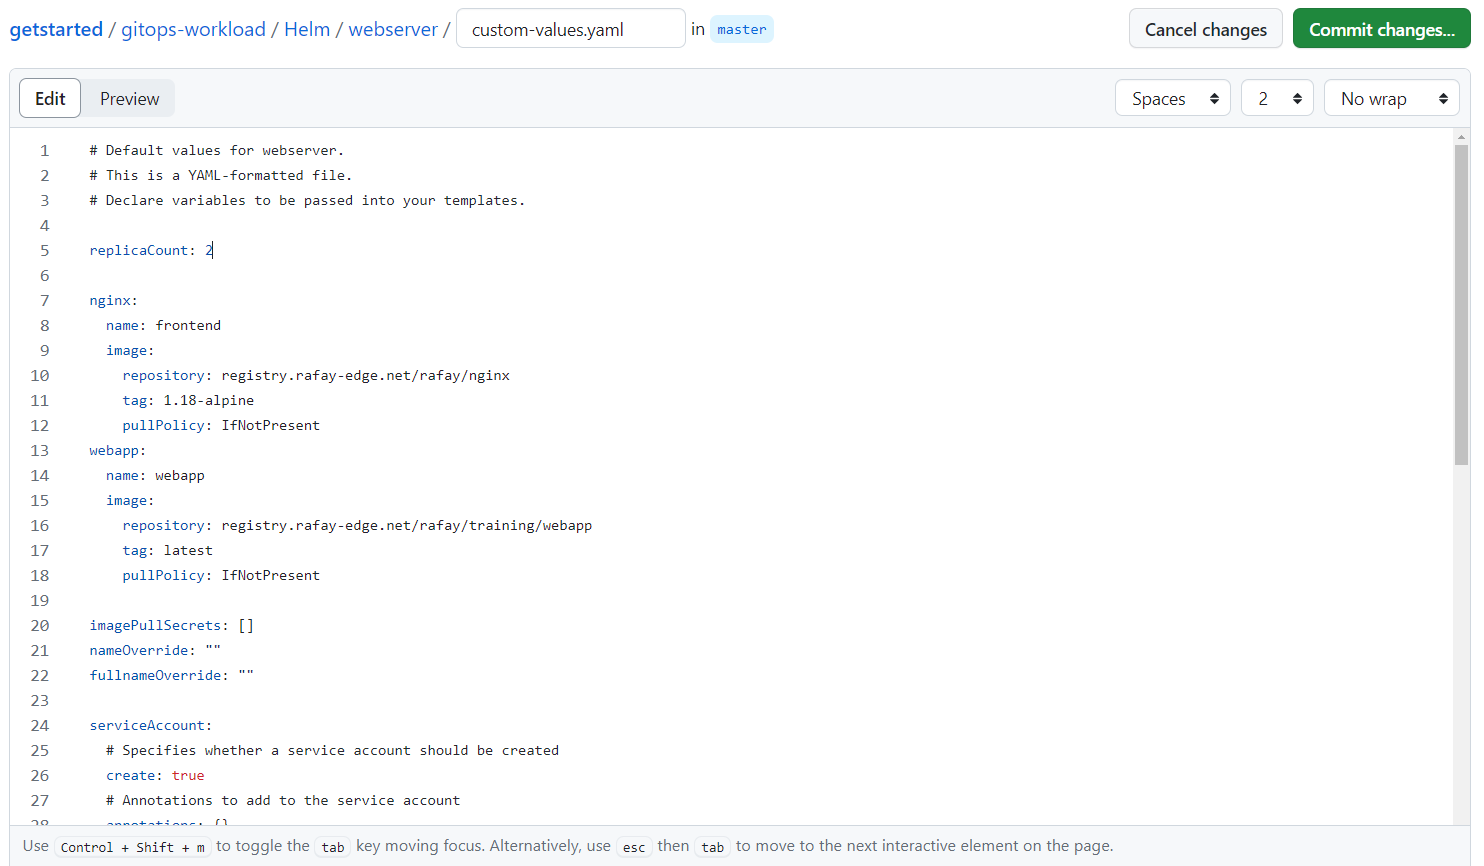
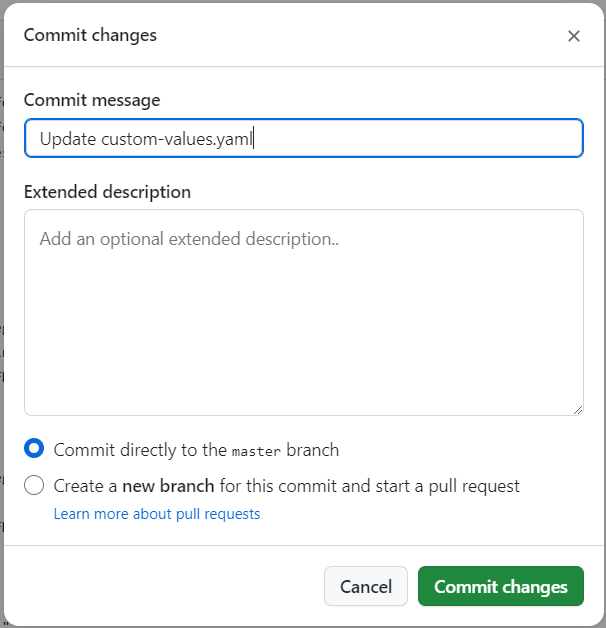
- Click Commit changes...
- Click Commit changes
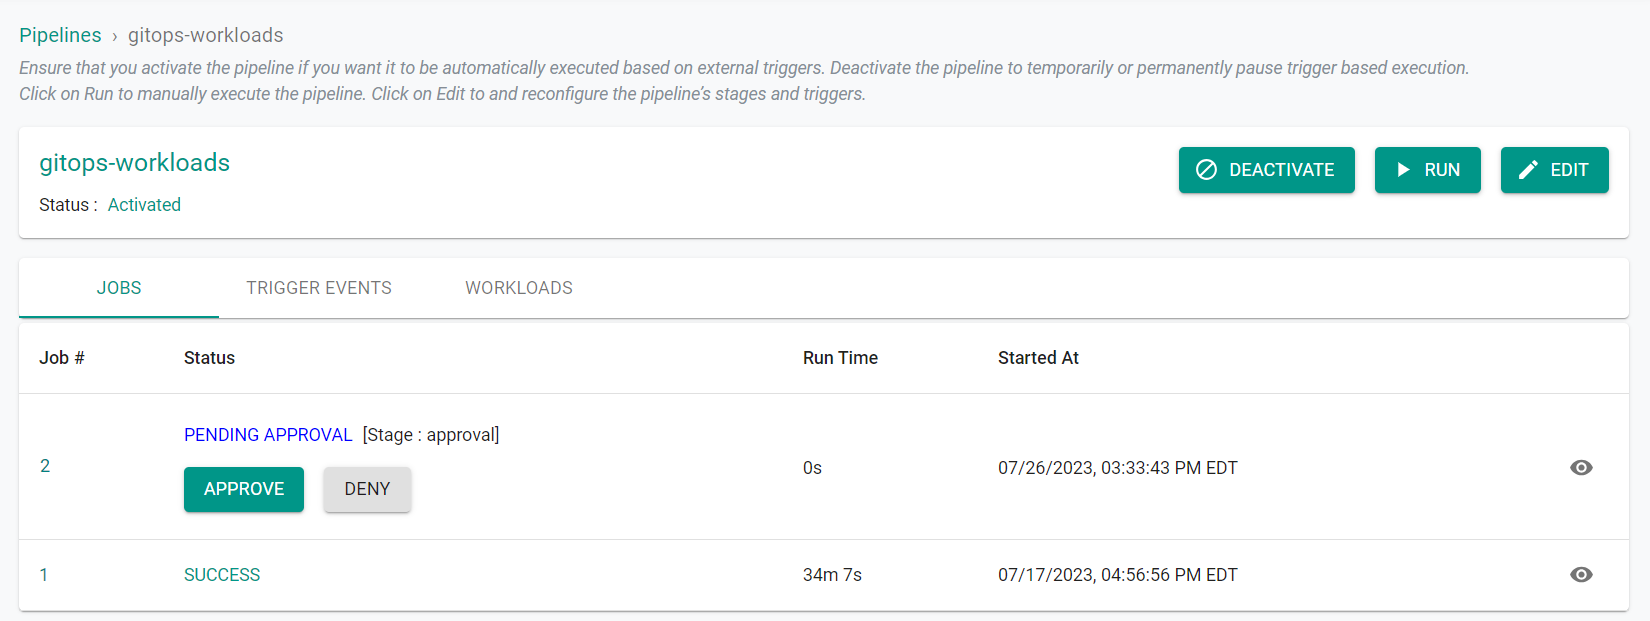
Step 4: Approve Pipeline
In this step, you will approve the Helm values update in the pipeline. Once the first pipeline stage is approved, the remaining stages will be proccessed. No action will be taken on the second pipeline stage as there were no changes to the YAML workload manifest. Since there were changes made to the Helm workload in Git, the pipeline will update the Helm workload.
- In your project, navigate to GitOps -> Pipelines
- Click on the gitops-workloads pipeline
You will see the pending approval.
- Click Approve
After a few seconds, you will see the pipeline job has completed.
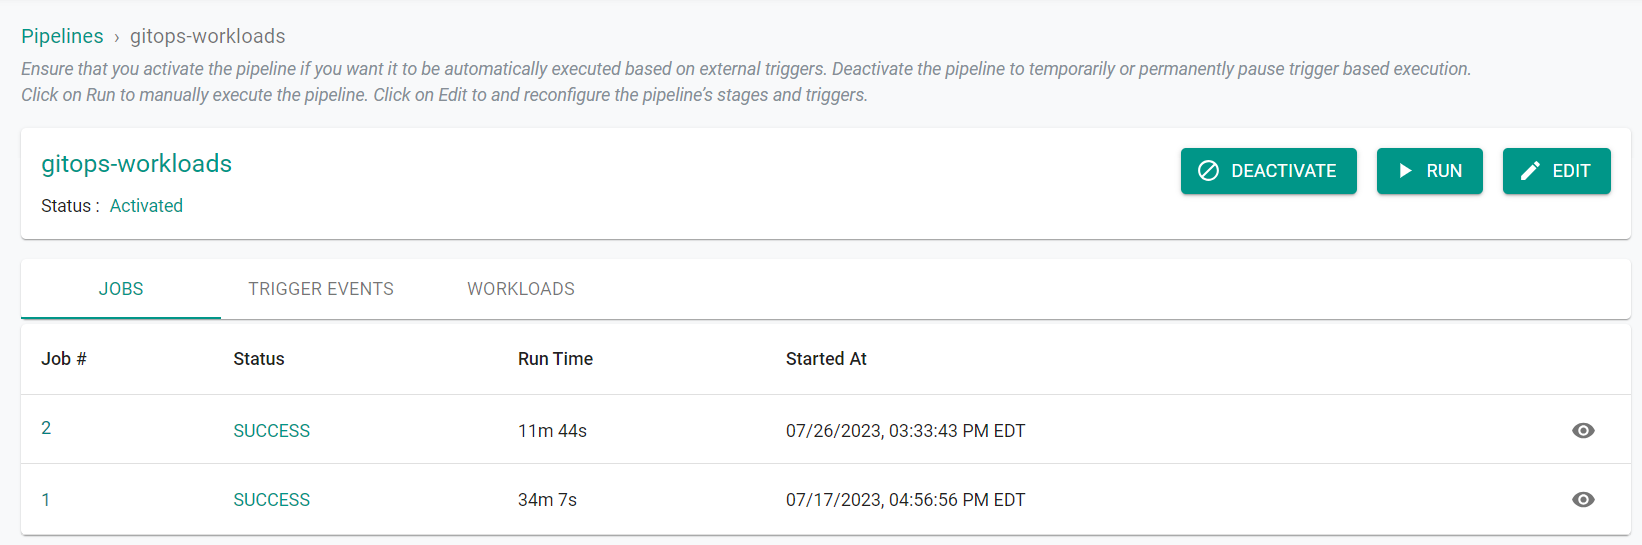
Next, you will verify the number of pods running for the Helm workload has increased to two.
- Run the following command on the cluster
kubectl get pods -n gitops-workloads
You should see output similar to the following showing two pods running for both the Helm and YAML workloads.
NAME                                              READY   STATUS    RESTARTS   AGE
helm-gitops-workload-webserver-594ff85c84-2lwxc   2/2     Running   0          3m54s
helm-gitops-workload-webserver-5884bbbdf6-cx5rn   2/2     Running   0          72m
nginx-yaml-5978fbc565-j45j7                       1/1     Running   0          86m
nginx-yaml-5978fbc565-zsb4p                       1/1     Running   0          44m
Recap
At this point, you have succesfully setup a multistage GitOps pipeline for application lifecycle management of both YAML and Helm workloads.