Helm Charts
Helm uses a packaging format called charts which is a collection of files that describe a set of Kubernetes resources. A single chart might be used to deploy something simple, like a memcached pod, or something complex, like a full web app stack with HTTP servers, databases, caches, and so on. Charts are created as files laid out in a particular directory tree, then they can be packaged into versioned archives to be deployed.
- Every chart must have a version number
- Kubernetes Helm uses version numbers as release markers
- Packages in repositories are identified by "name + version"
You can manage the lifecycle of Helm based workloads using the Web Console or RCTL CLI or REST APIs. We strongly recommend that customers automate this either
- By integrating RCTL with your existing CI system based automation pipeline, OR
- By leveraging the integrated GitOps capability.
Helm Versions
The Controller supports both Helm 2 and 3. Users are strongly advised to use Helm 3. Support for Helm 2 support is deprecated and is only meant to be used for legacy charts that are incompatible with Helm 3.
With Helm 3, the Controller acts like a Helm 3 client. It does not have to parse and break down the chart down to its atomic K8s resources. Read more about Helm 2 End of Life.
Create Workload
- Login into the Console (typically as a Project Admin)
- Navigate to Applications -> Workloads
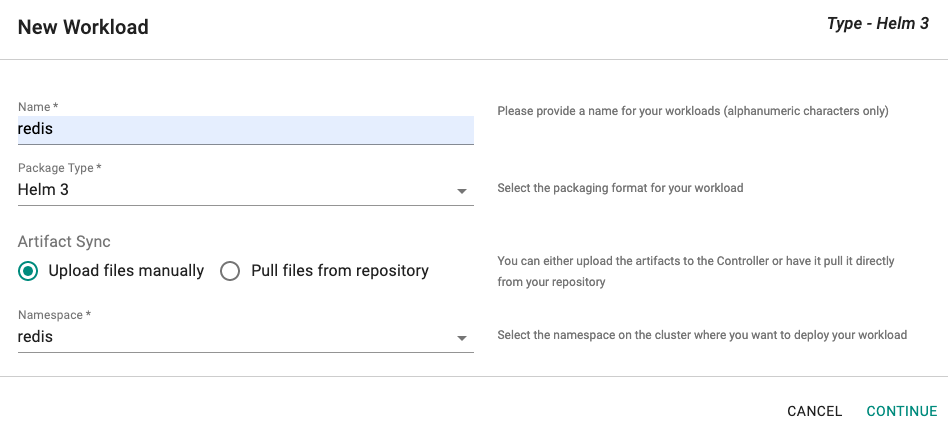
- Click on New Workload
- Provide a name, select Helm 3 for package type
- Select if you would like to "upload" the artifacts or you would like the Controller to "pull" it directly from a configured repository.
- Select the namespace where the resources should be deployed
Tip
Ensure that a namespace where you would like to deploy has already been created.
Option A: Pull from Repository
This approach requires the user to first select the type of repository (Git or Helm)
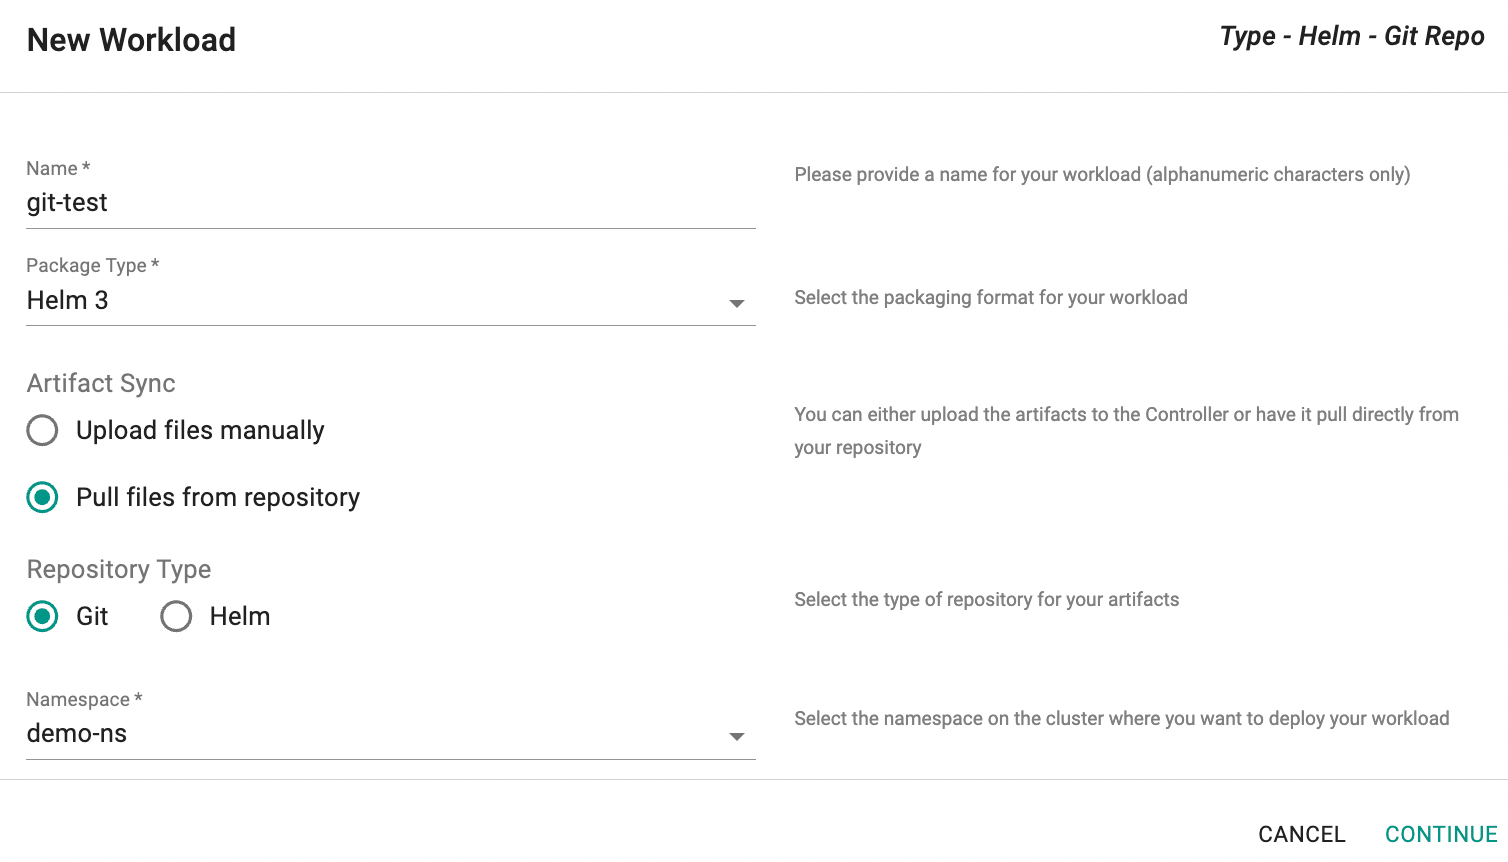
Option A1: Git Repository Type
In the New Workload dialog, select Git as the Repository Type and click Continue.
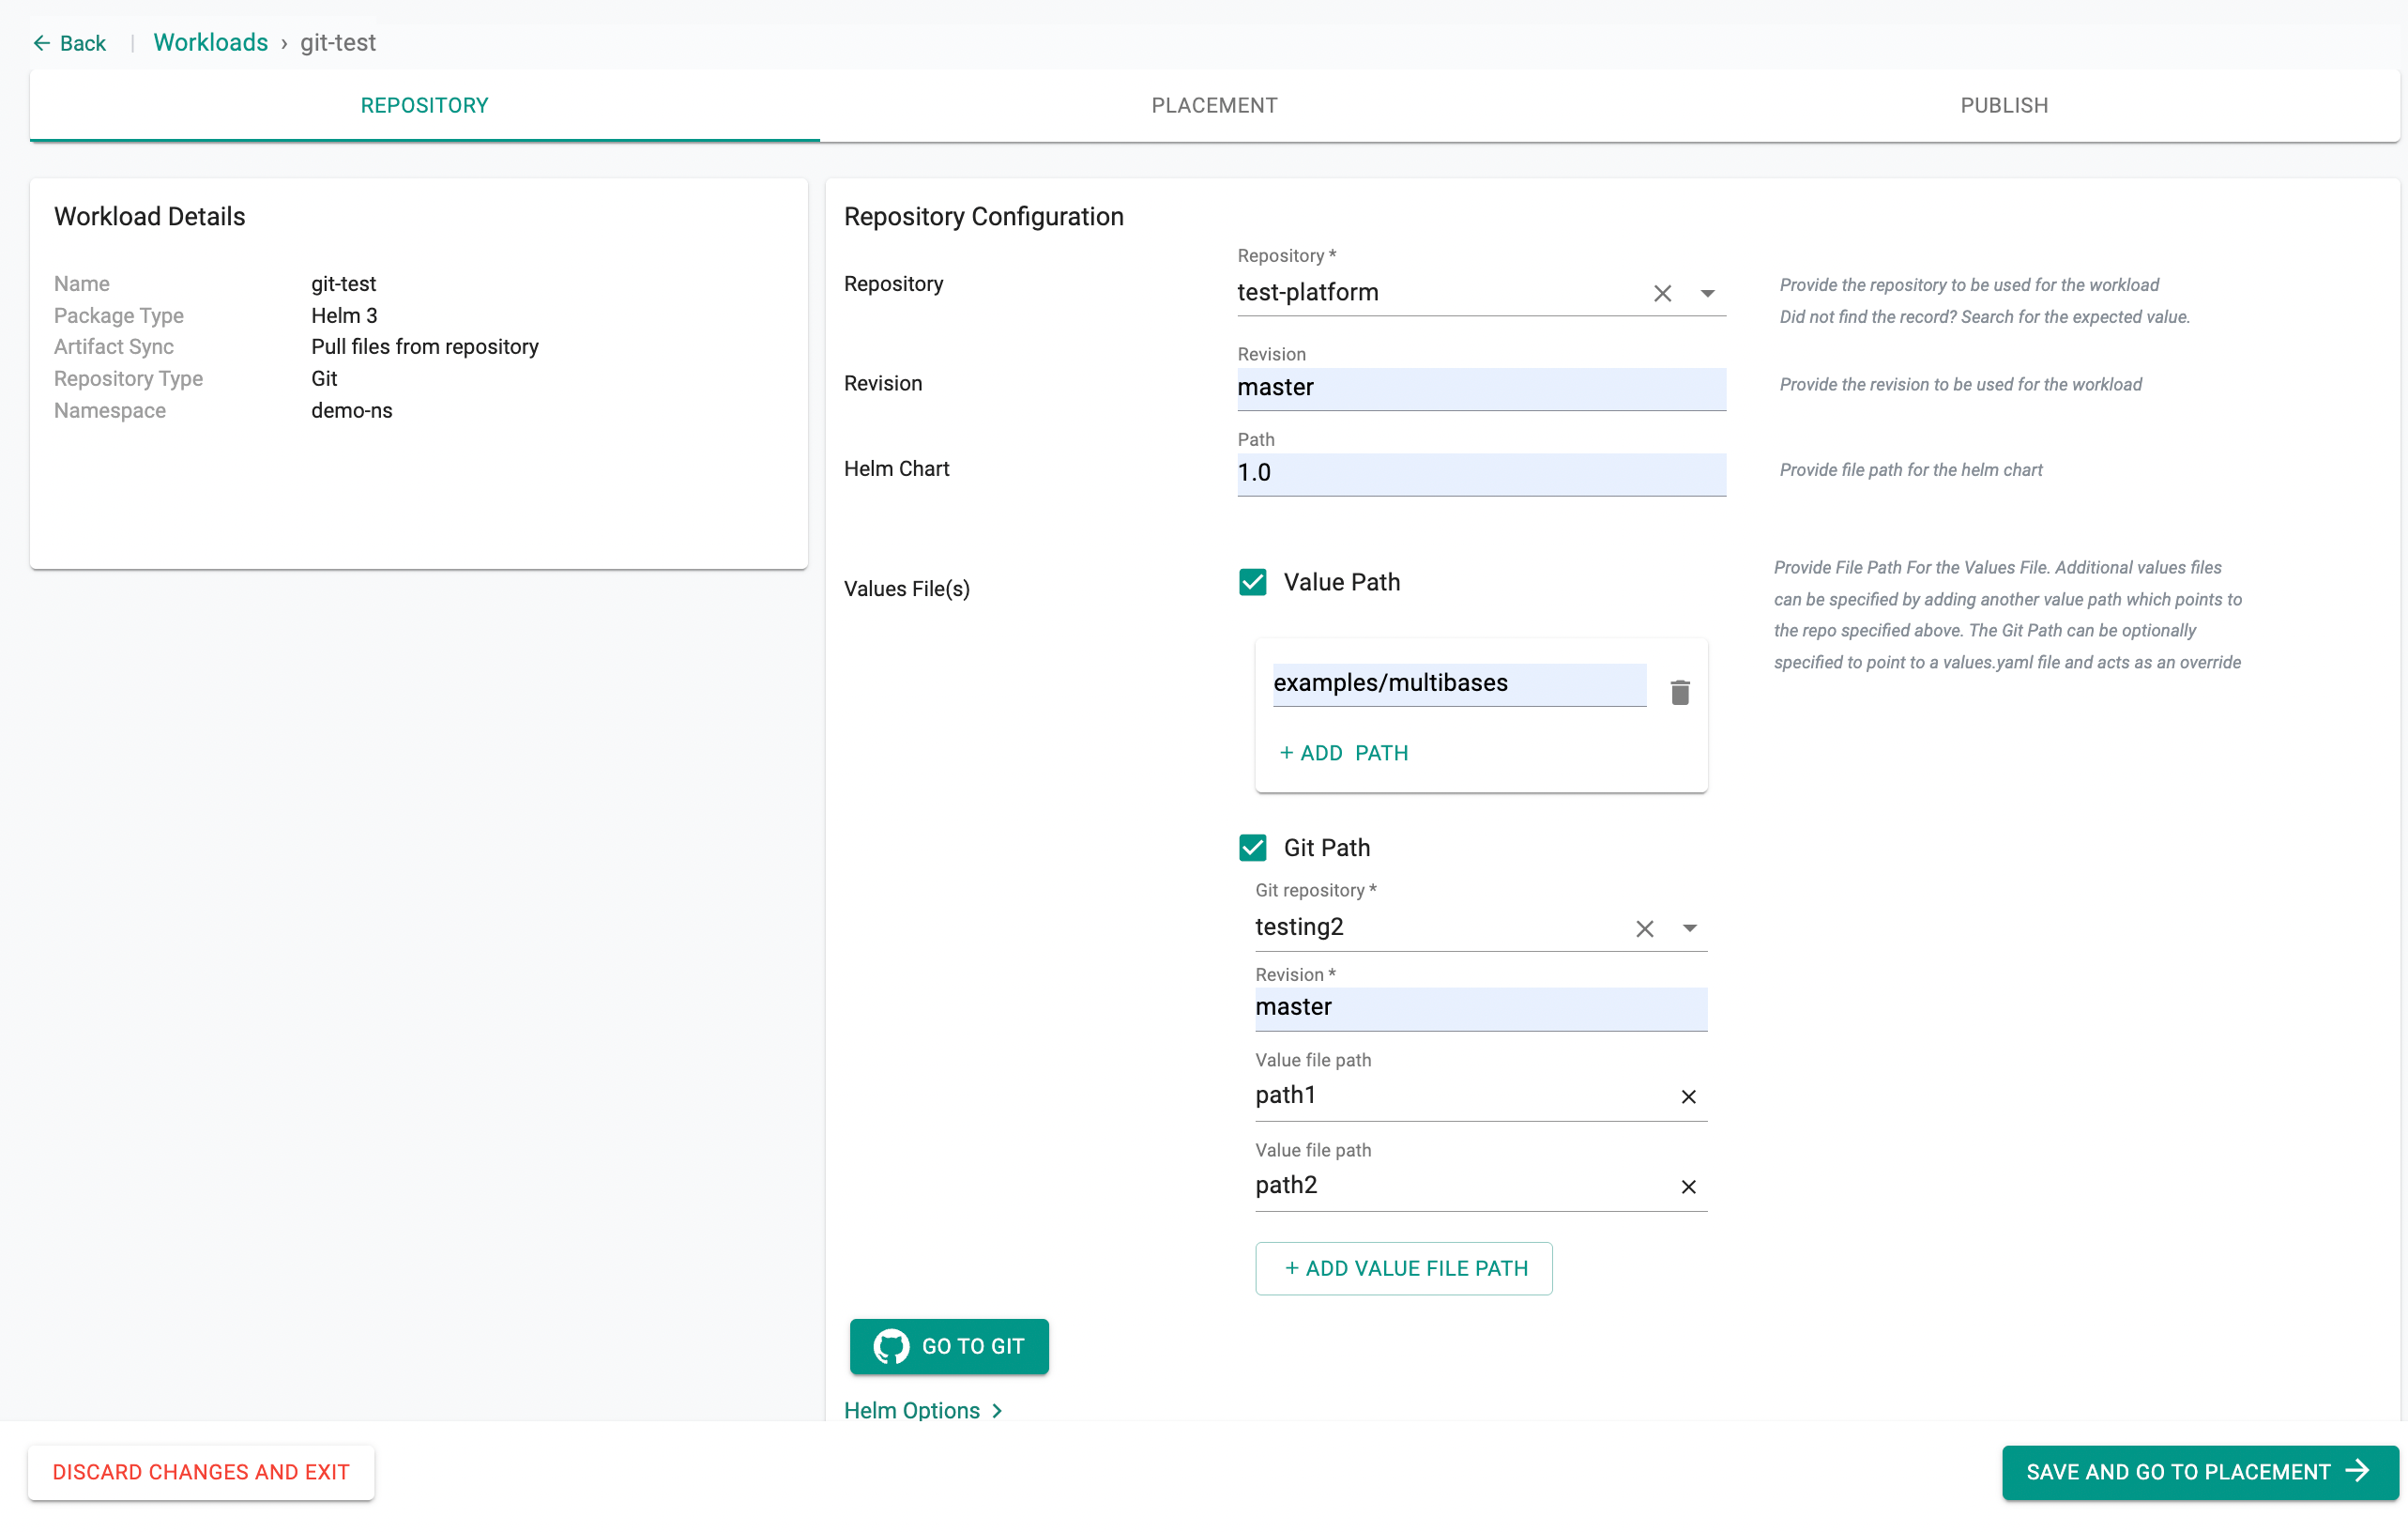
Then, in the next step:
- Select the repository from the dropdown list
- Set the Revision (branch, tag, or commit SHA)
- Provide the Helm chart path
- Under Values File(s), two options are available and can be used independently or together:
- Value Path: Use this when your values files are in the same repository as the Helm chart. Click + ADD PATH to add multiple value file paths from the chart repository.
- Git Path: use this when your values files are stored in a separate Git repository from the Helm chart. This allows you to maintain environment-specific configurations independently from the chart itself.
- Select the Git repository where your values files are stored
- Set the Revision (branch, tag, or commit SHA)
- Enter the first Value file path
- Click + ADD VALUE FILE PATH to add more entries
Tip
The last entry in the list takes the highest precedence. If multiple files define the same key, the value from the last file wins.
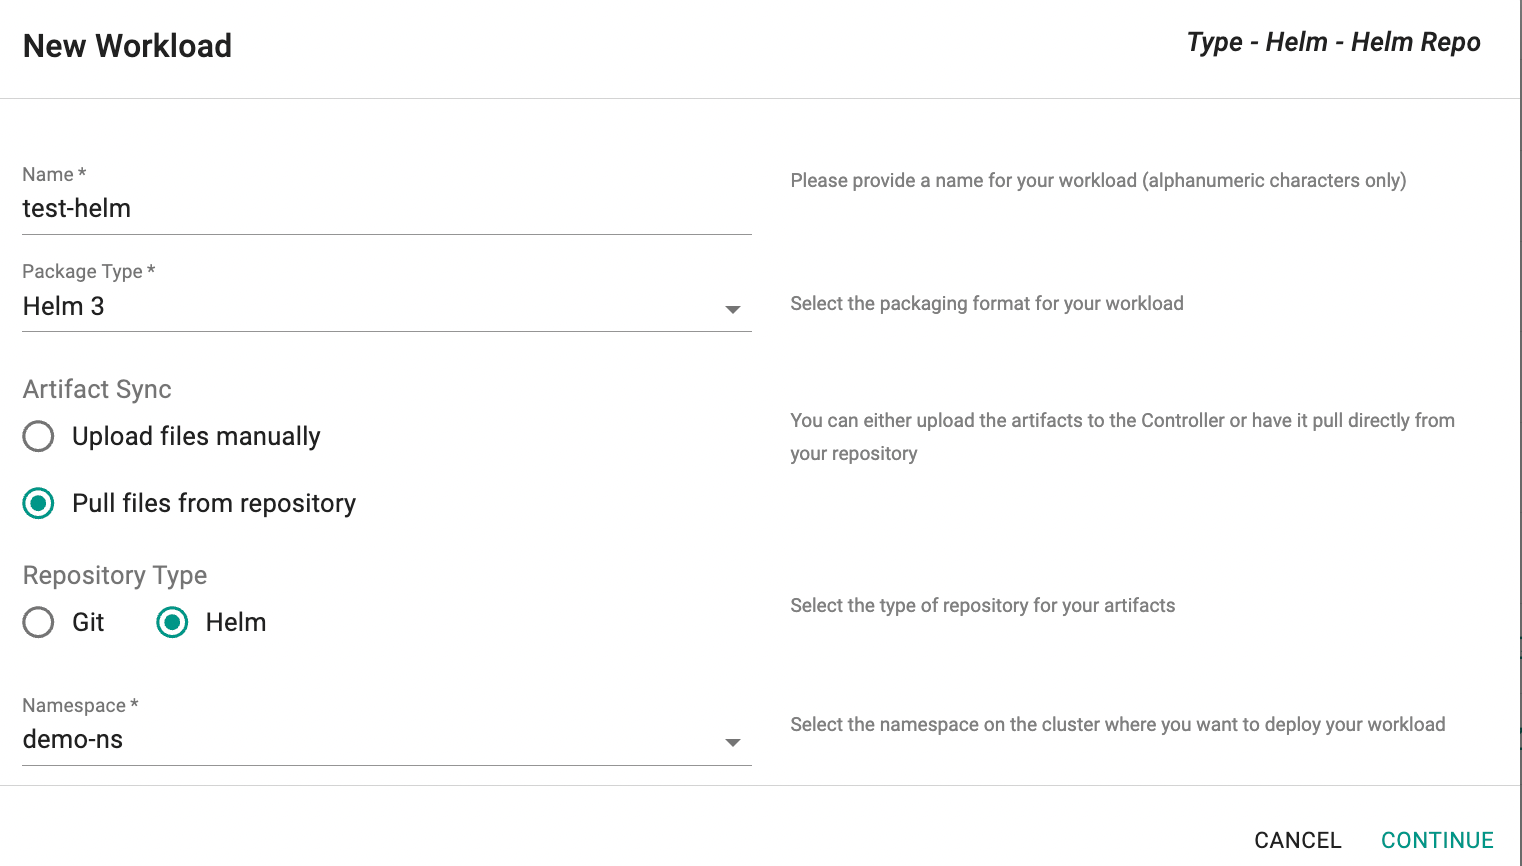
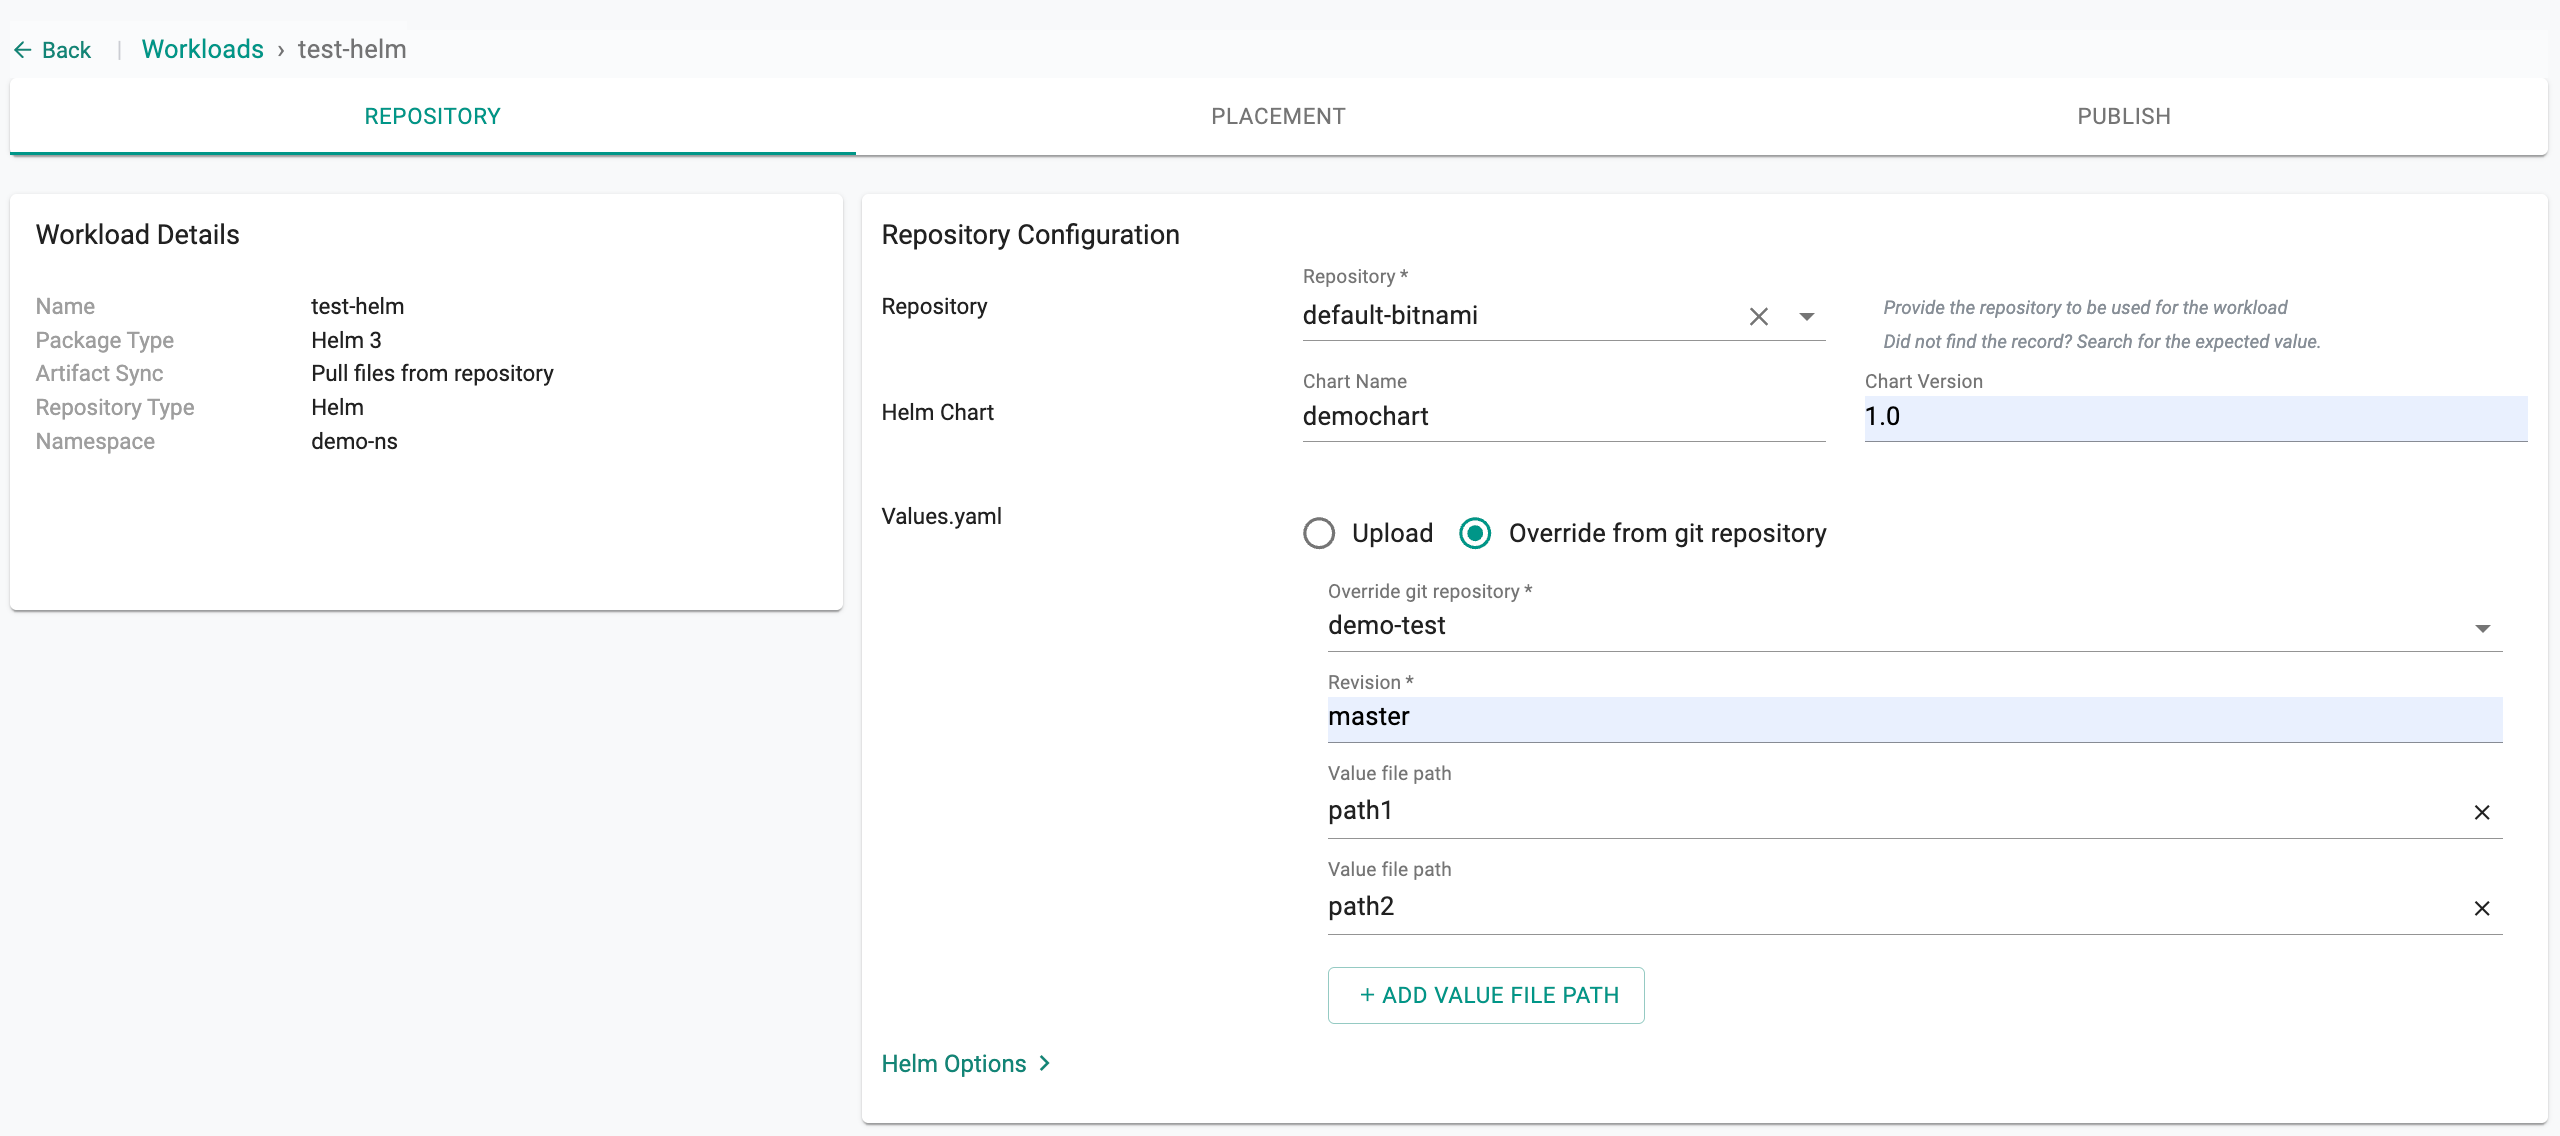
Option A2: Helm Repository Type
In the New Workload dialog, select Helm as the Repository Type and click Continue.
Then, in the next step:
- Select the repository from the dropdown list
- Enter the Chart Name and Chart Version (if not specified, the latest version is pulled)
Under Values.yaml, two options are available:
- Upload: Use this to upload a values file directly from your local system
-
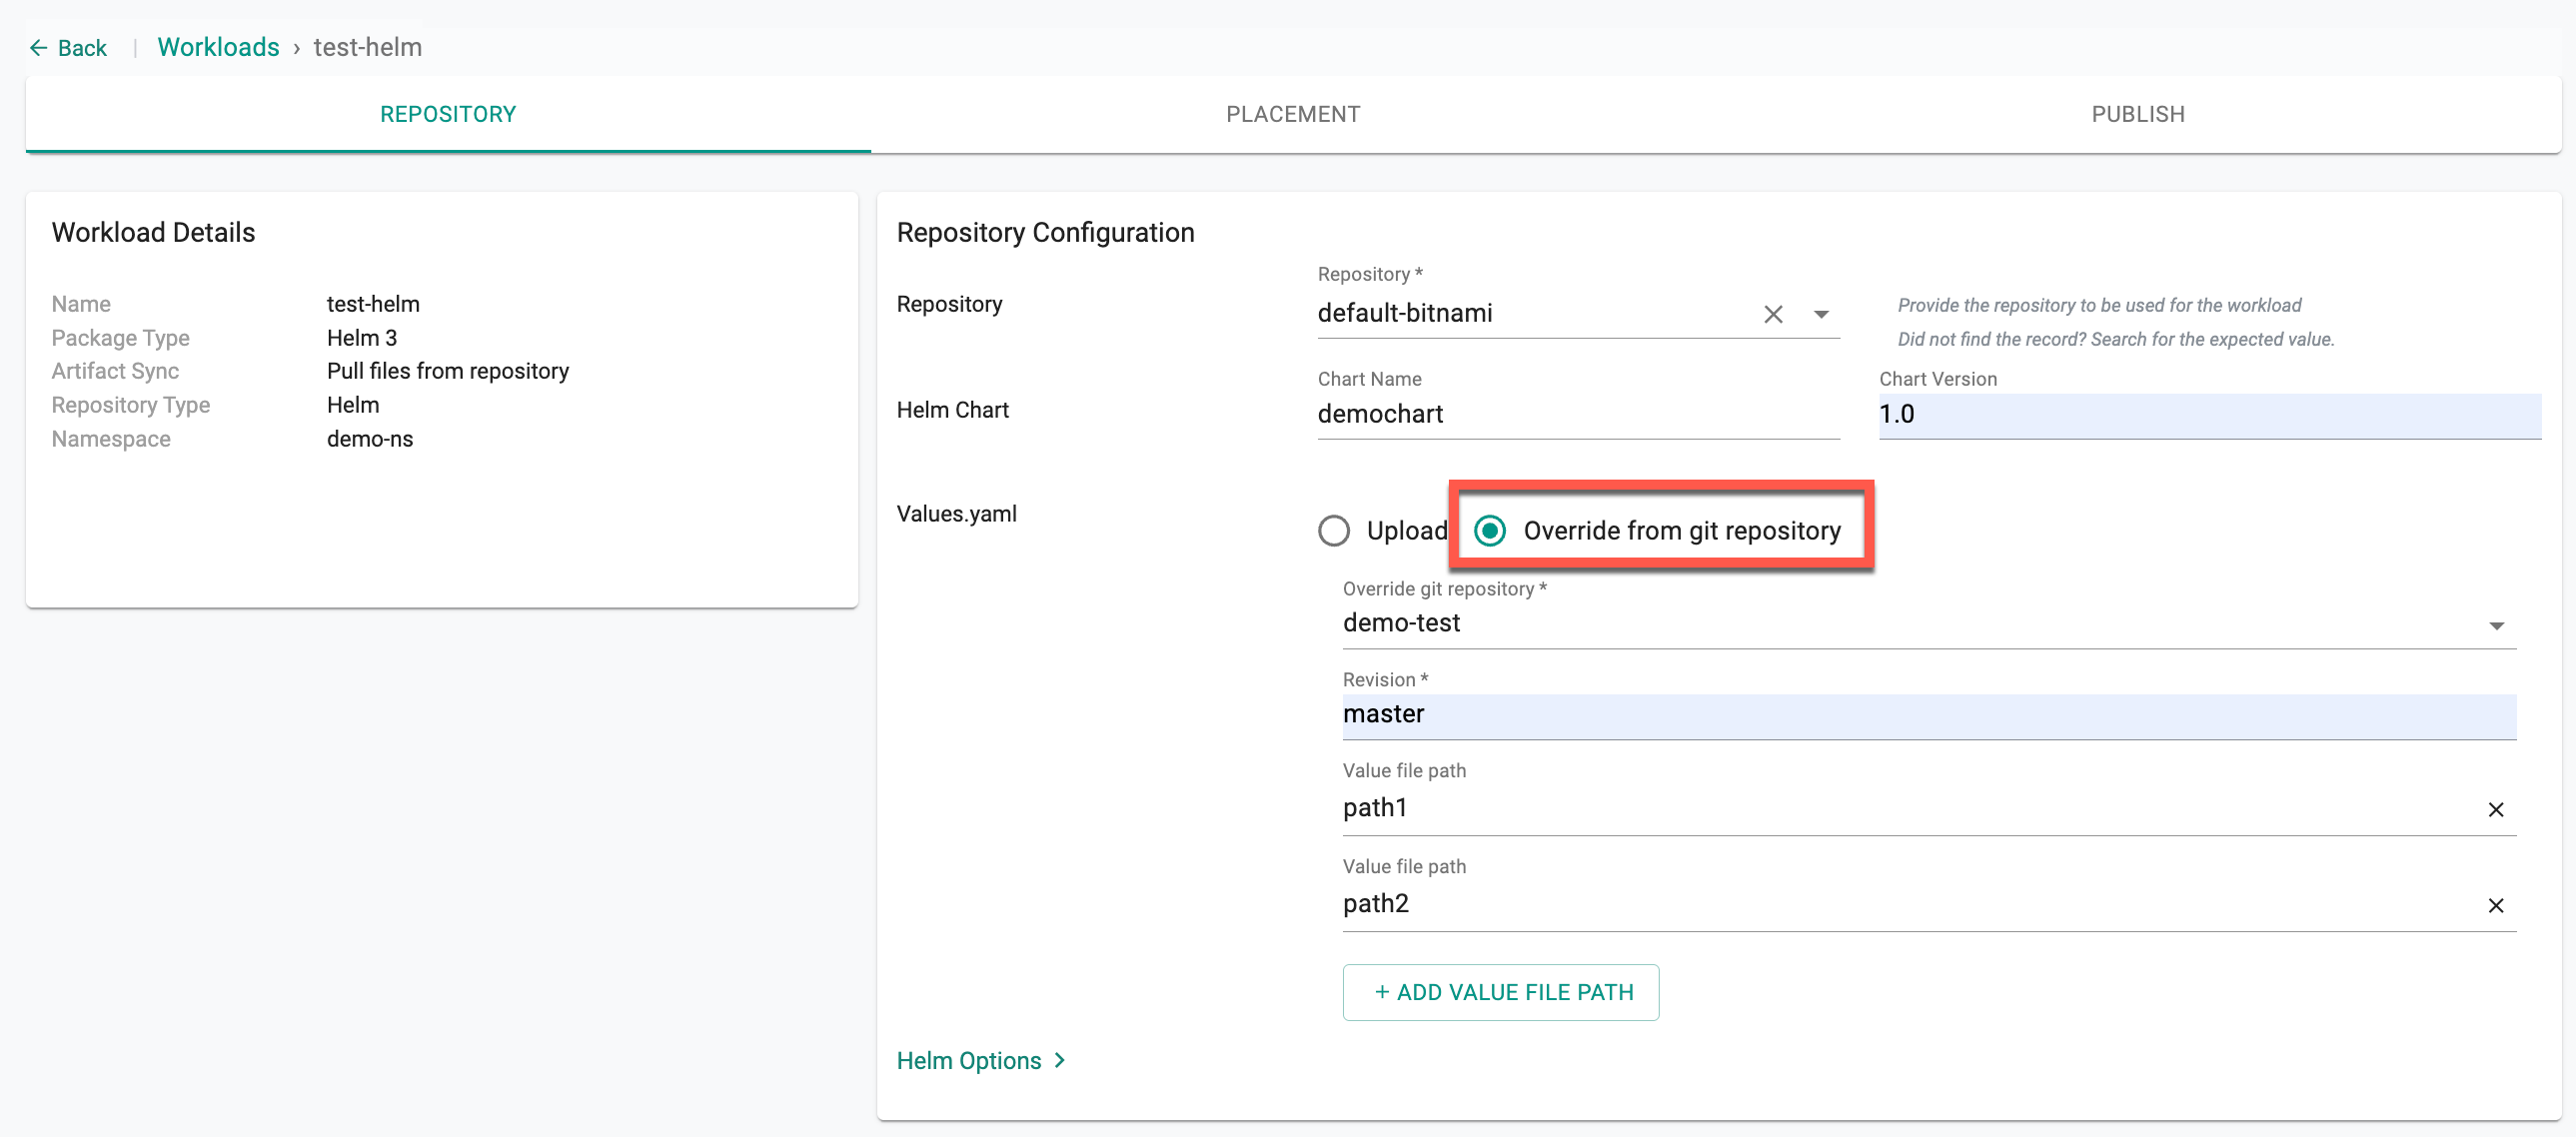
Override from git repository: Use this when your values files are managed separately in a Git repository, keeping your chart and environment-specific configurations decoupled
- Select the Override git repository
- Set the Revision (branch, tag, or commit SHA)
- Enter the first Value file path
- Click + ADD VALUE FILE PATH to add more entries
Tip
The last entry in the list takes the highest precedence. If multiple files define the same key, the value from the last file wins.
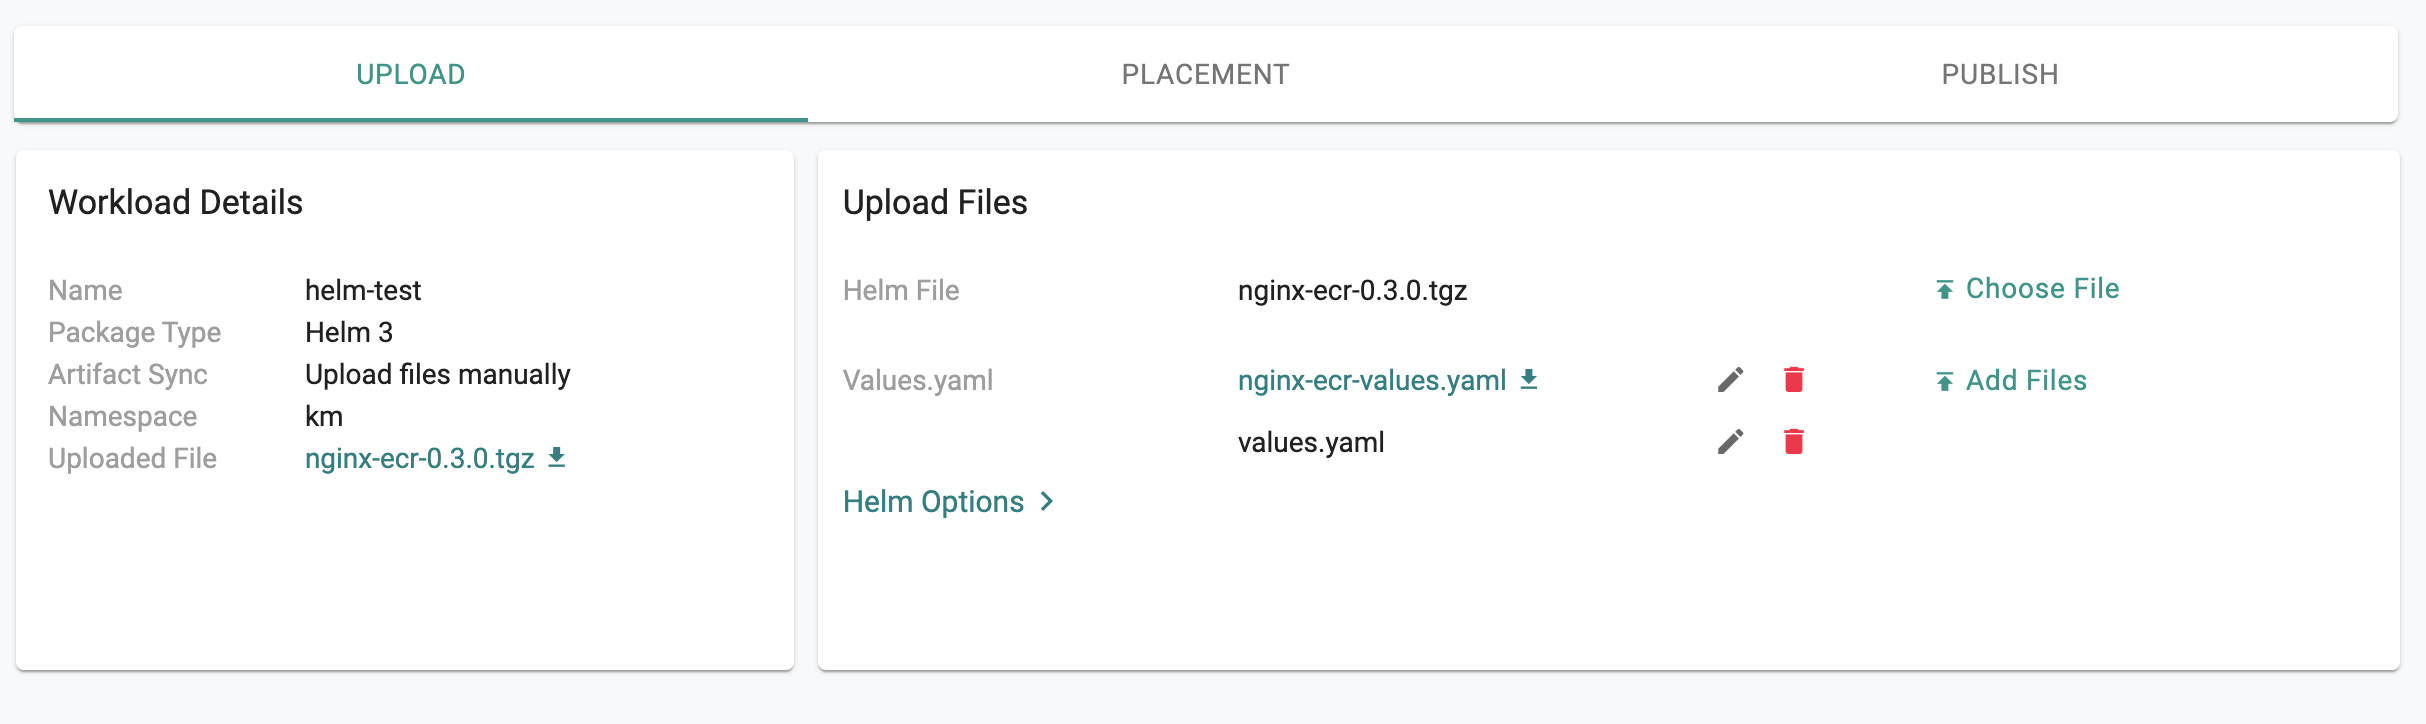
Option B: Upload Artifacts
This approach is suited for scenarios where the user would like to upload the artifacts to the Controller and not provide any form of access to their Git/Helm repository
- Upload the "Helm chart" (a tgz file) and if necessary a "values.yaml" override file
Multiple Values Files
It's possible to have multiple values files for the same helm chart.
For Helm 3 workloads created either by Upload files manually, Pull files from Git Repo, or Pull files from Helm Repo, all these values files can be uploaded or referenced when creating the workload.
Option A
- Click Upload Files to upload the Values File(s) from the system that you want to supply to the chart. Upload is the default selection
- Fetch values files directly from a Helm repository (either a traditional Helm repository or an OCI-based Helm repository)
Note: Users can provide just the Helm chart name or specify it along with the namespace, if required.
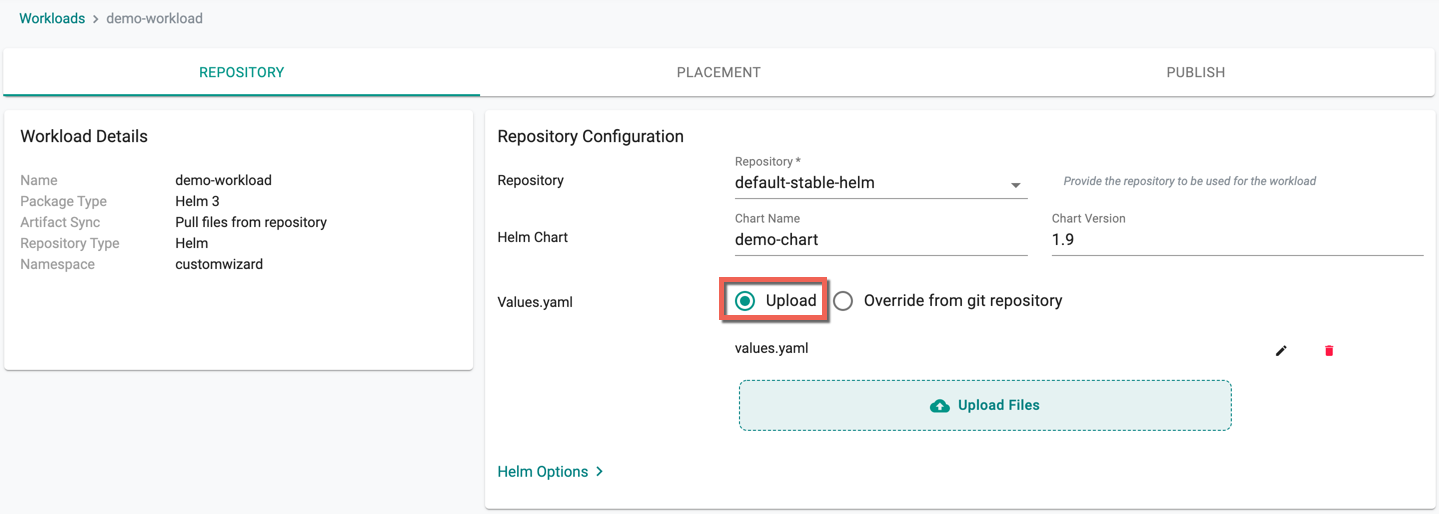
Chart Name Constraints for OCI-Based Helm Repositories
When configuring a Helm workload using an OCI-based Helm repository, the way the repository endpoint is defined determines how chart names can be referenced:
- If the endpoint includes a namespace along with a specific chart name (e.g.,
oci://c8n.io/demouser1/nginx), users must specify either:nginx(chart name only)demouser1/nginx(namespace/chart-name format)
In this case, workloads can only use the specified chart (nginx), even if multiple charts exist under the namespace.
- If the endpoint includes only the host (e.g.,
oci://c8n.io), workloads must be configured with the full namespace path and chart name, such asdemouser1/nginx - If the endpoint includes the host along with the namespace (e.g.,
oci://c8n.io/demouser1), users can specify any chart available under that namespace when deploying workloads
Option B
To use values files stored in a Git repository, perform the following steps:
- Select Override from git repository option
- Select the Override git repository from the dropdown list
- Set the Revision (branch, tag, or commit SHA)
- Enter the first Value file path
- Click + ADD VALUE FILE PATH to add more entries
Tip
The last entry in the list takes the highest precedence. If multiple files define the same key, the value from the last file wins.
Advanced Helm Options
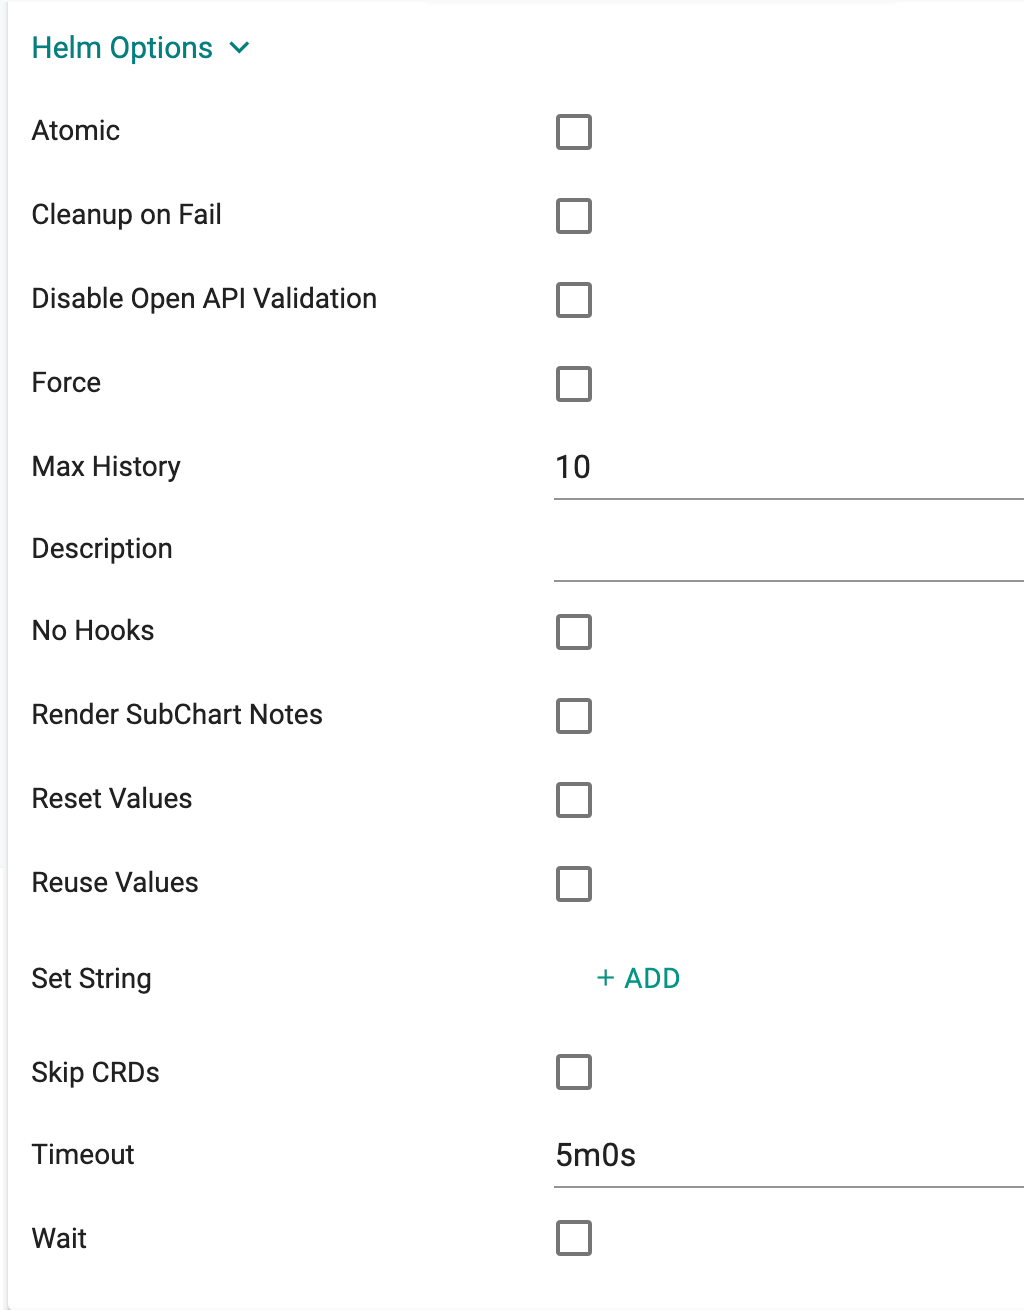
Support for advanced Helm options is available under "Helm Options".
| Helm Option | Description |
|---|---|
| Atomic | If enabled, upgrade process rolls back changes made in case of failed upgrade. The --wait flag will be set automatically if this option is enabled. It will wait for as long as the configured timeout duration |
| Cleanup on Fail | Allow deletion of new resources as part of the upgrade when upgrade fails |
| Disable Open API Validation | If enabled, the installation/upgrade process will not validate rendered templates against the Kubernetes OpenAPI Schema |
| Force | Force resource updates through a replacement strategy |
| Max History | Limit the maximum number of revisions saved per release, default value is 10 |
| Description | Add a custom description |
| No Hooks | If this option is enabled, pre/post hooks are disabled |
| Render SubChart Notes | If enabled, subchart notes are rendered along with the parent |
| Reset Values | When upgrading, reset the values to the ones built into the chart |
| Reuse Values | When upgrading, reuse the last release's values |
| Set String | set STRING values |
| Skip CRDs | If this option is enabled, no CRDs will be installed. By default, CRDs are installed if not already present |
| Timeout | Time to wait for any individual Kubernetes operation (like Jobs for hooks), default is 5m0s |
| Wait | If enabled, will wait until all Pods, PVCs, Services, and minimum number of Pods of a Deployment, StatefulSet, or ReplicaSet are in a ready state before marking the release as successful. It will wait for as long as the configured timeout duration |
| Wait for Jobs | When configured, it will wait until all Jobs are finished before marking the release as successful. It will wait for as long as the configured timeout duration |
 Warning
- If the Atomic option is set, upgrade process will roll back changes automatically in case of a failed upgrade. Please make sure to specify an appropriate timeout (default is 5 min) if you want to set the Atomic option. More information on Advanced Helm Options is available here
- When the timeout is set to 0, a default Add-On Timeout of 60 minutes is applied to prevent infinite wait loops. If configured with a higher timeout and the Helm chart encounters issues (e.g., in pre-hooks), the blueprint may remain stuck for that duration. It is recommended to set a reasonable timeout to avoid extended delays.
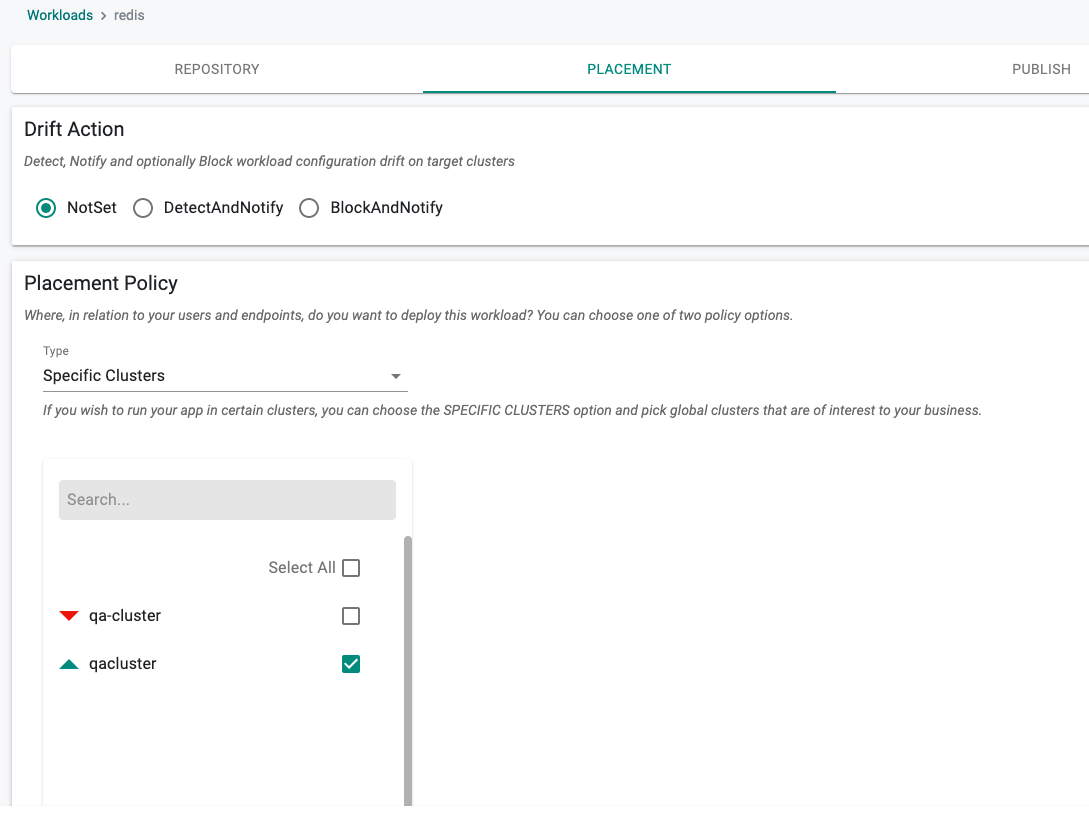
Placement Policy
In this step, specify the placement policy for the workload.
In the example below, the user has selected
- "Not Set" for Drift Detection
- The "Specific Clusters" placement policy
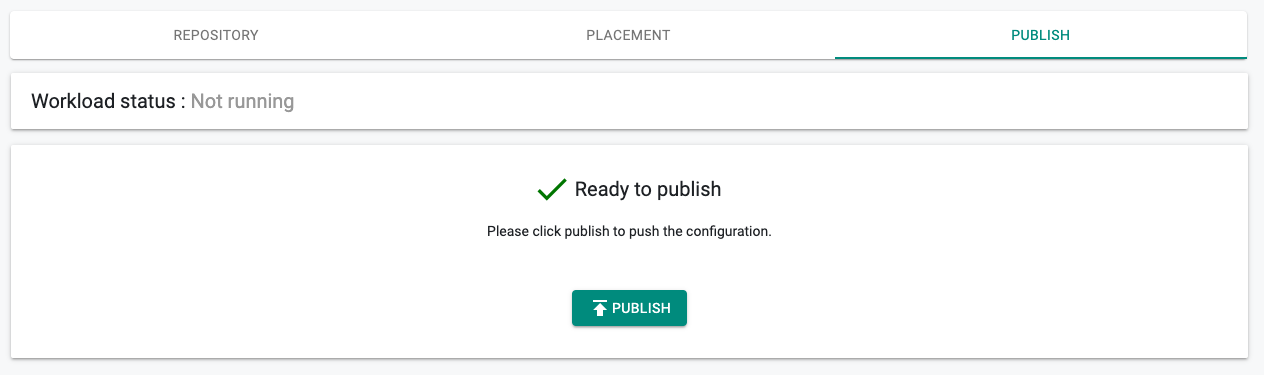
Publish Workload
We are now ready to publish the workload. Click on Publish to start the deployment process
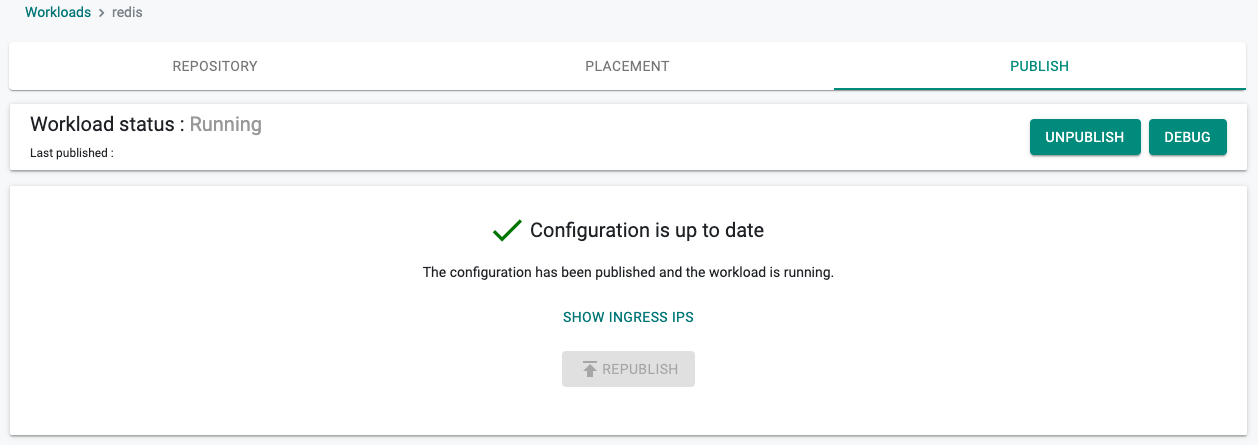
Progress/Status
Depending on the complexity of the placement policy (e.g. multiple clusters), the Helm chart (e.g. lots of readiness process), the deployment process can take 30 seconds to a few minutes. If the deployment was successful, appropriate status is shown to the user.
Use the Card View or Table View icons to view the workload details like status, namespace, last modified date & time, etc on the main workload list page. Table view is the default.
To view the cost details of a specific workload, click on the $ icon. This will navigate you to the Cost Explorer page, where you can access detailed cost information for the required workload.
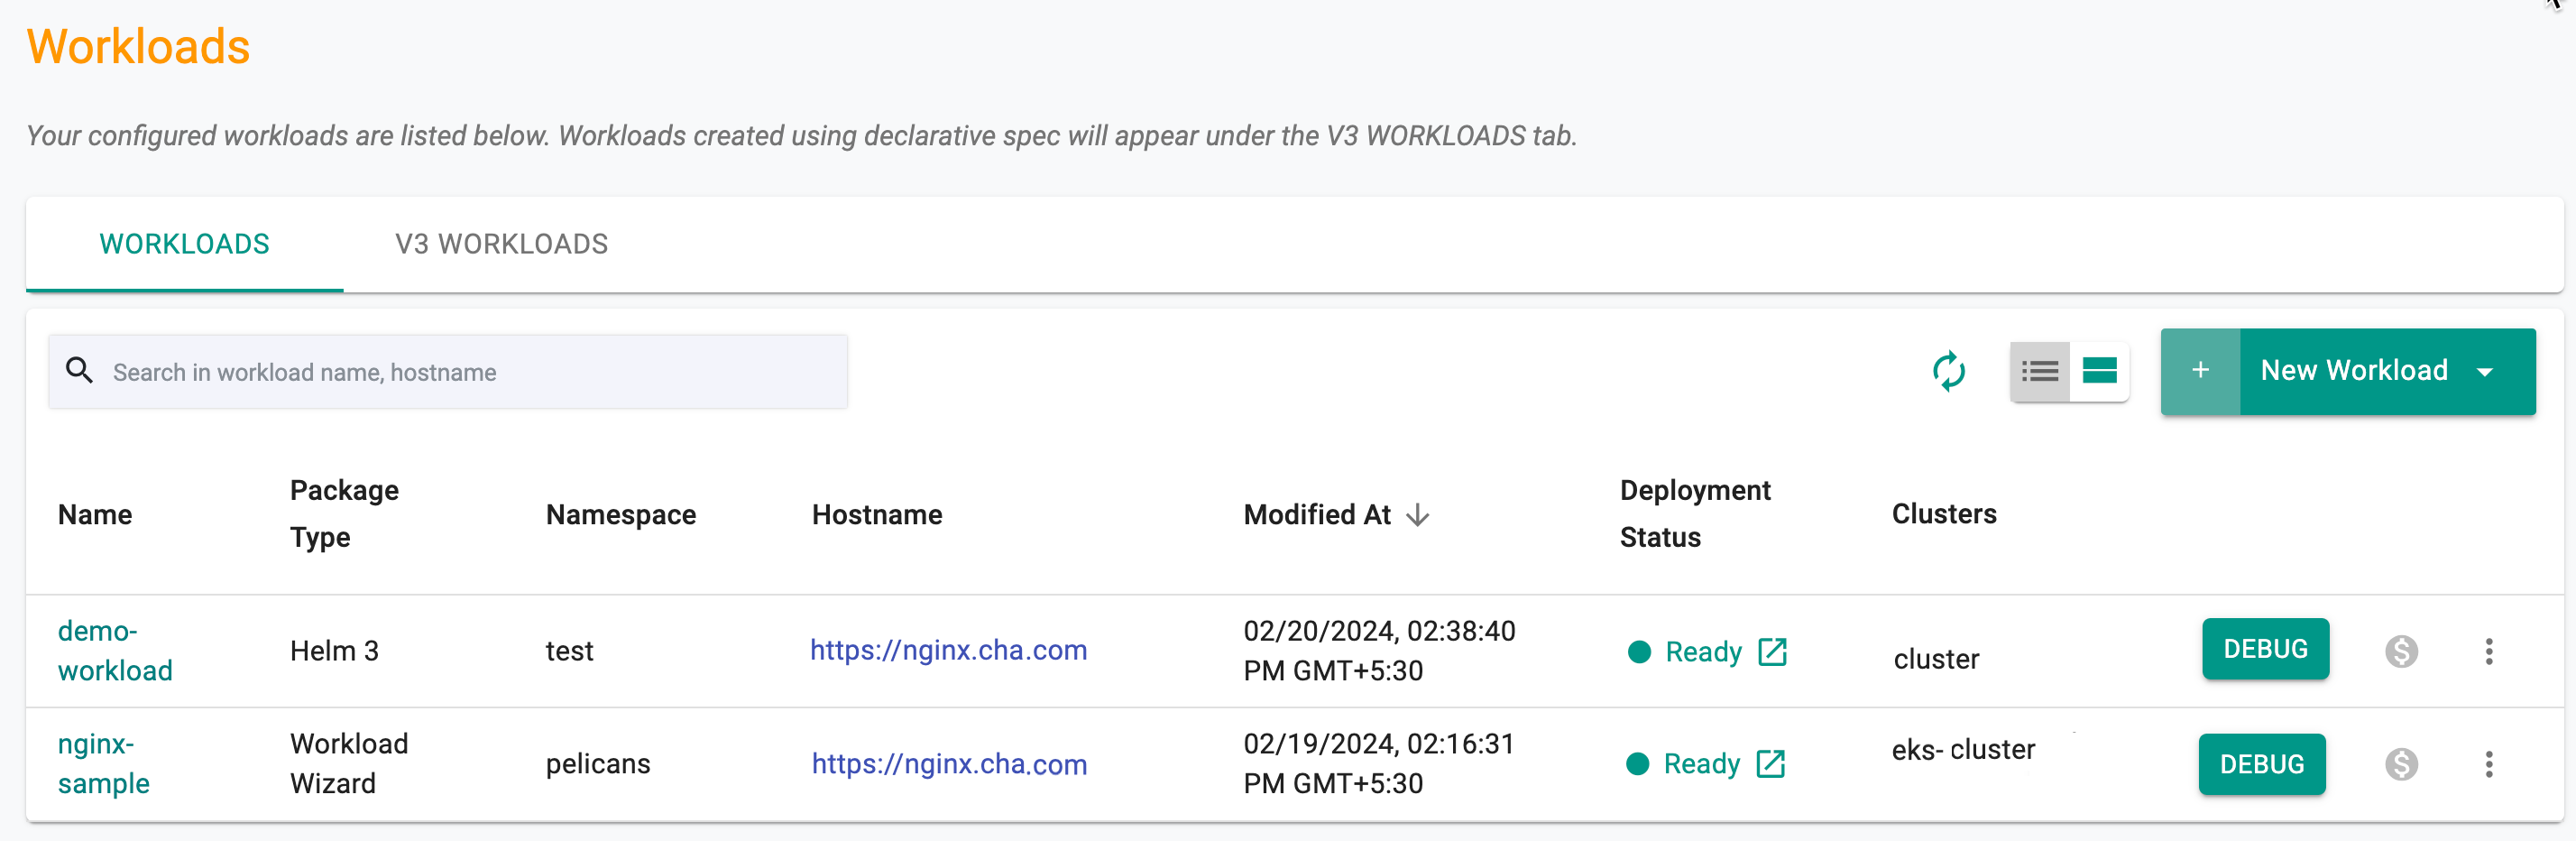
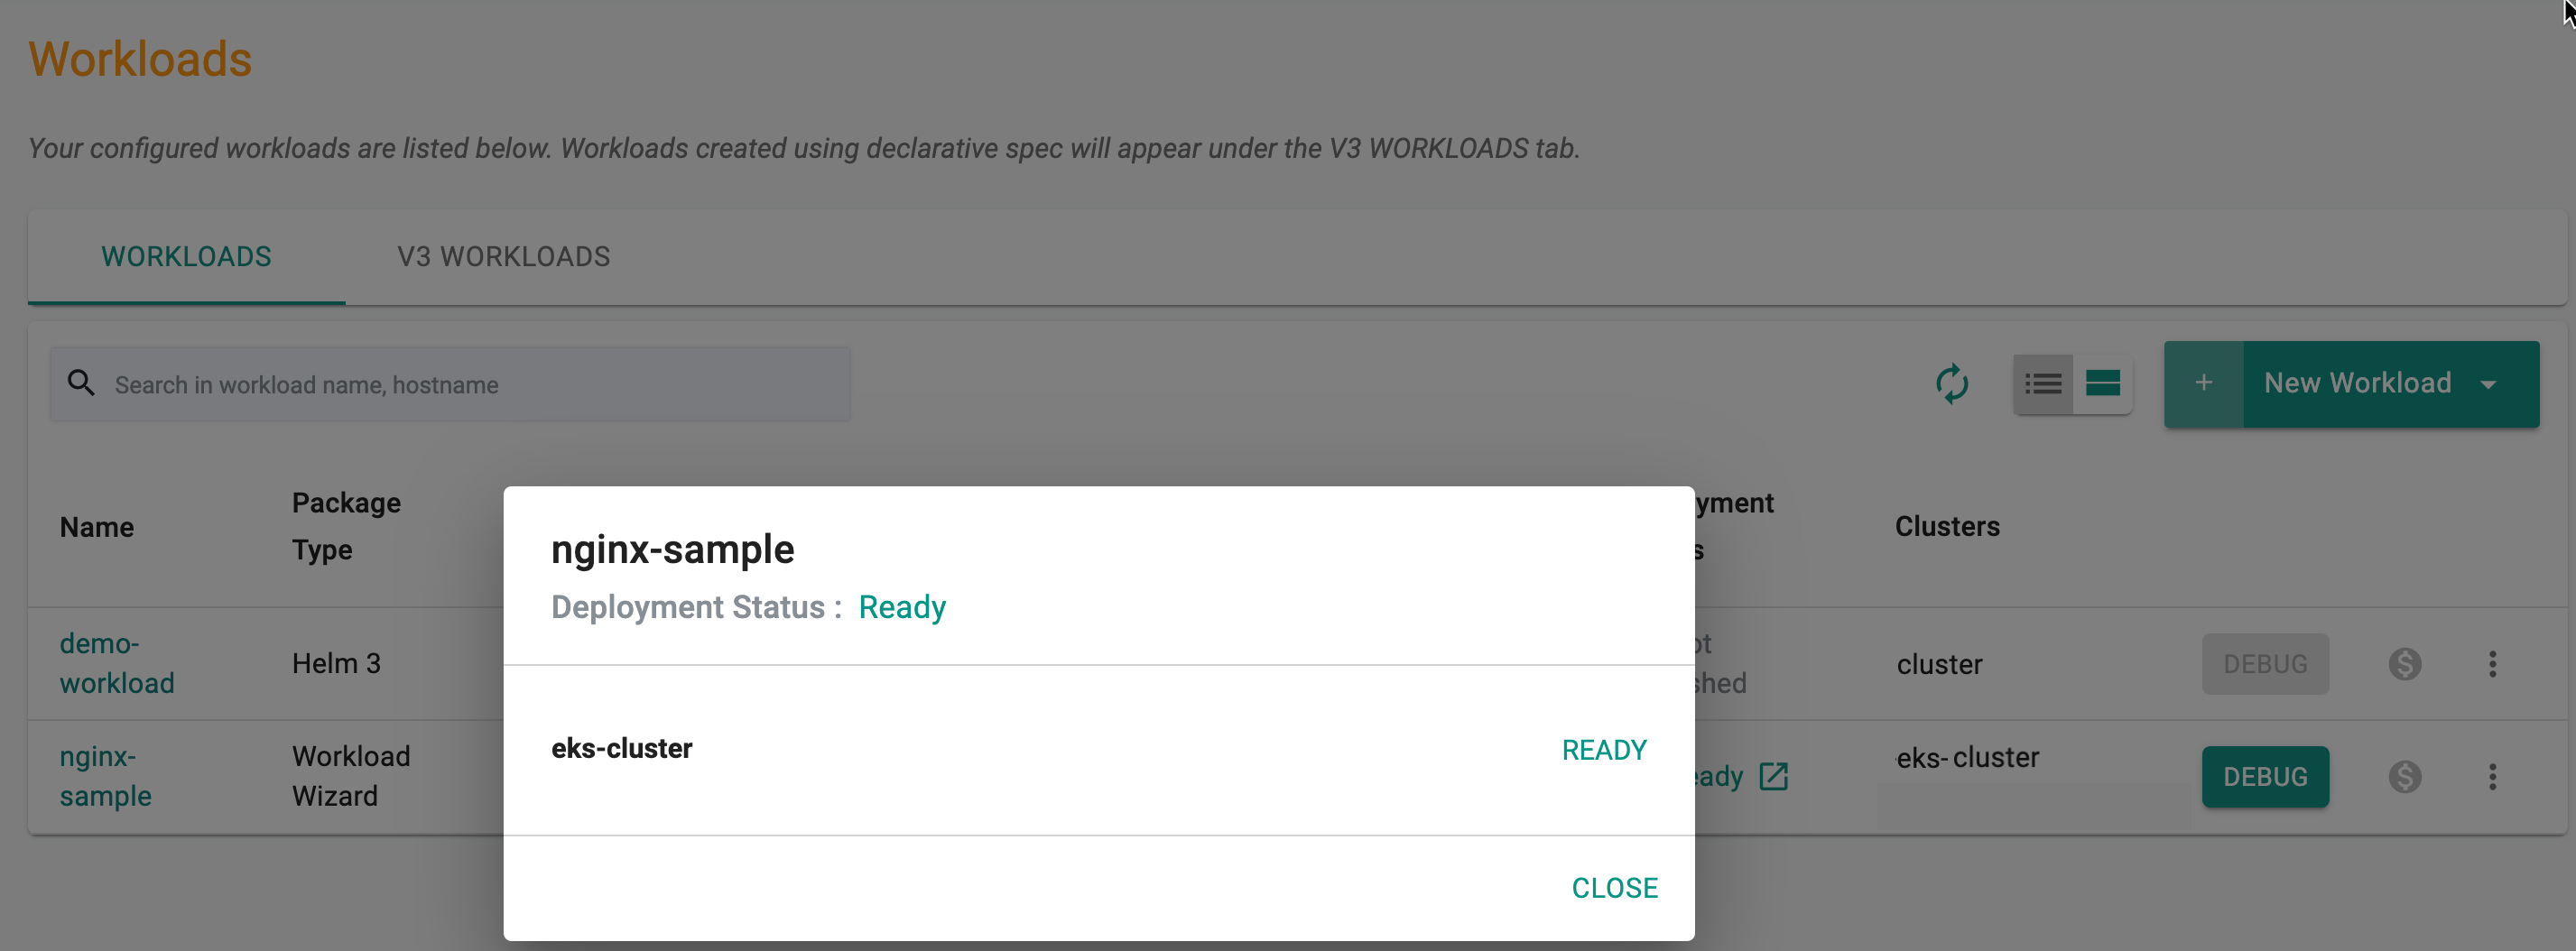
To get the list of workloads in the table view, use the Table View icon. Clicking on Deployment Status Ready workload shows the current state of the workload by cluster
Pod Metrics
To have the managed prometheus addon scrape pod metrics, add the following annotations to the pods with these parameters
metadata:
  annotations:
    prometheus.io/scrape: "true"
    prometheus.io/path: /metrics
    prometheus.io/port: "8080"
spec:
Adjust the prometheus.io/path based on the URL from where the pod serves metrics. Set prometheus.io/port to the port from where the pod serves metrics. The values for prometheus.io/scrape and prometheus.io/port must be enclosed within double quotes
Important
The collected metrics in Prometheus will be retained for 3 hours
Debugging/Troubleshooting
If there are application related issues during deployment, both the application developer and/or the operations user will require RBAC secure facilities to remotely debug. Built in "secure, interactive capabilities" are provided to help streamline the debugging and troubleshooting process.
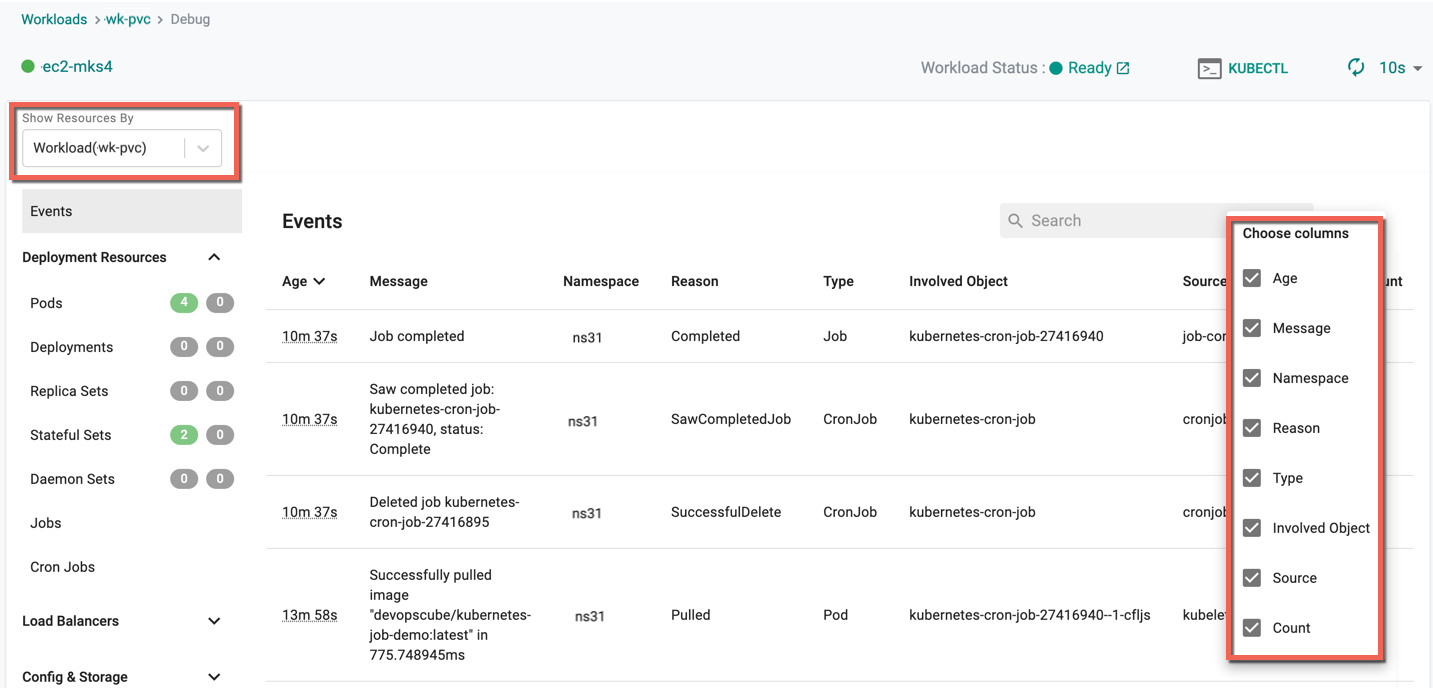
- Navigate to the Workload publish screen
- Click Debug to view the deployed Workload, Age (time in minutes since the deployment is complete), Message, Namespace, Reason, Type, Involved Object, Source, and Count
- Use the gear icon to show/hide the required columns
For more information on Debug, refer Debug
Developers
Developers that are responsible for a microservice or just the workload will not be provided. This persona is typically provisioned with a "Project Admin" role OR a "Project Read Only" role (in production environments).
- Navigate to the workload's publish screen or from the main workload list page, click on options
- Click on Debug
This will take the user to the "main debug page"
- For multi cluster deployments, select the cluster from the drop-down on the left
- A live channel is established to the remote cluster based on the zero trust control channel
KubeCTL
Click on "KubeCTL" to launch a browser based Zero Trust KubeCTL shell. Note the KubeCTL operations this user can perform is access controlled and secured using the configured ROLE. All actions performed by the user are audited for compliance.
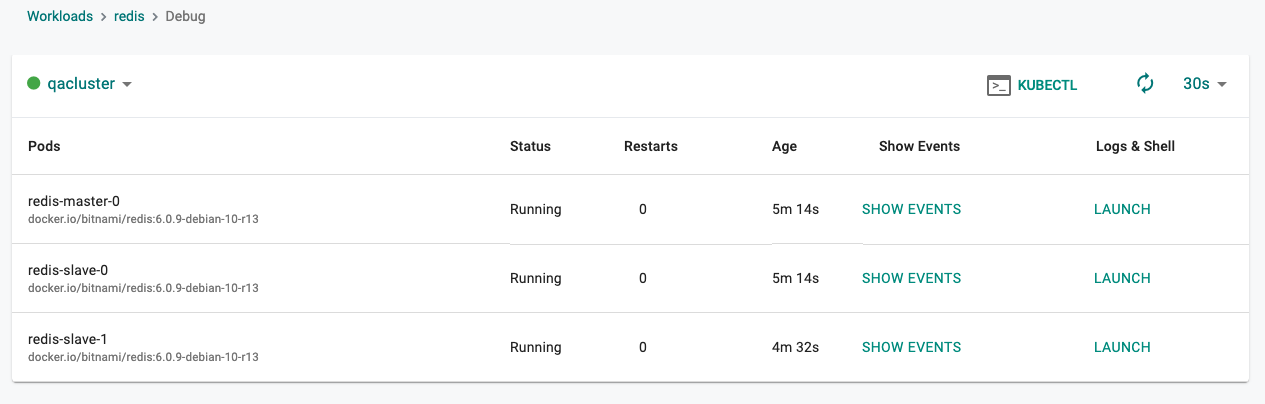
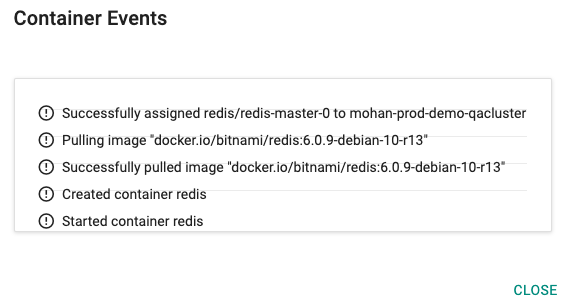
Kubernetes Events
Click on "Show Events" to view the K8s events associated with the workload's resources.
Logs and Shell
Click on "Launch" under Logs & Shell to establish a "live, interactive" debug channel to the pod on the remote cluster.
Infrastructure/Operations
This persona is generally an "Infrastructure Administrator" with privileged access to the Kubernetes Cluster.
All Workloads
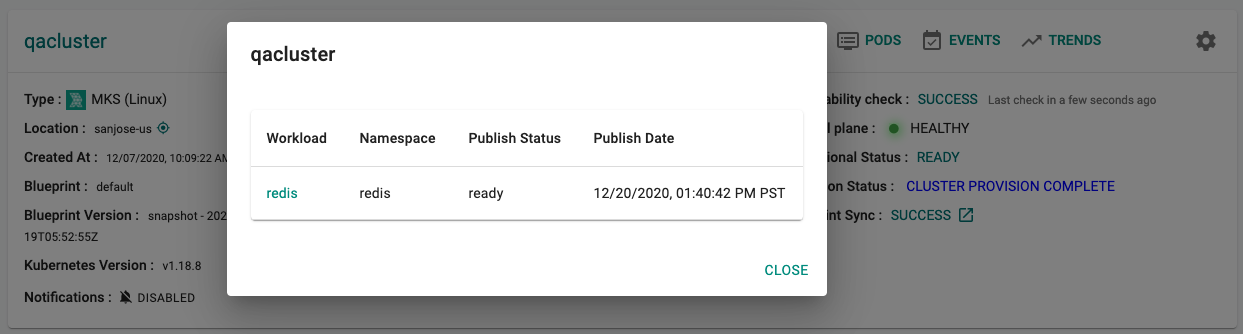
Infrastructure admins are provided a bird's eye view of all workloads and their status on Kubernetes clusters. Click on the "Workloads" link on the cluster card.
In the example below, you can see the deployment status of our "apache-helm3" workload
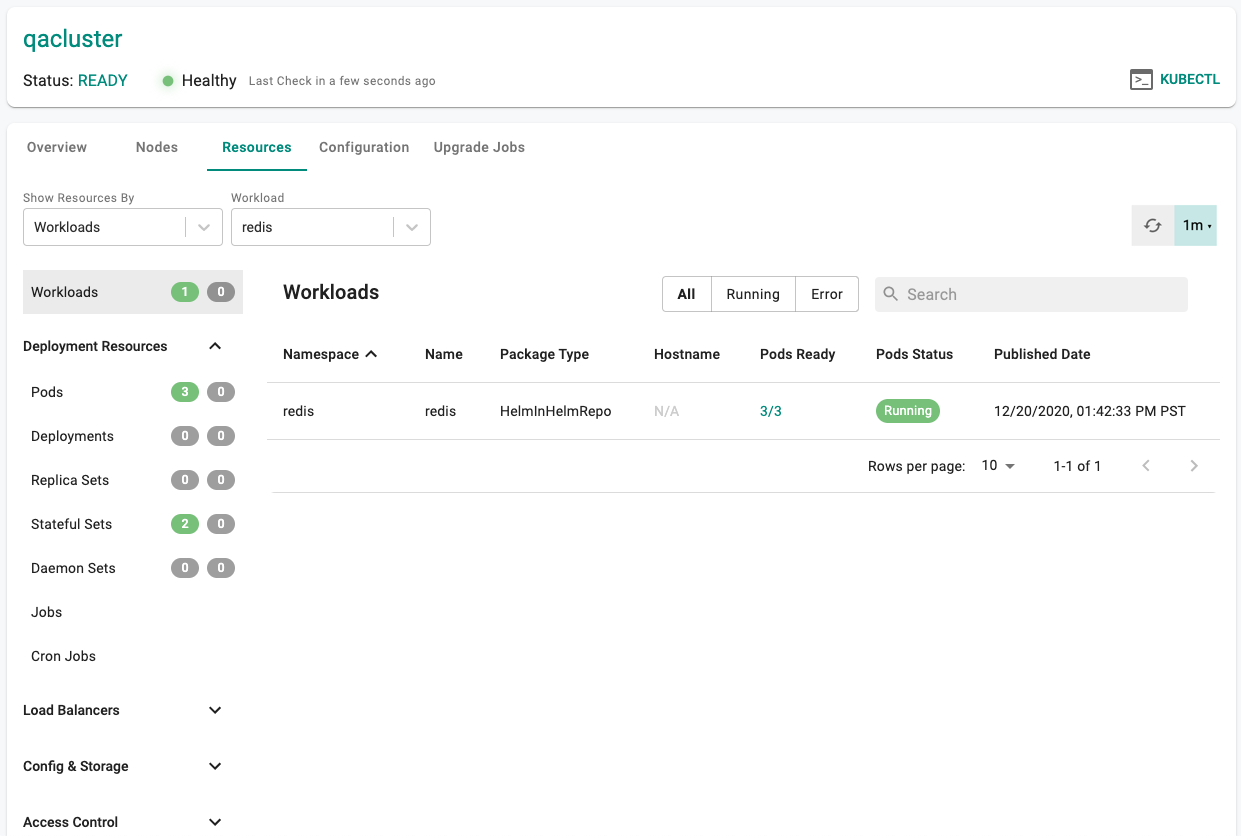
K8s Resources By Workload
Infrastructure admins can view details about the K8s resources for a given workload on a cluster.
- Click on the Cluster Dashboard
- Click on Resources
- Select "Workloads" for "View By"
- Select the "workload name"
In the example below, you can view the details of all the K8s resources for our workload.
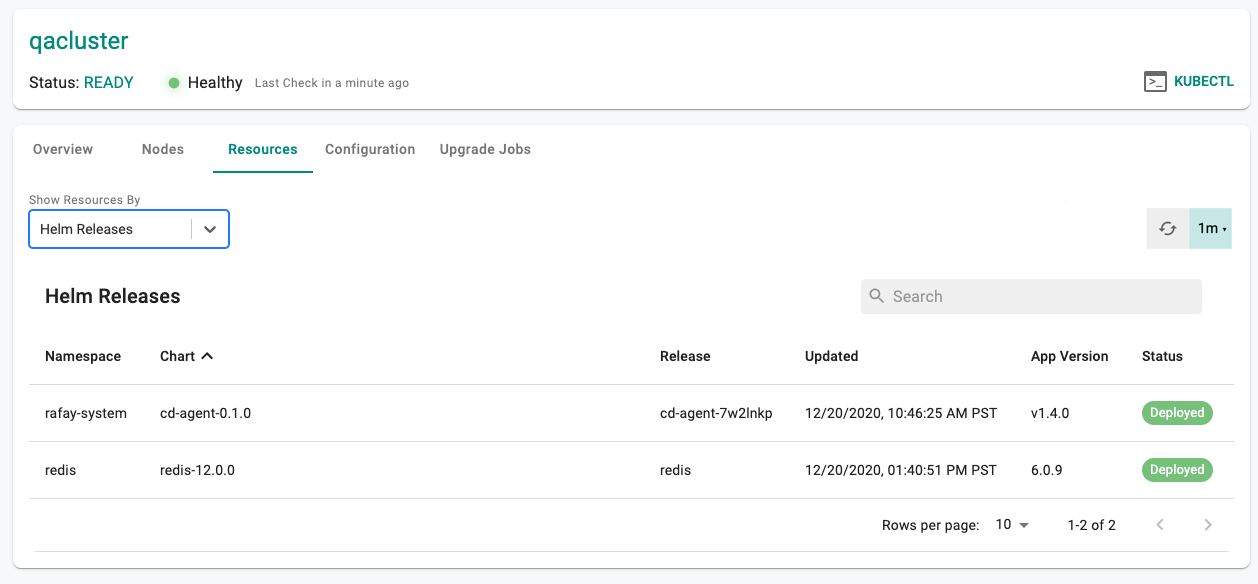
By Helm Release
- Click on the Cluster Dashboard
- Click on Resources
- Select "Helm Releases" for "View By"
In the example below, the Operations persona can see the Helm Chart's name, release, app version and other status information. If users have the Helm CLI configured to communicate with their cluster, they can use it to check status directly.
Unpublish
To unpublish the workload, click on the "unpublish button". The deployed resources on the remote clusters will be automatically removed.
Important
If the remote cluster was offline when the unpublish operation was initiated, the Controller will send this instruction to the cluster when it reconnects.
Actions
Edit or delete one (or) more workload(s) using the respective icons from the main workloads list page. Follow the prompts to delete a workload.
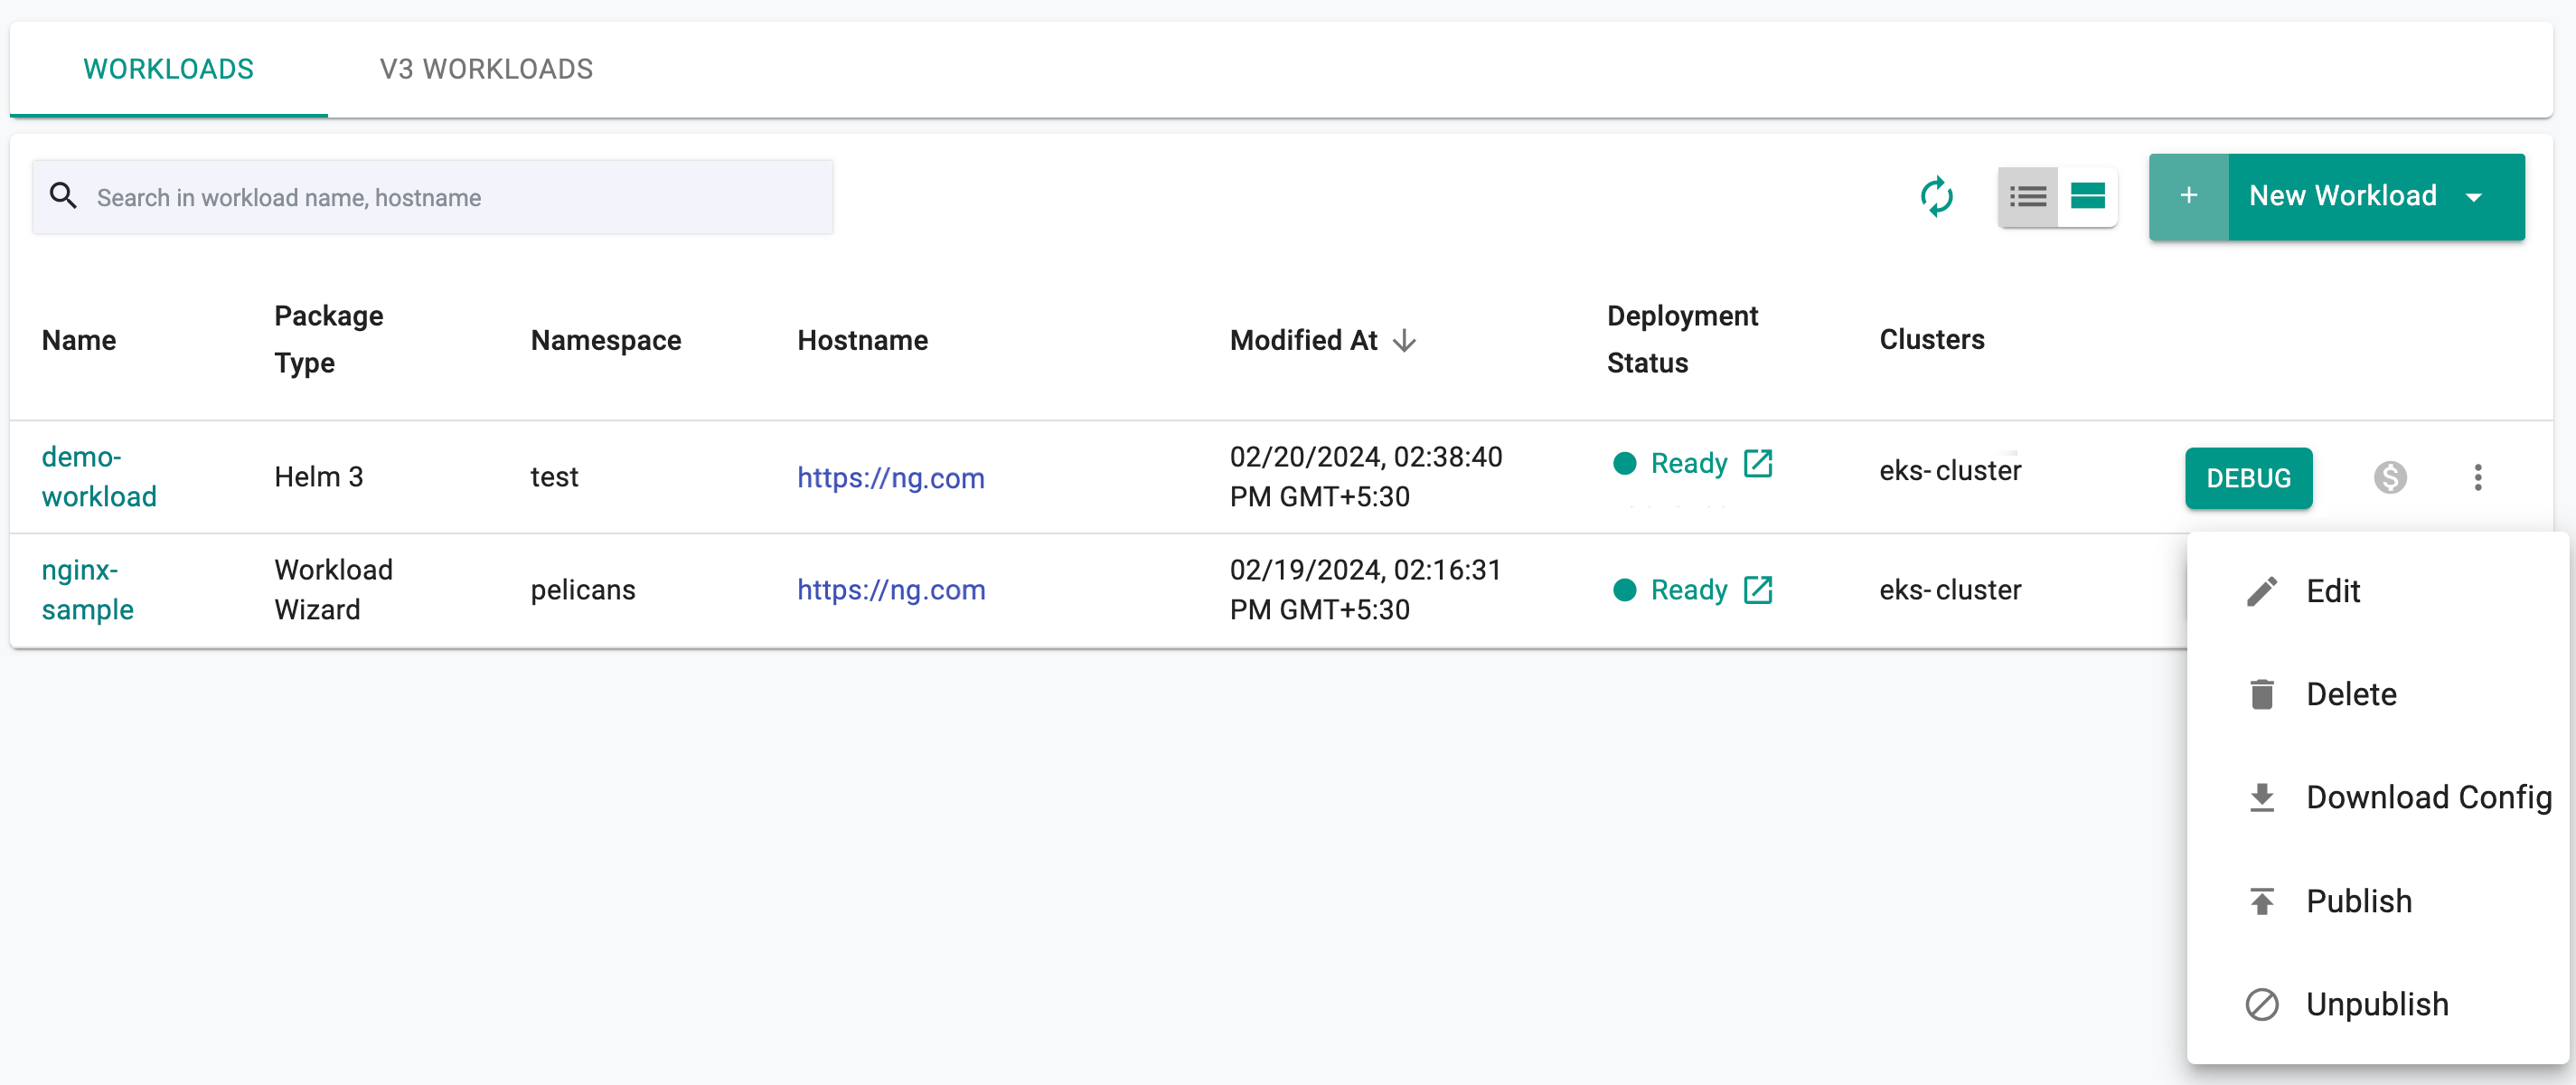
Note: When modifying a published workload, republish it