Alerts
What Will You Do
In this section, you will setup the OKTA IDP account with the Rafay console and configure an IDP user and group
- Connect OKTA
- Create IDP User
- Create IDP Group
- Add User to Group
- Associate Group to Application
Step 1: Connect IDP
We must first connect the OKTA organization with the controller. If you do not have an OKTA account, you can register for a free developer account.
Follow these instructions to integrate with OKTA.
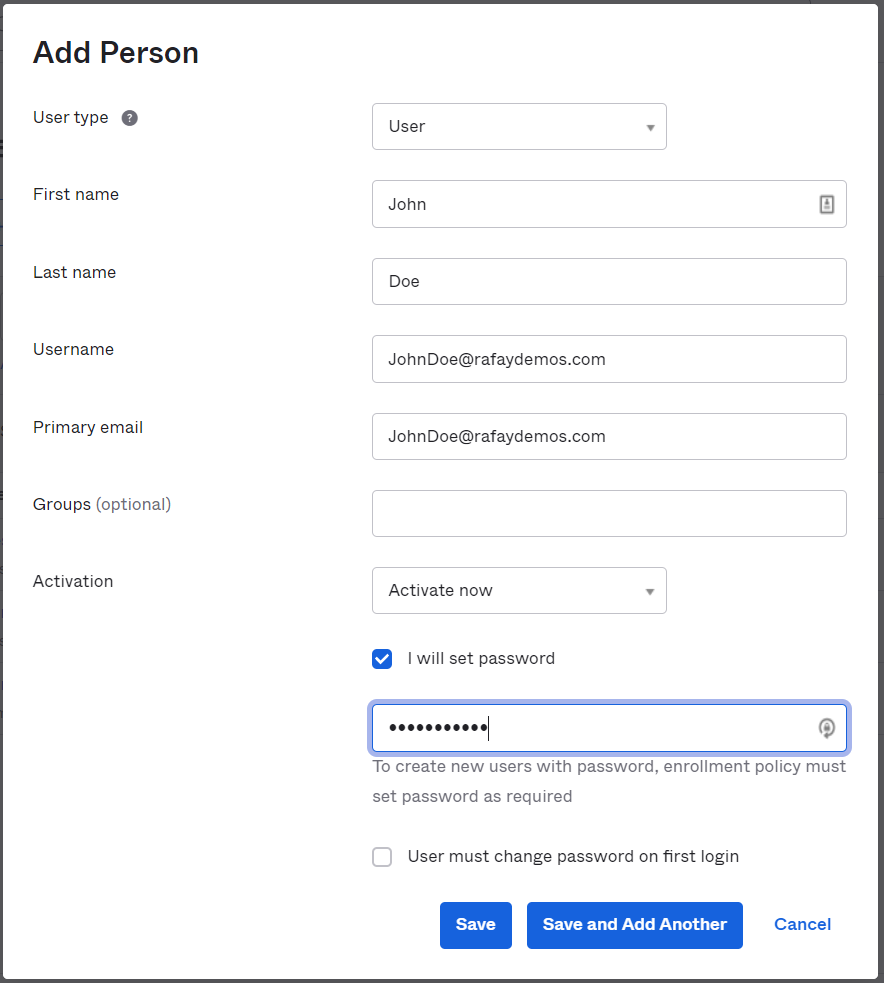
Step 2: Create IDP User
In this step, we will create a user within OKTA. This IDP user account will then be used to access the Rafay console.
- Ensure you are logged into your OKTA organization
- In the left hand navigation pane, navigate to Directory -> People
- Click Add person
- Set the User type to User
- Enter a First name
- Enter a Last name
- Enter an email address for the Username. The email address does not need to be real, but must have the same domain that was configured in the previous step.
- Set the Activation to Activate now
- Select I will set password
- Enter a password
- Deselect User must change password on first login
- Click Save
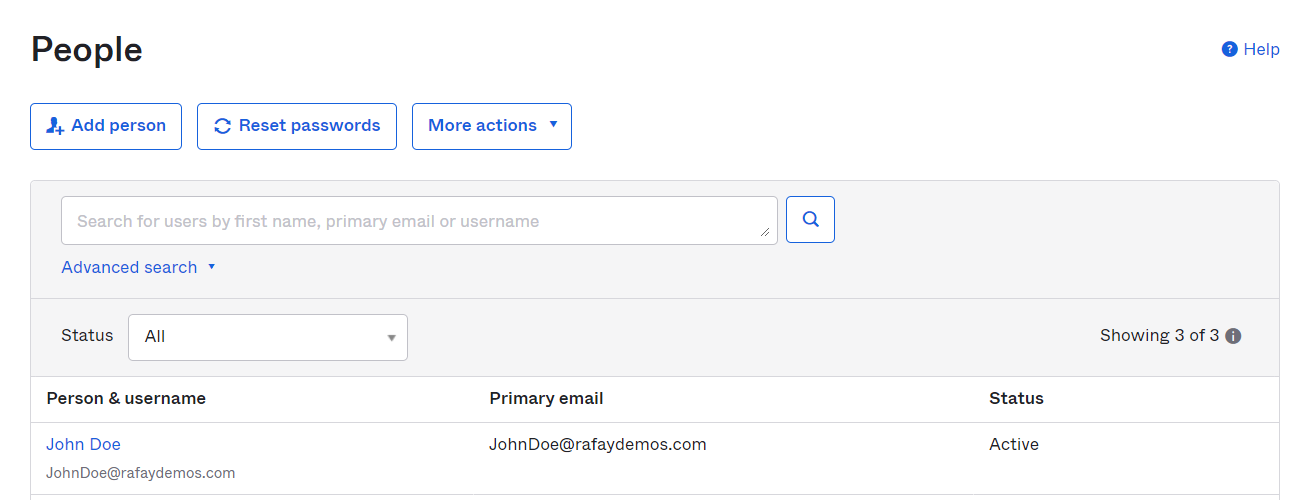
You should then see the created user account.
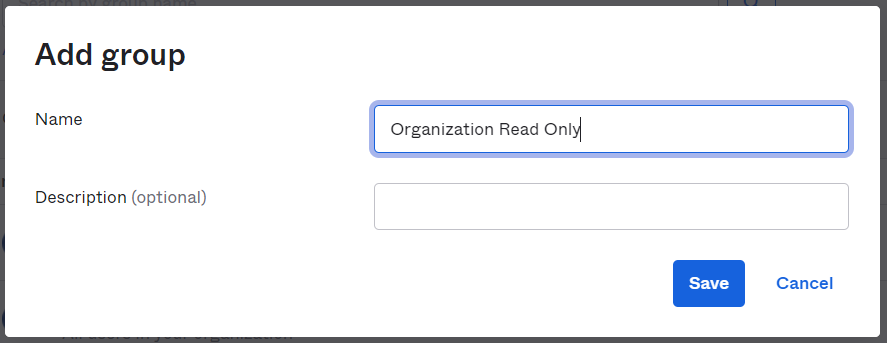
Step 3: Create IDP Group
In this step, we will create a user group within OKTA. The previously created user will then be added to this group. This group will contain the same name as the name of an existing group in the Rafay organization. The users in this IDP group will automatically be assigned to and assume the permissions of the Rafay group.
- Ensure you are logged into your OKTA organization
- In the left hand navigation pane, navigate to Directory -> Groups
- Click Add group
- Enter Organization Read Only for the Name
- Click Save
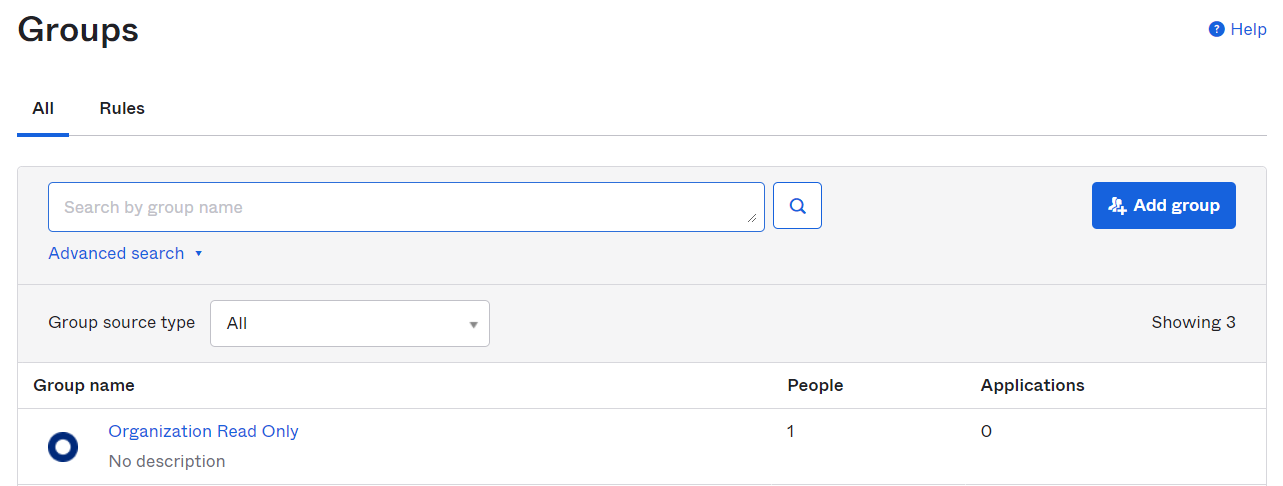
You should then see the created user group.
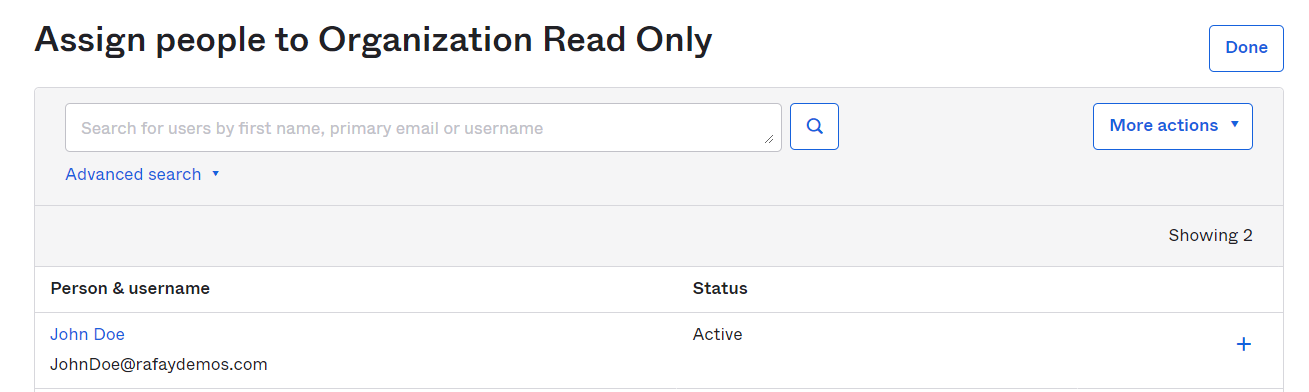
Step 4: Add IDP User to IDP Group
In this step, we will add the previously created IDP user to the IDP group in order to associate the user with the corresponding Rafay group.
- Ensure you are logged into your OKTA organization
- In the left hand navigation pane, navigate to Directory -> Groups
- Click on the previously created Organization Read Only group
- Click Assign people
- Click on the + symbol next to the previously created user
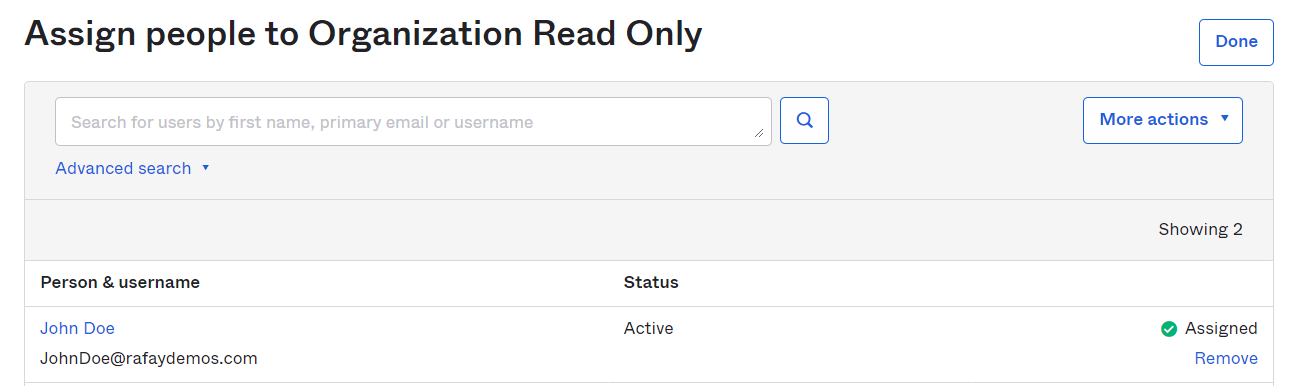
You should then see the created user assigned to the group.
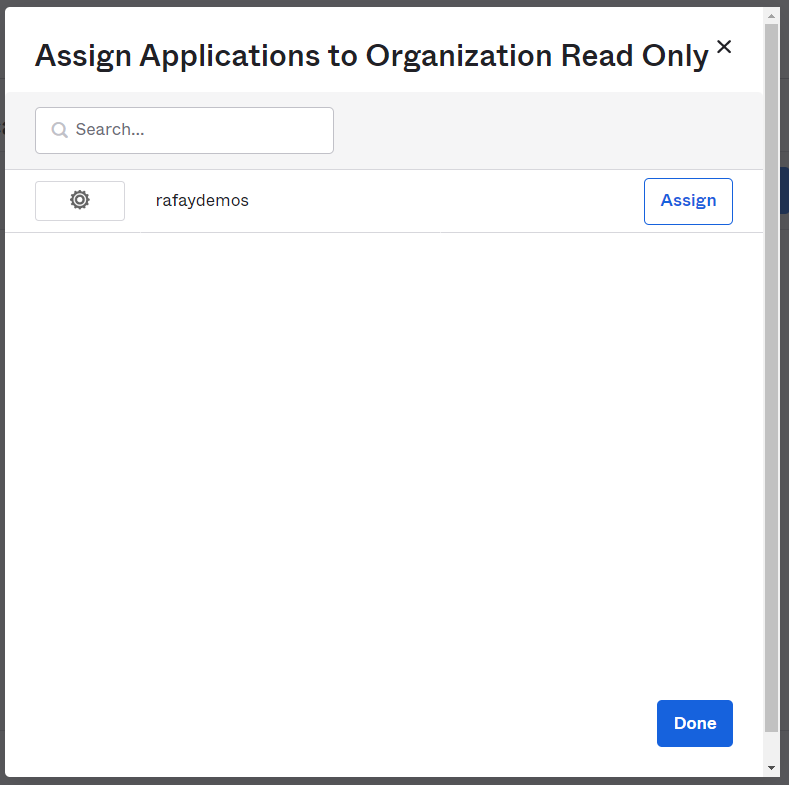
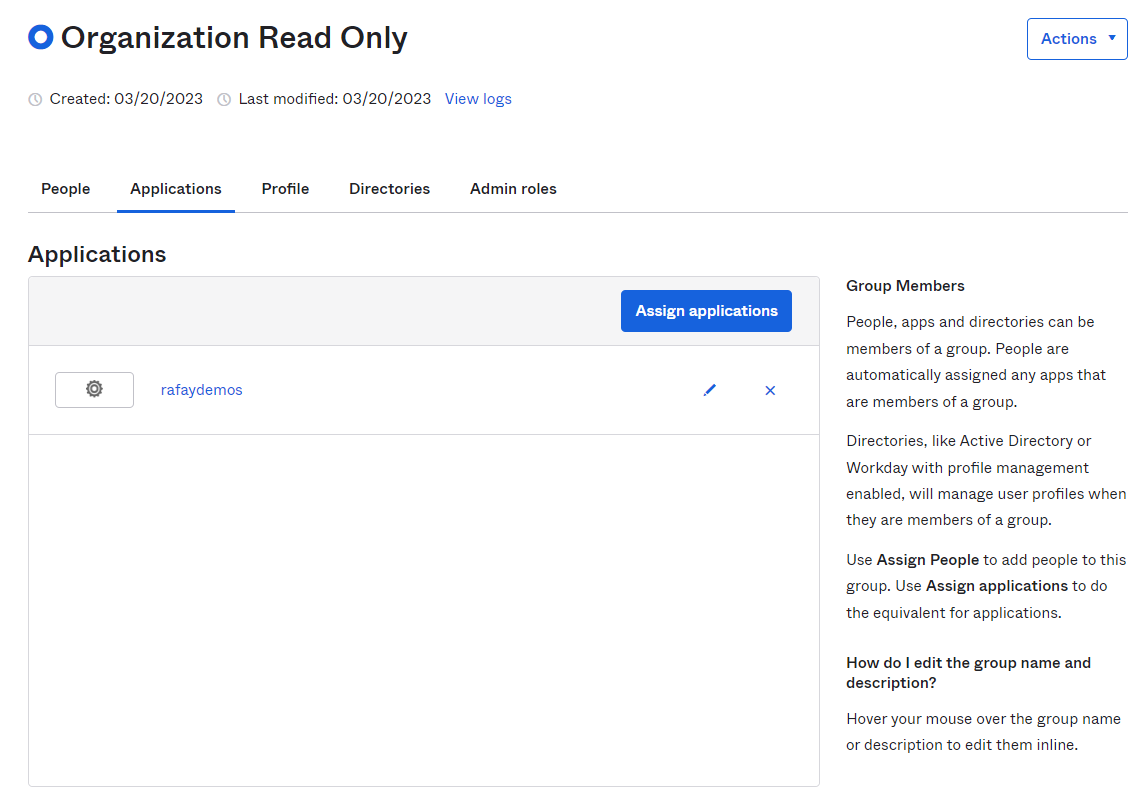
Step 5: Add IDP Group to OKTA Application
In this step, we will add the previously created IDP group to the the previously created OKTA application that corresponds with Rafay.
- Ensure you are logged into your OKTA organization
- In the left hand navigation pane, navigate to Directory -> Groups
- Click on the previously created Organization Read Only group
- Click the Applications tab
- Click Assign applications
- Click Assign next to the application associated with Rafay
- Click Done
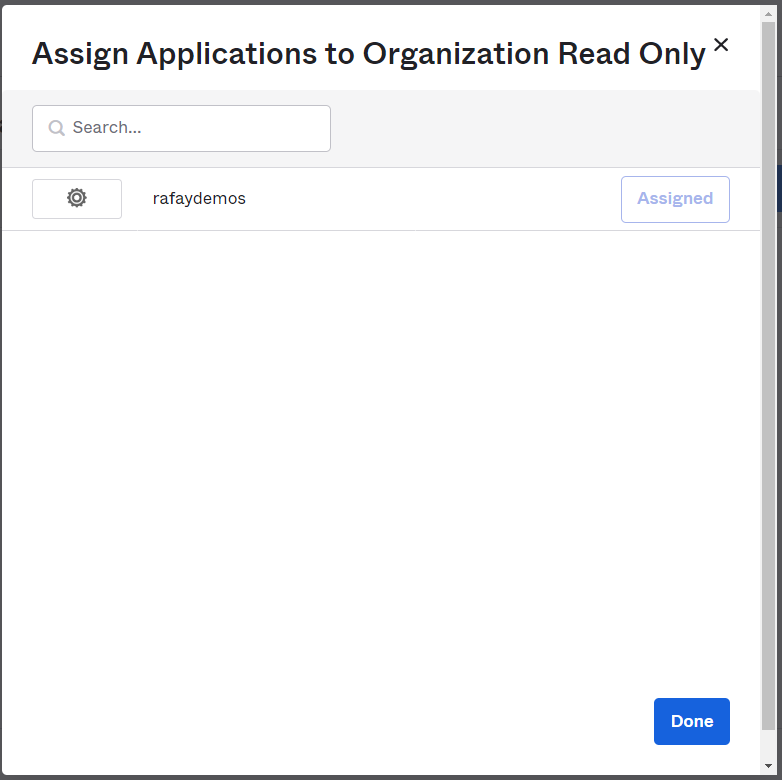
You should then see the application associated with the IDP group.
Recap
In this part, you successfully integrated the OKTA IDP with the console and setup an IDP user and IDP group to map to an existing Rafay group.