Part 1: Detect
This is Part 1 of the exercise that will focus on using the "Detect & Notify" drift detection setting within a custom blueprint to monitor for out of band changes to blueprint resources.
What Will You Do
In part 1, you will:
- Create a cluster blueprint with "Detect & Notify" drift detection
- Apply the blueprint to a cluster
- Modify the blueprint resources
- Track the changes in the system audit logs
Step 1: Create Blueprint
In this step, we will create a custom blueprint based off the "minimal" blueprint.
- Navigate to the project in your Org where your cluster is located
- Select Infrastructure -> Blueprints
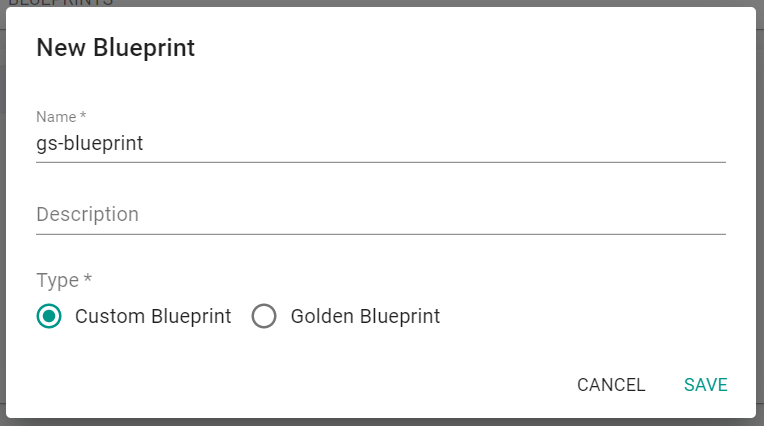
- Click "New Blueprint"
- Enter a name for the blueprint
- Select "Custom Blueprint" for the Type
- Click "Save"
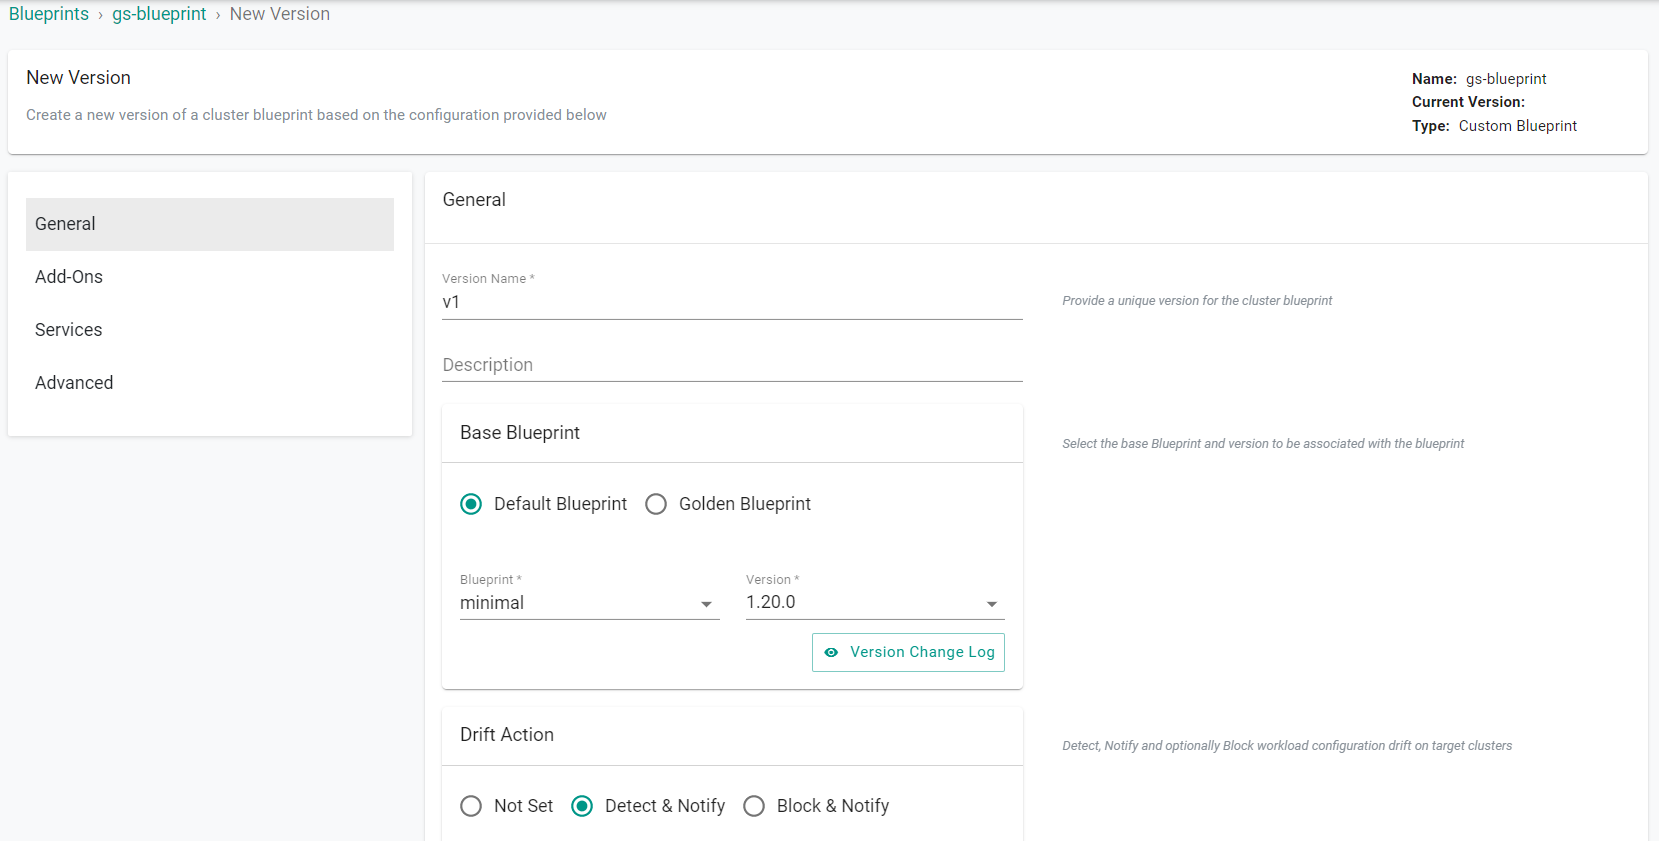
Next, create a blueprint version for this custom blueprint.
- Enter the "Version Name"
- Select the minimal blueprint as the base blueprint
- Select "Detect & Notify" for the Drift Action
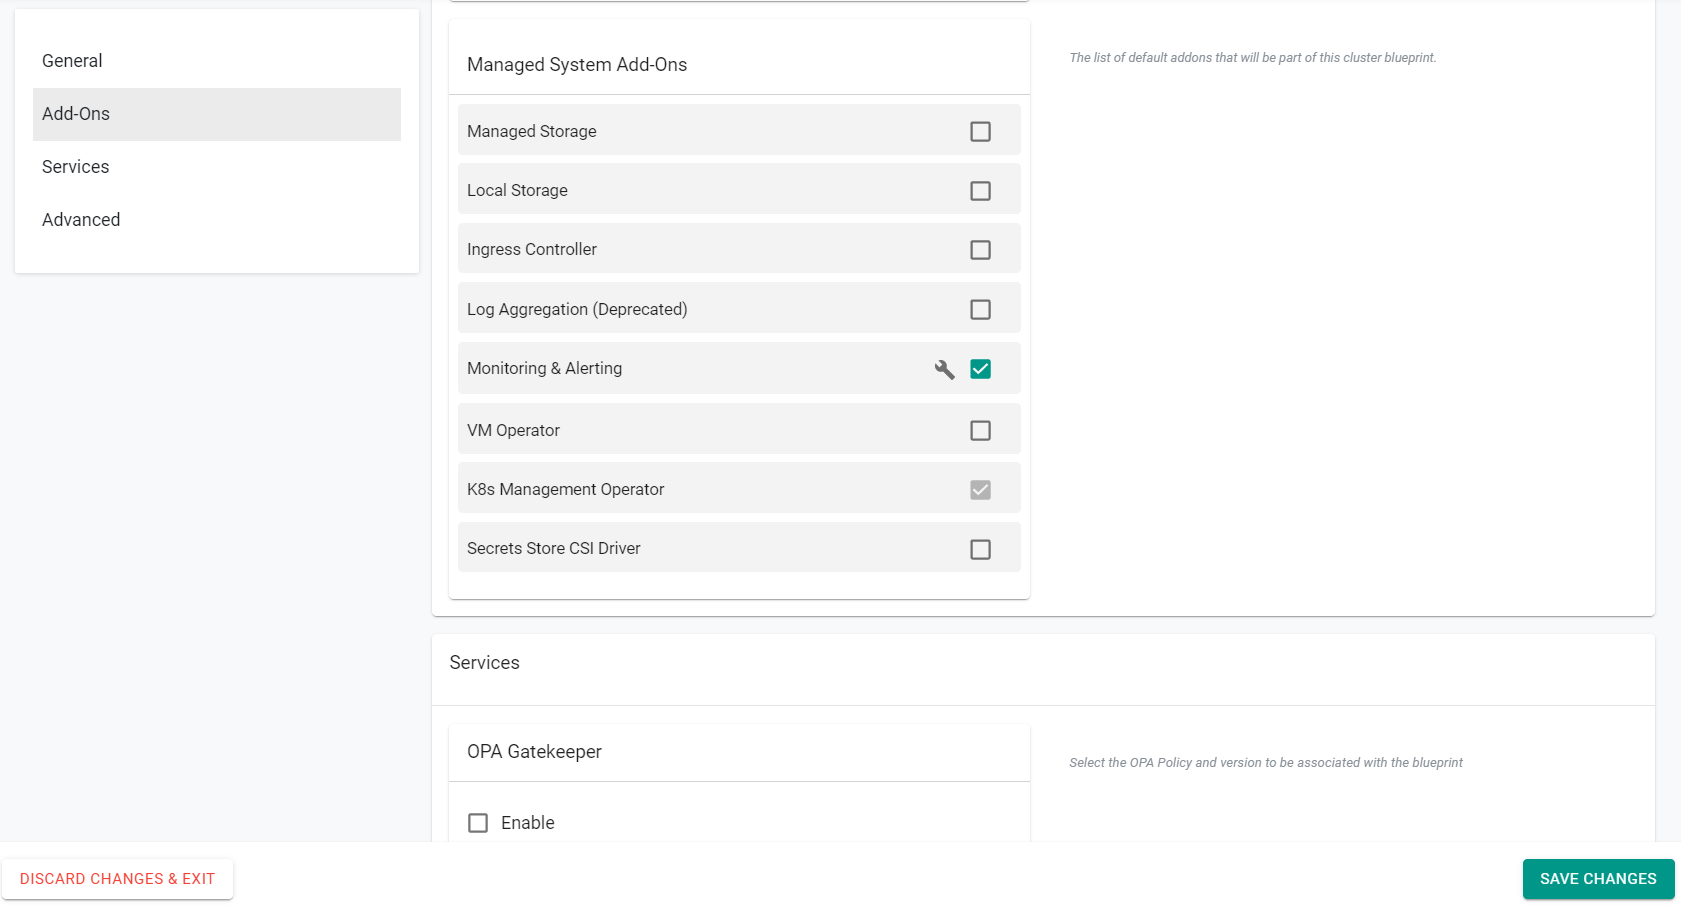
- Select "Monitoring & Alerting" under Managed System Add-Ons
- Click "Save Changes"
Step 2: Apply Blueprint
In this step, we will apply the blueprint to an existing cluster.
- Navigate to the project in your Org where the cluster is located
- Select Infrastructure -> Clusters
- Click the gear icon on the cluster card
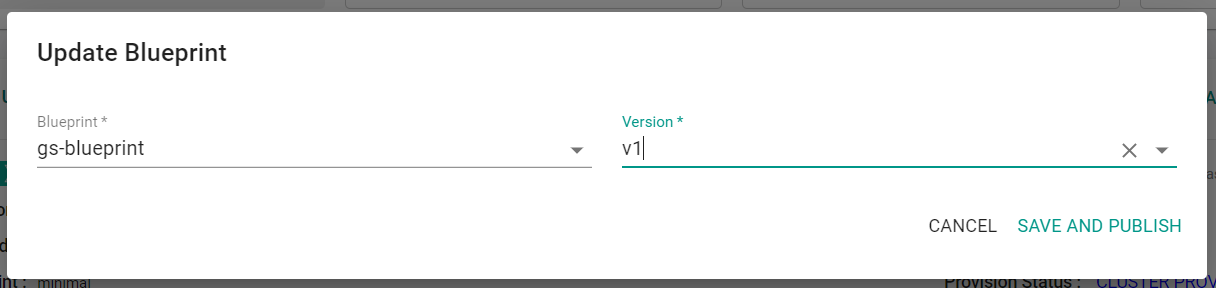
- Select "Update Blueprint"
- Select the previosuly created blueprint
- Select the blueprint version
- Click "Save and Publish"
The blueprint will begin to be applied to the cluster.
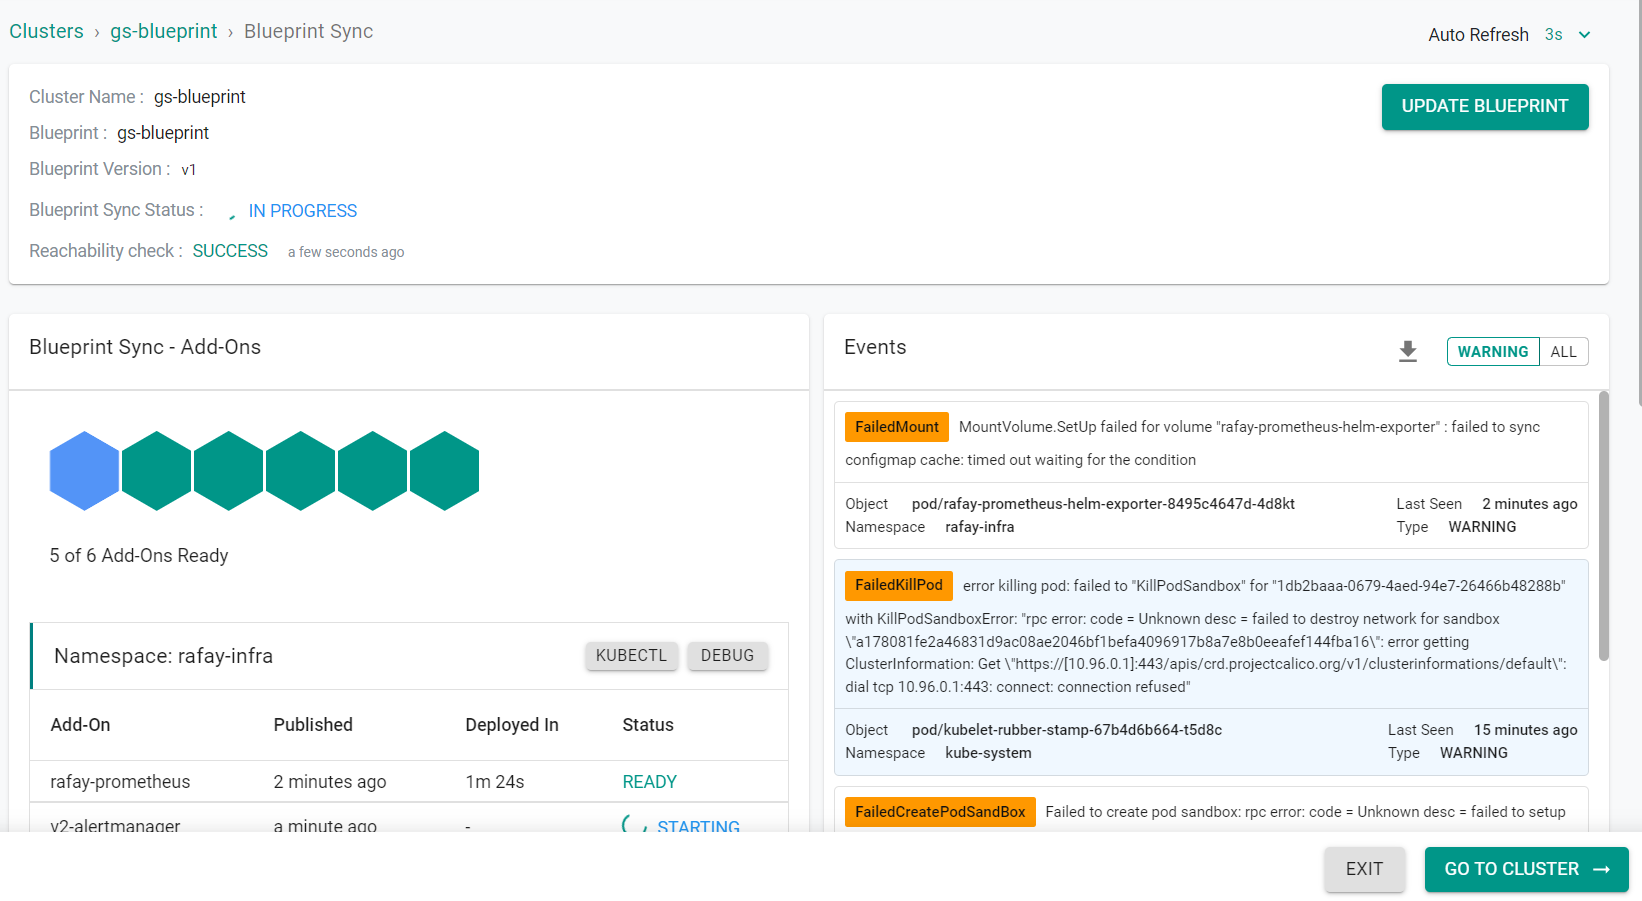
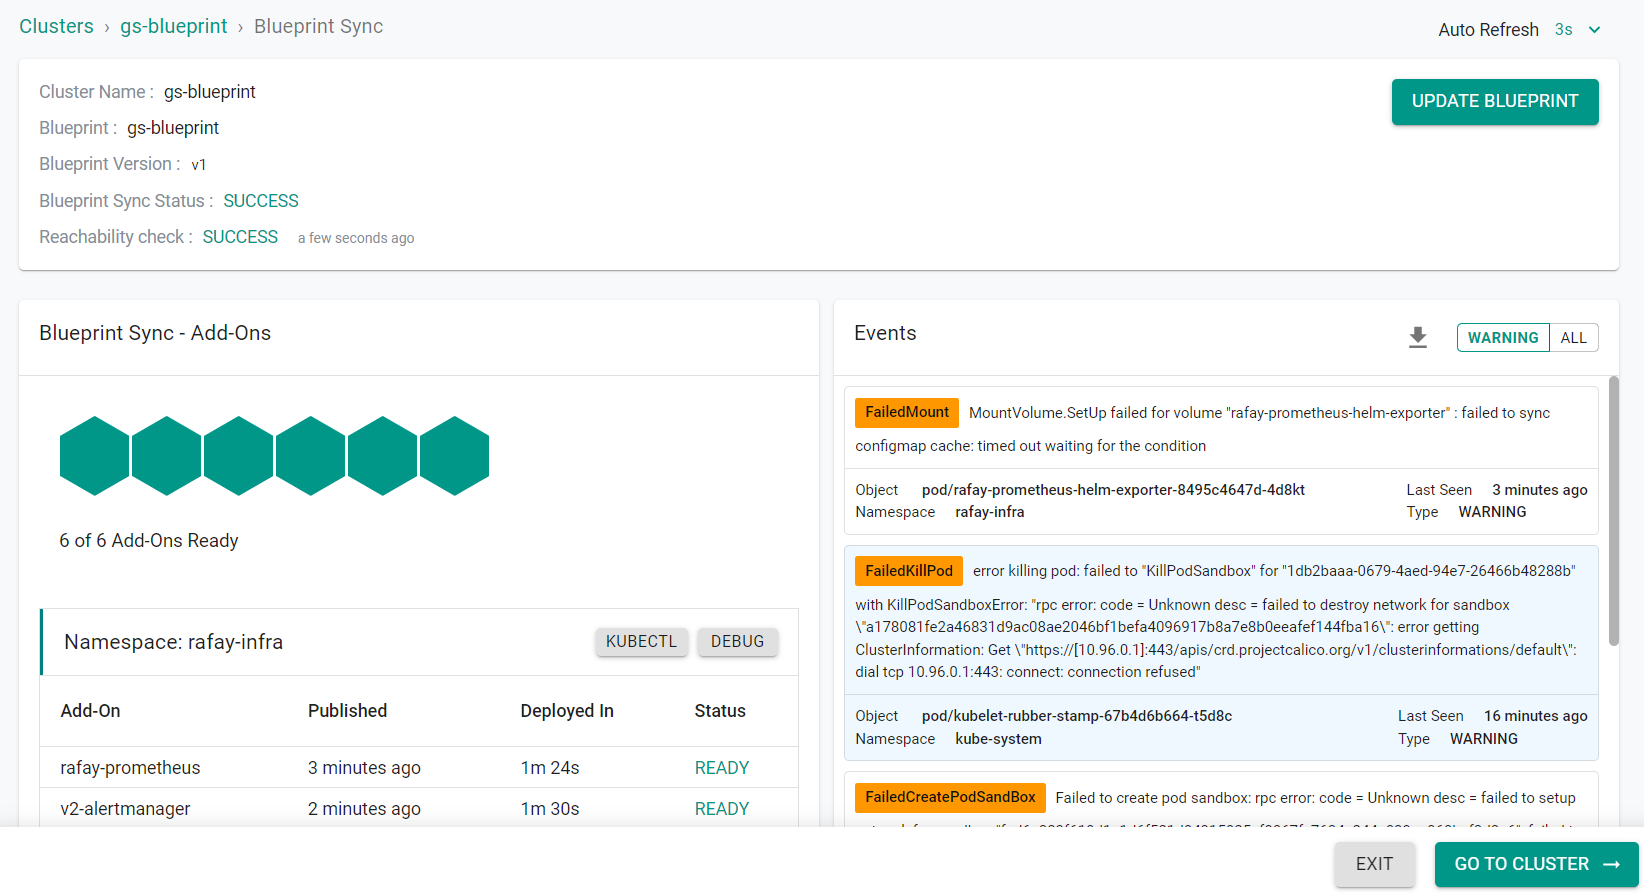
The blueprint is now applied to the cluster.
Step 3: Modify Blueprint Resources
In this step, we will remove the monitoring resources on the cluster that were deployed by the blueprint. Since our blueprint drift detection is set to "Detect & Notify", we will be able to remove the monitoring resources and track these changes in the system audit logs.
- Navigate to the project in your Org where the cluster is located.
- Select Infrastructure -> Clusters
- Click "Kubectl" on the cluster card
- Enter the following command
kubectl get deployments -n rafay-infra

We will now attempt to delete one of these deployments.
- Enter the following command
kubectl delete deployments -n rafay-infra rafay-prometheus-adapter

The deployment has been deleted.

Step 4: View Audit Logs
In this step, we will review the system audit logs to view the drift on the system.
- Click "Home" at the top of the screen
- Select System -> Audit Logs
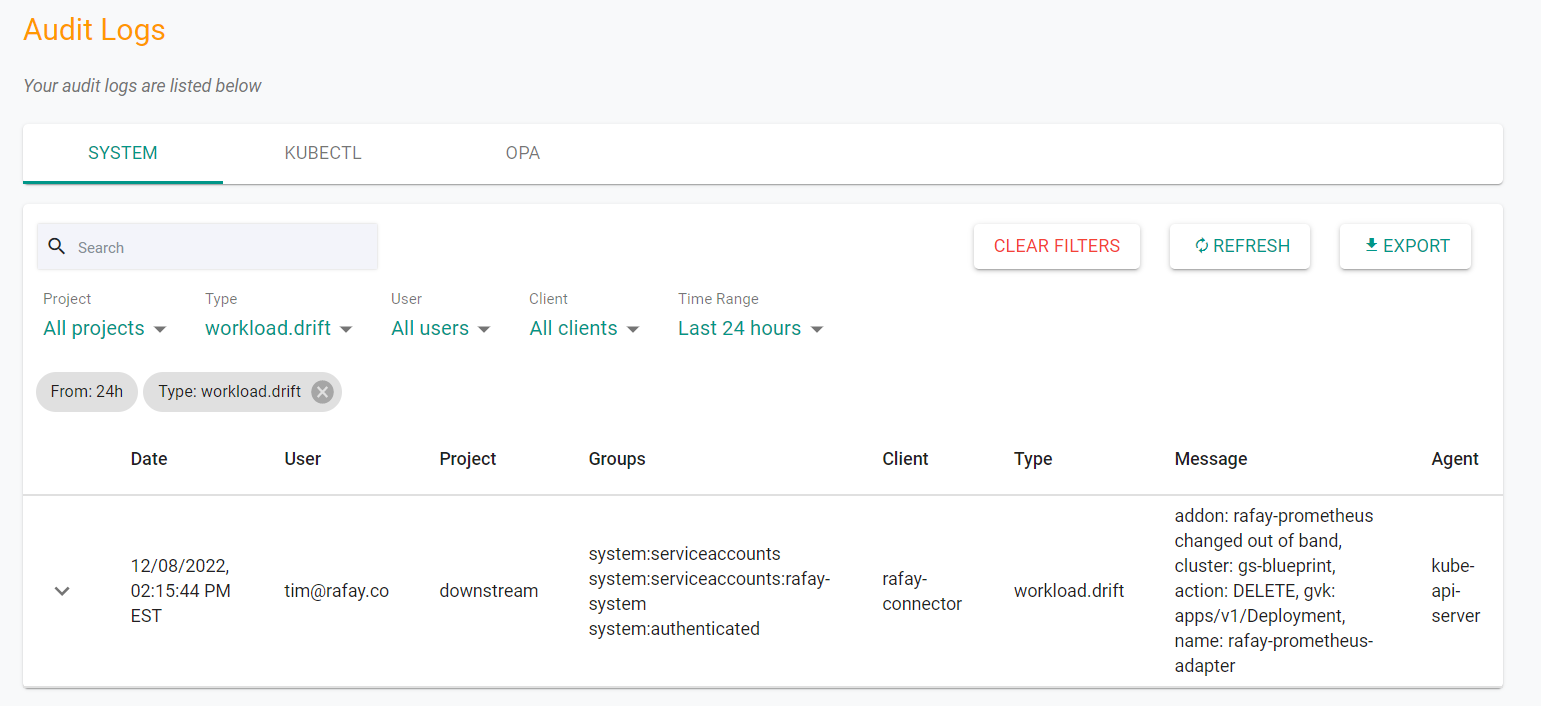
- Select "workload.drift" for the filter type
You will see the delete event that was previously performed.
Recap
Congratulations! At this point, you have successfully setup a cluster blueprint with drift detection to detect and notify out of band blueprint resource changes.