Workflow
Important
The scope for cluster overrides is now project-wide. So, the cluster overrides configured in a project will apply only to clusters within that project and any projects they are shared with.
Step 1: Create Cluster Override
As an Admin in the Web Console,
- Navigate to the Project
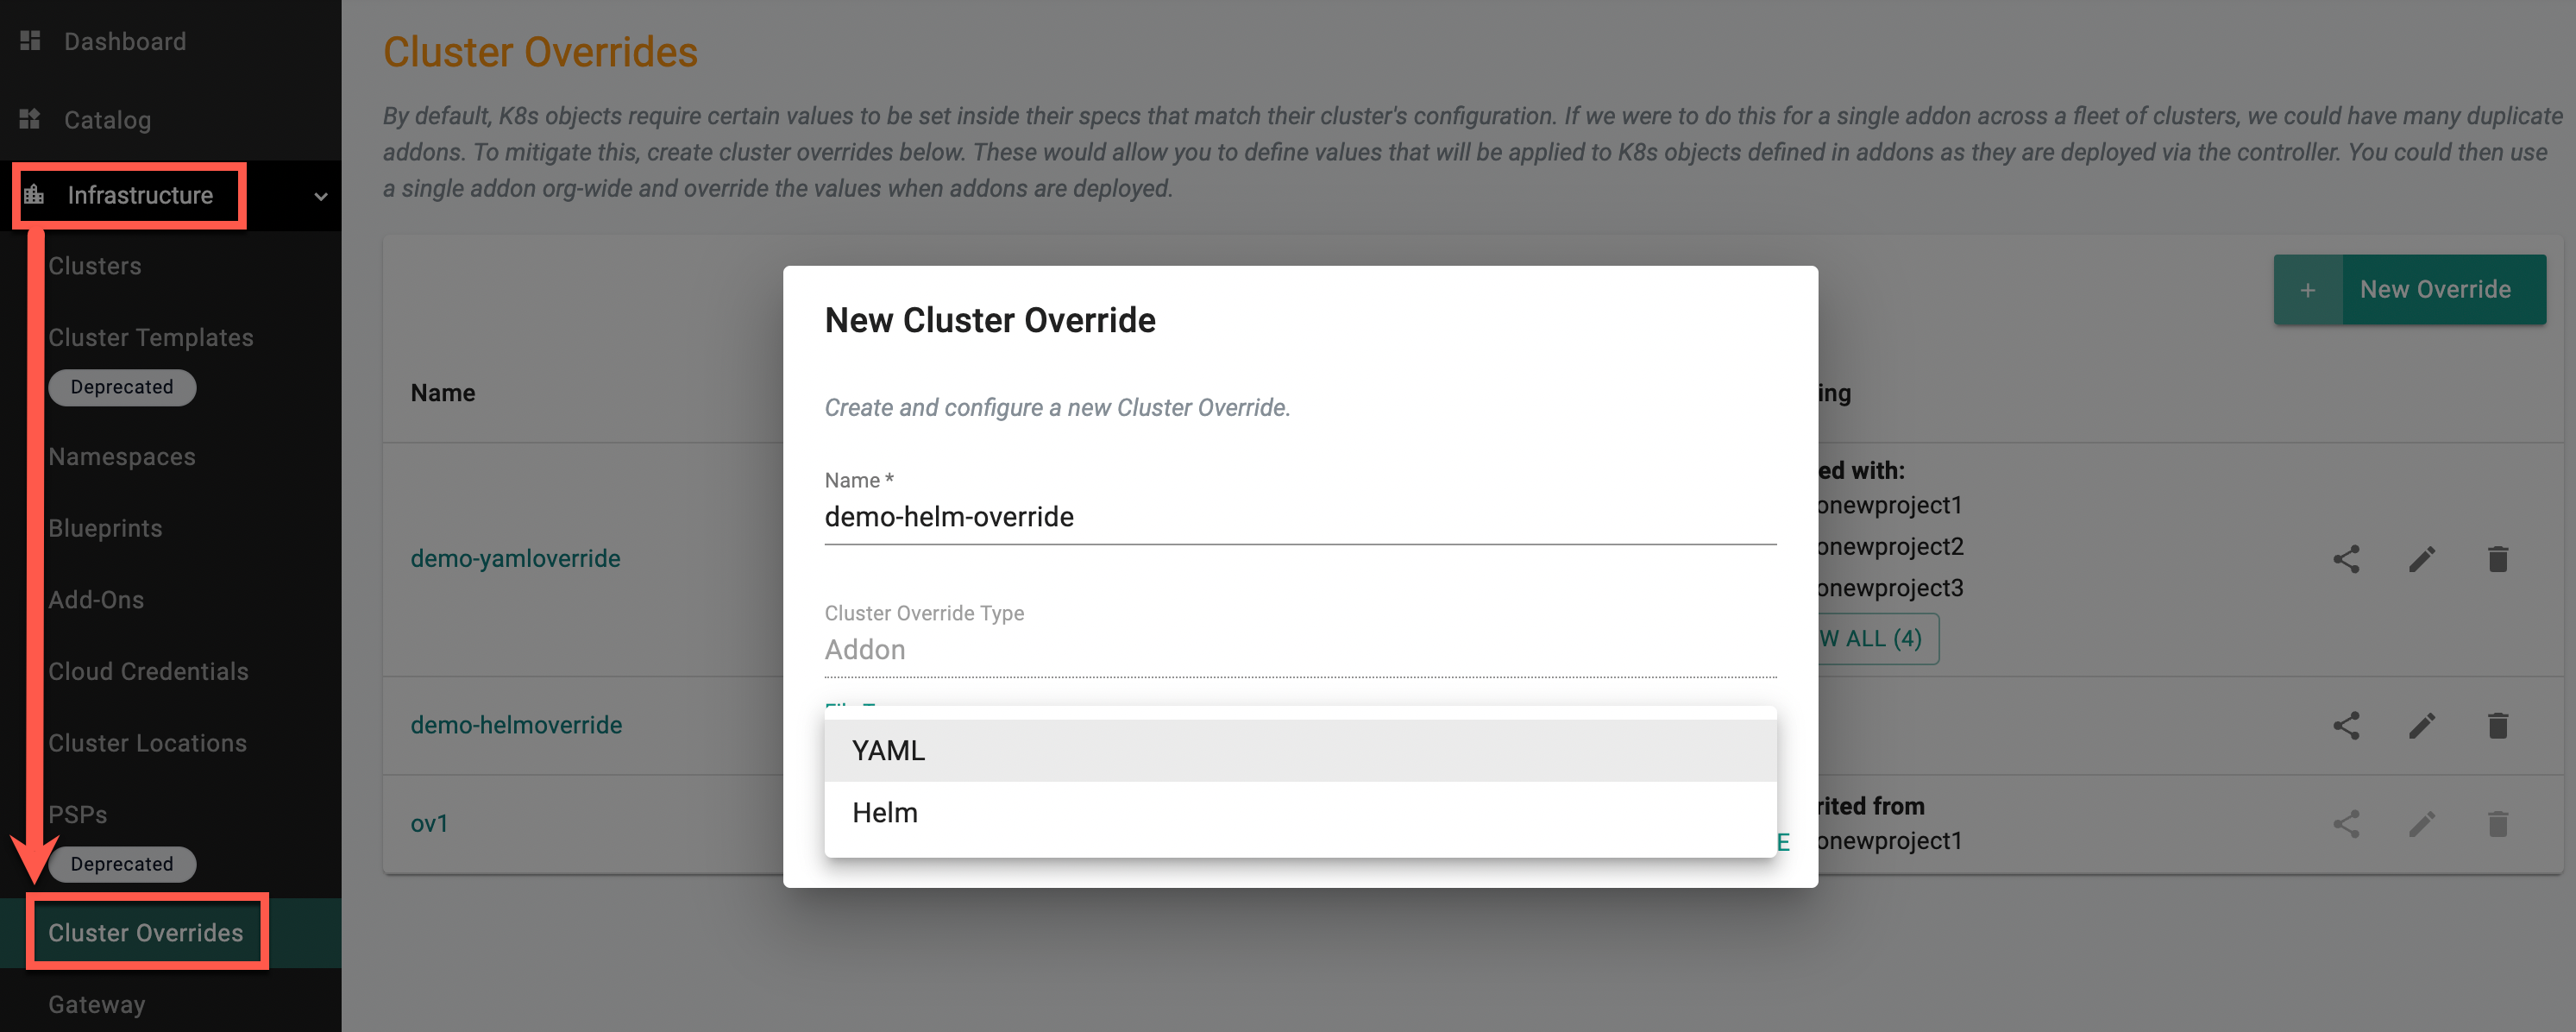
- Click on Cluster Overrides under Infrastructure. Cluster Override page appears
- Click New Override and provide a name. By default, the Cluster Override Type is selected as Addon
- Select the required File Type and click Create
Both Helm and Yaml Types are supported for overrides
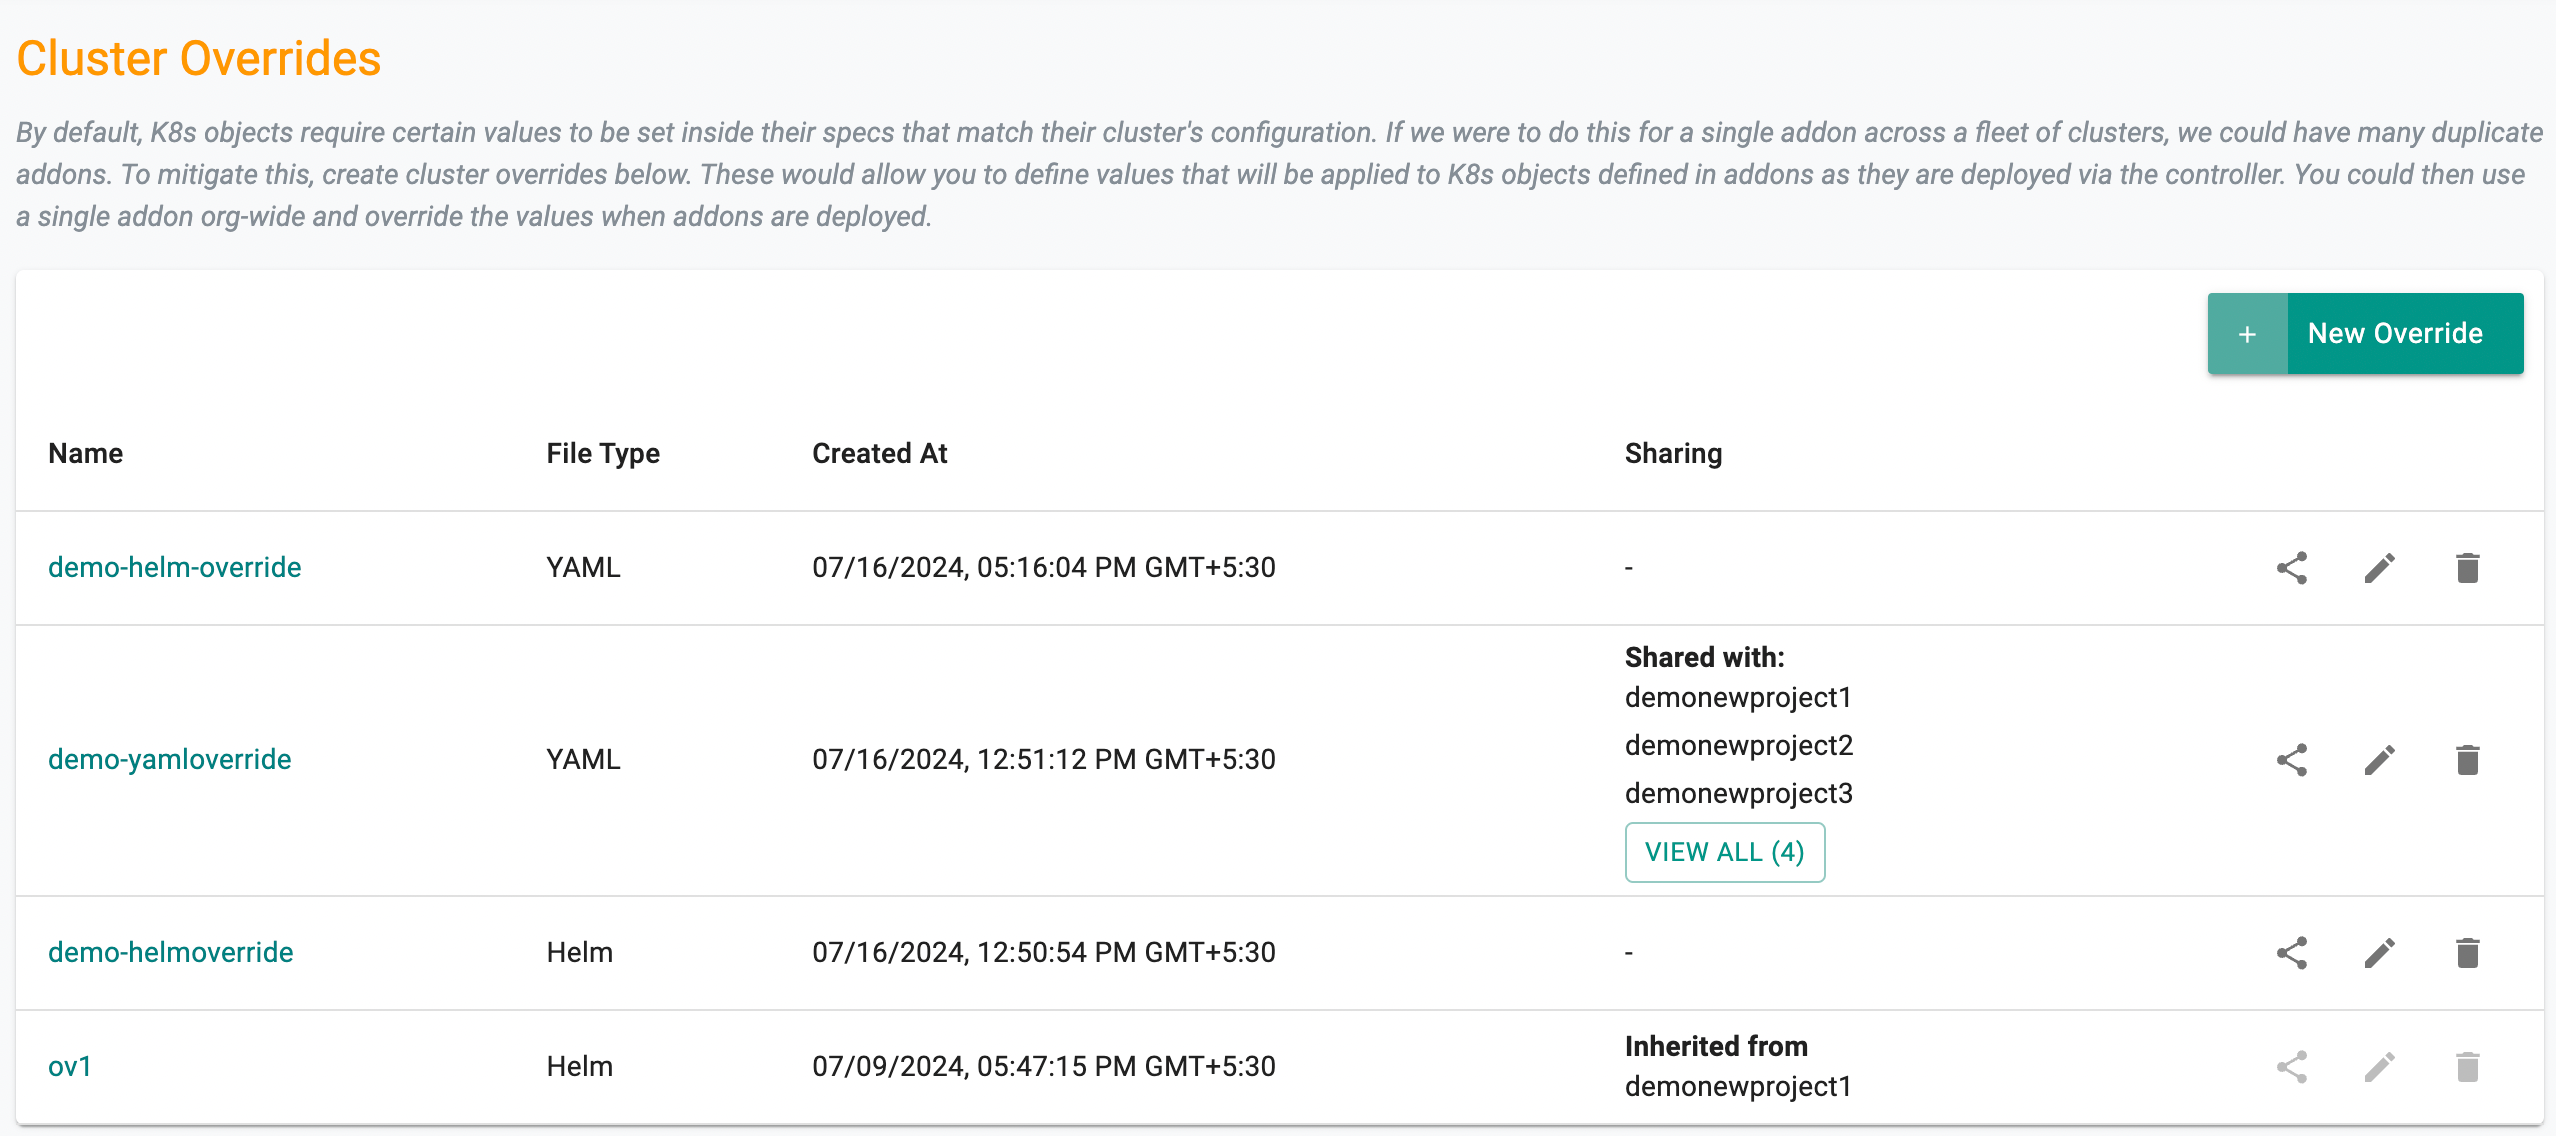
You can view the newly override listed in the Cluster Overrides page as shown in the below example
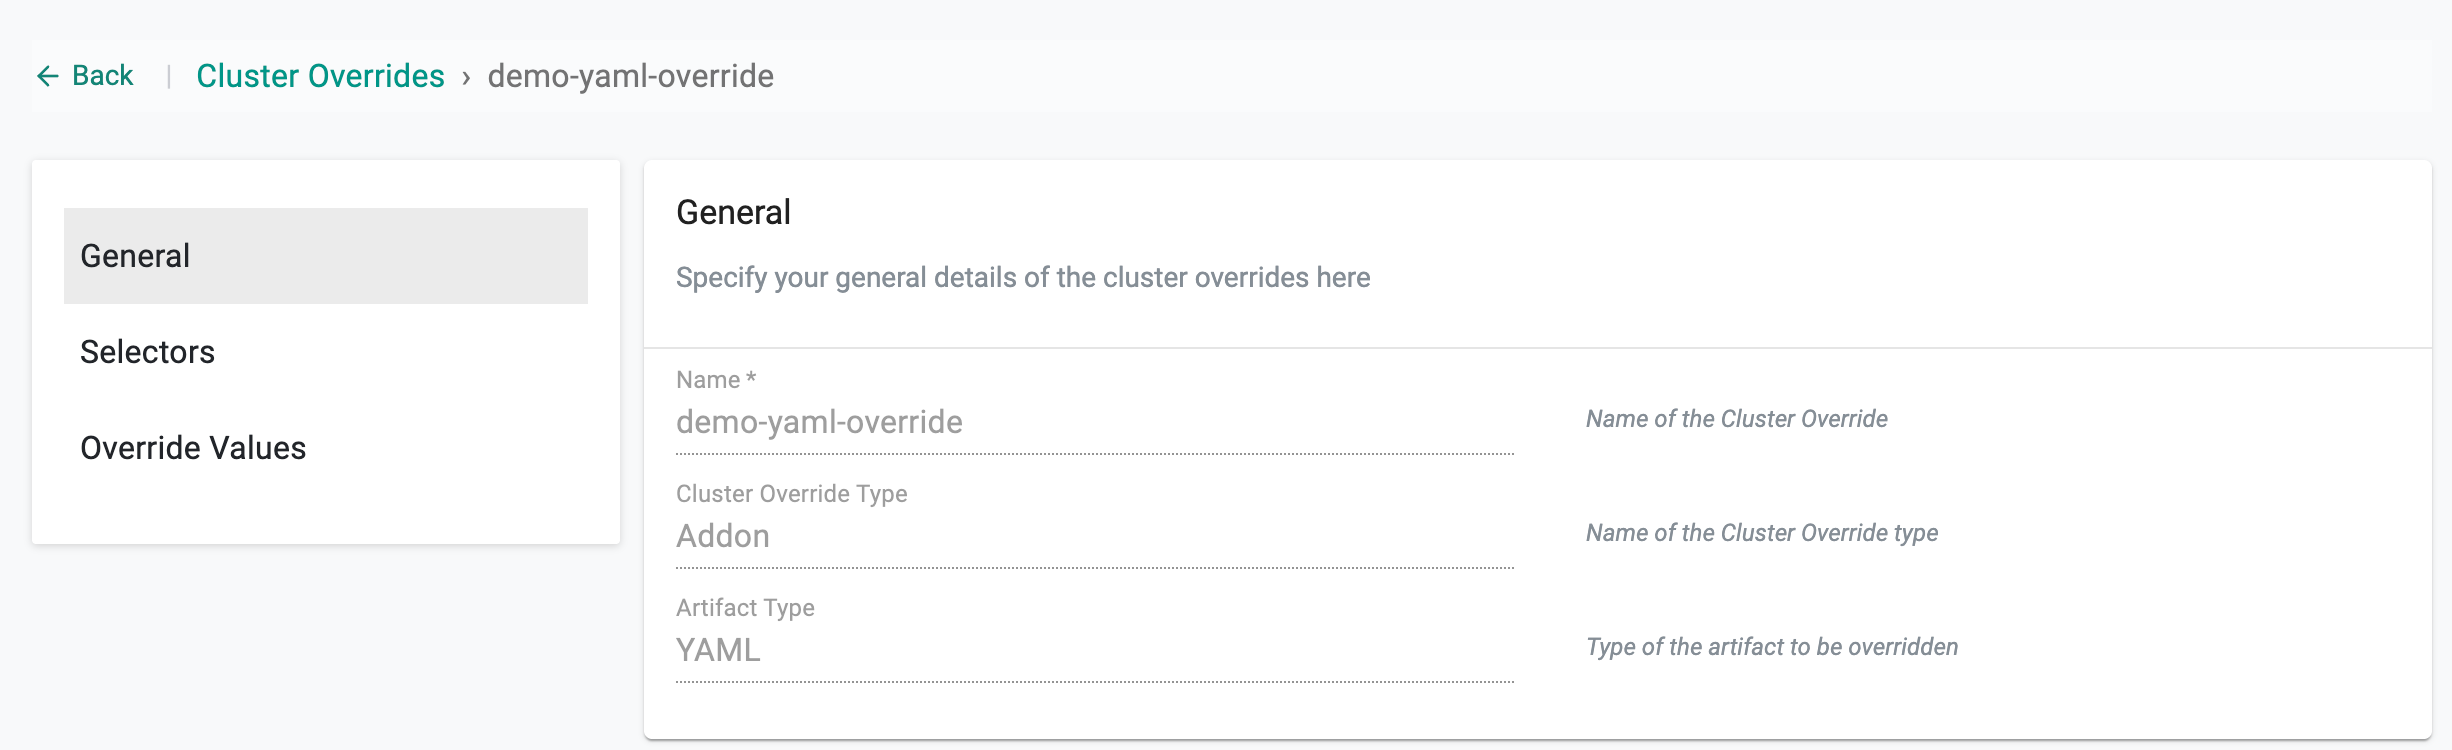
Step 2: Edit the Cluster Override
Click on the newly created Cluster Override or Edit icon to add/edit the required fields
General
Name and Cluster Override Type appears by default and non-editable
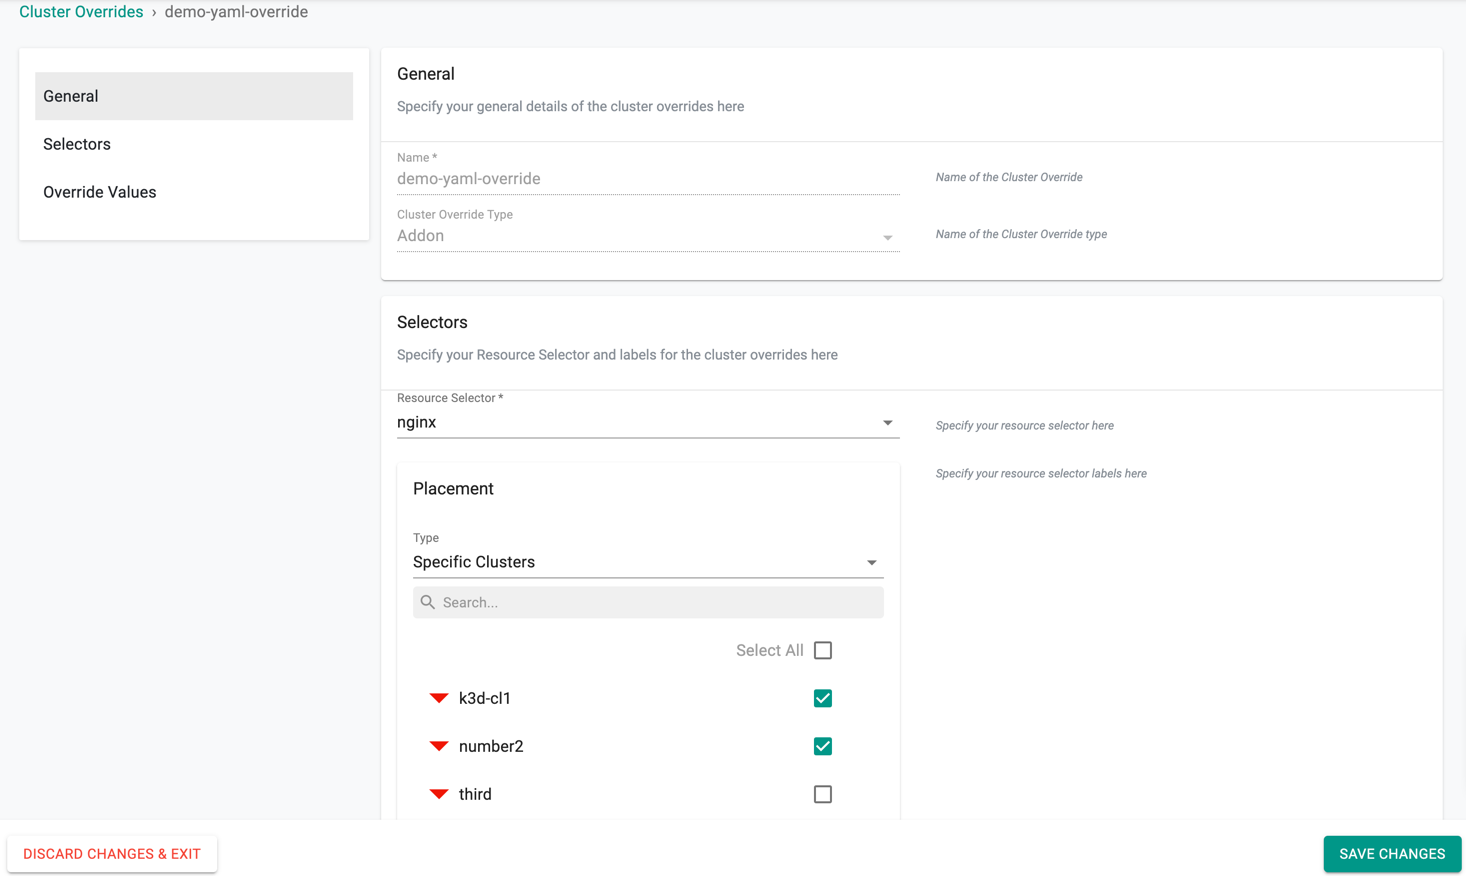
Selectors
- For the Resource Selector, choose the add-on for which the cluster override will be applied.
- You can either Select from List or provide a Custom Input (for example,
rafay.dev/name=test-addon). -
If Select from List is chosen, additional options appear to define how the override applies to add-on versions:
-
All Versions (Default): Applies the override to all available versions of the selected add-on when no version-matching rule is specified. This default behavior ensures backward compatibility for existing overrides.
Example: The add-on has versions
v1,v2,v3, andv4. Since no version regex is configured, the override is applied to all four versions. -
Version Matching (Regex): Applies the override only to add-on versions that match the configured regular expression. This provides fine-grained control over which versions the override applies to without listing versions individually.
Example 1: Regex
^v[1-3]$applies the override to versionsv1,v2, andv3, and excludesv4.Example 2: Regex
v1.*applies the override to versions such asv1,v1.1, andv1-beta, while excluding versions that do not start withv1.
-
- You can either Select from List or provide a Custom Input (for example,

Note:
- When configuring with rctl or Terraform, escape regex metacharacters as required by the configuration syntax.
- Only RE2-compatible regular expressions are supported.
- Under Placement, you can select clusters in two ways:
- Name: Select specific clusters by name.
- Labels: Select clusters based on associated labels.
1. By Cluster Name
- Select Name under "Select Cluster by"
- Use the search box to find and select one or more clusters
- Selected clusters will appear in the Selected Clusters list on the right
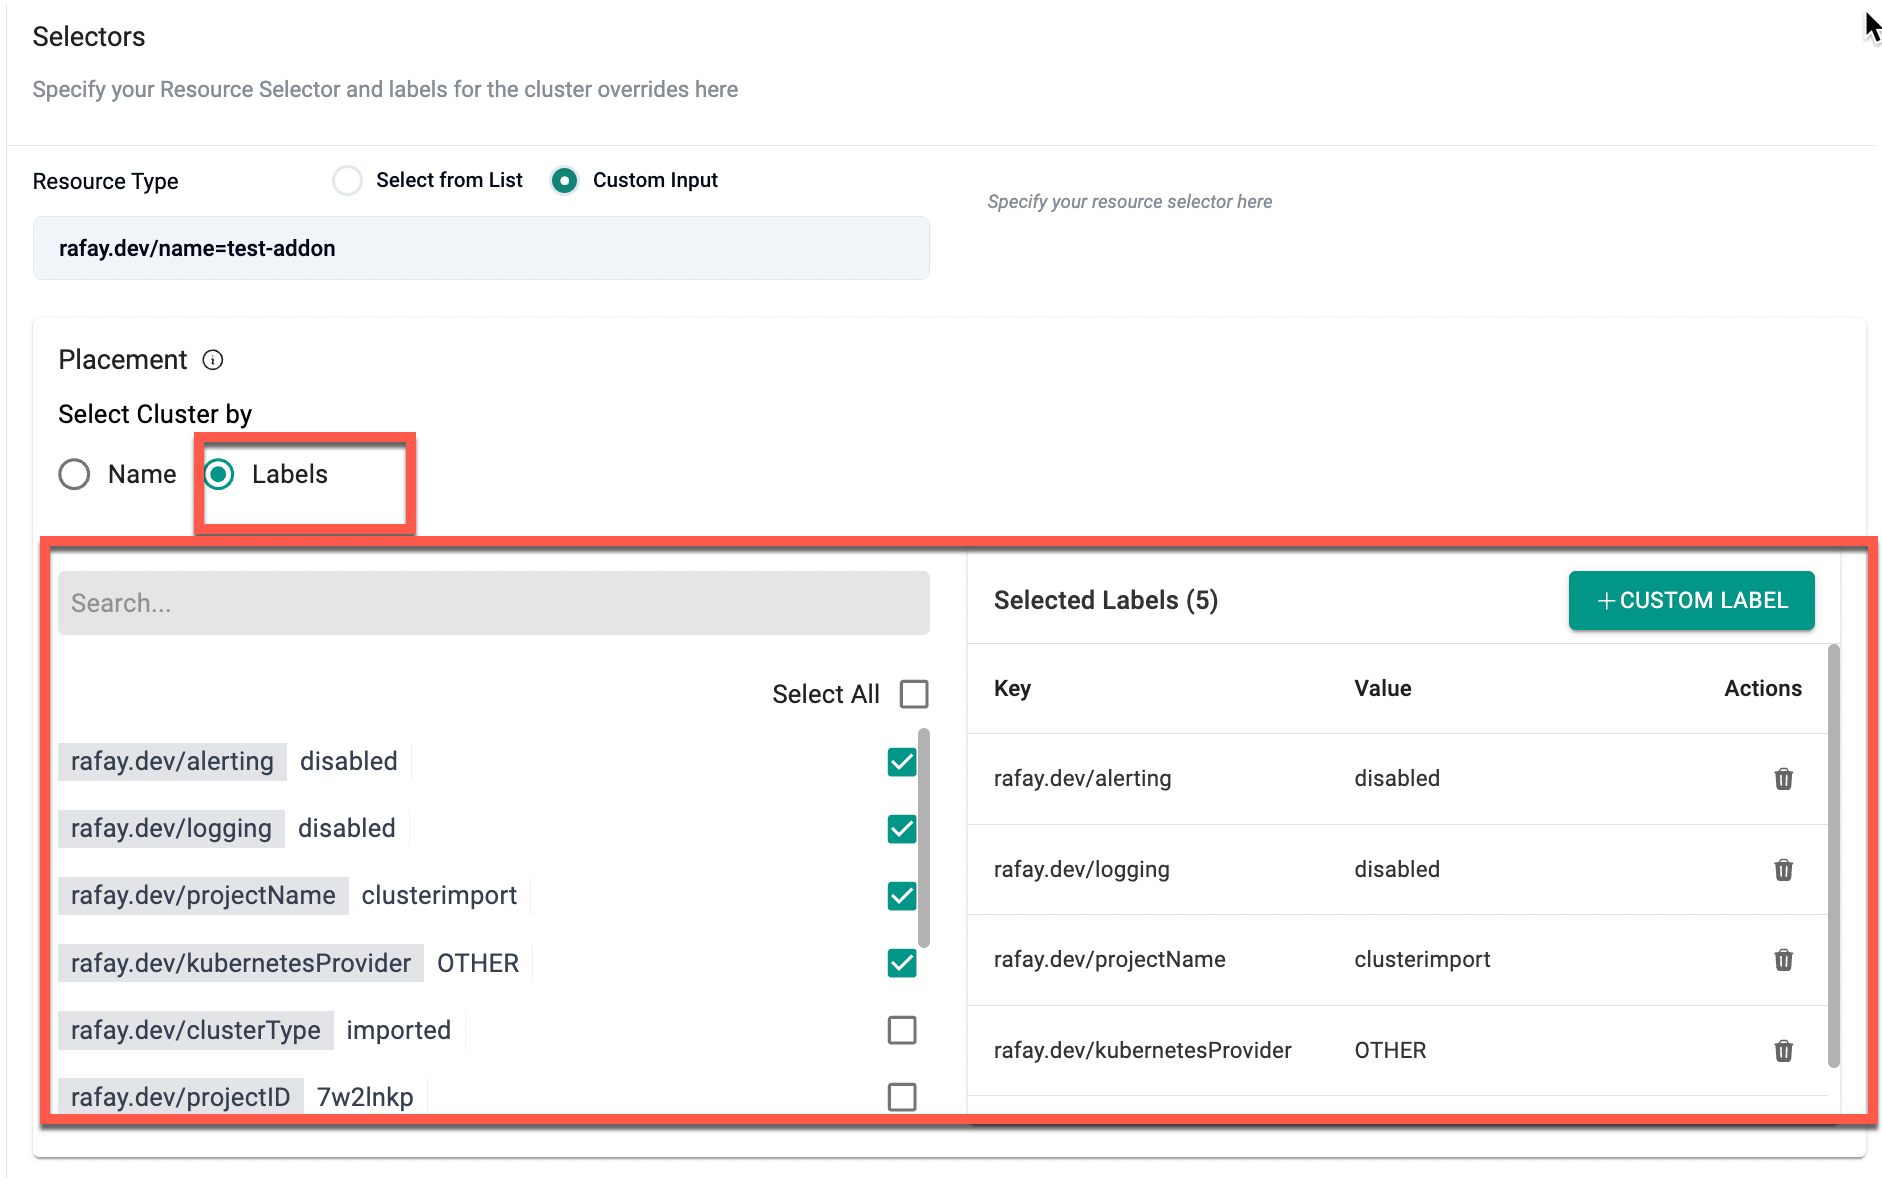
2. By Cluster Labels
- Select Labels under "Select Cluster by"
- Use the search box to filter and select one or more existing labels
- Chosen labels will be displayed under Selected Labels with Key/Value details
- Optionally, click + Custom Label to create a new label
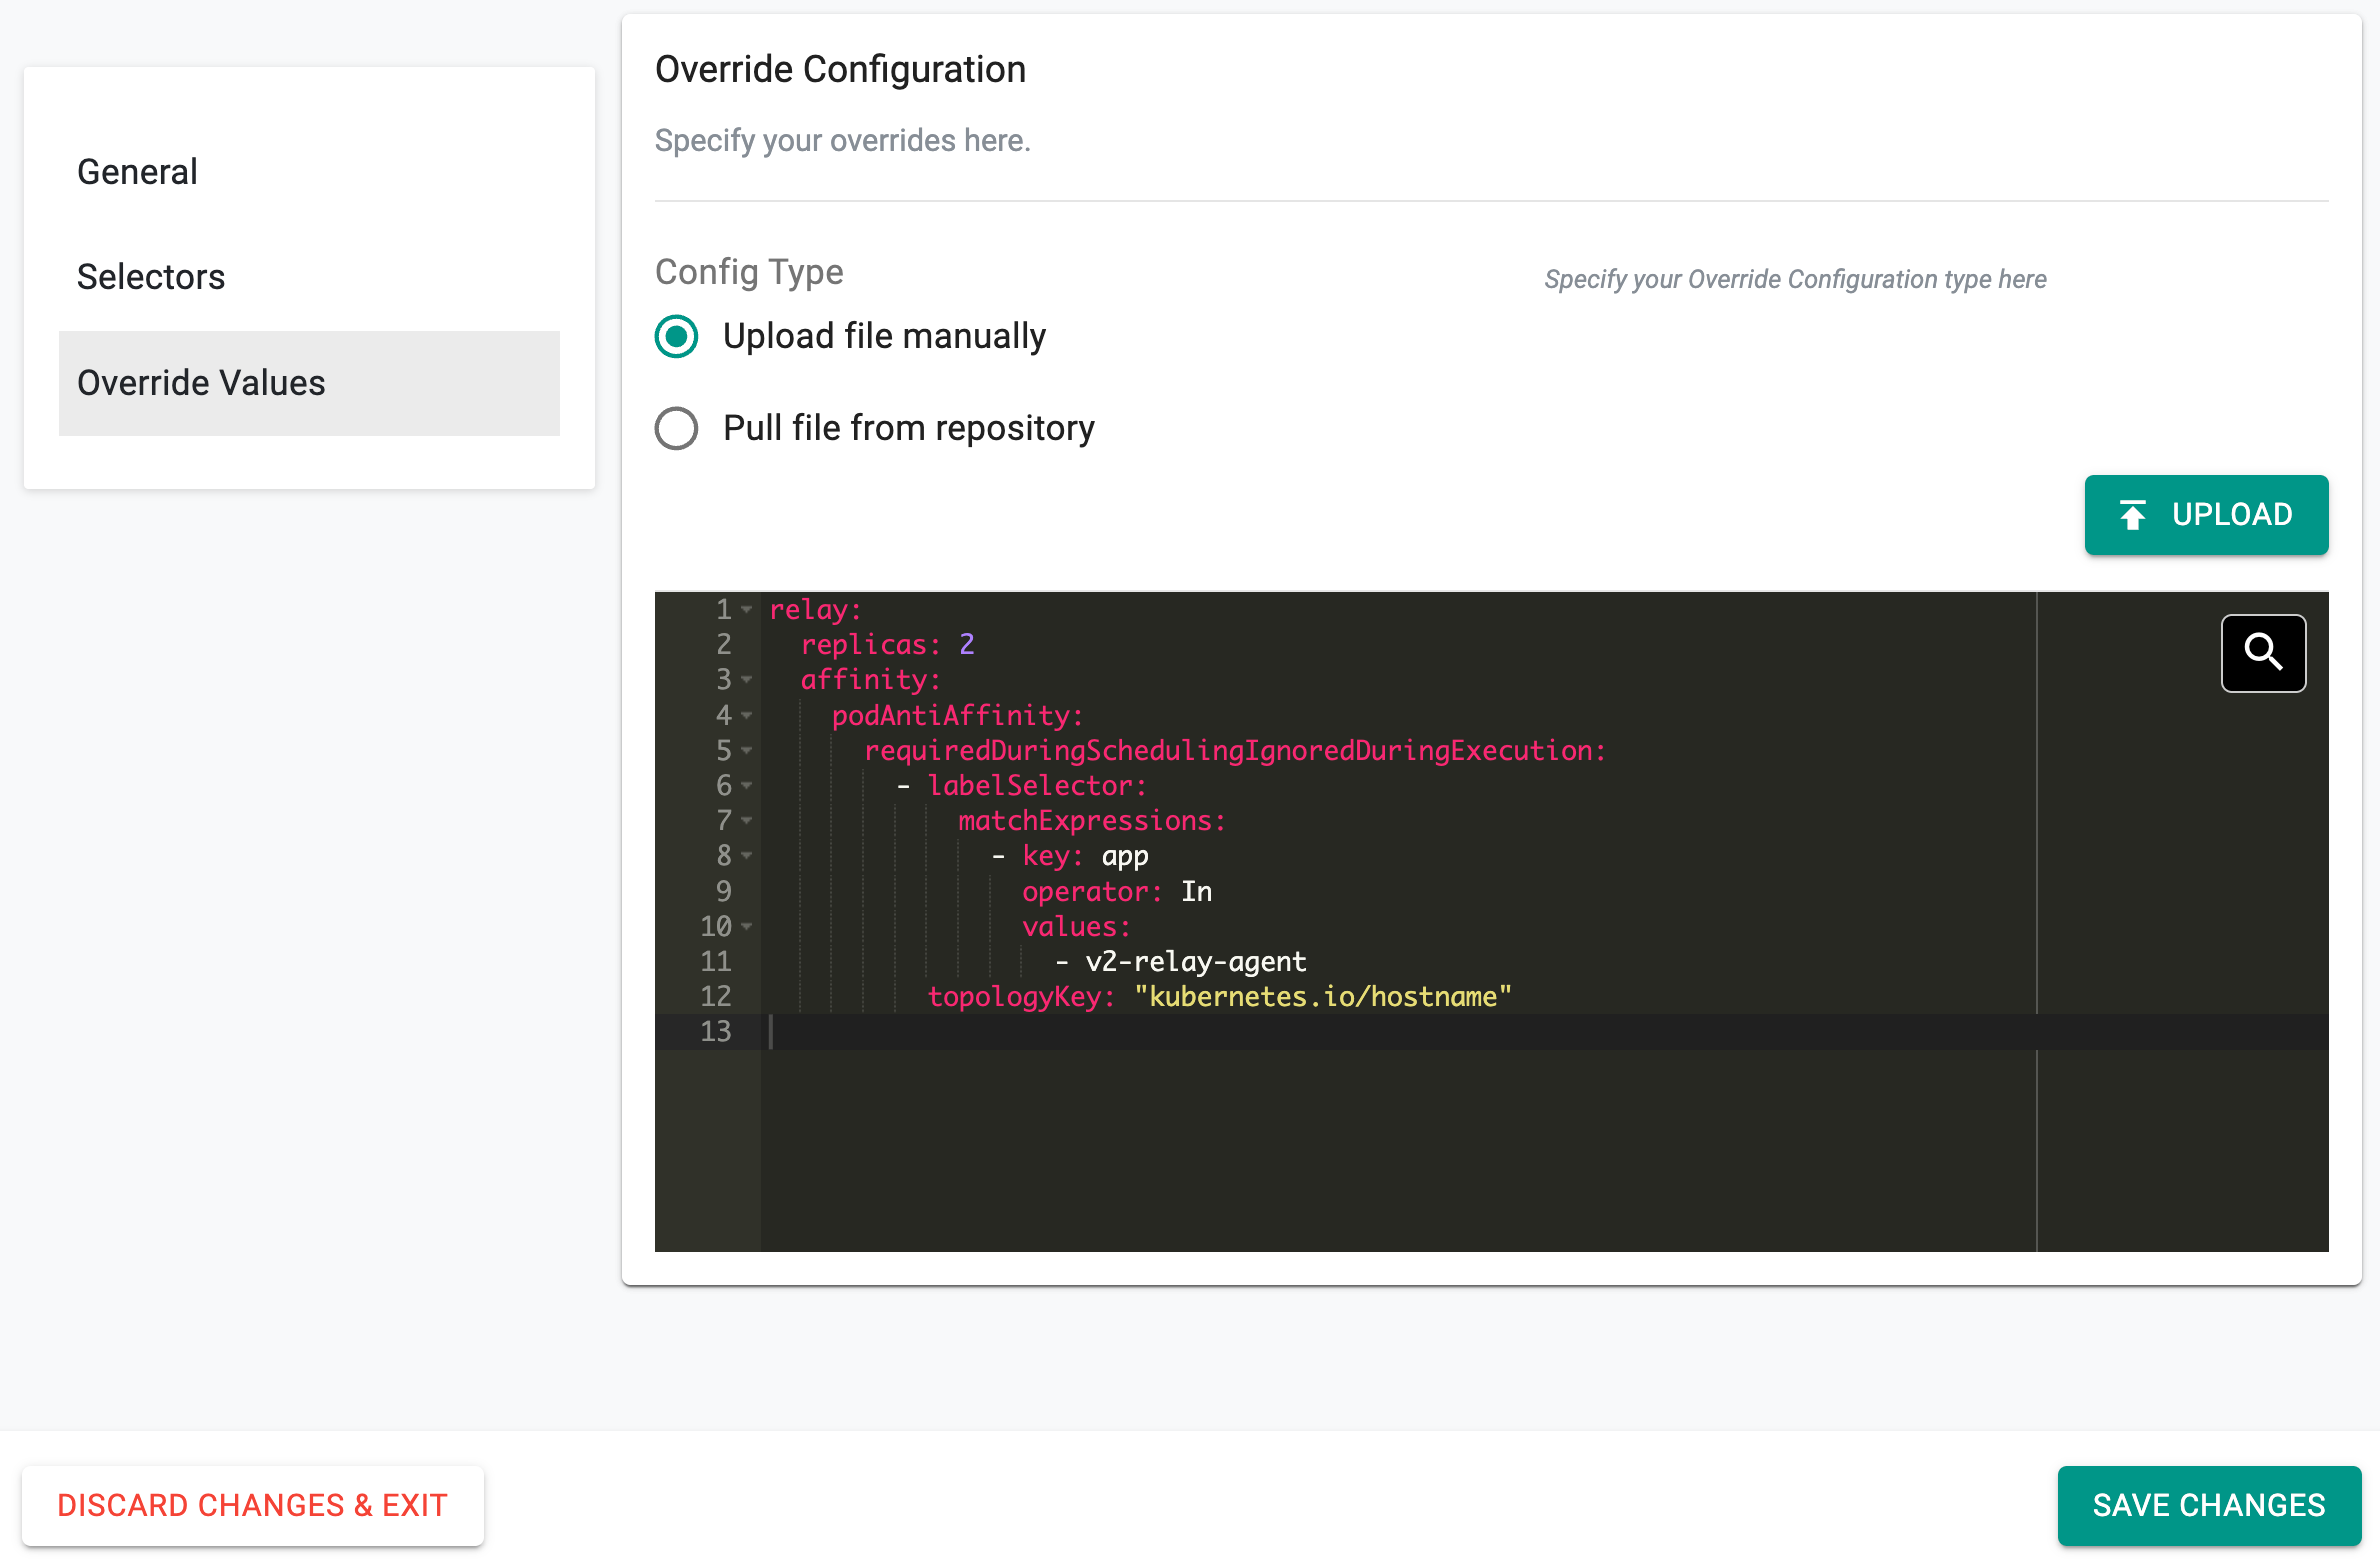
Override Values
Override Configuration allows the users to specify the override values and apply the values to one or more clusters. You can either provide the values manually or pull file from repository. By default, Upload file Manually is selected.
Helm Type Overrides
For the Helm Override Type, add the Override Values directly in the configuration screen as shown in the example to override the replica count.
Along with the general override values, the configuration can include parameters for managing the relay-agent component. This enables clusters to apply specific settings for replicas and podAntiAffinity through the override file. These values are processed during blueprint synchronization and ensure that relay-agent pods follow the defined scheduling rules.
Example – Replicas and Pod Anti-Affinity
relay:
  replicas: 2
  affinity:
    podAntiAffinity:
      requiredDuringSchedulingIgnoredDuringExecution:
        - labelSelector:
            matchExpressions:
              - key: app
                operator: In
                values:
                  - v2-relay-agent
          topologyKey: "kubernetes.io/hostname"
This configuration helps distribute relay-agent pods across nodes, preventing single-node dependency and improving availability.
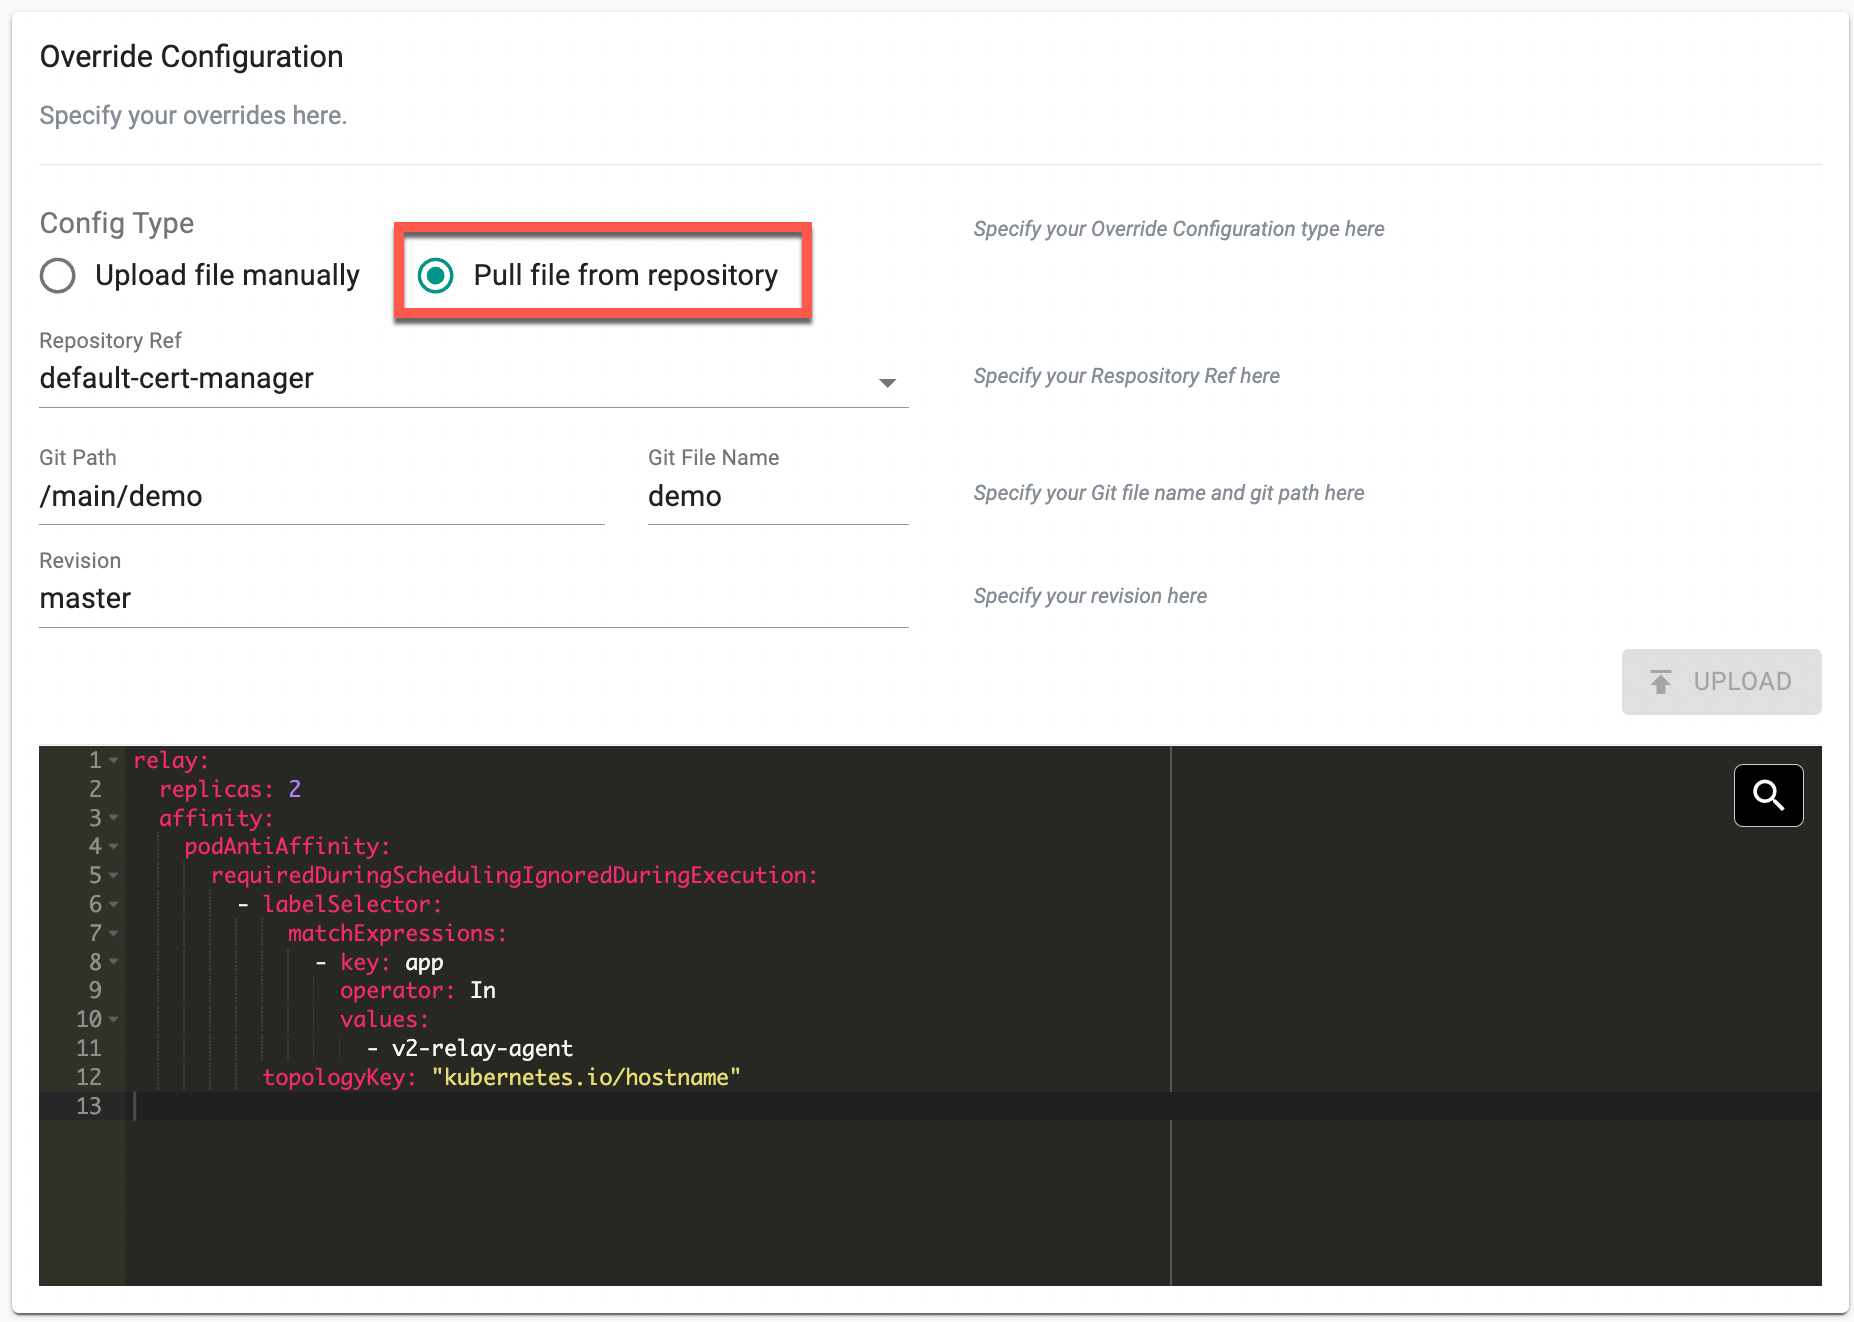
Upload and Repository-Based Overrides
- Upload allows adding an override values file directly from a system.
- Selecting Pull file from repository enables fetching override values from a Git repository using the specified path and file name.
Yaml Type Overrides
For the Yaml Override Type, user must follow the below yaml format to define the override value.
kind: Deployment
metadata:
  name: <app-name>
patch:
- op:<operation : replace | add | remove >
  path: <atomic path>
  key: <object values>
An illustrative example of the yaml config is shown below
apiVersion: apps/v1
kind: Deployment
metadata:
  name: nginx
patch:
- op: replace
  path: /spec/replicas
  value: 5
Example of Updating Replicas and Pod Anti-Affinity
Replica count and pod anti-affinity rules can also be updated using the same patch structure.
apiVersion: apps/v1
kind: Deployment
metadata:
  name: v2-relay-agent
patch:
- op: replace
  path: /spec/replicas
  value: 2

- op: add
  path: /spec/template/spec/affinity/podAntiAffinity
  value:
    requiredDuringSchedulingIgnoredDuringExecution:
      - labelSelector:
          matchExpressions:
            - key: app
              operator: In
              values:
                - v2-relay-agent
        topologyKey: "kubernetes.io/hostname"

Similar to Helm overrides, Upload allows the users to upload an override value(s) file from their system. Also, users can select the Pull file from repository and provide the Git repo details to pull the required override values from the specified Git path
- Click Save Changes
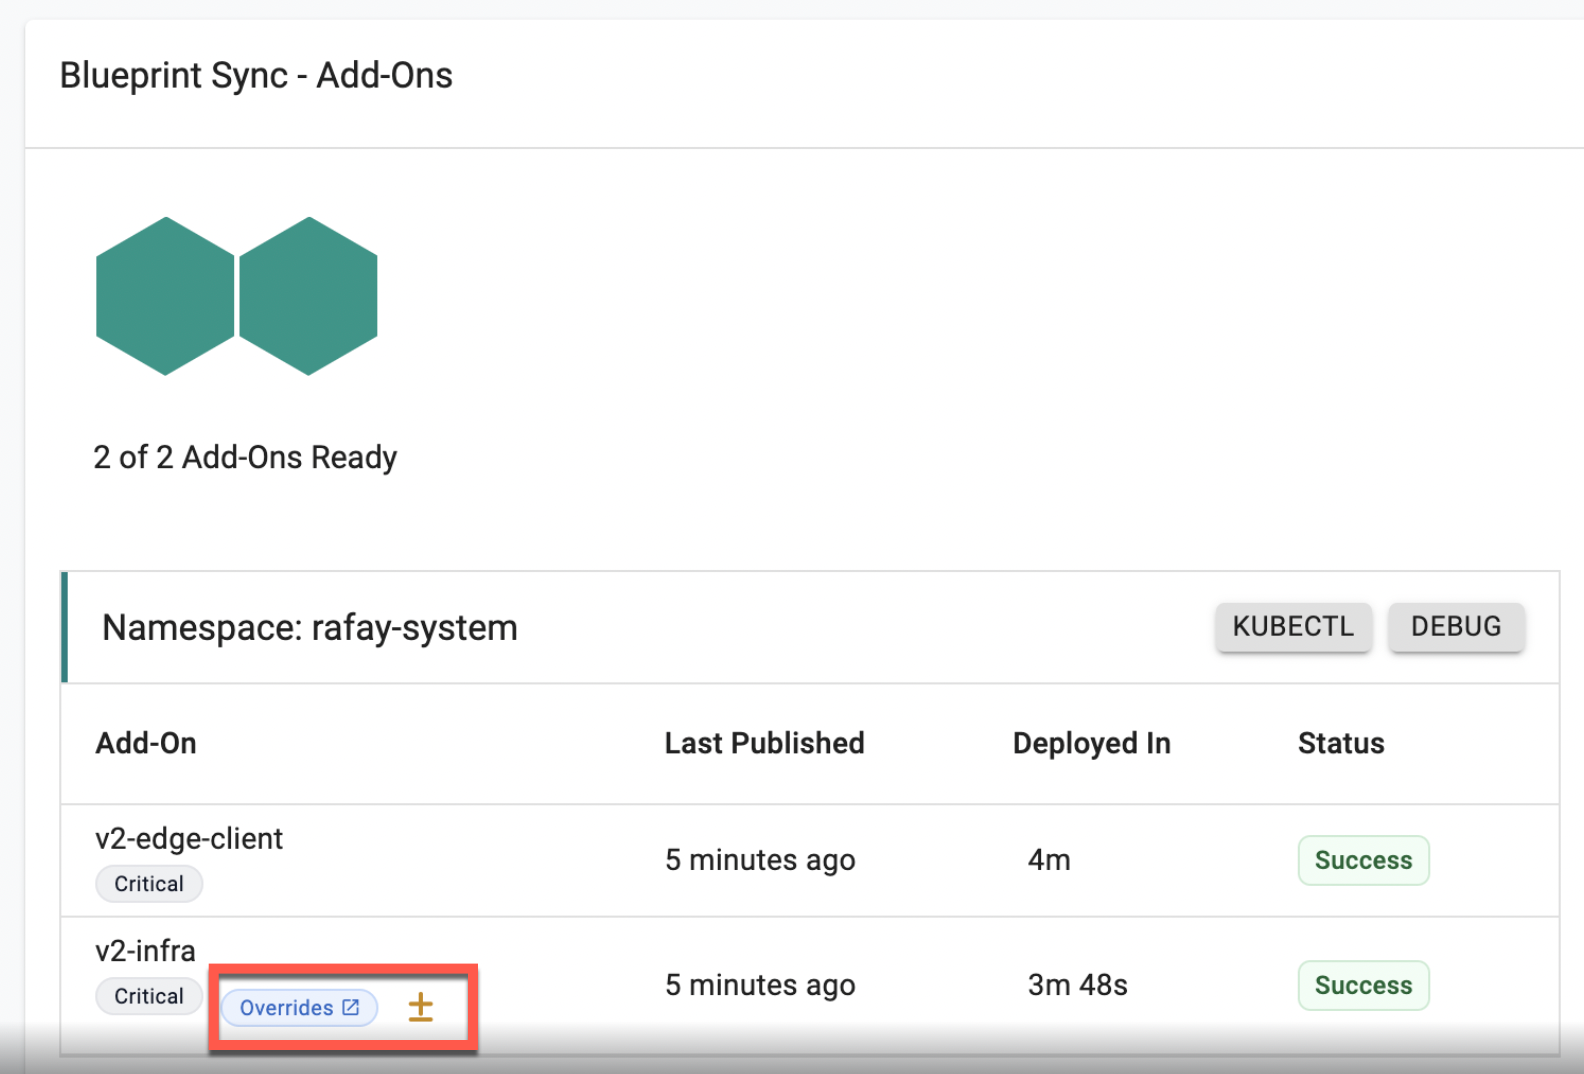
Step 3: Deploy the Add-on
During the blueprint sync, the system evaluates the override configuration and applies the updated values defined in the override file. The Add-Ons view displays an Overrides indicator for components where override values are applied. This confirms that the override configuration has been processed during the sync.
Example:
In the example shown below, the v2-infra add-on includes override updates, indicated by the Overrides badge. Once the blueprint sync completes, the component reflects the applied override values and transitions to a successful state.
Step 4: Verify that the cluster override has been applied to the deployment
kubectl get deployments
NAME         READY   UP-TO-DATE   AVAILABLE   AGE
deathstar    1/1     1            1           108d
nginx-yaml   5/5     5            5           4m13s
Important
- Users can share the Cluster Add-on Overrides to one or more projects. For more information, refer to Share Override
- If multiple add-on overrides match the resource in a cluster, the overrides are applied in the order they were created, with the latest override taking priority. This applies to overrides shared across projects
Configurable Addon Retry Limit
Users who find that multiple retries for an addon can significantly delay blueprint synchronization, especially due to dependencies, can now configure the number of readiness check retries for addons. This enhancement enables users to define the retry limit, ensuring faster failure detection when addons do not become ready within a specified time. By adjusting the retry count, users can streamline blueprint synchronization, improve deployment efficiency, and gain greater control over addon readiness.
To set the retry limit,
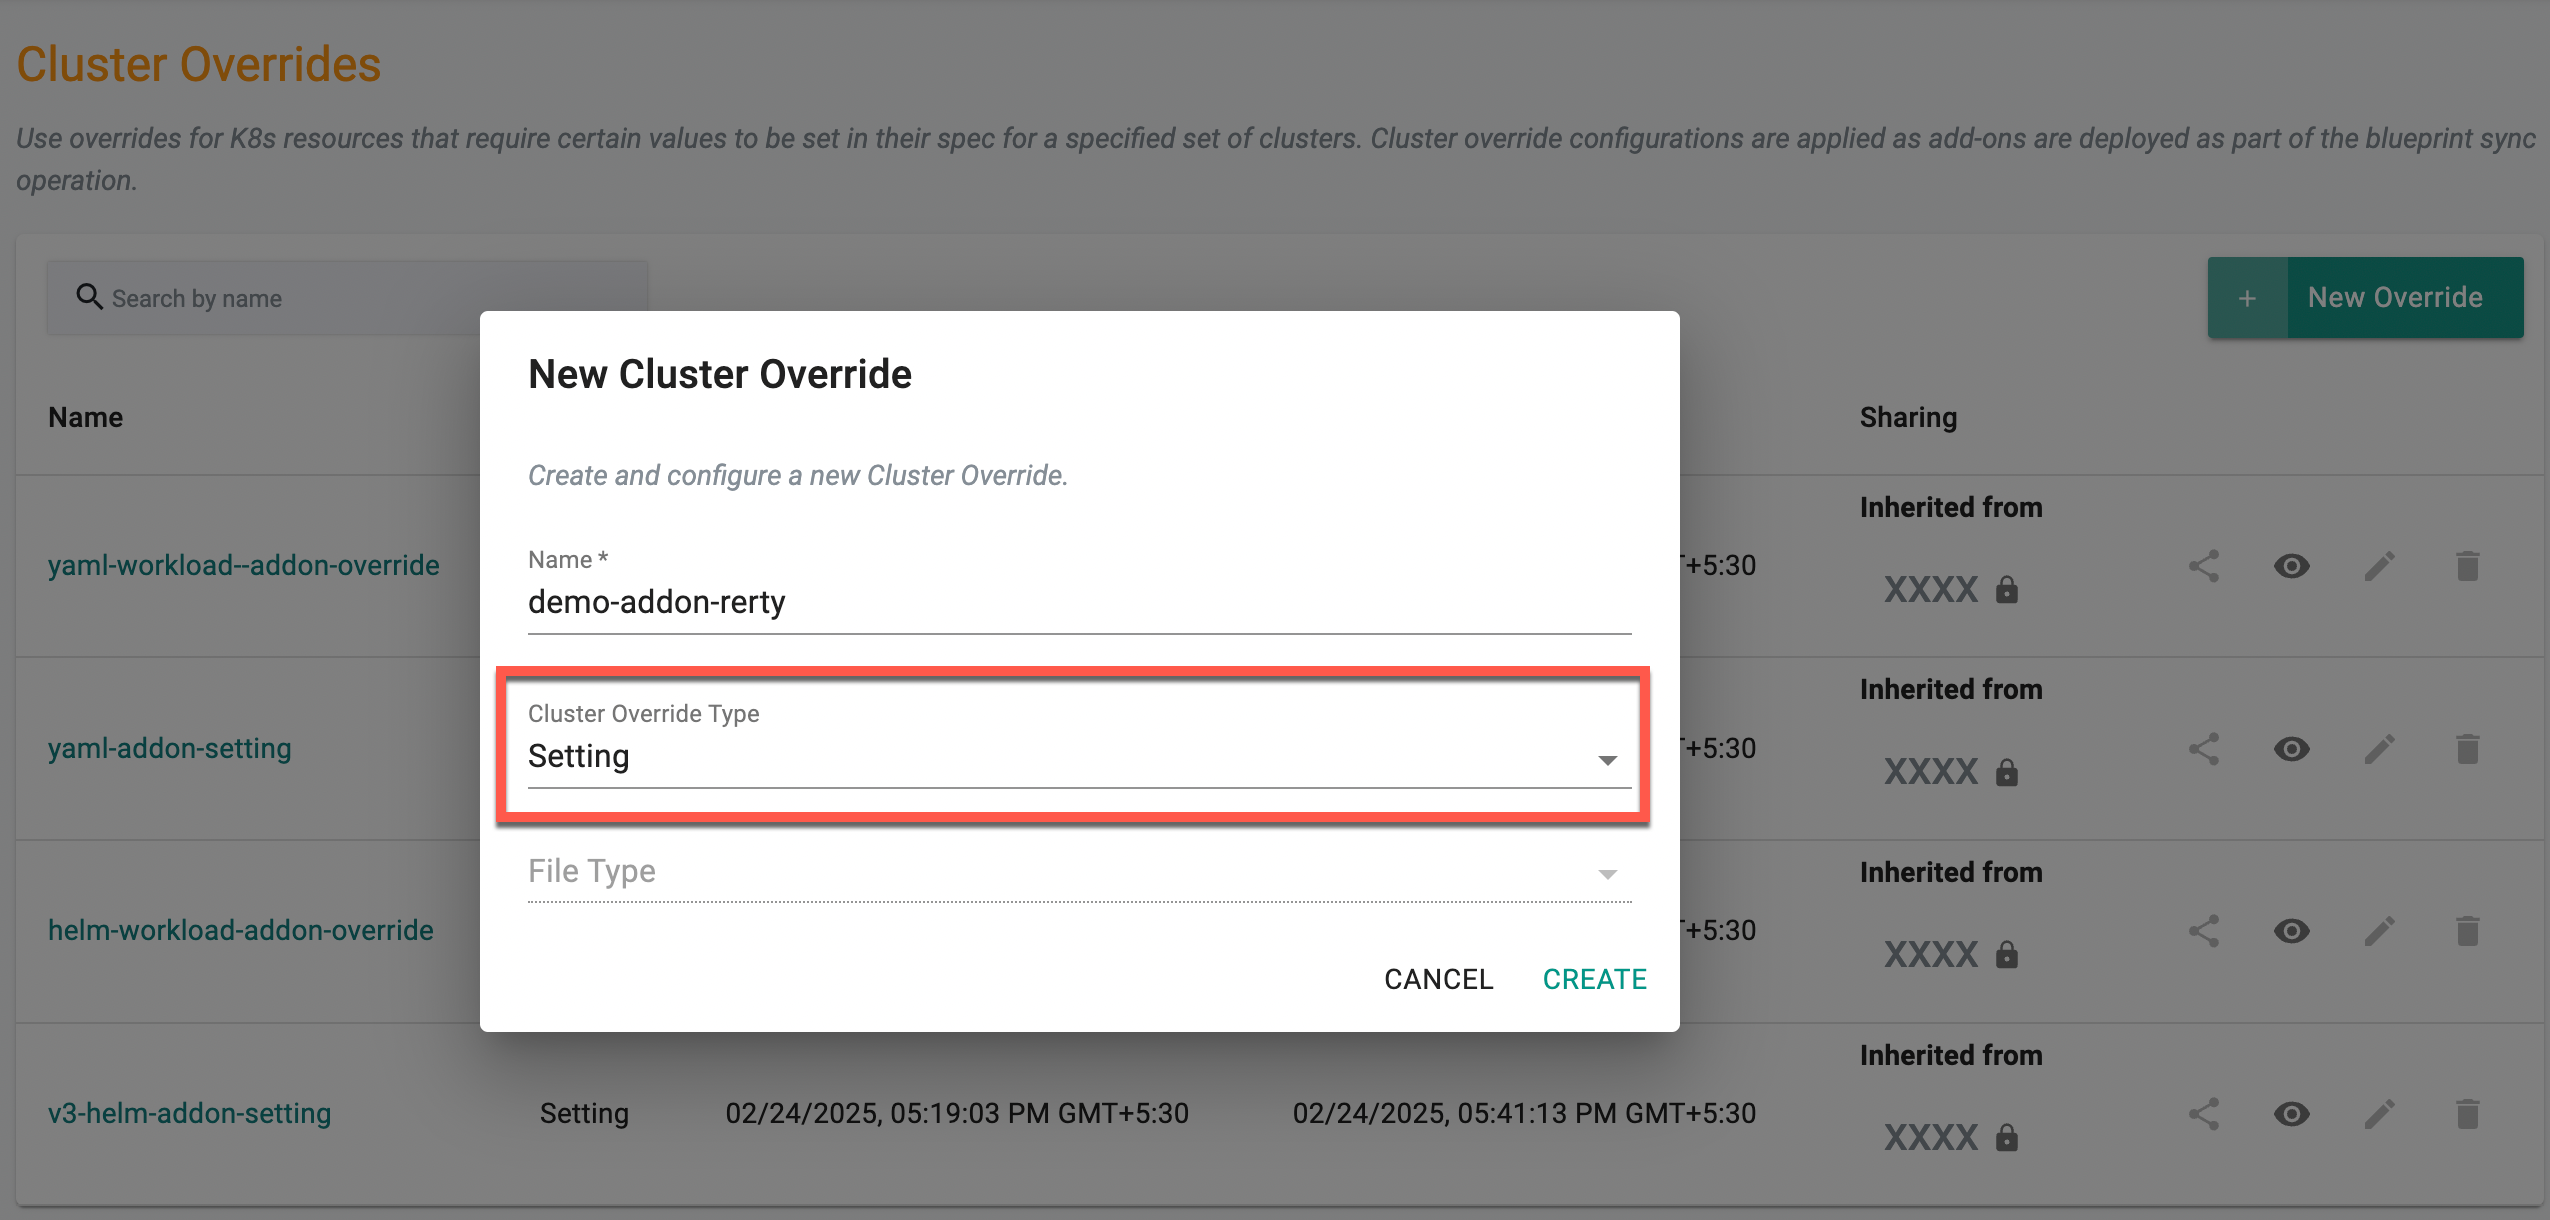
- Click New Override and provide a name
- Select Setting as the Cluster Override type and click Create
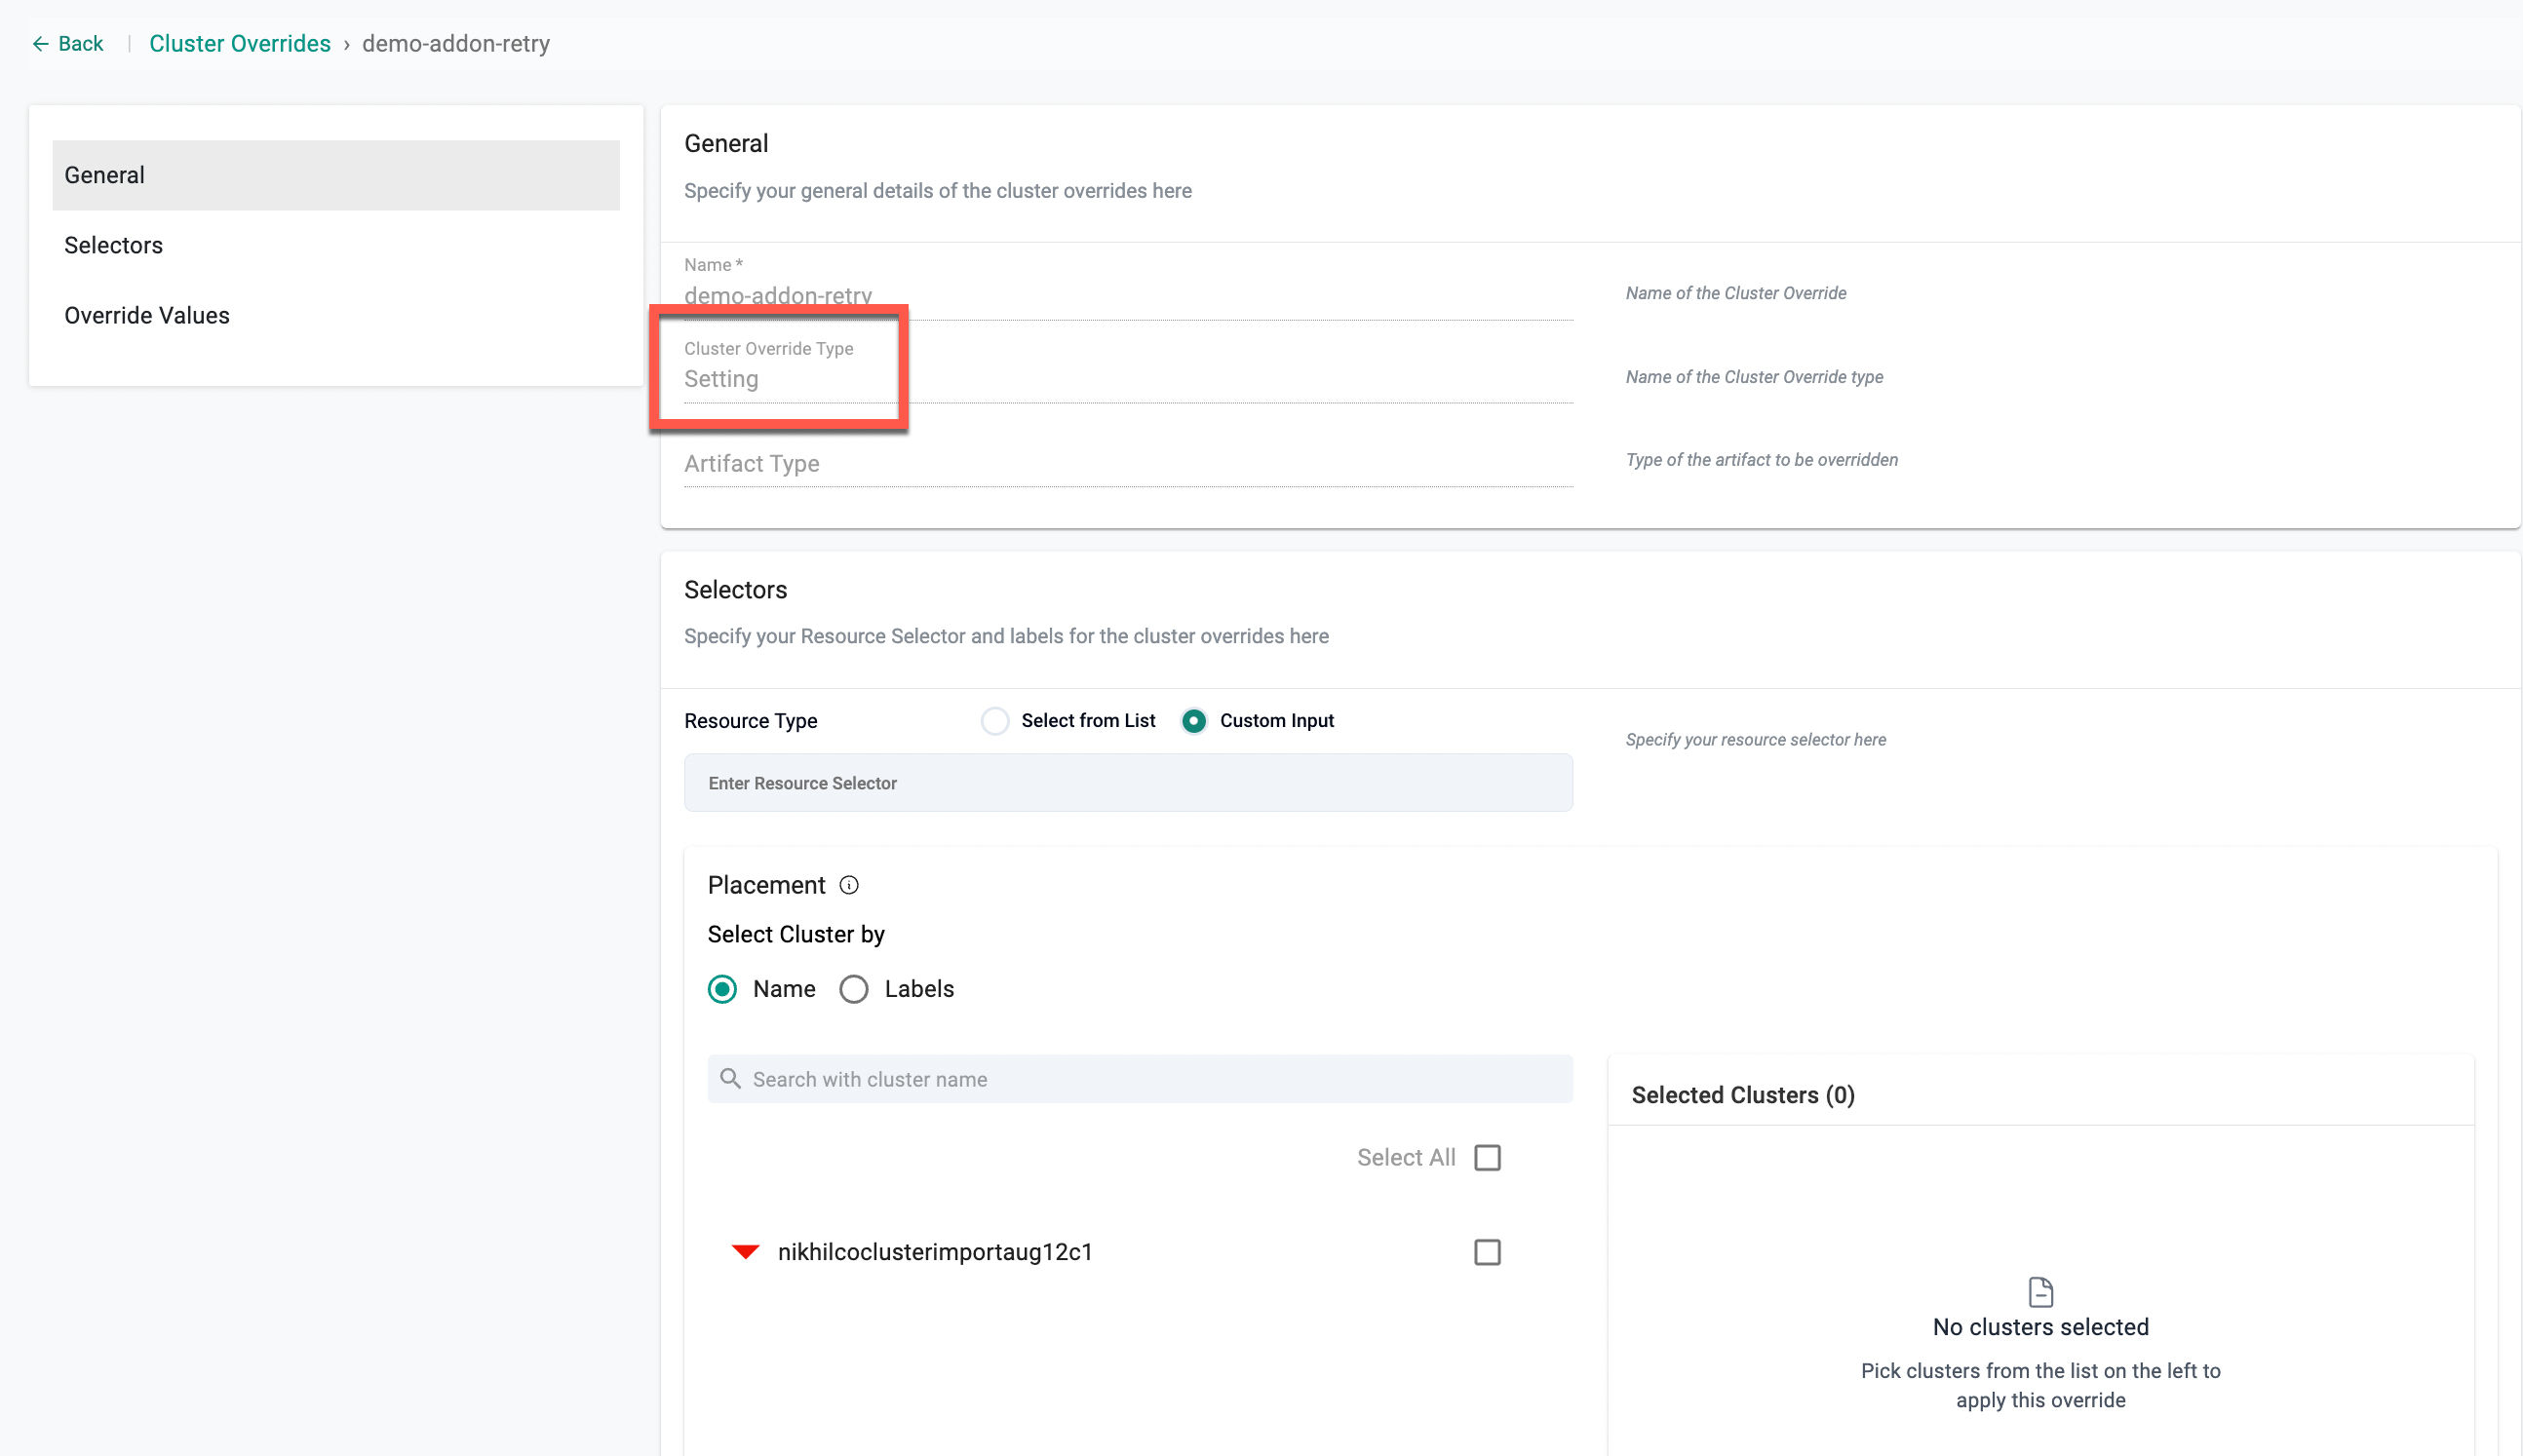
- Select the required Resource Selector and Placement type. The example below shows the Specific Cluster type
Note: Both Yaml and Helm types are supported
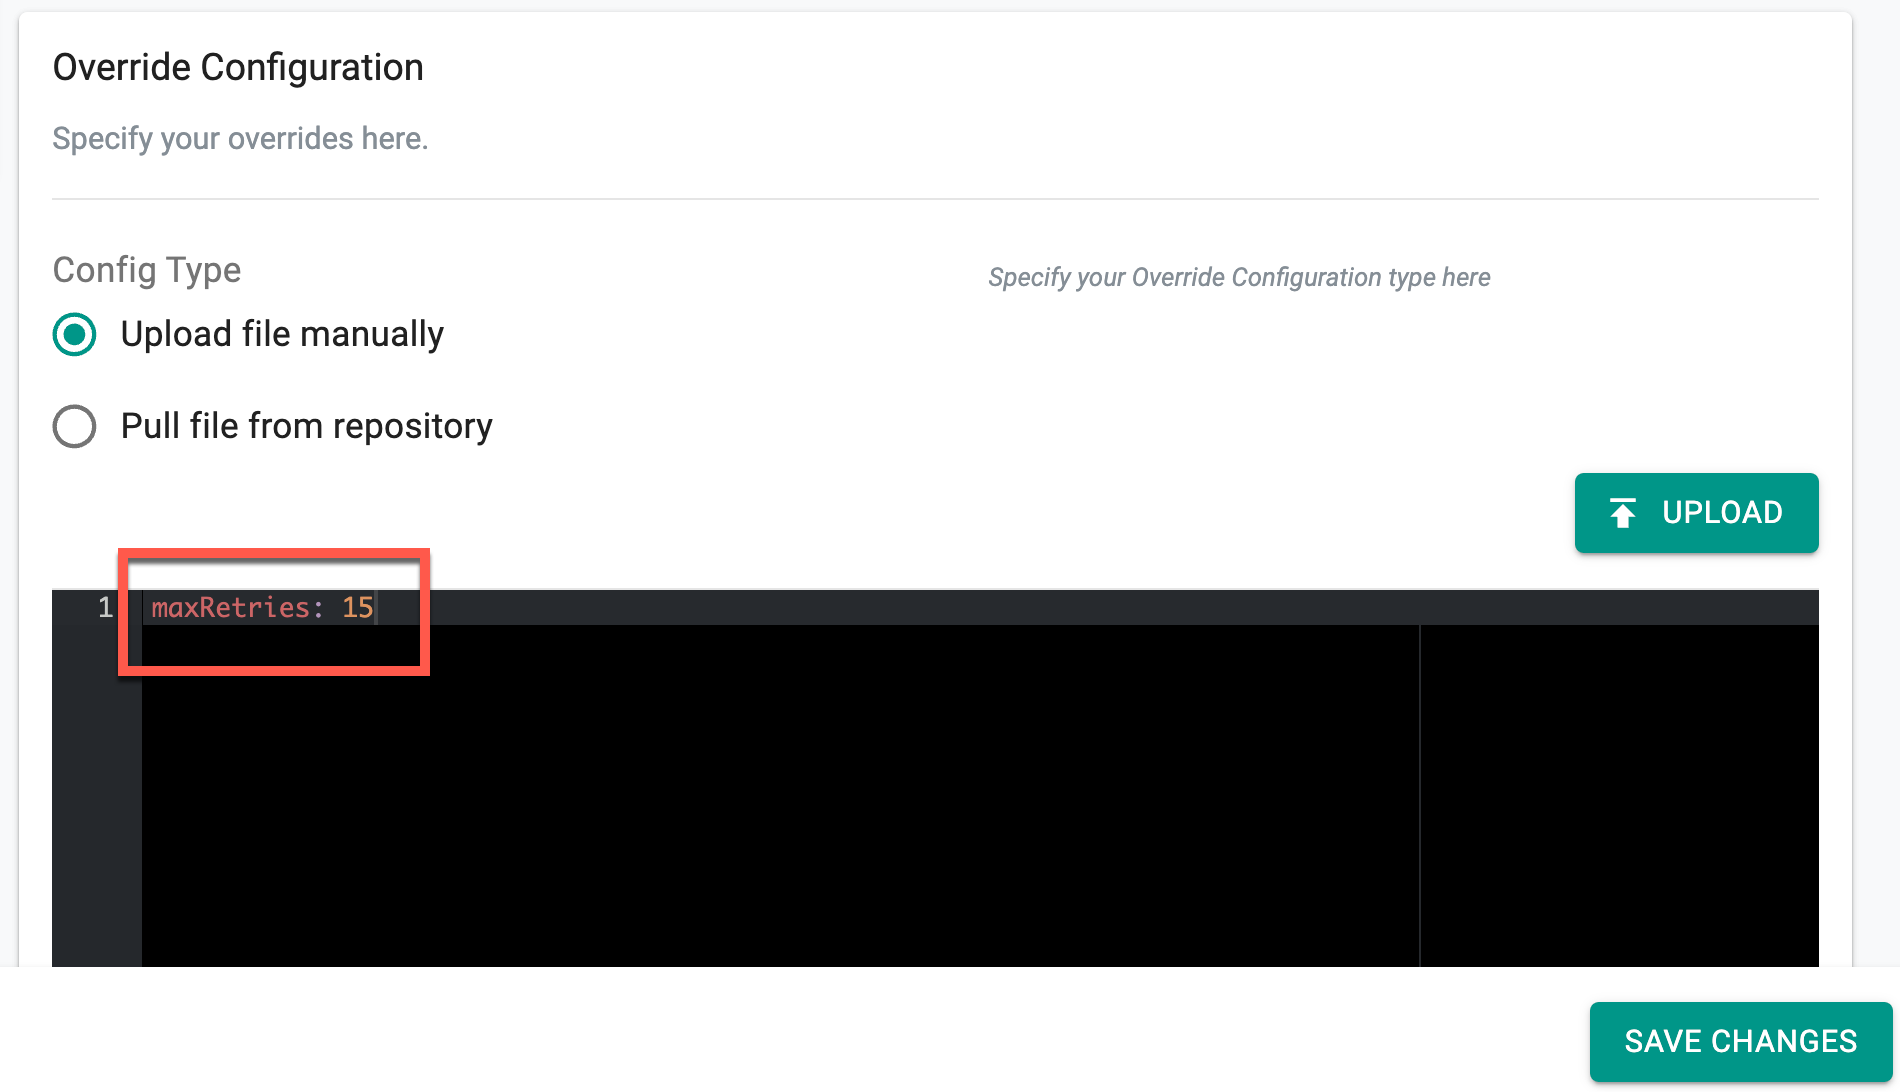
- Specify the maximum retry count in the configuration editor, as shown below, where maxretry is set to 15.
⚠️ Important: The retry count range must be between 2 and 20.
- Click Save Changes
Once the retry limit is set to 15 and saved, the system enforces this as the maximum number of readiness check retries for the selected cluster addons. If an addon fails the readiness check initially, it will be retried up to 15 times. If it becomes ready within these attempts, the deployment continues. Otherwise, after 15 failed retries, the system stops further attempts and marks the addon as failed, preventing delays in blueprint synchronization.
Retry Limits in RCTL Configuration
- Create a setting.yaml file with the following parameter to define the maximum number of readiness check retries:
maxRetries: 4
- Append the file path in the valuesPath field of the AddonOverride spec to apply this configuration:
valuesPath:
  name: file://setting.yaml
Refer to the Add-On CLI page for full configuration spec