Part 7: GitOps Pipelines
This is Part 7 of a multi-part, self-paced exercise.
What Will You Do
In this part, you will create a GitOps Pipeline to manage the lifecycle of an application. For simplicity, this part assumes the user has an account on Github and will fork the repository as a Public repository.
Estimated Time
Estimated time burden for this part is 15 minutes.
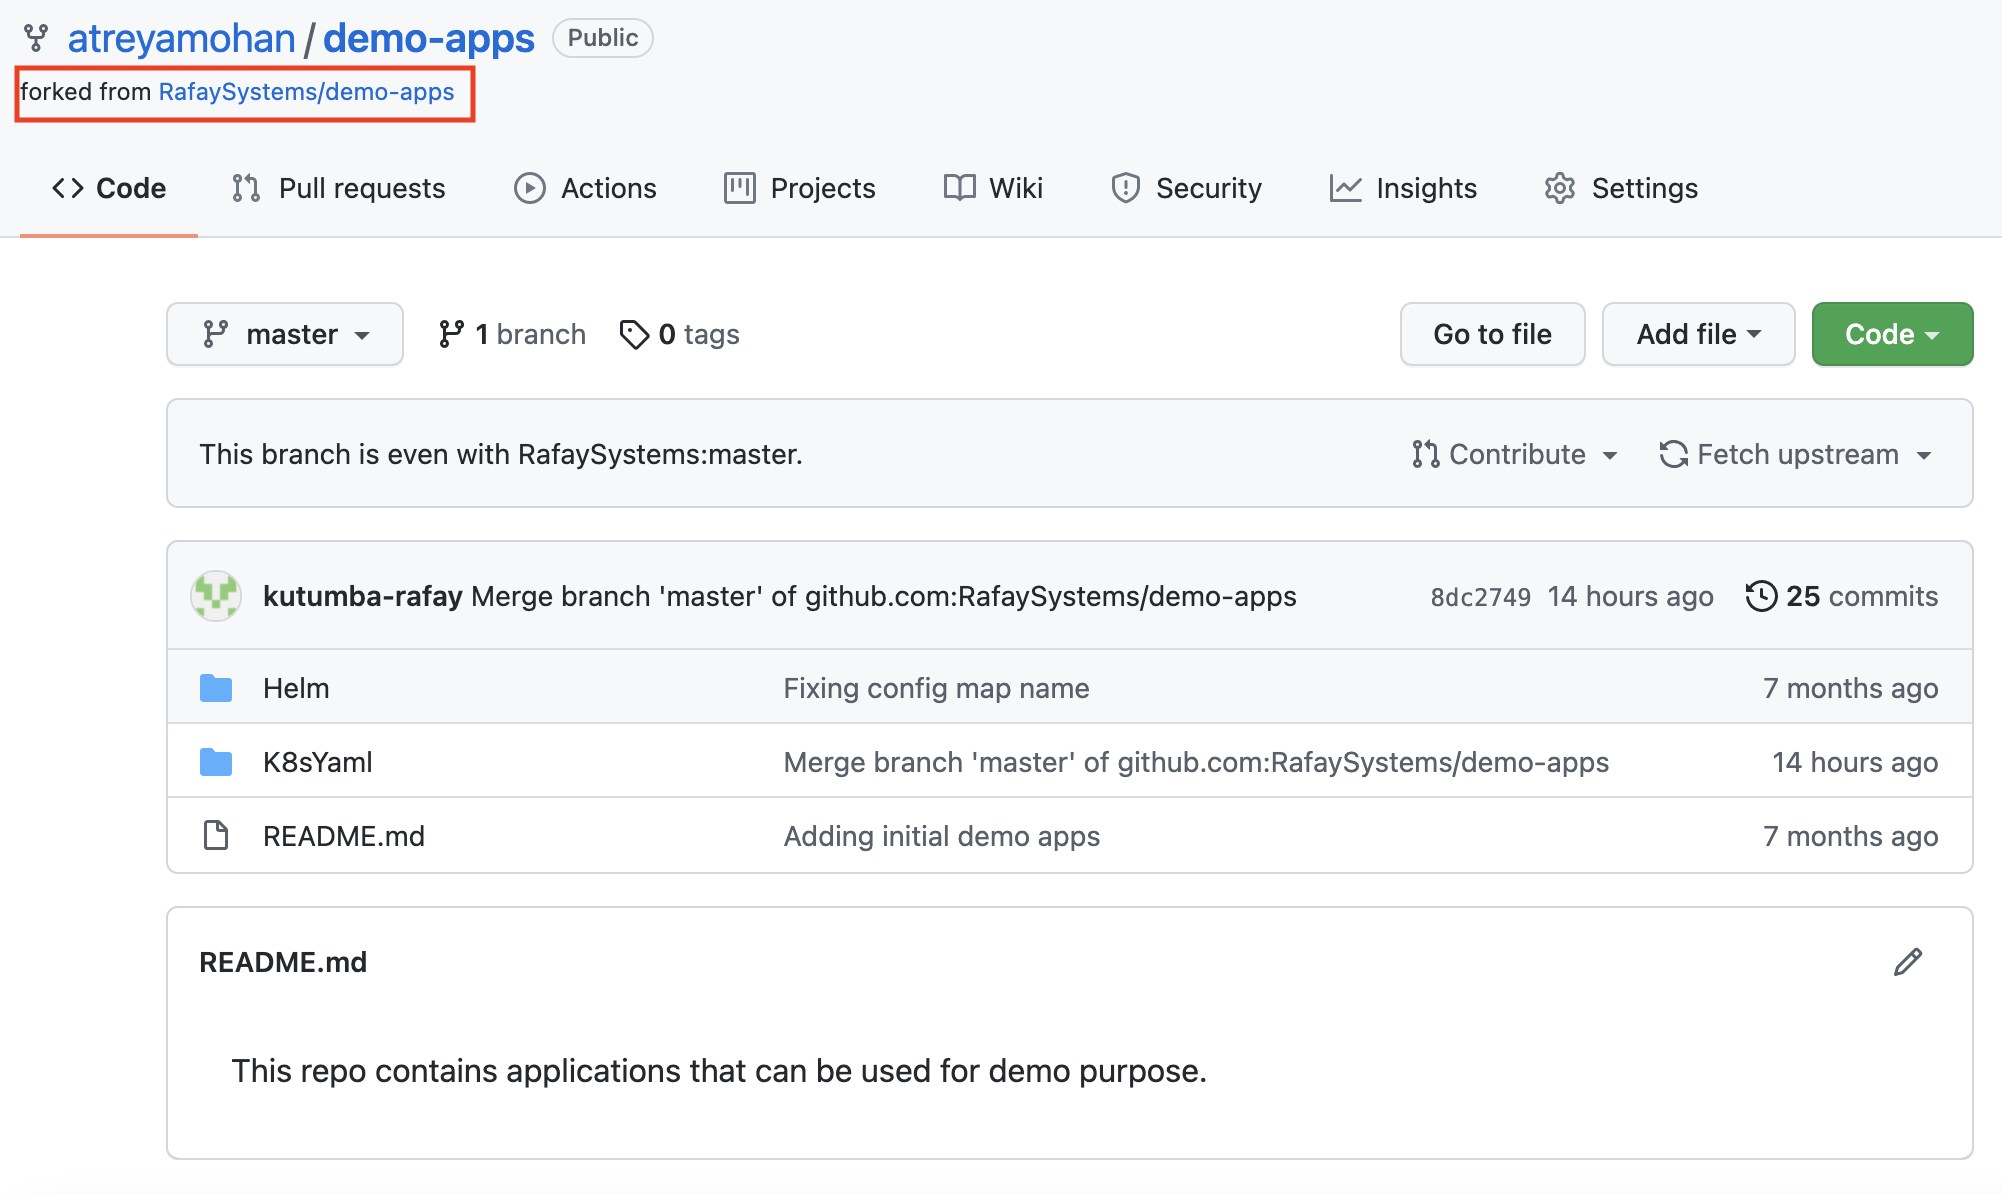
Step 1: Fork Repository
To setup a GitOps pipeline, you will need a Git repository. To help you get started, let us fork an existing repository.
- Ensure you are logged into your GitHub.com account
- Navigate to the public Git repository
- Click on Fork repository
- Select your account name to fork repo to
This will create a copy of the repository in your Git system (e.g. GitHub). An example is shown below.
Step 2: Add Repository
- In the desktop project, navigate to Integrations -> Repositories
- Click on New Repositories
- Provide a friendly name
- Select Git for Type
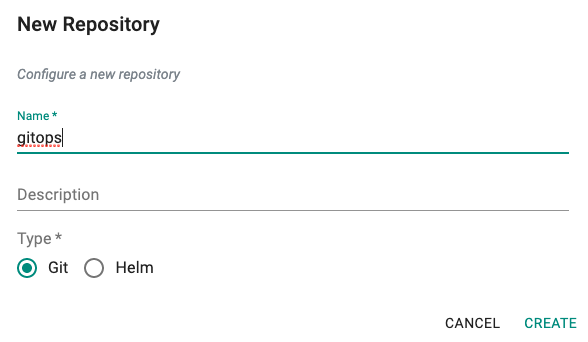
- Provide the Git repo's Endpoint URL
- Save
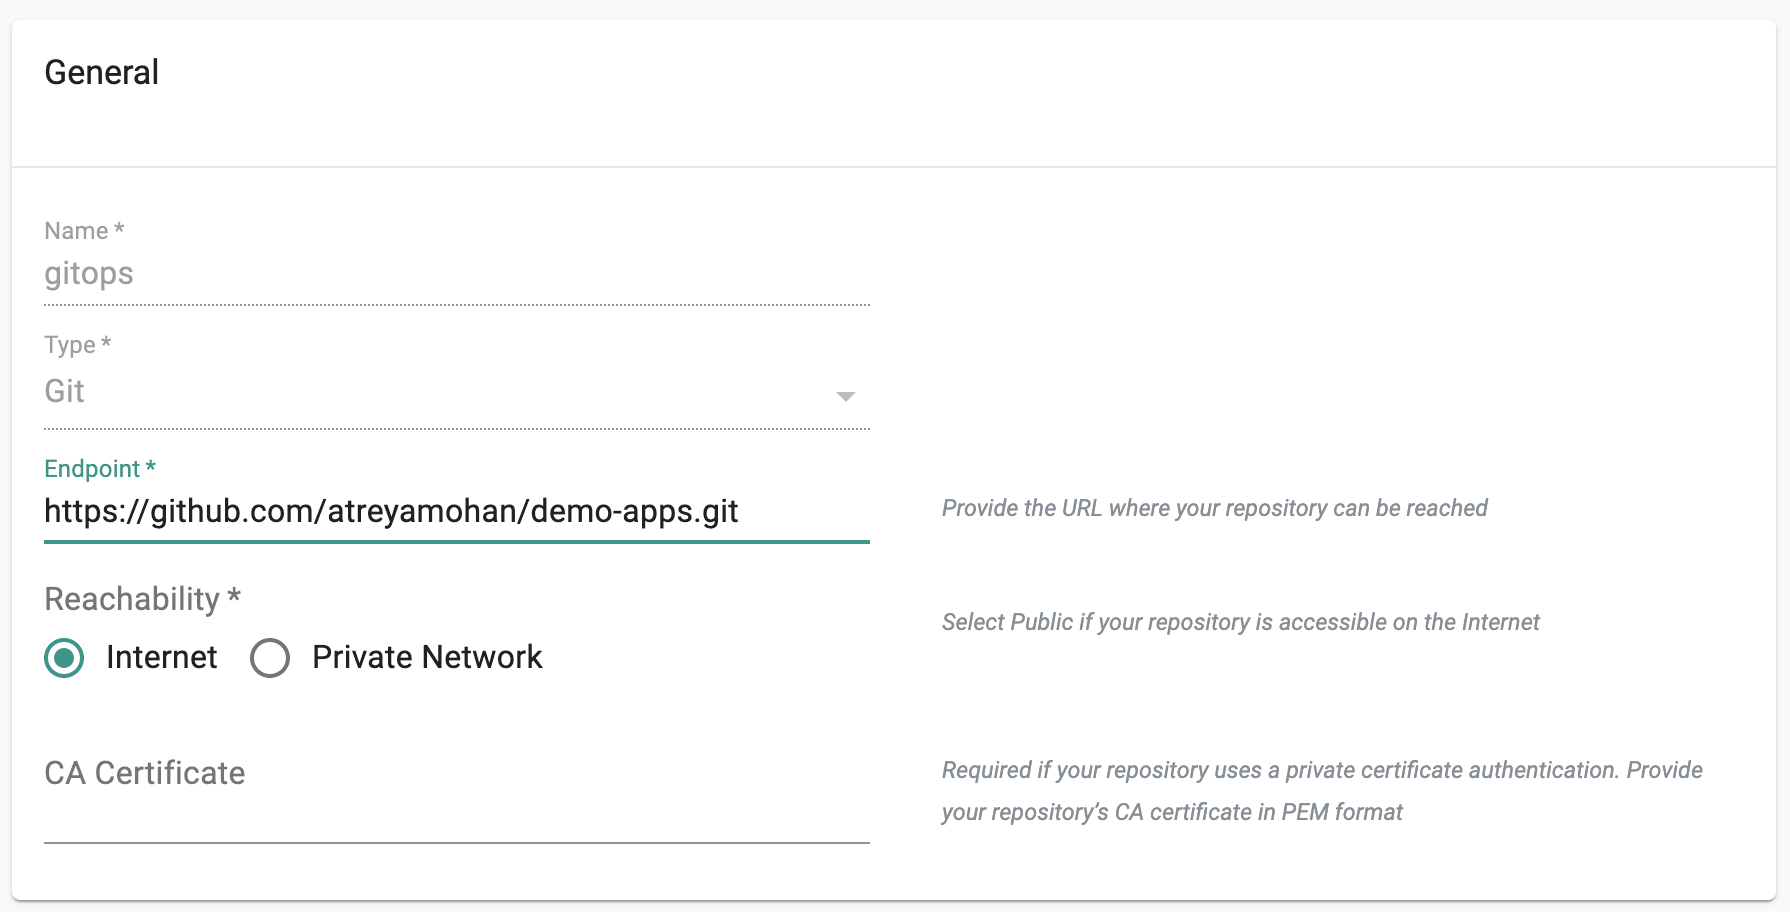
Note
It does not matter if your Github repo is public or private. If private, you need to provide access credentials.
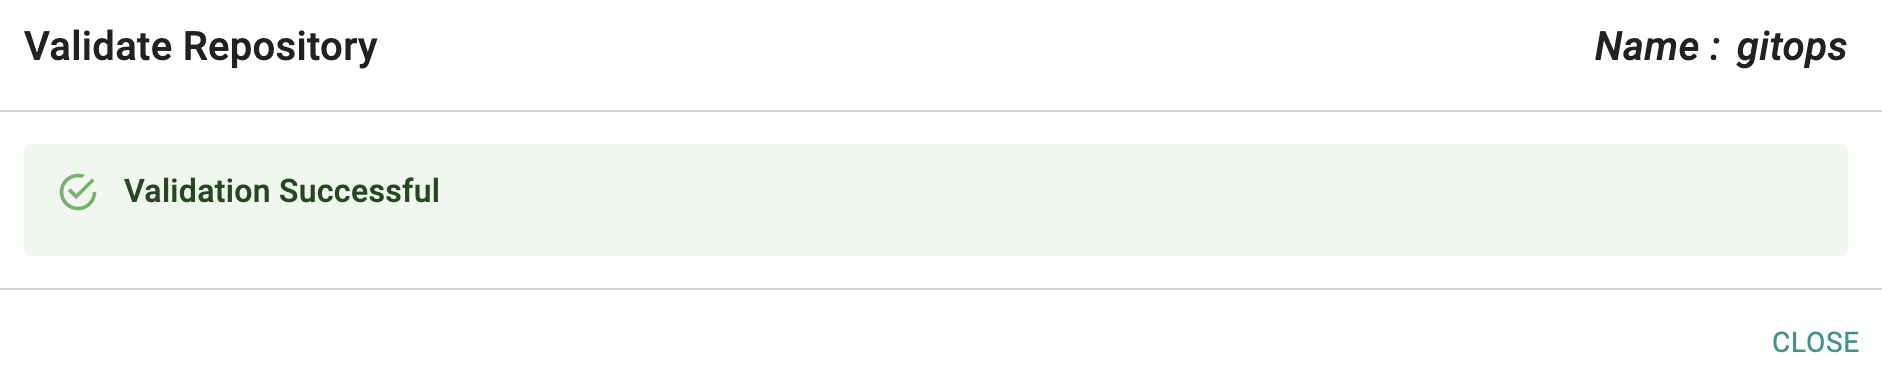
Optionally,
- Under Infrastructure -> Repositories, Click on validate for your repository
- If you see a validation successful message, the controller is able to access the repository
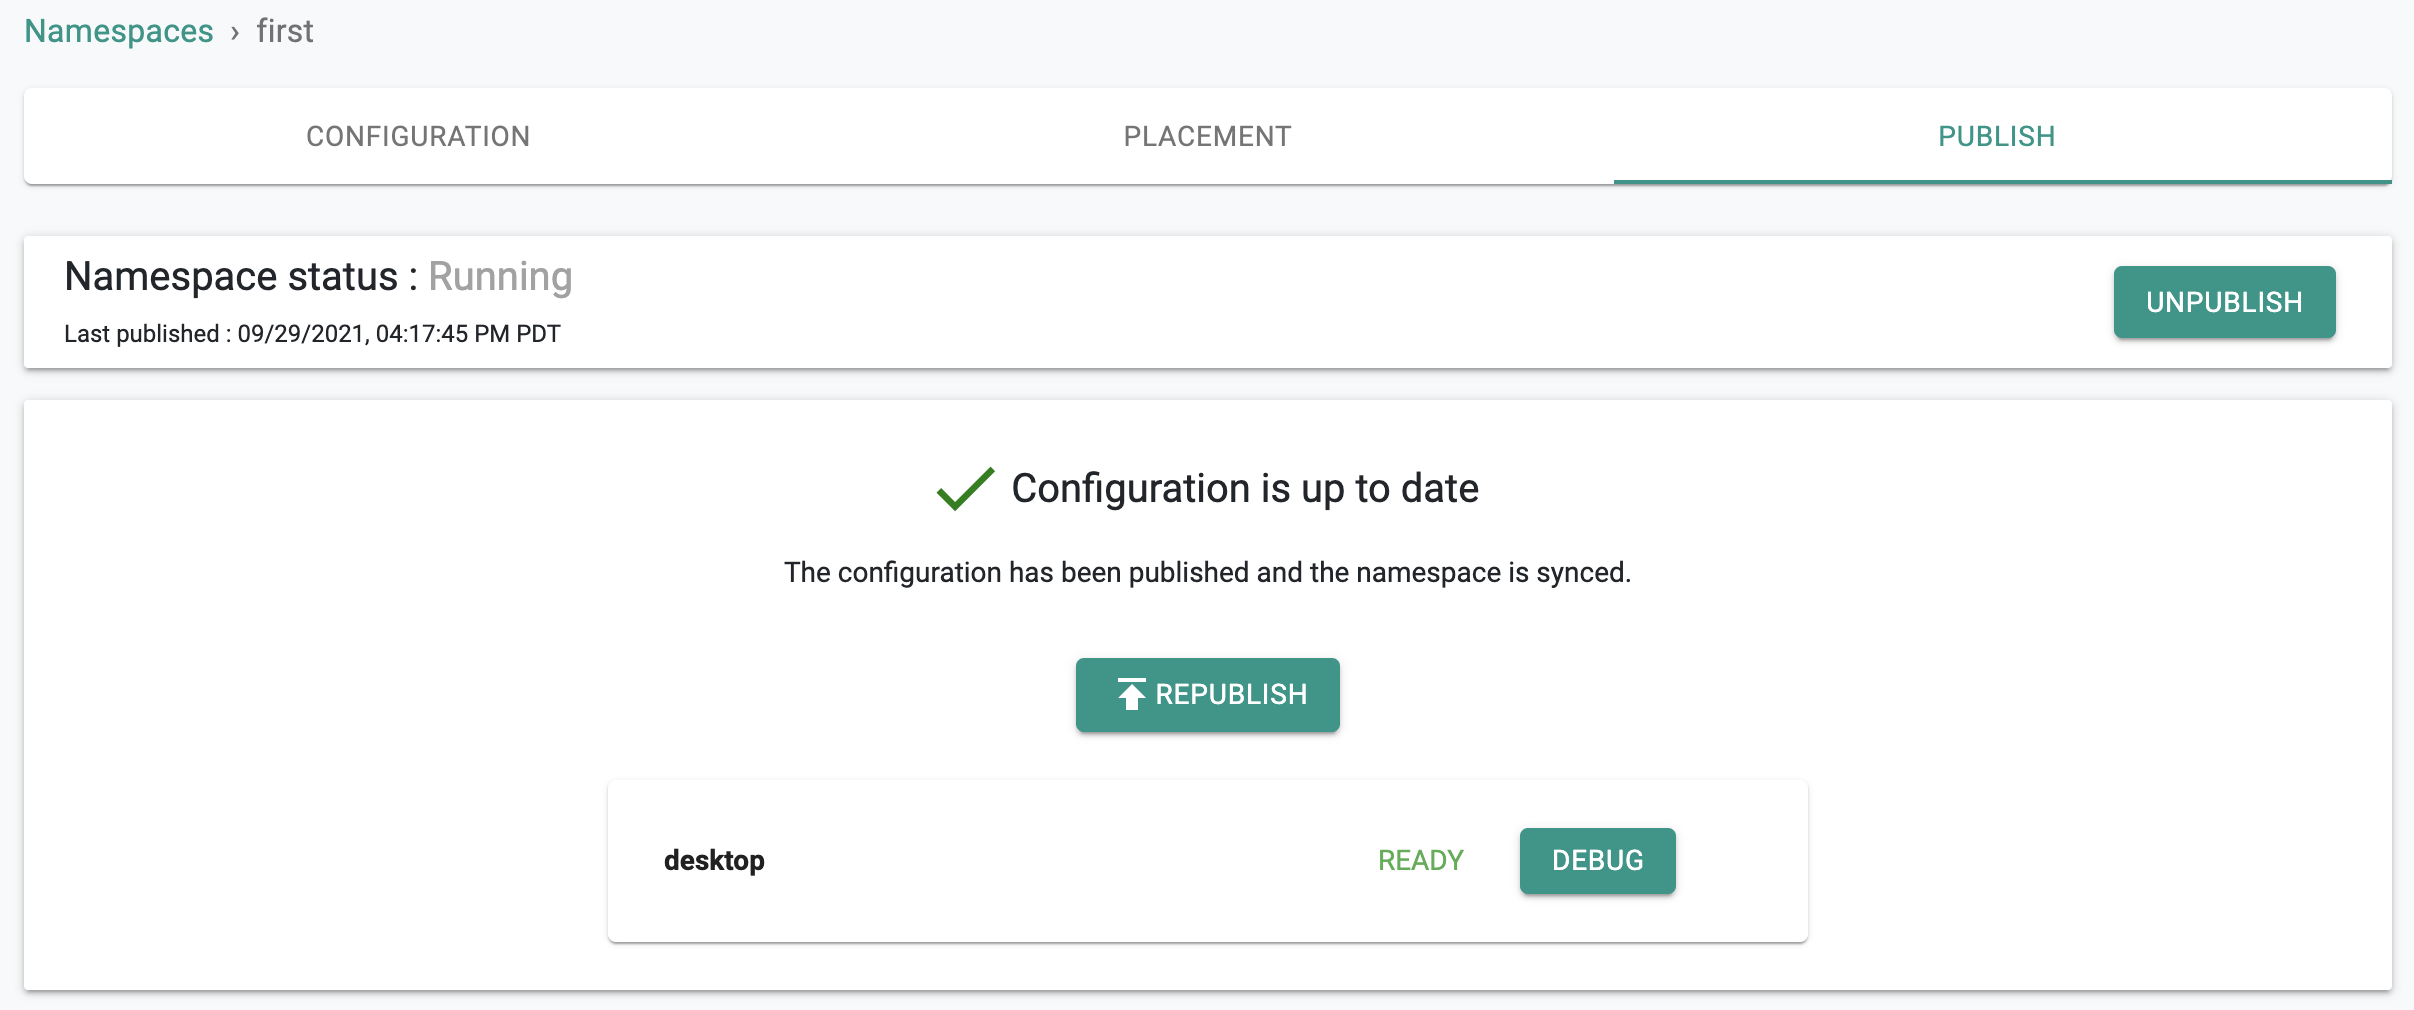
Step 3: Create Namespace
We need to create a namespace to deploy our workload via the GitOps pipeline
- Navigate to Infrastructure -> Namespaces
- Click on New Namespace
- Provide a name, select wizard for type and Save
- Under placement, select your cluster and publish the namespace
In the example below, we have created a namespace called "first" on our cluster.
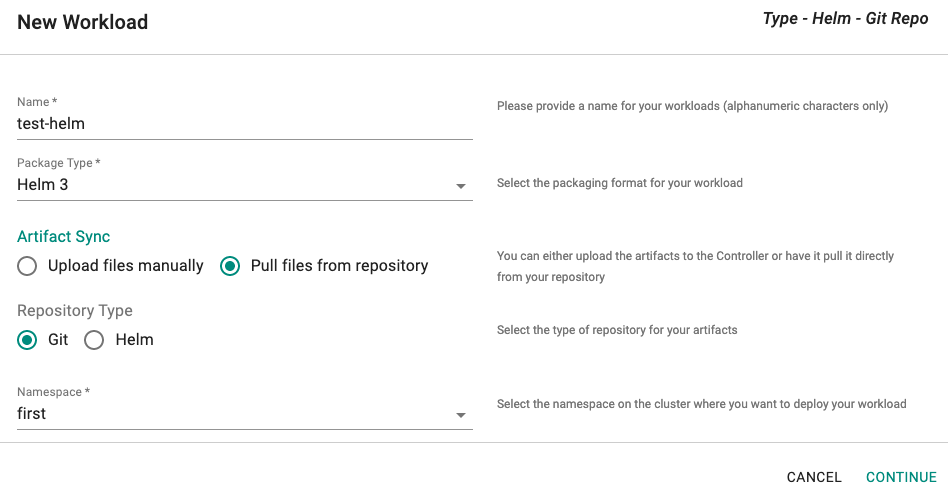
Step 4: Create Workload
Now, we are ready to create a workload based on k8s manifests in our Git repository and publish it to the namespace we just created.
- Navigate to Applications -> Workloads
- Click on New Workload and provide a friendly name
- Select "Helm 3" for package type
- Select "Pull files from repository" for Artifact Sync
- Select "Git" for Repository Type
- Select the namespace you created in the previous step and Select "Continue"
Step 5: Publish Workload
We are now ready to configure our workload by (a) specifying the Git repo and (b) selecting the cluster for placement.
- Select the name of the repository created in the previous steps
- Select "master for revision
- Enter path for Helm file i.e. "Helm/webserver"
- Enter path for the values file i.e. "Helm/webserver/values.yaml" and Select "Continue"
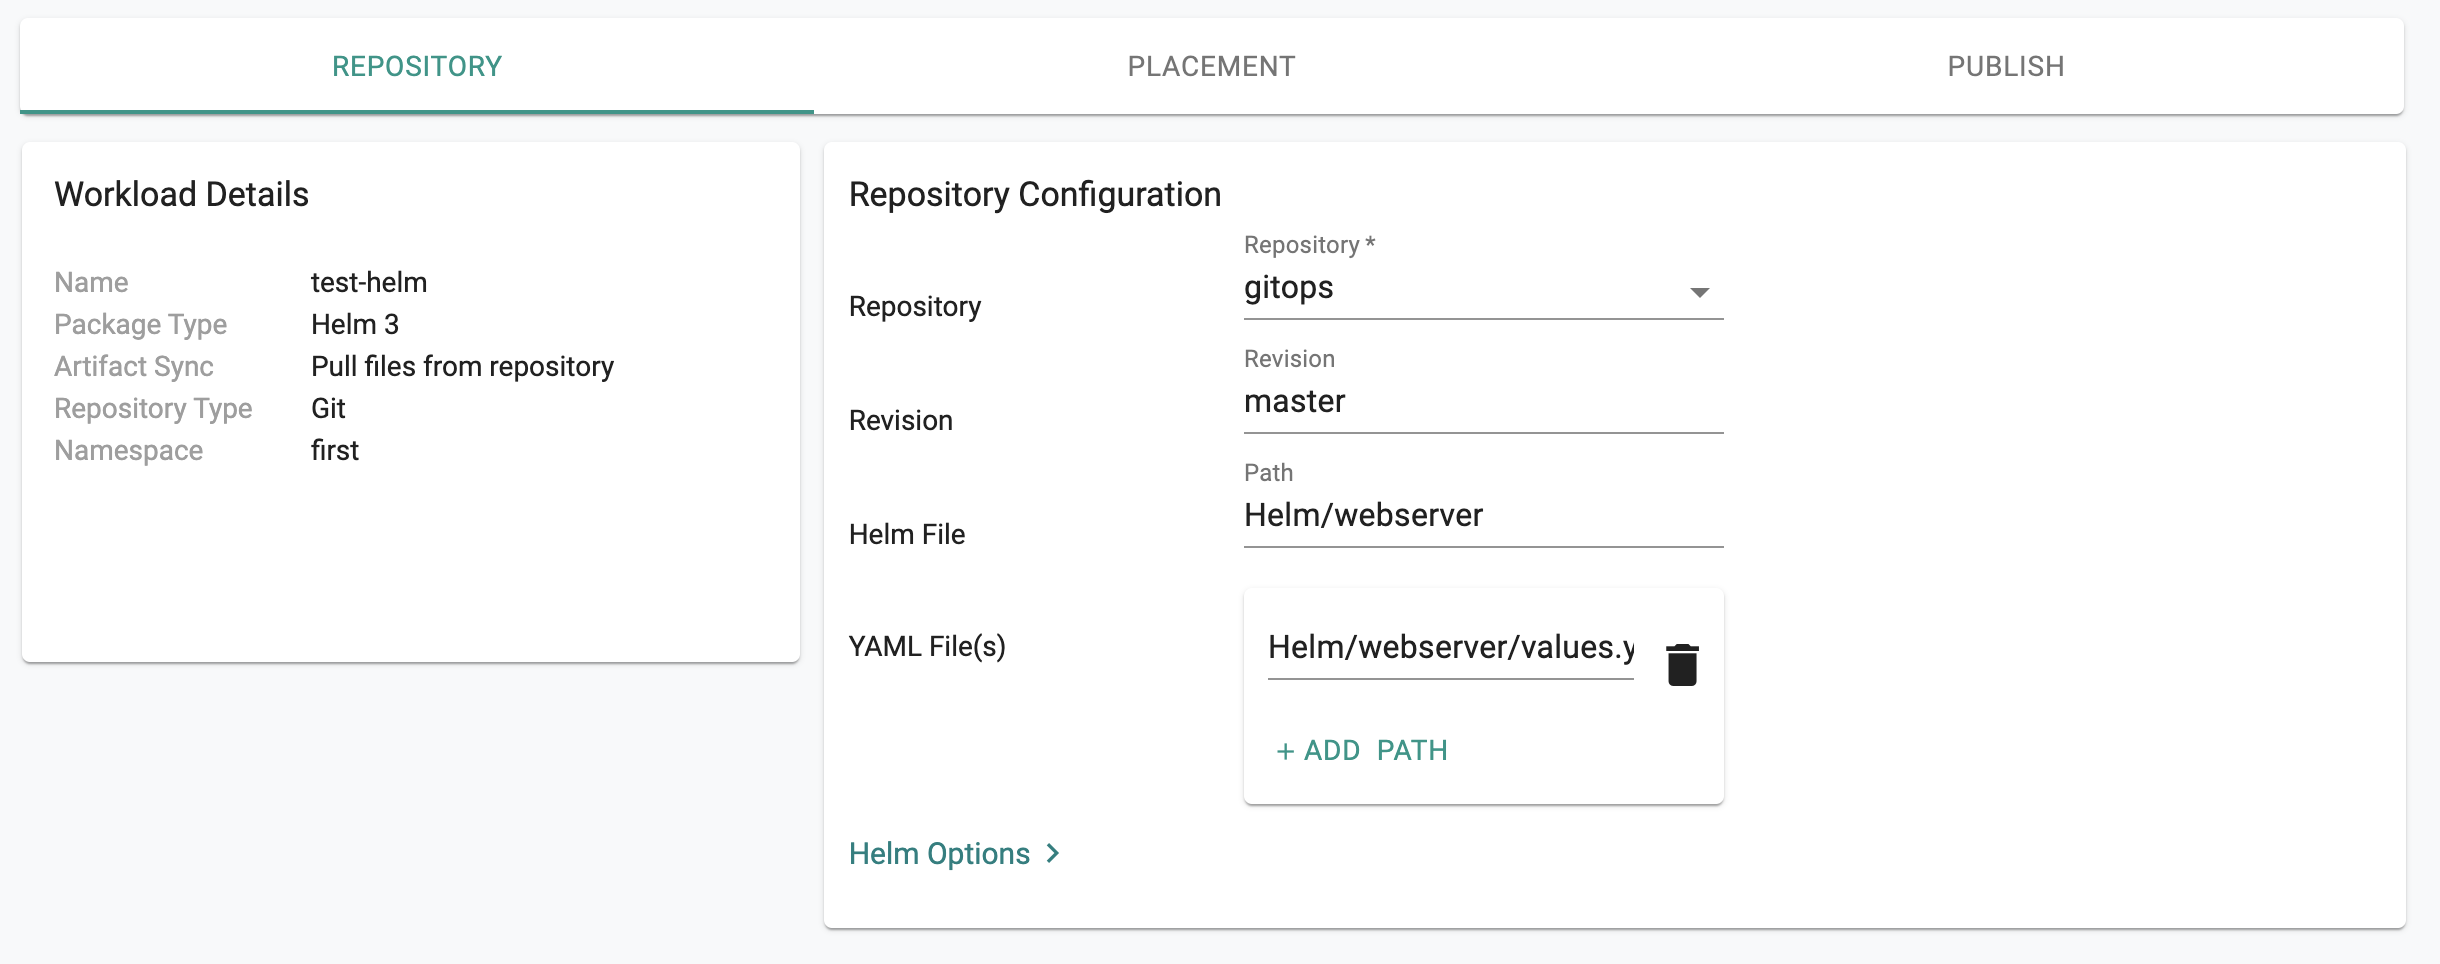
- Select your cluster for Placement Policy and Publish workload.
In a few seconds, the workload's k8s resource will become operational on your cluster.
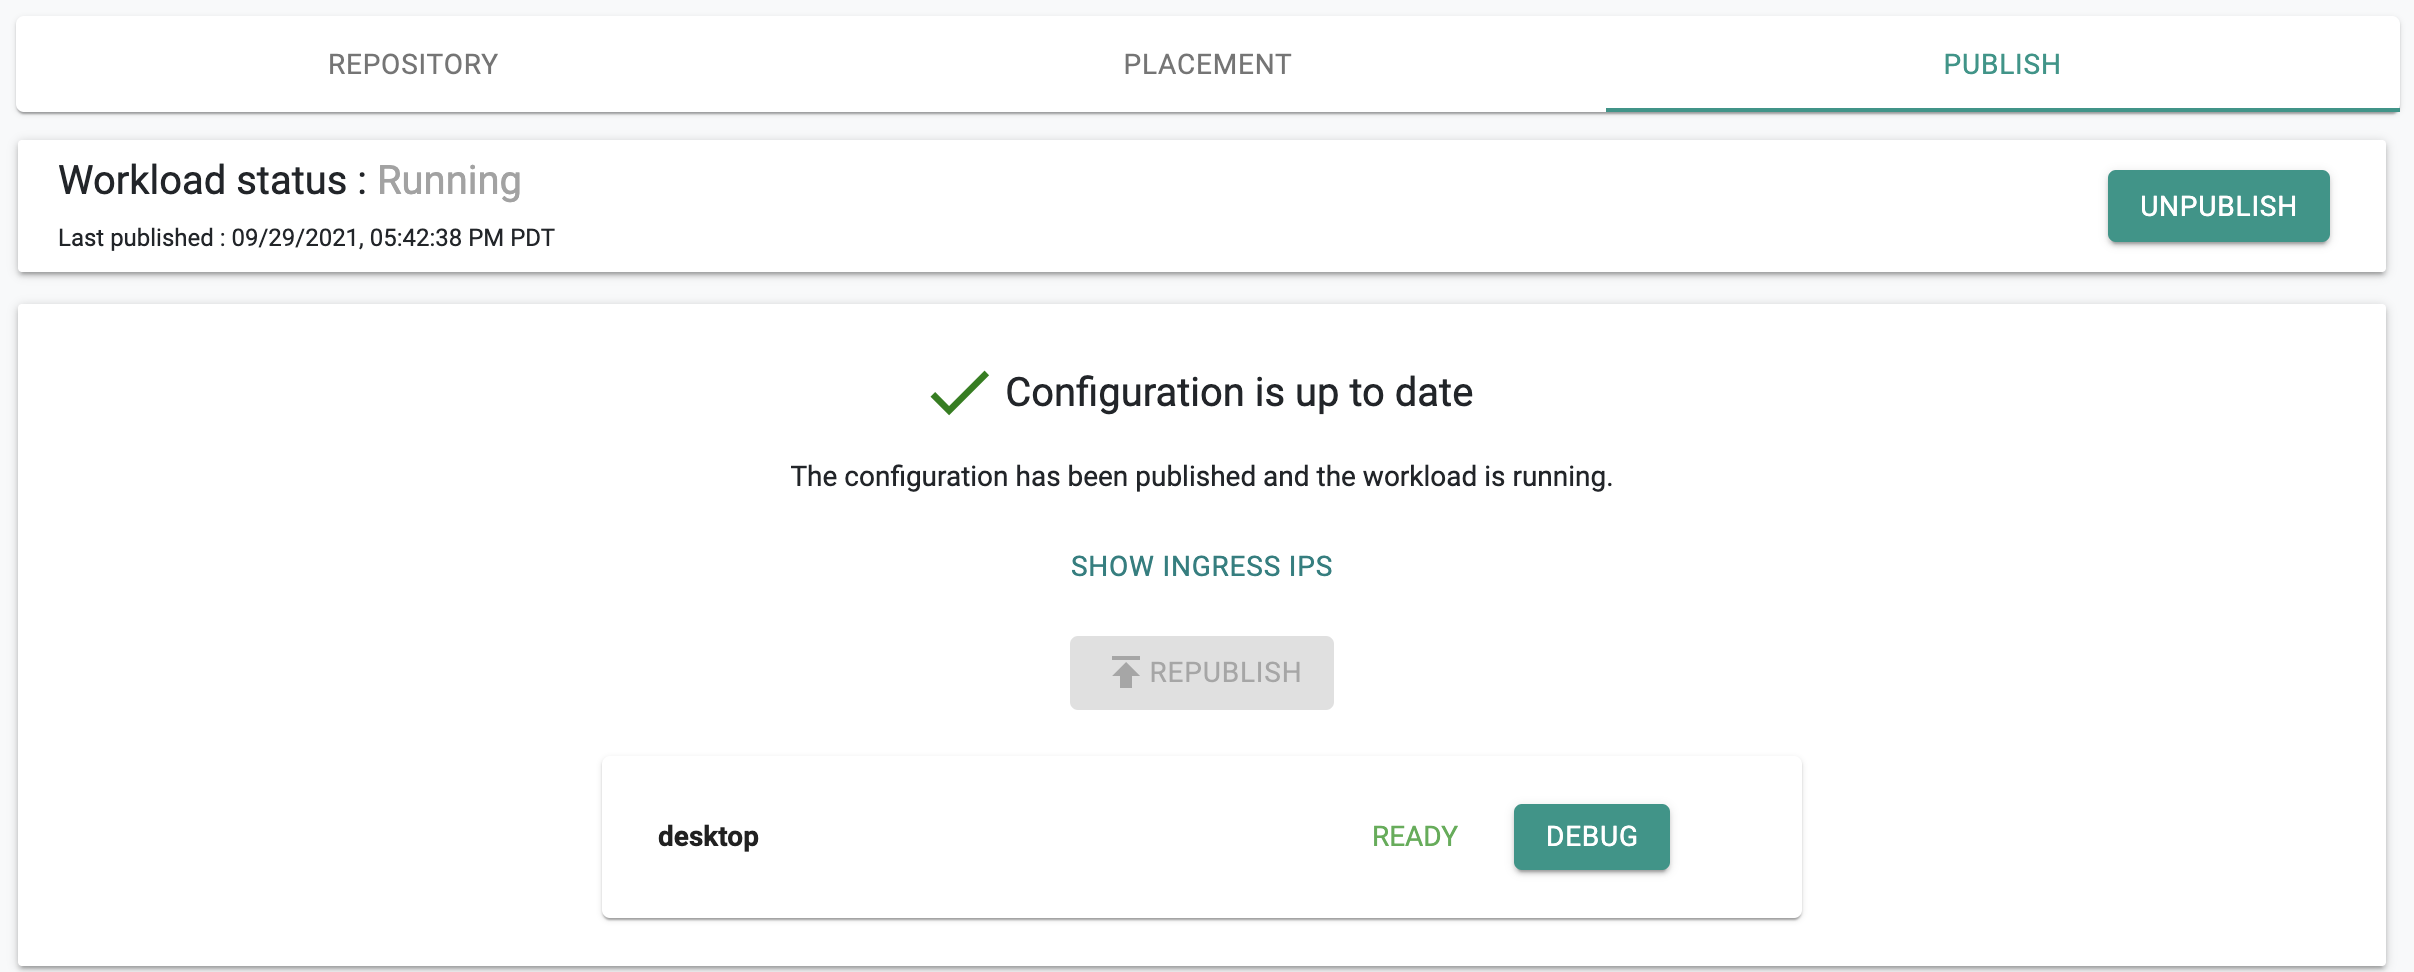
Optionally, you can also verify the status of the resources using the zero trust kubectl channel. You should see something like the following
kubectl get po -n first

NAME                                   READY   STATUS    RESTARTS   AGE
test-helm-webserver-7874b96c7c-tzpqt   2/2     Running   0          10s
Step 6: GitOps Pipeline
In the previous step, we manually created a workload and deployed it to your cluster. Everytime you make a change to the manifests in your Git repo, you have to remember to republish the workload. With a GitOps pipeline, you can completely automate this ensuring that the workload on the clusters are "always kept reconciled" with changes made in the Git repository.
- Navigate to GitOps -> Pipelines
- Click on New pipeline and provide it a friendly name
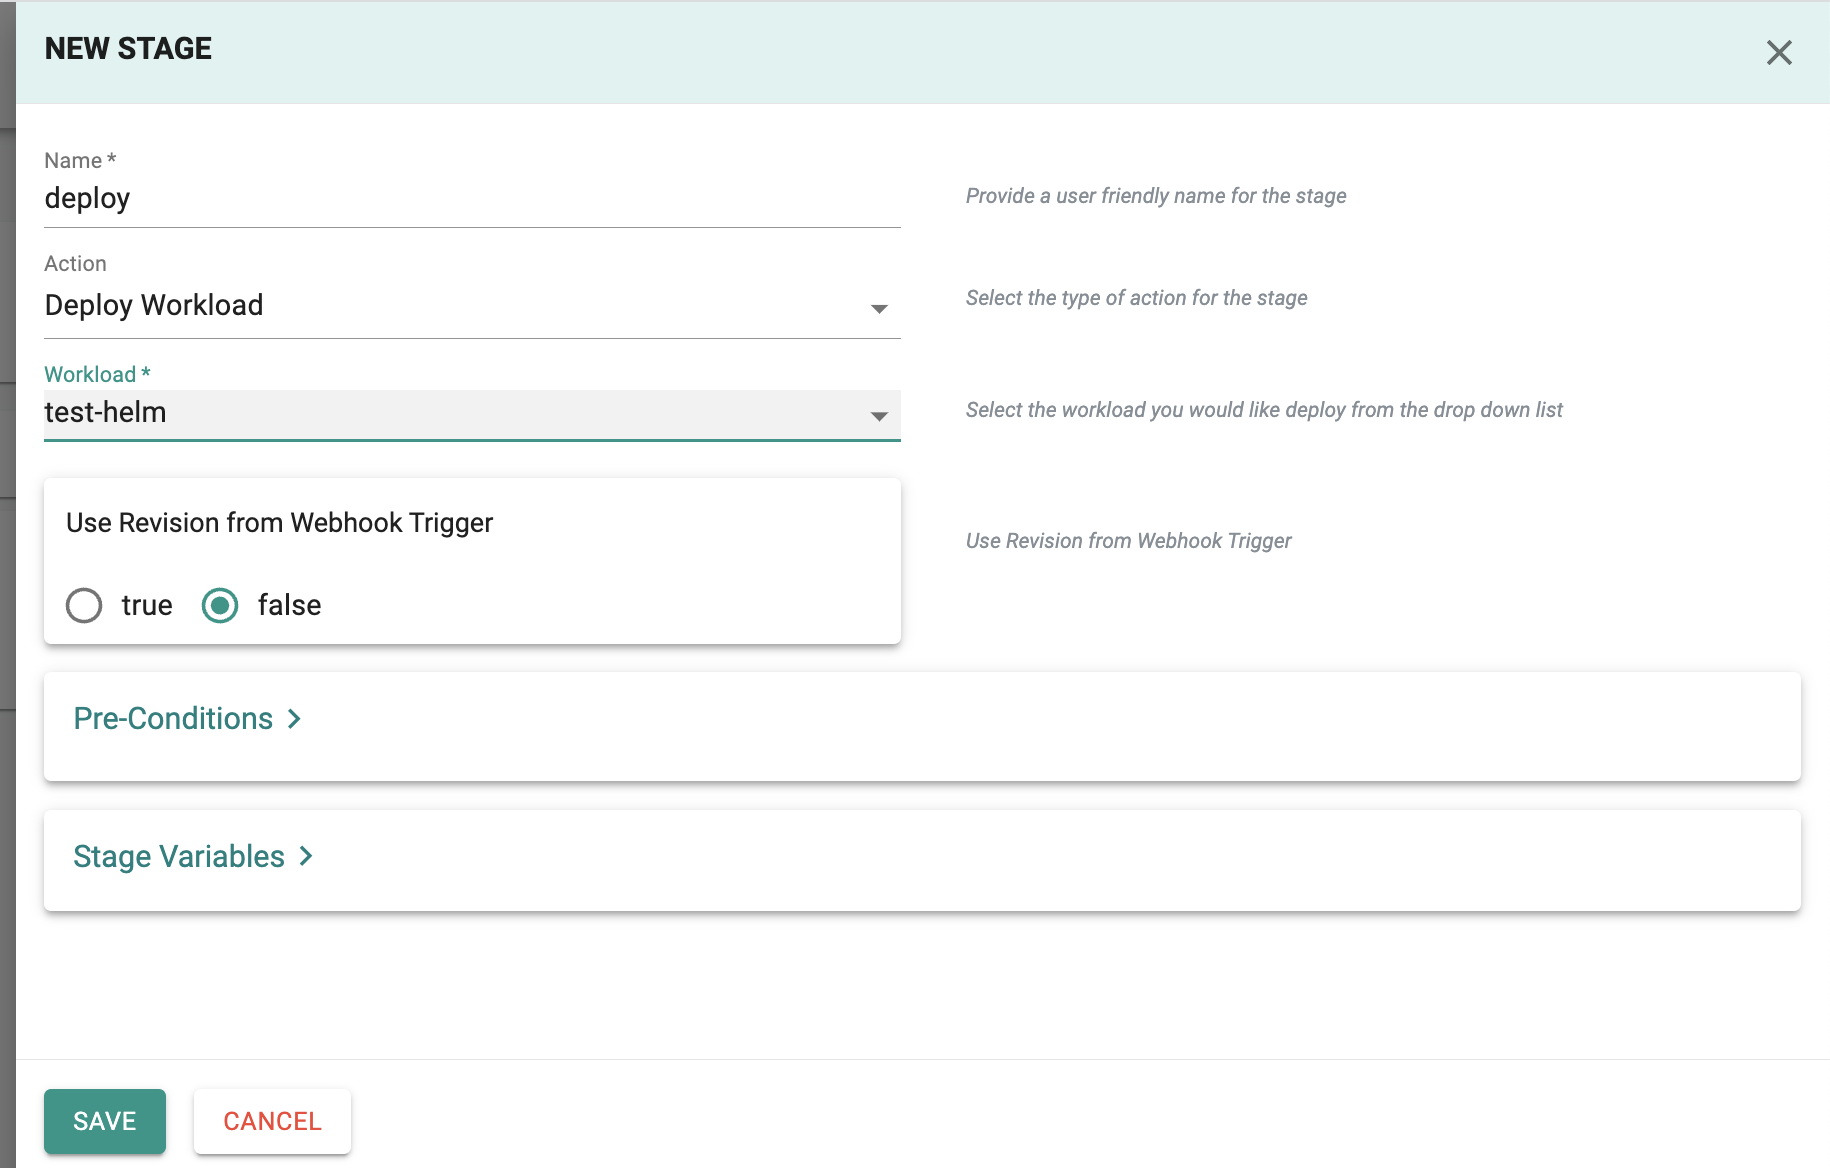
Add Stage
A pipeline can have multiple stages, with completely different actions to model your desired workflows. In this exercise, we will test with a single stage pipeline.
- Under Stages, add a new Stage
- Provide a name for the stage
- For Action, select "Deploy Workload"
- For workload, select the workload you created in the previous step
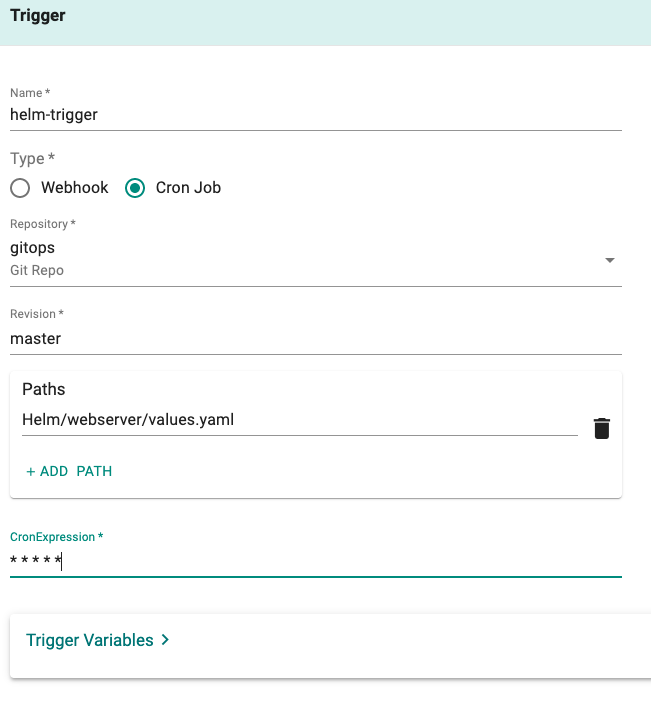
Add Trigger
A pipeline can be executed based on an "external trigger". In this exercise, we will configure a cron job based trigger that will periodically check your Git repository for modifications to the specified files.
- Under Triggers, add a new Trigger and provide a friendly name
- Select "Cron Job" for type
- Select the name of the repository to monitor
- Enter "master" for revision
- Enter Path for the file in the Git repo to monitor for changes. In our case, "Helm/webserver/values.yaml"
- Enter a cron expression specifying the frequency. In our case, "*****" to check the repository every minute.
Activate Pipeline
By default, newly created pipelines start life in a deactivated state.
- Click on Activate to activate pipeline
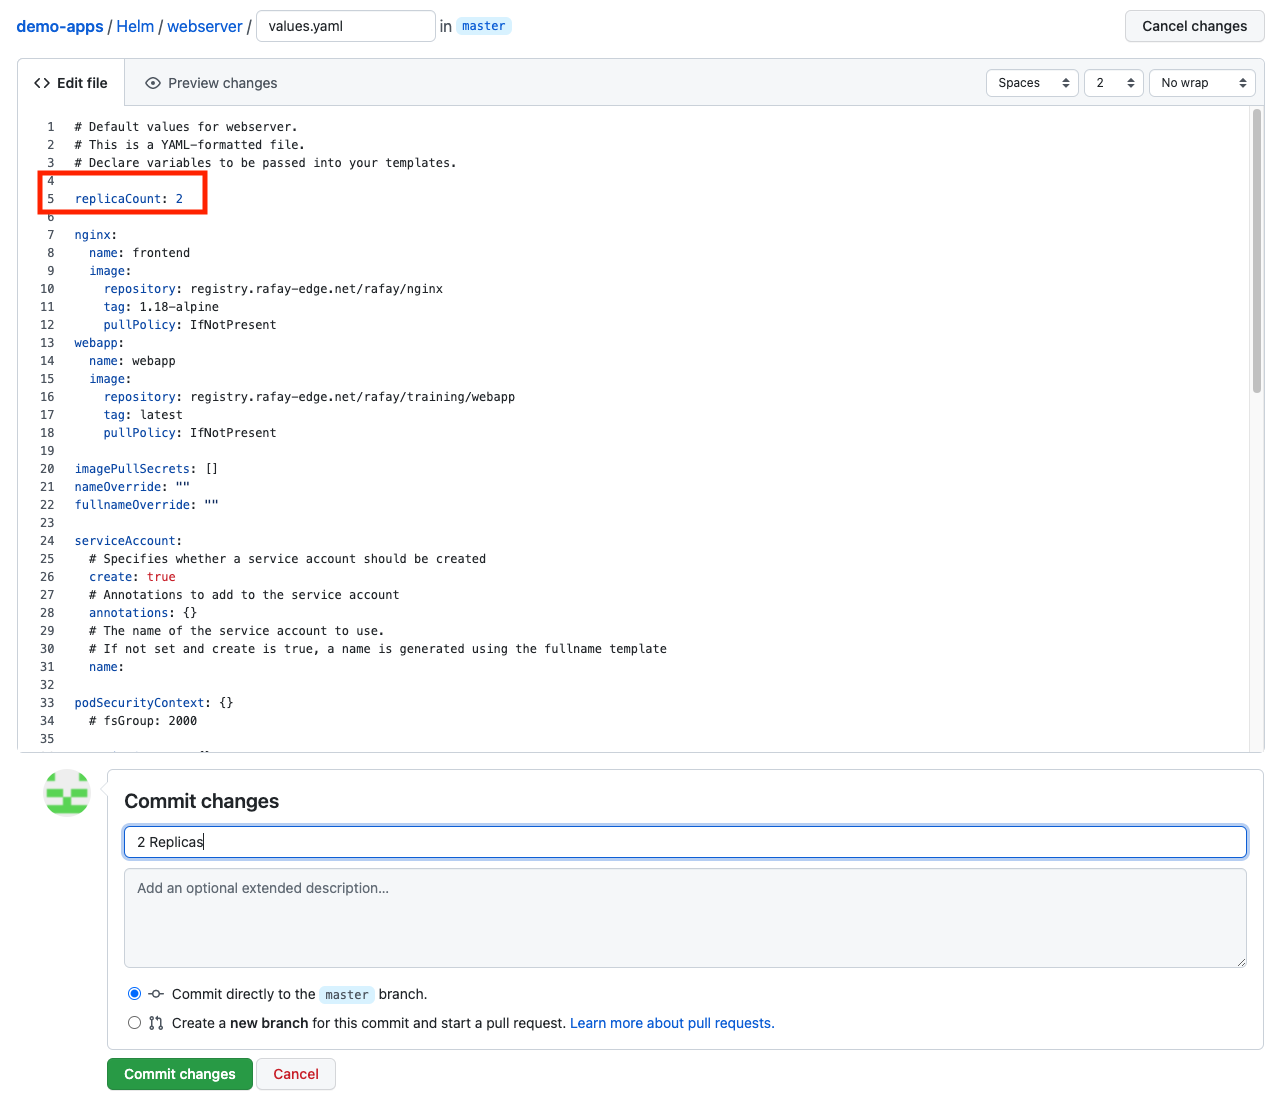
Step 7: Update Git Repo
Now, you are ready to make changes in your Git repo and have the changes be picked up by the pipeline and reconciled to the clusters.
- Navigate to the file "Git repo -> demo-apps -> Helm -> webserver -> values.yaml"
- Update the "replicaCount" to a different number. For example, from 1 to 2
- Commit the changes to the repository
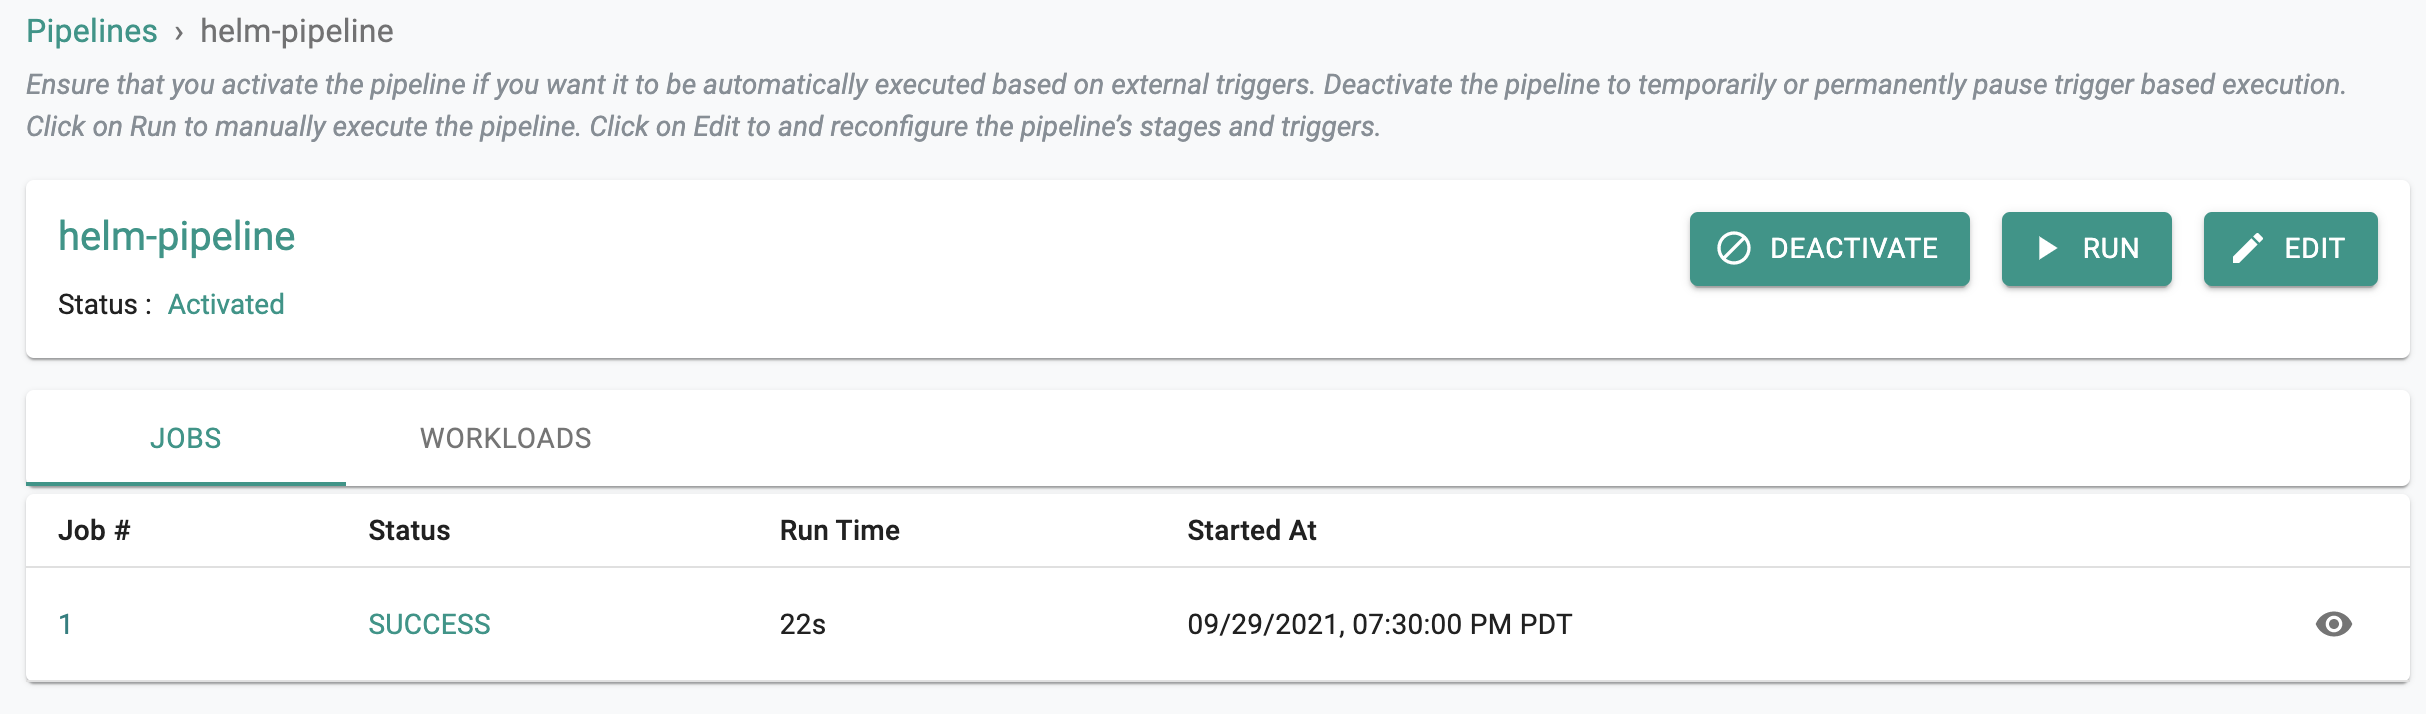
In a few seconds, the cron job based trigger will detect the changes and execute a pipeline job. In the example below, the pipeline took 22 seconds to reconcile the changes in the Git repository with the downstream clusters.
Step 8: Verify Updates on Cluster
- Navigate to Infrastructure -> Cluster
- Click on Kubectl and check the number of replicas.
In the example below, notice that the age of one of the pods is just 15 seconds. This was the additional replica added as part of the changes in the Git repo.
kubectl get po -n first

NAME                                   READY   STATUS    RESTARTS   AGE
test-helm-webserver-7874b96c7c-gslv4   2/2     Running   0          15s
test-helm-webserver-7874b96c7c-tzpqt   2/2     Running   0          142m
Recap
Congratulations! At this point, you have successfully created a workload and wrapped it with a GitOps pipeline for completely automated, hands off deployments.