GCP Configuration
GCP IAM
To create and manage GKE clusters, complete the following configuration in GCP console
- GCP Project
- IAM Policy
- Cloud Credentials
- Enable APIs
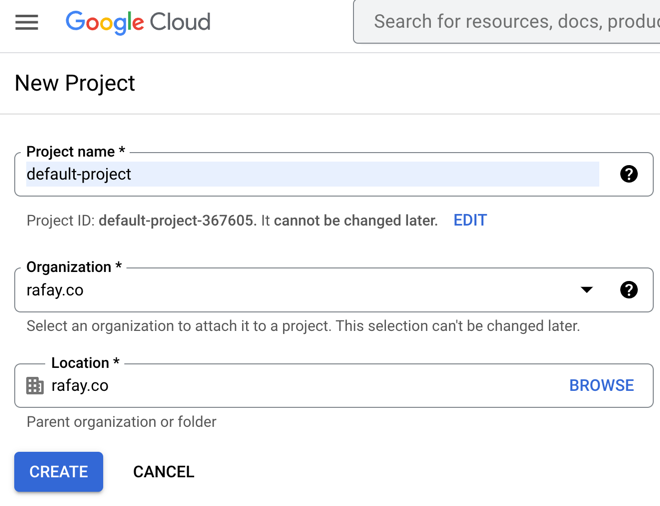
Step 1: GCP Project
Important
Skip this step if you would like to use an "existing" GCP project
- Login to the GCP Console
- Click on IAM & Admin and select IAM
- Click Create Project
- Provide a project name and select an organization
- Browse for a required location and click Create
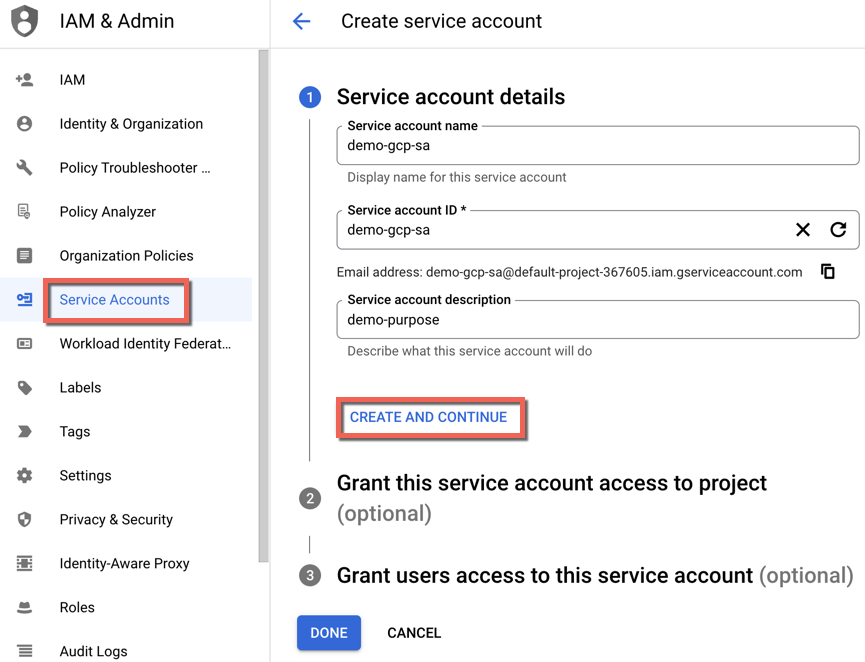
Step 2: IAM Policy
Create Service Account
- Click on IAM & Admin and select Service Accounts
- Click Create Service Account
- Provide a Service Account Name and the Service Account ID (auto generated)
- Optionally, provide a Service account description and click Create and Continue
Add Roles to SAs
Add the below roles to the created Service Account
- Compute Admin
- Kubernetes Engine Admin
- Service Account User
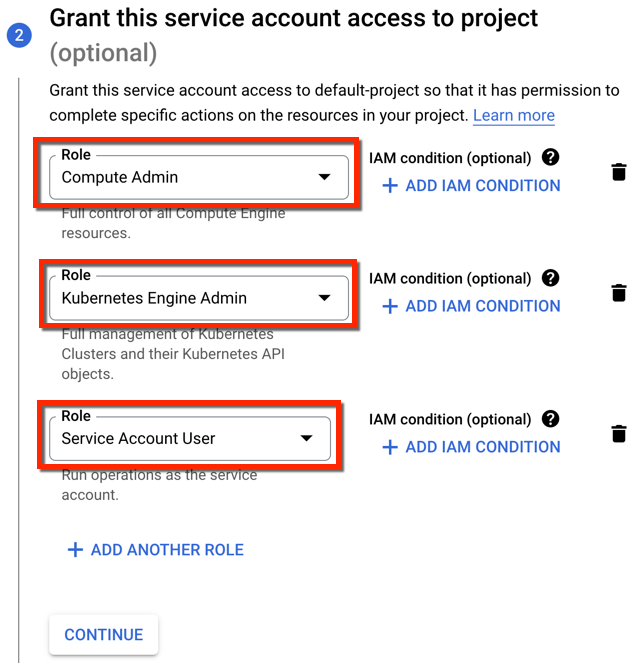
Click Continue
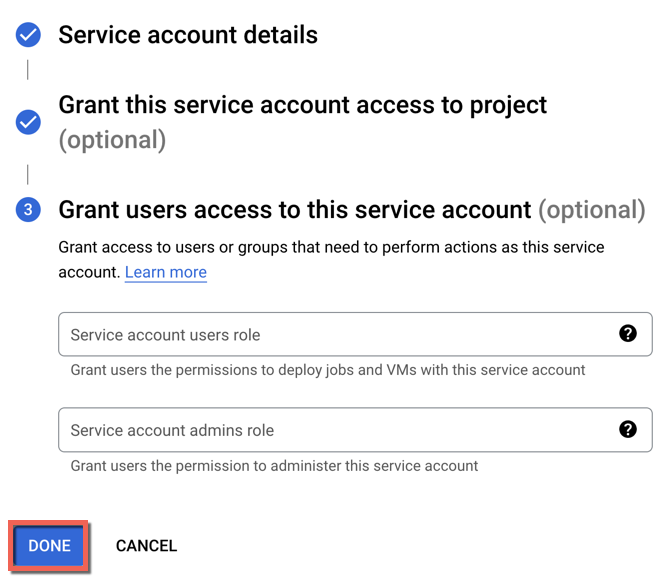
Grant User Access
Optionally, add one or more users to this service account and click Done
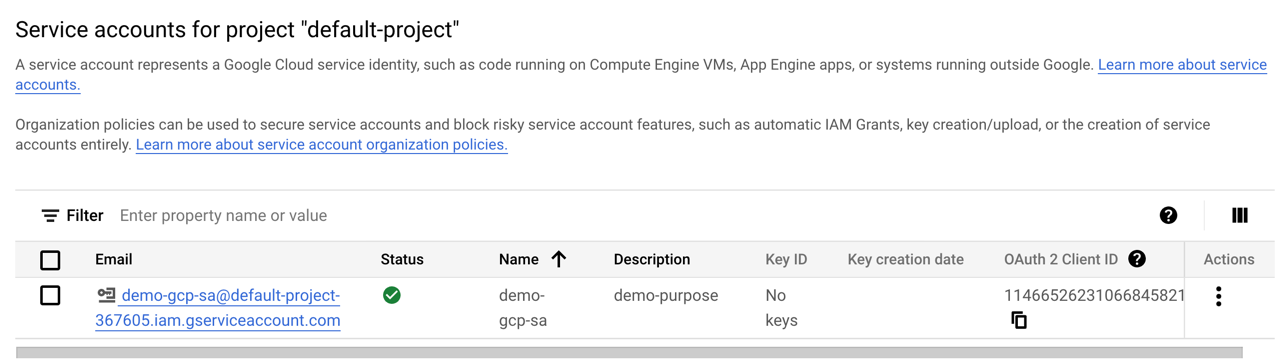
On successful creation, you can view the service account listed in the table as shown below
Step 3: JSON Credential
Once the Service Account is created,
- Select the service account from the list and click the Keys tab
- Click Add Key and select Create new Key
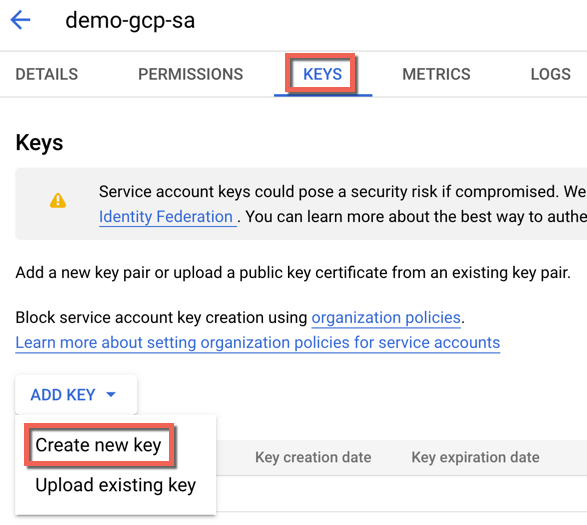
By default, JSON key type is selected
- Click Create
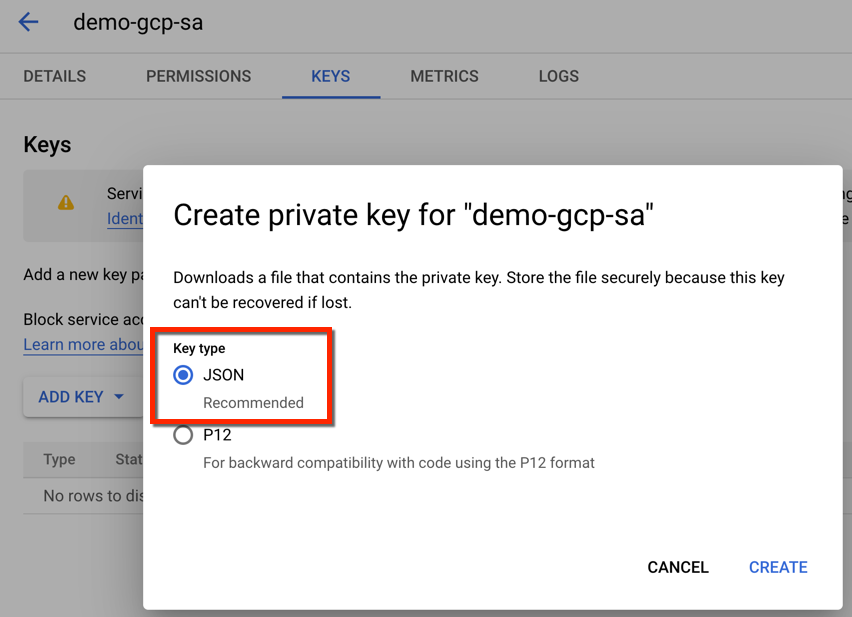
On successful creation, the json file will be downloaded automatically. We will use this json file to create a Cloud Credential in Controller for GKE lifecycle management.
Step 4: Enable APIs
Enable the following APIs on your Google Cloud Platform to allow the controller to interact with GCP progammatically using GCP's APIs.
In the GCP Console,
- Click APIs & Services
-
Enable APIs And Services
-
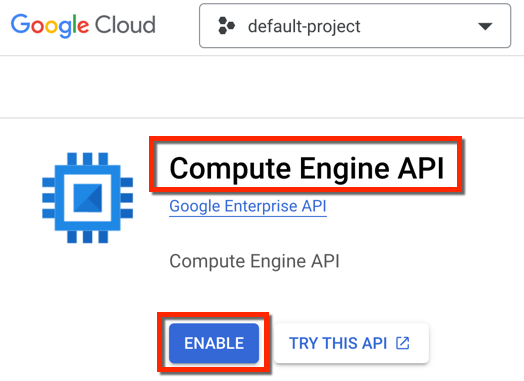
Search for the below three (3) APIs from a list of APIs and enable
- Compute Engine API
- Cloud Resource Manager API
- Kubernetes Engine API
Below is an example showing what this looks like for the Compute Engine API
Cross Project Service Accounts
Users can now leverage a centralized IAM service account from one Google Cloud project to provision GKE clusters in another project, streamlining service account management across the organization.
To enable cross-project service account usage, follow the steps below. Assume Project demos-12345 is the project from which a service account is to be used to create a cluster in Project dev-12345
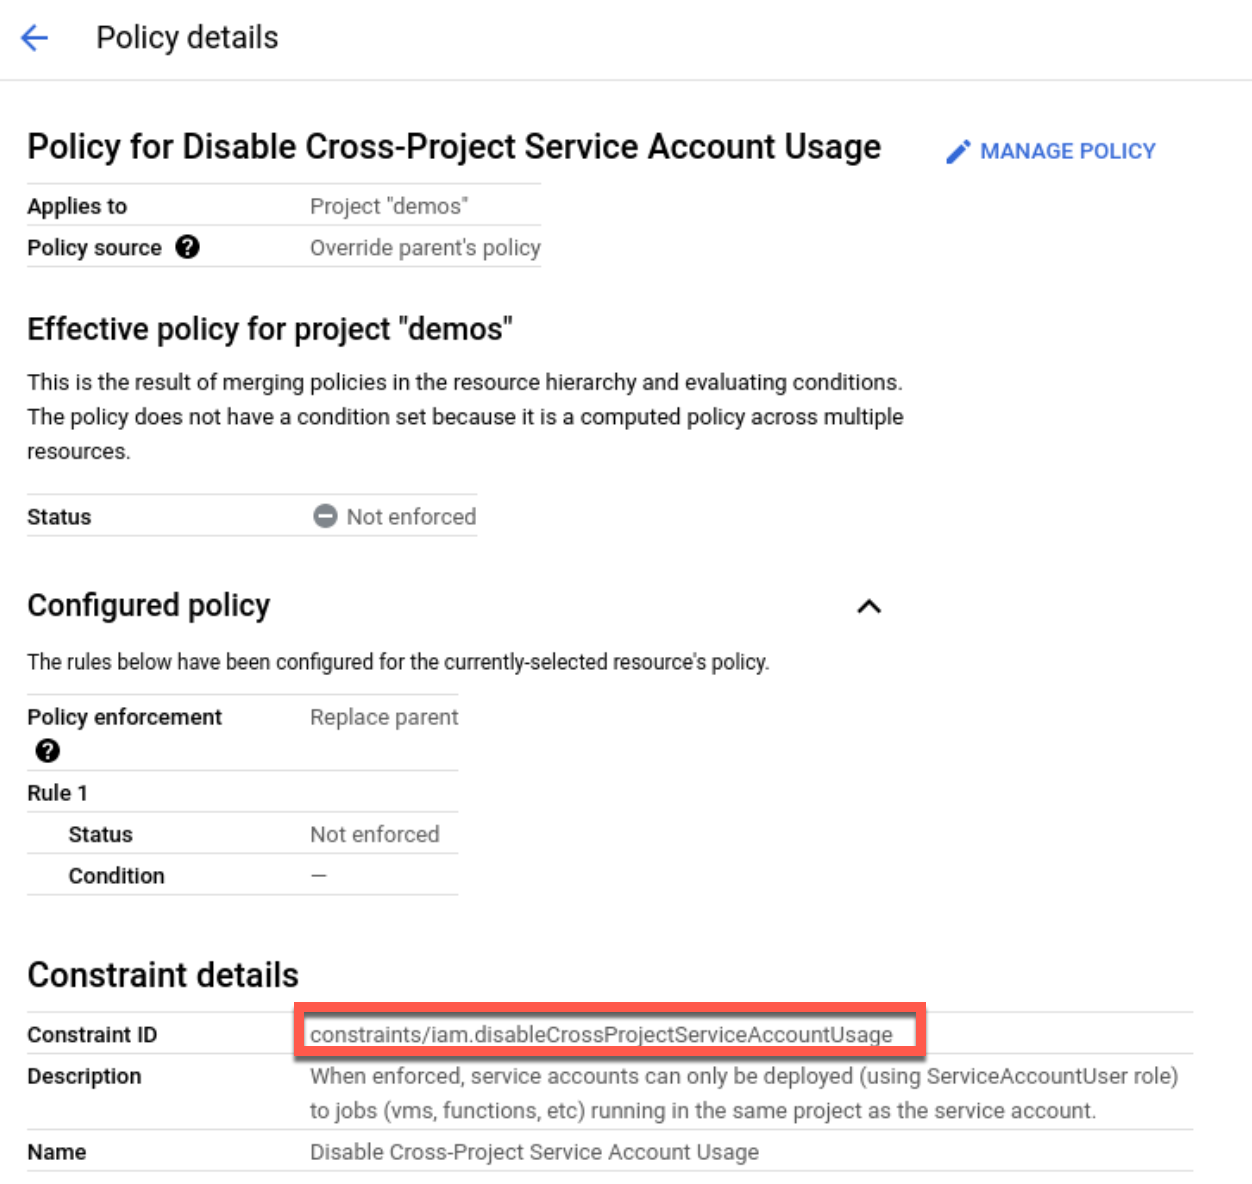
Step 1: Enabling Cross-Project Service Account Usage in GCP
- On project demos-12345, go to IAM & Admin on the GCP Console.
- Select Organization Policies and search for
constraints/iam.disableCrossProjectServiceAccountUsage. - Click Edit and select Override parent’s policy.
- Add a rule and set Enforcement off.
Step 2: Configure Service Account
-
In the demos-12345 project, create the service account
[email protected]. In the controller, create a cloud credential with the keys of this service account. -
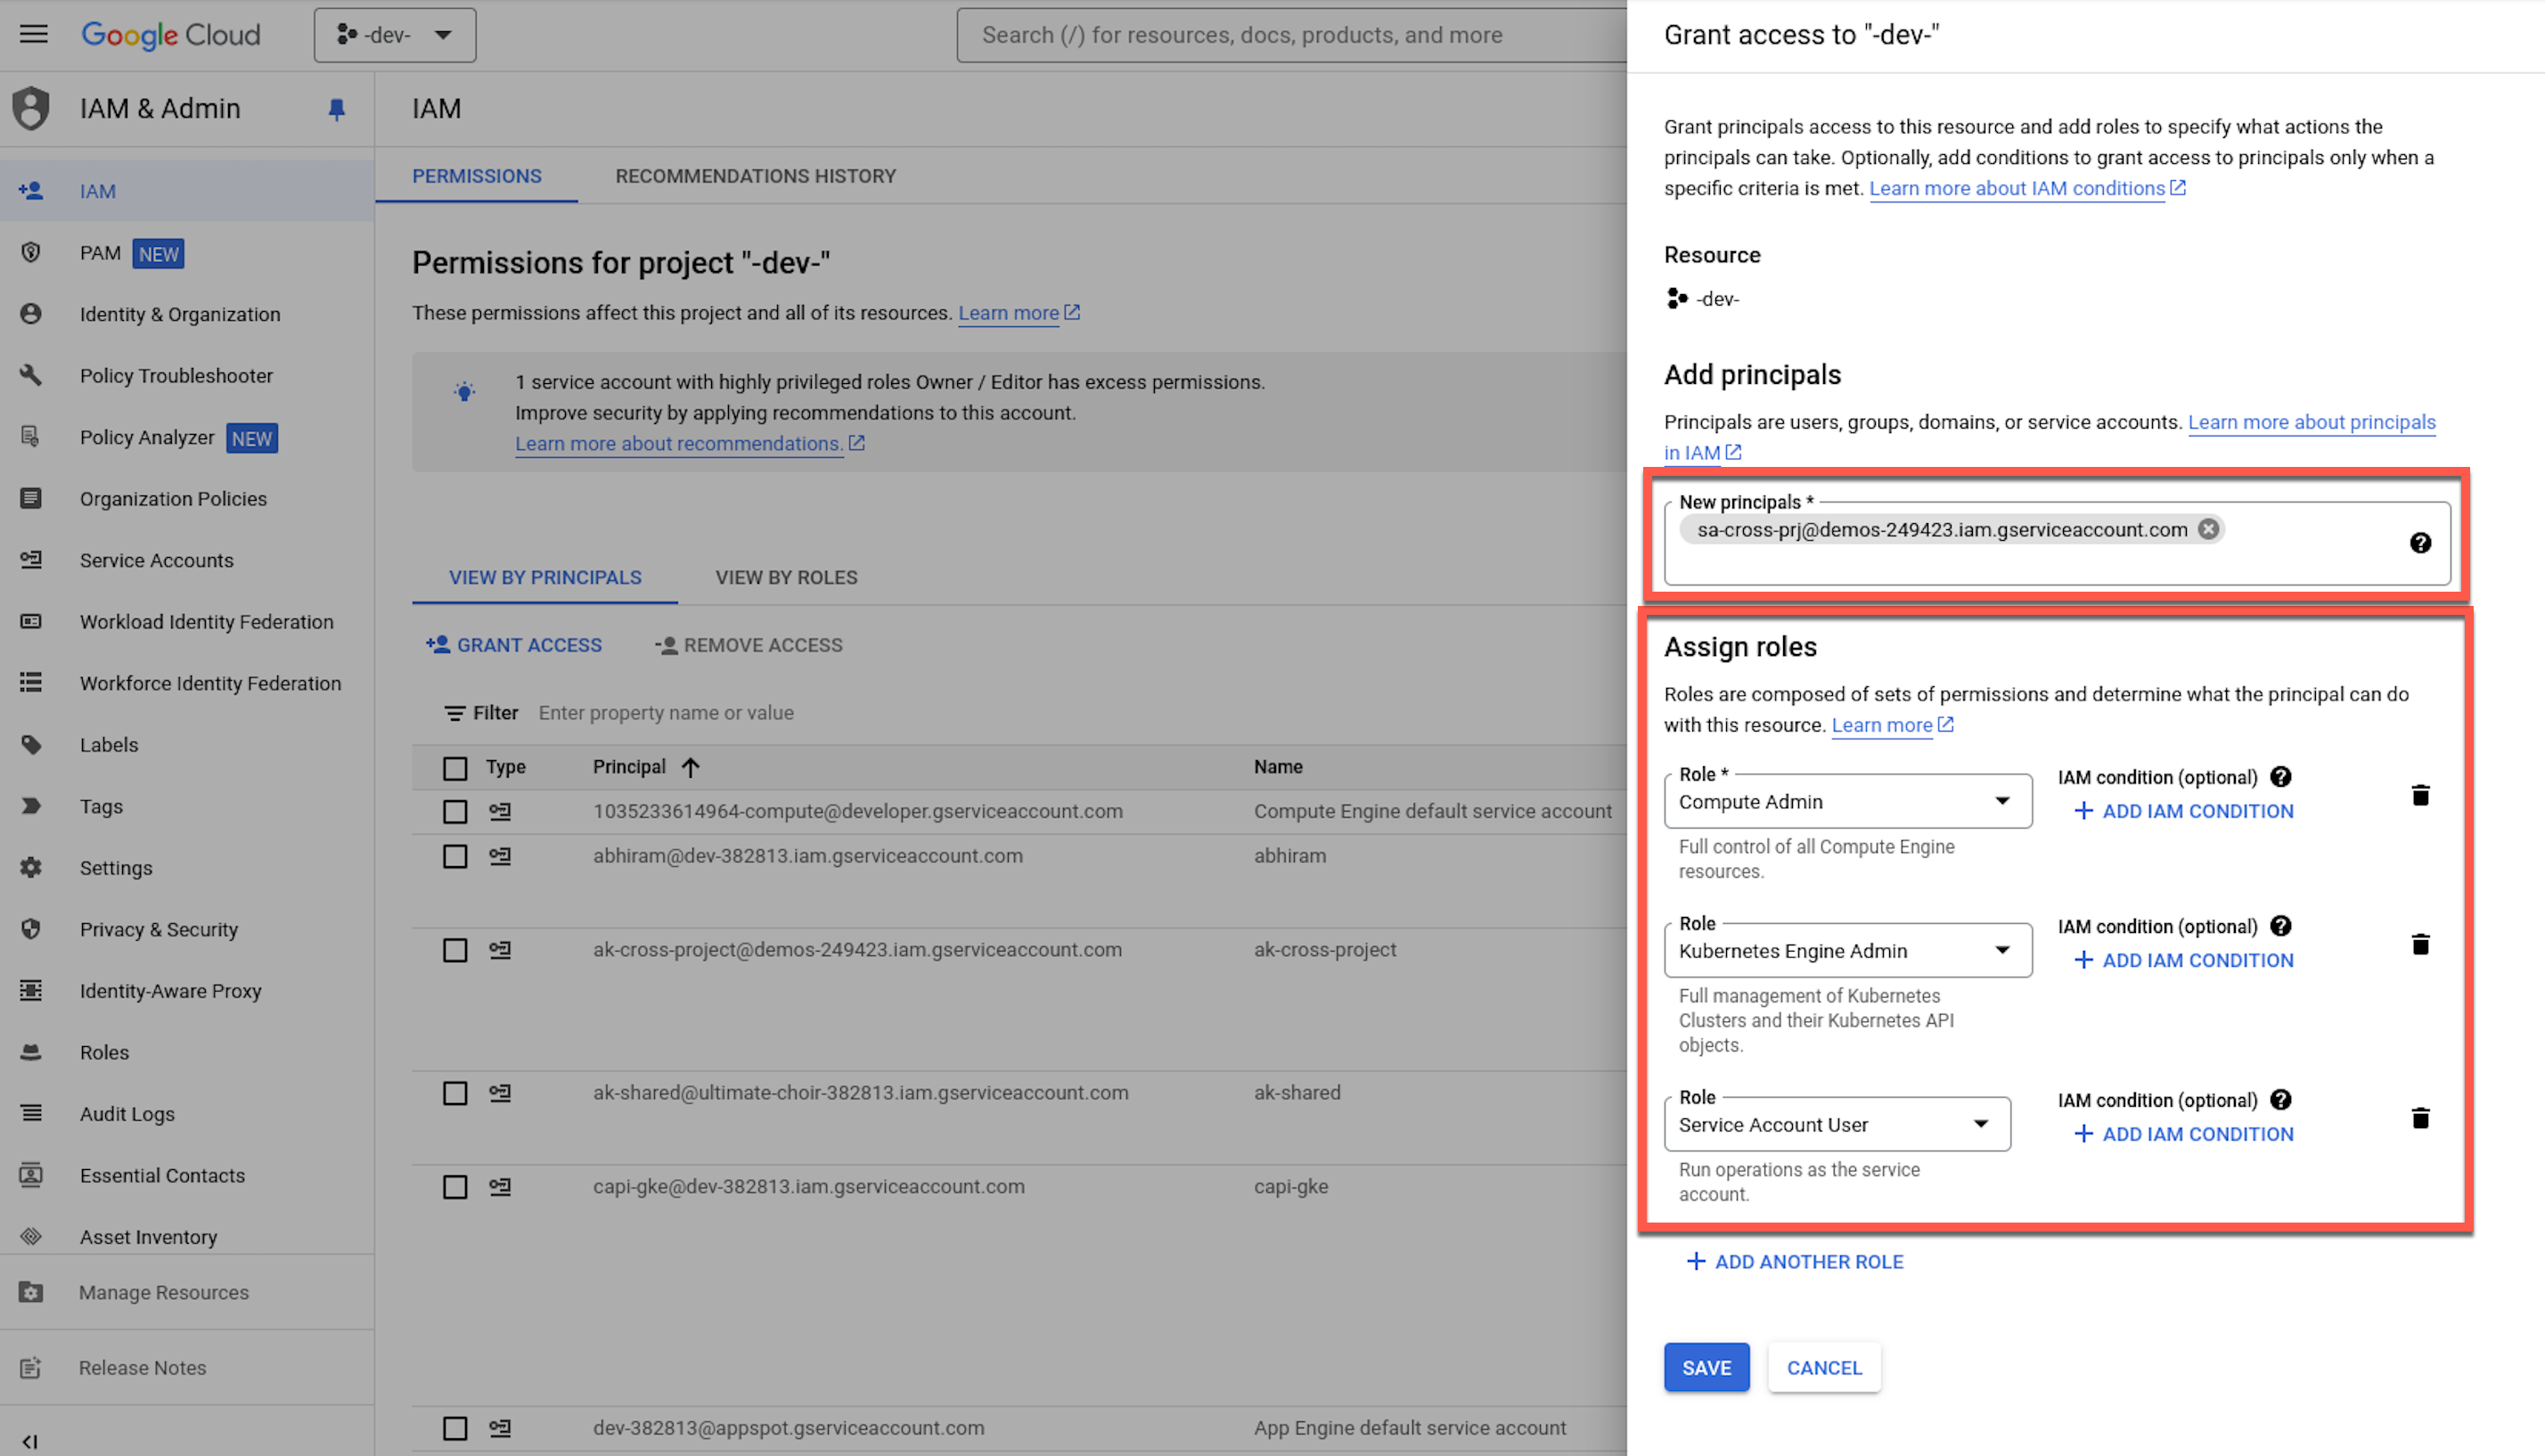
Navigate to IAM & Admin -> IAM -> Grant Access under Project dev-12345 in the GCP Console. Add the principal
[email protected]with the roles Compute Admin, Kubernetes Engine Admin, and Service Account User.
-
Grant the service agents in the dev-12345 project access to the service account
[email protected]in the demos-12345 project. This is necessary because resources such as the bootstrap VM need to use the service account to pull kubeconfig to apply bootstrap yaml.- Get project number for Project dev-12345
gcloud projects describe dev-12345 --format="value(projectNumber)"
1035233614964
gcloud iam service-accounts add-iam-policy-binding \
     [email protected]  \
      --member=serviceAccount:[email protected] \
      --role=roles/iam.serviceAccountTokenCreator --project demos-12345
gcloud iam service-accounts add-iam-policy-binding \
     [email protected]  \
      --member=serviceAccount:service-1035233614964@container-engine-robot.iam.gserviceaccount.com \
      --role=roles/iam.serviceAccountUser --project demos-12345
gcloud iam service-accounts add-iam-policy-binding \
     [email protected]  \
      --member=serviceAccount:[email protected] \
      --role=roles/iam.serviceAccountUser --project demos-12345
Step 3: Launch the GKE cluster in Controller
Launch the cluster in Project dev-12345 using the controller, but utilize the cloud credential with the service account [email protected] from project demos-12345.
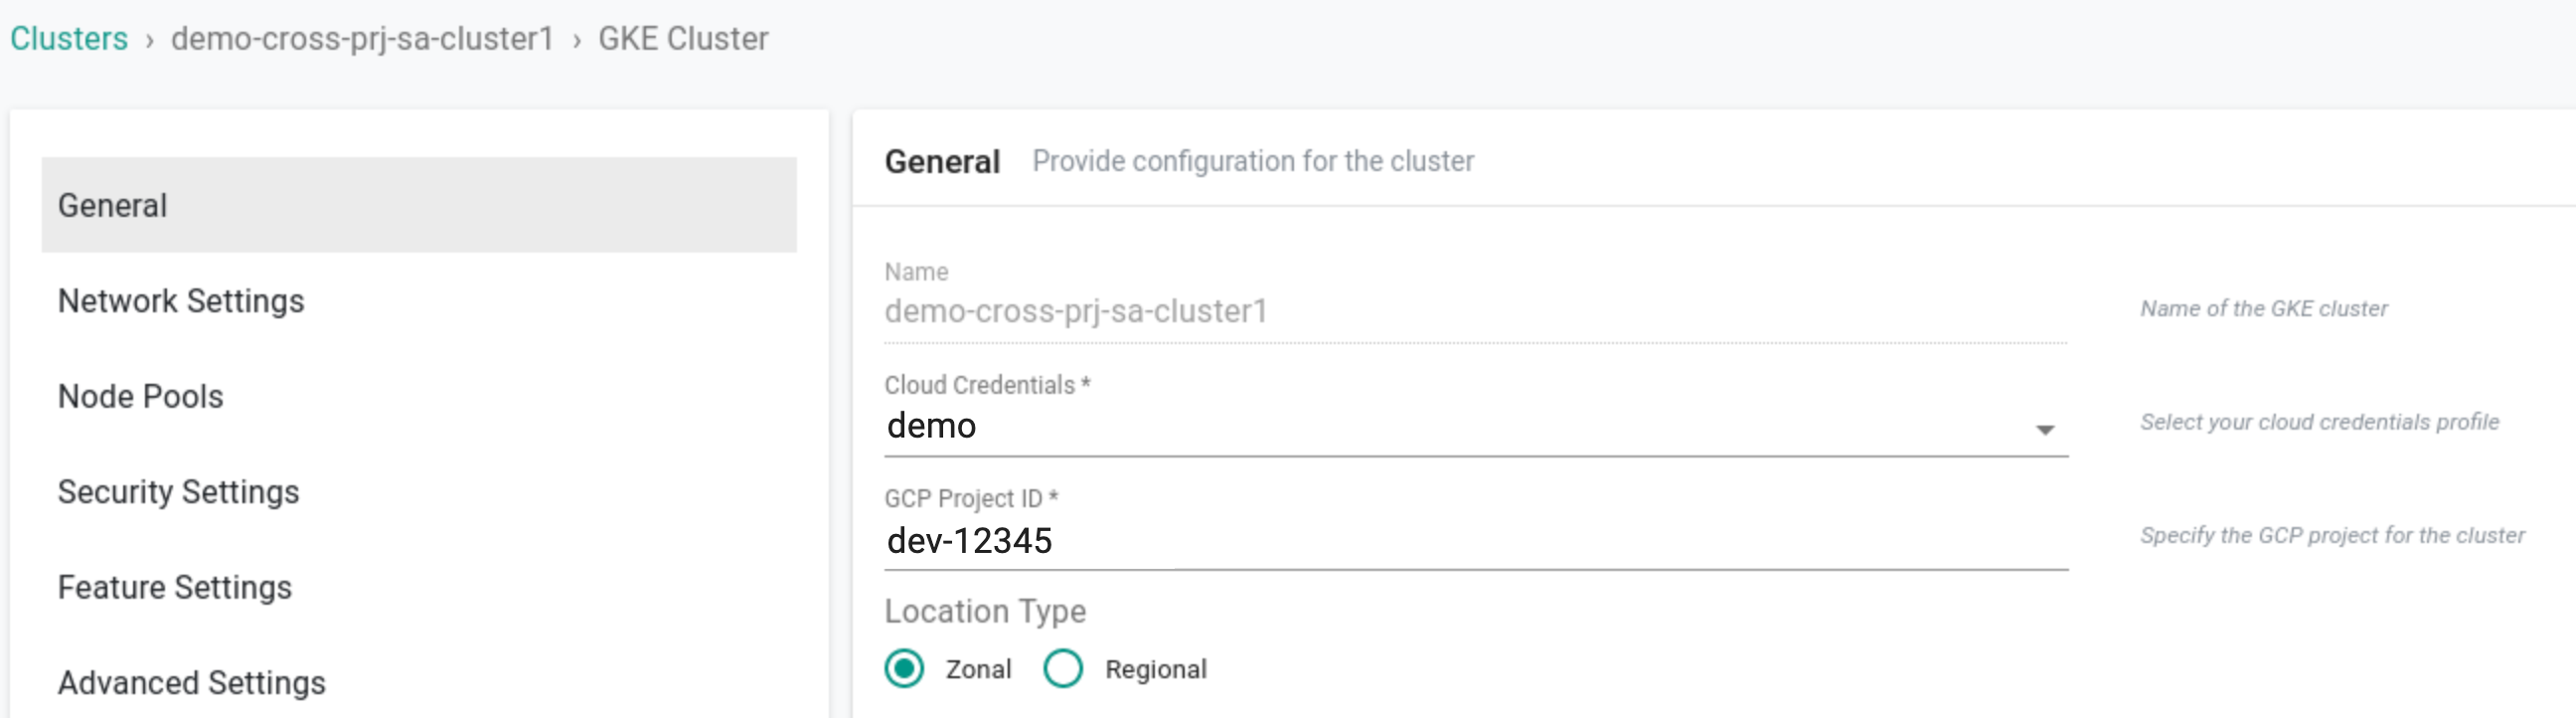
After successful provisioning, the cloud credential GCP Project and cluster GCP Project differ in the cluster Configuration.
Reservation Affinity
Users can reserve Compute Engine instances in a specific zone to ensure that resources are available for their workloads when needed. Reservation ensures Compute Engine resources are readily available by securing capacity for zonal resources. With capacity reservation, VMs start in less than 120 seconds, offering quick access to resources. Each reservation guarantees capacity for one or more VMs with the same properties, and reserved resources are available immediately upon creation and persist until deletion. For more information, visit this page
Create Reservation
To create a reservation, perform the below steps in the Google Cloud Console.
- Select Compute Engine and the required project from the drop-down
- Select Reservation and click Create Reservation
- Provide a reservation name and optionally, a description
- Select a Region and Zone for reserving the capacity
-
Select the reservation type based on the requirement:
- Local: Local reservation can only be applied to the resources in the current project
- Shared: A shared reservation can be used for resources across multiple projects, across folders or the entire organization. To use this shared reservation during GKE cluster Node Pool configuration, users must specify the project ID to which the reservation is shared and the exact reservation name
-
Select how to utilize this reservation when creating a VM instance from the two (2) options

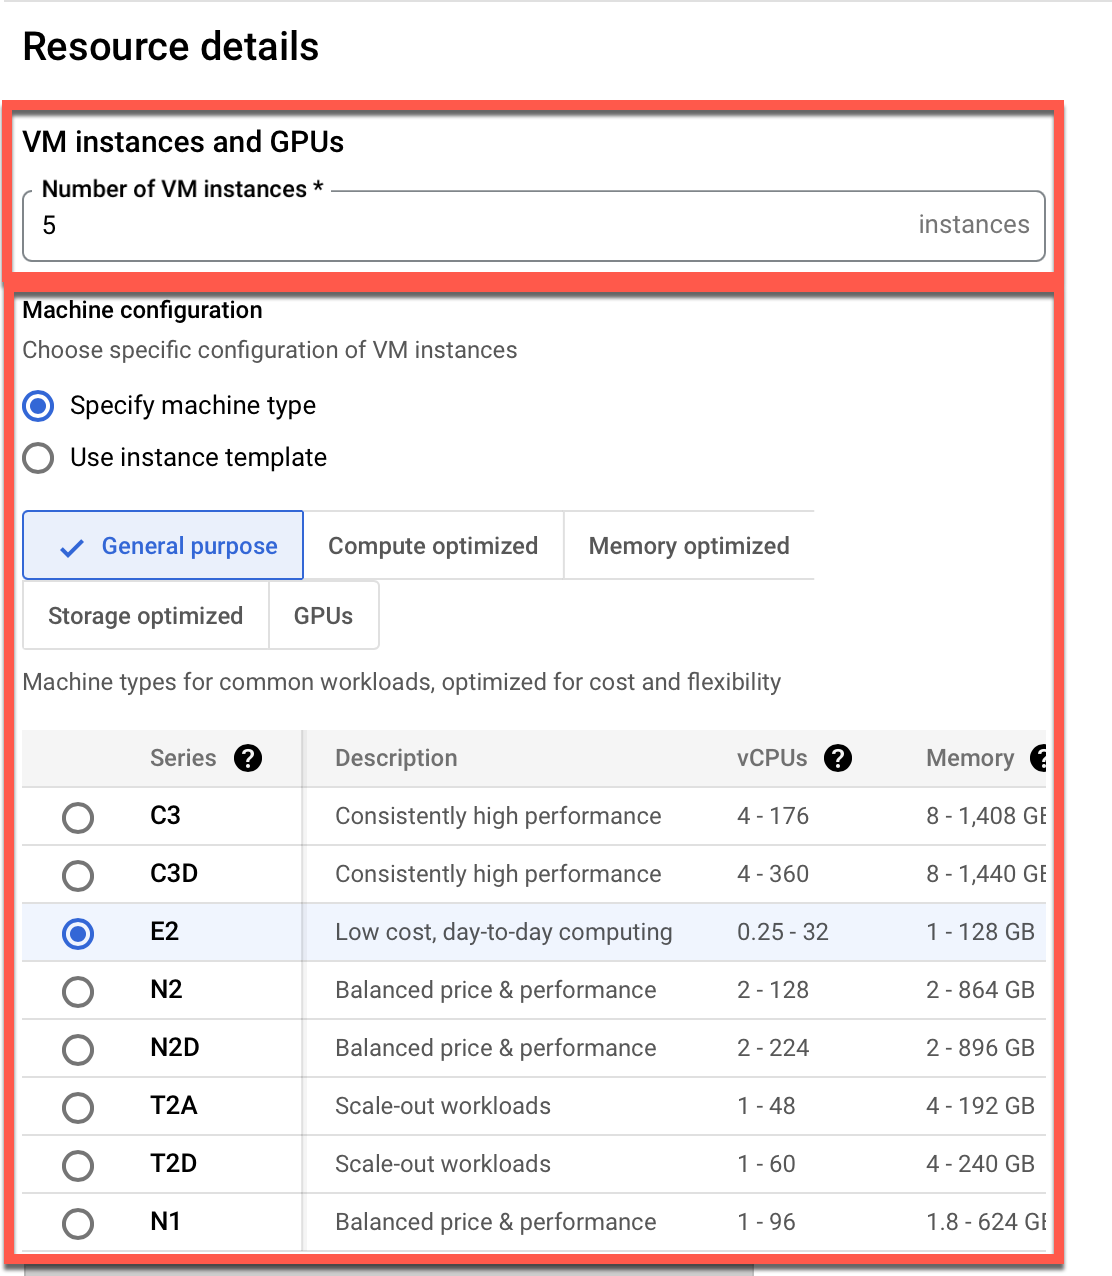
- Specify the Number of VM instances to reserve the capacity. Here is an example with a count of 5 to reserve capacity for five instances
- Choose VM instances configuration:
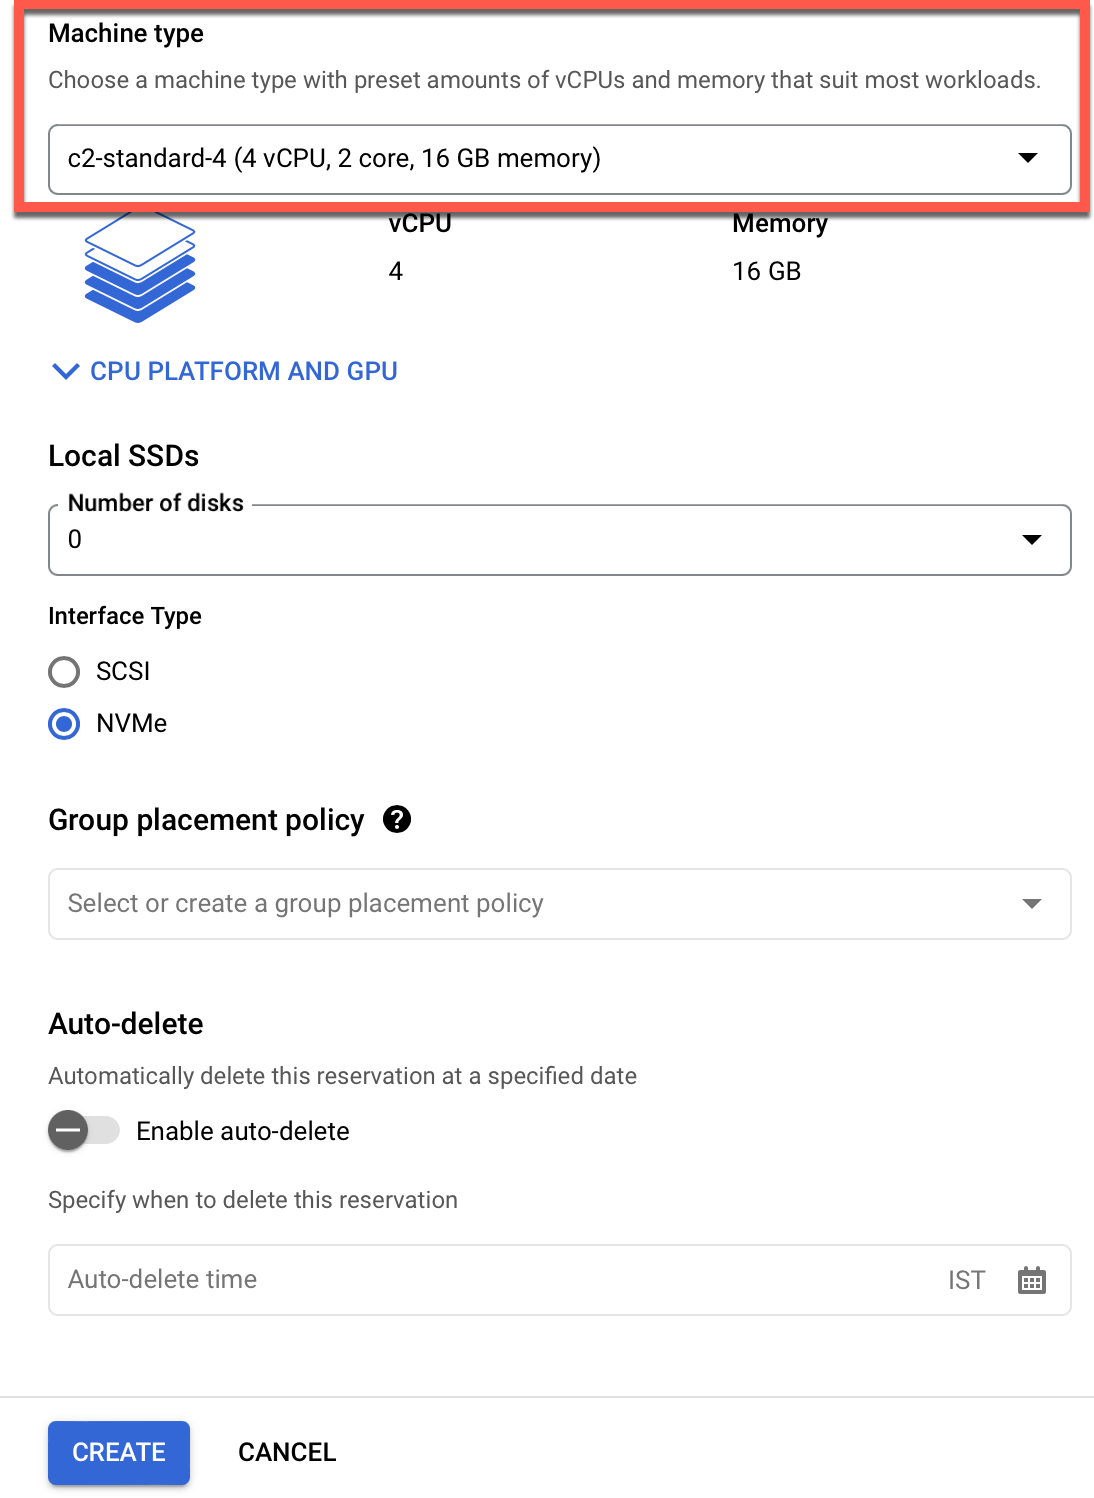
- Specify machine type: Choose from various machine types available
- Use instance template: Select the desired instance template from the drop-down menu
- Select the required Machine Type from the drop-down and click Create
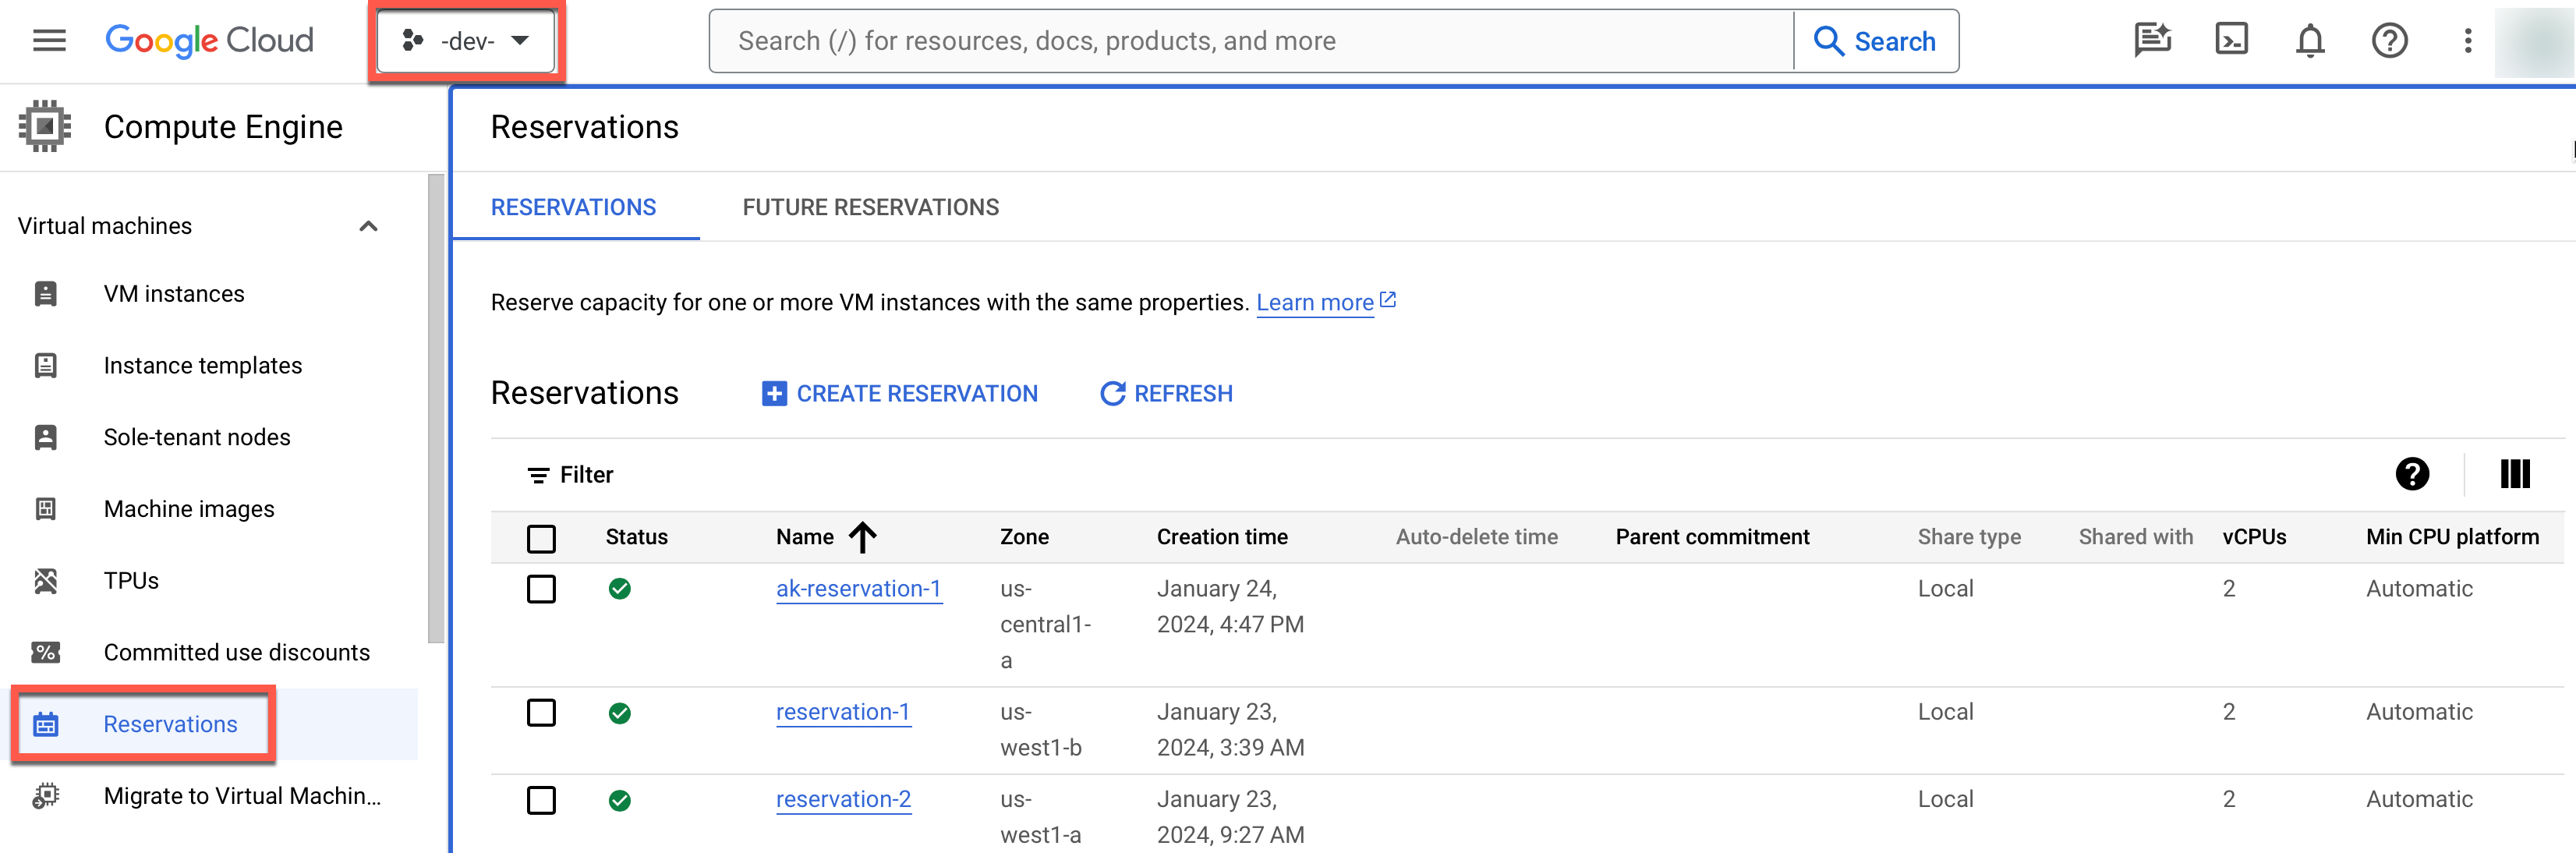
Once the reservation is created, view it as depicted below:
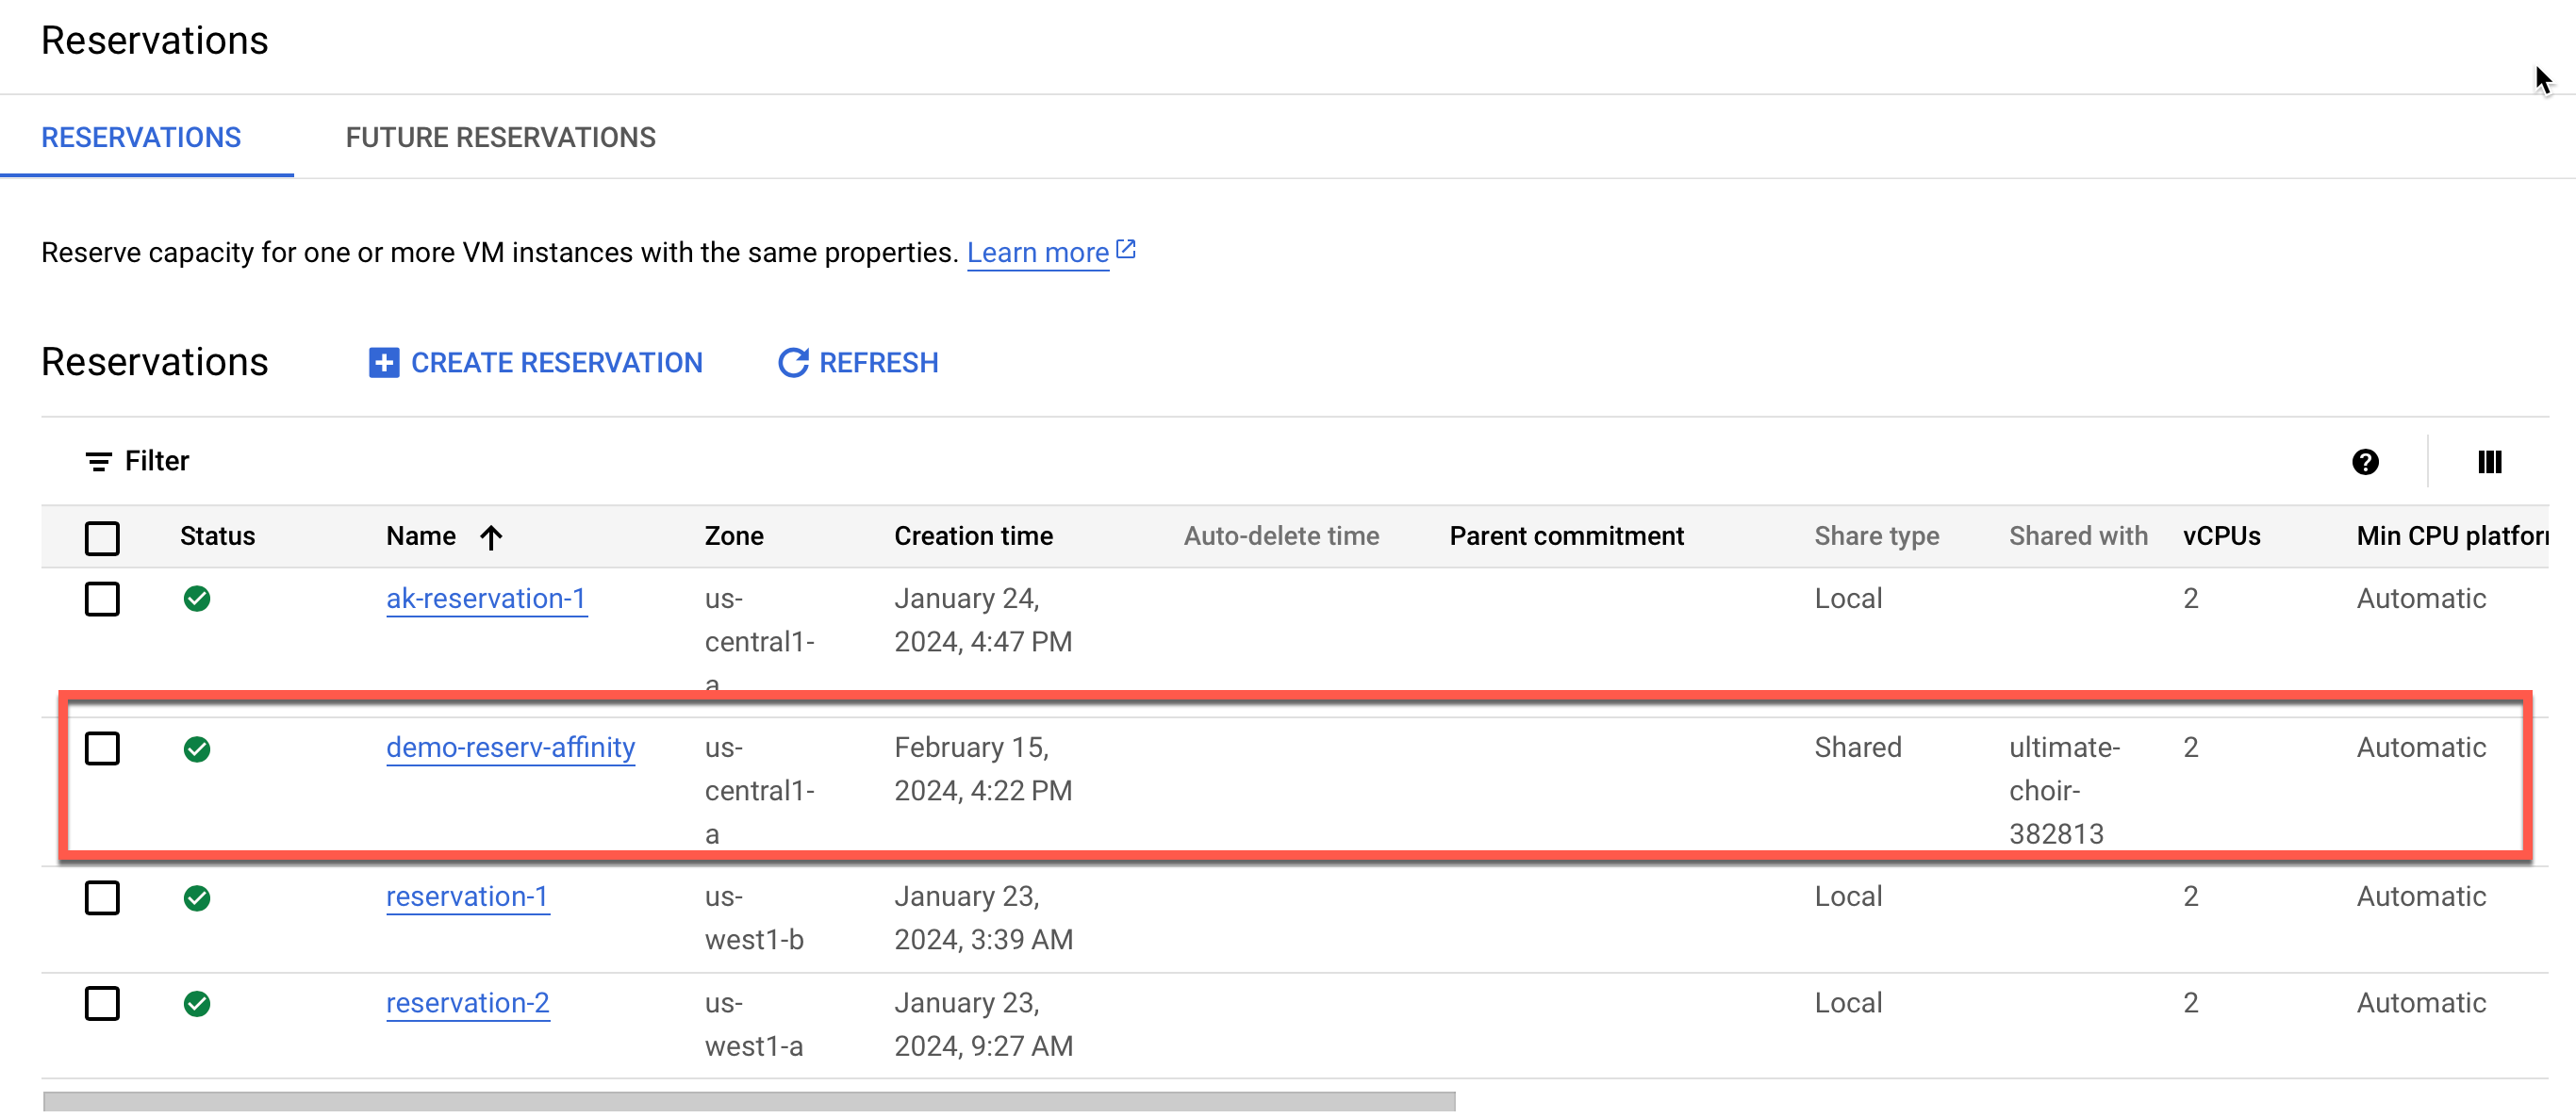
NOTE: Upon successful creation of a reservation, the user can only edit the Number of VM instances and not any other details.
Users can utilize these VM reservations when adding the GKE Clusters Node Pool configuration via the controller. Also, these reservations can be used by multiple clusters until the capacity limit is reached.