AWS CNI
Overview
Cilium is a popular CNI (Container Network Interface) in the market today because of its eBPF implementation that allows it to perform at a higher scale and gain deep insights into your network and security enforcement at the kernel level. However, one of the key capabilities of Cilium that makes it extremely useful is its ability to chain with other CNIs, allowing customers to not disrupt their existing network configuration while still being able to use some of the key capabilities of Cilium such as network policies.
What Will You Do
In this exercise,
- You will create a cluster blueprint with a "Cilium" add-on.
- You will then apply this cluster blueprint to the managed cluster to have Cilium running in chained mode for network policy enforcement.
- Along with Cilium, you will be installing Hubble with its relay and user interface components.
Important
This tutorial describes the steps to create and use a Cilium-based blueprint using the Web Console. The entire workflow can also be fully automated and embedded into an automation pipeline.
Assumptions
- You have already provisioned or imported an AWS EKS cluster using the controller and that it is in a healthy state.
- The primary CNI in use by the EKS Cluster is AWS CNI.
Pre-requisites
Download Cilium Helm Chart package from Cilium’s repo GitHub - Helm charts repository for the Cilium project
Step 1: Create Cilium Add-On
In this example, we will be using Cilium 1.14.2. Follow the below steps to create the add-on.
(1) Create a Helm 3 type add-on in controller and configure the above downloaded Cilium Helm Chart. To support chaining configuration, override the default values as follows, based on the primary CNI running in the cluster
Below is an example of AWS Primary CNI value.yaml
enableIPv4Masquerade: false
tunnel: "disabled"
cni:
  chainingMode: "aws-cni"
  customConf: true
  configMap: "cilium-chained-config"
  uninstall: true
operator:
  replicas: 1
(2) Create another add-on of type K8s YAML and provide custom configurations for values. This configuration will be deployed as a ConfigMap in the cluster, and the Cilium chaining deployment mentioned above depends on this ConfigMap. Custom configurations can be found below.
Below is an example configuration for the ConfigMap that will be deployed in the cluster:
apiVersion: v1
kind: ConfigMap
metadata:
  name: cilium-chained-config
data:
  cni-config: |-
    {
      "cniVersion": "0.3.1",
      "name": "aws-cni",
      "plugins": [
        {
          "name": "aws-cni",
          "type": "aws-cni",
          "vethPrefix": "eni",
          "mtu": "9001",
          "pluginLogFile": "/var/log/aws-routed-eni/plugin.log",
          "pluginLogLevel": "DEBUG"
        },
        {
          "type": "portmap",
          "capabilities": {"portMappings": true},
          "snat": true
        },
        {
           "name": "cilium",
           "type": "cilium-cni",
           "enable-debug": false
        }
      ]
    }
Step 2: Create the blueprint
Now, we are ready to assemble a custom cluster blueprint using the Cilium add-on.
- Under Infrastructure, select "Blueprints"
- Create a blueprint with the two add-ons mentioned above as custom add-ons. Configure the main Cilium add-on (from Point 1 of Step 1: Create Cilium Add-On) to depend on the add-on created in Point 2 of Step 1: Create Cilium Add-On
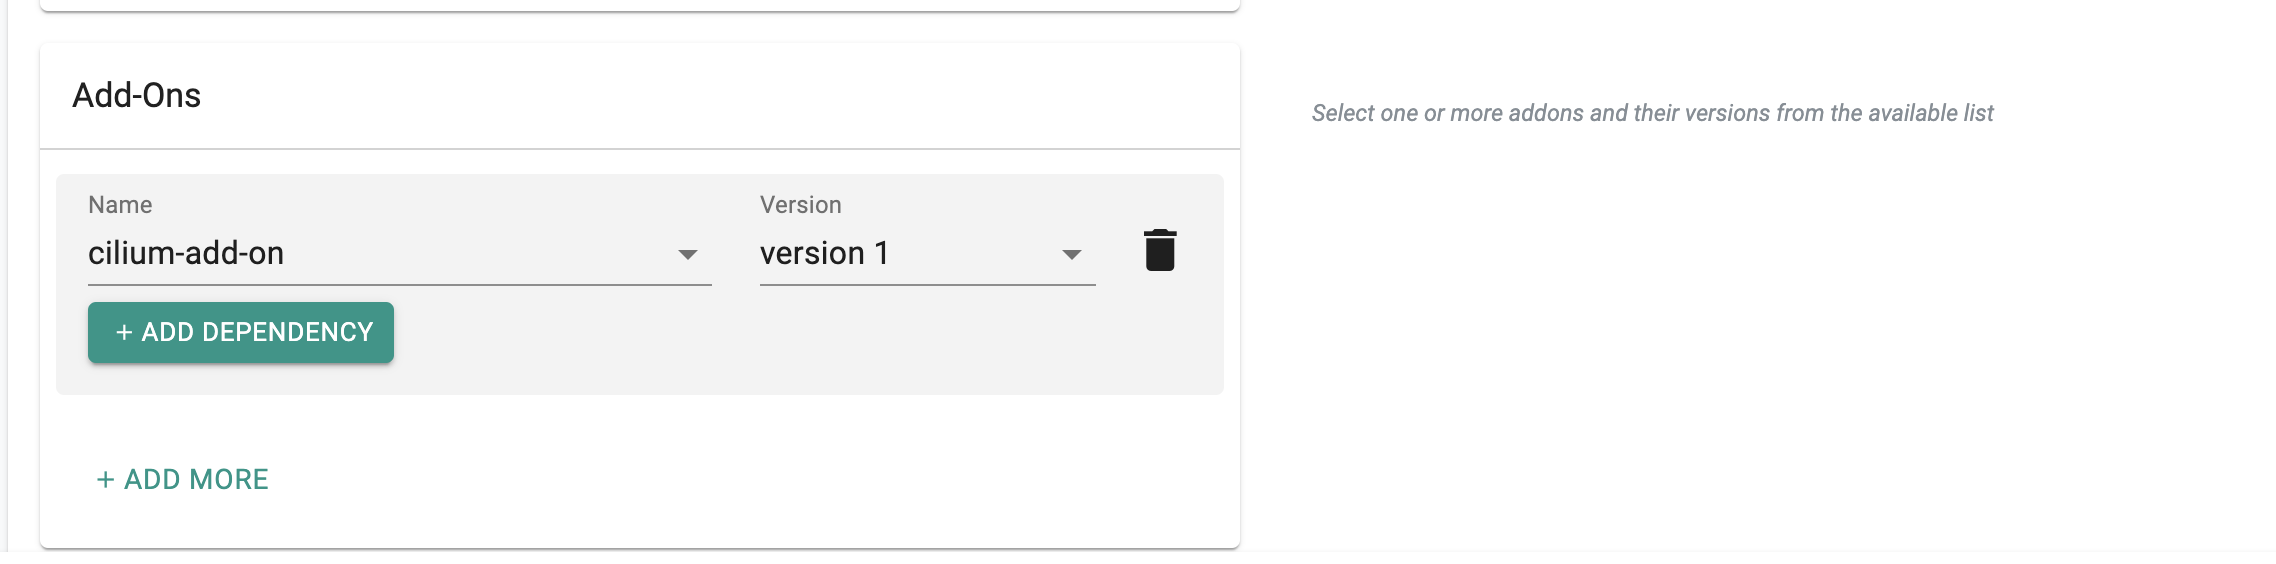
- Click "SAVE CHANGES"
Step 3: Apply Blueprint
Now, we are ready to apply this blueprint to a cluster.
Deploy the blueprint onto a cluster. The Cilium add-on will be deployed in the user's namespace in chaining mode, performing the same job as Rafay's managed network policy (Cilium in chaining mode).
- Click on Options for the target Cluster in the Web Console.
- Under Infrastructure, go clusters and scroll down to yours. Make sure your cluster’s reachable, control plane is healthy, it is operational, and that the blueprint sync is successful.
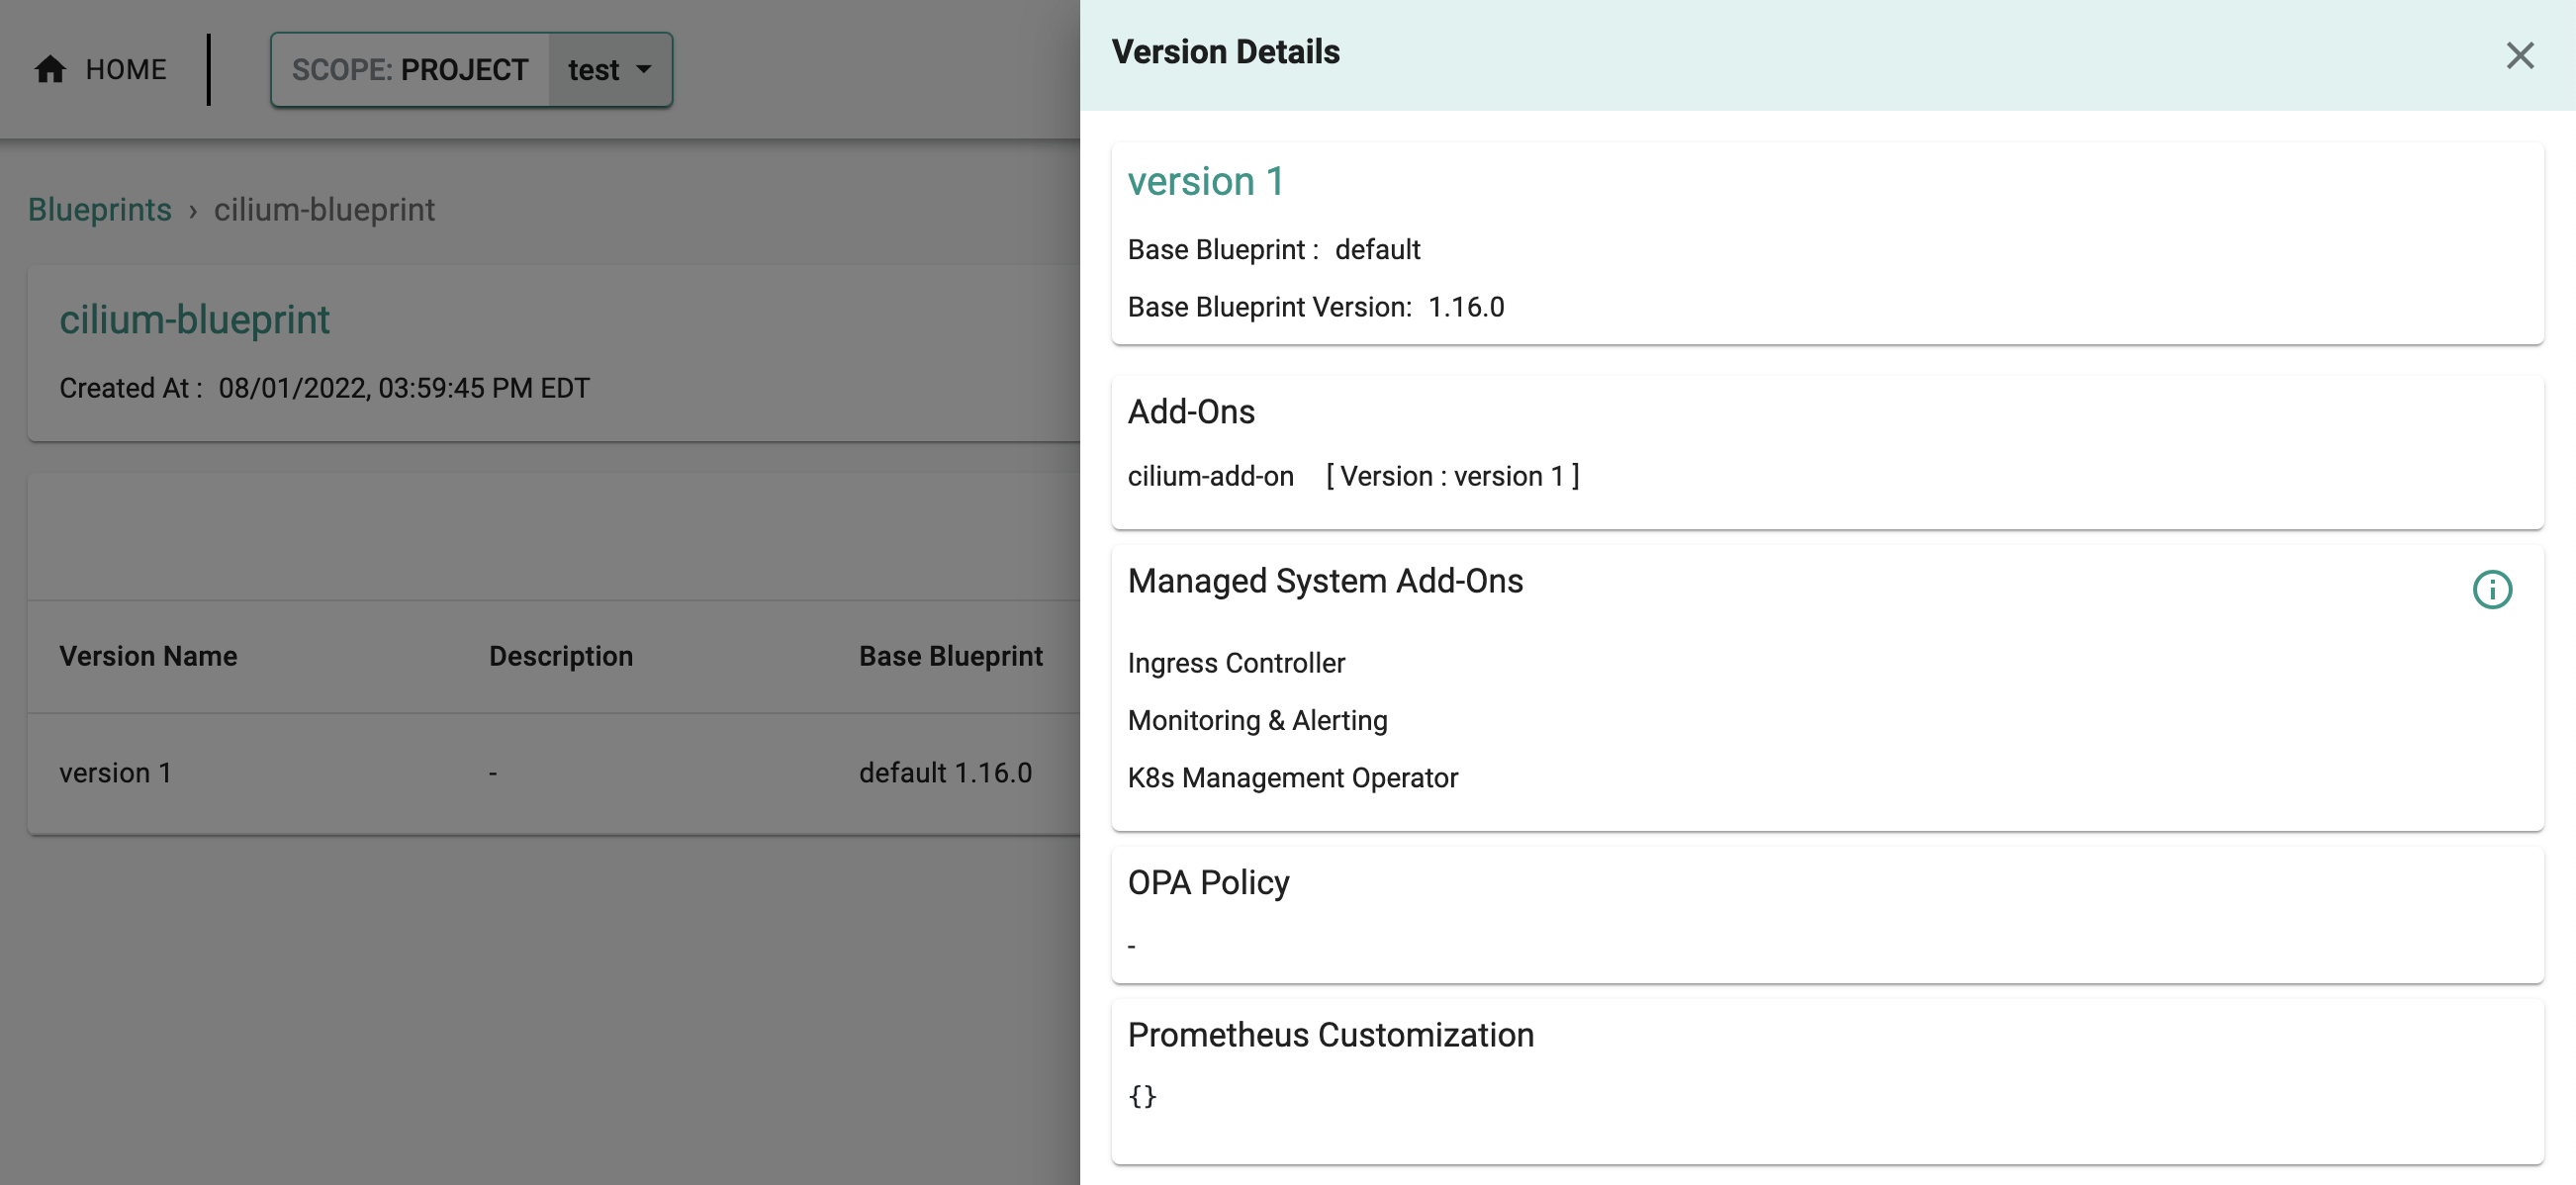
- Select "Update Blueprint" and select "cilium-blueprint" from the dropdown and for the version select "version 1" from the dropdown.
- Click on "Save and Publish".
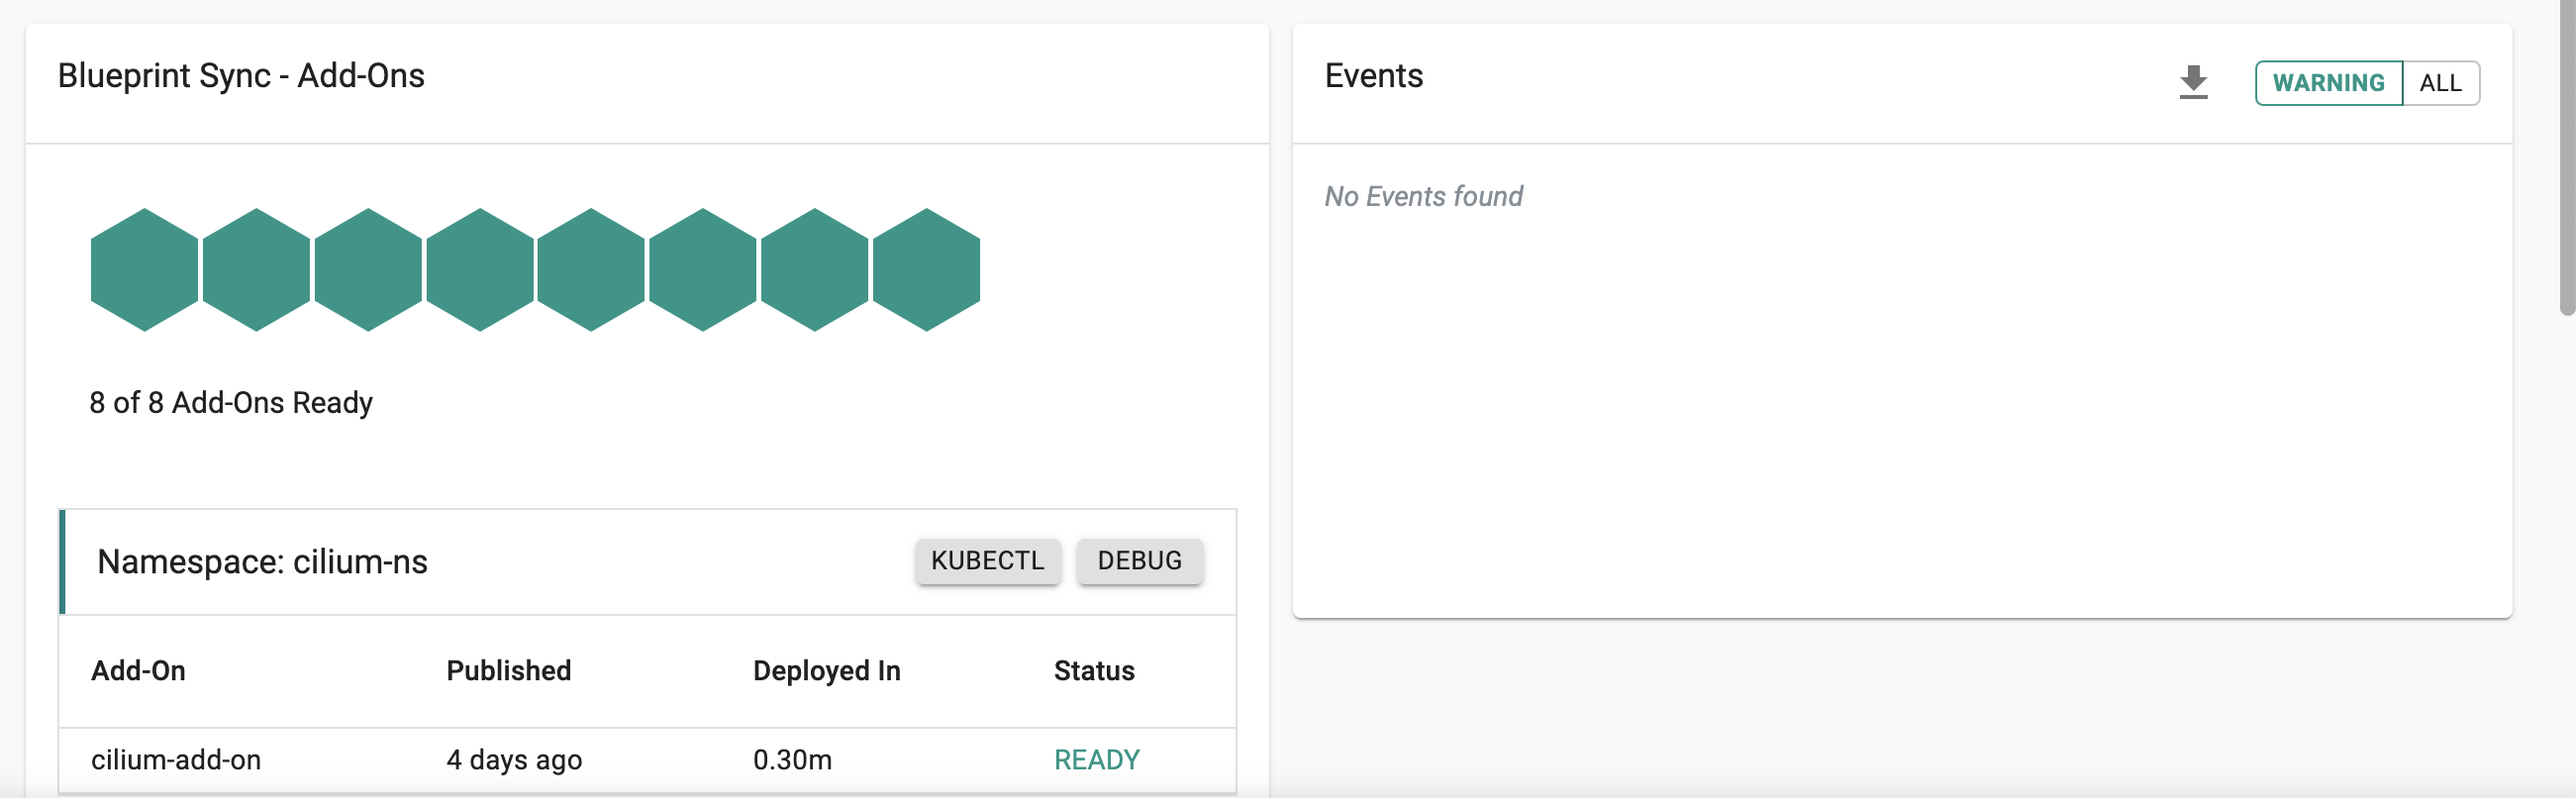
This will start the deployment of the add-ons configured in the cilium blueprint to the targeted cluster. Click on the arrow next to the "Blueprint Sync" status to see the status of the blueprint sync. The blueprint sync process can take a few minutes. Once complete, the cluster will display the current cluster blueprint details and whether the sync was successful or not.
Step 4: Enable Port-Forwarding
In order to access the Hubble interface, we will need to enable access to the frontend application using port-forward. To do this, we will download and use the Kubeconfig with the KubeCTL CLI
kubectl port-forward -n cilium-ns svc/hubble-ui --address 0.0.0.0 --address :: 12000:80

Forwarding from 0.0.0.0:12000 -> 8081
Forwarding from [::]:12000 -> 8081
Handling connection for 12000
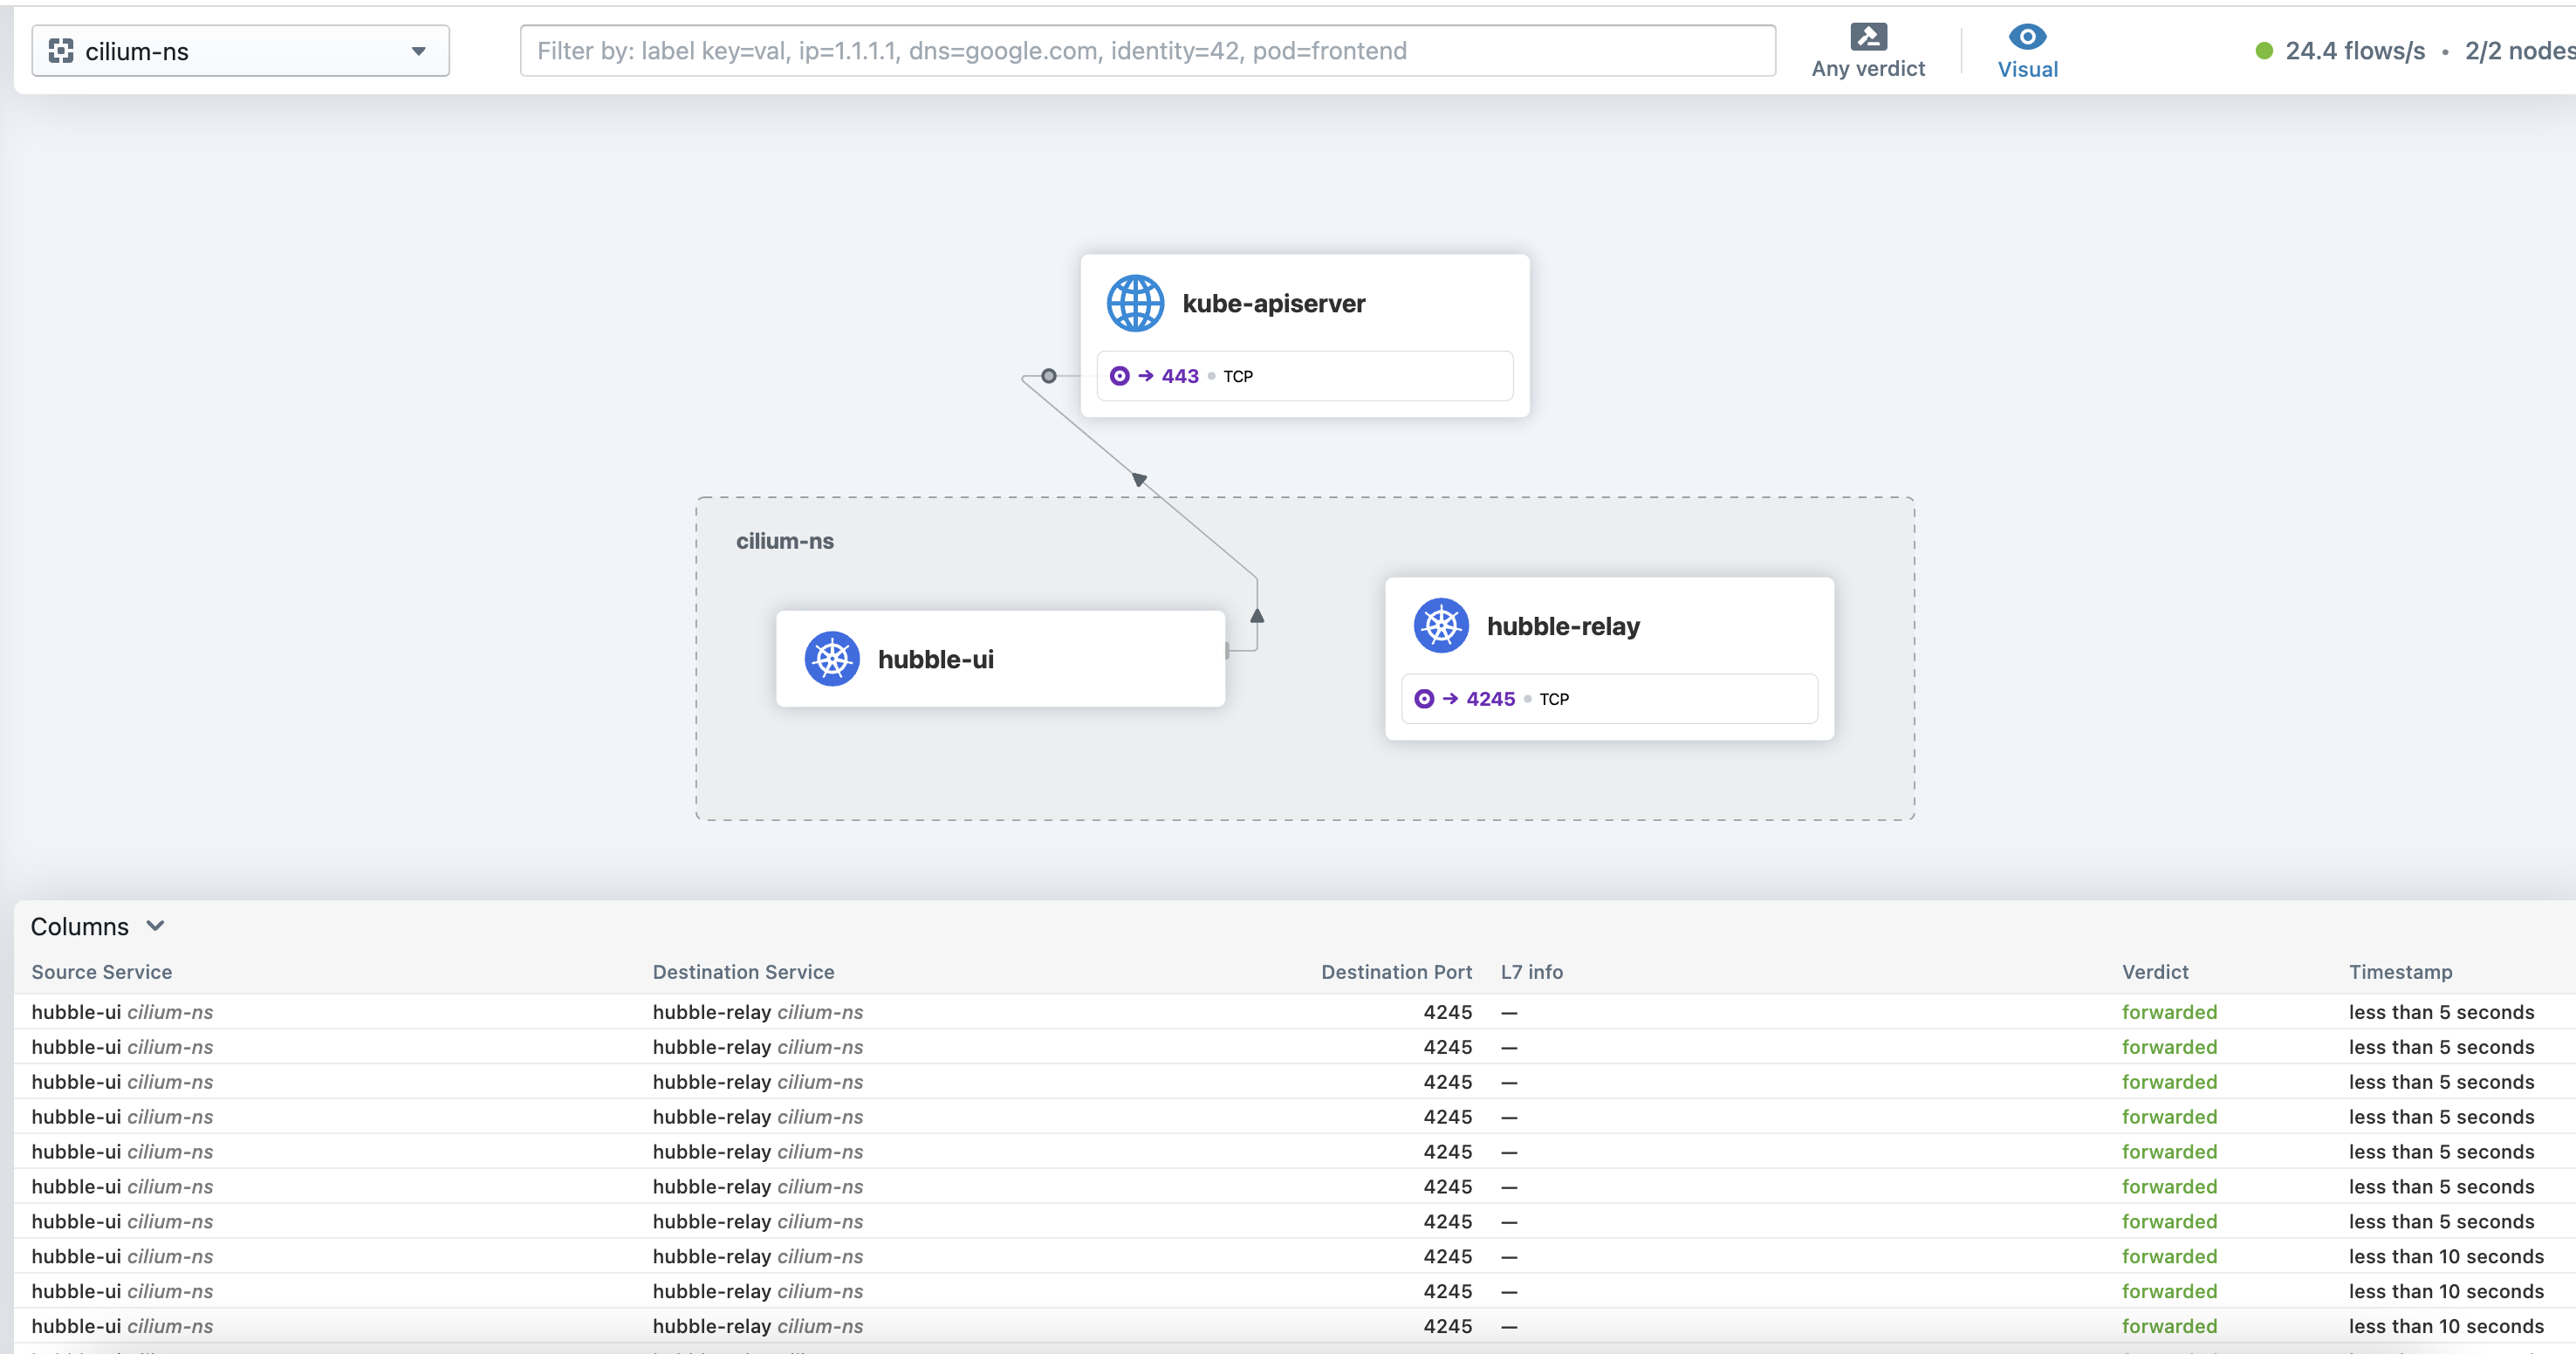
Step 5: View Data
You can now access the Hubble interface by visiting the following link. http://0.0.0.0:12000
Recap and Next steps
Congratulations! You have successfully created a custom cluster blueprint with the Cilium add-on and applied it to a cluster.
Next, you can do the following to leverage Cilium network policy enforcement and Hubble for observability:
- Run through the following tutorial on HTTP Policy Enforcement
- Observe network flows via Hubble command line interface (CLI)
- Learn how to visualize network traffic flows via the Hubble UI