Part 2: Workload
What Will You Do
In this part of the self-paced exercise, you will deploy a Windows workload to the manged Windows node group on the EKS Cluster.
Step 1: Deploy Windows Workload
In this step, we will deploy a Windows workload into the previously created namespace.
- Navigate to the project in your Org where the cluster is located.
- Select Applications > Workloads
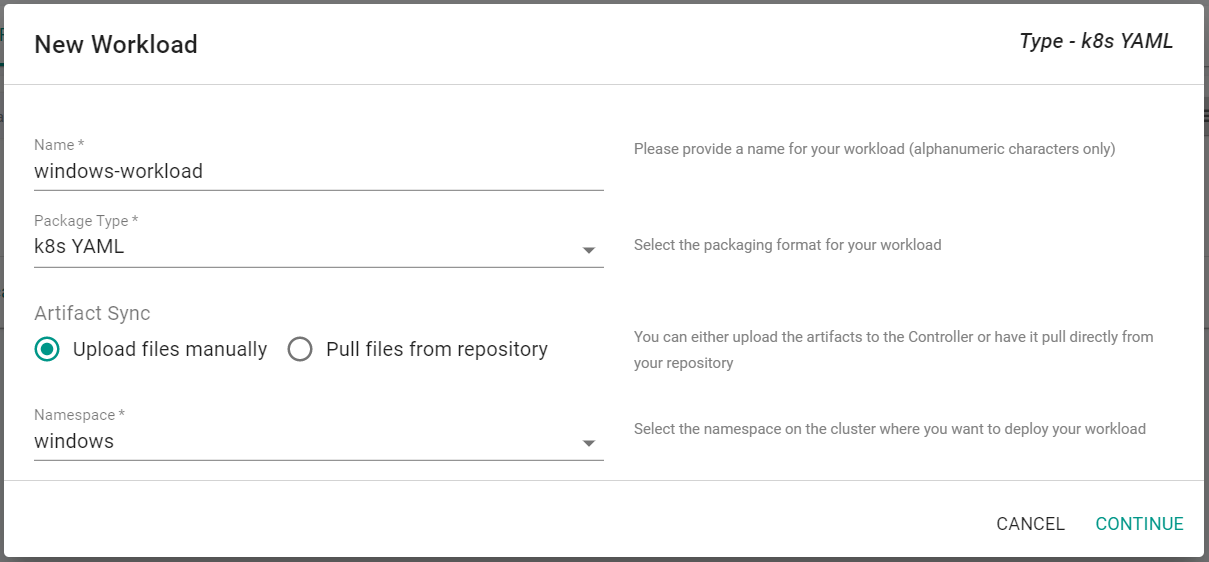
- Click "New Workload" > "Create New Workload"
- Enter "windows-workload" for the name
- Select "k8s YAML" for the Package Type
- Select "Upload files manually"
- Select the "Windows" namespace
- Click "Continue"
- Save the below specification file to your computer as "windows-workload.yaml".
Important
The 'nodeSelector' section, lines 31 & 32, specifies which OS to use. This is an important configuration to specify to avoid scheduling issues. Without a nodeSelector configuration, this deployment could be scheduled on a Linux node, causing it to fail. Kubernetes scheduling doesn't recognize Operating System, rather it is based on scores. For more information, please visit this URL.
apiVersion: apps/v1
kind: Deployment
metadata:
  name: windows-server-iis-ltsc2019
  namespace: windows
spec:
  selector:
    matchLabels:
      app: windows-server-iis-ltsc2019
      tier: backend
      track: stable
  replicas: 1
  template:
    metadata:
      labels:
        app: windows-server-iis-ltsc2019
        tier: backend
        track: stable
    spec:
      containers:
      - name: windows-server-iis-ltsc2019
        image: mcr.microsoft.com/windows/servercore/iis:windowsservercore-ltsc2019
        ports:
        - name: http
          containerPort: 80
        imagePullPolicy: IfNotPresent
        command:
        - powershell.exe
        - -command
        - "Add-WindowsFeature Web-Server; Invoke-WebRequest -UseBasicParsing -Uri 'https://dotnetbinaries.blob.core.windows.net/servicemonitor/2.0.1.6/ServiceMonitor.exe' -OutFile 'C:\\ServiceMonitor.exe'; echo '<html><body><br/><br/><H1>Windows Node Group Get Started!!!<H1></body><html>' > C:\\inetpub\\wwwroot\\iisstart.htm; C:\\ServiceMonitor.exe 'w3svc'; "
      nodeSelector:
        kubernetes.io/os: windows
---
apiVersion: v1
kind: Service
metadata:
  name: windows-server-iis-ltsc2019-service
  namespace: windows
spec:
  ports:
  - port: 80
    protocol: TCP
    targetPort: 80
  selector:
    app: windows-server-iis-ltsc2019
    tier: backend
    track: stable
  sessionAffinity: None
  type: LoadBalancer
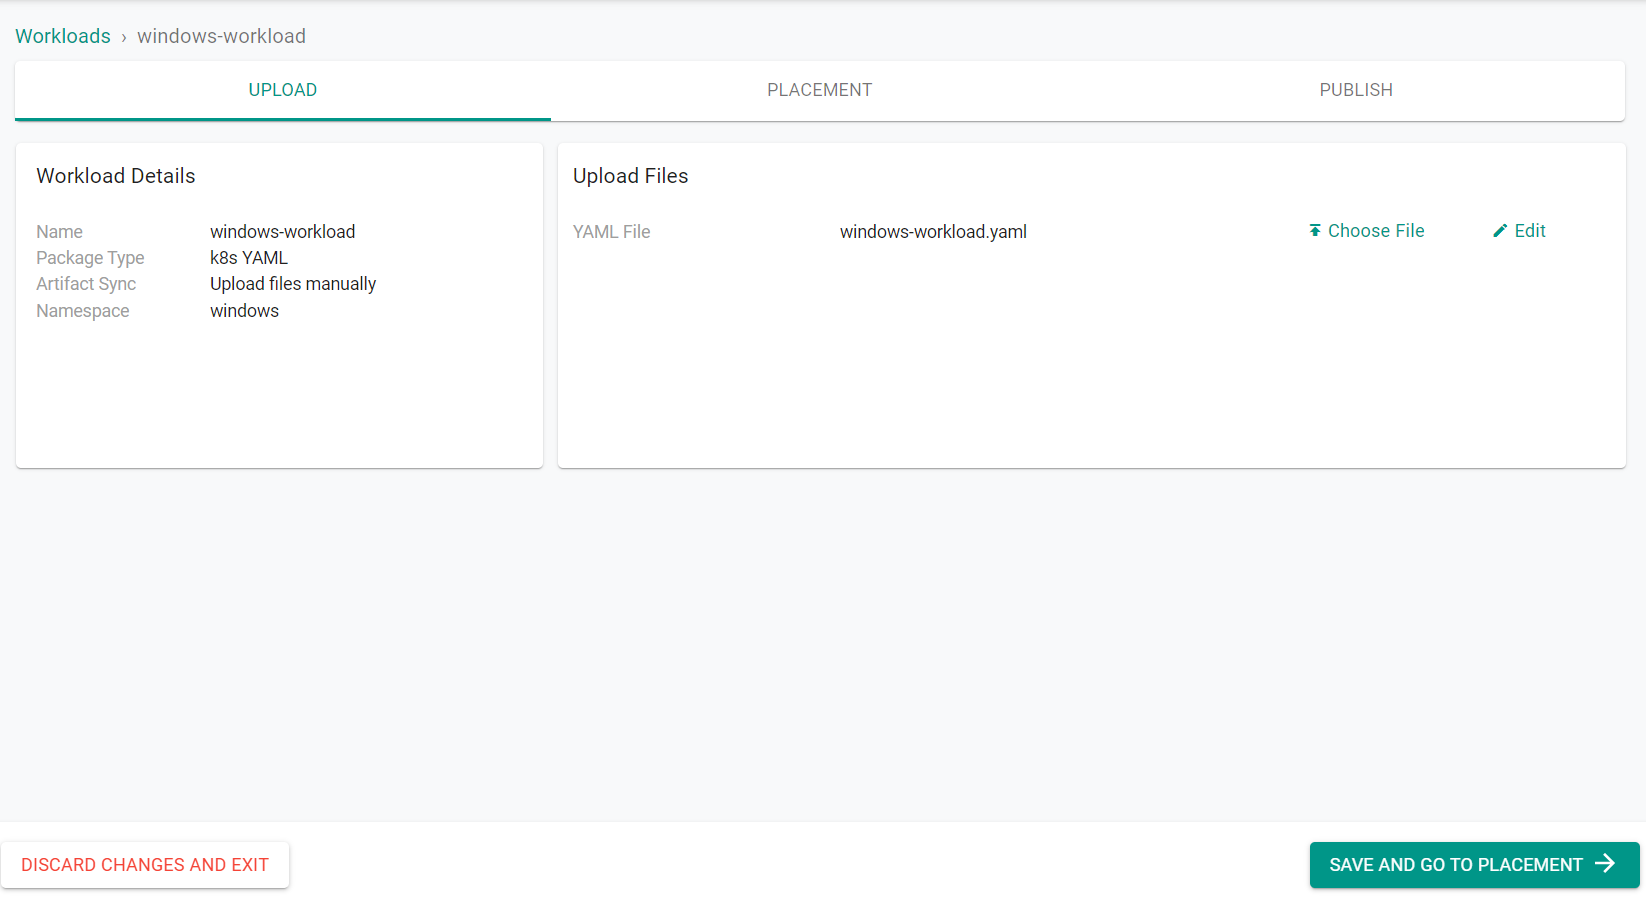
- Click "Choose File" to upload the previously created YAML file
- Click "Save and Go To Placement"
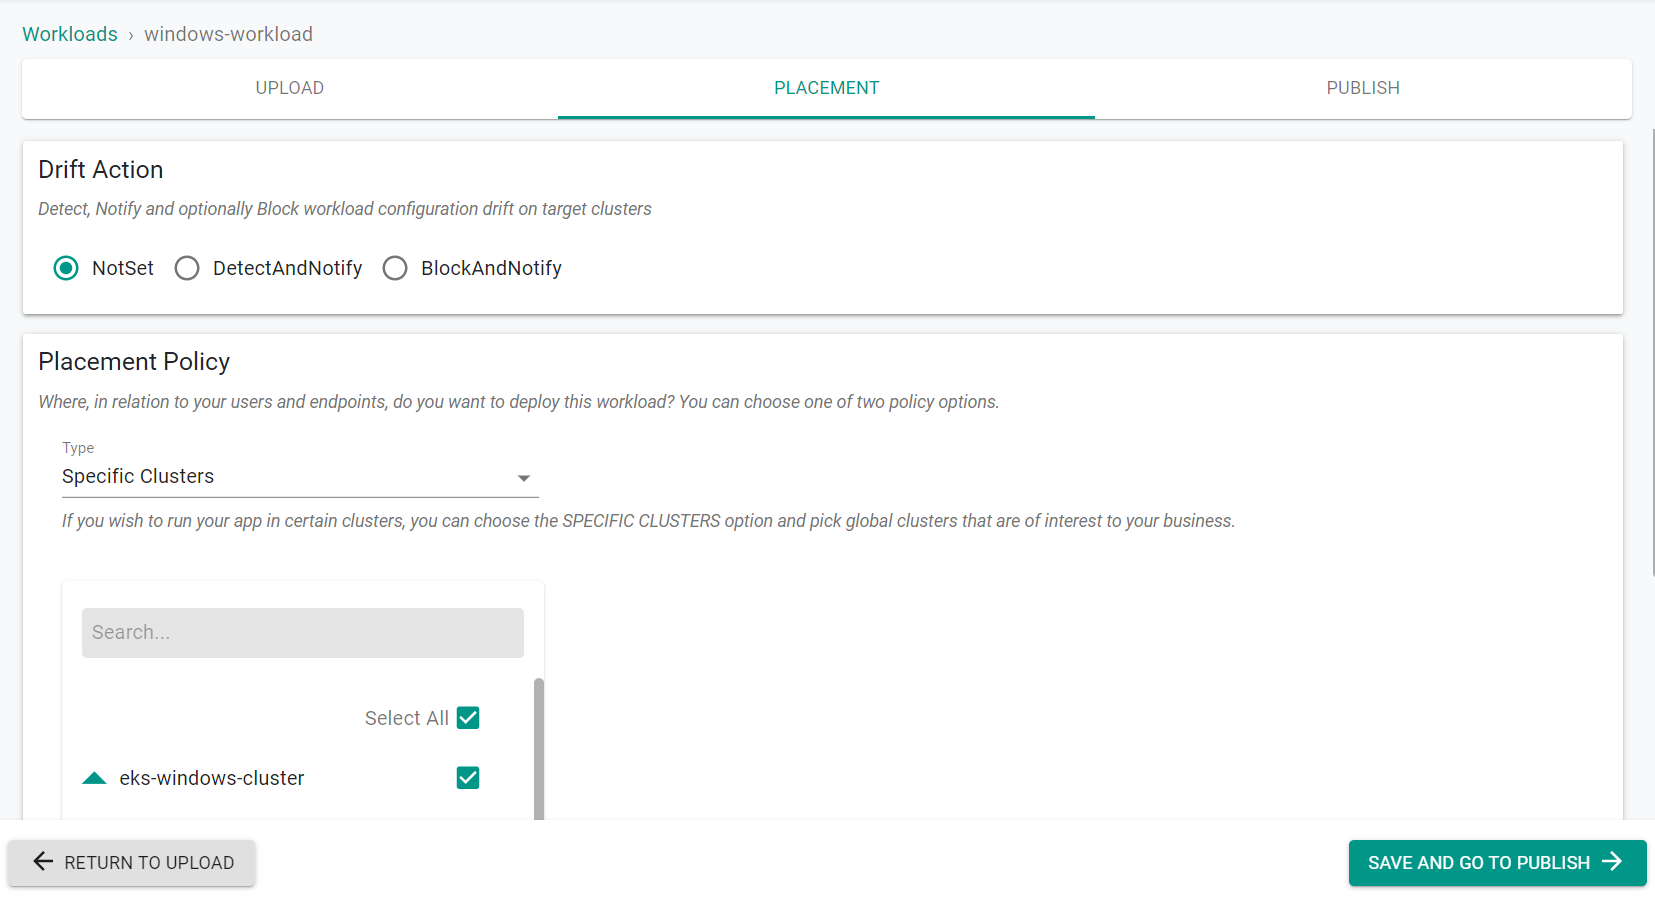
- Select the cluster to deploy the workload on
- Click "Save & Go To Publish"
- Click "Publish"
The workload is now published on the cluster.
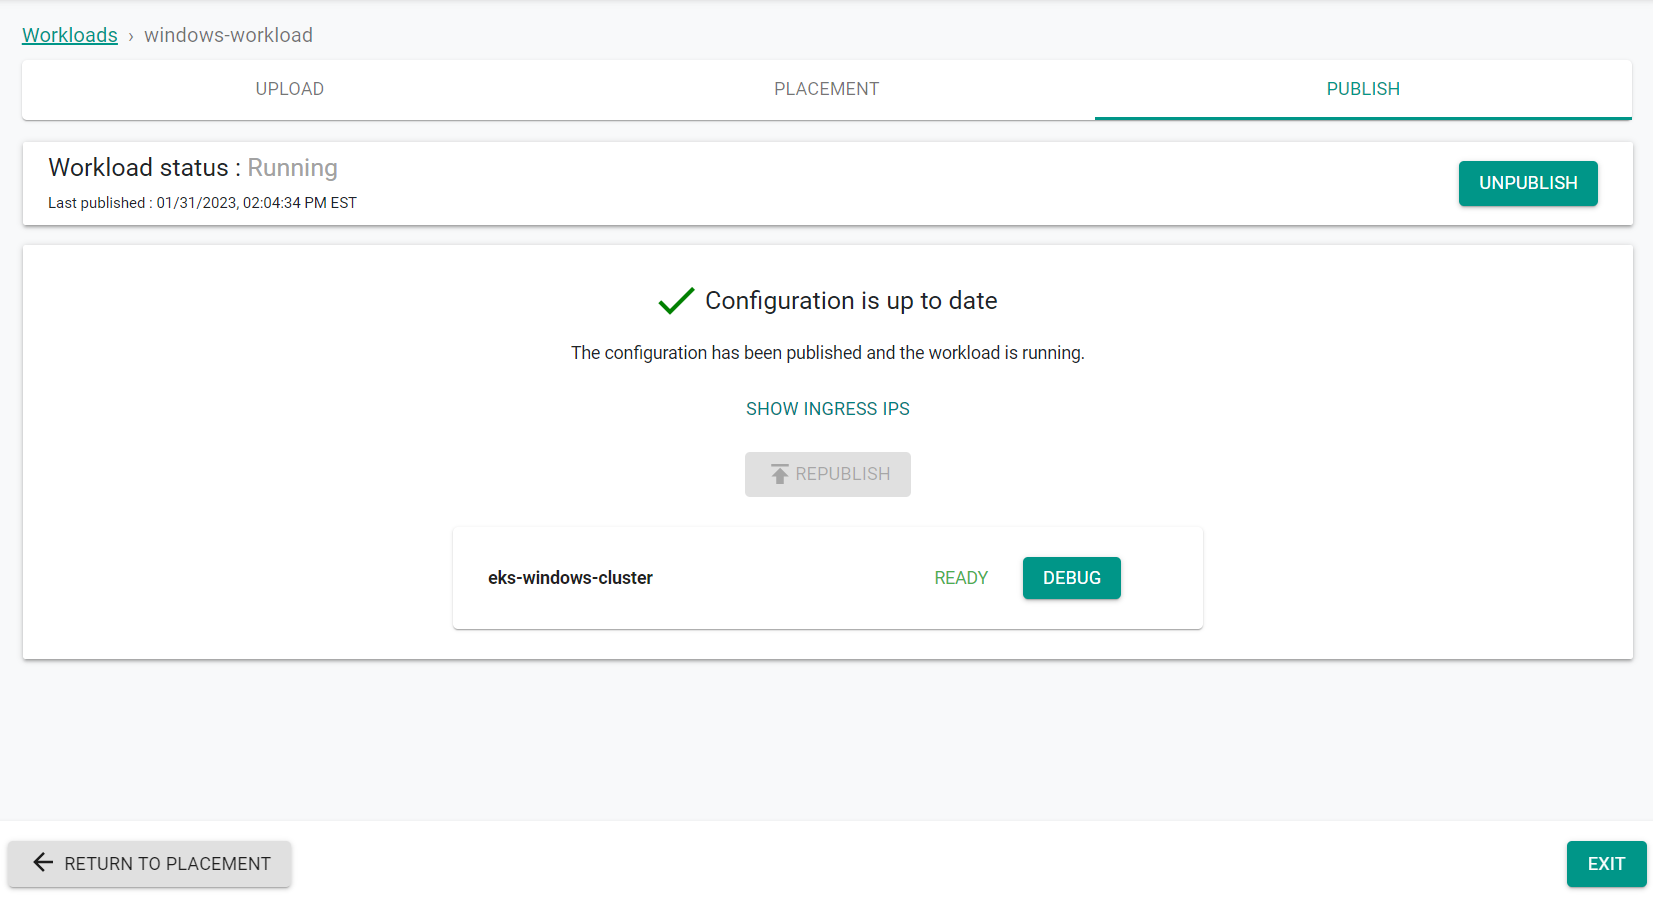
- Click "Exit"
Step 2: Validate Workload
In this step, we will verify the Windows workload is running and accessible.
- Navigate to the project in your Org where the cluster is located.
- Select Infrastructure > Clusters
- Click on the kubectl link of the cluster and type the following command
kubectl get pods -n windows
You should see output similar to the following showing the windows workload running
NAME                                           READY   STATUS    RESTARTS   AGE
windows-server-iis-ltsc2019-7b985676f9-wpvbn   1/1     Running   0          13m
- Enter the following command
kubectl get services -n windows
You should see output similar to the following showing the external IP address of the workload.
NAME                                  TYPE           CLUSTER-IP      EXTERNAL-IP                                                              PORT(S)        AGE
windows-server-iis-ltsc2019-service   LoadBalancer   10.100.127.47   ac1f6dd67171541c2a4e0d6818b5f9c2-954058756.us-west-2.elb.amazonaws.com   80:32376/TCP   9m24s
- Enter the external IP address from the previous command into a web browser
You should see a response from the Windows web server workload.

Recap
Congratulations! At this point, you have successfully provisioned a Windows workload running on an Amazon EKS cluster with a managed Windows node group in your AWS account.