Environment Template
Environment templates are a collection of resource templates and static resources that contain environment variables, lifecycle hooks, dependencies, etc. For example, an environment template could represent a full operating environment required for a complex Kubernetes application.
Create an Environment Template
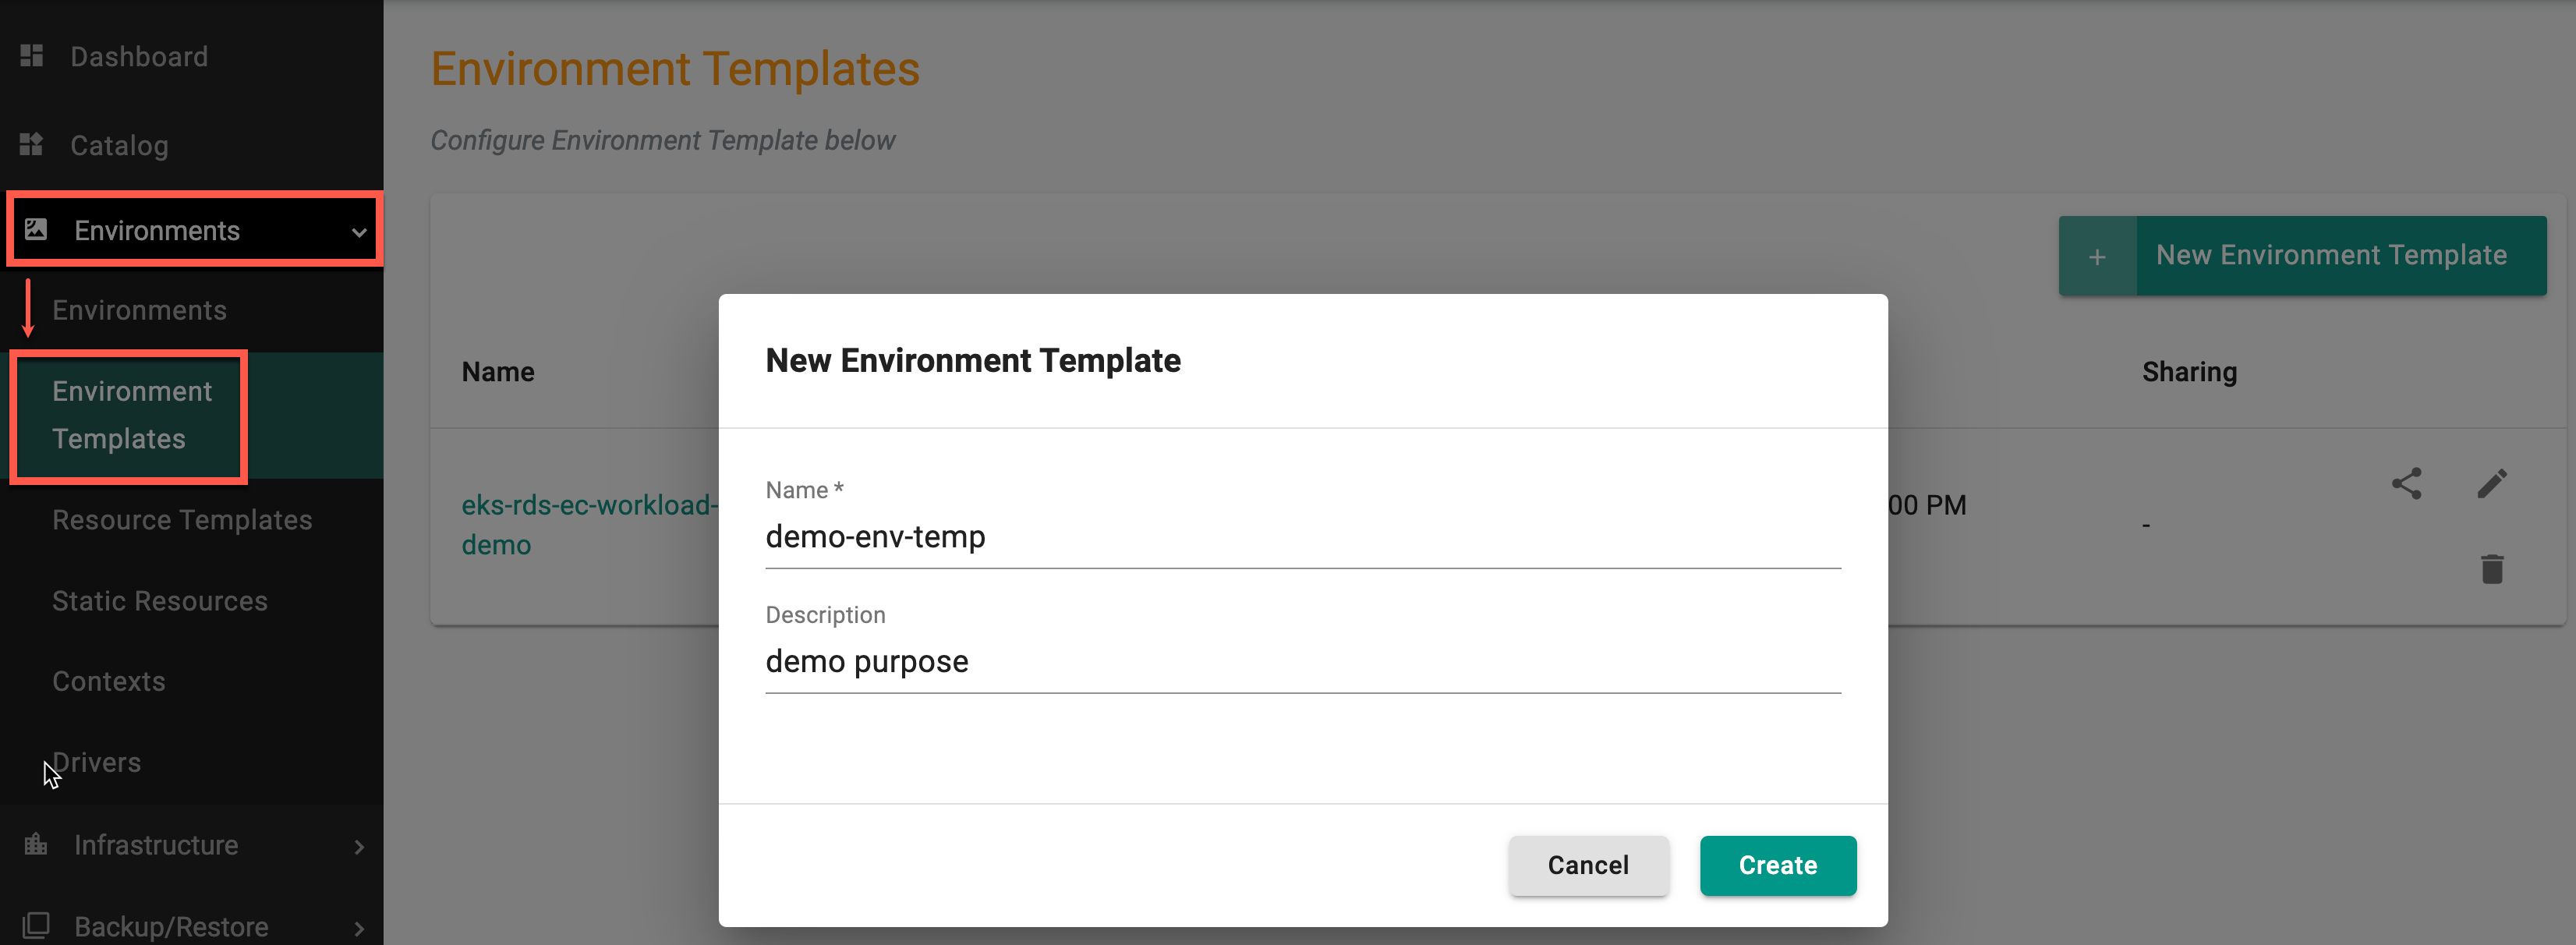
- In a project, select Environments > Environment Templates.
- Select New Environment Template.
- Type a name for the environment template. Optionally, type a description.
- See below for information about each configuration category.
- Select Save to save the environment template. Click Cancel to close the configuration and go back to the environment template list.
General
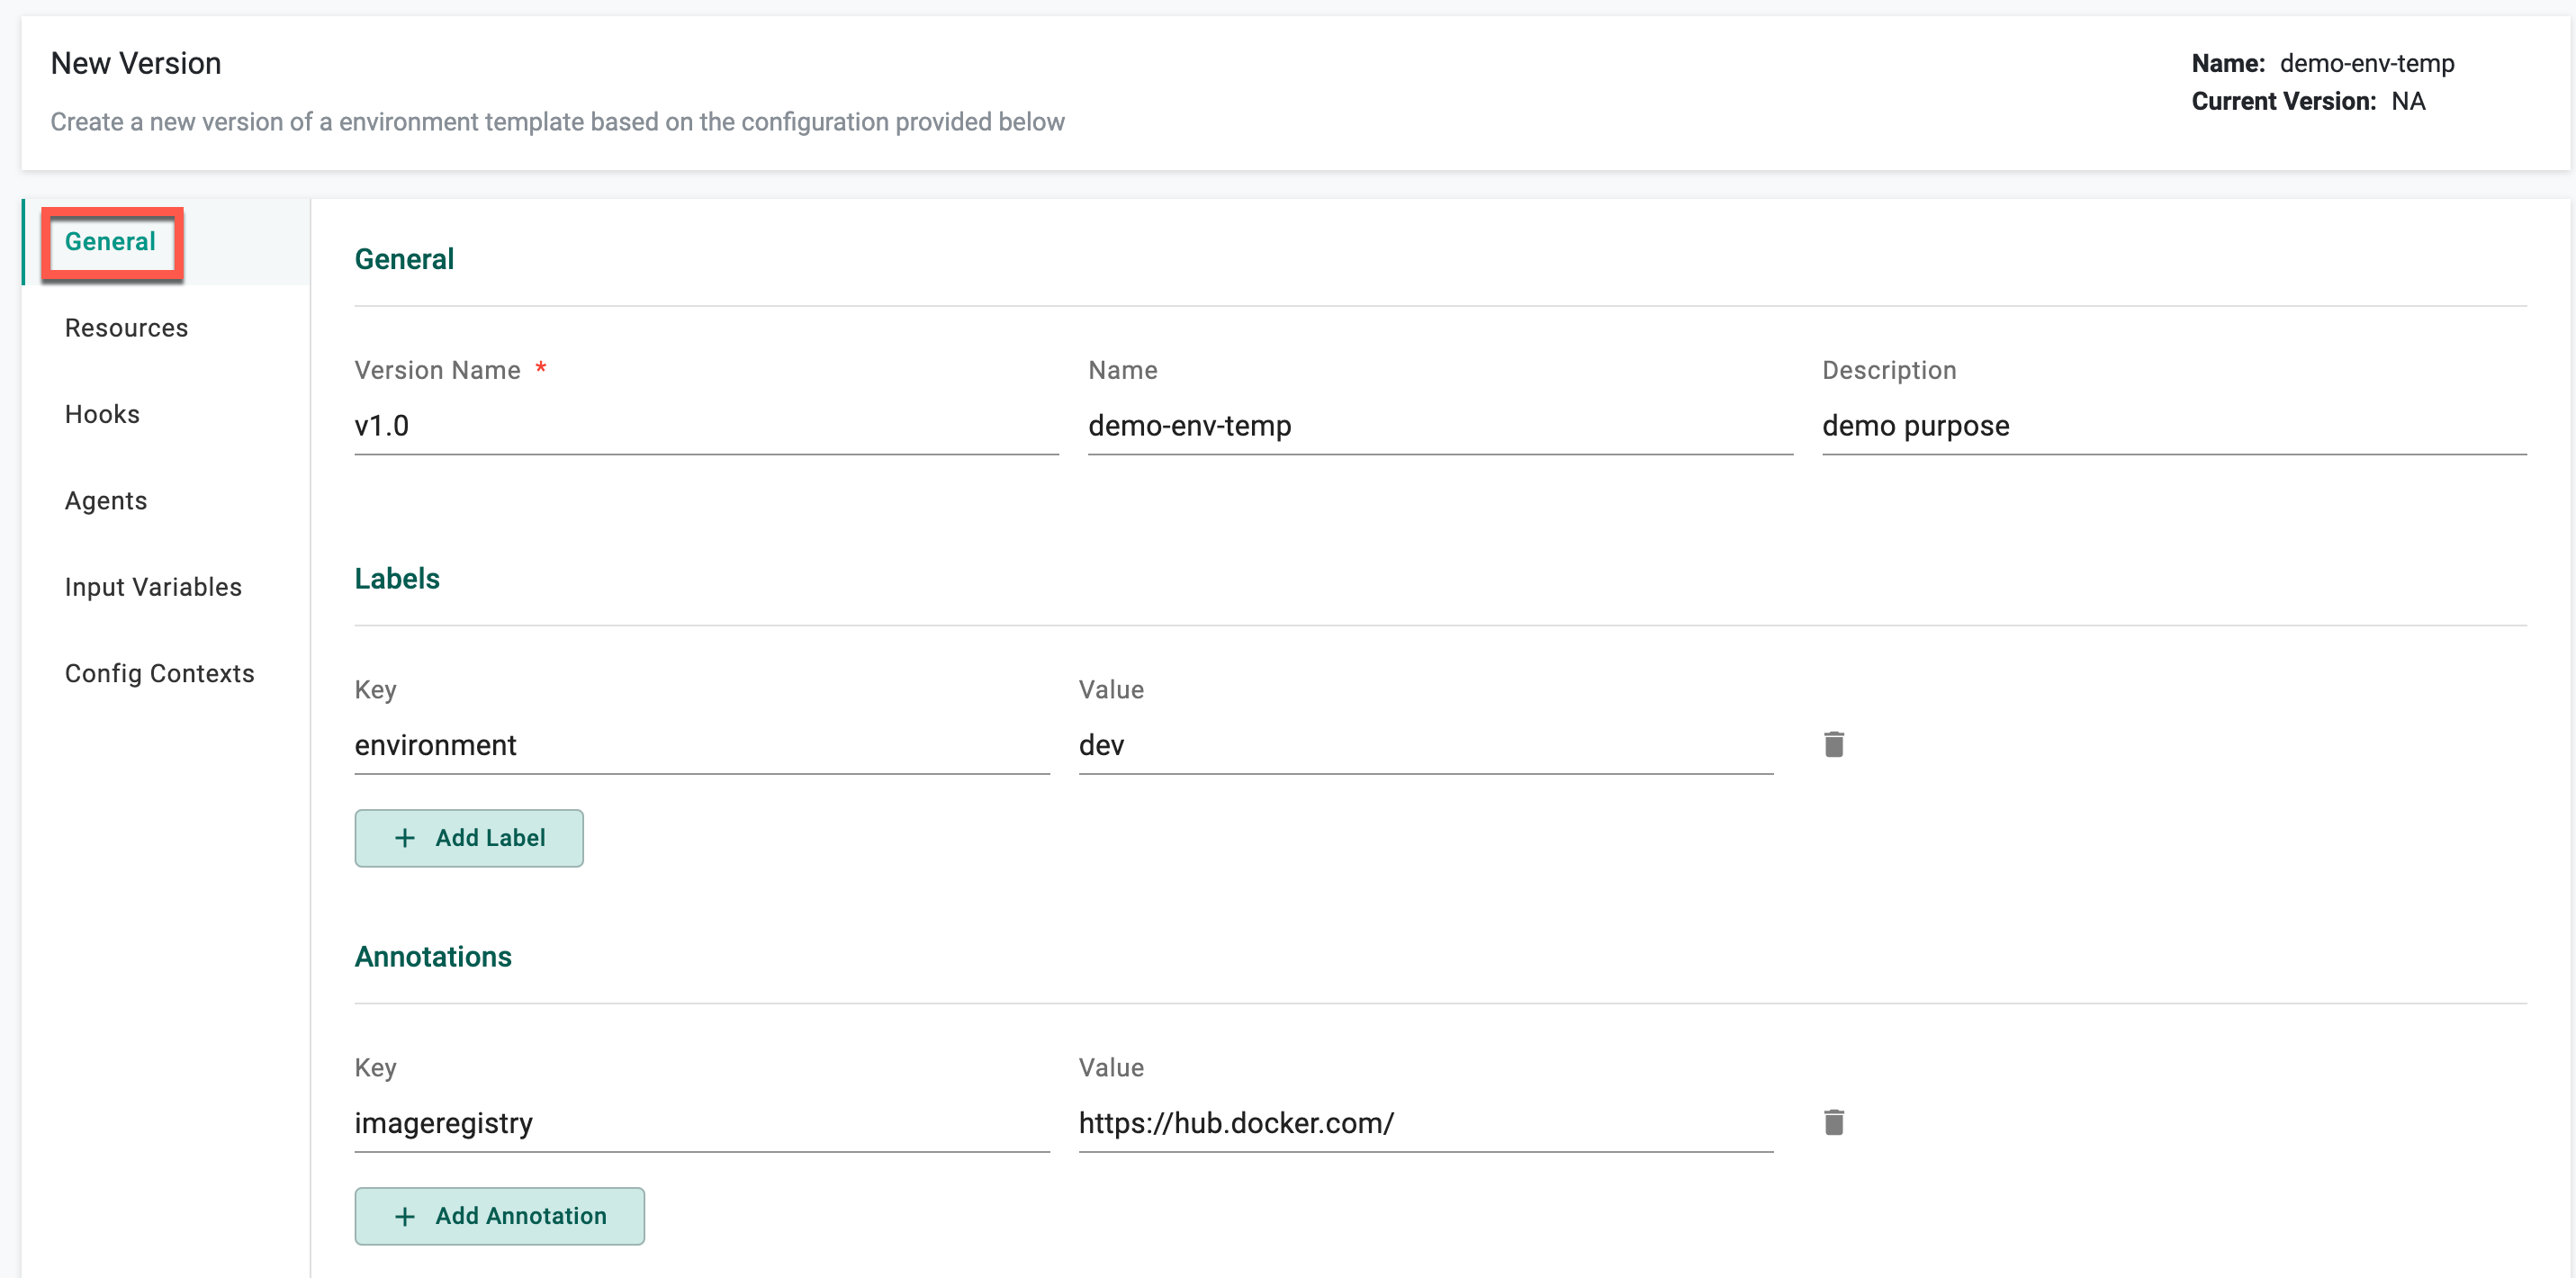
The environment template new version is created and the General configuration page displays
| Setting | Description |
|---|---|
| Version Name | Enter the version for the resource. Examples: v1, 0.1, 3 |
| Name | Enter a name for the resource |
| Description | Enter a description for the resource. This is optional |
| Labels | Add a label to the resource. Use labels to specify identifying attributes of objects that are meaningful and relevant to users, but do not directly imply semantics to the core system. This is a key-value pair. For example, the key is environment and the value is dev |
| Annotations | Annotations can be added to display information such as Category and the IaC source code information for the environment template. For example, if the category of the environment template is 'Developer Productivity', use the key eaas.envmgmt.io/category and the value Developer Productivity. To display the IaC source code information, use the key eaas.envmgmt.io/github |
Resources
| Setting | Description |
|---|---|
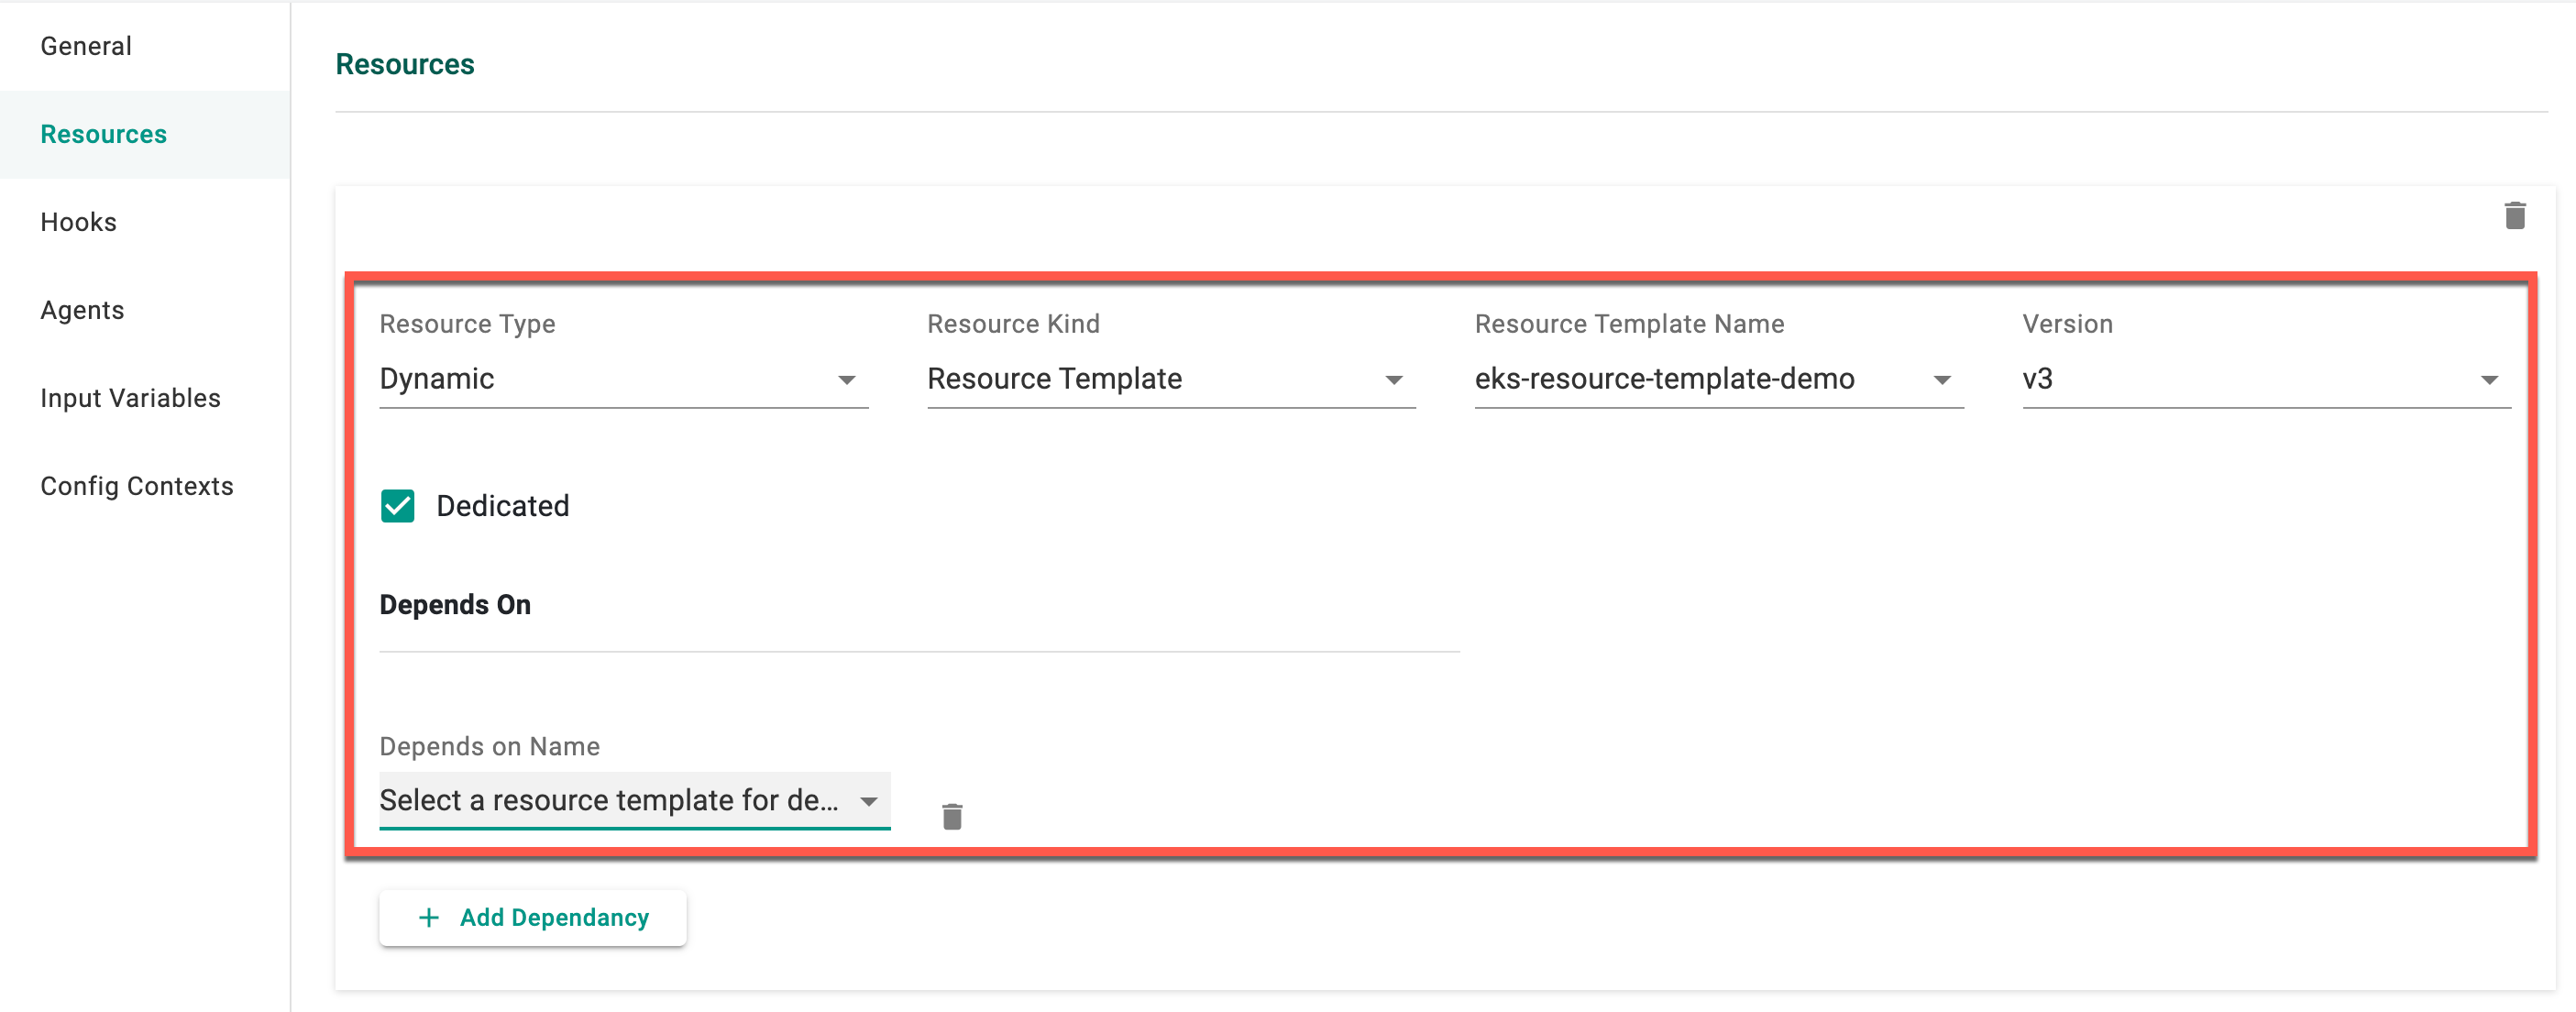
| Resource Type | Select the type of resource. Supported values are: Dynamic and Static |

Dynamic Resource
| Setting | Description |
|---|---|
| Resource Kind | Select the kind of resource. Supported value for Dynamic is: Resource Template |
| Resource Template Name | Select the resource template to associate with the environment template |
| Version | Select the resource version to use |
| Dedicated | This is for Dynamic resource types |
| Depends On | This is for Dynamic resource types |
| -- Depends on Name | Add a name of a dependency |
Static Resource
| Setting | Description |
|---|---|
| Resource Kind | Select the kind of resource. Supported values for Static are: Resource and Environment |
| Resource Name | Select the name of the resource to associate with the environment template |

Hooks
Environment Hooks
| Setting | Description |
|---|---|
| On Completion | Set a hook that is triggered when resource creation or updating is complete |
| On Failure | Set a hook that is triggered when resource creation or updating fails to complete |
| On Init | Set a hook that is triggered when resource creation or updating is initialized |
| On Success | Set a hook that is triggered when resource creation or updating is successful |

Agents
| Parameter | Description |
|---|---|
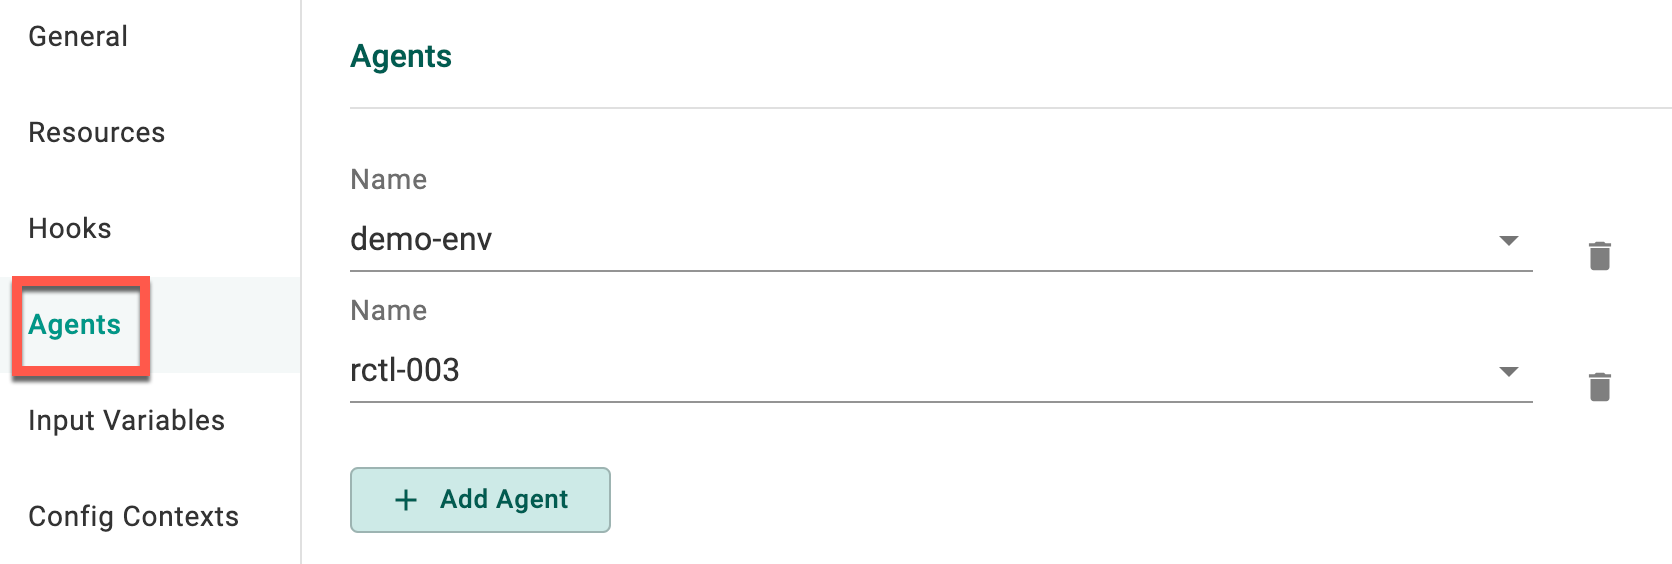
| Name | Select an agent to associate with this resource |
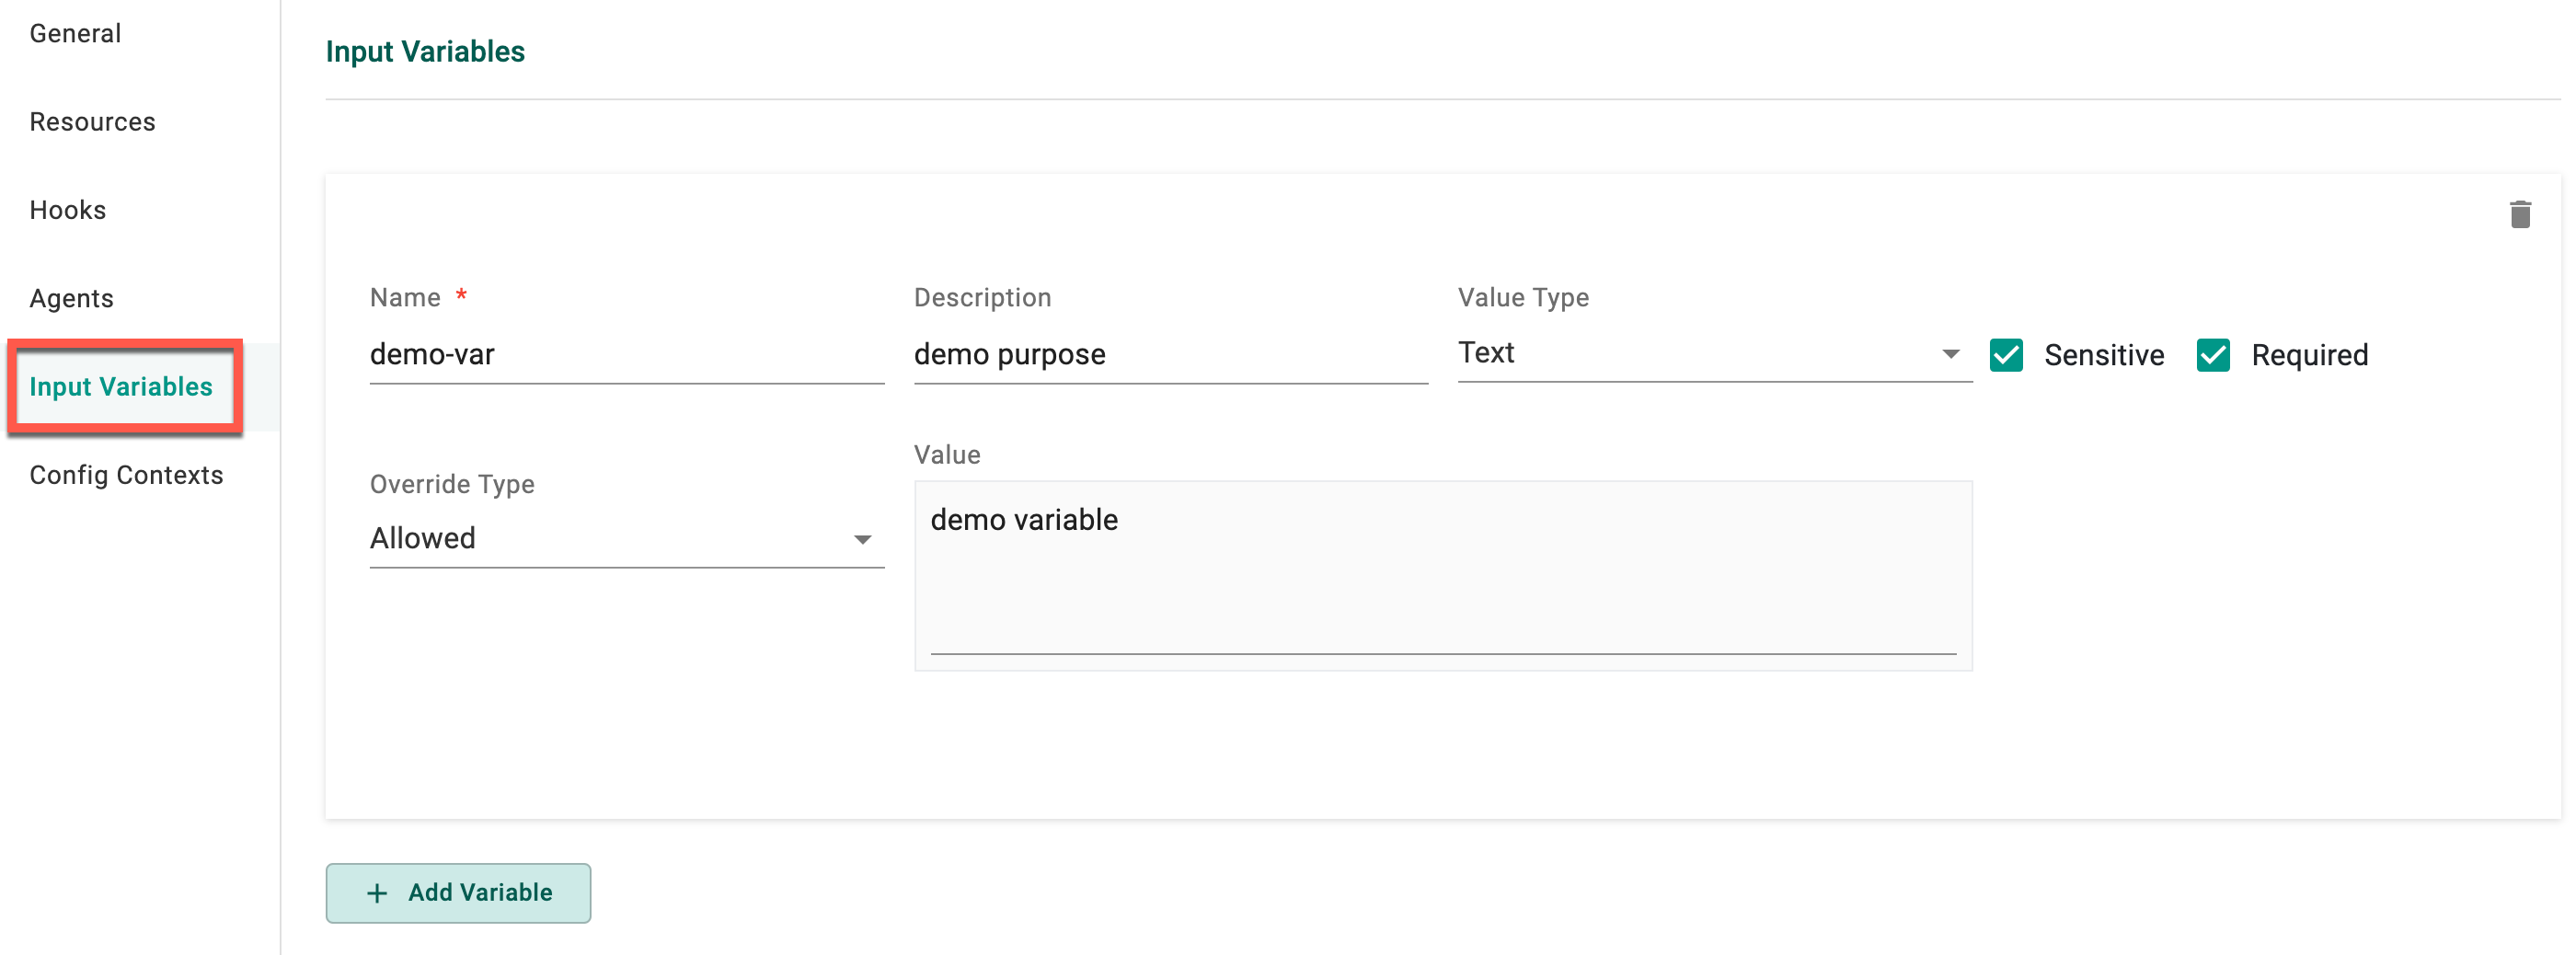
Input Variables
| Setting | Description |
|---|---|
| Name | The name of the variable |
| Description | A brief description of the variable |
| Value | The variable value |
| Value Type | The type of value |
| -- HCL | Hashicorp configuration language |
| -- JSON | JavaScript Object Notation (JSON) is a lightweight data-interchange format |
| -- Expressions | Expressions are valid units of code that resolve to a value |
| -- Text | Text value |
| Override Type | Controls if a user can change a variable or not |
| -- Allowed | Allows the user to override the value |
| -- Not Allowed | Does not allow the user to override the value |
| -- Restricted | Allows the user to override the value by selecting a different, pre-defined value |
| Restricted Values | If Restricted is selected for the Override Type, enter the values that are allowed |
| Sensitive | Does not display the value in the UI |
| Required | The variable is required when using this Context |
Contexts
| Setting | Description |
|---|---|
| Context | Select a Context to associate with this resource |
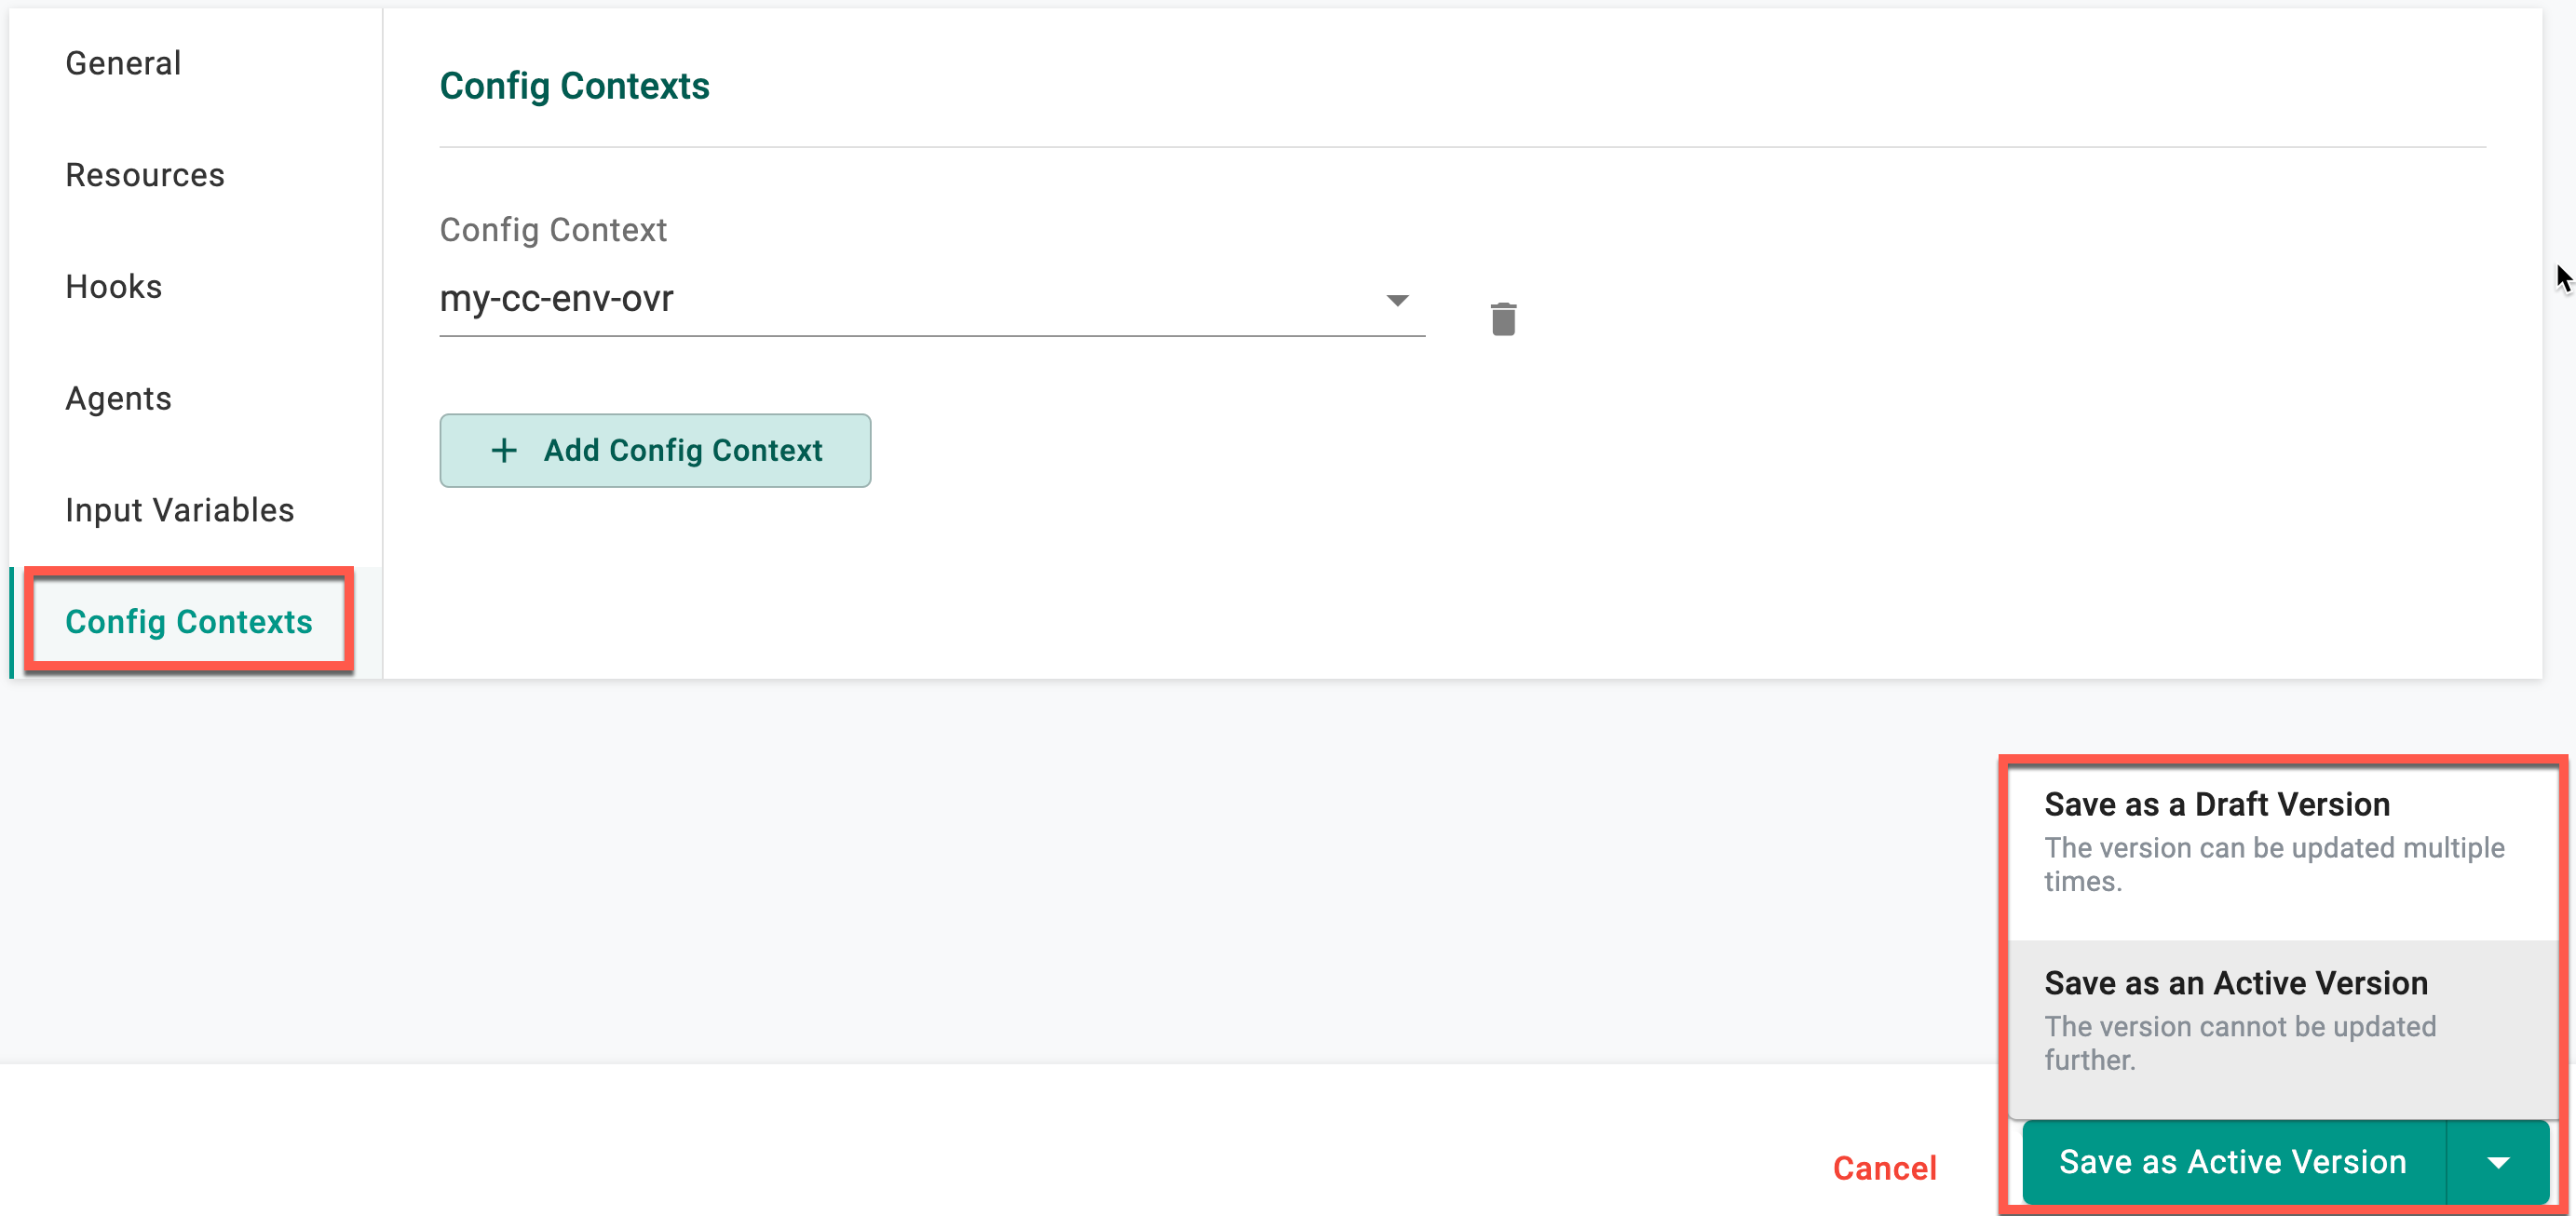
Upon furnishing the essential details, choose either Save as Active Version or Save as Draft Version
Version Management
Upon saving the configurations, users have the ability to review the list of environment templates with versions. To delve into specific version details, click on the corresponding version number.

There are three (3) distinct states for environment template versions:
- Draft
- Active
- Disabled
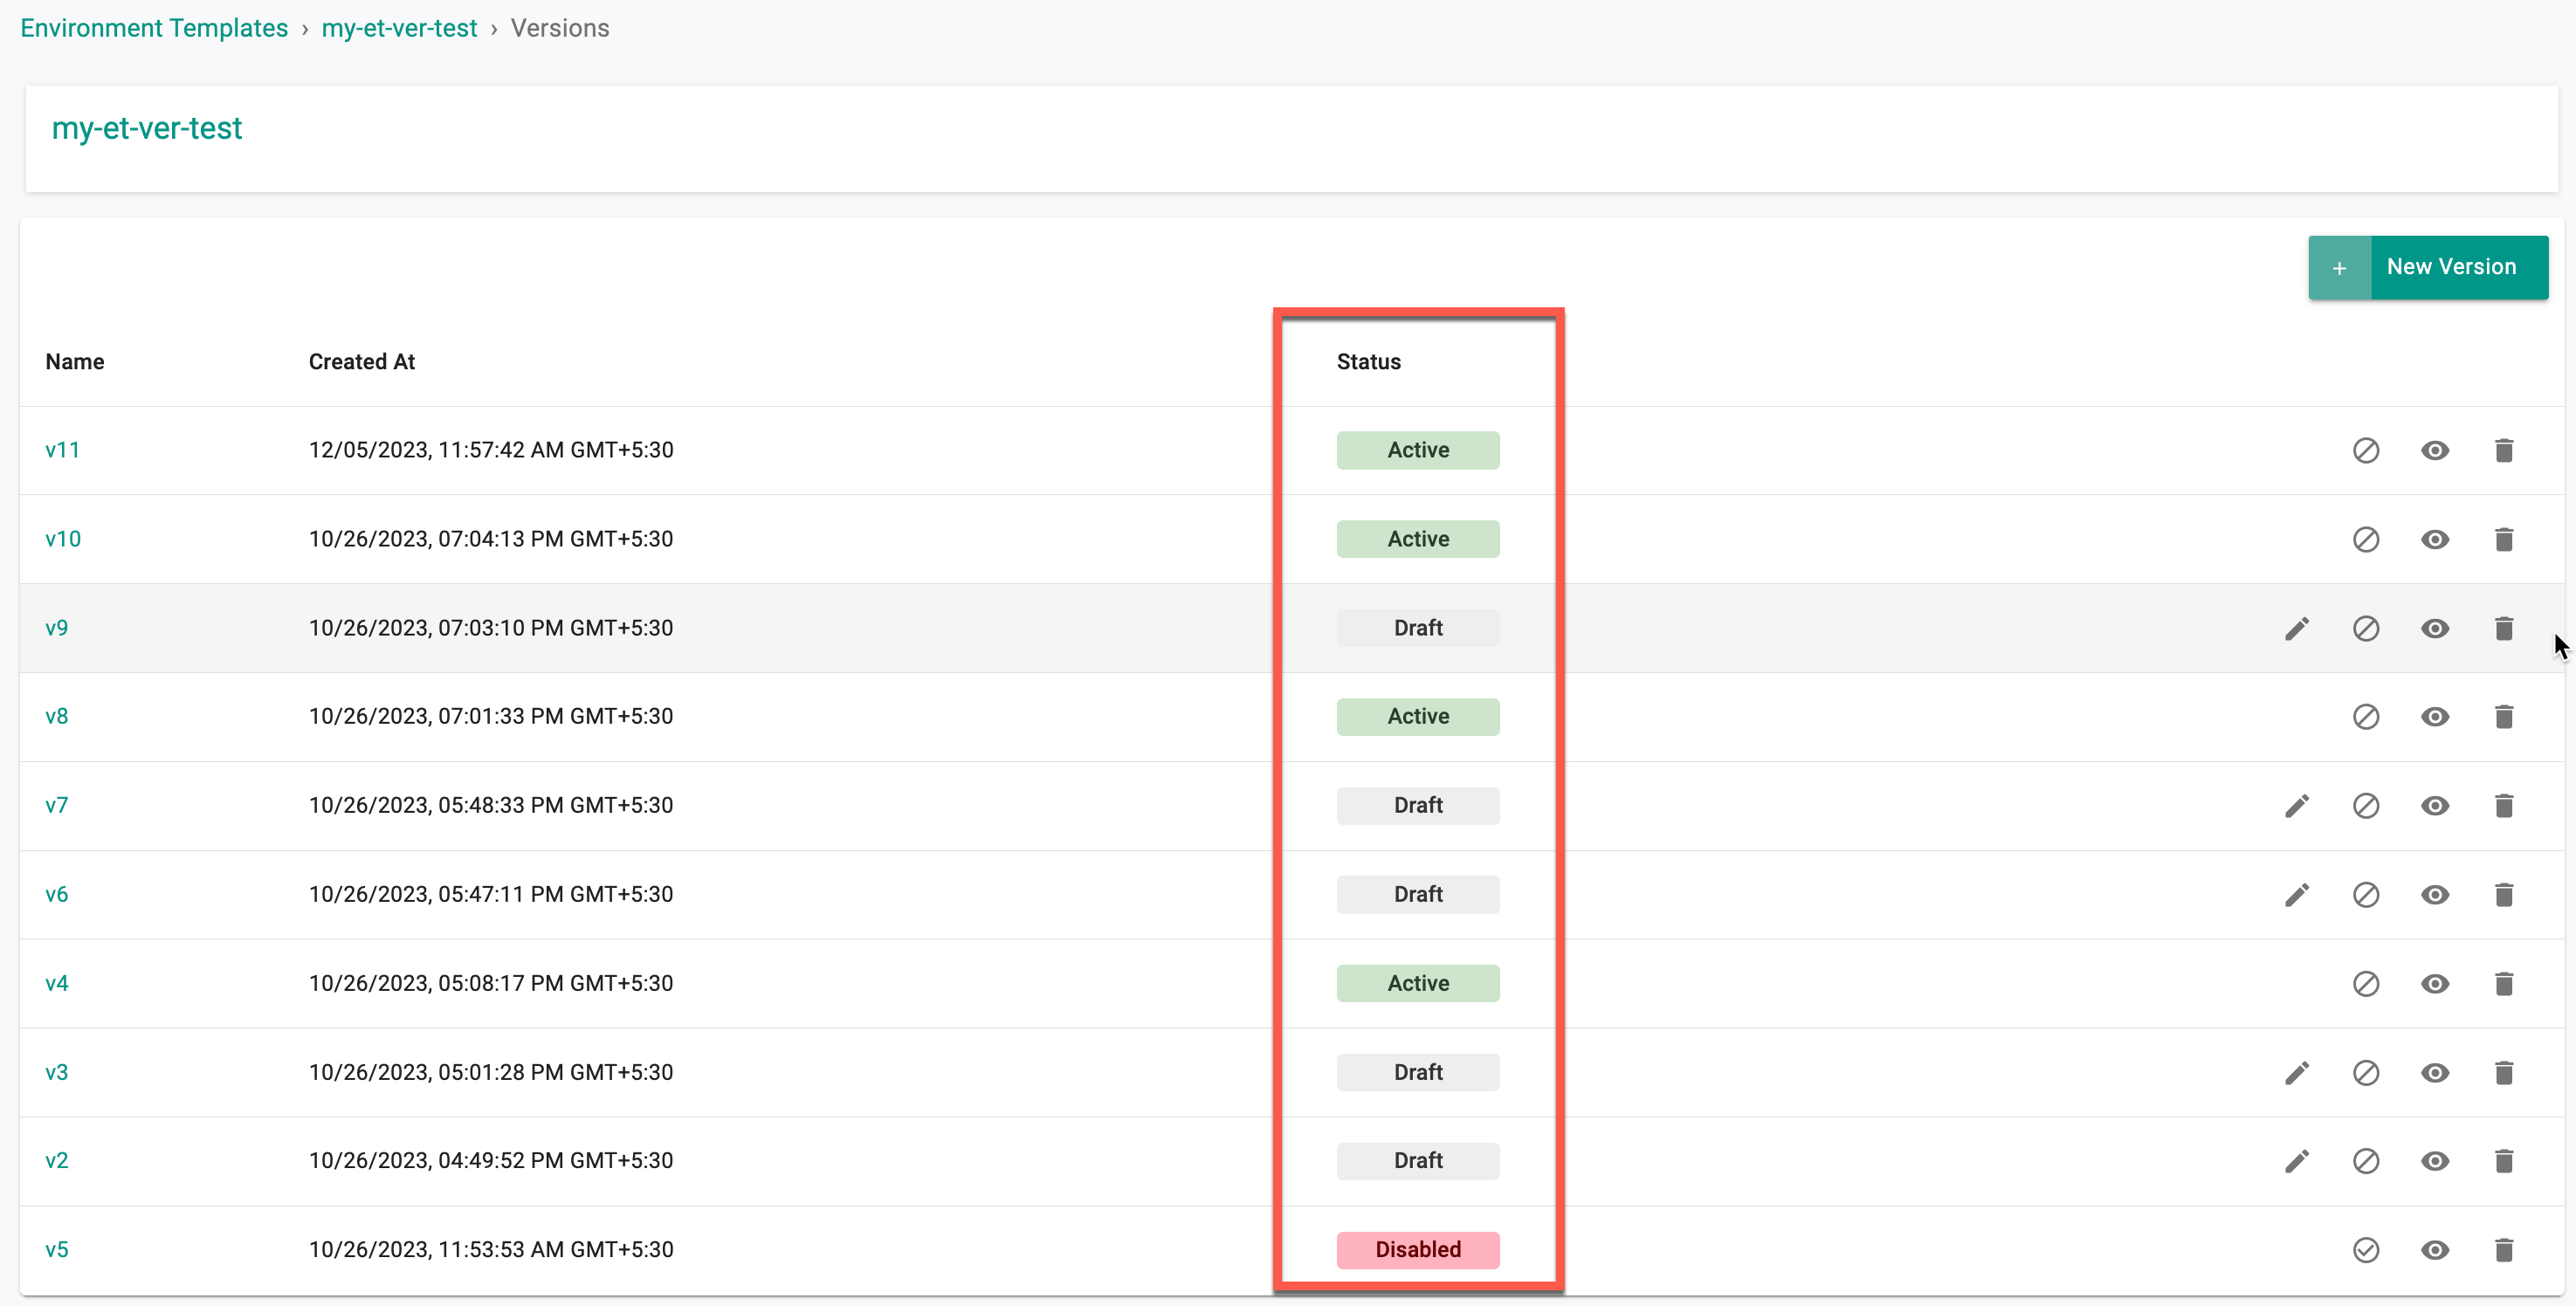
Users can create a draft version of environment templates and make multiple edits to it during the testing/validation phase. Once it is verified that the template is working as expected, users can transition the status from Draft to Active. However, it's important to note that no further edits can be made to the template in the active status. A new version has to be created for any edits to an Active version. Draft versions are project scoped which means that these versions are not shared with downstream projects (when the template is shared).
If a version of a template needs to be made unavailable for security related reasons or compliance, users can disable it by clicking on the Disable icon. Disabling effectively restricts further use of this version, meaning it can no longer be referenced in any new environments that are created. However, existing environments already using this version will remain unaffected.
Draft Status
In the draft status, the following rules apply:
- Inaccessible from shared projects
- Usable within the same project
- Editable multiple times
- Can be marked as active (accessible from shared projects)
- Can be marked as disabled and restored to an active state by enabling
Active Status
For versions in the active status:
- Cannot be reverted back to draft from any other state
- Accessible from shared projects
- No further changes allowed
- Can be marked as disabled and restored to an active state by enabling
Disabled Status
Versions in the disabled status adhere to the following rules:
- Cannot be used in the future; no impact on existing projects
- Can be restored to an active state by enabling
Important
- Use the delete icon to remove a version if it is not currently in use. Versions cannot be deleted if they are in use
- GitOps and Terraform do not support version management; they will always synchronize with the latest active version
![]()