Part 2: Sync from Git
What Will You Do
In this section, you will create a new EKS cluster using the UI and see that the System Sync pipeline automatically converts the cluster resource to infrastructure as code and pushes the cluster manifest to the Git repository. We will then increase the minimum node count on the cluster by updating the cluster manifest from Git and see that the cluster node count increases on the cluster.
Step 1: Provision Cluster
In this step, we will provision a new cluster from the UI. Alternatively, you can import and takeover an existing cluster rather than creating a new cluster through the UI. To proceed with importing a cluster, follow these instructions
- In your project, navigate to Infrastructure -> Clusters
- Click "New Cluster"
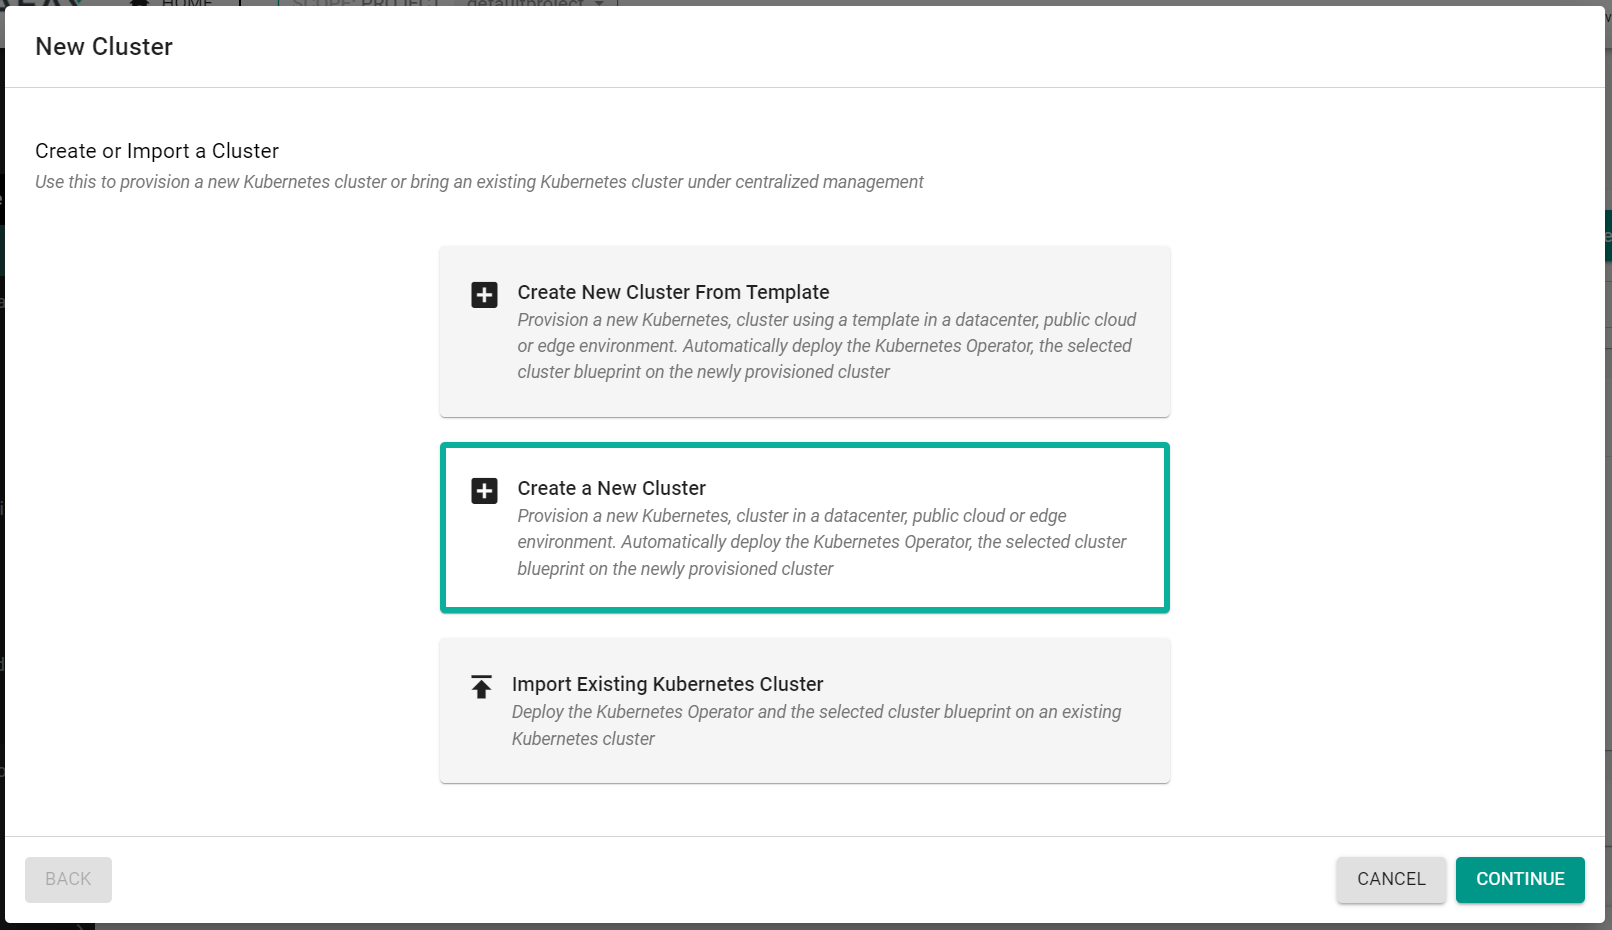
- Select "Create a New Cluster"
- Click "Continue"
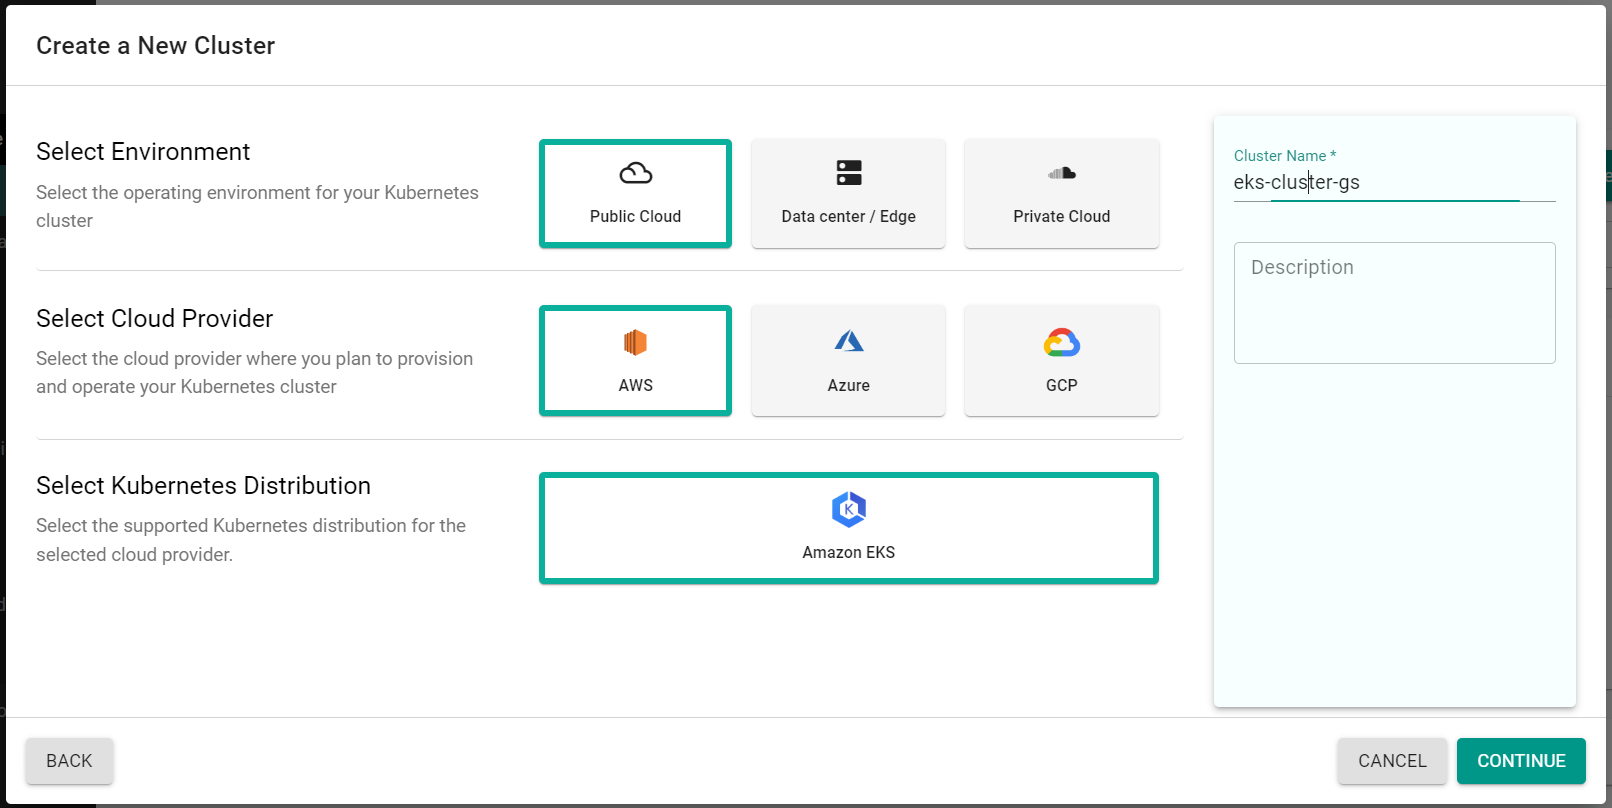
- Select "Public Cloud"
- Select "AWS"
- Select "Amazon EKS"
- Enter a cluster name
- Click "Continue"
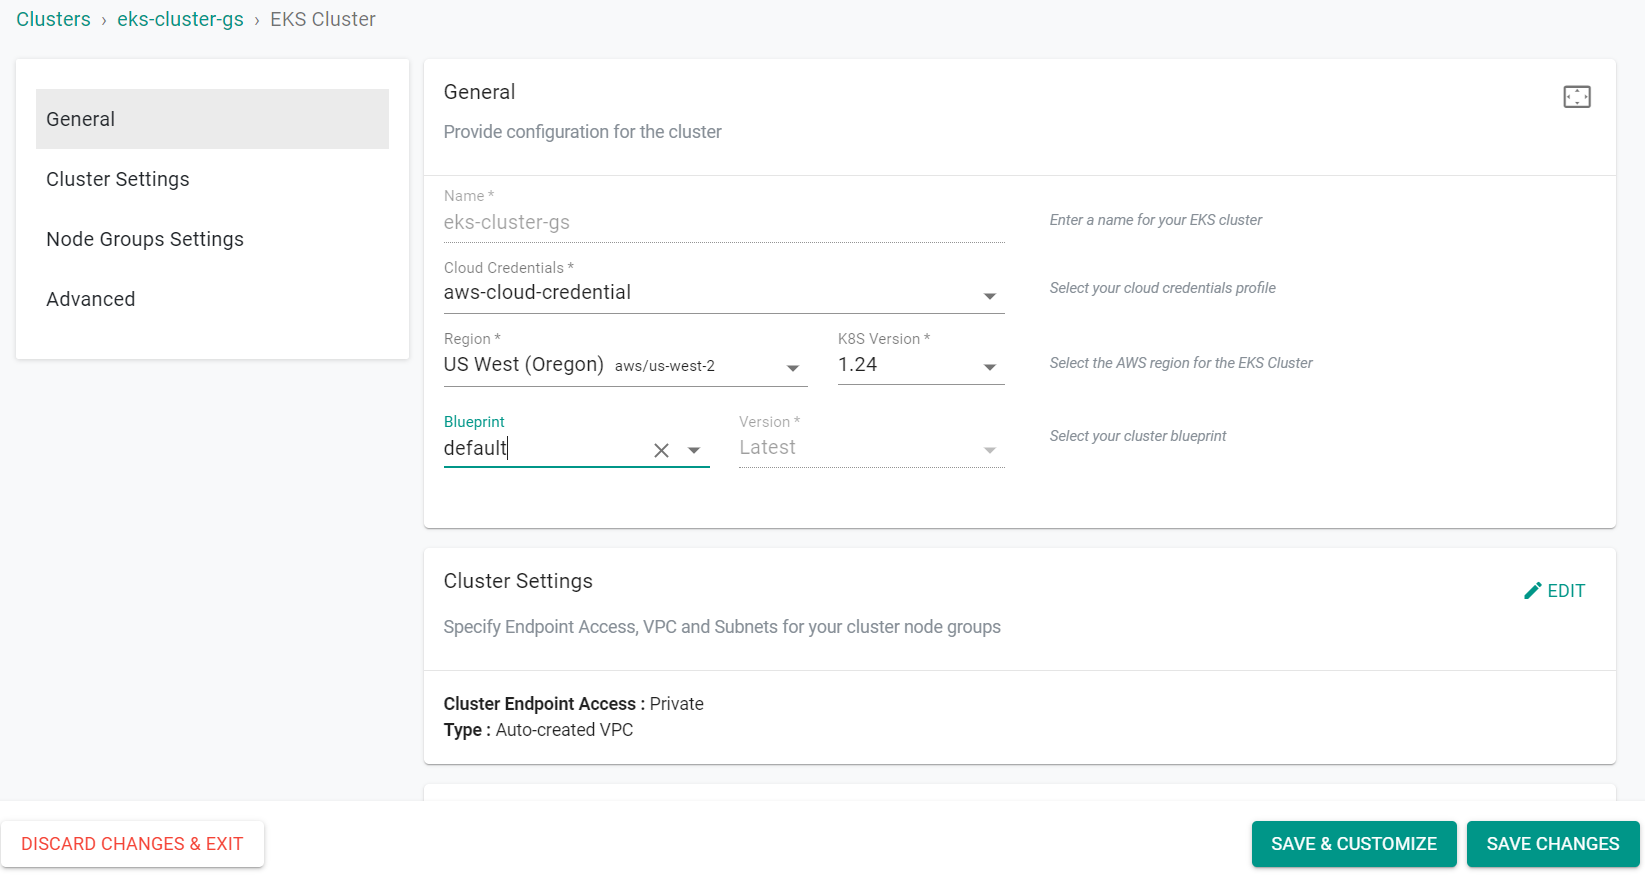
- Select the previously created "Cloud Credentials"
- Select the AWS Region for the cluster
- Select the K8S Version for the cluster
- Select the "default" blueprint
- Click "Save Changes"
- Click "Provision"
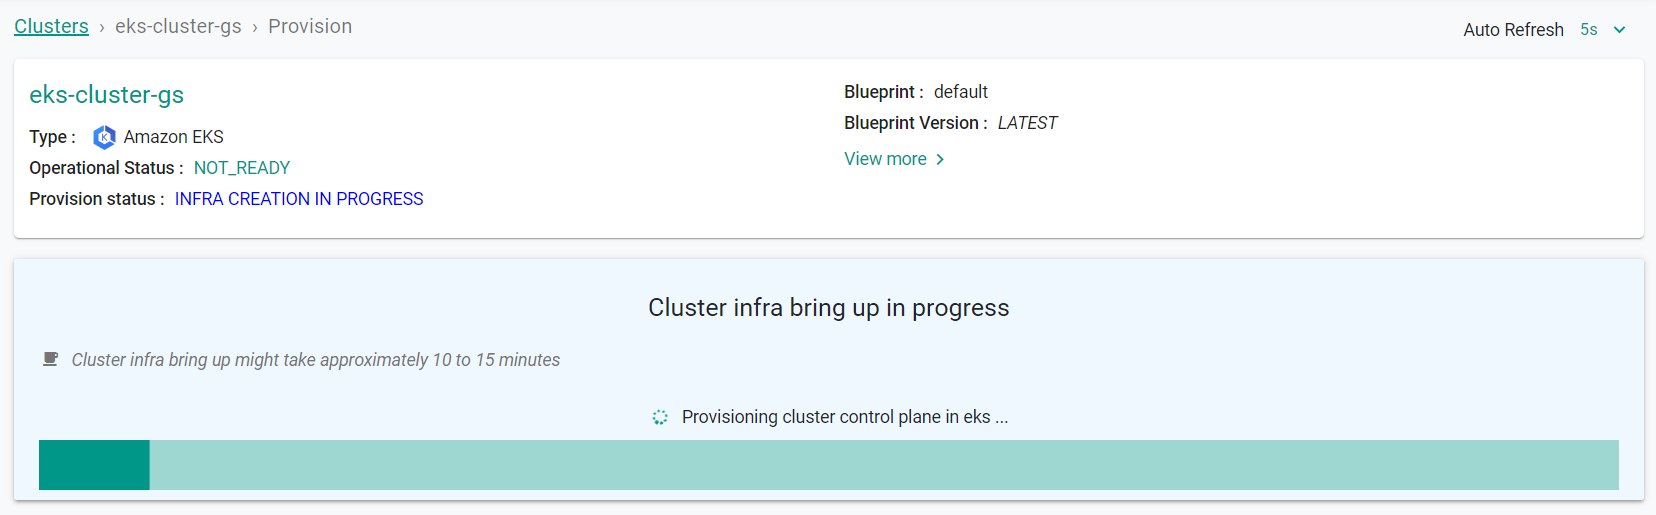
Provisioning will take approximately 45 minutes to complete. The final step in the process is the blueprint sync for the default blueprint. This can take a few minutes to complete because this requires the download of several container images and deployment of monitoring and log aggregation components.
Step 2: Validate GitOps
In this step, we will check that the GitOps pipeline created a cluster specification file and pushed it to the Git repository.
- In your project, navigate to GitOps -> Pipelines
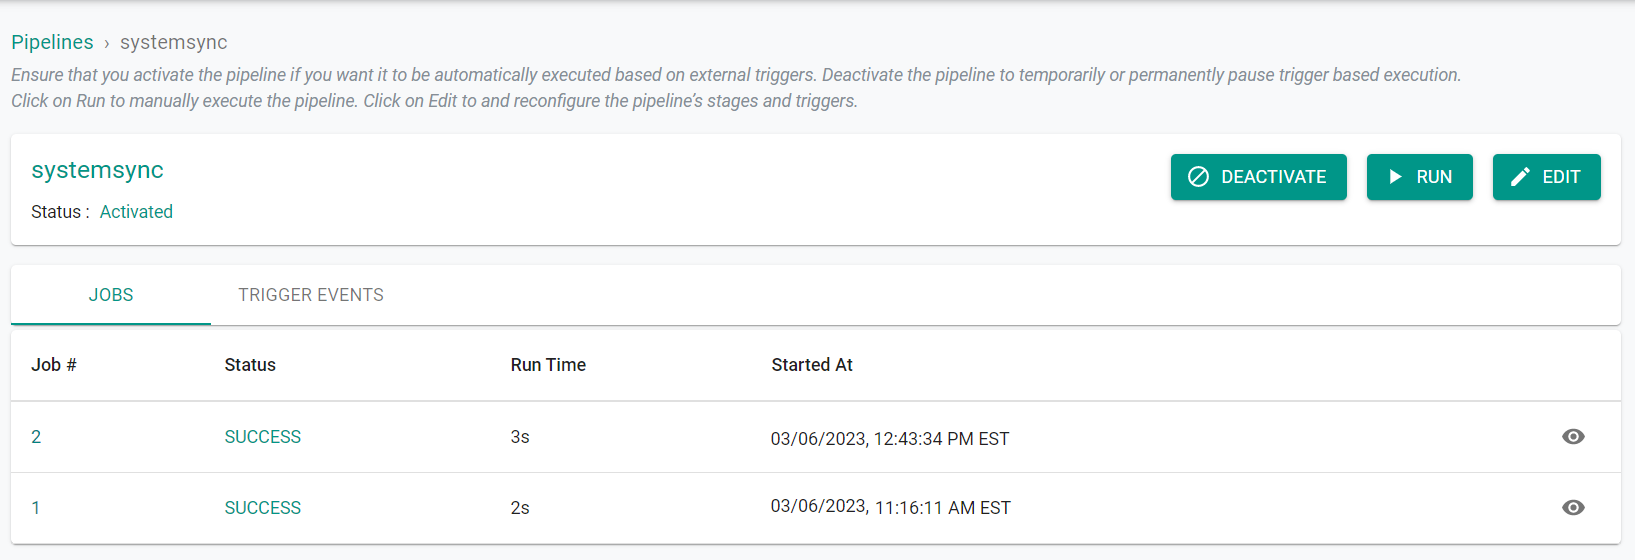
- Click on the name of the previously created pipeline
You will see that a second job in the pipeline was initiated. This job was triggered by the system when the new cluster was created. This new job was the system writing the cluster specification file to the Git repo.
Now, we will check that the Git repo has the cluster spec file.
- Navigate to your GitHub repository
- In the repo, navigate to projects -> defaultproject/clusters
Note
The Git path will be different if you used a different project name.
You will see the cluster specification files for all clusters in the project.

Step 3: Update Cluster From Git
In this step, we will update the minimum node count in the cluster spec file on the Git repository and then witness the cluster being updated automatically in the system.
- Navigate to your Git repo -> "projects/Project Name/clusters/Cluster Name.yaml"
- Edit the file and update the text for "desiredCapacity" from "desiredCapacity: 2 to "desiredCapacity: 3"
- Edit the file and update the text for "maxSize" from "maxSize: 2 to "maxSize: 3"
- Commit the changes to your Git repository
apiVersion: infra.k8smgmt.io/v3
kind: Cluster
metadata:
  # The name of the cluster
  name: eks-cluster-gs
  # The name of the project the cluster will be created in
  project: defaultproject
spec:
  blueprintConfig:
  # The name of the blueprint the cluster will use
    name: default
    # The version of the blueprint the cluster will use
    version: latest
  # The name of the cloud credential that will be used to create the cluster
  cloudCredentials: aws-cloud-credential
  config:
    # The EKS addons that will be applied to the cluster
    addons:
    - name: kube-proxy
      version: latest
    - name: vpc-cni
      version: latest
    - name: coredns
      version: latest
    managedNodeGroups:
      # The AWS AMI family type the nodes will use
    - amiFamily: AmazonLinux2
      # The desired number of nodes that can run in the node group
      desiredCapacity: 3
      iam:
        withAddonPolicies:
          # Enables the IAM policy for cluster autoscaler
          autoScaler: true
      # The AWS EC2 instance type that will be used for the nodes
      instanceType: t3.large
      # The maximum number of nodes that can run in the node group
      maxSize:
      # The minimum number of nodes that can run in the node group
      minSize: 2
      # The name of the node group that will be created in AWS
      name: NG1
      # The size in gigabytes of the volume attached to each node
      volumeSize:
      # The type of disk backing the node volume. alid variants are: "gp2" is General Purpose SSD, "gp3" is General Purpose SSD which can be optimised for high throughput (default), "io1" is Provisioned IOPS SSD, "sc1" is Cold HDD, "st1" is Throughput Optimized HDD.
      volumeType: gp3
    metadata:
      # The name of the cluster
      name: eks-cluster-gs
      # The AWS region the cluster will be created in
      region: us-west-2
      # The Kubernetes version that will be installed on the cluster
      version: latest
    vpc:
      # The CIDR that will be used  by the cluster VPC
      cidr: 192.168.0.0/16
      clusterEndpoints:
        # Enables private access to the Kubernetes API server endpoints
        privateAccess: true
        # Enables public access to the Kubernetes API server endpoints
        publicAccess: false
  proxyConfig: {}
  type: aws-eks
status:
  blueprint:
    name: default
  conditions:
  - reason: registered
    status: "True"
    type: ClusterRegisterSucceeded
  - reason: checked in
    status: "True"
    type: ClusterCheckInSucceeded
  - reason: all nodes synced
    status: "True"
    type: ClusterNodeSyncSucceeded
  - reason: all namespaces synced
    status: "True"
    type: ClusterNamespaceSyncSucceeded
  - reason: all tasks/workloads synced
    status: "True"
    type: ClusterBlueprintSyncSucceeded
  - reason: blueprint synced
    status: "True"
    type: ClusterReady
  createdAt: "2023-03-06T16:27:15Z"
  displayName: eks-cluster-gs
  extra:
    vaultIntegration: {}
  id: 28d81zk
  name: eks-cluster-gs
  provisionStatus: CLUSTER_PROVISION_COMPLETE
The commit will trigger the GitOps pipeline and it will automatically update the cluster node pool.
- In your project, navigate to GitOps -> Pipelines
- Click on the name of the previously created pipeline
You will see that a third job in the pipeline was initiated. This job was triggered by the system when the new cluster was created. This new job was the system writing the cluster specification file to the Git repo.
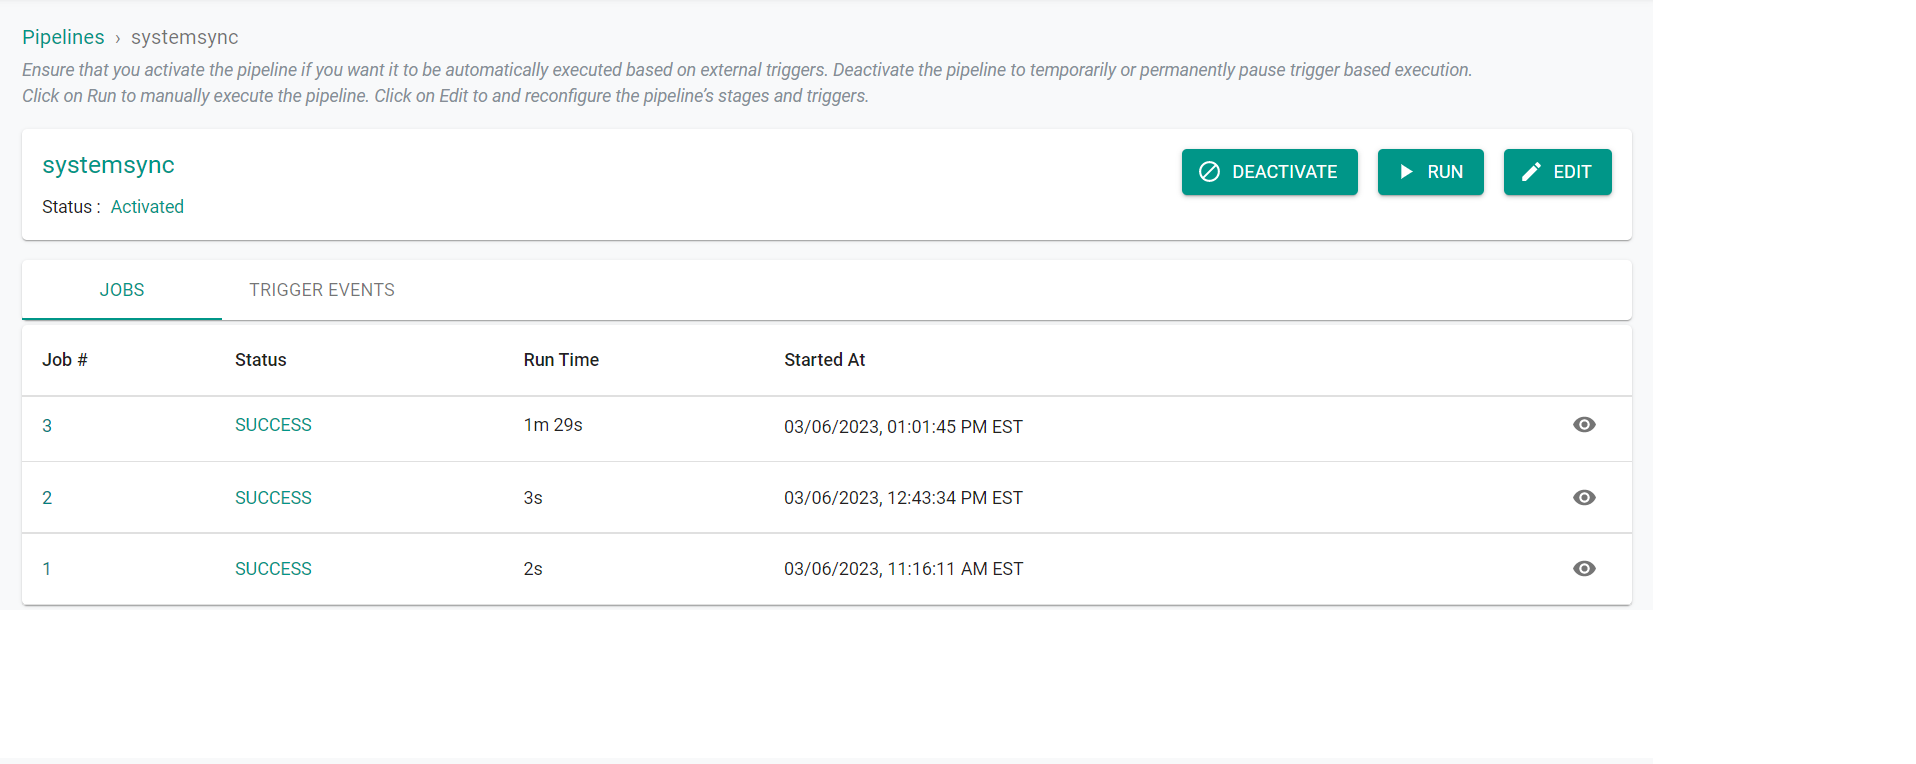
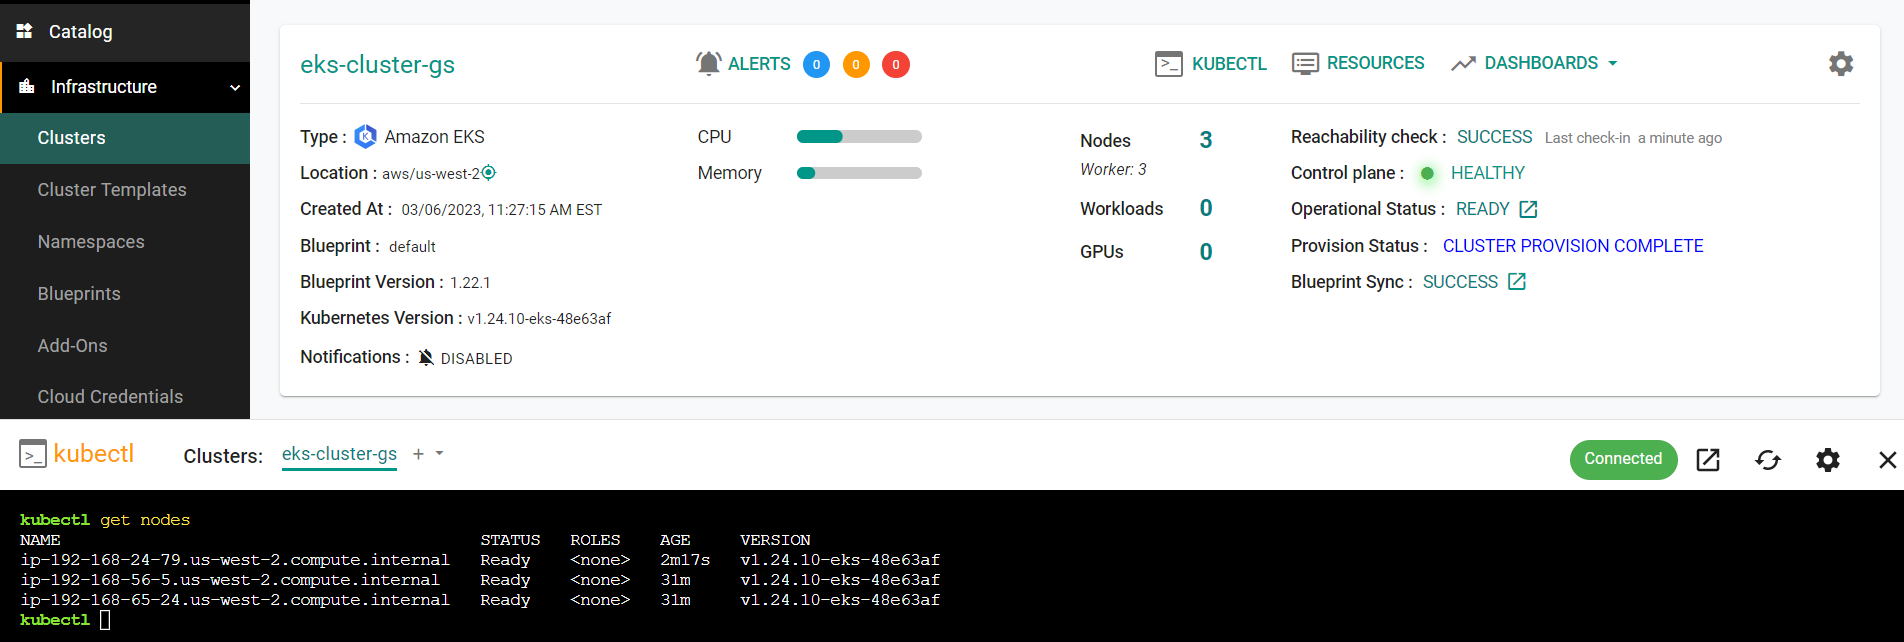
After a few minutes, we can see that that the number of nodes in the cluster was increased to three.
Recap
In this part, you tested bidirectional synchronization between your Git repository and the system when creating and updating an EKS cluster.