Install
Rafay now offers seamless integration with NVIDIA NVSentinel, enabling turnkey deployment of intelligent threat detection and runtime security for AI/ML workloads within Kubernetes environments. Traditionally complex to integrate across distributed clusters, NVSentinel is now fully automated and repeatable using Rafay’s custom Cluster Blueprint.
This integration abstracts away the multi-step setup of NVIDIA’s AI security stack—including telemetry collection, model monitoring, anomaly detection, and policy enforcement—into a streamlined, blueprint-driven deployment using Rafay’s PaaS platform. Platform teams can rapidly secure AI workloads with built-in observability, governance, and lifecycle automation—without requiring deep expertise in AI security tooling or infrastructure.
Rafay’s NVSentinel Blueprint supports:
Automated deployment of NVSentinel components across clusters Continuous monitoring of AI/ML model behavior and drift detection Real-time threat detection and anomaly alerting Integration with Kubernetes policies for runtime enforcement Centralized visibility and security posture management for AI workloads
This makes it one of the fastest and most reliable ways to operationalize AI workload security and monitoring in Kubernetes at scale.
Step 1: Download RCTL
The RCTL CLI allows you to programmatically interact with the controller enabling users to construct sophisticated automation workflows.
- Login into your Org
- Navigate to My Tools to download both the RCTL CLI and the CLI Config file
- Initialize RCTL using the step-by-step instructions
- Ensure you update your OS's Path environment variable for RCTL
Step 2: Download Files
You will download a ZIP archive containing specification files that will be used by RCTL to create the needed resources within the controller.
- Download this file
- Extract the archive to your local machine
Step 3: Create Namespaces
In this step, you will use RCTL to create all of the namespaces needed for the cluster blueprint add-ons.
Info
The specifications files are configured for a project named system-catalog. If you are using a different project name, the specification files will need to be updated.
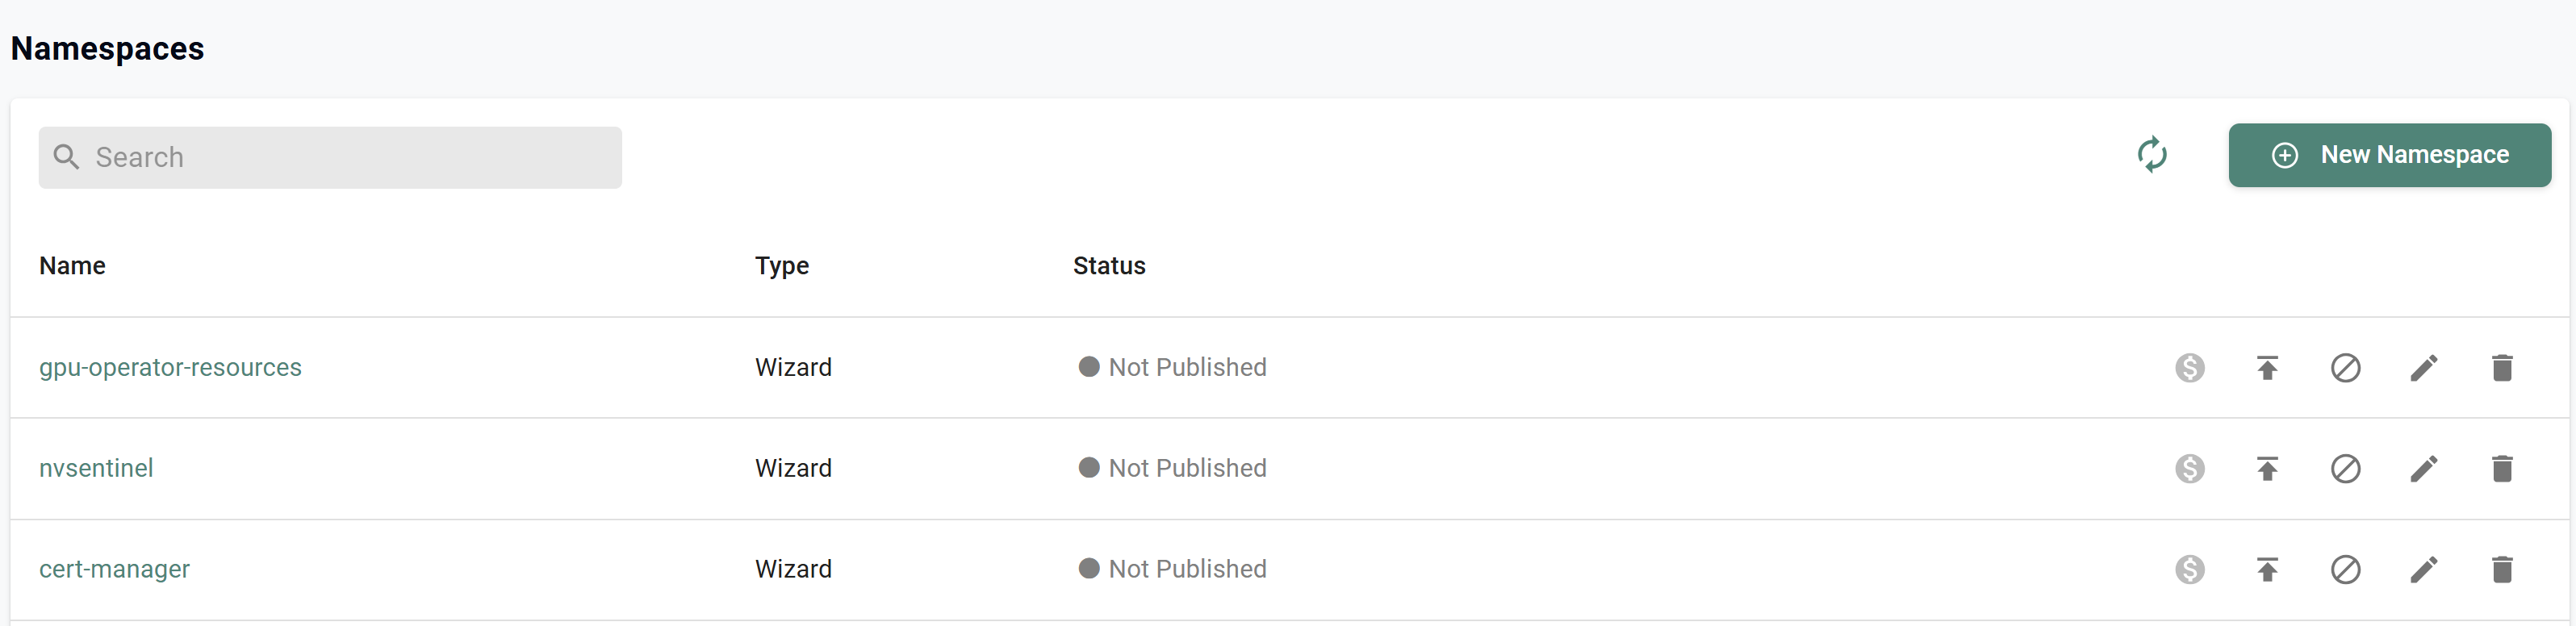
- In your CLI, navigate to the /nvsentinel/namespaces in your extracted archive
- Run the following command to loop through all of the YAML files and create the respective namespaces
for file in ./*.yaml; do [ -f "$file" ] && rctl apply -f "$file"; done
- In your project, navigate to Infrastructure -> Namespaces where you will see the newly created namespaces
Step 4: Create Repositories
In this step, you will use RCTL to create all of the repositories needed for the cluster blueprint add-ons.
Info
The specifications files are configured for a project named system-catalog. If you are using a different project name, the specification files will need to be updated.
- In your CLI, navigate to the /nvsentinel/repositories in your extracted archive
- Run the following command to loop through all of the YAML files and create the respective repositories
for file in ./*.yaml; do [ -f "$file" ] && rctl apply -f "$file"; done
- In your project, navigate to Integrations -> Repositories where you will see the newly created repositories

Step 5: Create Add-Ons
In this step, you will use RCTL to create all of the Add-On needed for the cluster blueprint.
Info
The specifications files are configured for a project named system-catalog. If you are using a different project name, the specification files will need to be updated.
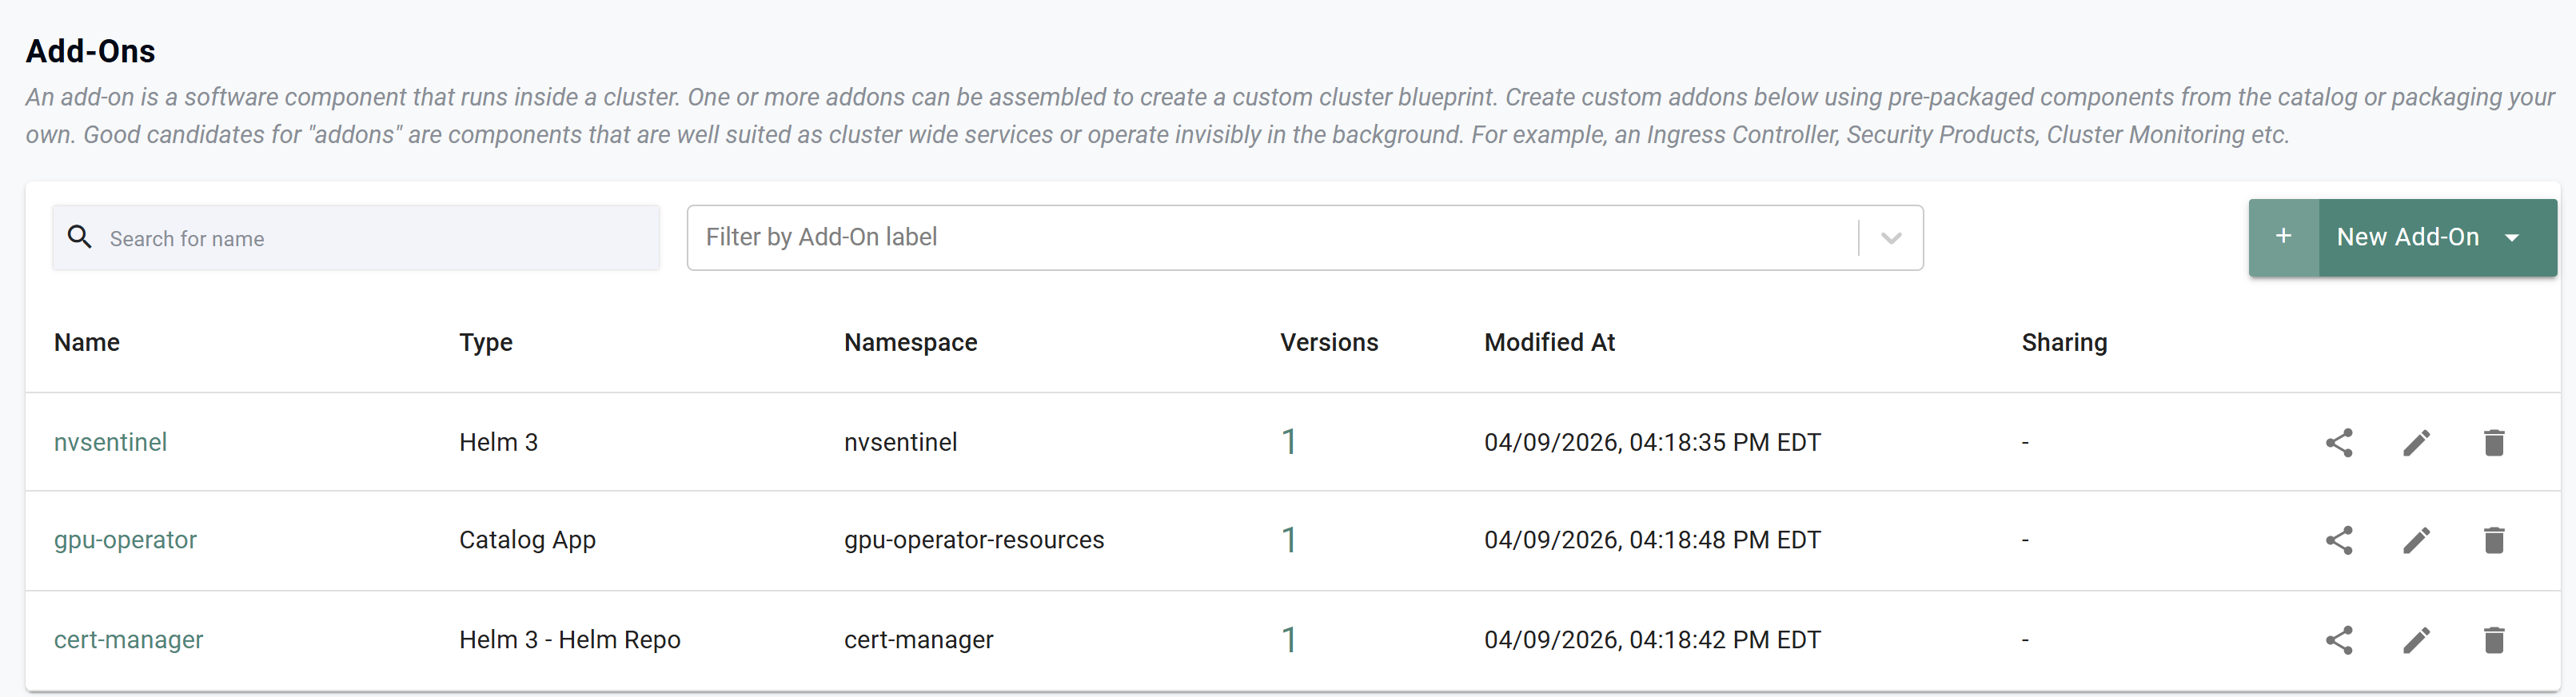
- In your CLI, navigate to the /nvsentinel/addons in your extracted archive
- Run the following command to loop through all of the YAML files and create the respective add-ons
for file in ./*.yaml; do [ -f "$file" ] && rctl apply -f "$file"; done
- In your project, navigate to Infrastructure -> Add-Ons where you will see the newly created add-ons
Step 6: Create Cluster Blueprint
In this step, you will use RCTL to create the cluster blueprint.
Info
The specifications files are configured for a project named system-catalog. If you are using a different project name, the specification files will need to be updated.
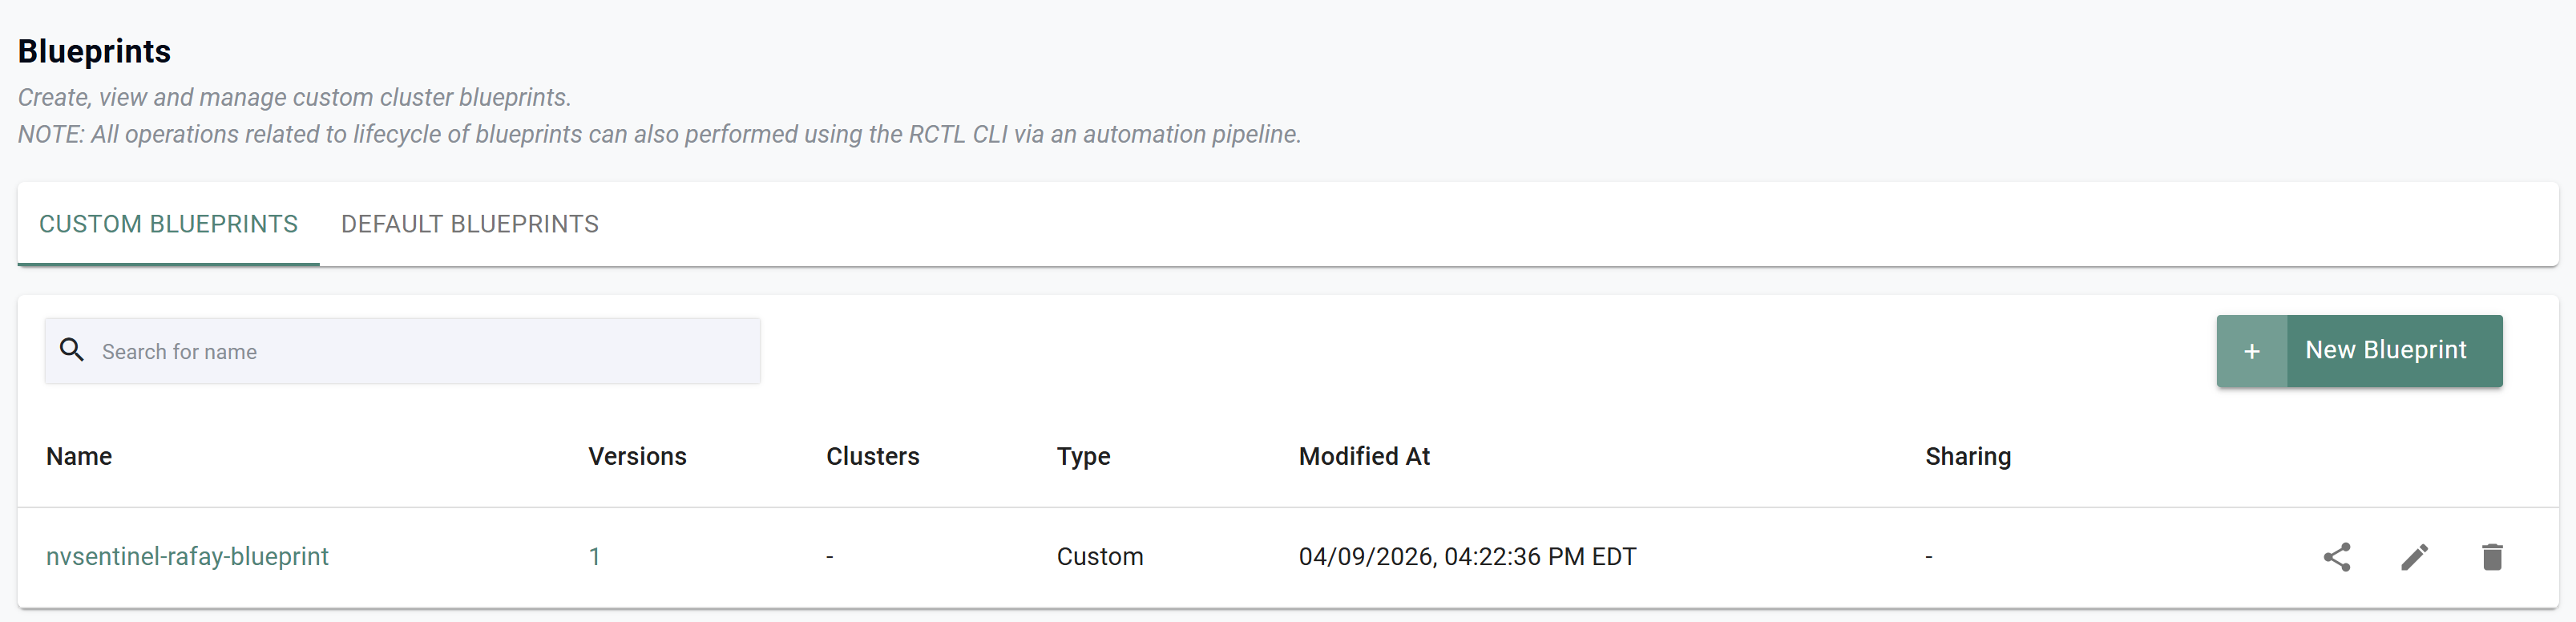
- In your CLI, navigate to the /nvsentinel/blueprint in your extracted archive
- Run the following command to create the blueprint
rctl apply -f nvsentinel-rafay-blueprint.yaml
- In your project, navigate to Infrastructure -> Blueprints where you will see the newly created blueprint
- Once the blueprint is created, apply the blueprint to your cluster
Step 7: Validate NVSentinel
In this step, you will run the NVSentinel validation script to ensure all components are working.
- Log into the terminal of the cluster node and run the following commands to download and execute the validation script
git clone https://github.com/NVIDIA/NVSentinel.git
./NVSentinel/scripts/validate-nvsentinel.sh --version v1.0.0
You should see output similar to the following showing the validation was successful.
=== Namespace ===
✓ namespace nvsentinel exists
=== Datastore ===
✓ using datastore: mongodb
=== Cluster Nodes ===
✓ cluster has 1 total nodes (1 GPU nodes, 0 KWOK fake nodes)
=== Image Versions ===
✓ all nvsentinel images use v1.0.0 (pattern: ghcr.io/nvidia/nvsentinel)
✓ cluster images: 11 ghcr.io, 7 nvcr.io, 1 registry.k8s.io, 3 quay.io, 4 docker.io, 00 localhost, 28 other
=== Image Pull Secrets ===
⚠ nvidia-ngcuser-pull-secret not found
=== StatefulSets ===
✓ mongodb: 3/3 ready
=== Jobs ===
✓ create-mongodb-database: completed successfully
=== Deployments ===
✓ fault-quarantine: 1/1 ready
✓ fault-remediation: 1/1 ready
✓ janitor: 1/1 ready
✓ labeler: 1/1 ready
✓ node-drainer: 1/1 ready
⚠ simple-health-client deployment not found (optional component)
=== DaemonSets ===
✓ platform-connectors: 1/1 ready
✓ gpu-health-monitor-dcgm-3.x: 0/0 ready (node selector: no matching nodes)
✓ gpu-health-monitor-dcgm-4.x: 0/0 ready (node selector: no matching nodes)
✓ syslog-health-monitor-regular: 1/1 ready
✓ syslog-health-monitor-kata: 0/0 ready (node selector: no matching nodes)
=== Pod Health ===
✓ all 12 pods healthy
=== Services ===
✓ mongodb-headless: 3 endpoints
✓ mongodb-metrics: 3 endpoints
✓ janitor: 1 endpoints
⚠ simple-health-client not found (optional service)
=== Critical Issues ===
✓ no ImagePullBackOff issues
✓ no CrashLoopBackOff issues
✓ no containers with excessive restarts
=== Summary ===
✓ NVSentinel deployment validation PASSED
Step 8: Test NVSentinel
In this step, you will simulate a GPU error and watch NVSentinel cordon the node to prevent scheduling on it.
- Open 2 terminal windows to the cluster node
- Run the following command in the first terminal to watch the node status
kubectl get nodes -w
- Run the following command in the second terminal window to simulate a GPU error
logger -p kern.err "NVRM: Xid (PCI:0000:00:1e.0): 79, pid='<unknown>', name=<unknown>, GPU-Board Error: Dbl Bit ECC Error"
In the first terminal window, you should see the node transition to "SchedulingDisabled"
- Additionally, you can run the following command to see the GPU error in the logs
kubectl logs -f daemonset/syslog-health-monitor-regular -n nvsentinel
You will see logs similar to the following:
{"time":"2026-04-09T16:27:36.777376402Z","level":"INFO","msg":"Resuming from last known cursor","module":"syslog-health-monitor","version":"v1.0.0","check":"SysLogsXIDError","cursor":"s=ea511f7304d042e2a4f747dd0eec7d51;i=6e99;b=7b9c68d10f02438cac03c7fa8f2f0083;m=f7325971;t=64f097d755b79;x=996d753d001d3c2b"}
{"time":"2026-04-09T16:27:36.777537961Z","level":"INFO","msg":"Found action for XID code","module":"syslog-health-monitor","version":"v1.0.0","xidCode":79,"action":"RESTART_BM"}
{"time":"2026-04-09T16:27:36.777555051Z","level":"ERROR","msg":"Error getting GPU UUID from metadata","module":"syslog-health-monitor","version":"v1.0.0","pci":"0000:00:1e","error":"GPU not found for PCI address: 0000:00:1e"}
{"time":"2026-04-09T16:27:36.777570609Z","level":"INFO","msg":"Attempting to send health event","module":"syslog-health-monitor","version":"v1.0.0","events":{"version":1,"events":[{"version":1,"agent":"syslog-health-monitor","componentClass":"GPU","checkName":"SysLogsXIDError","isFatal":true,"message":"MESSAGE=NVRM: Xid (PCI:0000:00:1e.0): 79, pid='<unknown>', name=<unknown>, GPU-Board Error: Dbl Bit ECC Error","recommendedAction":24,"errorCode":["79"],"entitiesImpacted":[{"entityType":"PCI","entityValue":"0000:00:1e"}],"generatedTimestamp":{"seconds":1775752056,"nanos":777565575},"nodeName":"nvsentinel-tim","processingStrategy":1}]}}
{"time":"2026-04-09T16:27:36.778208793Z","level":"INFO","msg":"Successfully sent health events","module":"syslog-health-monitor","version":"v1.0.0","events":{"version":1,"events":[{"version":1,"agent":"syslog-health-monitor","componentClass":"GPU","checkName":"SysLogsXIDError","isFatal":true,"message":"MESSAGE=NVRM: Xid (PCI:0000:00:1e.0): 79, pid='<unknown>', name=<unknown>, GPU-Board Error: Dbl Bit ECC Error","recommendedAction":24,"errorCode":["79"],"entitiesImpacted":[{"entityType":"PCI","entityValue":"0000:00:1e"}],"generatedTimestamp":{"seconds":1775752056,"nanos":777565575},"nodeName":"nvsentinel-tim","processingStrategy":1}]}}
{"time":"2026-04-09T16:27:36.778318697Z","level":"INFO","msg":"Check no more","module":"syslog-health-monitor","version":"v1.0.0","name":"SysLogsXIDError","cursor":"s=ea511f7304d042e2a4f747dd0eec7d51;i=6e9b;b=7b9c68d10f02438cac03c7fa8f2f0083;m=f77ae267;t=64f097dbde46e;x=111904bbc52b55cf"}
{"time":"2026-04-09T16:27:36.778331127Z","level":"INFO","msg":"Finished processing journal entries","module":"syslog-health-monitor","version":"v1.0.0","check":"SysLogsXIDError","nextCursor":"s=ea511f7304d042e2a4f747dd0eec7d51;i=6e9b;b=7b9c68d10f02438cac03c7fa8f2f0083;m=f77ae267;t=64f097dbde46e;x=111904bbc52b55cf"}
Recap
You have successfully created a custom cluster blueprint containing the add-ons needed for NVIDIA NVSentinel Integration. This blueprint can be applied to a fleet of Kubernetes clusters.