Setup & Use
In this exercise, you will install Cilium with load balancer support. Cilium supports BGP (Border Gateway Protocol) to advertise Kubernetes Service IPs (e.g., LoadBalancer IPs) to external network routers. This integration allows Cilium-managed services to be directly reachable from outside the Kubernetes cluster without relying on external cloud load balancers or additional proxies. This is particularly useful in bare metal or hybrid cloud environments.
Please read this introductory blog on Cilium's Load Balancing capabilities for Kubernetes.
Important
This tutorial describes the steps using the Rafay Web Console. The entire workflow can also be fully automated and embedded into an automation pipeline
Assumptions
You have already provisioned or imported a Kubernetes cluster into your Rafay Org.
Step 1: Deploy FRR Router (Optional)
In this step, you can deploy an FRR router pod onto the cluster if you do not have an upstream BGP router to test with.
- Login into the cluster
- Save the following YAML file to the cluster as "frr.yaml"
- Update the "neighbor" IP addresses within the YAML to match the Node IP
apiVersion: v1
kind: Pod
metadata:
  name: frr
  labels:
    app: frr
spec:
  hostNetwork: true
  containers:
    - name: frr
      image: quay.io/frrouting/frr:10.3.1
      securityContext:
        privileged: true
      volumeMounts:
        - mountPath: /etc/frr
          name: frr-config
  volumes:
    - name: frr-config
      configMap:
        name: frr-config
---
apiVersion: v1
kind: ConfigMap
metadata:
  name: frr-config
data:
  daemons: |
    bgpd=yes
  bgpd.conf: |
    hostname frr
    password zebra
    log stdout
    router bgp 64513
      bgp router-id 1.1.1.1
      neighbor 10.0.0.10 remote-as 64512
      neighbor 10.0.0.10 passive
      address-family ipv4 unicast
        neighbor 10.0.0.10 activate
        exit-address-family
- Run the following command to apply the resource
kubectl apply -f frr.yaml
- Run the following command to ensure the resources were created successfully
kubectl get pod frr
You will see output similar to the following:
NAME   READY   STATUS    RESTARTS   AGE
frr    1/1     Running   0          10s
Step 2: Create Cilium Namespace
- Login into the Web Console
- Navigate to Infrastructure -> Namespaces
- Create a new namespace, enter the name kube-system and select type as Wizard
- In the placement section, select a cluster
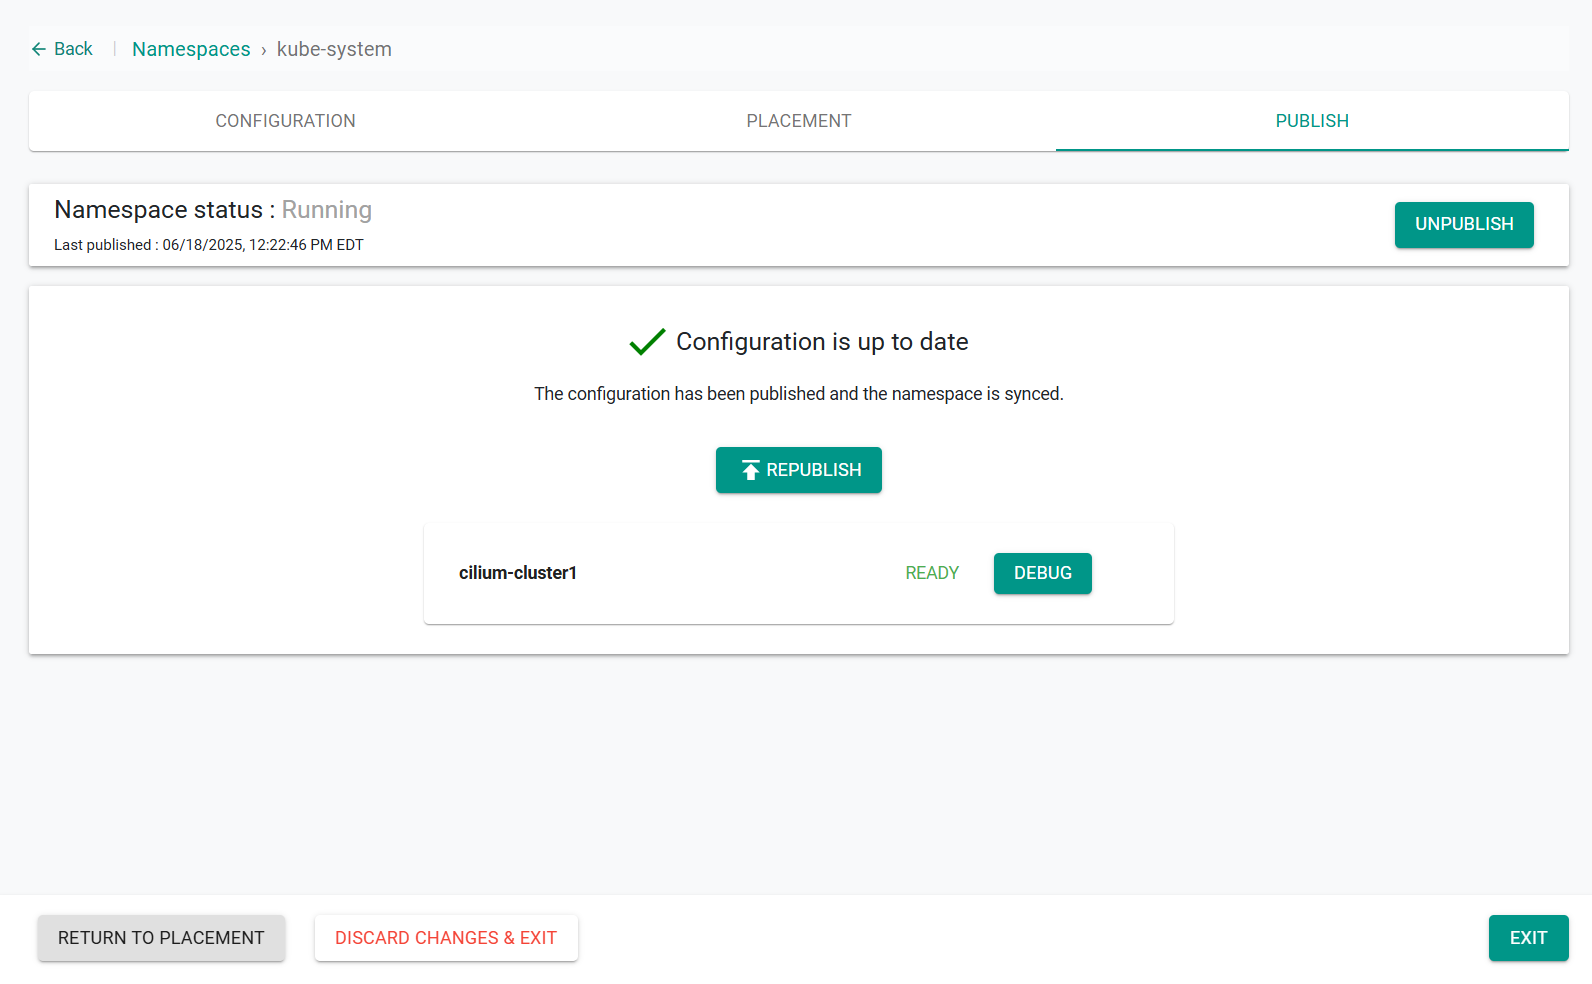
- Click Save & Go to Publish
- Publish the namespace
Step 3: Create Cilium Add-on
- Navigate to Infrastructure -> Add-Ons
- Select New Add-On -> Create New Add-On from Catalog
- Search for cilium
- Select cilium from default-helm
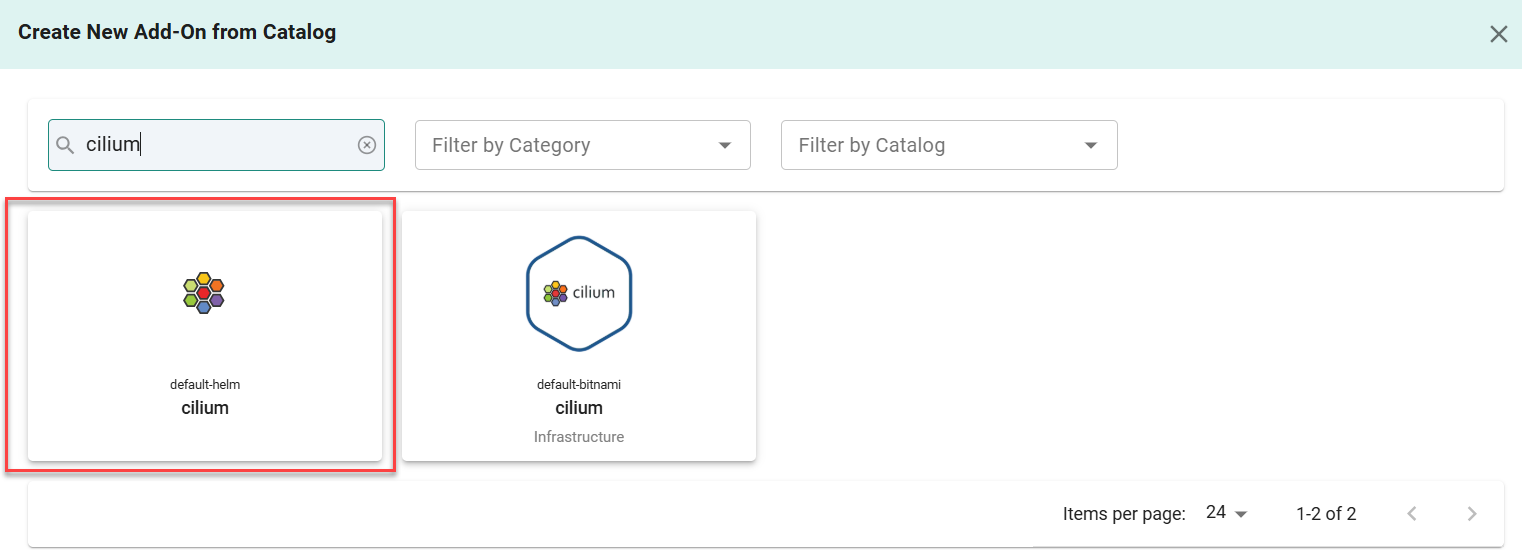
- Select Create Add-On
- Enter the name cilium for the add-on
- Specify the namespace (e.g. cilium and select the namespace created as part of the previous step)
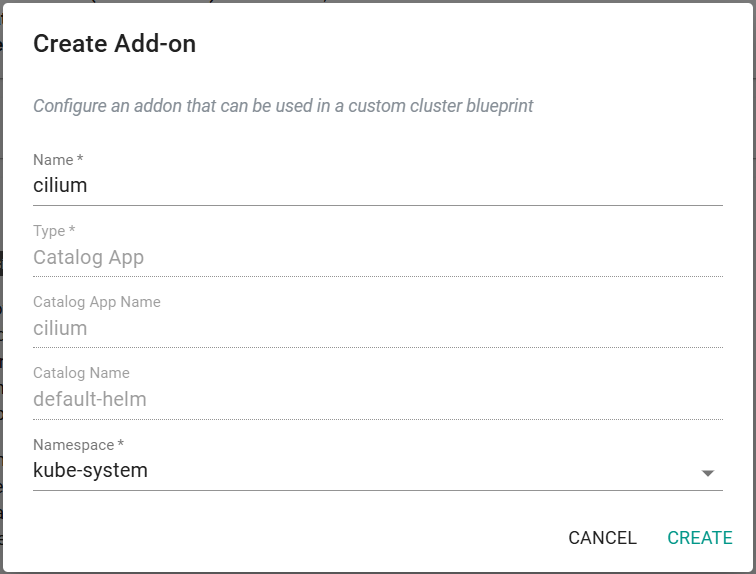
- Click Create
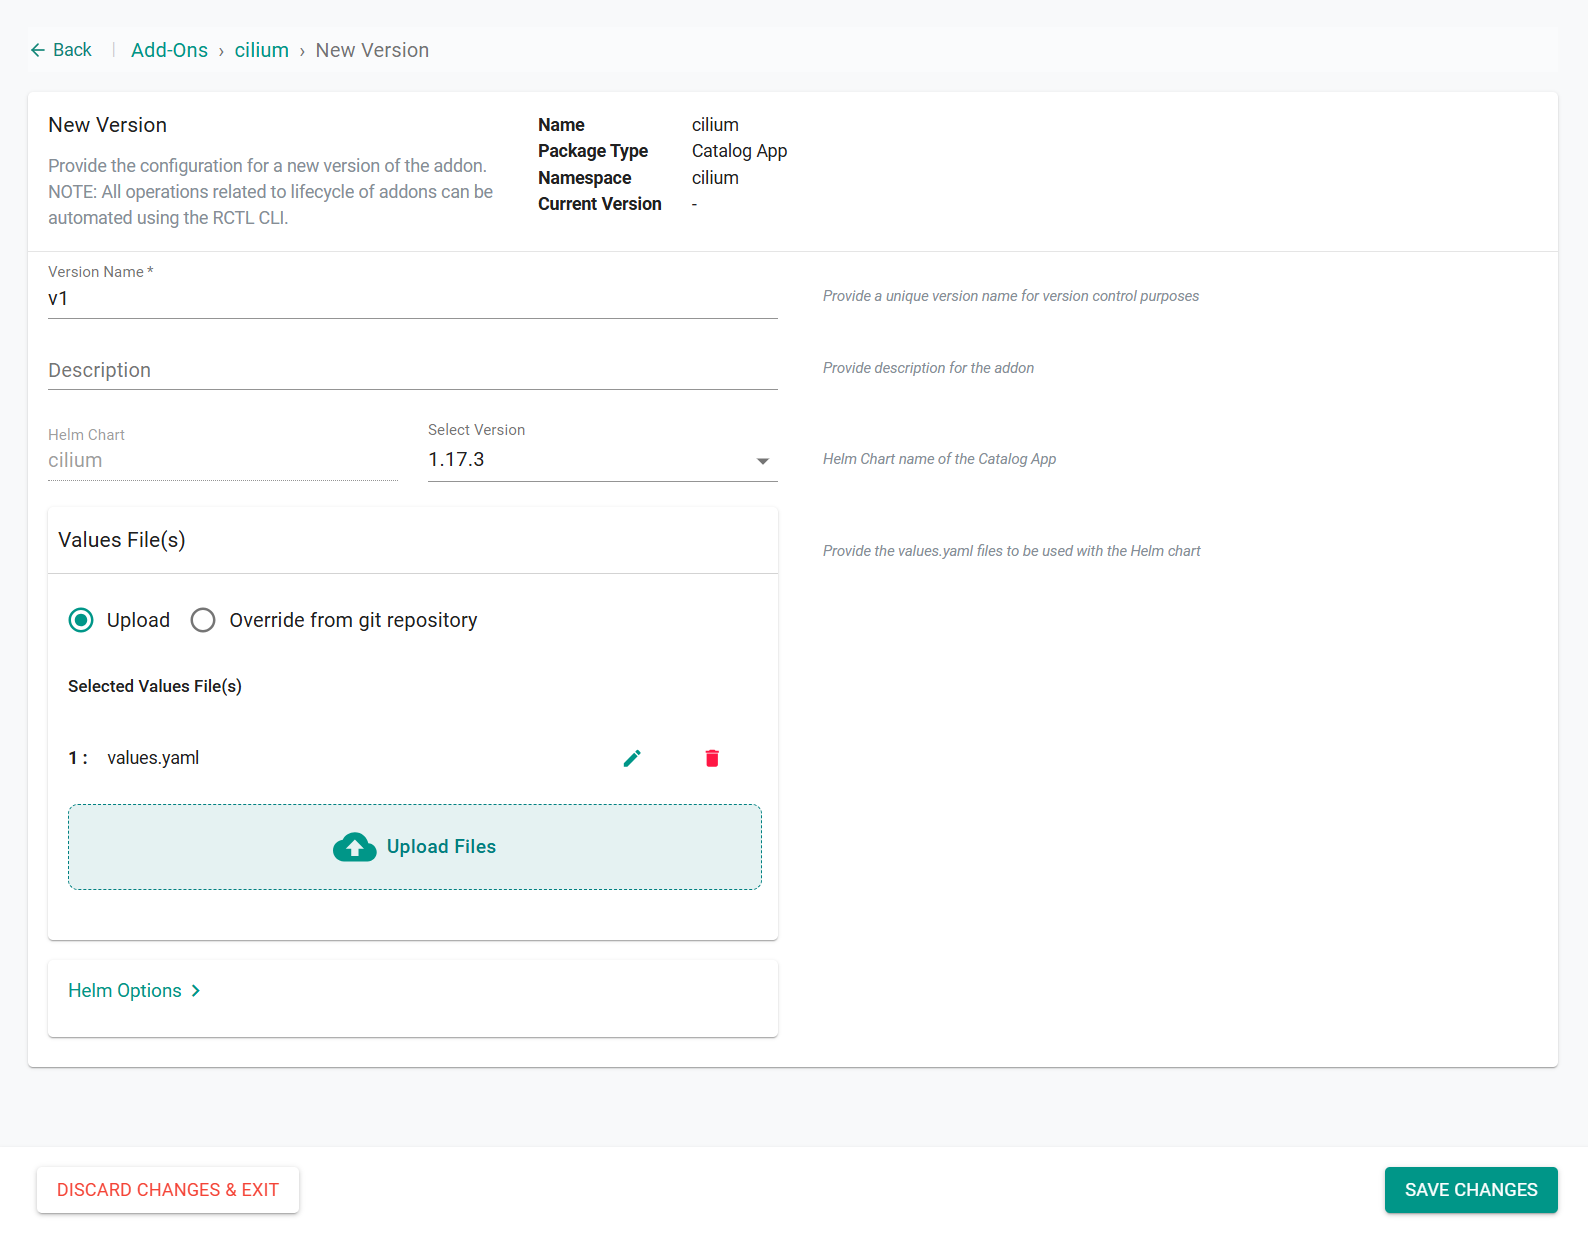
- Enter a version name
- Upload the following helm values
kubeProxyReplacement: true

bgpControlPlane:
  enabled: true
- Click Save Changes
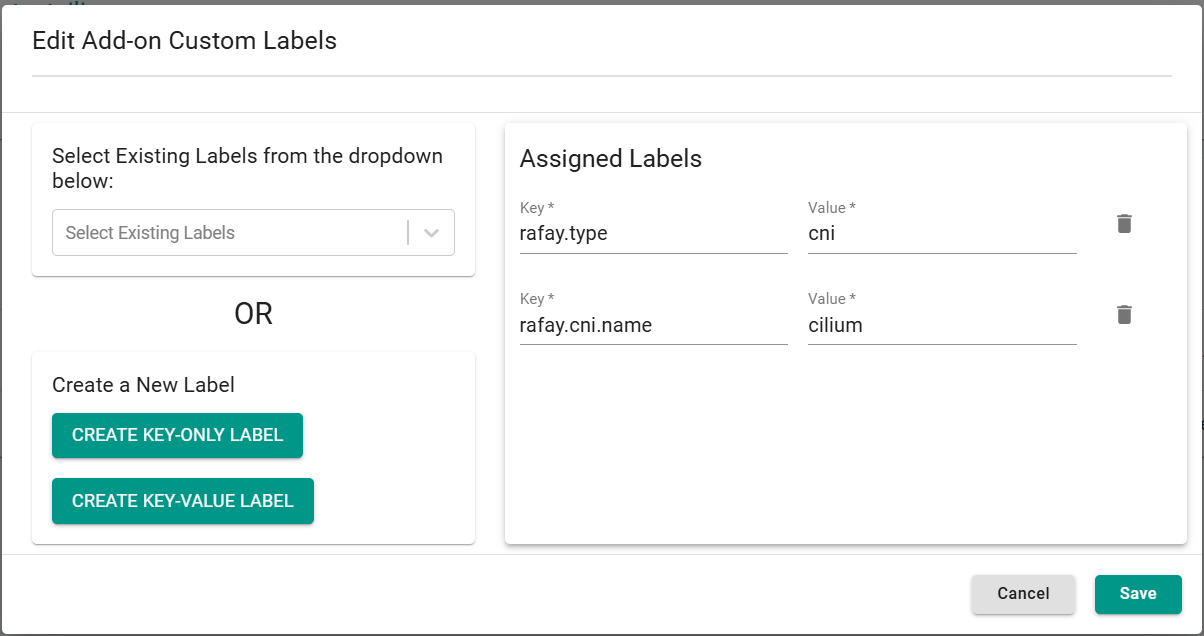
- Click Manage Labels
- Click Create Key-Value Label
- Enter key rafay.type and value cni
- Click Create Key-Value Label
- Enter key rafay.cni.name and value cilium
Step 4: Create BGP Peering
This step will create an add-on which will peer cilium with an upstream BGP router.
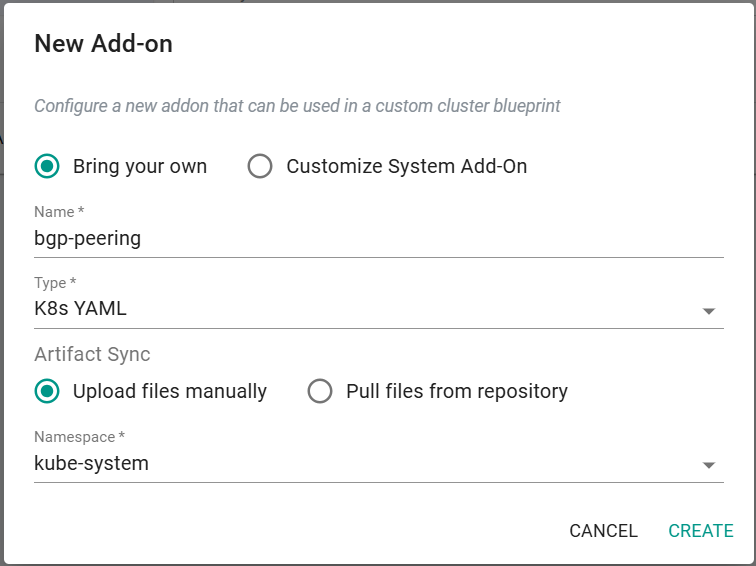
- Navigate to Infrastructure -> Add-Ons
- Select New Add-On -> Create New Add-On
- Enter a name for the add-on
- Select "K8s YAML"
- Select "Upload files manually"
- Specify the namespace (e.g. cilium and select the namespace created as part of the previous step)
- Click Create
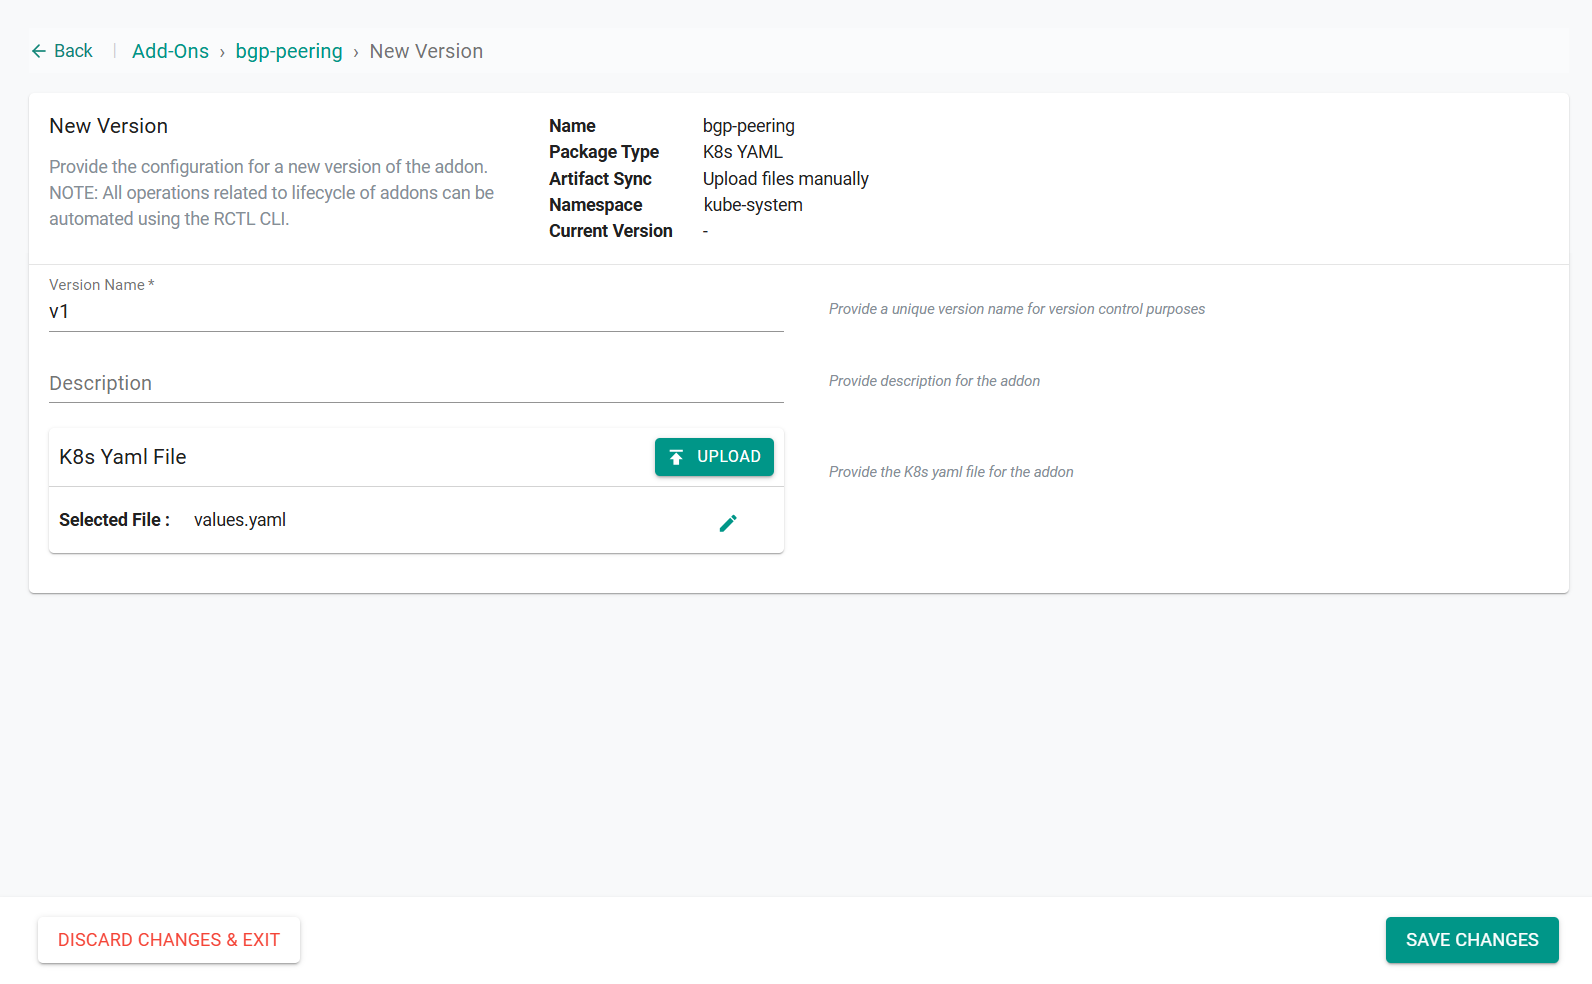
- Click "New Version"
- Enter a version name
- Upload the following YAML
Important
Update the peerAddress and peerASN with that of the peer BGP router. If using FRR on the same node, use the IP of the node where the FRR pod is running.
apiVersion: cilium.io/v2alpha1
kind: CiliumBGPPeeringPolicy
metadata:
  name: bgp-lb-announce
spec:
  nodeSelector: {}  # Empty = all nodes
  virtualRouters:
    - localASN: 64512
      exportPodCIDR: false
      serviceSelector:
        matchExpressions:
          - key: io.kubernetes.service.type
            operator: In
            values:
              - LoadBalancer
      neighbors:
        - peerAddress: 10.0.0.10/32
          peerASN: 64513
- Click Save Changes
Step 5: Create IP Pool Add-on
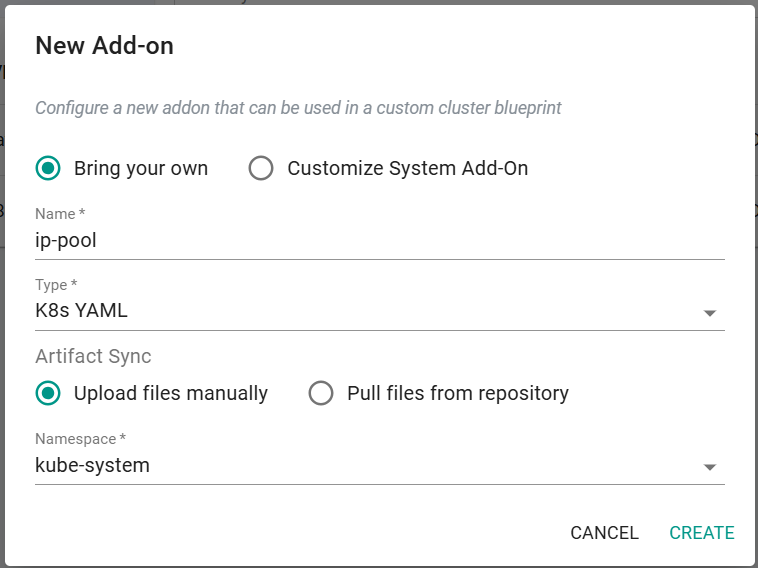
- Navigate to Infrastructure -> Add-Ons
- Select New Add-On -> Create New Add-On
- Enter a name for the add-on
- Select "K8s YAML"
- Select "Upload files manually"
- Specify the namespace (e.g. cilium and select the namespace created as part of the previous step
- Click Create
- Click "New Version"
- Enter a version name
- Upload the following YAML
apiVersion: "cilium.io/v2alpha1"
kind: CiliumLoadBalancerIPPool
metadata:
  name: "cilium-lb-pool"
spec:
  blocks:
  - cidr: "10.0.1.0/24"
- Click Save Changes

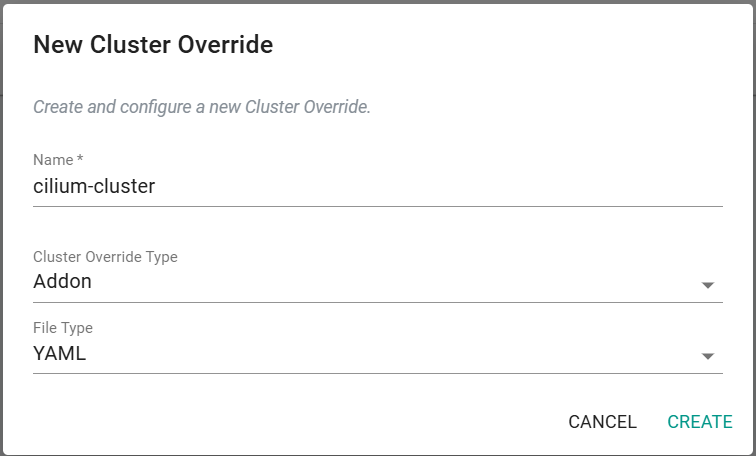
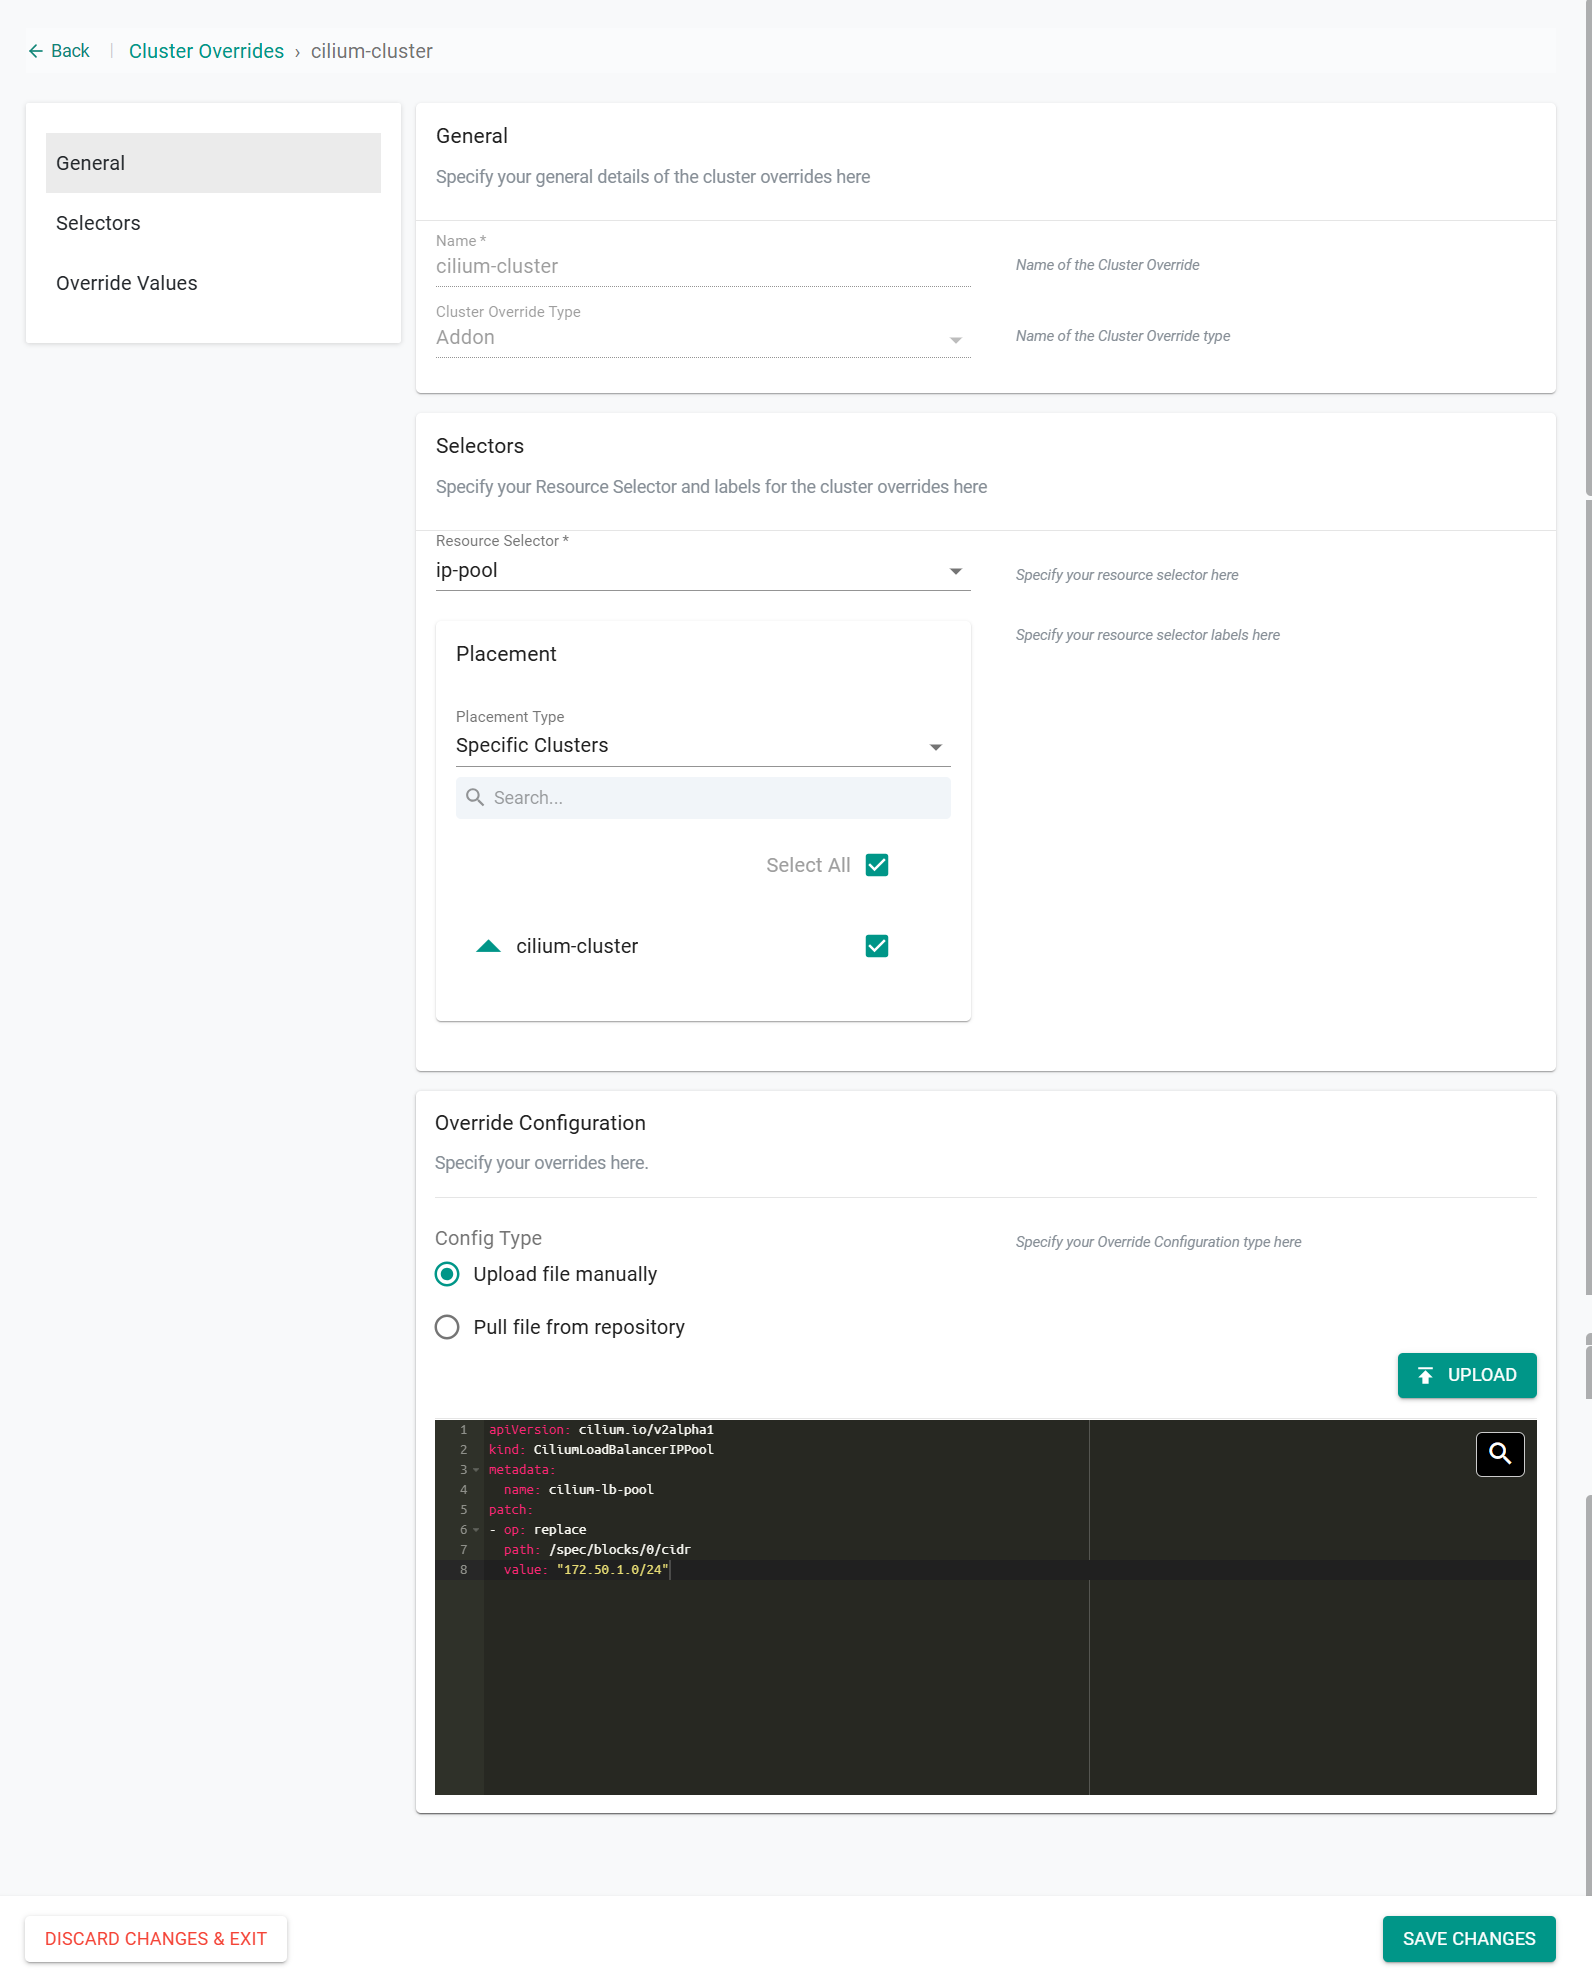
Step 6: Create Cluster Override
Since the IPs within the IP Pool will be specific to each cluster, we will create an override defining the specific IPs that should be used within this specific cluster.
- Navigate to Infrastructure -> Cluster Overrides
- Select New Override
- Enter a name for the override
- Select "Addon"
- Select "YAML"
- Click Create
- Under "Resource Selector", Select the IP Pool addon
- Under "Placement Type", Select "Specific Clusters"
- Select the specific cluster where the IPs should be used
- Enter the following override configuration being sure to update the cidr to match the IPs that should be used on this cluster
apiVersion: cilium.io/v2alpha1
kind: CiliumLoadBalancerIPPool
metadata:
  name: cilium-lb-pool
patch:
- op: replace
  path: /spec/blocks/0/cidr
  value: "172.50.1.0/24"
- Click Save Changes
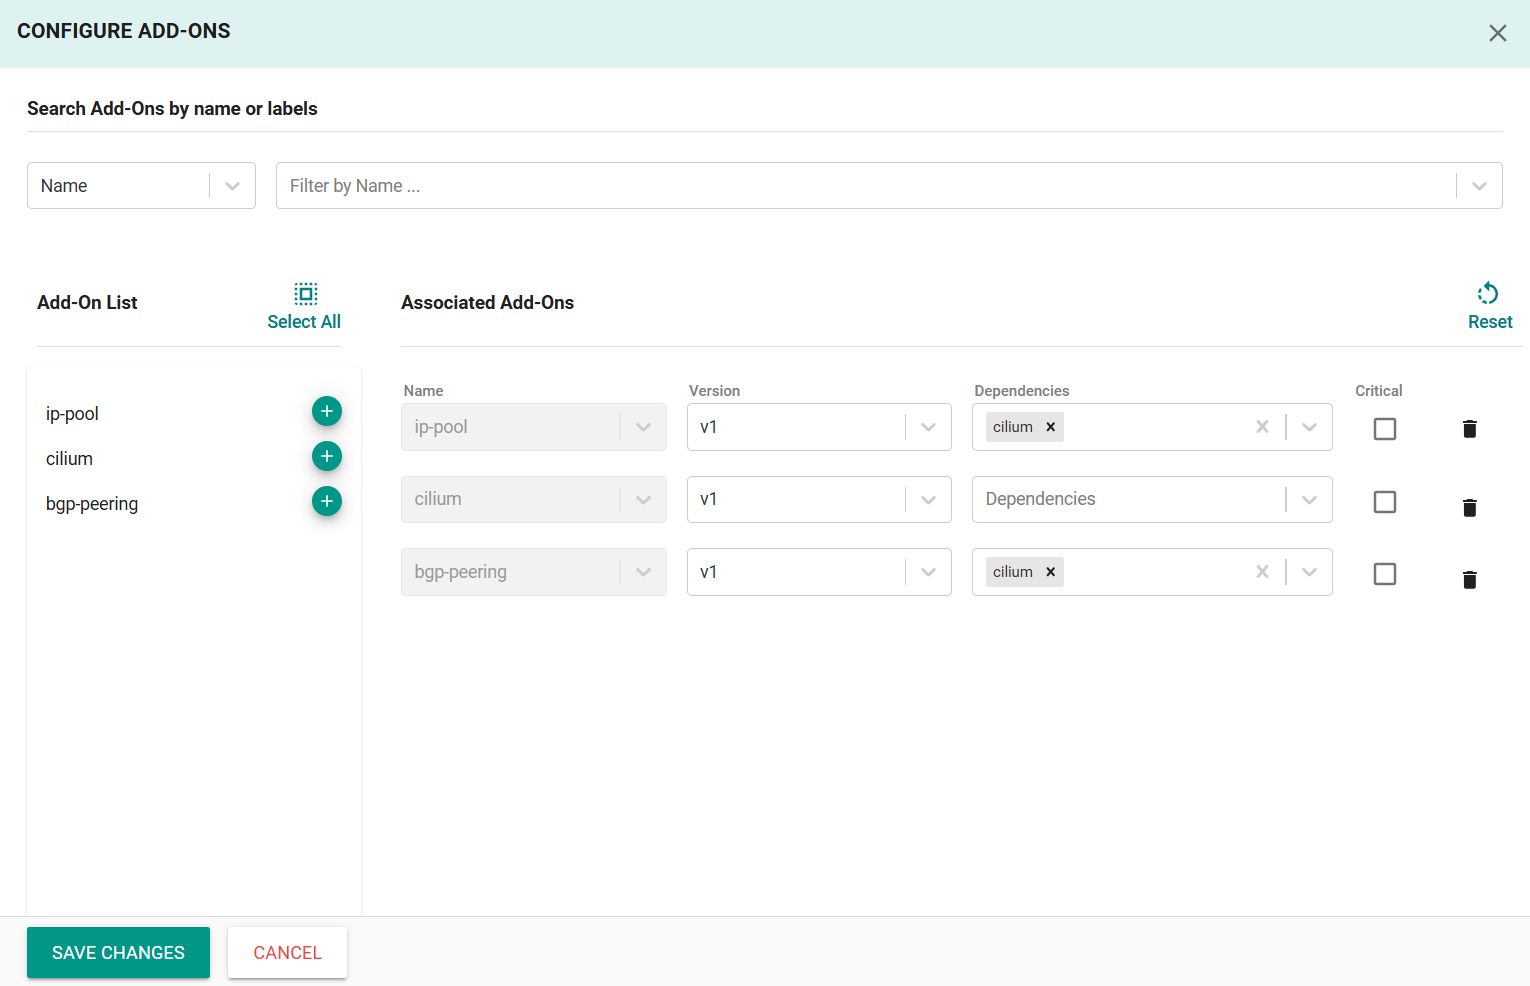
Step 7: Create Blueprint
- Navigate to Infrastructure -> Blueprints
- Click New Blueprint
- Enter a name
- Click Save
- Enter a version name
- Click Configure Add-Ons
- Select the previously created Cilium add-ons
- Select the cilium add-on as the dependency for the ip-pool and bgp-peering add-ons
- Click Save Changes
- Click Save Changes
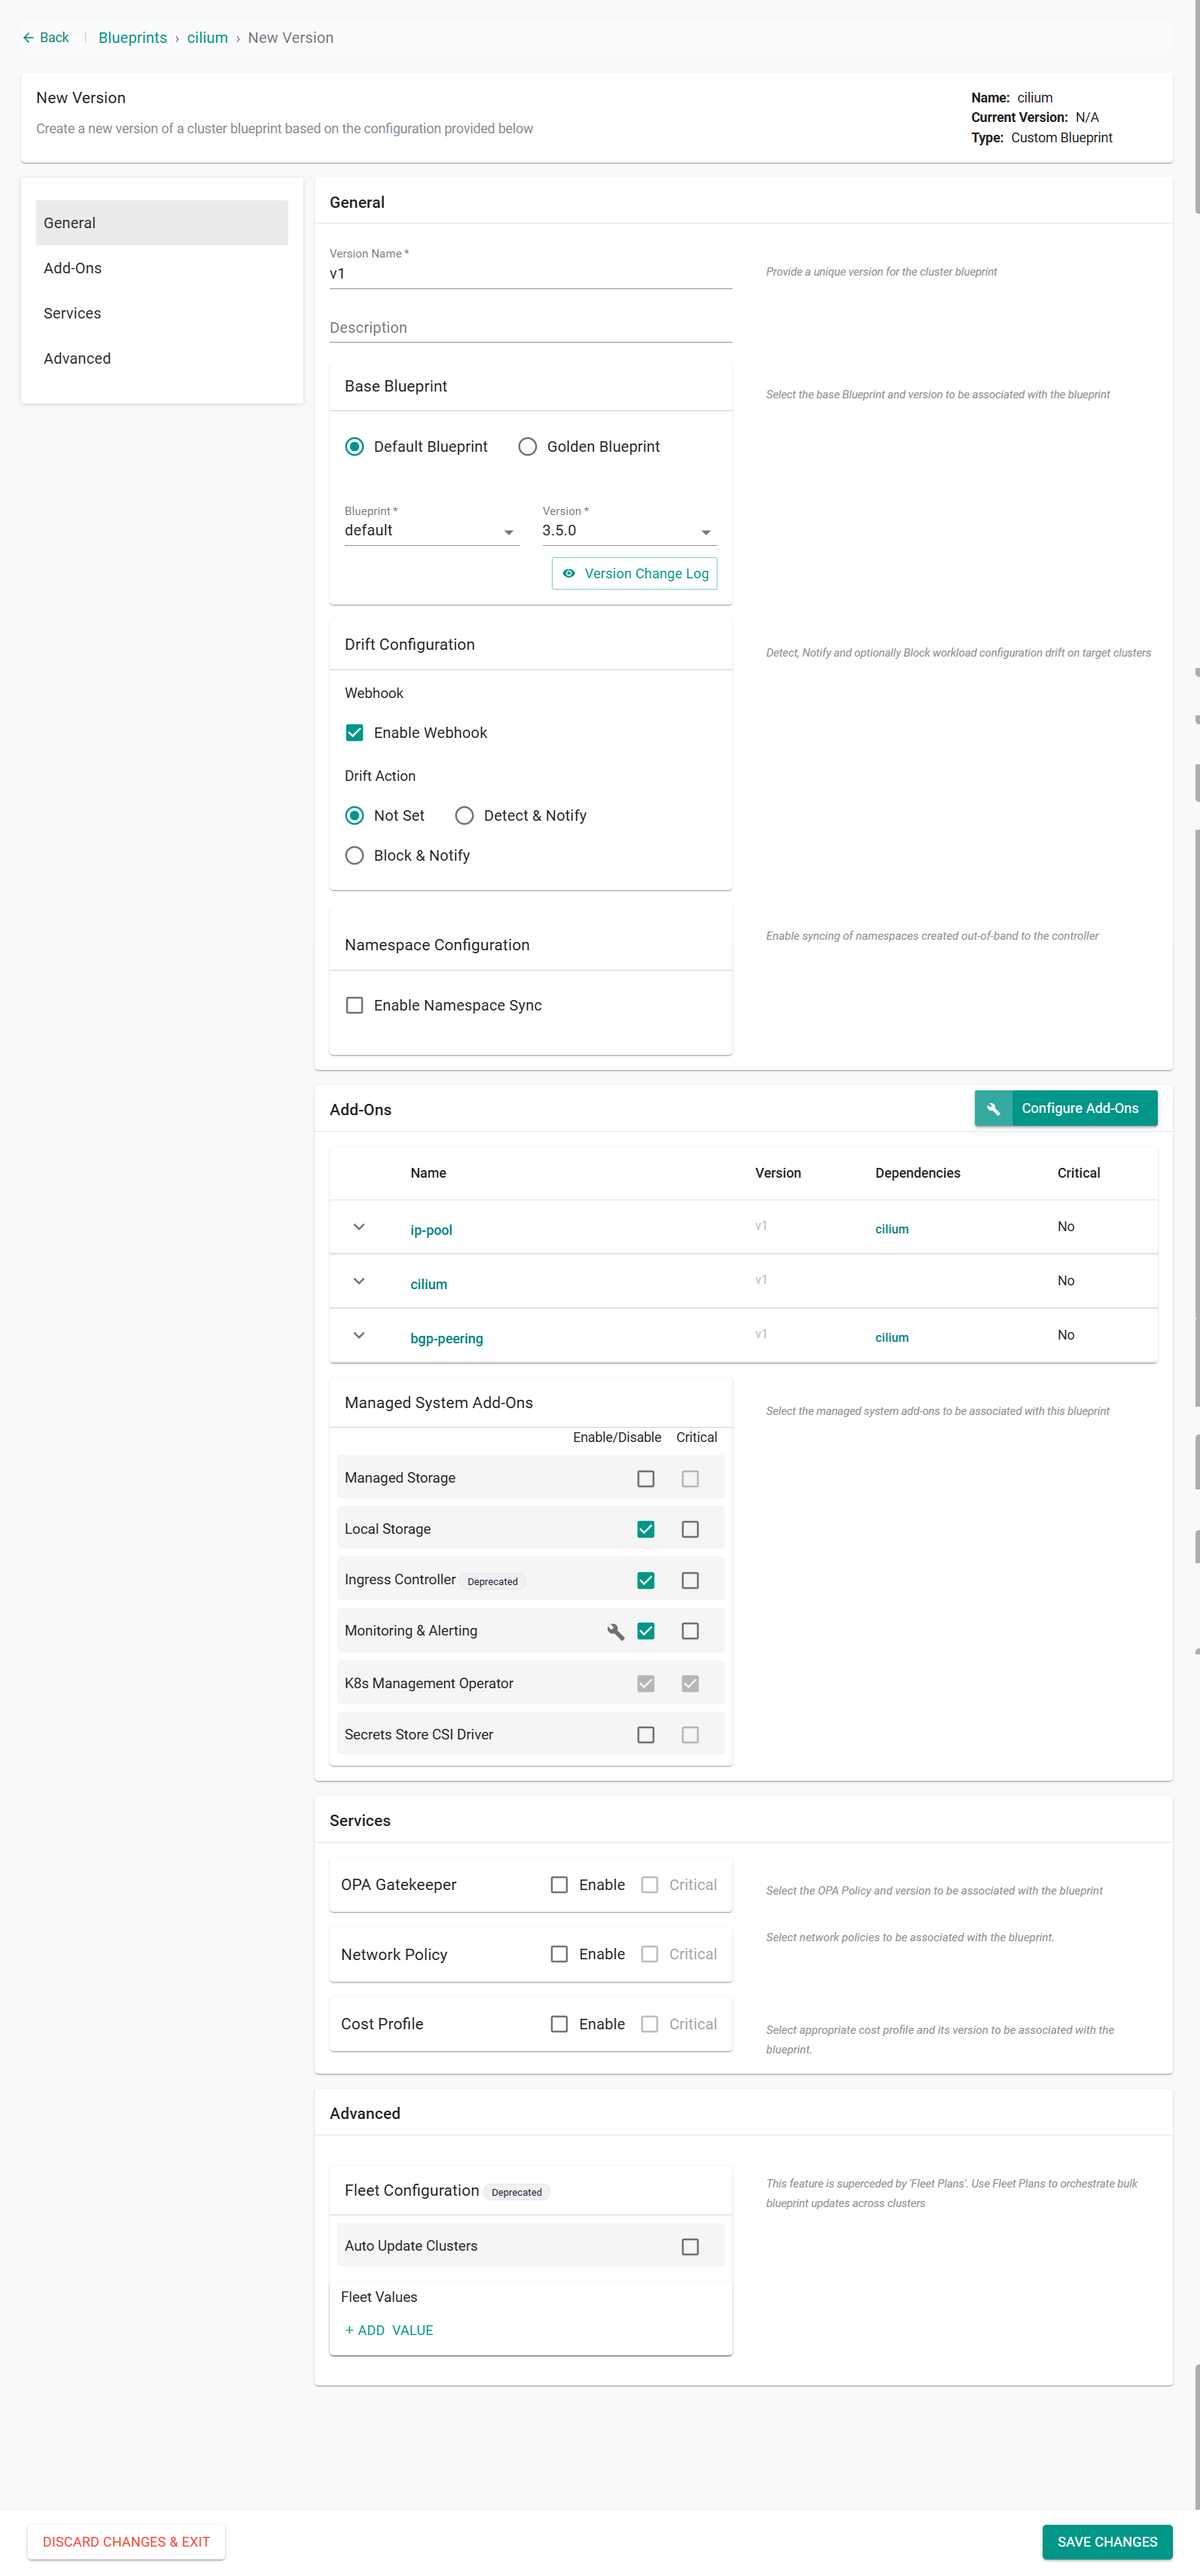
- Click Save Changes
Step 8: Apply Blueprint
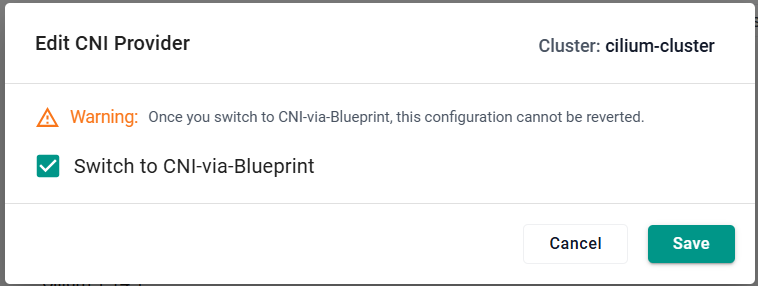
Before applying the blueprint to an existing cluster, you will need to update the cluster to detect the new cilium CNI addon. Note that if applying the blueprint directly to a cluster during cluster provisioning, set the cluster networking to "CNI-via-Blueprint".
- Navigate to Infrastructure -> Clusters
- Click on the cluster name
- On the "Configuration" tab, click Edit on "CNI Provider"
- Select Switch to CNI-via-Blueprint
- Click Save
Now, you will apply the blueprint to the cluster.
- Navigate to Infrastructure -> Clusters
- Click the gear icon on your cluster and select Update Blueprint
- Select the previously updated blueprint
- Click Save and Publish
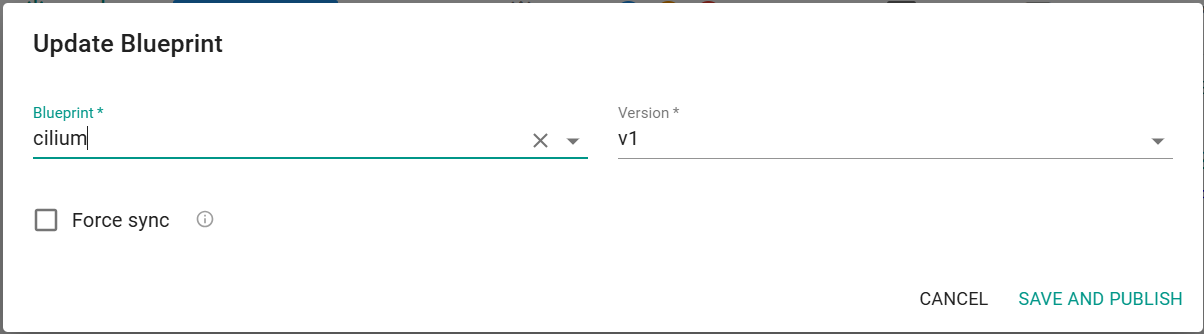
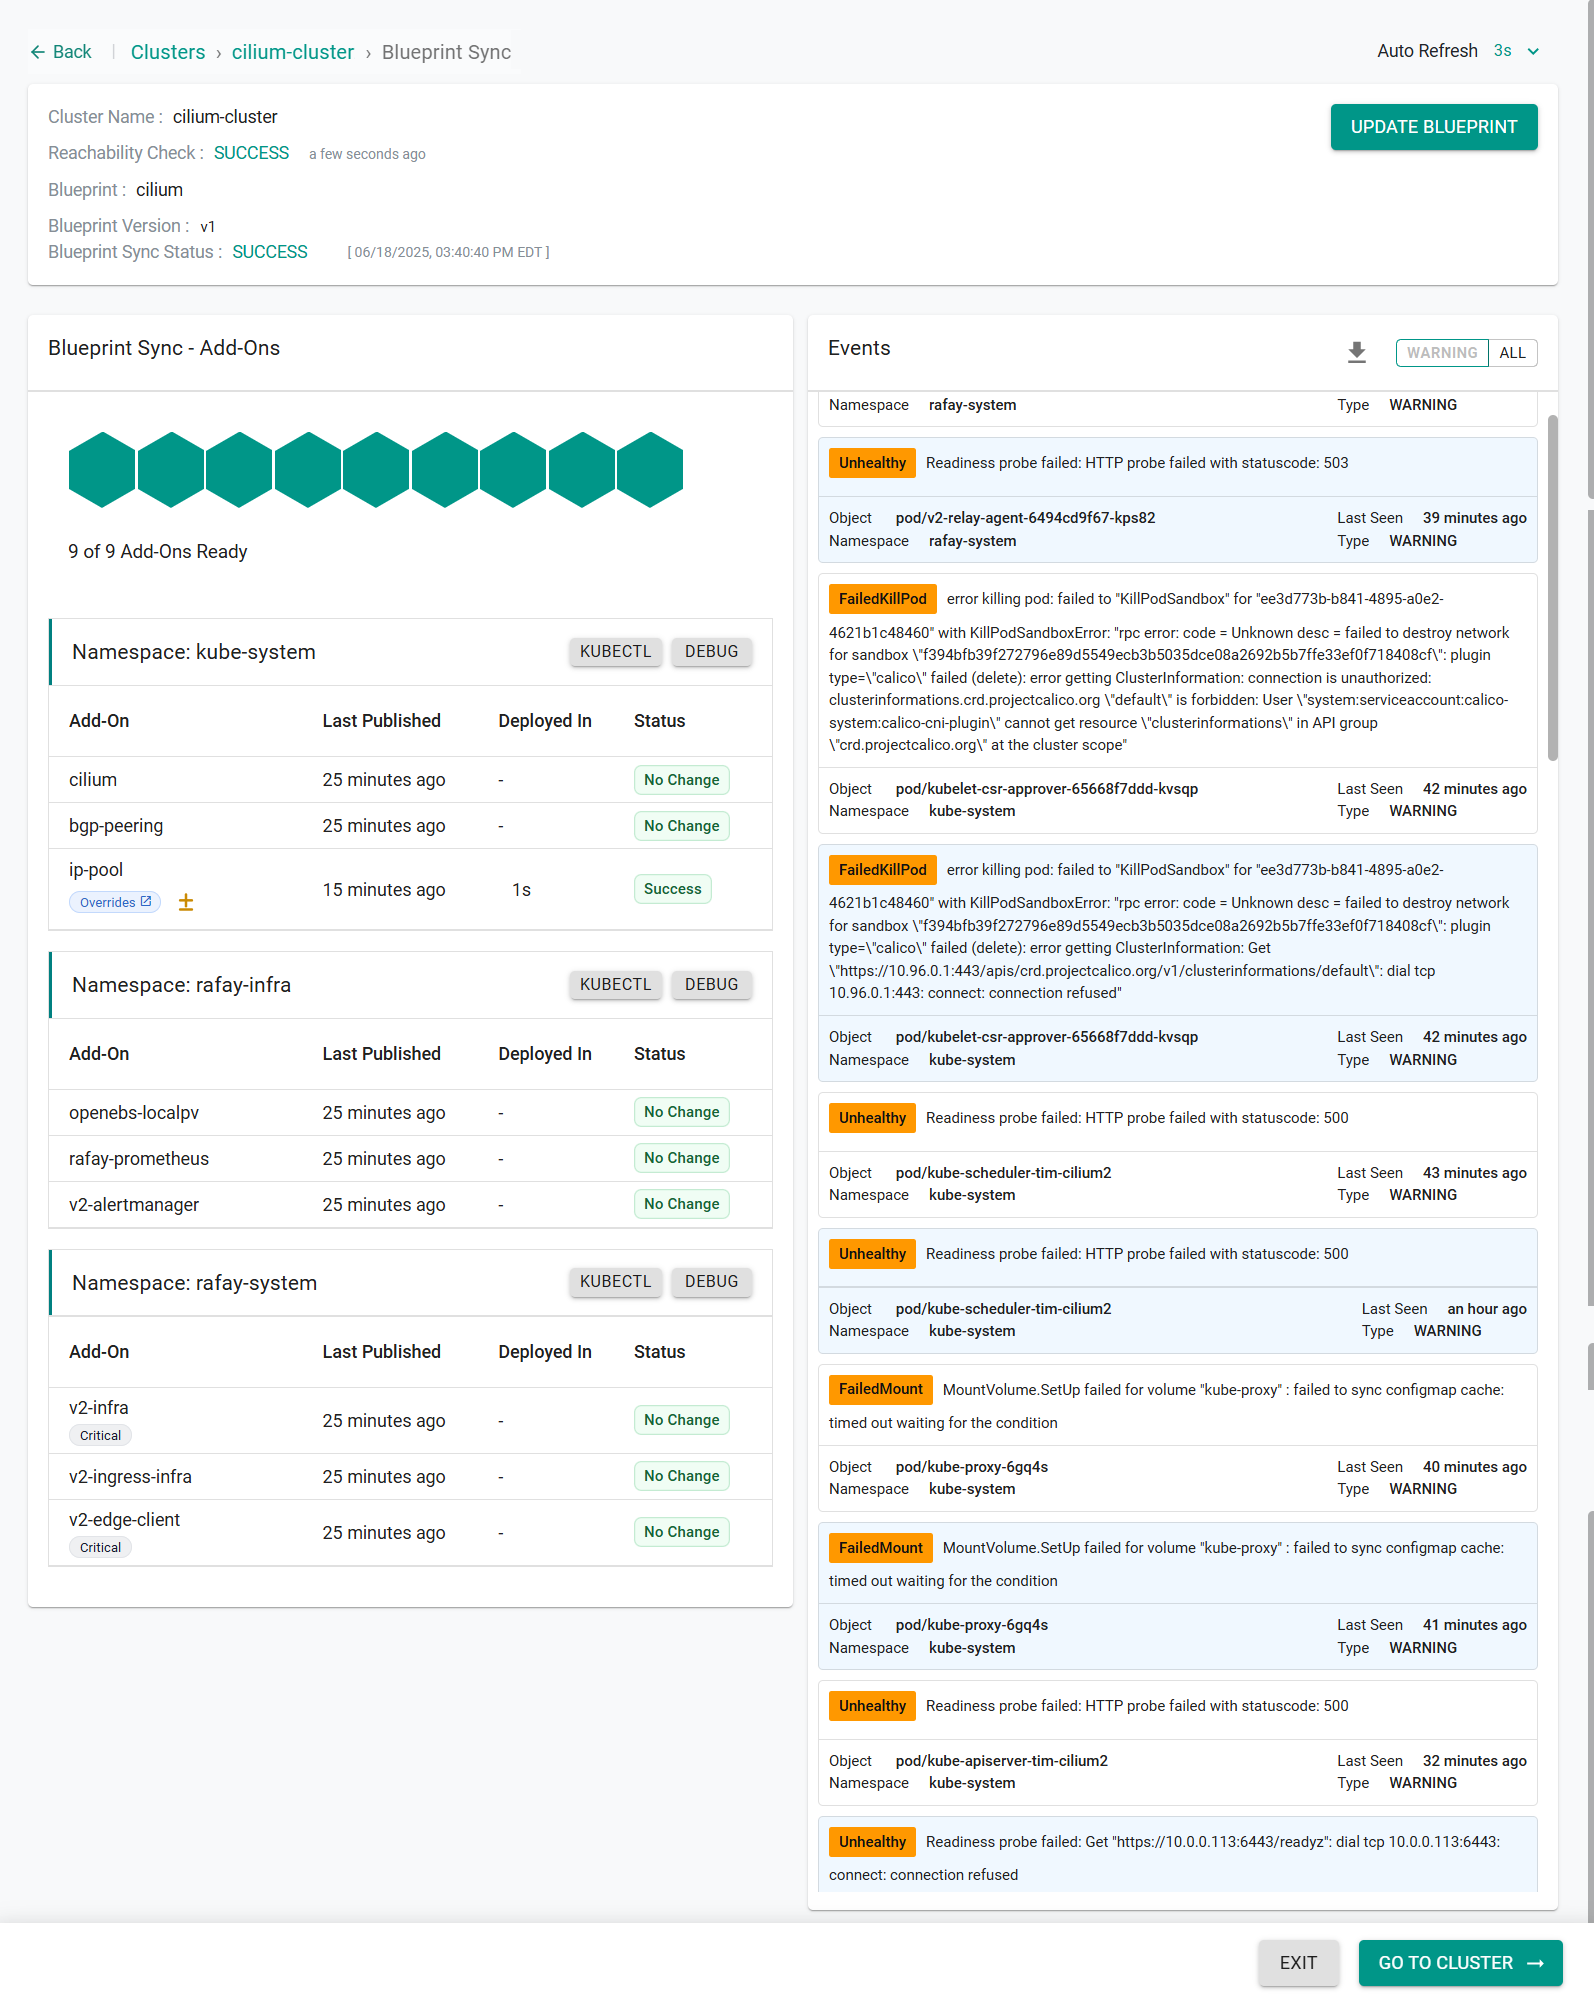
After a few seconds, the blueprint with the Cilium add-ons will be published on the cluster.
Step 9: Test LoadBalancer
In this step, you will create a sample NGINX deployment with a loadbalancer service.
- Create a file named app.yaml with the following contents
apiVersion: apps/v1
kind: Deployment
metadata:
  name: nginx
spec:
  replicas: 1
  selector:
    matchLabels:
      app: nginx
  template:
    metadata:
      labels:
        app: nginx
    spec:
      containers:
        - name: nginx
          image: nginx
          ports:
            - containerPort: 80
---
apiVersion: v1
kind: Service
metadata:
  name: nginx-lb
  labels:
    expose: "true"
spec:
  selector:
    app: nginx
  type: LoadBalancer
  ports:
    - port: 80
      targetPort: 80
- Type the following command to create the resource
kubectl apply -f app.yaml
- Type the following command to validate the service was created and obtained an external-ip
kubectl get services
You will see output similar to the following:
NAME         TYPE           CLUSTER-IP       EXTERNAL-IP   PORT(S)        AGE
kubernetes   ClusterIP      10.96.0.1        <none>        443/TCP        31m
nginx-lb     LoadBalancer   10.107.177.209   172.50.1.0    80:30349/TCP   8s
- From the node, run the following command being sure to update the IP with the external-IP of your loadbalancer service
curl http://172.50.1.0
You will see output similar to the following showing connectivity to the NGINX app through the load balancer service.
<!DOCTYPE html>
<html>
<head>
<title>Welcome to nginx!</title>
<style>
html { color-scheme: light dark; }
body { width: 35em; margin: 0 auto;
font-family: Tahoma, Verdana, Arial, sans-serif; }
</style>
</head>
<body>
<h1>Welcome to nginx!</h1>
<p>If you see this page, the nginx web server is successfully installed and
working. Further configuration is required.</p>

<p>For online documentation and support please refer to
<a href="http://nginx.org/">nginx.org</a>.<br/>
Commercial support is available at
<a href="http://nginx.com/">nginx.com</a>.</p>

<p><em>Thank you for using nginx.</em></p>
</body>
</html>