Containers
Overview
Workload created using the "workload wizard" can have multiple containers and each container can have its own unique configuration.
Container Configuration
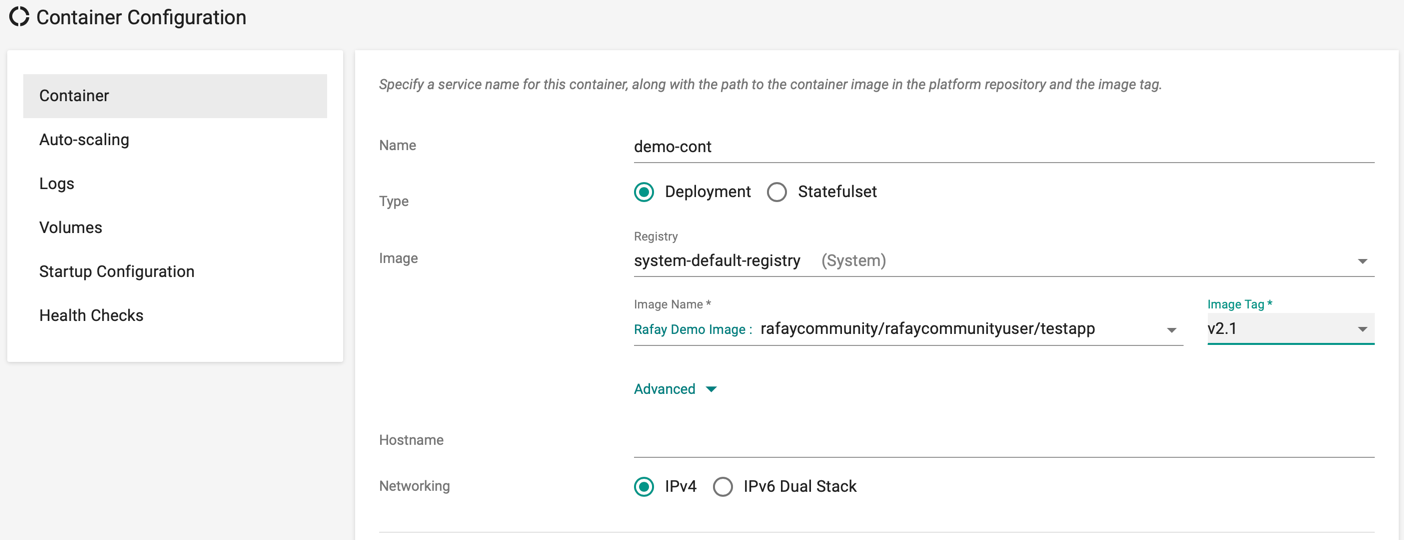
Service Name
- Provide a service name for your container. Note that the name has to be unique within a given workload.
Container Image
- Provide the Image and the Tag for the container image. This can be pulled from the customer's Container Registry.
Container Registry
Advanced
Users can optionally configure "commands" and "args" to dynamically change the behavior of their container.
Type
The workload wizard currently supports "Deployments" and "Stateful Sets" types.
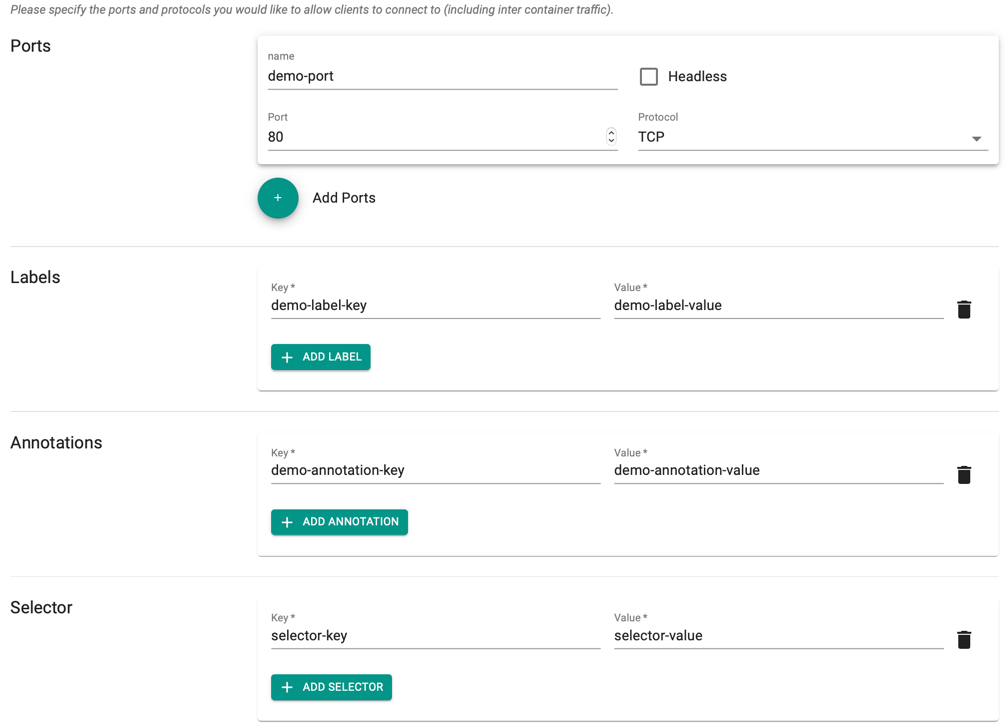
Ports and Protocol
- Specify the ports and protocols that you would like to allow clients to connect to the container. Both TCP and UDP protocols are supported within the cluster.
Labels, Annotations and Selector
- Click Add Label to add one or more labels to the pods. These labels are key/value pairs attached to pods and helps to identify the attributes of pods
- Click Add Annotation to add one or more annotations. These annotations are key/value pairs attached to any resource
- Selector: Click Add Selector to add key/value pairs that pick the right node labels for deploying any application
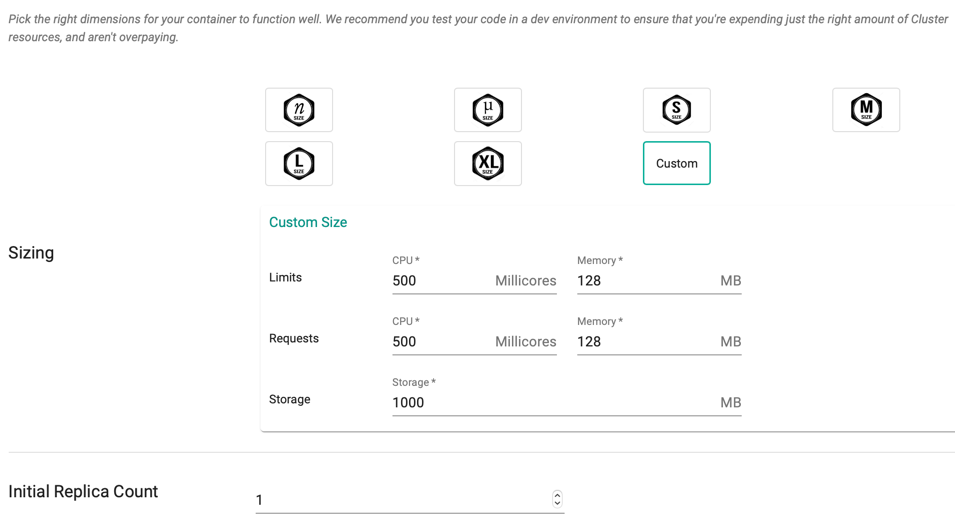
Sizing
The controller provides a standard set of container sizes by default
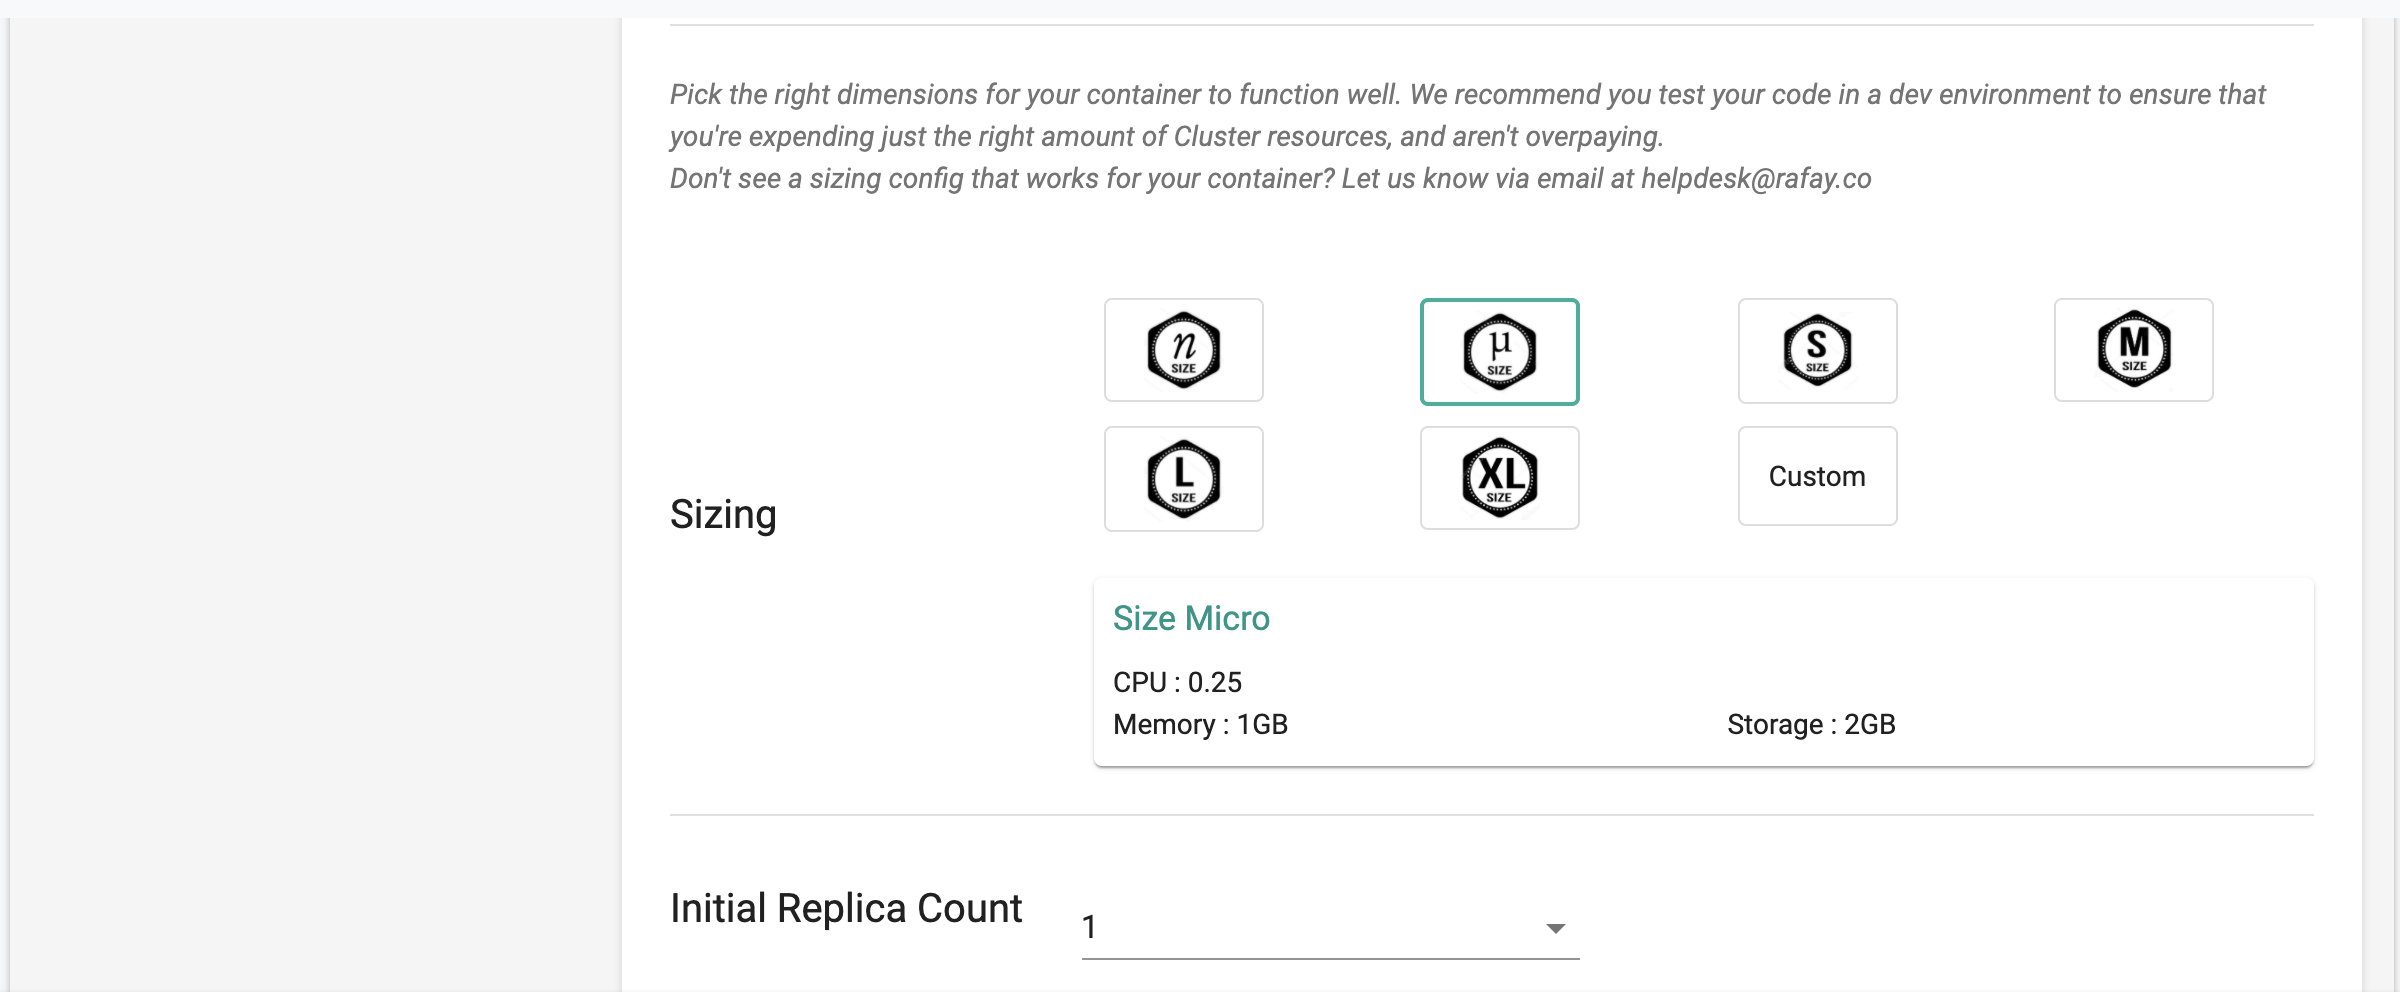
Custom
The application owners can also create custom container sizes if needed. In addition to this, when additional capacity needs to be allocated for a workload, the default capacity for the Org Namespace can be updated in the Ops Console
Important
Request count should not exceed the Limits. If exceeding, the system throws an error when publishing the workload
Initial Replica Count
Certain containers in the workload may be heavily utilized and there may be a need to operate multiple replicas to handle the baseline load.
For example, a user facing container may have to handle 1000s of concurrent connections. It may make sense for this container to start life by running >1 replicas.
Customers can review container utilization trends in the dashboard and determine the most appropriate number of initial replicas.
Auto Scaling
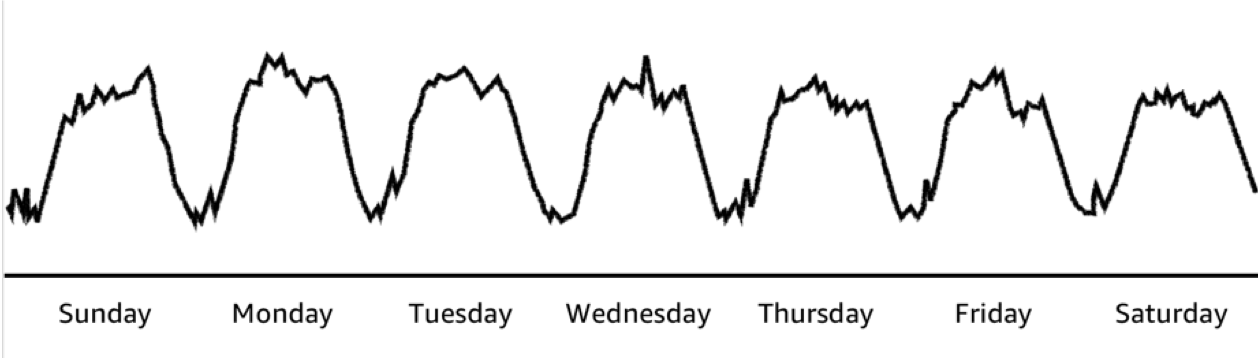
A typical application will have periods of low and high utilization. For example, a business productivity application is likely to have very high utilization from 9am to 5pm business hours and very low utilization on weekends. In contrast, an entertainment application may have high utilization in the evenings and extremely high utilization on weekends.
It makes significant economic sense for application operators like Design Capacity for a Baseline and leverage Auto Scaling for the peaks.
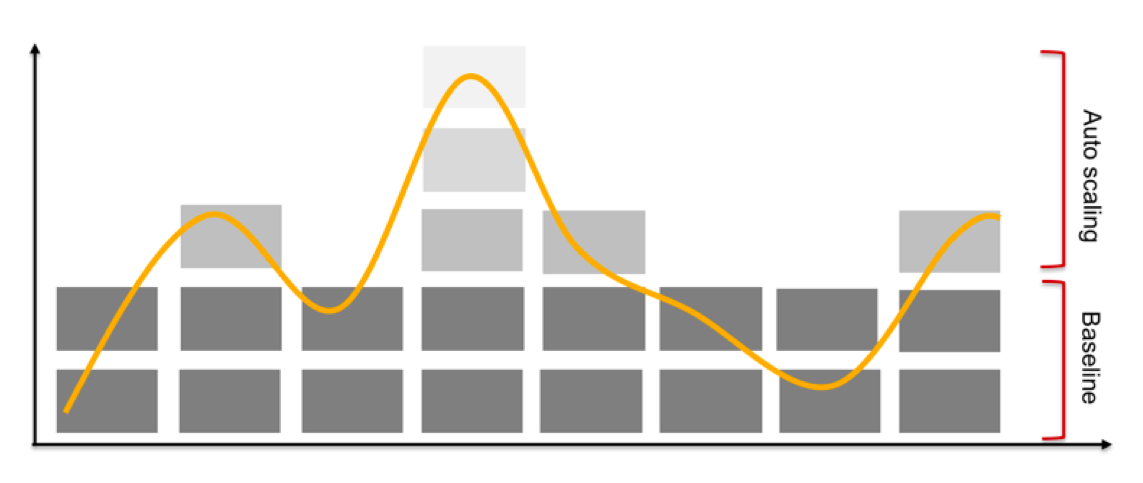
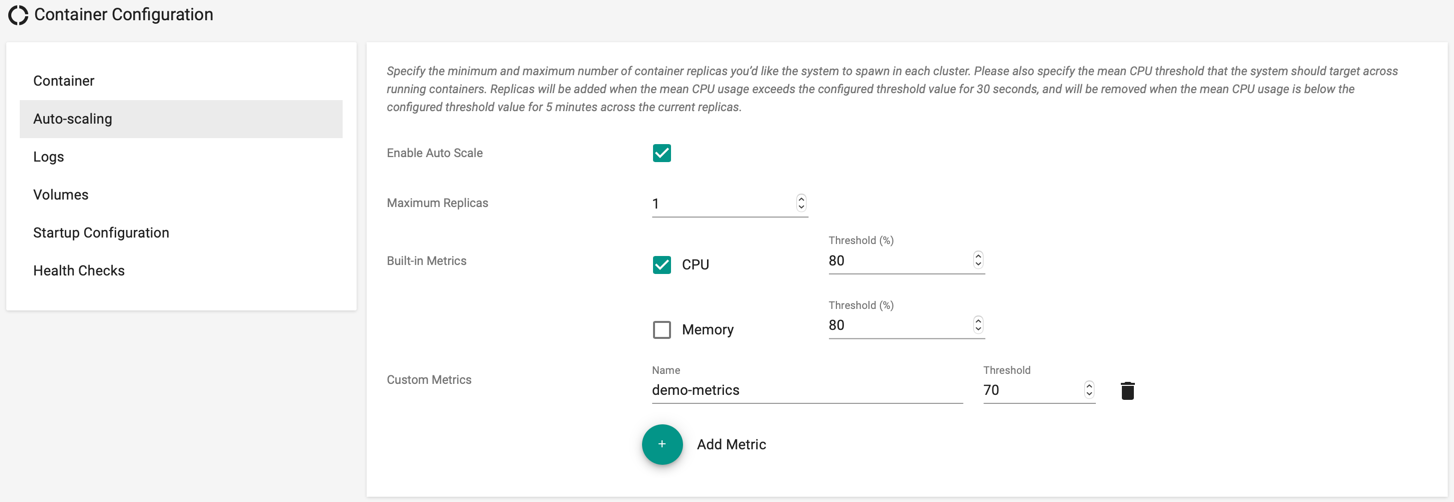
Customers can configure thresholds for metrics (CPU and Memory utilization) for auto scaling is triggered. When triggered, replicas are added to ensure that utilization is brought below the configured thresholds. Containers can be configured to autoscale to a specified upper limit (so as to not blow away the budget). Click Add Metric to create a customized metrics and threshold
Scale down is performed automatically after a cool down period (5 minutes) to ensure that the system does not land up trashing.
Volumes
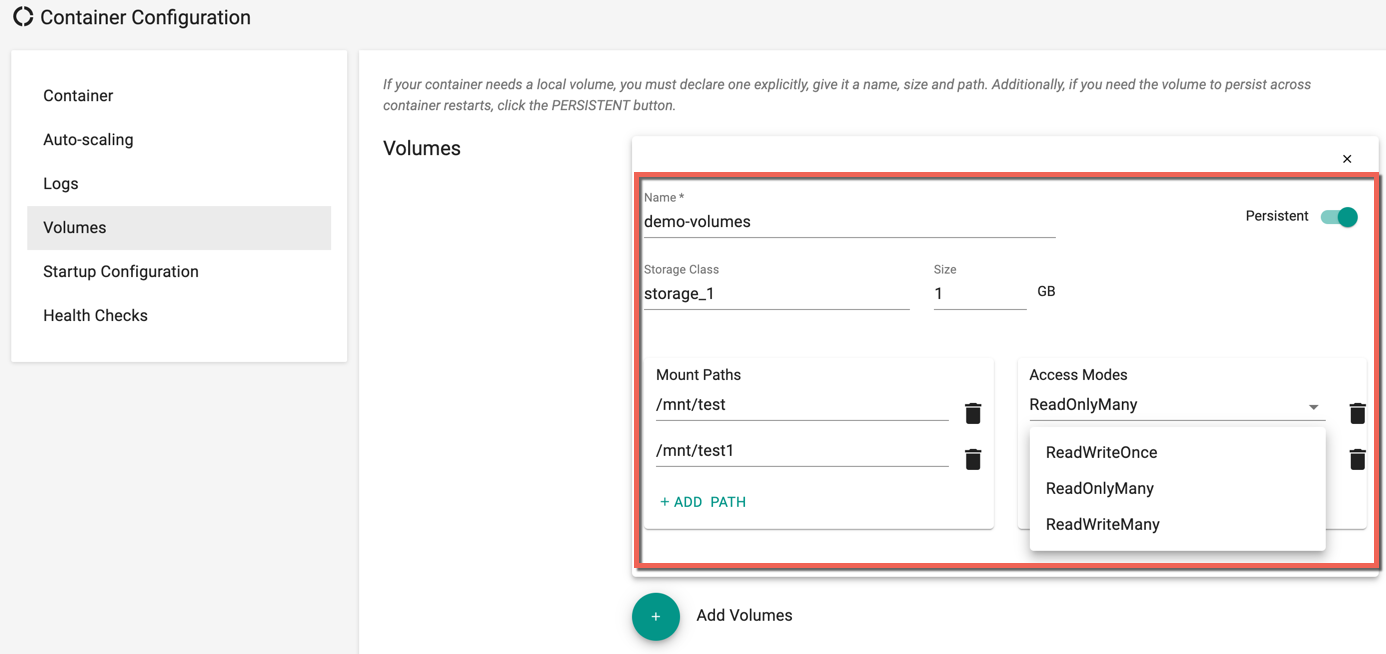
If the container need a local storage volume, it needs to be declared explicitly. Customers need to give it a name, specify the Storage Class (optional), a size, configure the mount path and configure if it needs to be persist across container restarts
Users are allowed to add multiple mount path(s) if required. Select the Access Modes for the specified mount path(s) from the drop-down. ReadWriteOnce, ReadOnlyMany, and ReadWriteMany are the three available access modes. If none of the access modes is selected, ReadWriteOnce mode is applied by default
A container can be configured with multiple storage volumes if it requires it. For example, if the container is a database, it makes sense for the storage volume to be persistent to ensure there is no data loss. In contrast, for stateless containers, there is little value in persistent storage
Startup Configuration
A container may require access to a number of configuration information when it starts up.
Environment Variables
Containers may need access to specific ENV variables during startup. If these contain sensitive data, customers should enable the "secure" option to ensure that they are secured both in transit and at rest on the cluster and only accessible to the configured container.
The default security setting is "secure" to protect against inadvertent configuration errors.
Files
Containers may need access to a file with configuration information etc during startup. For example, a webserver container may need a specific config file for it to startup properly. The file is made available to the container at a configured mount point.
If the file contains sensitive data, customers should enable the "secure" option to ensure that they are secured both in transit and at rest on the cluster and only accessible to the configured container.
The default security setting is "secure" to protect against inadvertent configuration errors.
Certificates and Private Keys
If the container needs to act as a TLS server or a client, it will require access to certificates and private keys. This is made available to the container at a configured mount point.
Private keys are extremely sensitive credentials. As a result, they are distributed to the required clusters in a secure manner (encrypted).

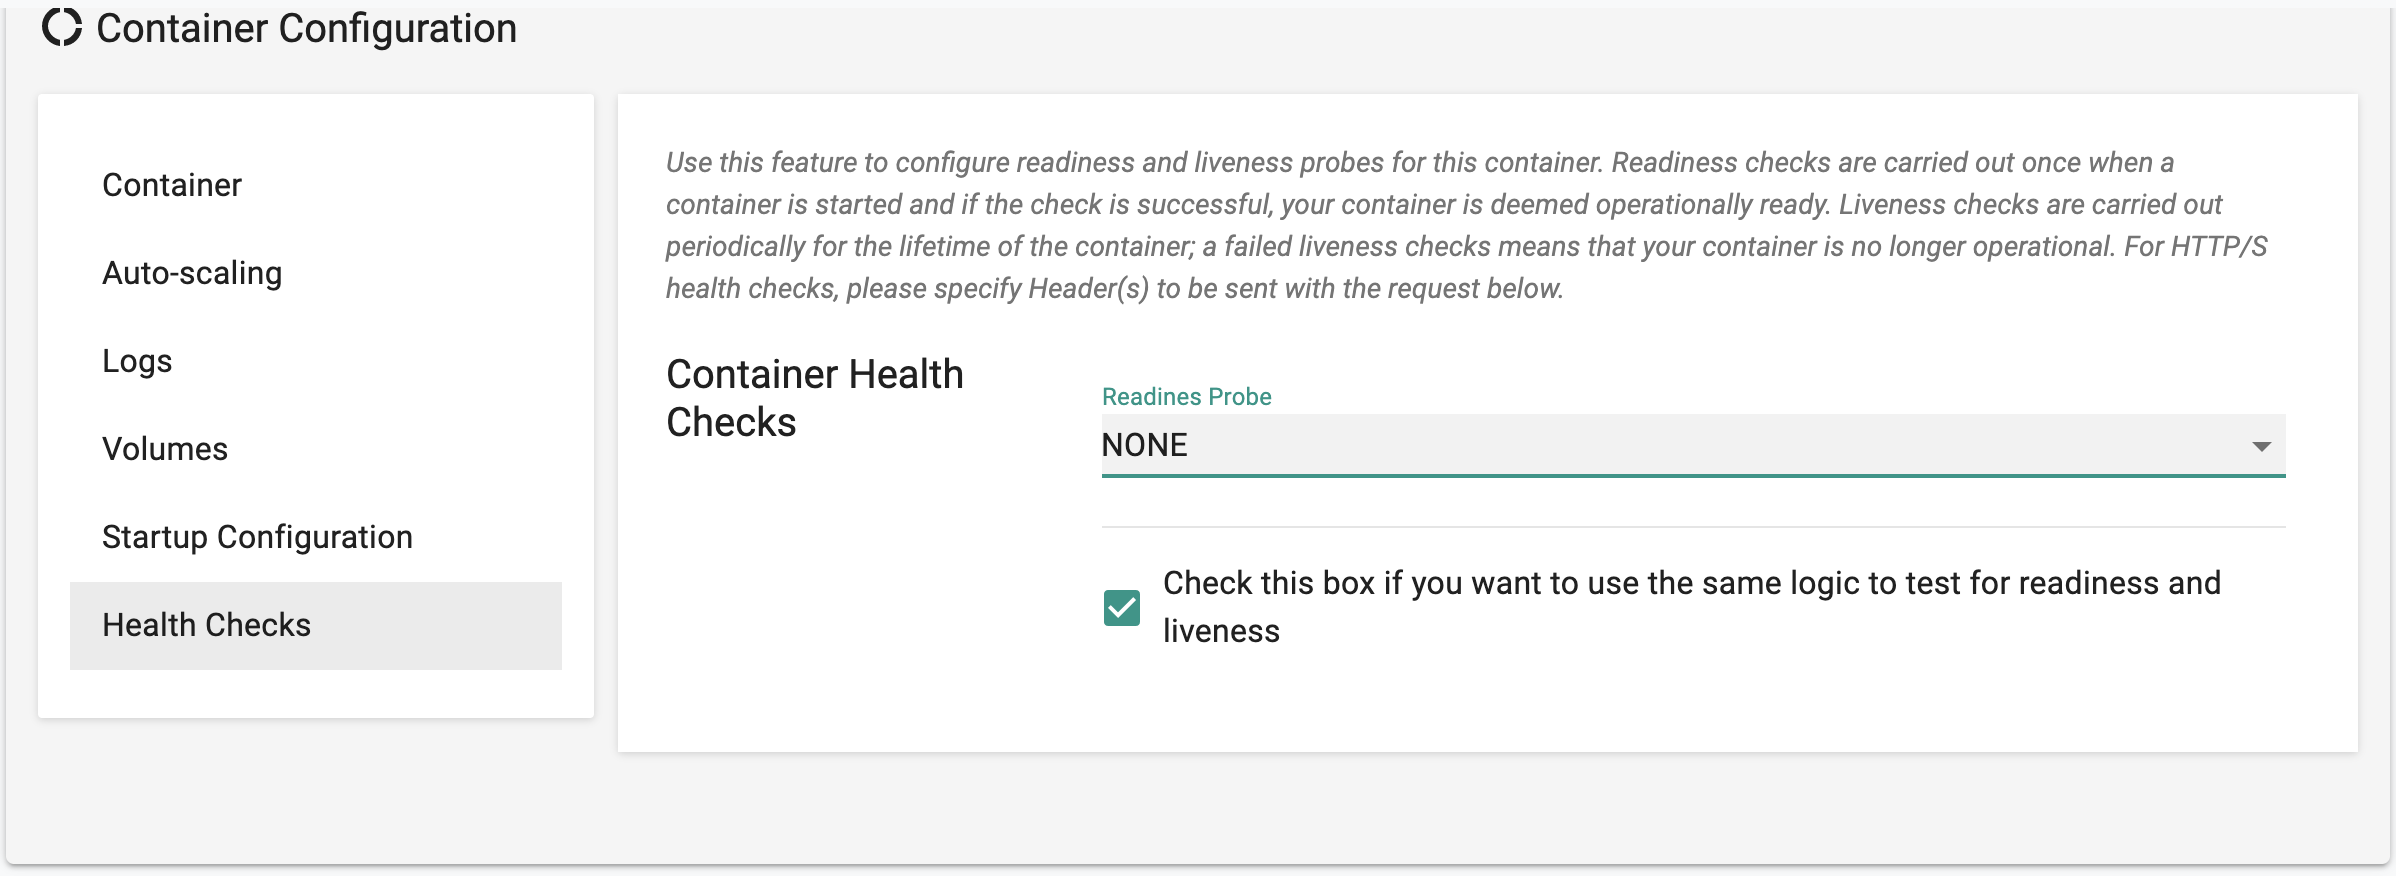
Health Checks
We strongly recommend that customers leverage health check capabilities to ensure availability of their applications. The controller can be configured to perform two types of health checks on containers.
Readiness
Readiness checks are performed when a container starts.
Liveness
Liveness checks are performed on an ongoing basis during the lifetime of a container and can be used to determine if the container is still healthy. If not, it will stop sending it traffic and take remediation action. Only one probe each can be configured for readiness and liveness respectively. However, the same probe can used for both readiness and liveness tests.
Types of Probes
The controller allows customers to create probes based on EXEC, HTTP, HTTPS and TCP.
-
Probe Interval: The frequency (in seconds) at which the platform will probe the container. The default probe interval is 10 seconds.
-
Timeout: Number of seconds the platform will wait before the unresponsive container is deemed unavailable.
-
Success Threshold: Number of probes before the container is deemed as available.
-
Failure Threshold: Number of probes before the container is deemed as unavailable.