Worker Nodes
Worker nodes can be manually added or removed from provisioned and managed clusters. Watch a video showcasing how worker nodes can be Added and Removed from a managed Kubernetes cluster.
Manually Provisioned Clusters
For manually provisioned clusters, the controller does not have the ability to provision or deprovision VMs/instances on the infrastructure.
Supported Environments
Ensure you have reviewed the supported environments before proceeding.
Important
Both Windows and Linux-arm64 based worker nodes can be added during cluster provisioning, as long as there is at least one Linux-amd64 based master/worker node already provisioned
Add Worker Nodes
- Create required VMs or instances
- Login into the Web Console
- Select the cluster and click on nodes
- Click "Add Node" and Follow the Node Installation Instructions to install the bootstrap agent on the VM
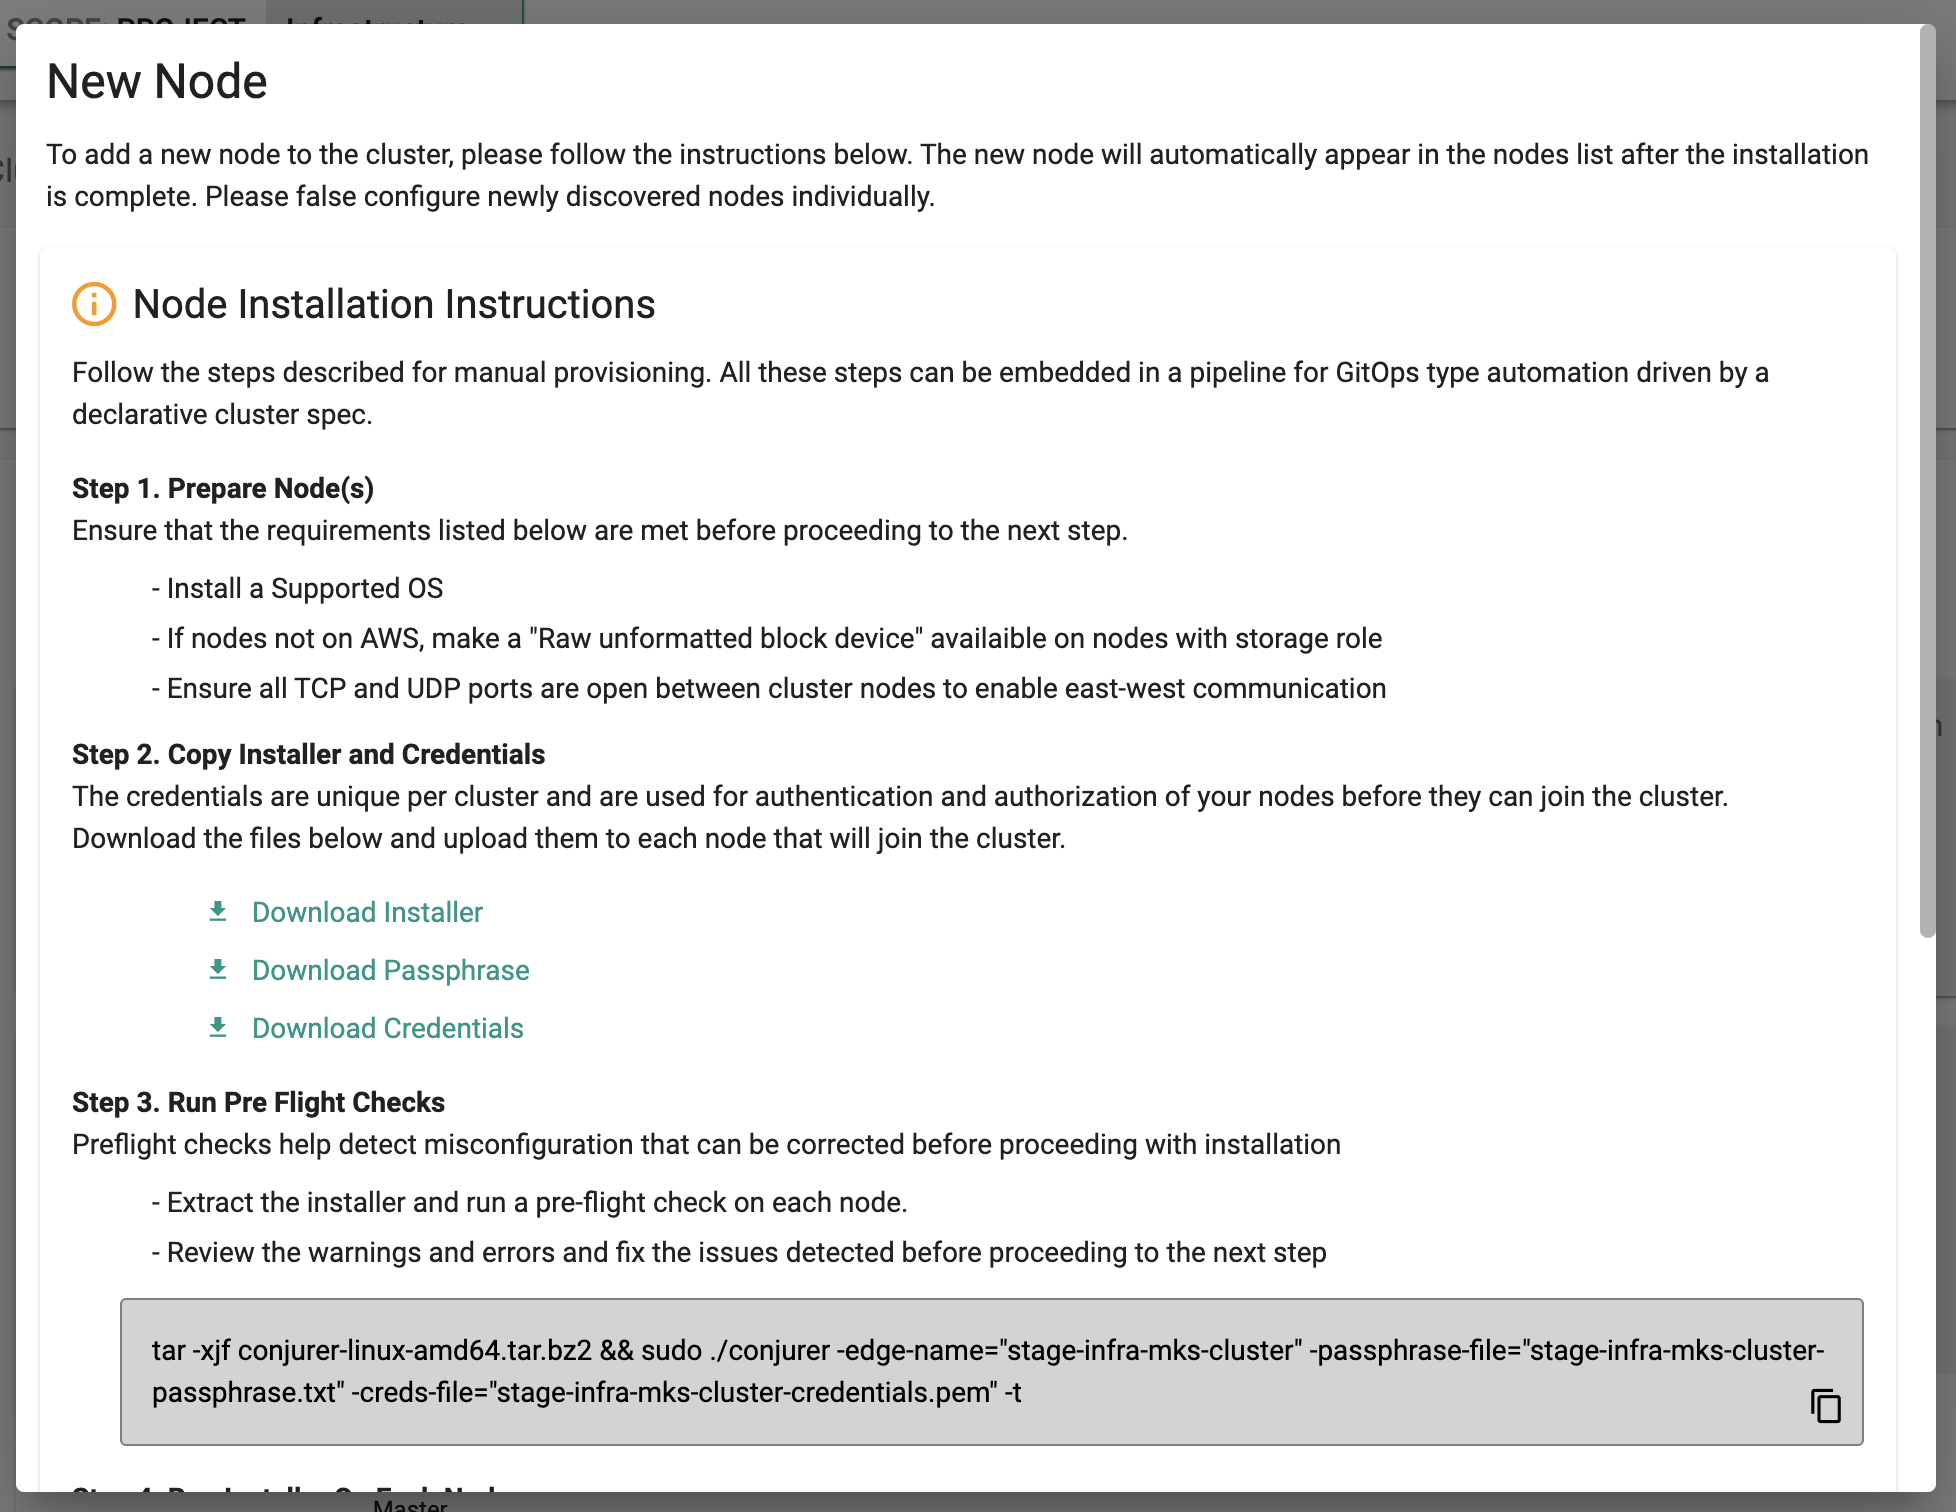
- Configure and approve the node so that it can be joined as a worker node to the cluster.
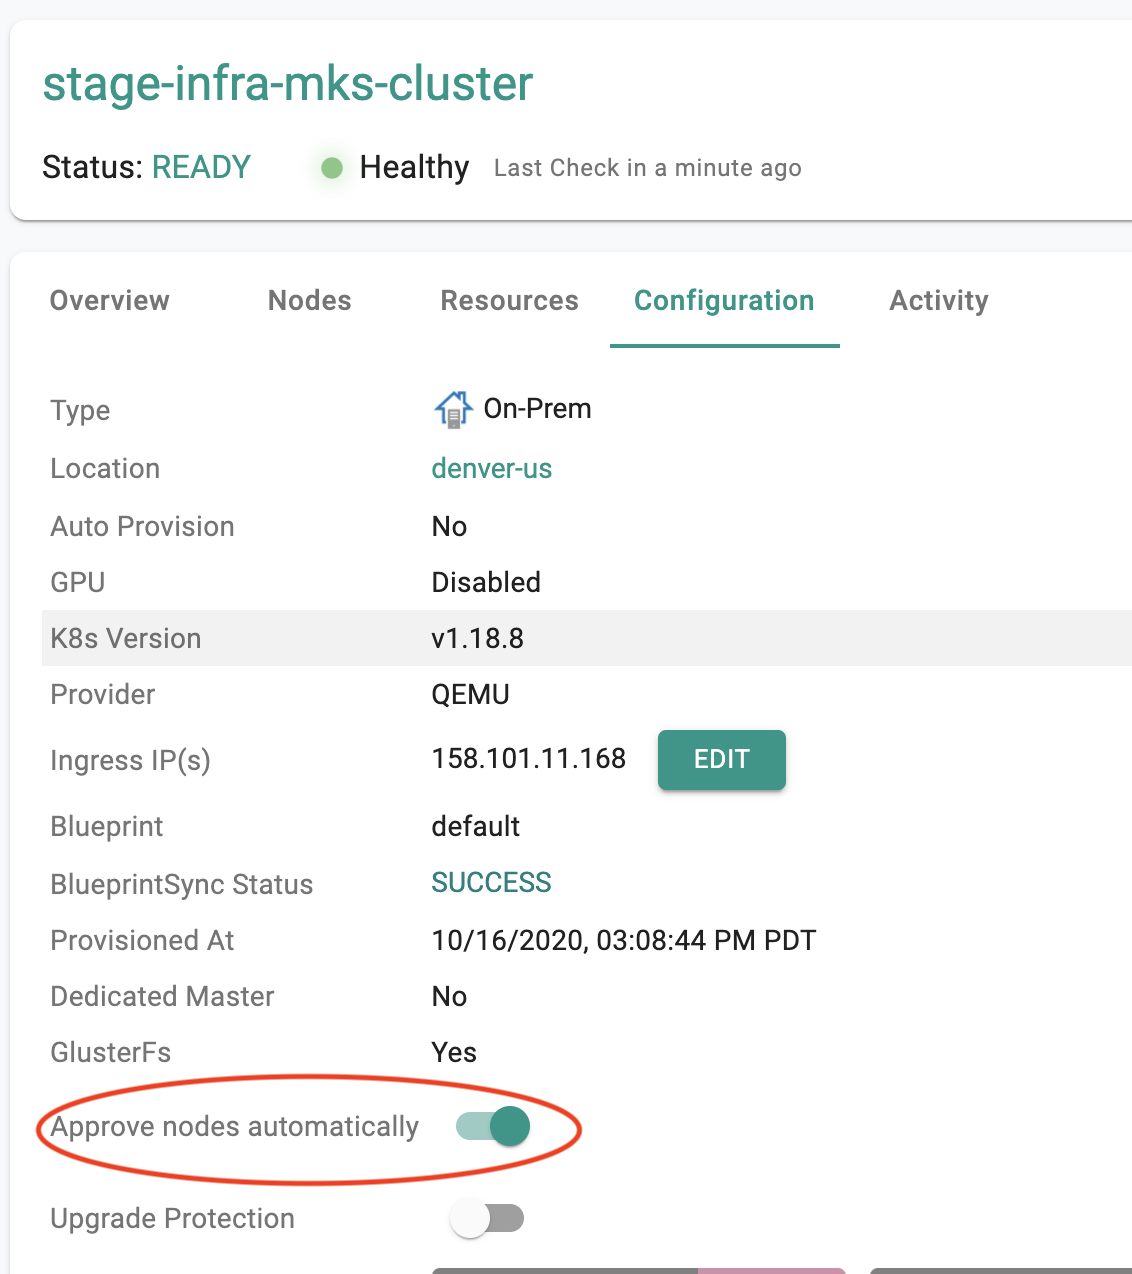
Users can optionally enable "auto approval" for new worker nodes to join the cluster. To do this, enable the auto approval "toggle" in the cluster detail page as shown in the screenshot below.
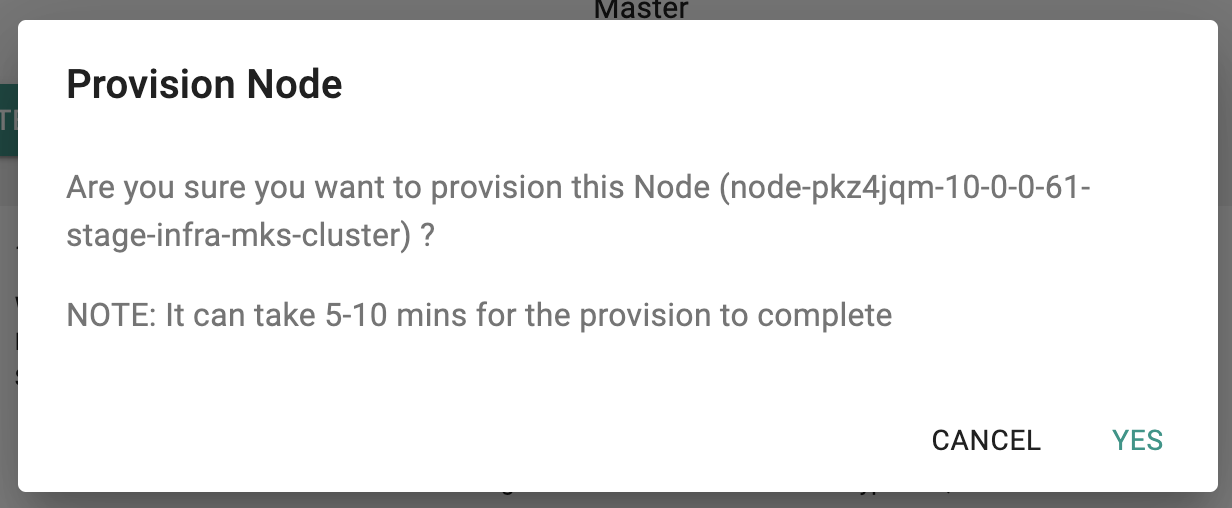
- Click on "Provision" and confirm to start adding this node as a worker node to the existing cluster
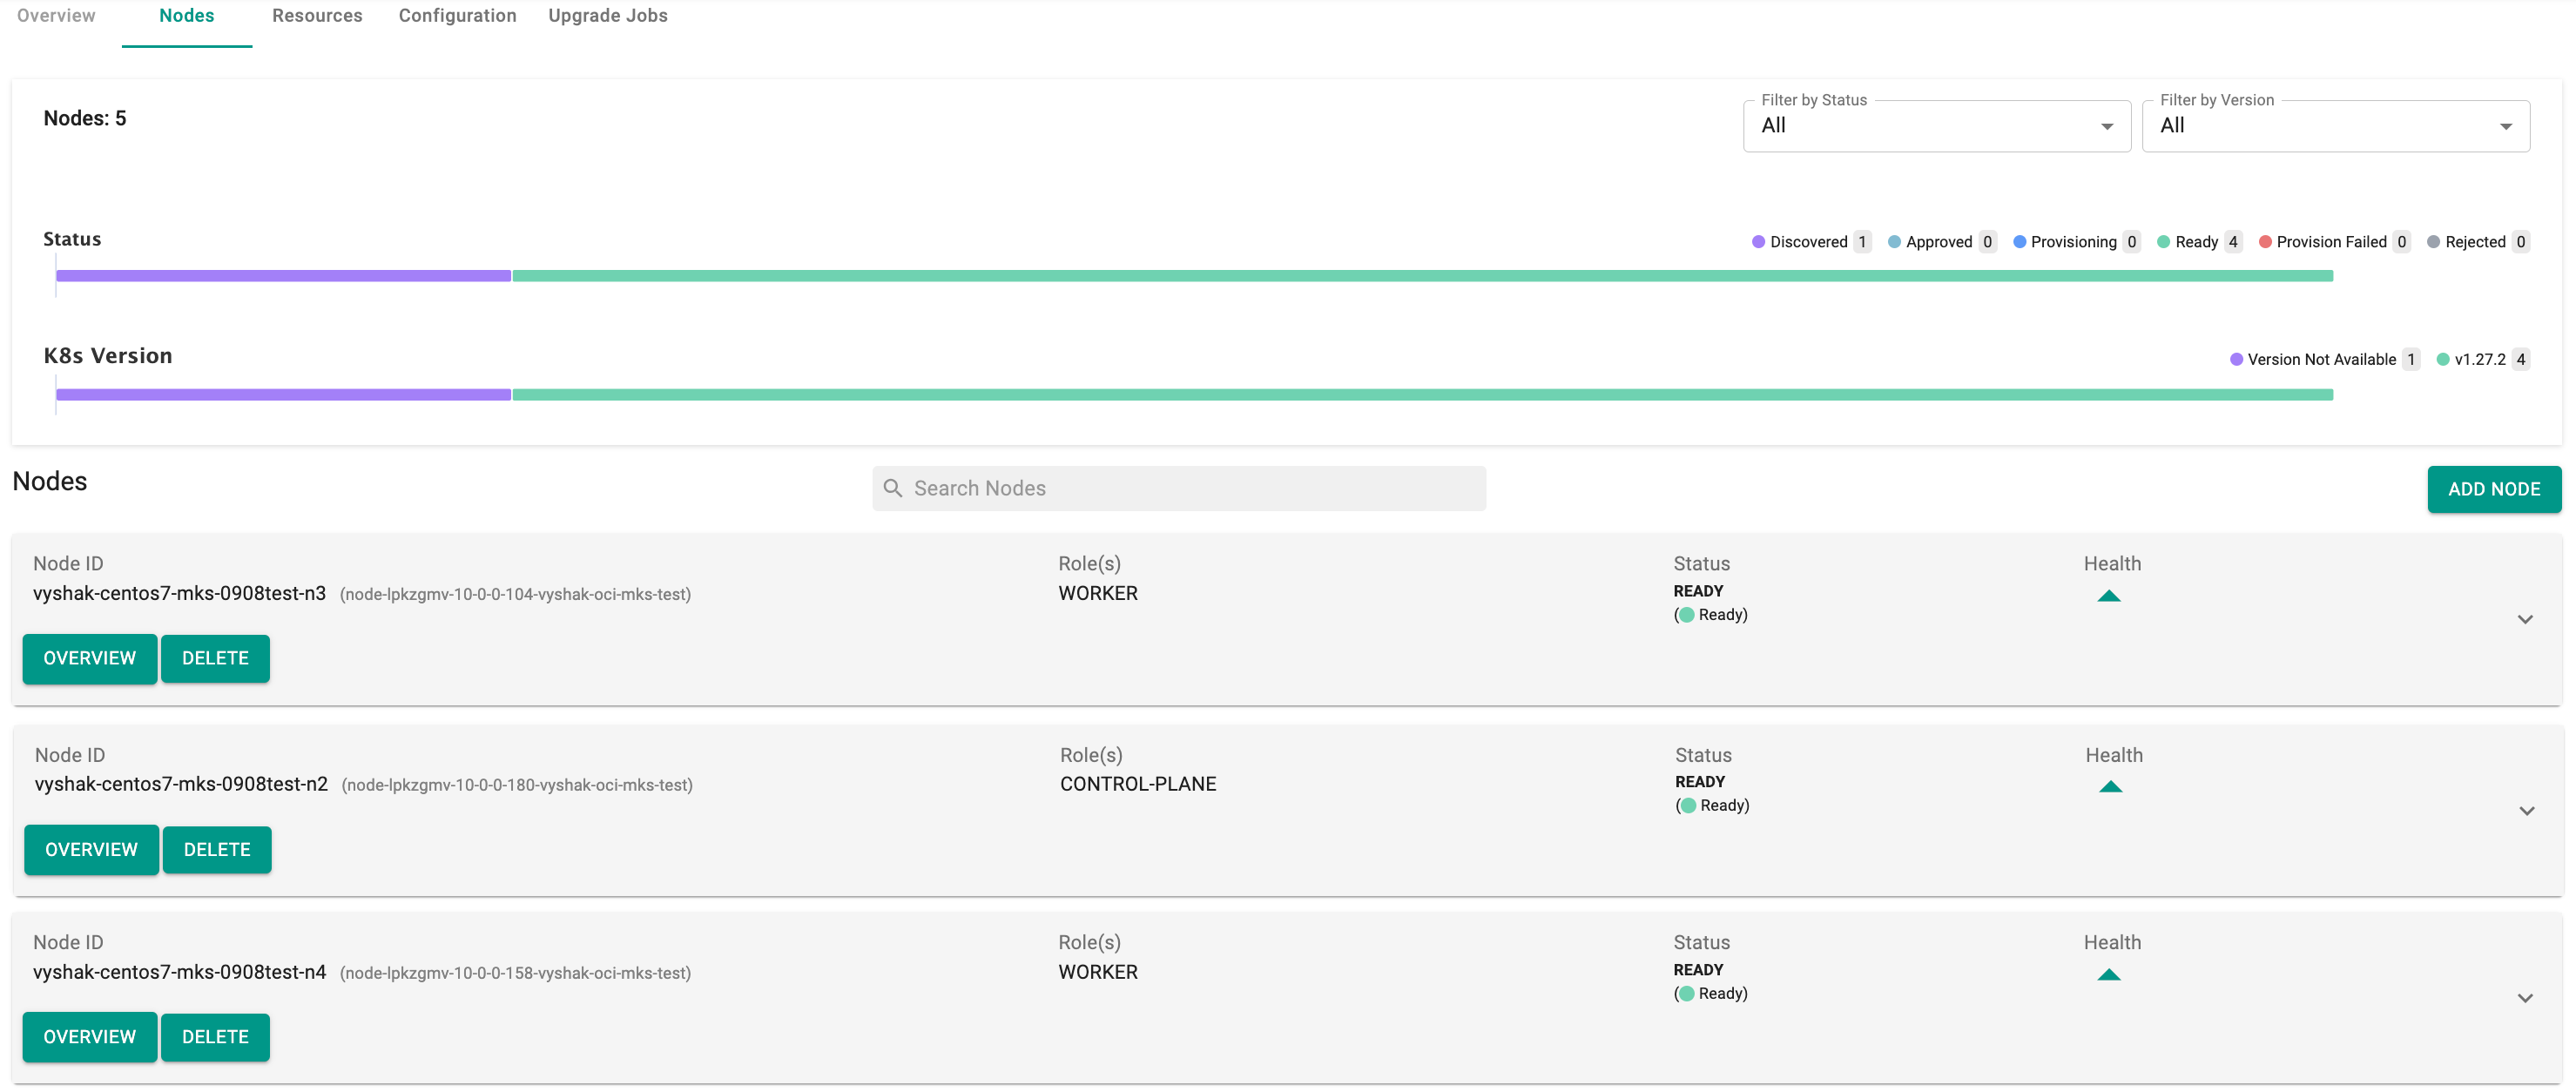
- Once the node is provisioned, it will join the cluster with the worker role
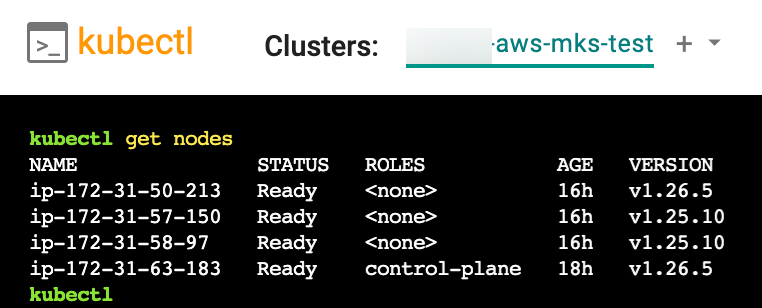
Delete Worker Nodes
- Select the cluster and click on nodes
- Click on "DELETE" button of the node you would like to delete and confirm the deletion
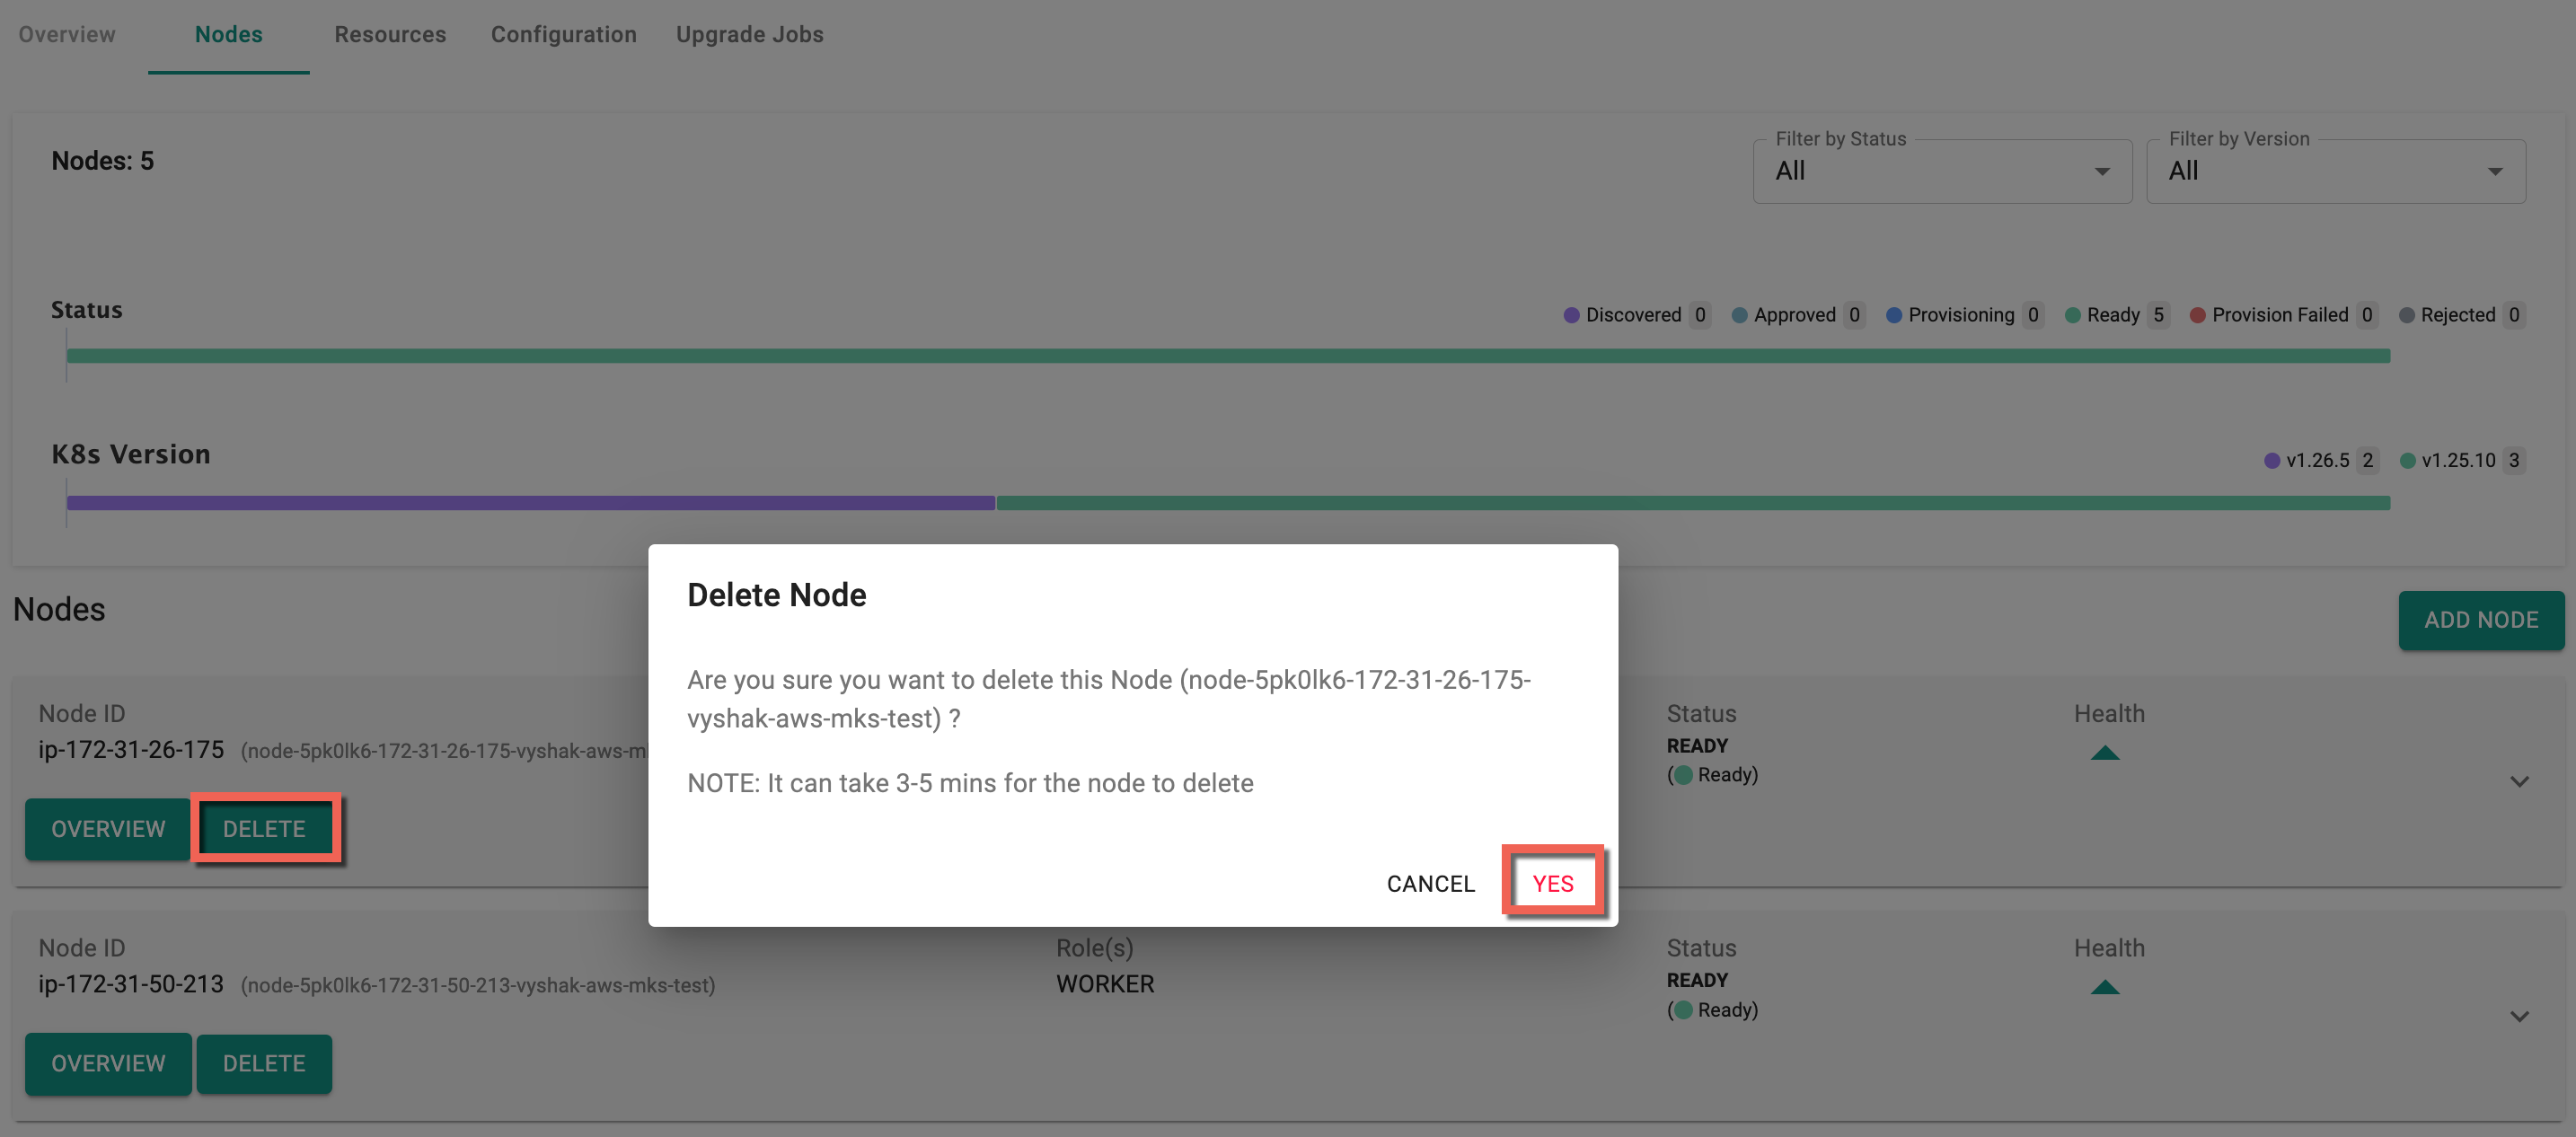
- Once the process is kicked off, the controller will drain the node by rescheduling pods on other nodes and then remove the worker node from the cluster.
Important
For manually provisioned clusters, it is the customer's responsibility to deprovision the VM or Instance after deleting the worker node from the cluster.
Auto Provisioned Clusters
For "auto provisioned" clusters, the controller will automatically provision the necessary instances for the worker nodes. For manually provisioned clusters, customers need to run the bootstrap agent (conjurer) to attach it to the cluster.
Add Worker Nodes
- Login into the Web Console
- Select the cluster and click on Nodes tab. Here you can view a visual representation displaying the count of nodes categorized by their respective statuses and k8s version of each node (highlighted in different colors)
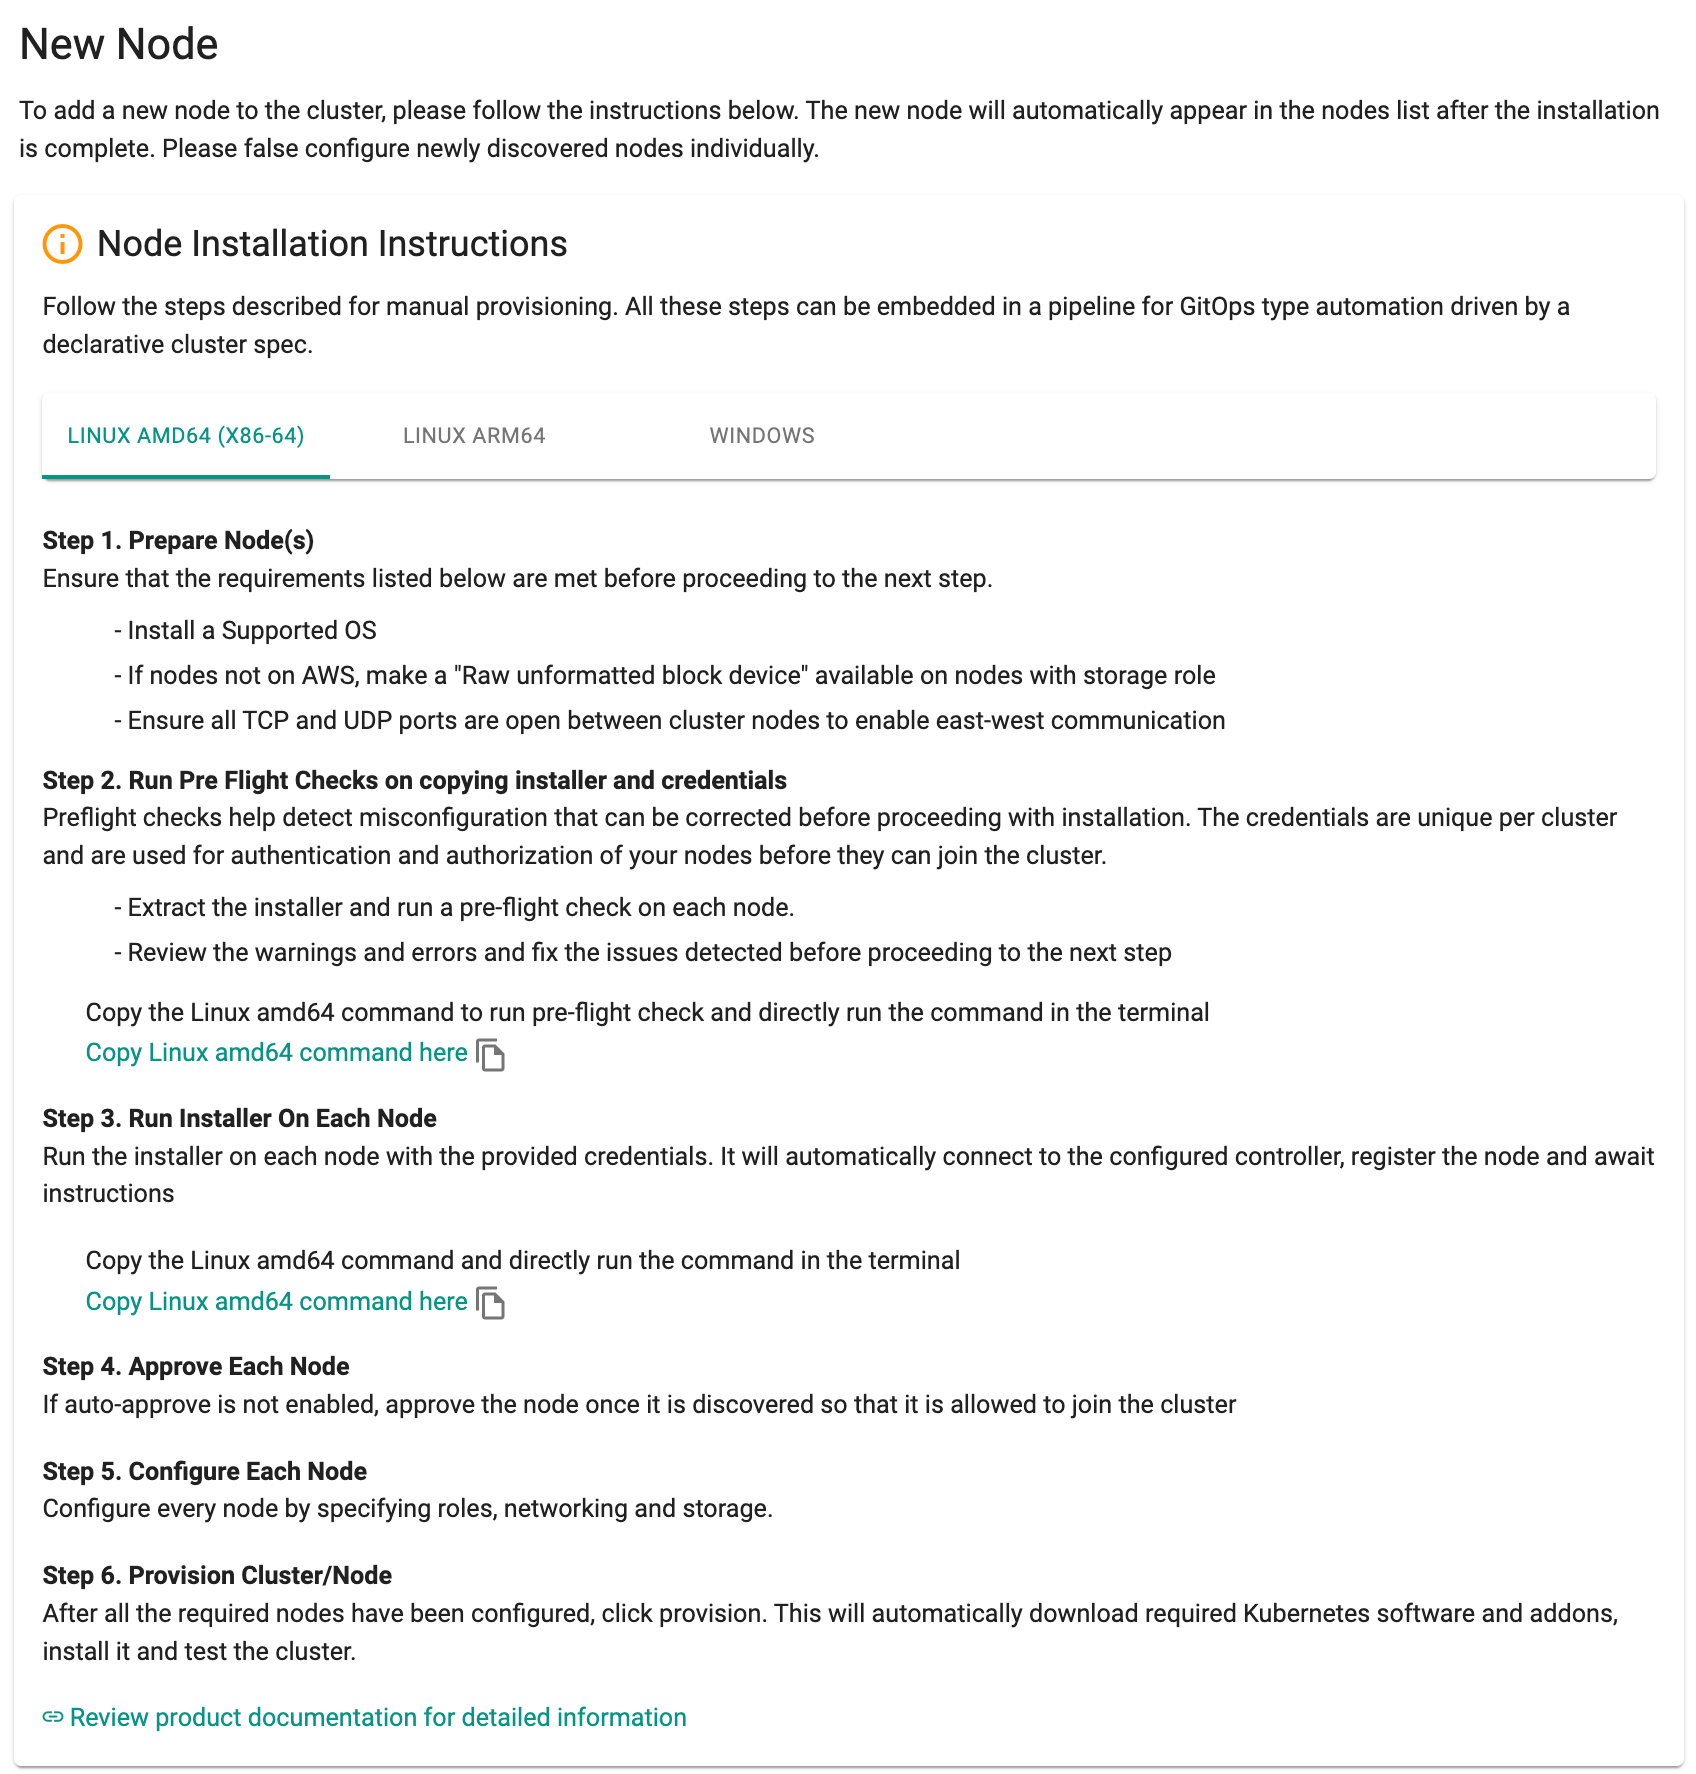
- Click on "Add Nodes" and follow the Node Installation Instructions to install the bootstrap agent on the VM
Once the new nodes are added, the initial status of a new node before approval is Discovered. Enabling the auto-approval option will change the node status to Approved (as depicted below). Conversely, with the option disabled, the node status will remain as Discovered.
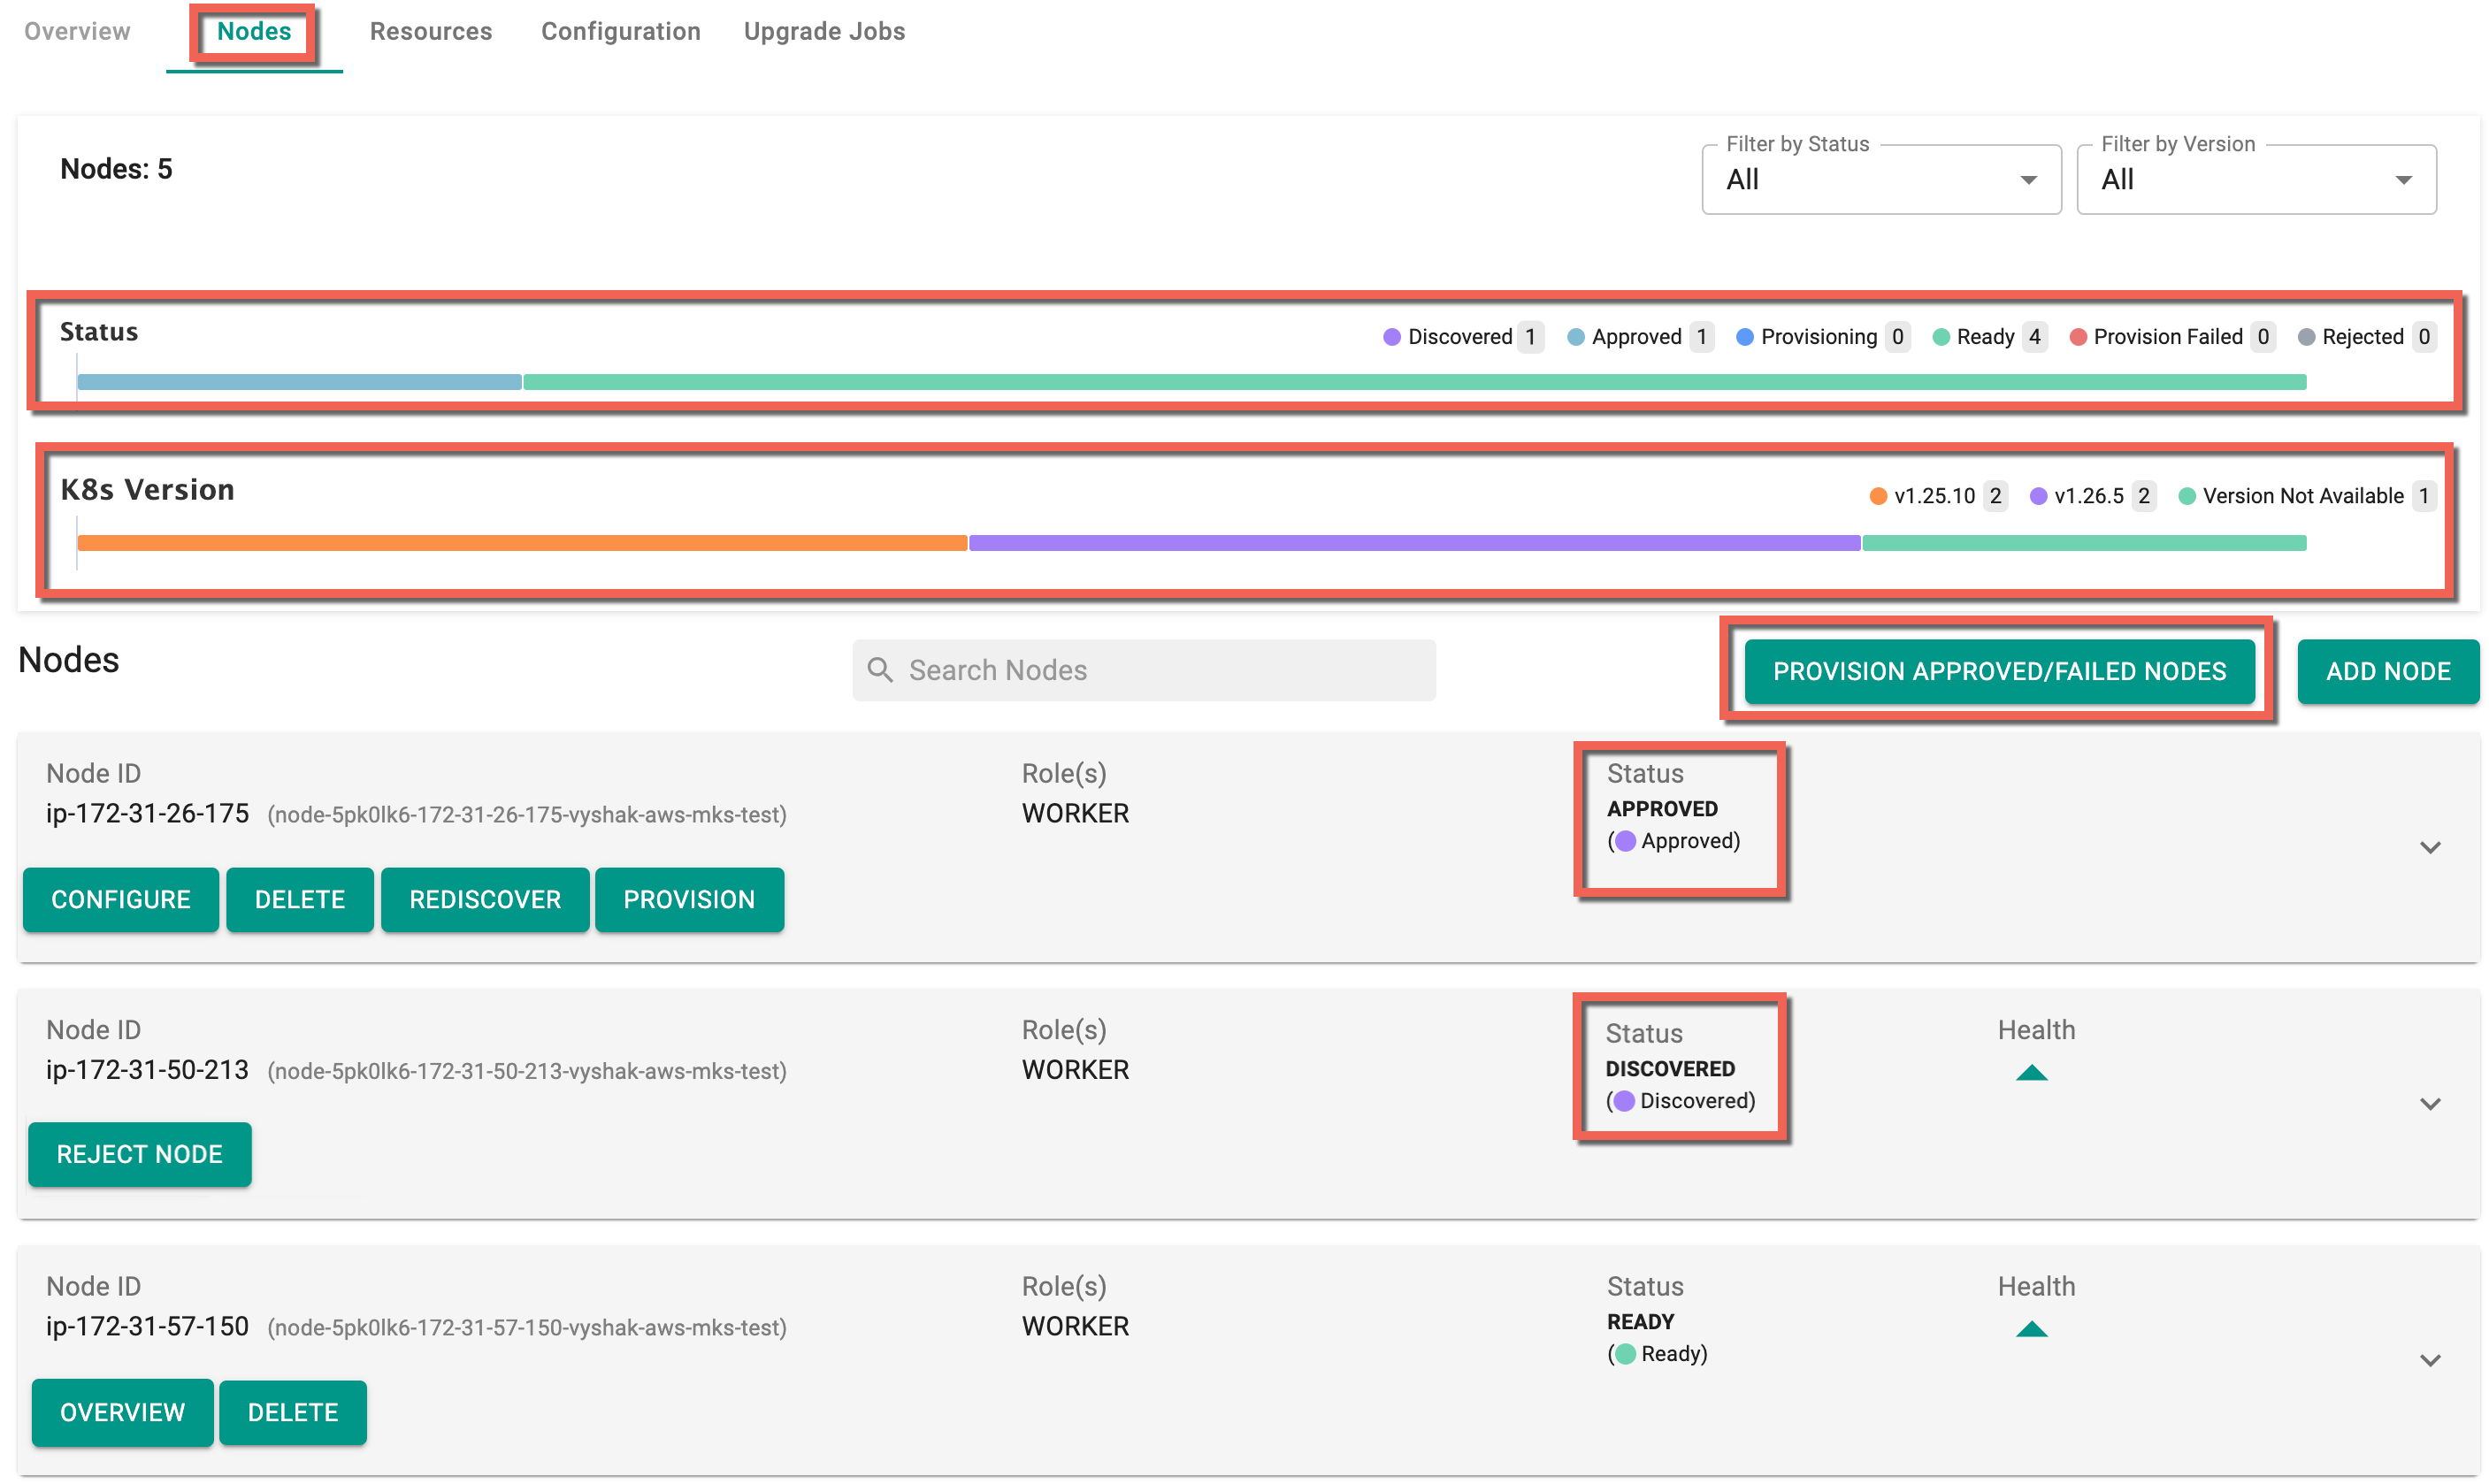
- Click Provision Approved/Failed Nodes button to provision all the Approved/ Provision Failed / Pretest Failed worker nodes simultaneously
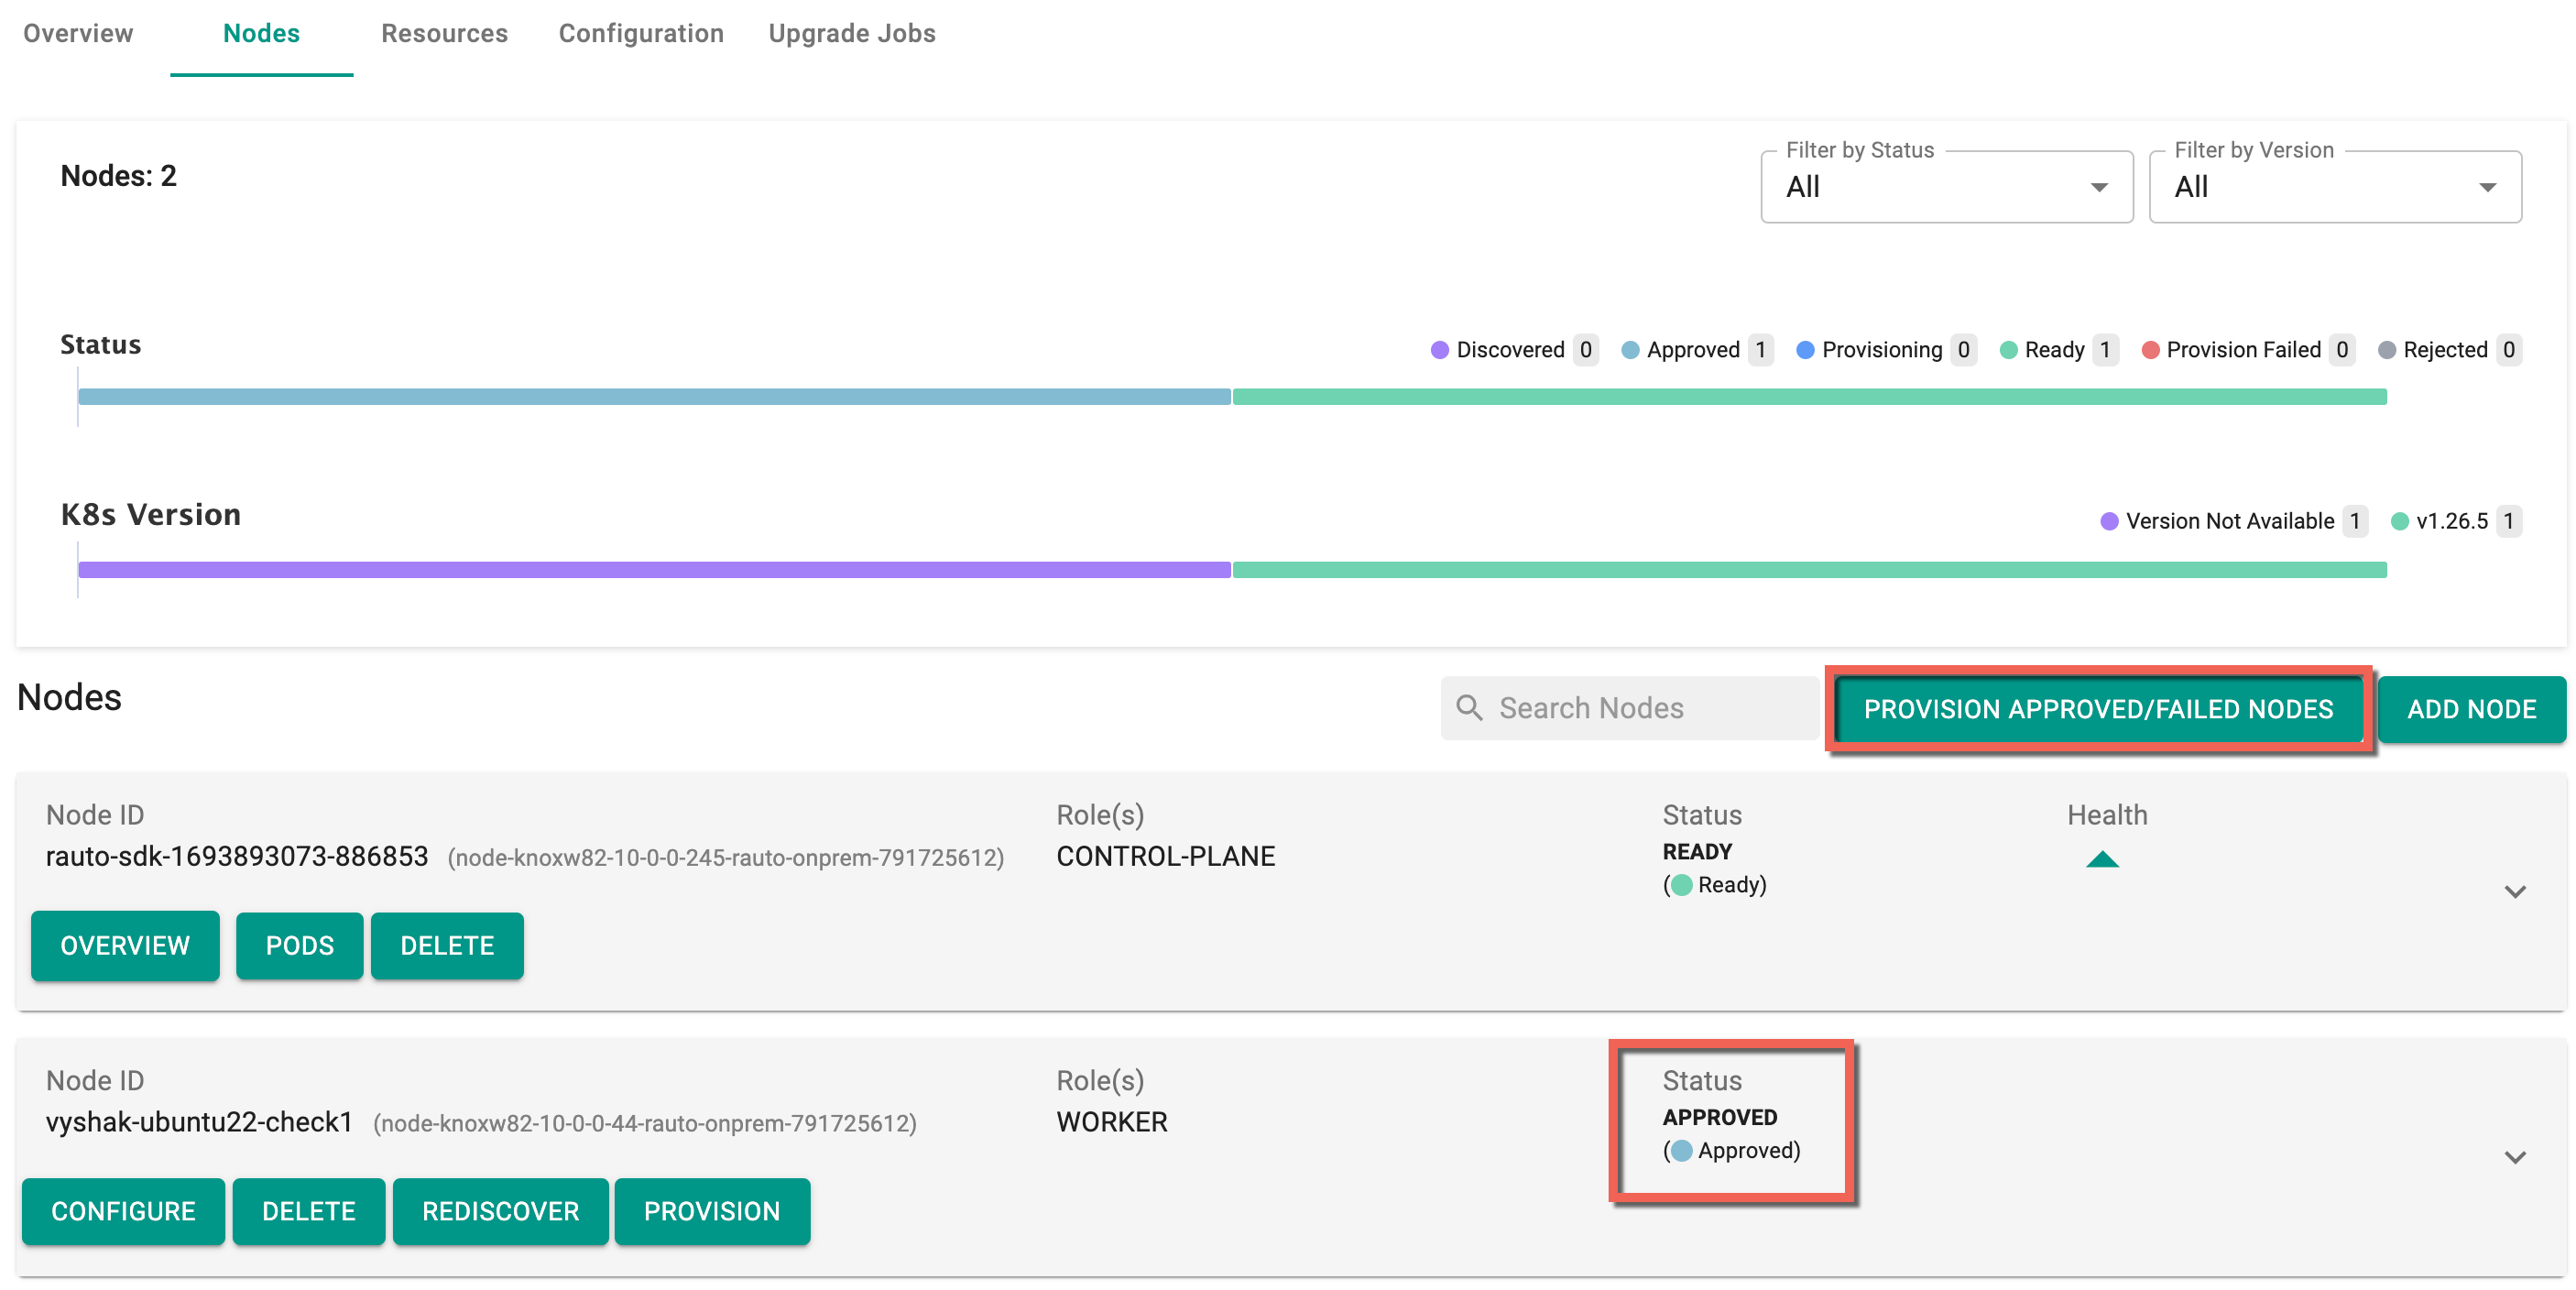
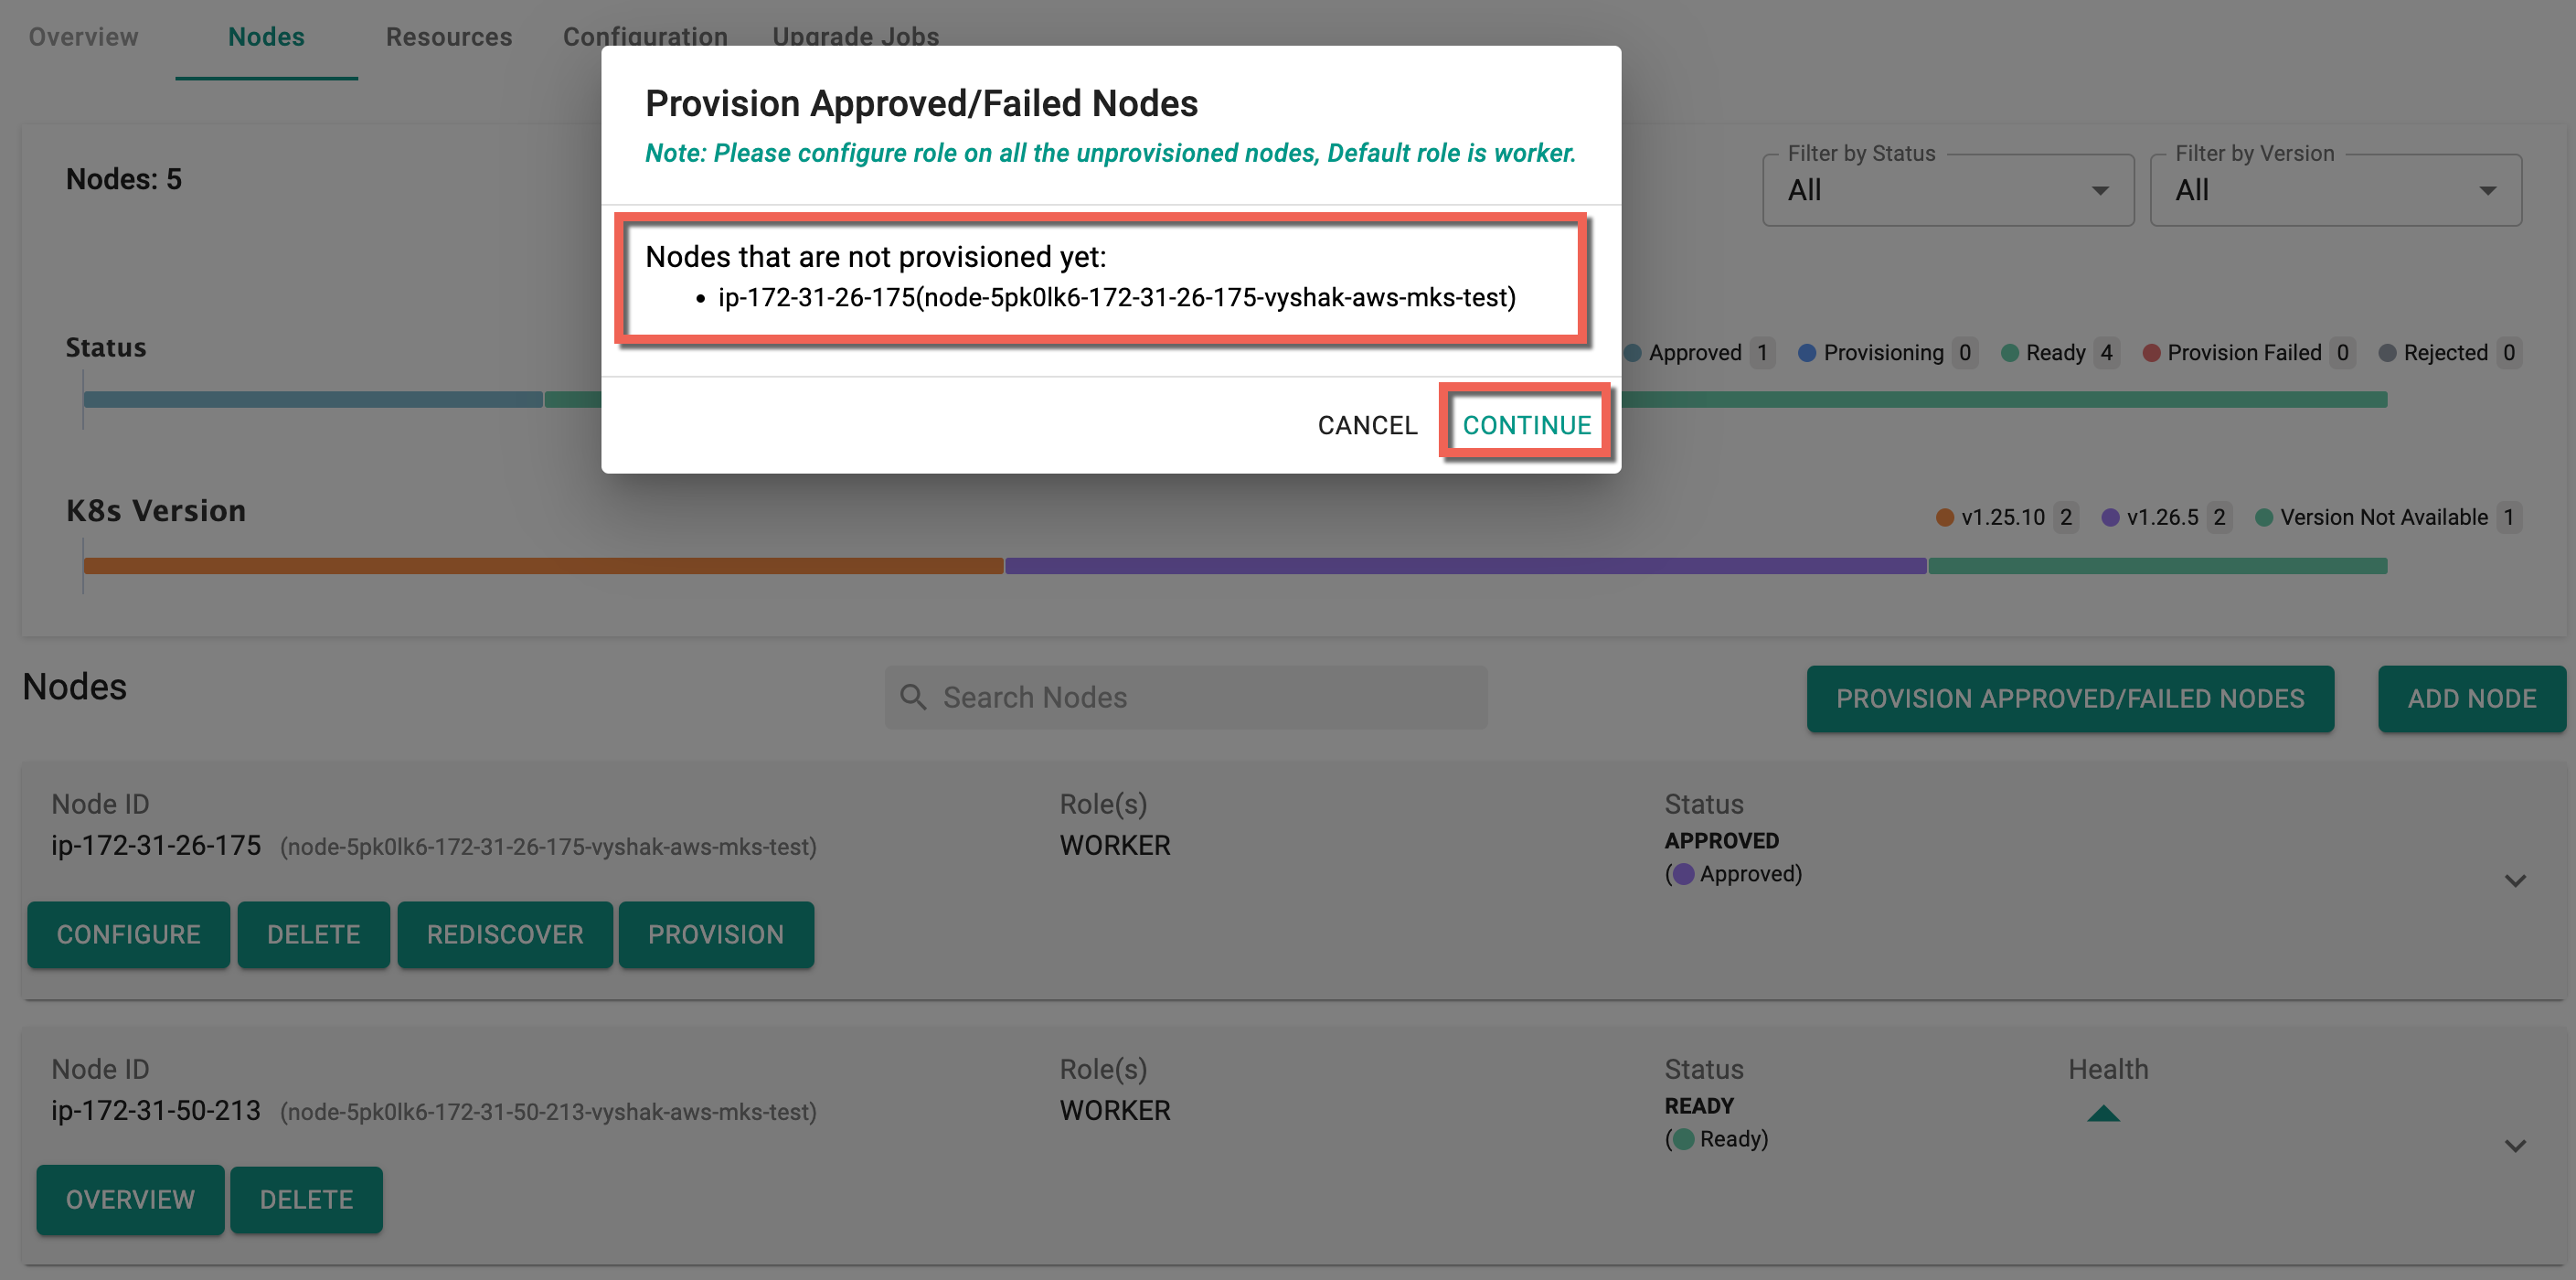
You can view the list of nodes that are ready for provisioning.
- Click Continue
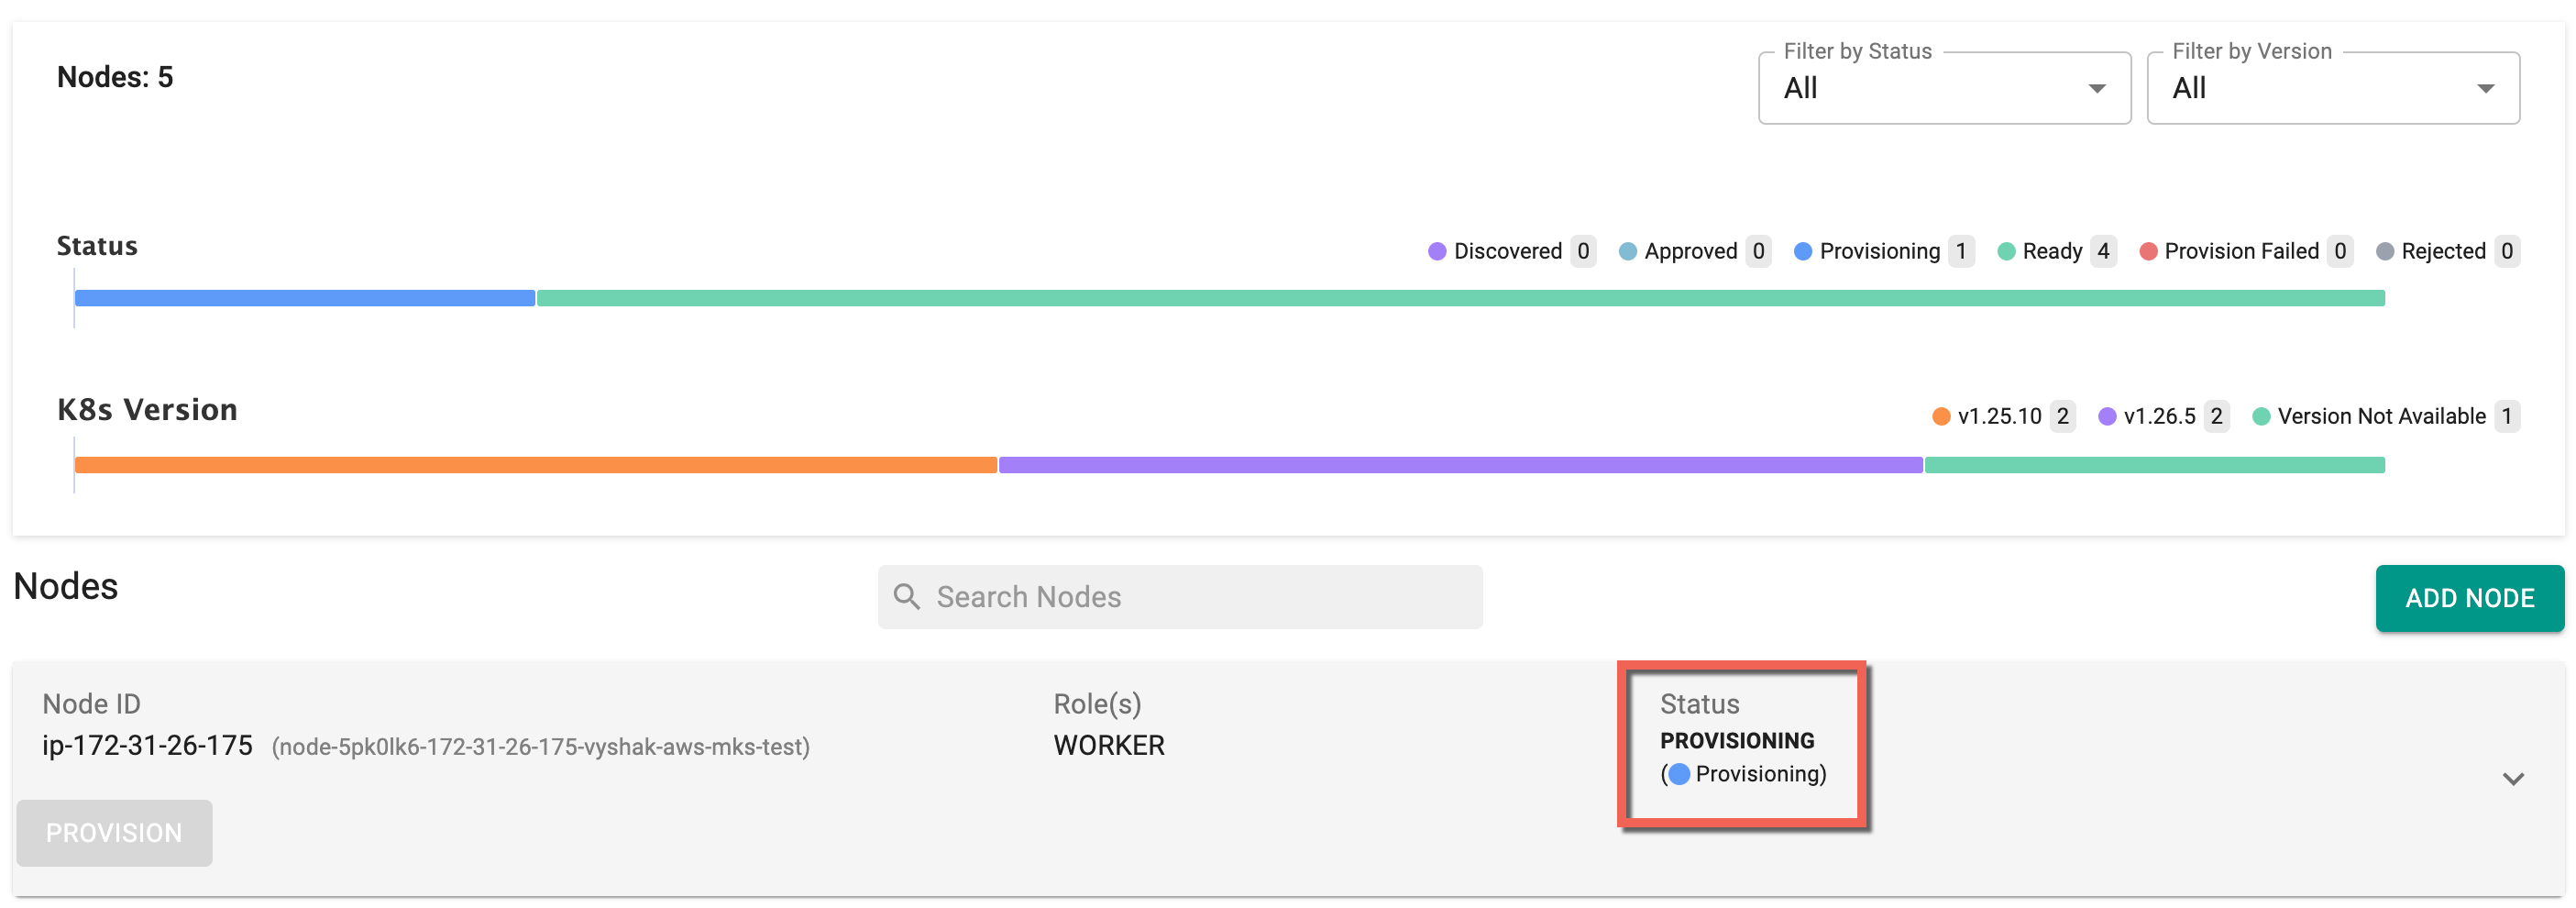
Now you can see the provisioning status as show below
Important
It can take approximately 5 minutes for new worker nodes to become available because of the time required to instantiate new instances.
Once the worker nodes are successfully provisioned, the status changes to Ready
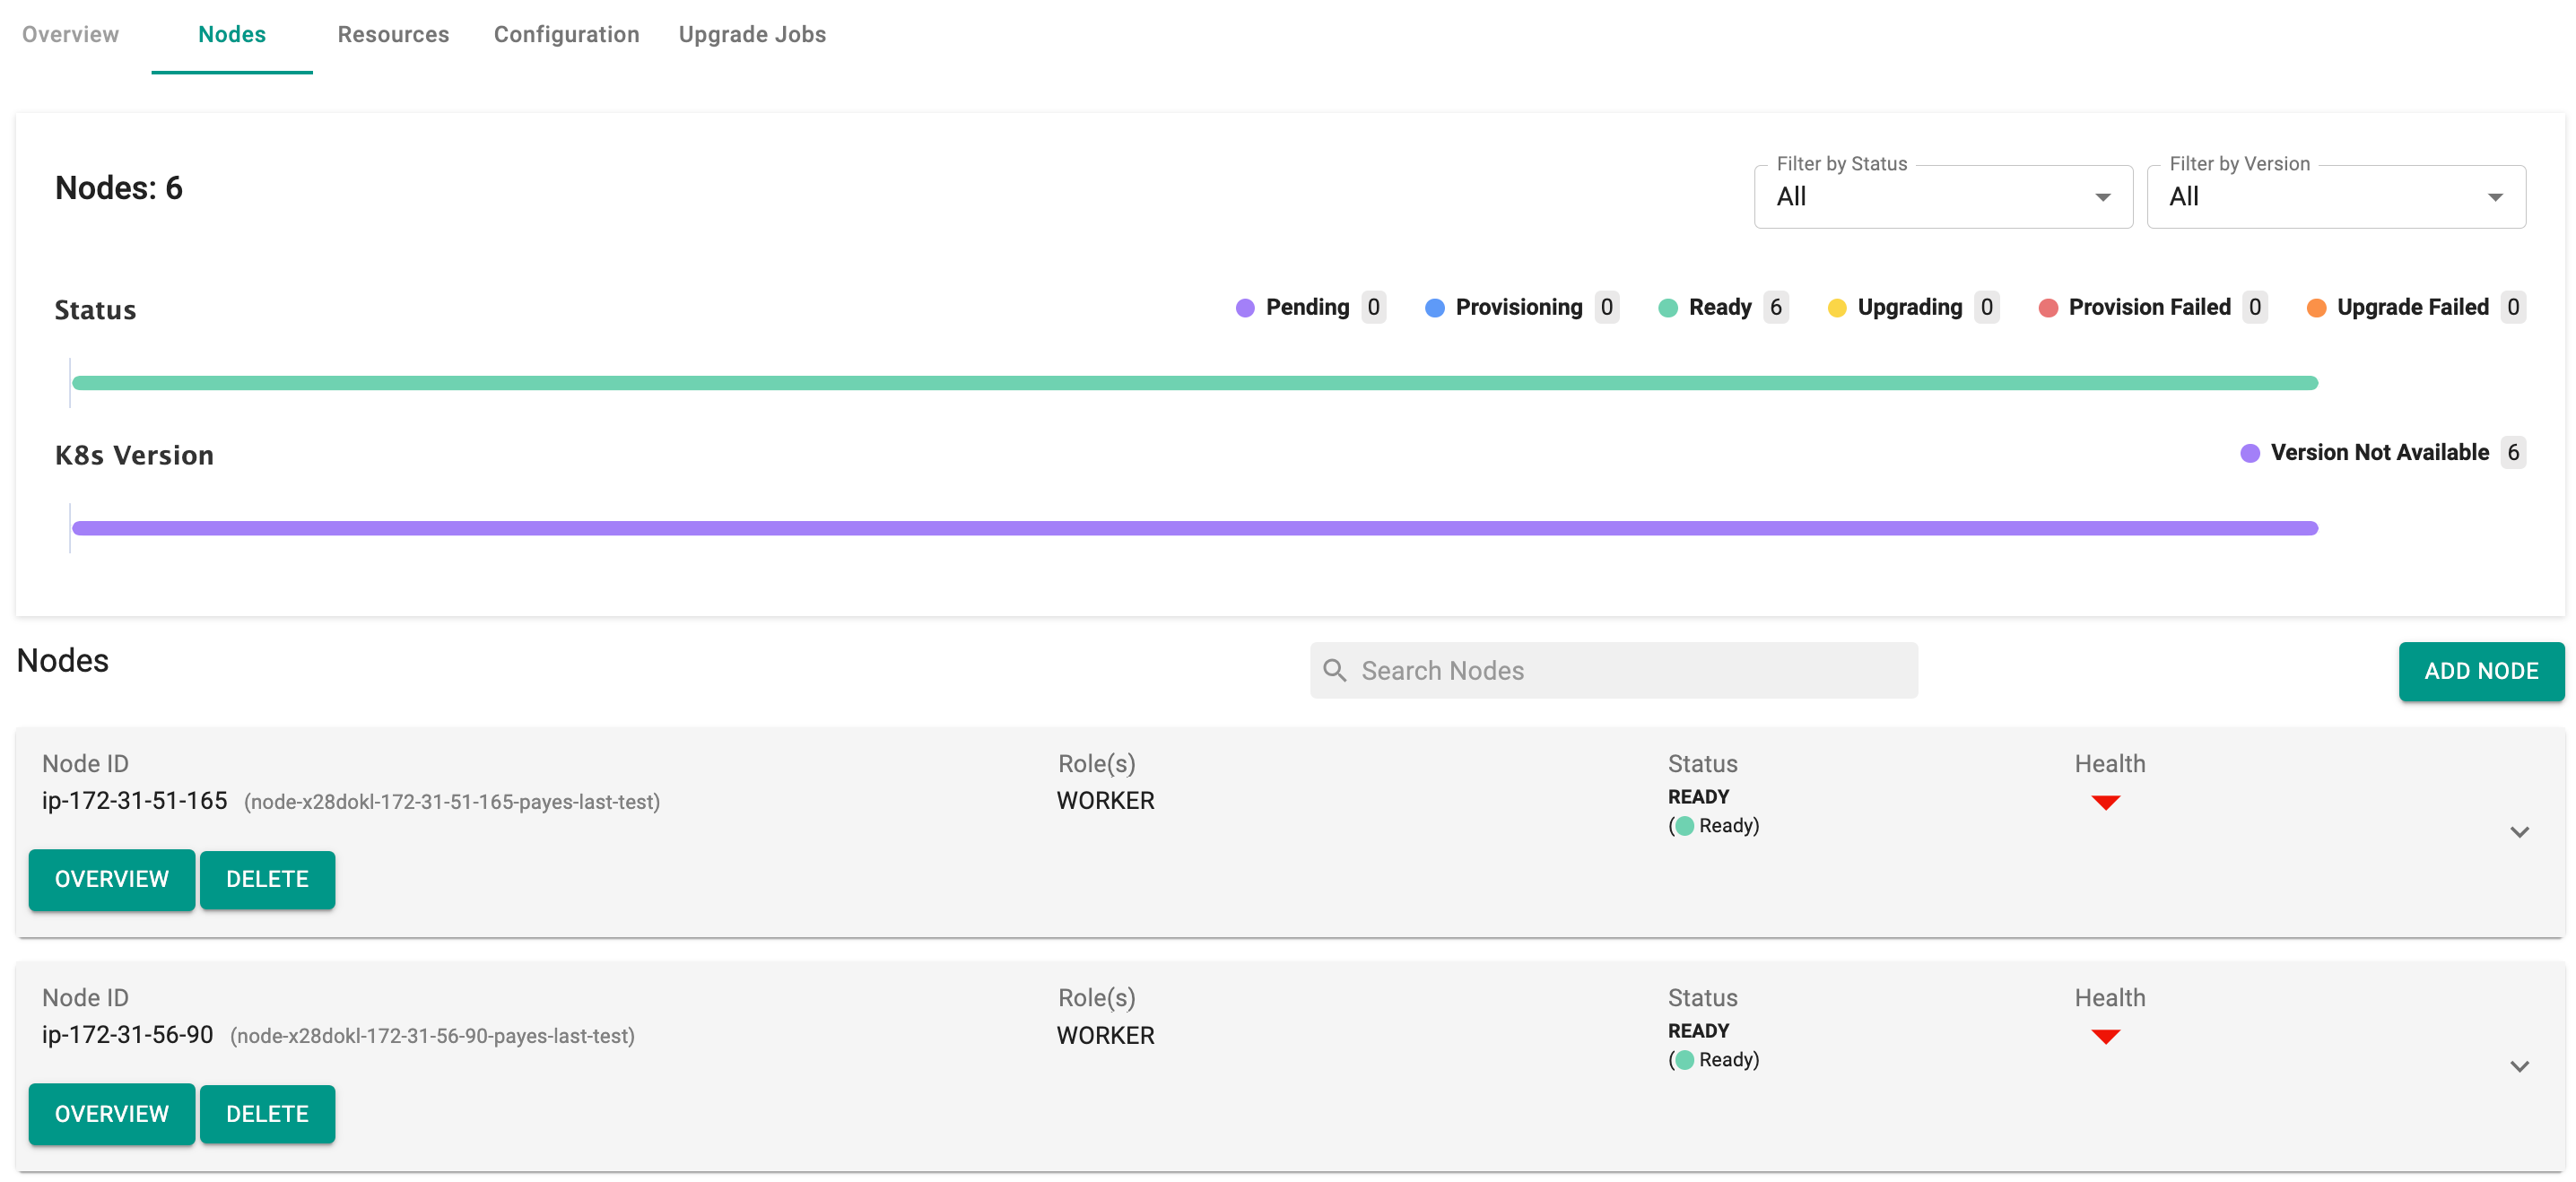
When all nodes have been provisioned, and there are no pending nodes for provisioning, the Provision Approved/Failed Nodes button will not be available on this page.
If a cluster provisioning is ongoing with 10 nodes (1 Master and 9 workers) and some worker nodes encounter provisioning failures, re-triggering the process will exclusively address those specific workers that had issues before. This behavior applies specifically to Day 0 scenarios involving worker node provisioning failures and does not extend to cases where Master Node Provisioning fails, especially in a High Availability (HA) setup with multiple master nodes.
Delete Worker Nodes
- Select the cluster and click on nodes
- Click on the "worker" node you would like to Delete and click on "Delete"

Once the process is kicked off, the controller will perform the following steps automatically
- Drain the node by rescheduling pods on other nodes
- Terminate the instance on AWS
- Remove the instance from AWS
Reboot K8s Worker Nodes
Perform the below steps to reboot the worker nodes:
- Mark the node as unschedulable by running the command
# kubectl cordon <node1>
- Drain the node to remove all running pods, excluding daemonset pods
kubectl drain <node1> --ignore-daemonsets
- Restart the cordoned node
- Once the reboot is complete, ensure that the kubelet and container runtime engine are up and running. Verify the node's readiness by running the below command
kubectl get node
- Uncordon the node using the below command
# kubectl uncordon <node1>
Once a node is ready and uncordoned, perform the same steps on another node in the cluster.