Namespace Network Policies
Overview
Important
For any pods/workloads that existed pre deployment of Cilium/Network Policy Manager onto the cluster, those pods/workloads must be RESTARTED in order for policies to take effect. New pods/workloads do NOT need to be restarted.
Important
Org Admin or Project Admin or Workspace Admin role is required to create and use namespace network policies
A namespace network policy is a bundle of network security rules that can be applied to one or more namespaces. Namespace network policies are used to protect pods and applications residing in a namespace by enforcing a default set of rules for zero-trust while specifying how pods are allowed to communicate with other various entities whether that be other pods, other namespaces, system resources, or the internet.
Use Cases
- Establish secure defaults: as a user, you want to make sure your pod is isolated and segmented to make sure that it is segmented. For example, if the database pod doesn't need to communicate with the internet, you can create a default ingress deny rule for any traffic coming from the internet
- Build zero-trust into your applications: Rather than allowing communication with all entities, establish zero-trust by whitelisting the specific pods and namespaces that need to be communicated with and deny traffic from anything else. For example, restrict ingress traffic from a database pod to only backend pods
- Establish-multi-tenancy: In a shared cluster, you can build multi-tenancy by only allowing pods from specific namespaces that belong to a given tenant to communicate with each other
Managing Namespace Policies
Creating a Namespace Policy
In order to create a namespace policy, you must add namespace-scoped network policy rules to it. Refer here for instructions to create Network Policy rules.
- Login to the controller and under Network Policy, navigate to the Policies screen. Select the namespace tab and click new policy
- Give a name for the policy and click Create
- Provide a version name
- Click Add Rules and add your namespace-scoped rules with the corresponding version you want to use
- Click Save Changes
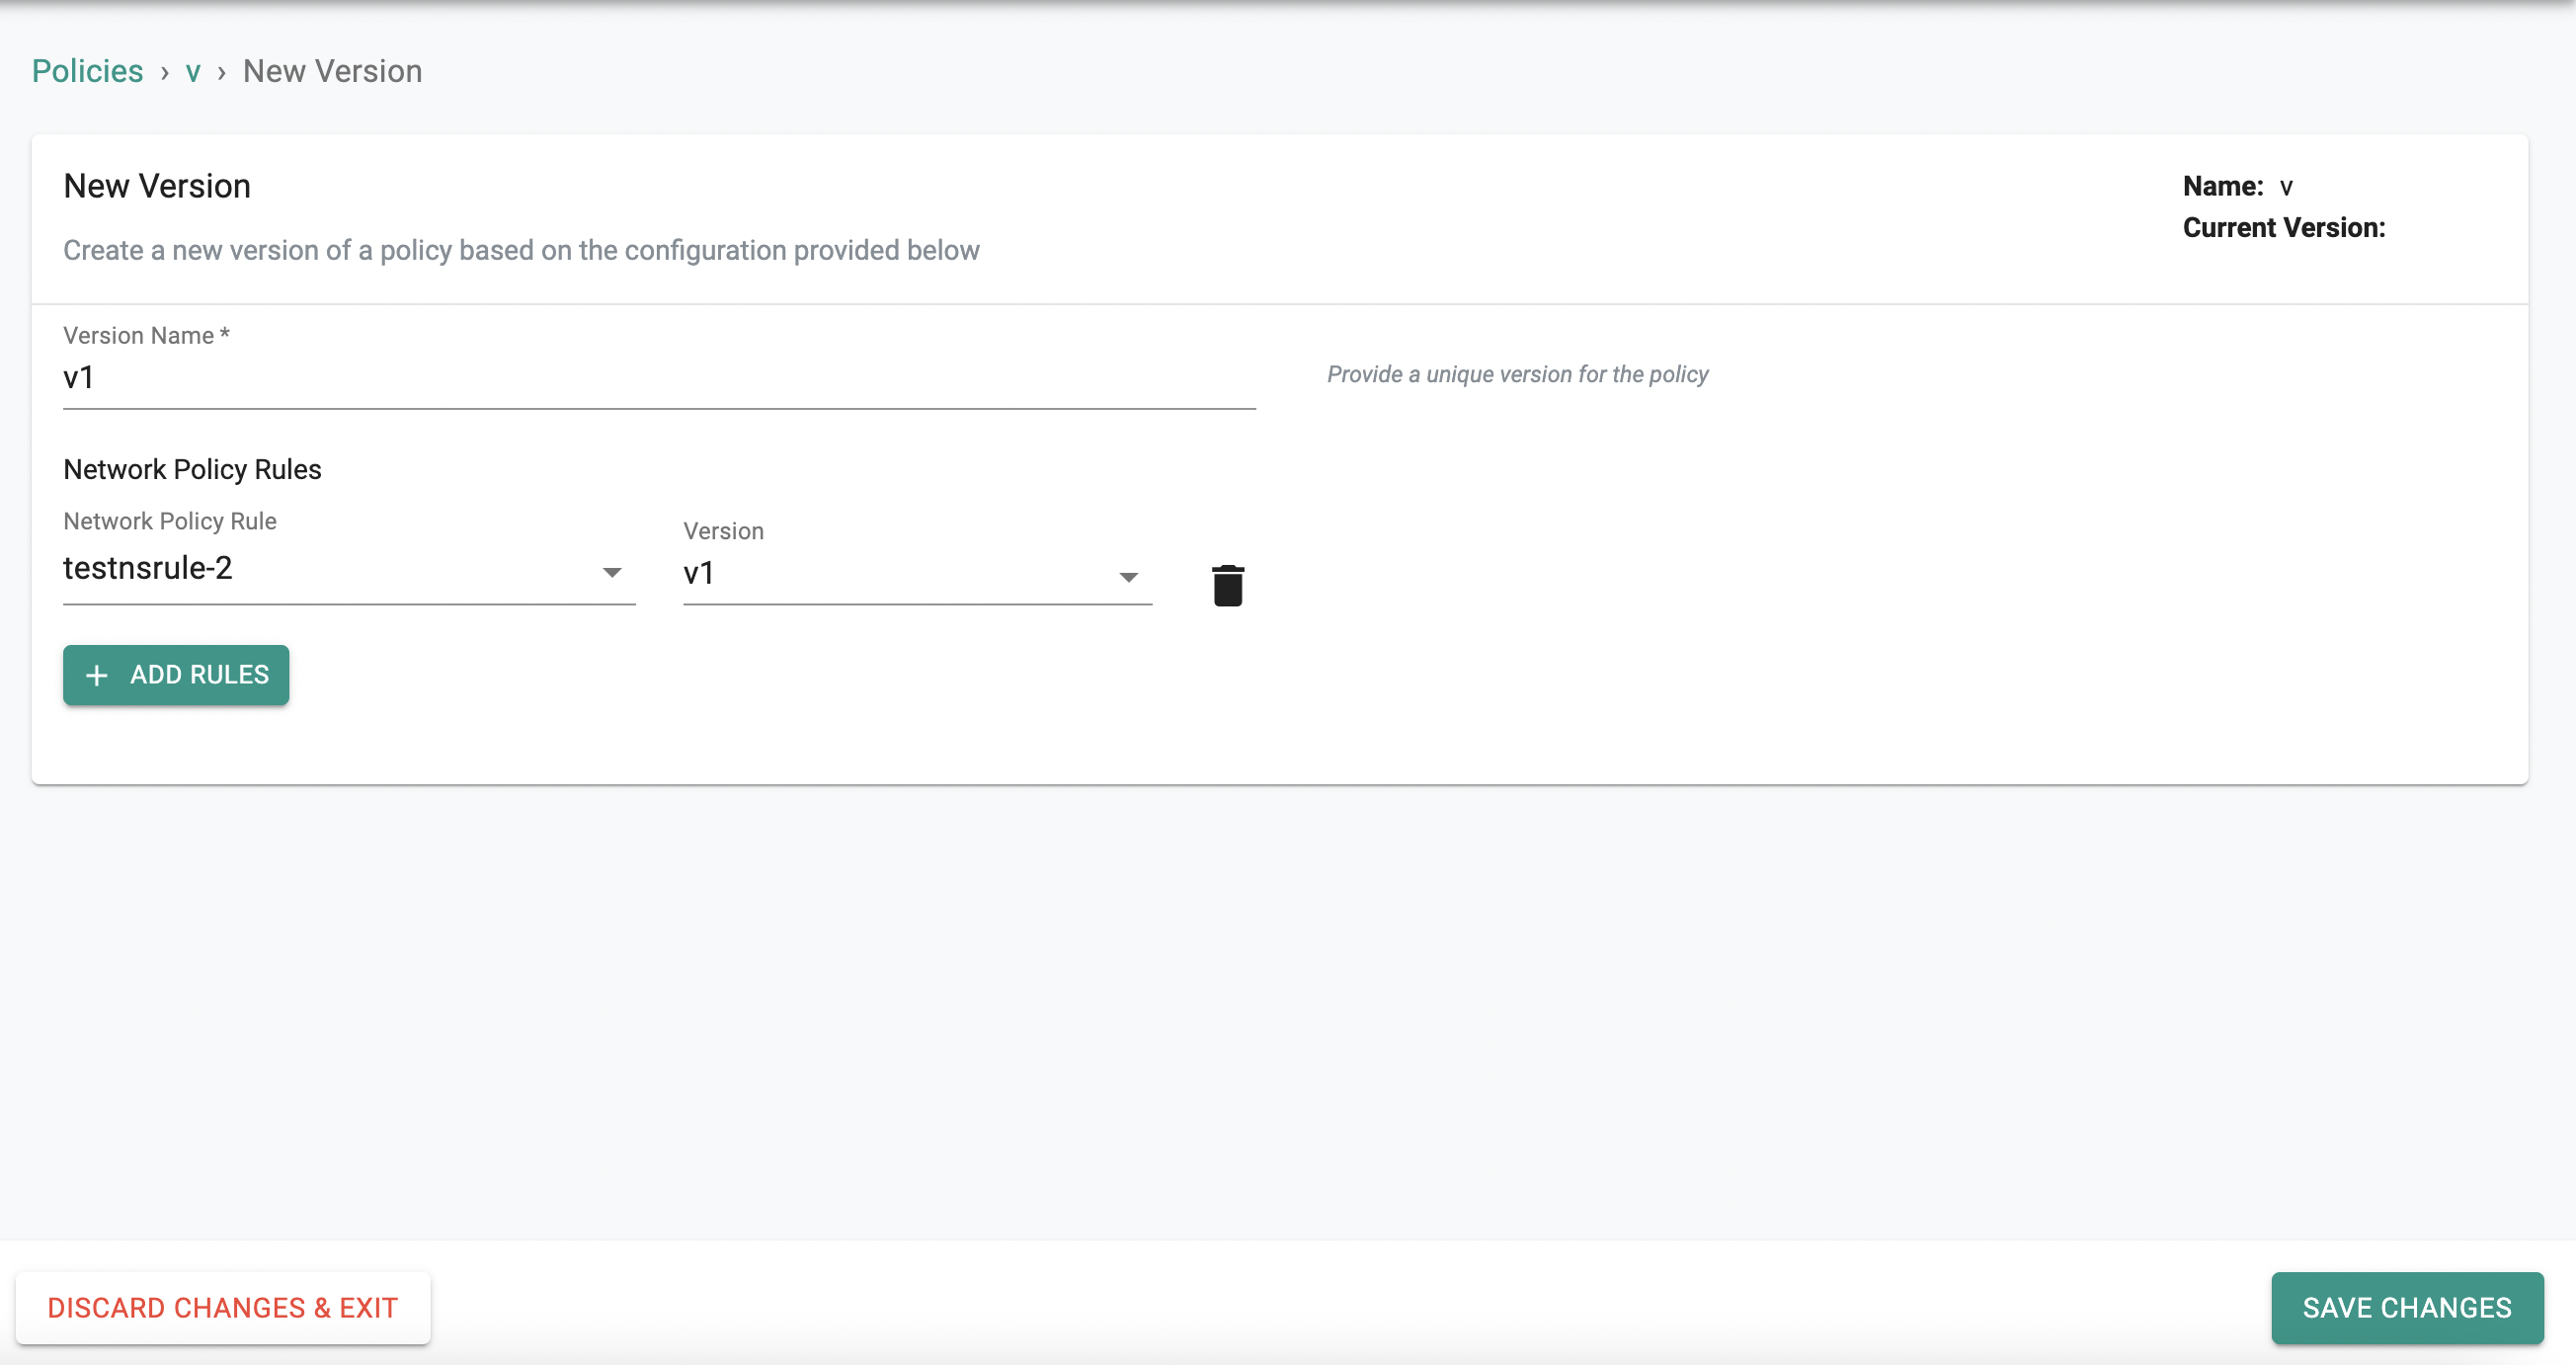
Rules can be added to or removed from a policy using the same workflow. A new version needs to be created every time a policy is updated.
Using Namespace Policies
Namespaces Policies are added to/removed namespaces by doing the following:
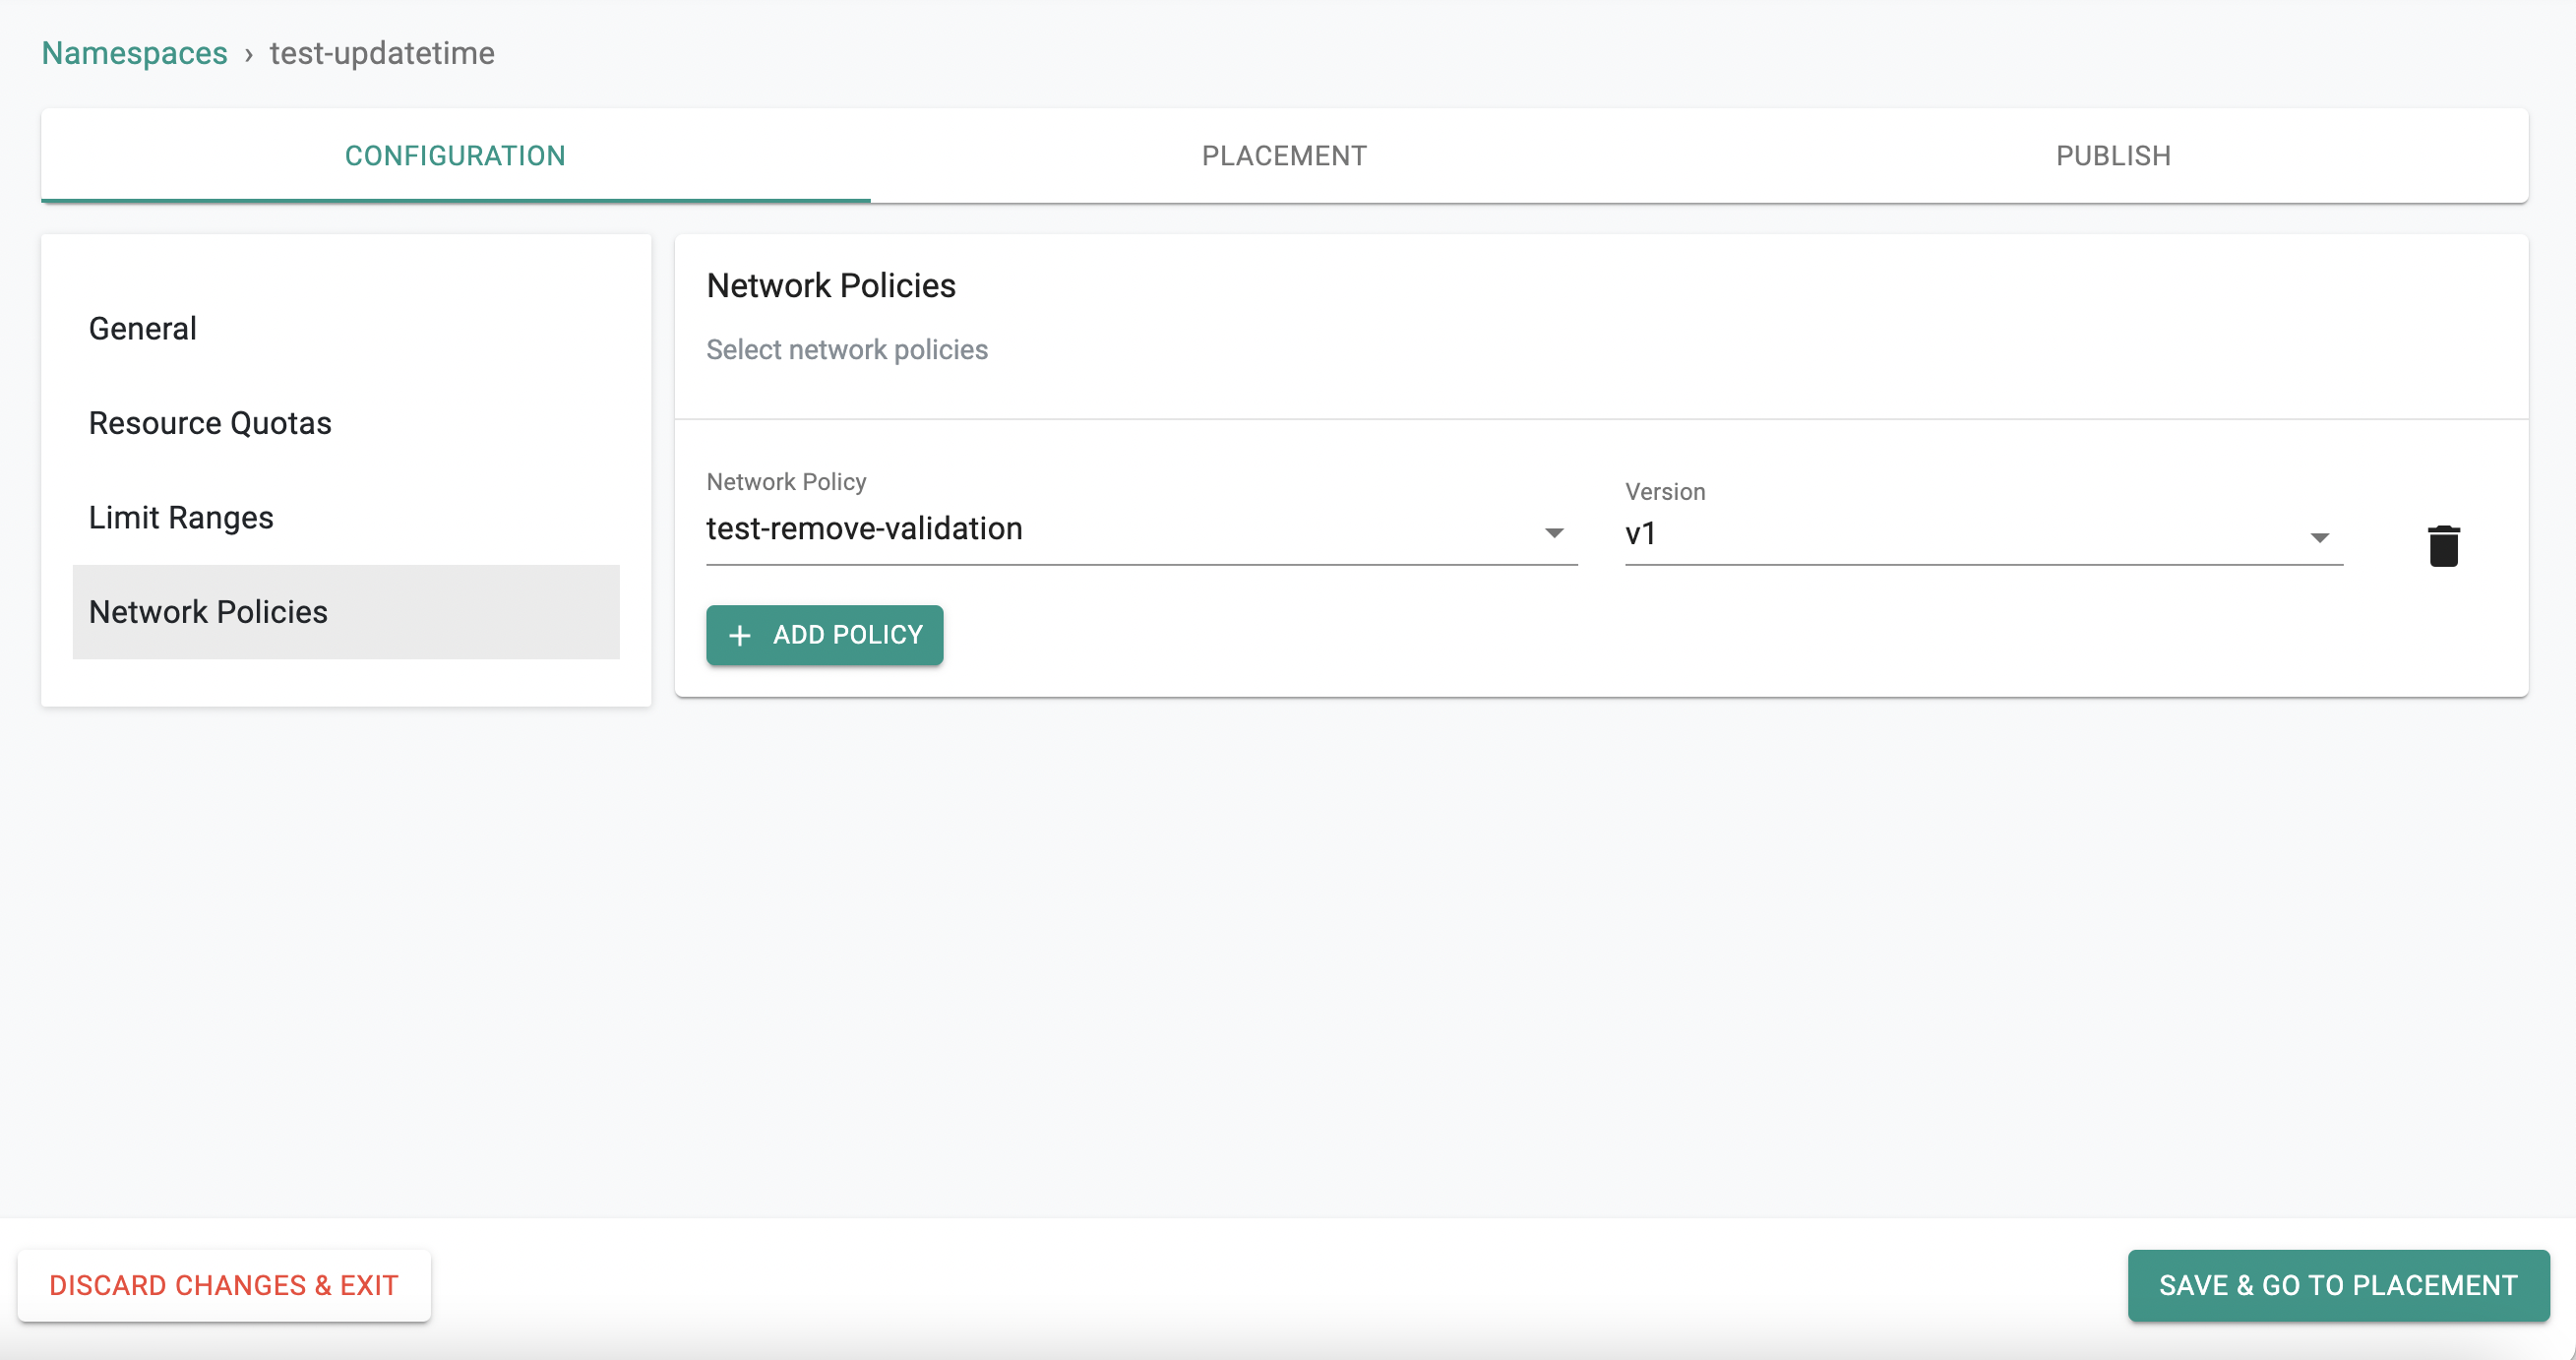
- Login to the controller and navigate to Namespaces
- Select the namespace that you want to apply the namespace policy/policies to, and click edit
- Under the Configuration tab, navigate to Network Policies.
- To add namespace network policies, select from the dropdown and select the corresponding version to use
- To remove a namespace network policy, simply hit the delete icon to the right of the policy
- Click Save and navigate to placement
- Select the clusters and click republish.