Installation Profiles
Overview
An installation profile is a set of parameters that are used during the setting up and installation of the Network Policy and Visibility Managed Add-On (Cilium).

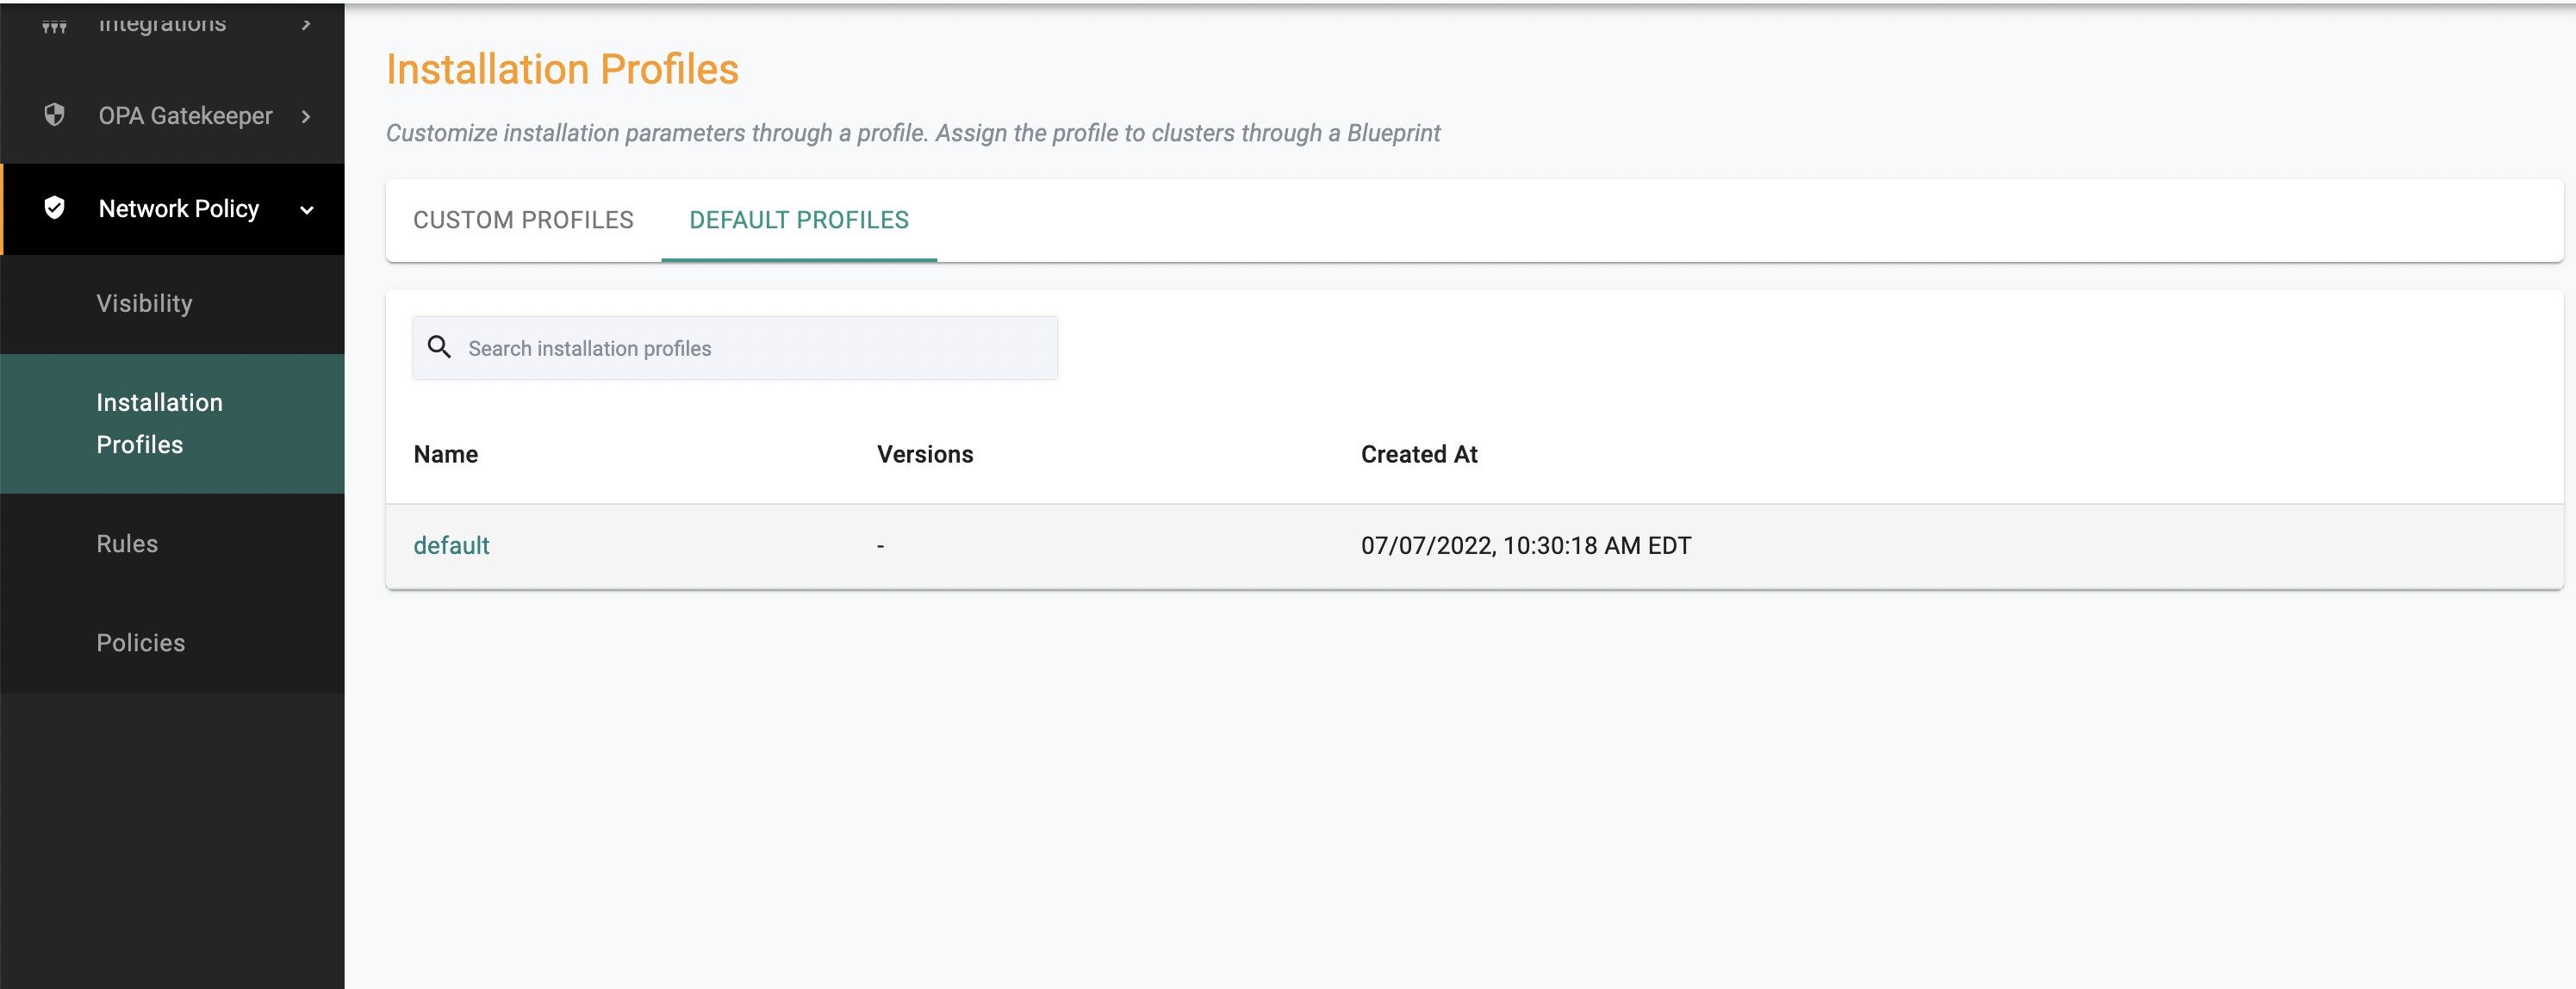
The Installation Profiles page shows custom and default network profiles. A default installation profile is provided that can be leveraged out of box. In cases where installation profiles need to be customized, a custom installation profile can be created.
An option to select 'None' is also available for cases where Cilium does not need to be installed in chaining mode (e.g. Cilium is the primary CNI).
Custom Installation Profiles
In certain cases, admins may want the ability to customize certain installation parameters for Cilium (e.g. for specific clusters or specific types of environment). To facilitate this, an admin can create custom installation profiles.
Parameters Supported
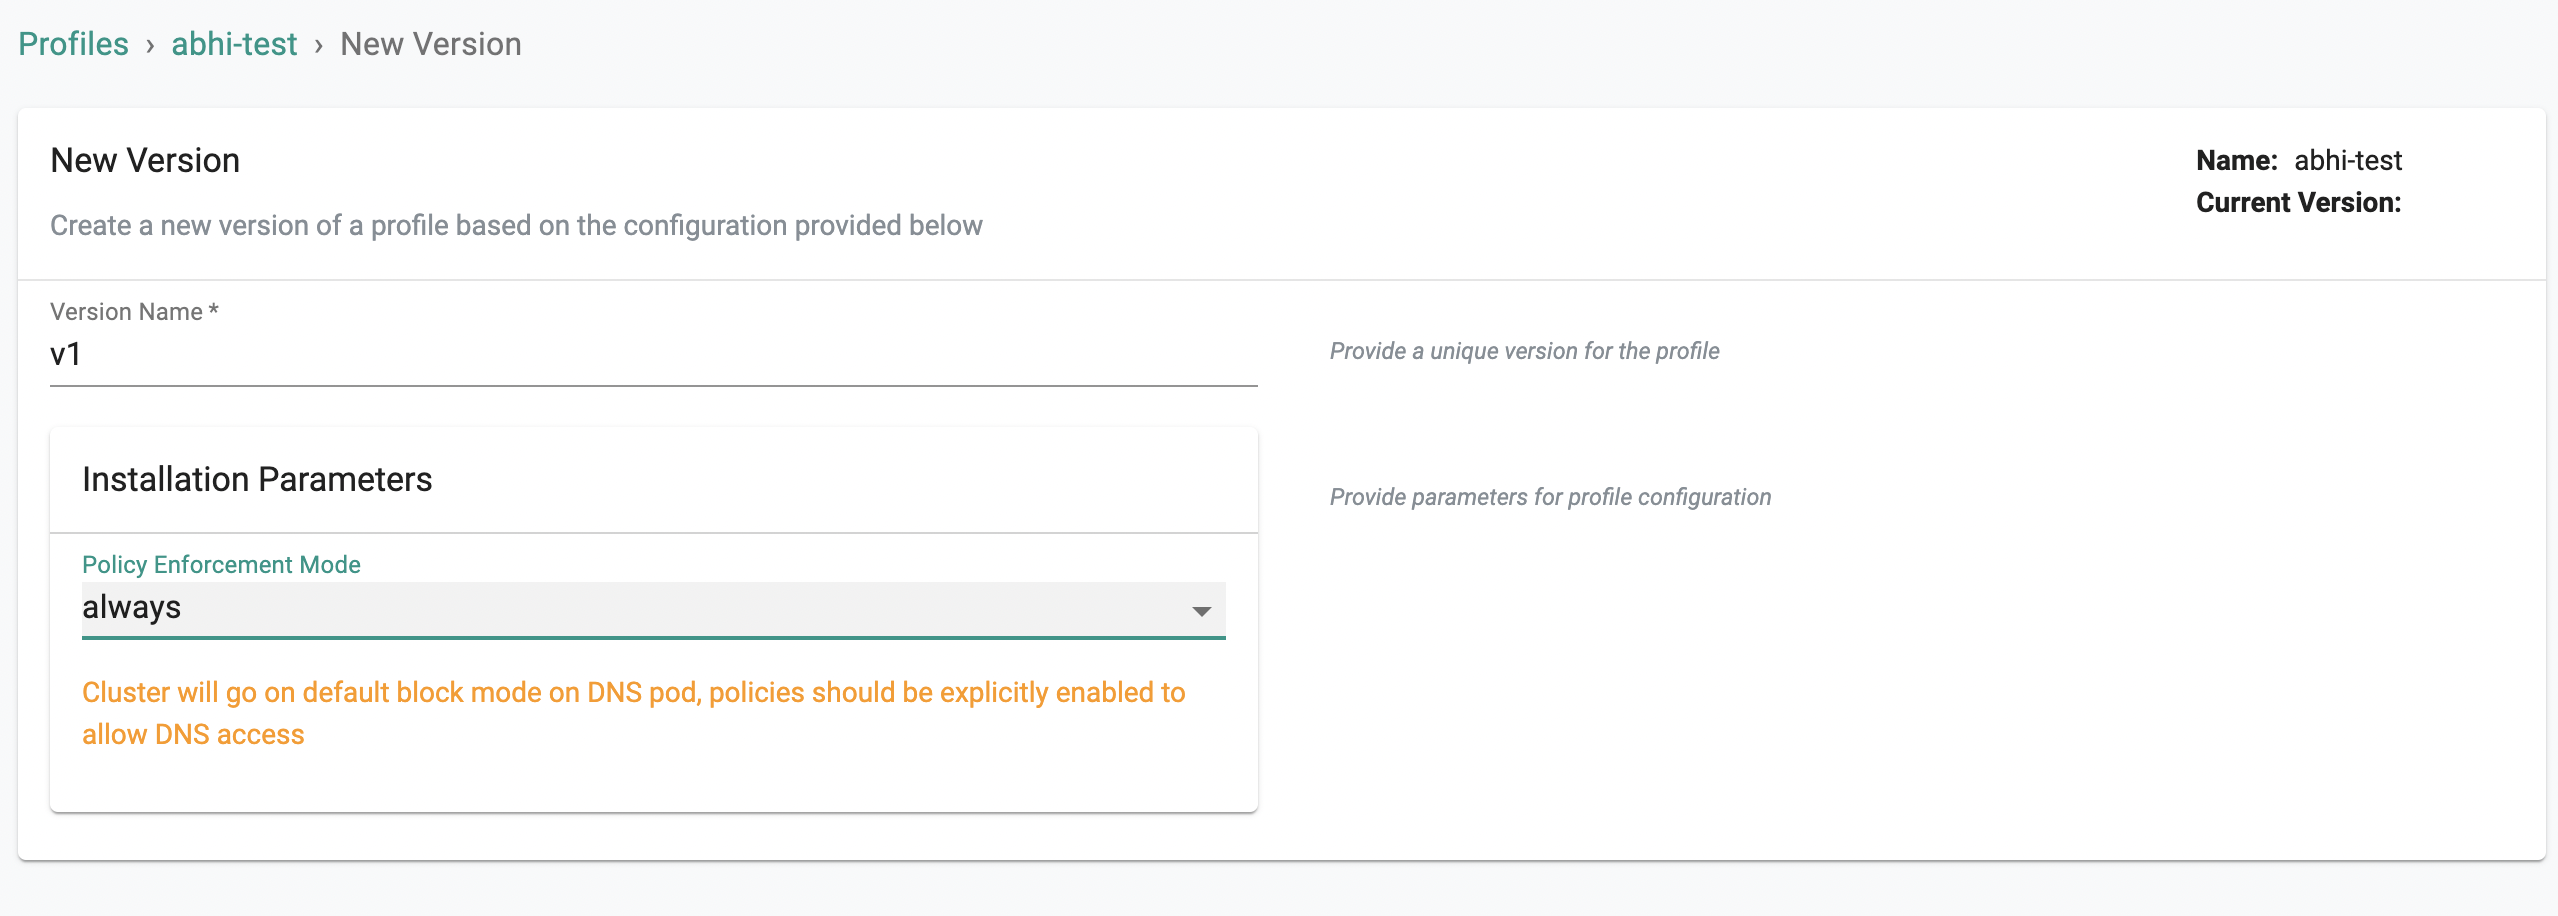
- Policy Enforcement Mode: This determines how the policy needs to be enforced. See Cilium's Policy Enforcement Documentation for more details.
Creating a Custom Installation Profile
Perform the steps to create a custom installation profile:
- Login to the controller and select Installation Profiles under Network Policy
- Under the Custom Profiles tab, click New Profile. Provide a name for the profile. Remember that if you intend to share this profile with other projects, the name needs to be unique. Click on Create
- Provide a unique version name under Version Name.
- Select the installation parameters
- Click Save Changes.

New versions of the profile can be created by clicking New Version and going through the same workflow as above. Parameters for the installation profile can be viewed by clicking the info button under Configuration next to Spec.
Updating a Custom Installation Profile
Updating an installation profile will create a new version for the profile.
Perform the steps to update a custom installation profile:
- Login to the controller select Installation Profiles under Network Policy
- Find the name of the custom profile in the custom profiles tab (can also use the search). Click the edit icon to update the profile
- Click New Version
- Provide a unique version name under Version Name
- Select the installation parameters
- Click Save Changes
Deleting a Custom Installation Profile
Perform the steps to delete a custom installation profile:
- Login to the controller select Installation Profiles under Network Policy
- Find the name of the custom profile in the custom profiles tab (can also use 'search')
- Click the trash icon to delete the installation profile
NOTE: If the profile is in use in a blueprint, you will not be able to delete the profile.
Using a Custom Installation Profile
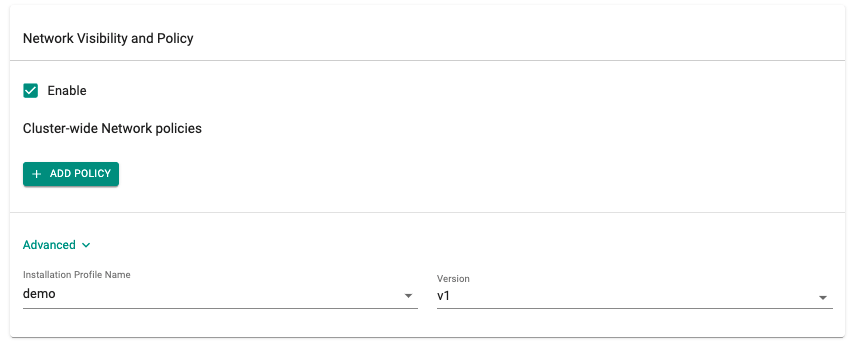
Custom Installation Profiles can be selected as part of enabling Network Policy & Visibility when creating or updating a blueprint.
Follow the instructions here for the Custom Blueprint Creation.
- Go to the Network Visibility and Policy section to enable the capability
- Expand Advanced section, select the installation profile and the version
Important
When using a custom blueprint, if it inherits from a golden blueprint, then the installation profile specified in the golden blueprint cannot be overridden or deleted. This is to ensure that the golden path for installation the admin specifies is being followed.
