Management
In an Org, users with Organization Admin, Infra Admin and Workspace Admin roles have the privilege to create, read, update and delete namespaces.
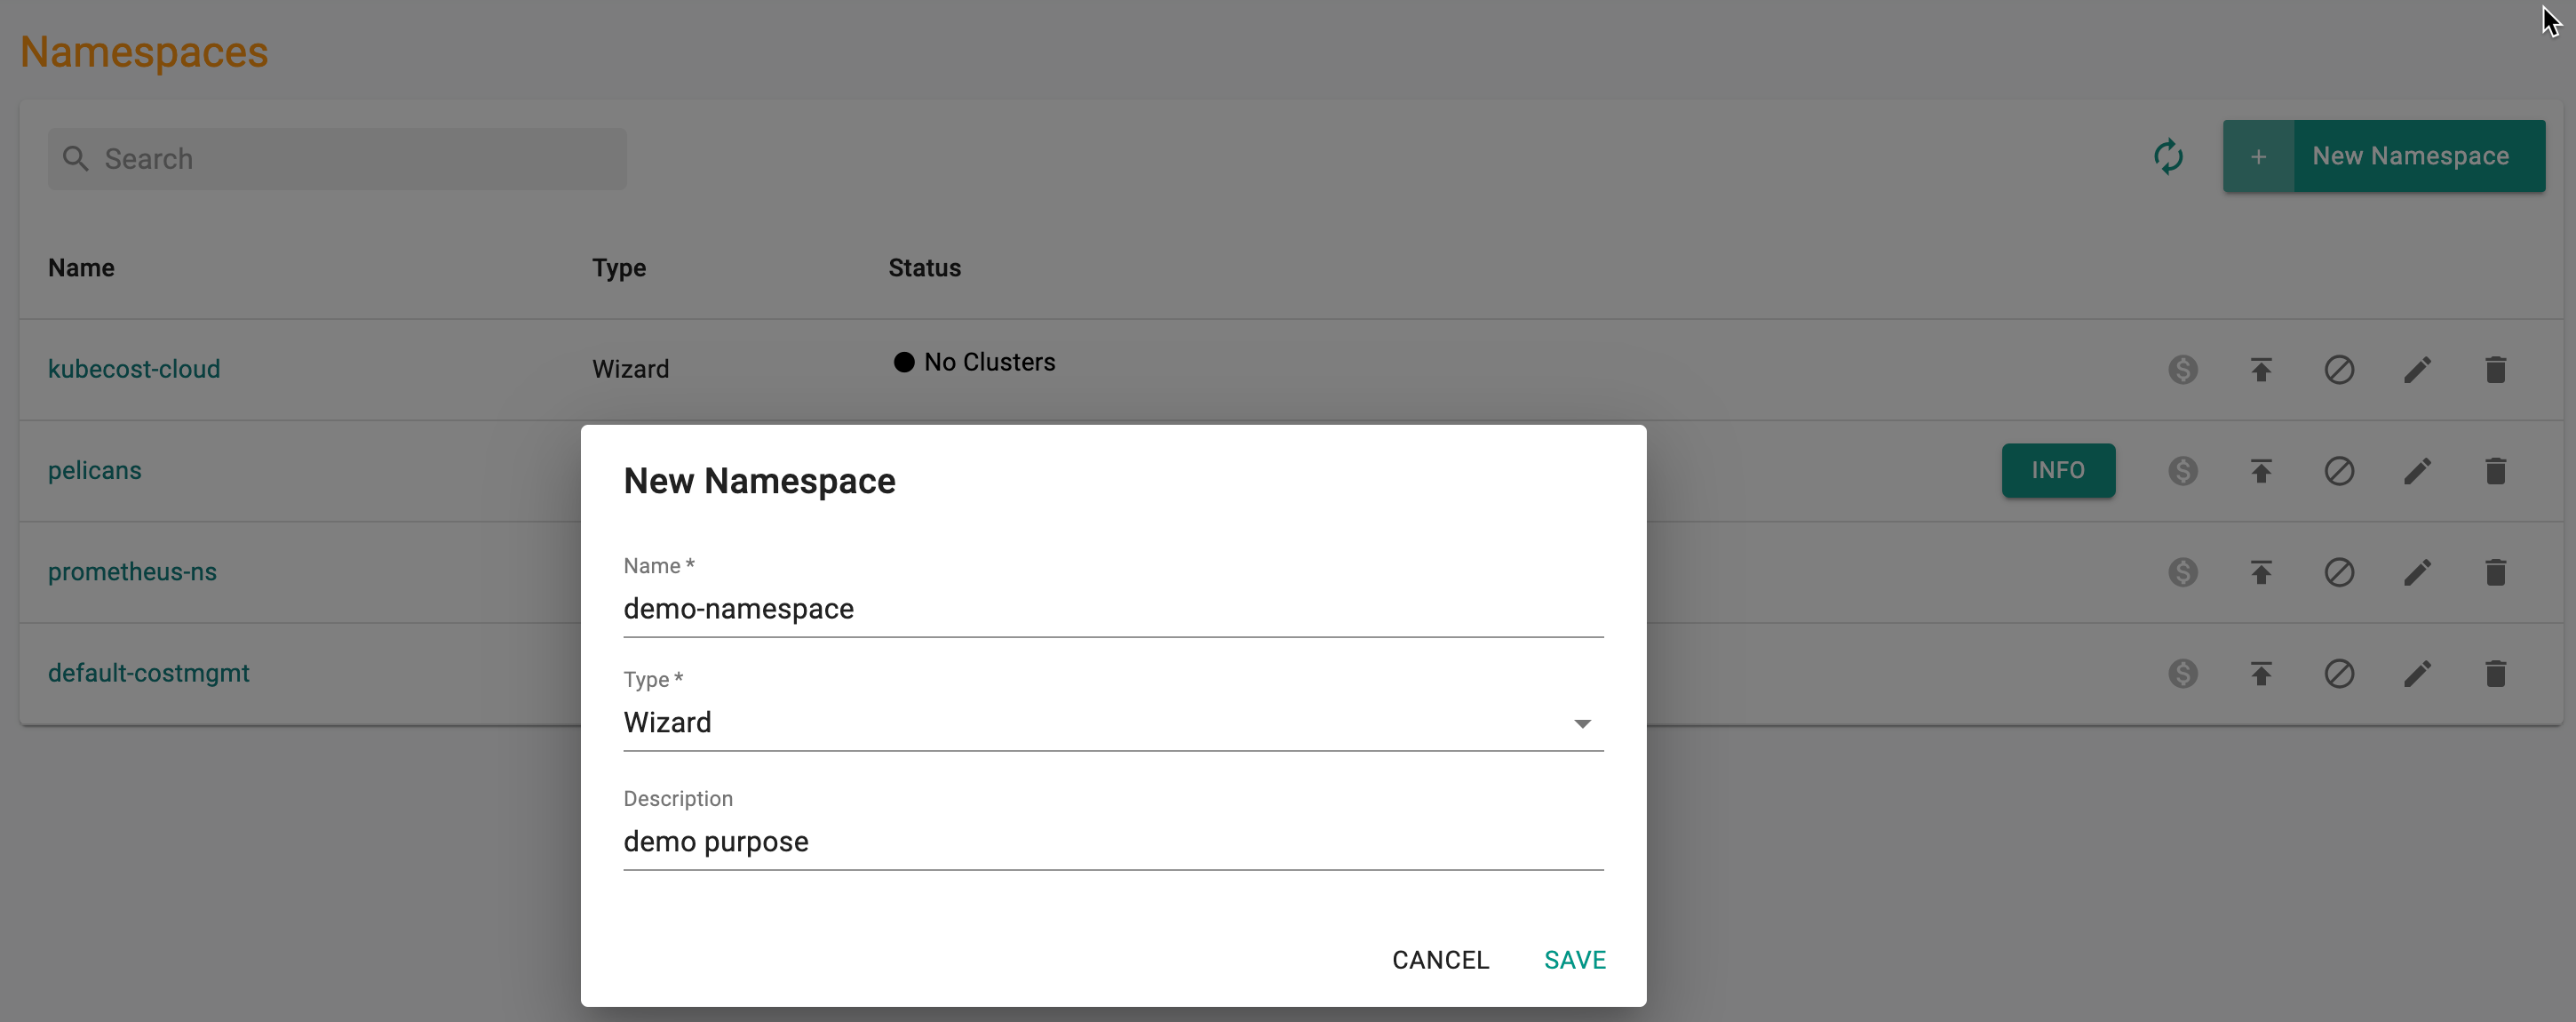
Create Namespace
- Navigate to the Web Console
- Select Namespaces from the left pane and click New Namespace
- Enter a name for the Namespace
💡 Note:
The namespace name character limit is 63, as per K8s standards.
- Select the Type from the drop-down
- Wizard: Allows to enter the parameters manually
- Upload: Allows to upload the parameters as yaml files
- Repo: Allows to retrieve the parameters from a GitHub repository
Note
If no type is selected, Wizard is considered by default.
- Enter a namespace description (Optional)
- Click Save to proceed with the Namespace creation or Cancel to discard the process
By default, every namespace is created without any resource quotas.
Important
You cannot create duplicate namespaces on the same cluster. Also, you cannot create namespaces with names that are reserved. Specifically "rafay", "rafay-system" and "rafay-infra".
Configure
Configuration details are customer defined. Based on the selection of Type, configuration page differs.
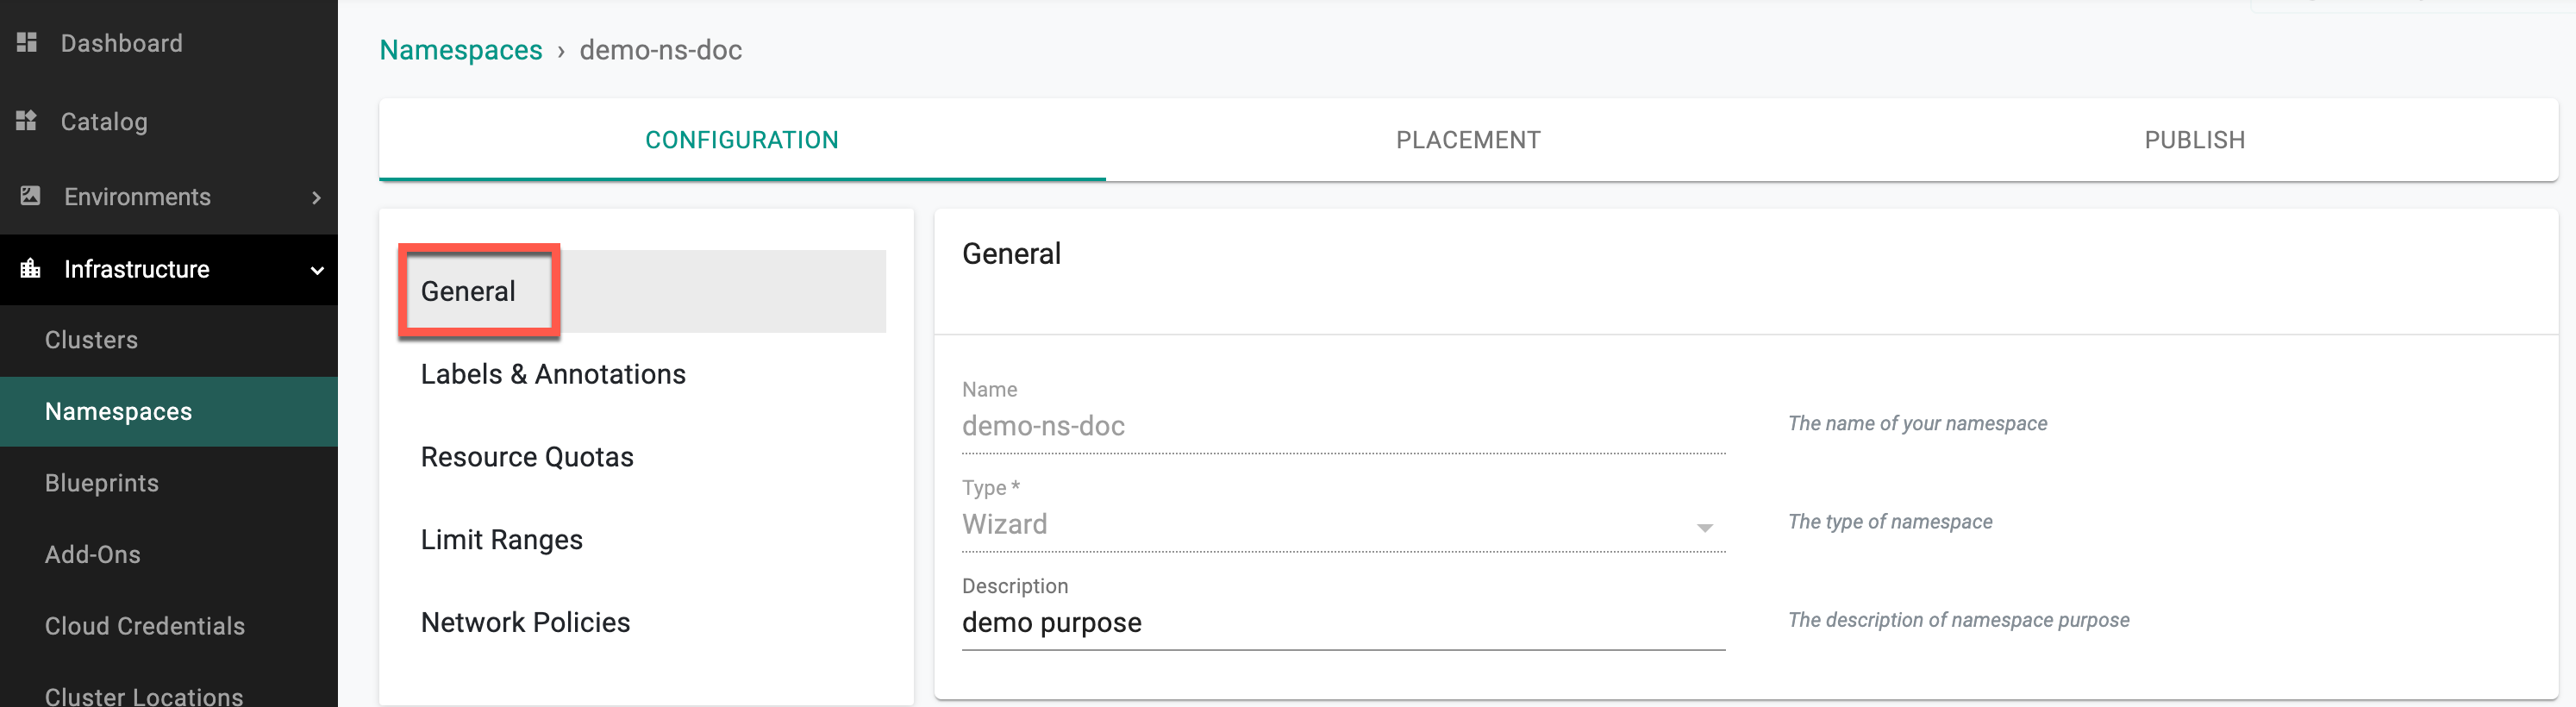
Namespace Wizard
For the Wizard type, configuration page allows to provide General, Resource Quotas, and Limit Ranges details for the new namespace.
General (Optional)
General page shows the details entered during the namespace creation.
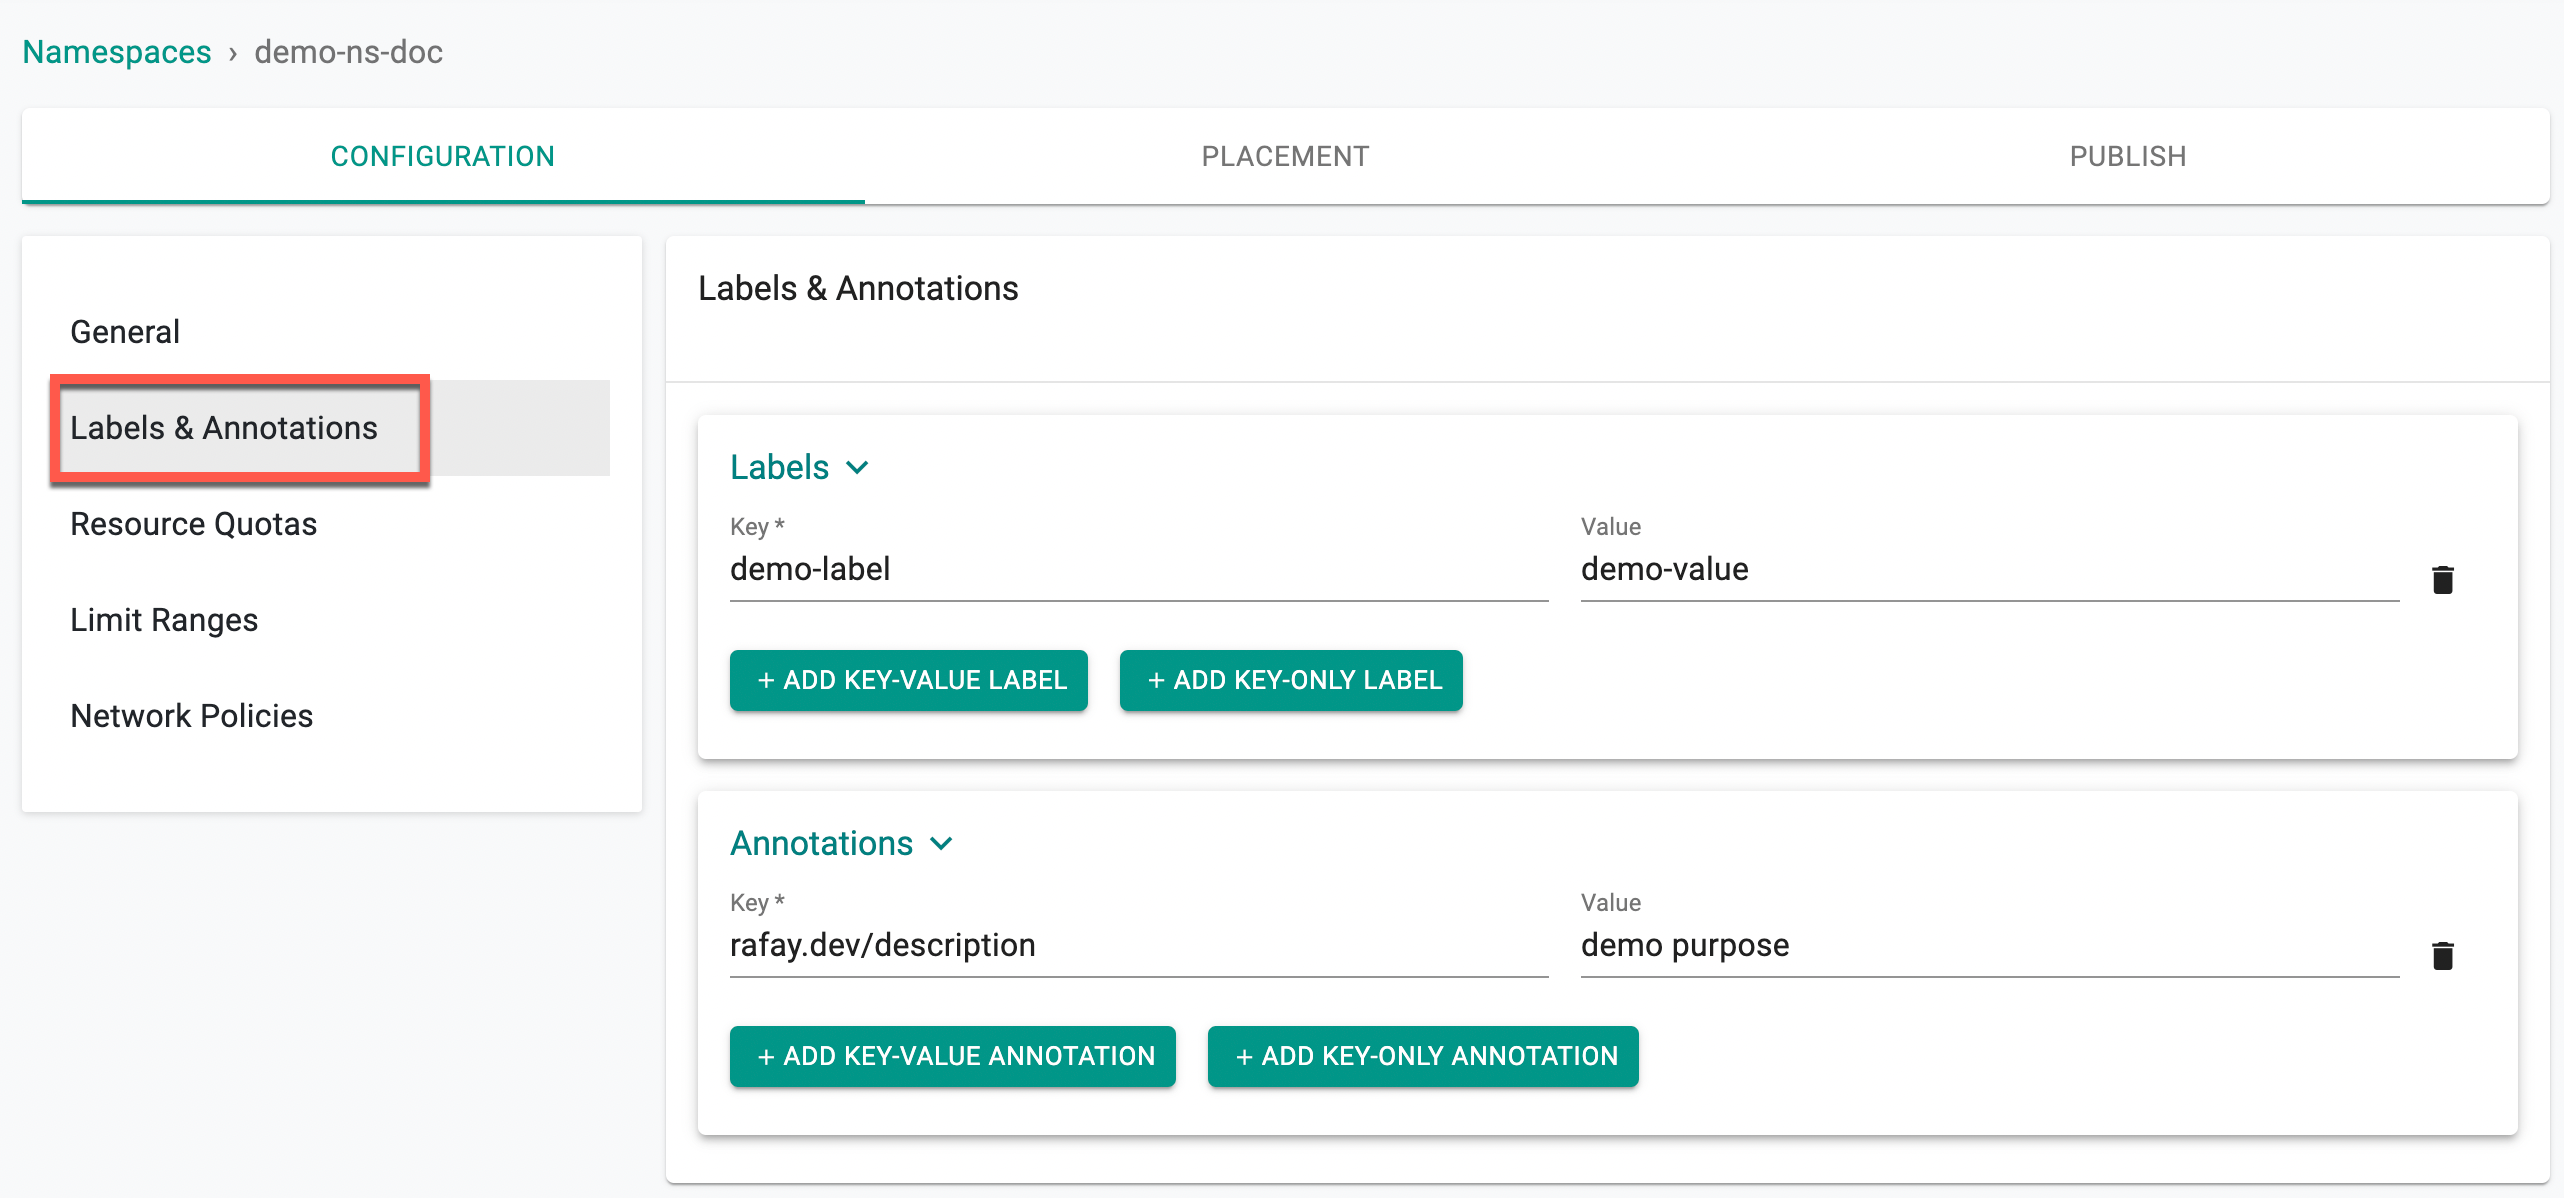
Labels & Annotations
- Add ADD KEY-VALUE LABEL and ADD KEY-ONLY LABEL to the namespace. Labels are key/value pairs that are attached to objects like pods.These labels are intended to identify attributes of namespace. Users can add multiple labels for a namespace. Also, labels can be attached and modified at any time
Important
Key-value labels can now be configured for namespaces, streamlining resource management and enhancing chargeback processes. For detailed configuration specifications, visit the Namespace Labels Configuration Page.
- Click Annotations to add ADD KEY-VALUE ANNOTATION and ADD KEY-ONLY ANNOTATION to the namespace Annotations are used to attach arbitrary non-identifying metadata to namespace. Users can add multiple annotations for a namespace. The valid annotation keys have prefix (optional) and name
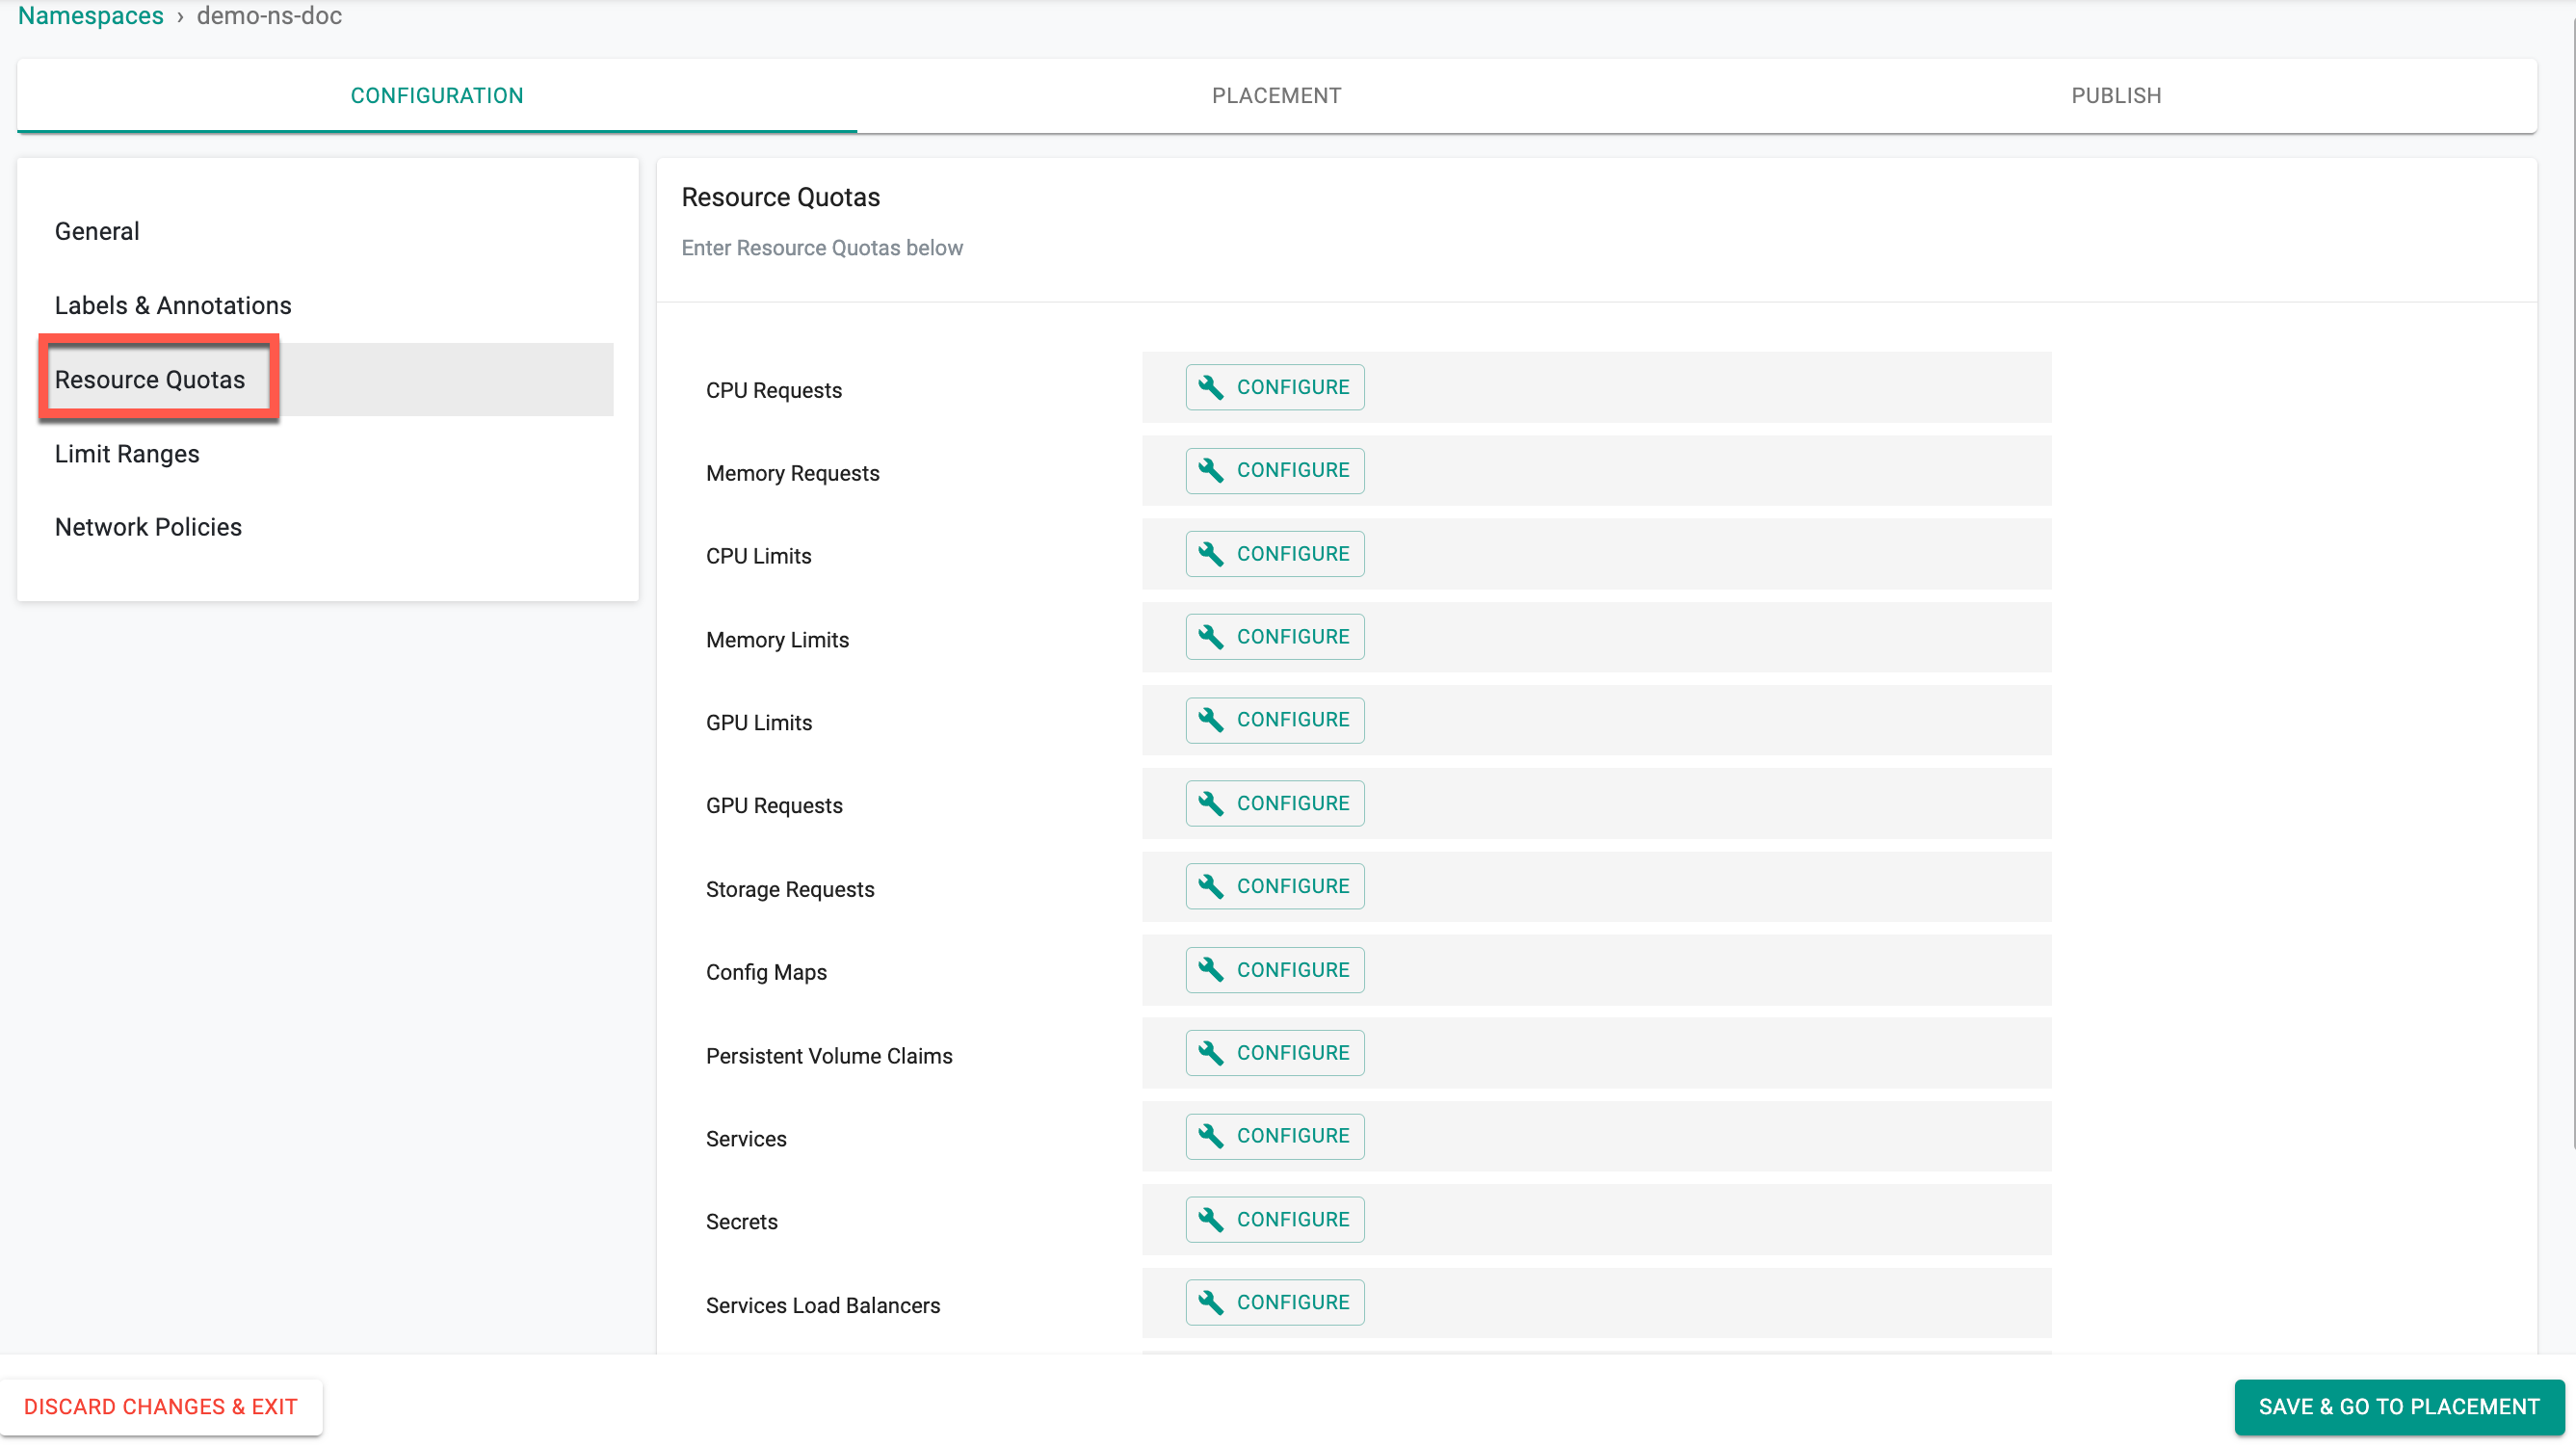
Resource Quotas (Optional)
Resource Quotas allows to enter the CPU and Memory quotas for a namespace.
- Click Resource Quotas in the Configuration page
- By default, the namespace resources quotas appears that are already set in Resources Quota page
- Click the Configure button to configure a new resource quota or edit the quota within the limit
- Limit indicates the maximum limit for the resource(s)
⚠️ Note:
To know how to configure the project namespace quota limit for one or more resources, refer to the Project Resources Quota
Limit Ranges (Optional)
The Limit Ranges enforces defaults and limits for all Pods and Containers. This entry tracks the usage to ensure it does not exceed resource minimum, maximum and ratio defined in the namespace Limit Ranges.
Limit Ranges allows to enter the Pod and Container storage details.
- Click Limit Ranges in the Configuration page
- Enter the Pod and Container Limit ranges
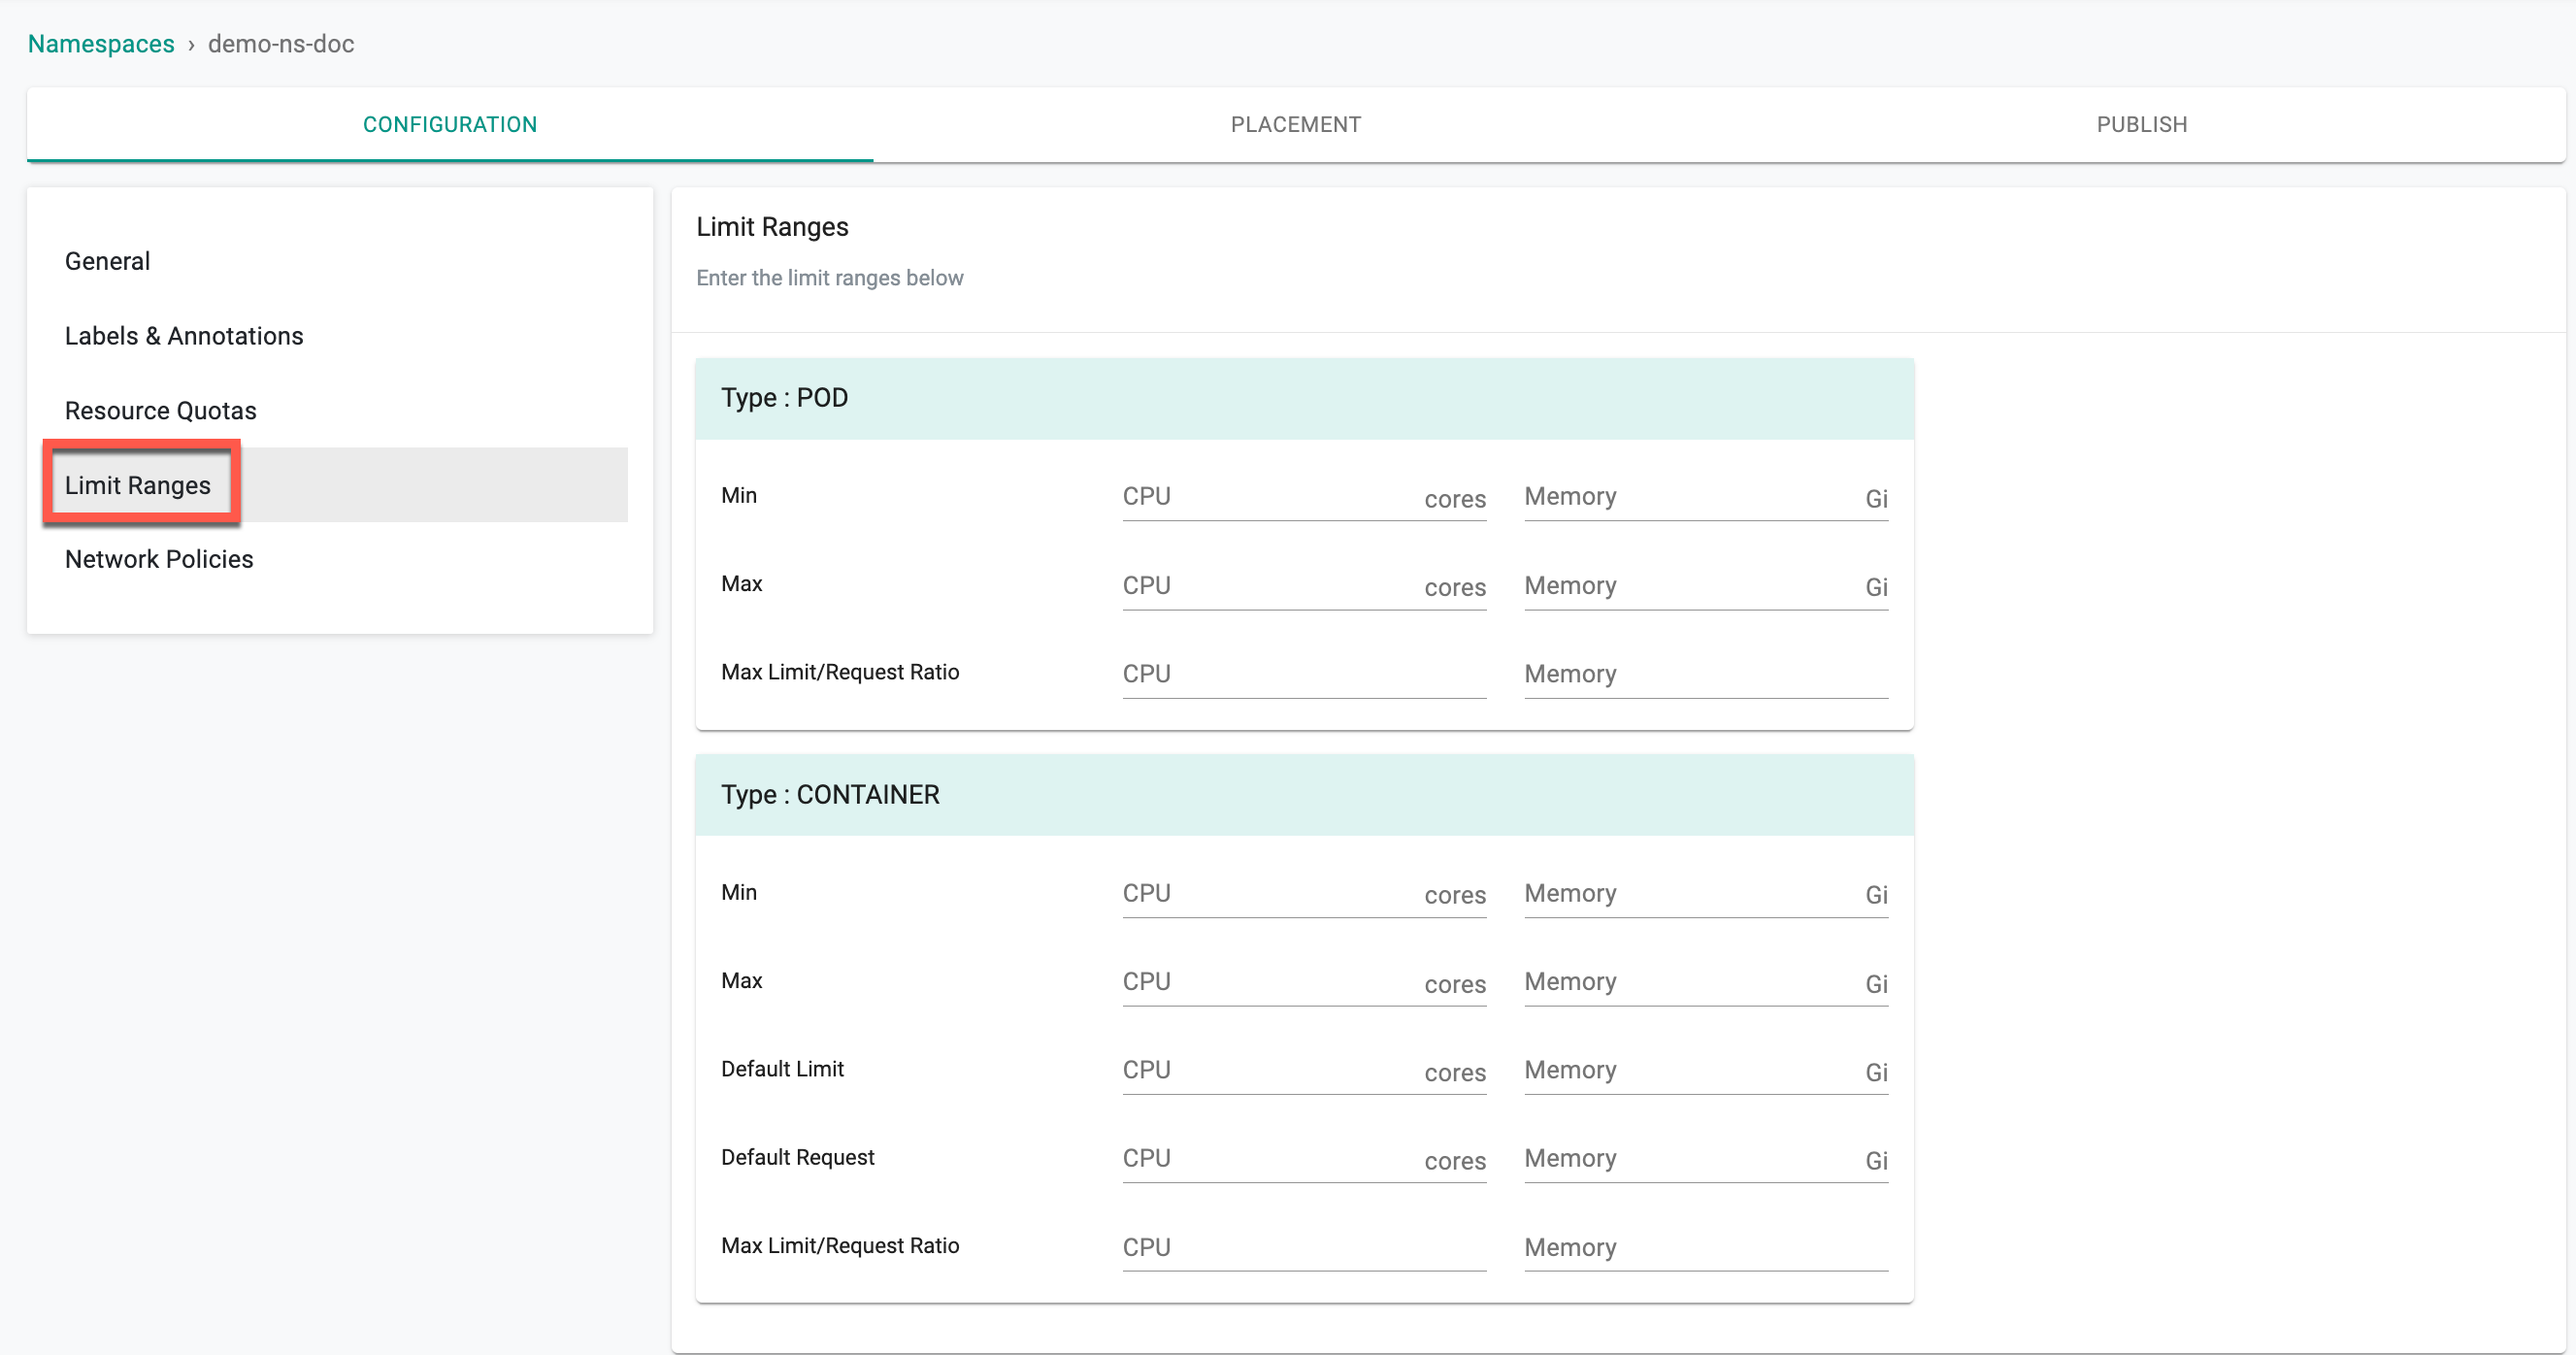
Limit Ranges validations occurs only at Pod Admission stage, not on Running Pods.
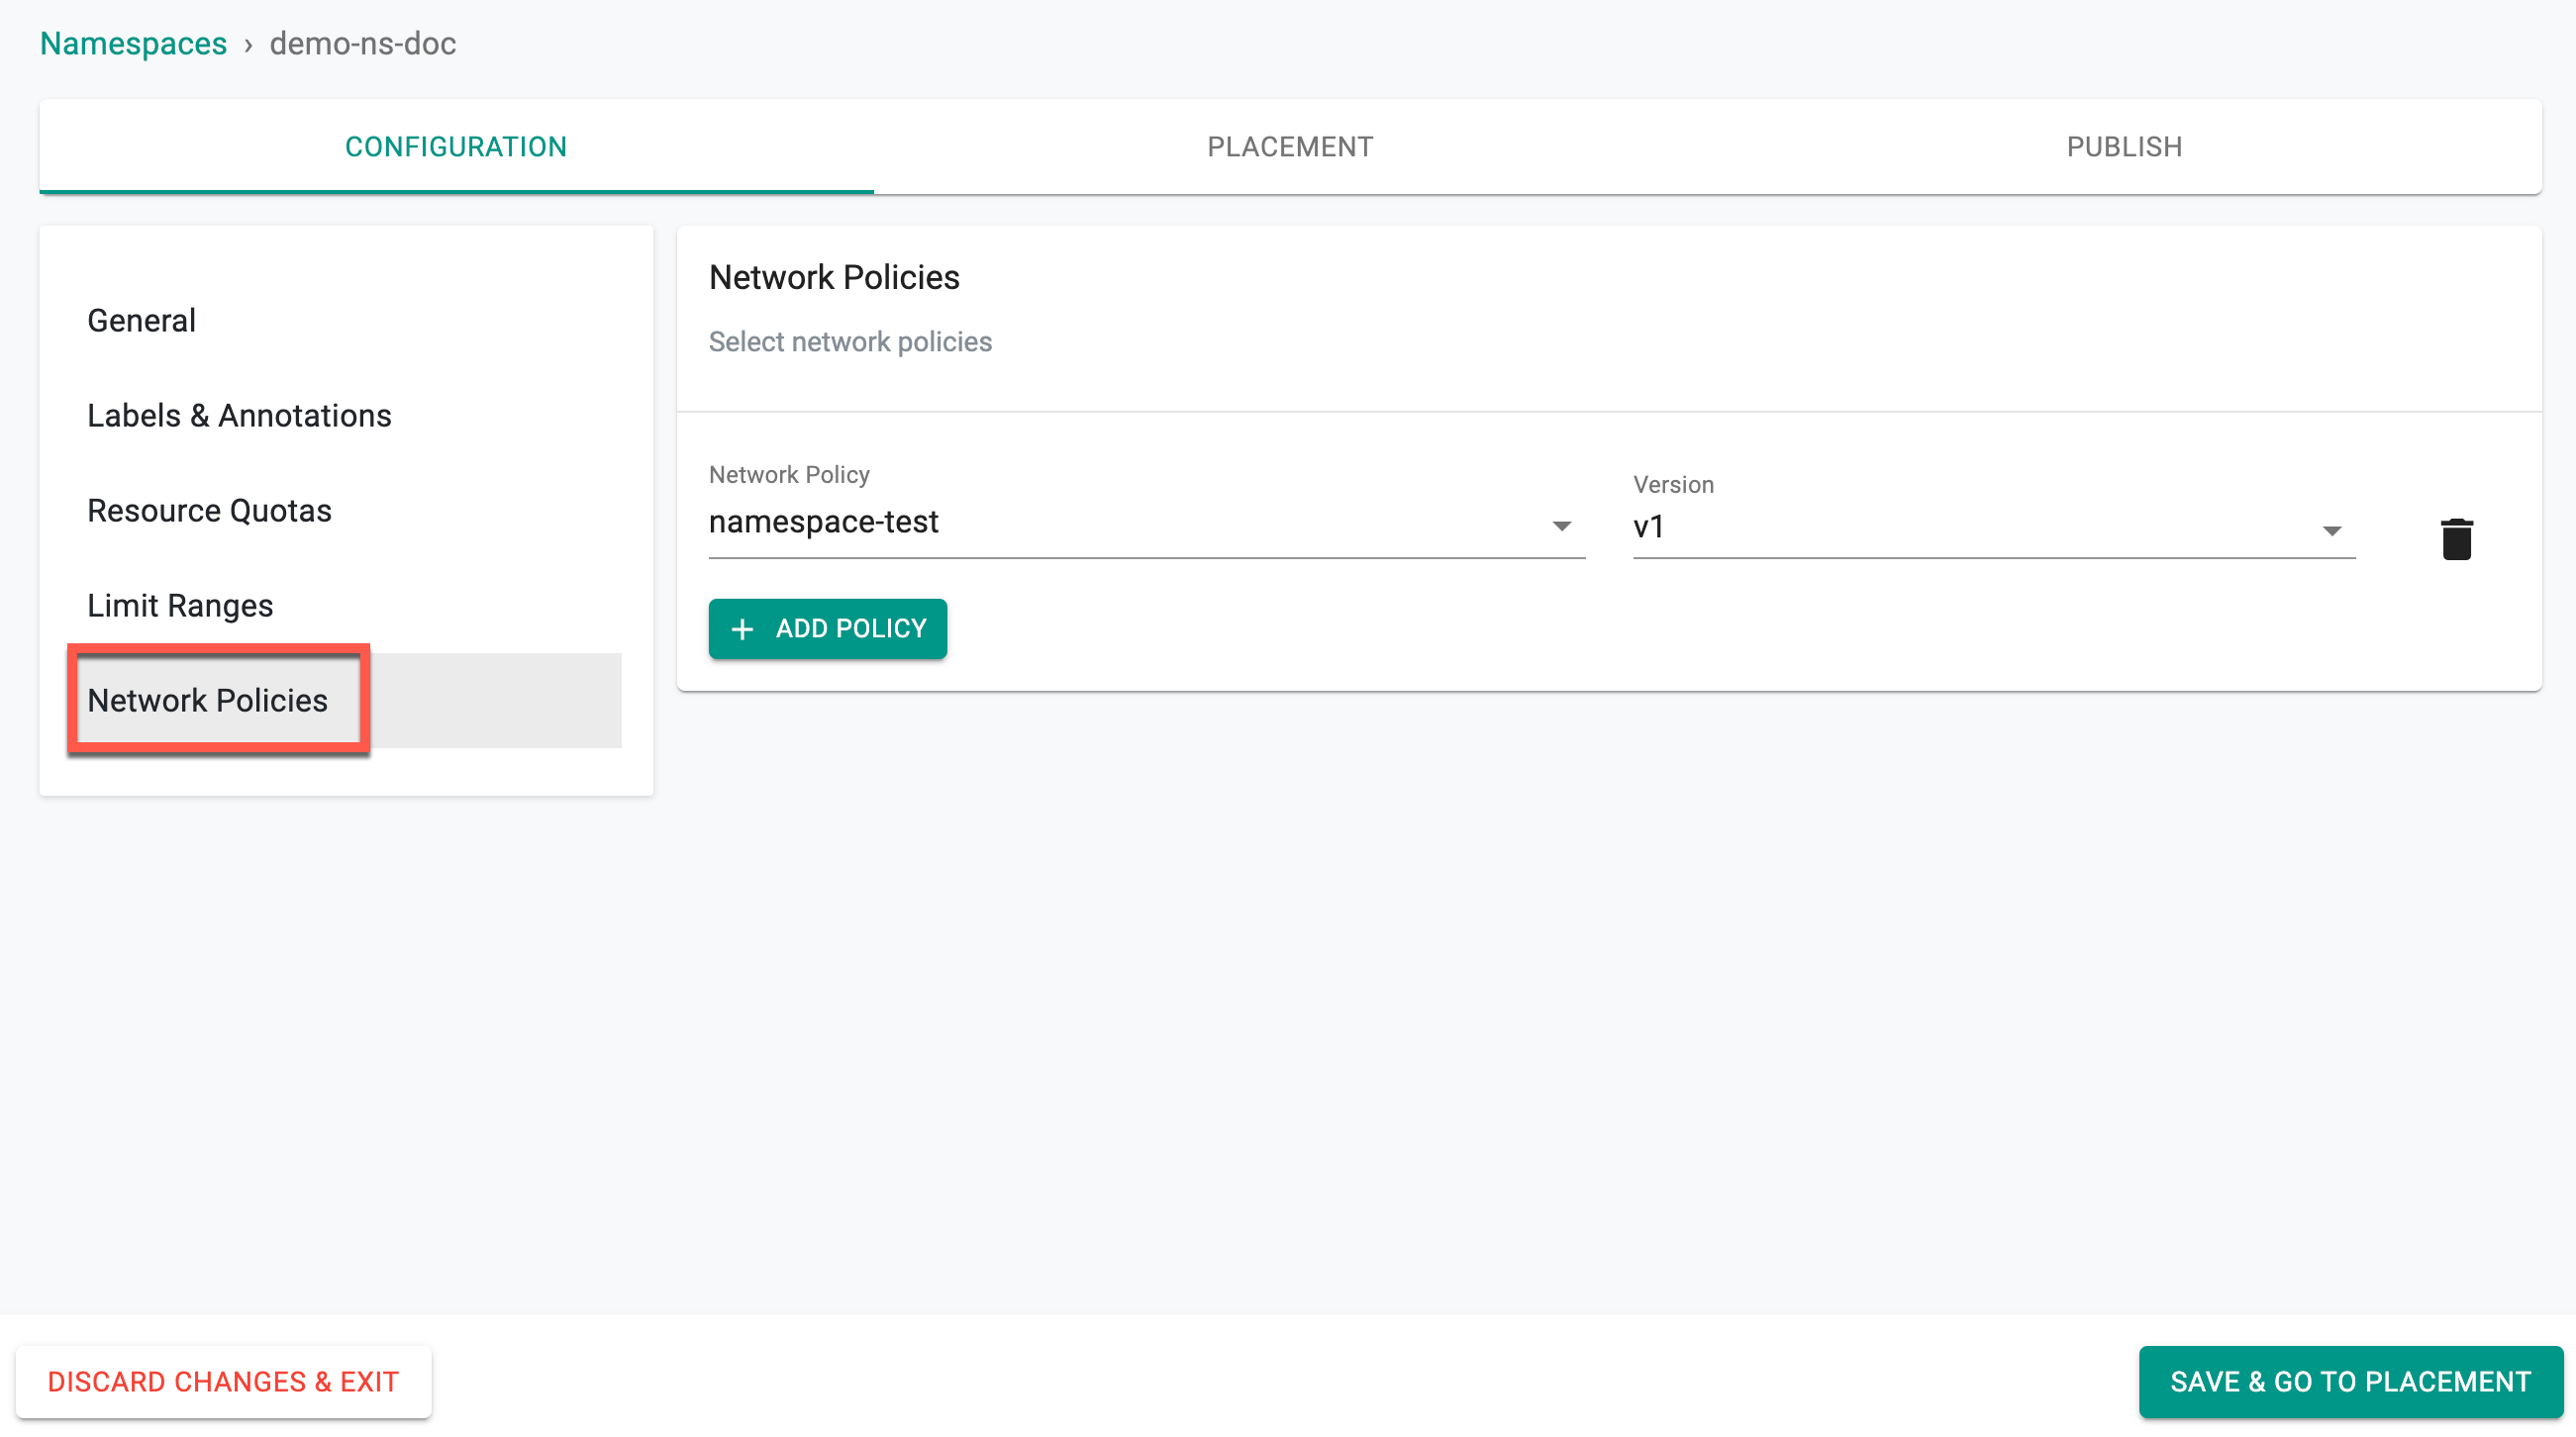
Network Policies (Optional)
The Network Policies enables users to manage network policies for a namespace by selecting and associating policies that control traffic flow between pods and external resources. Users can specify the policy version, add new policies using the + ADD POLICY button. This is essential for enforcing security rules and regulating communication within the namespace, ensuring controlled access between workloads.
Click Save & Go to Placement to continue to the Placement step.
Upload Spec
For the Upload type, configuration page allows to upload a yaml file that contains the namespace configuration details.
- Click Upload and select the yaml file.
Important
The 'name' metadata in the yaml file should match the namespace name.

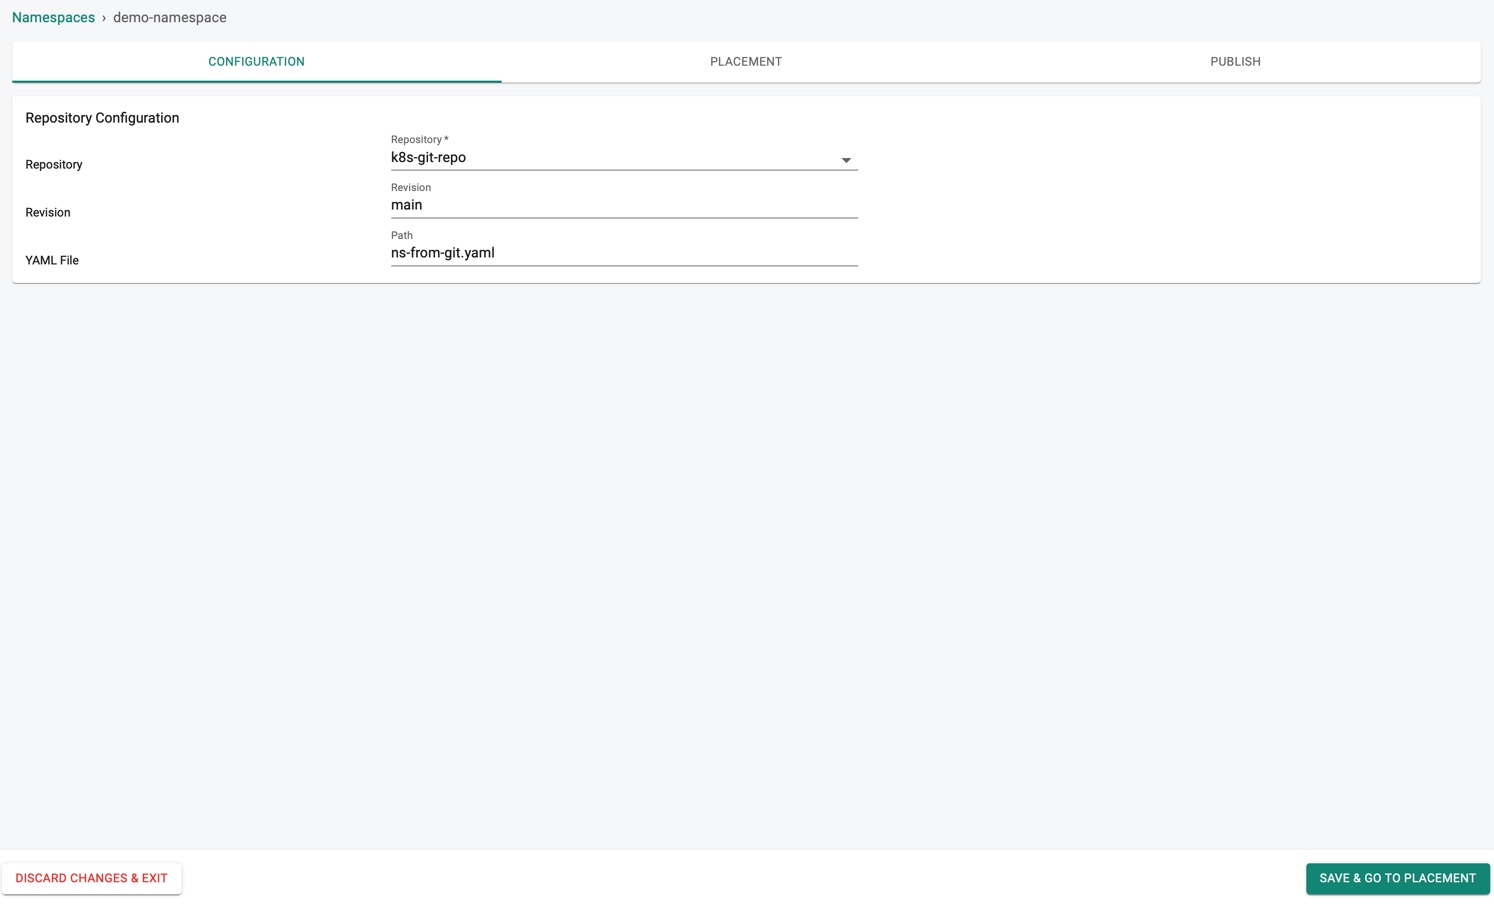
YAML in Repo
For the Repo type, configuration page allows to provide the below information.
- Enter the Repository name where the configuration details are stored, Revision and YAML File GitHub path
Important
The 'name' metadata in the yaml file should match the namespace name.
Click SAVE & GO TO PLACEMENT to proceed or DISCARD CHANGES & EXIT to abort the process
Placement
Placement in the controller is to indicate the "intent" for where/how the user wish to configure their namespace.
-
Select a Drift Action
-
NotSet: Allow anyone to perform actions on the target clusters without restrictions
- DetectAndNotify: Allow the authorised users to perform actions on the target clusters, detect the actions and notify through alerts
-
BlockAndNotify: Restrict the users to perform any actions on the target clusters for security purpose. Blocked notifications are sent through alerts.
-
Select a Placement Policy type
- Specific Locations: Allows to select the clusters within a specific region or location
- Specific Clusters: Allows to select a specific cluster
- Custom Labels: Allows to select the clusters available with specific labels
In the example below, NotSet and Specific Clusters are selected.
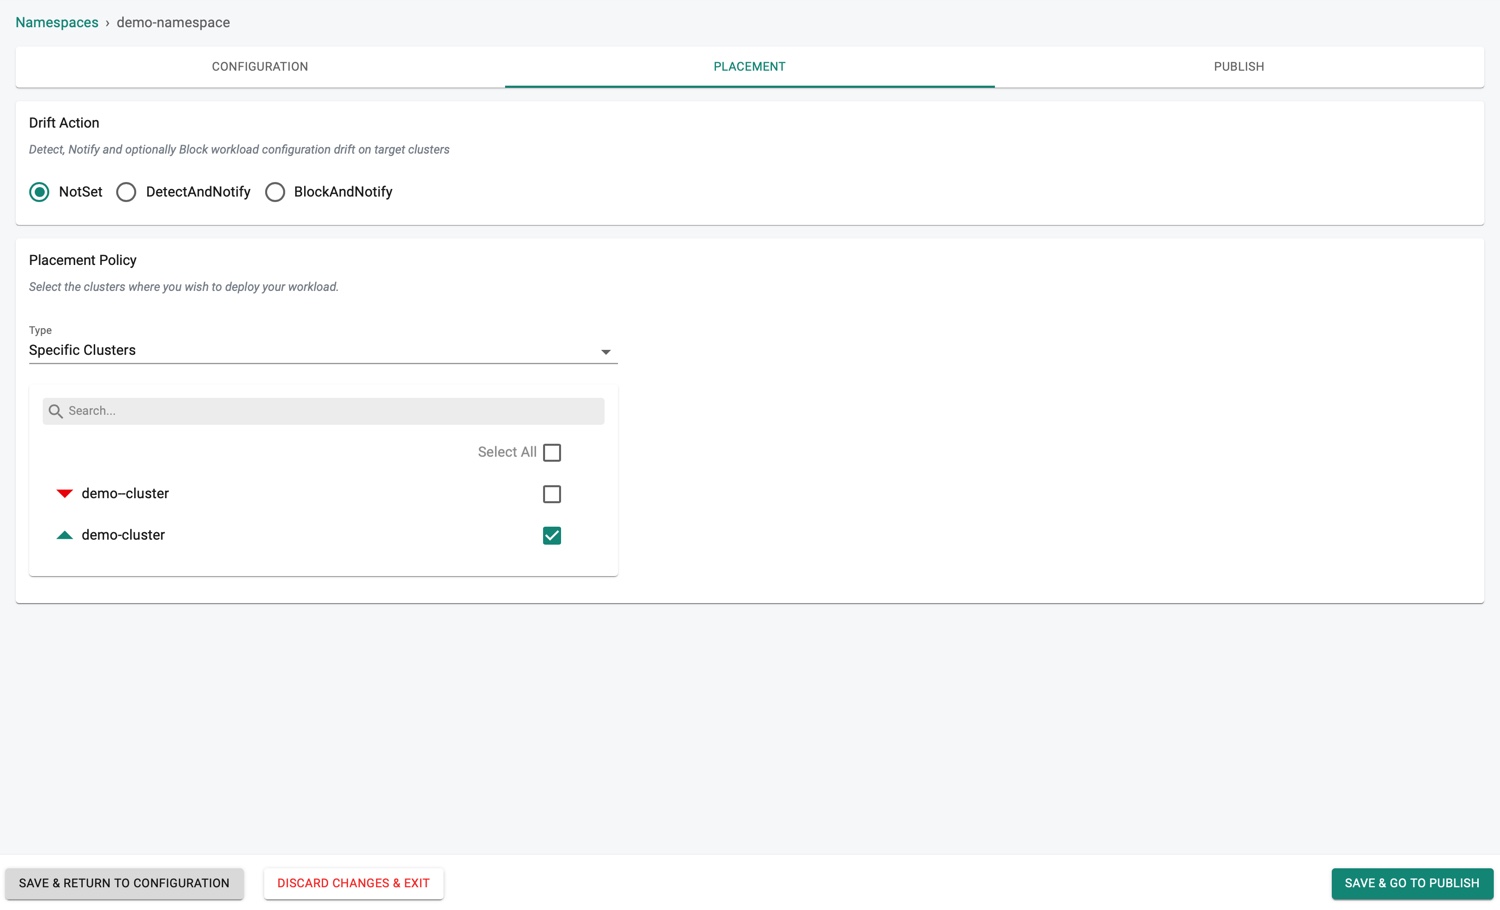
- Click SAVE & GO TO PUBLISH to save and publish the namespace
Click SAVE & RETURN TO CONFIGURATION to save the placement data and return to configuration section if any modifications required (or) DISCARD CHANGES & EXIT to abort the process.
For more information, refer placement policy
Publish
Namespace is now ready to publish. Click Publish to start the deployment process.
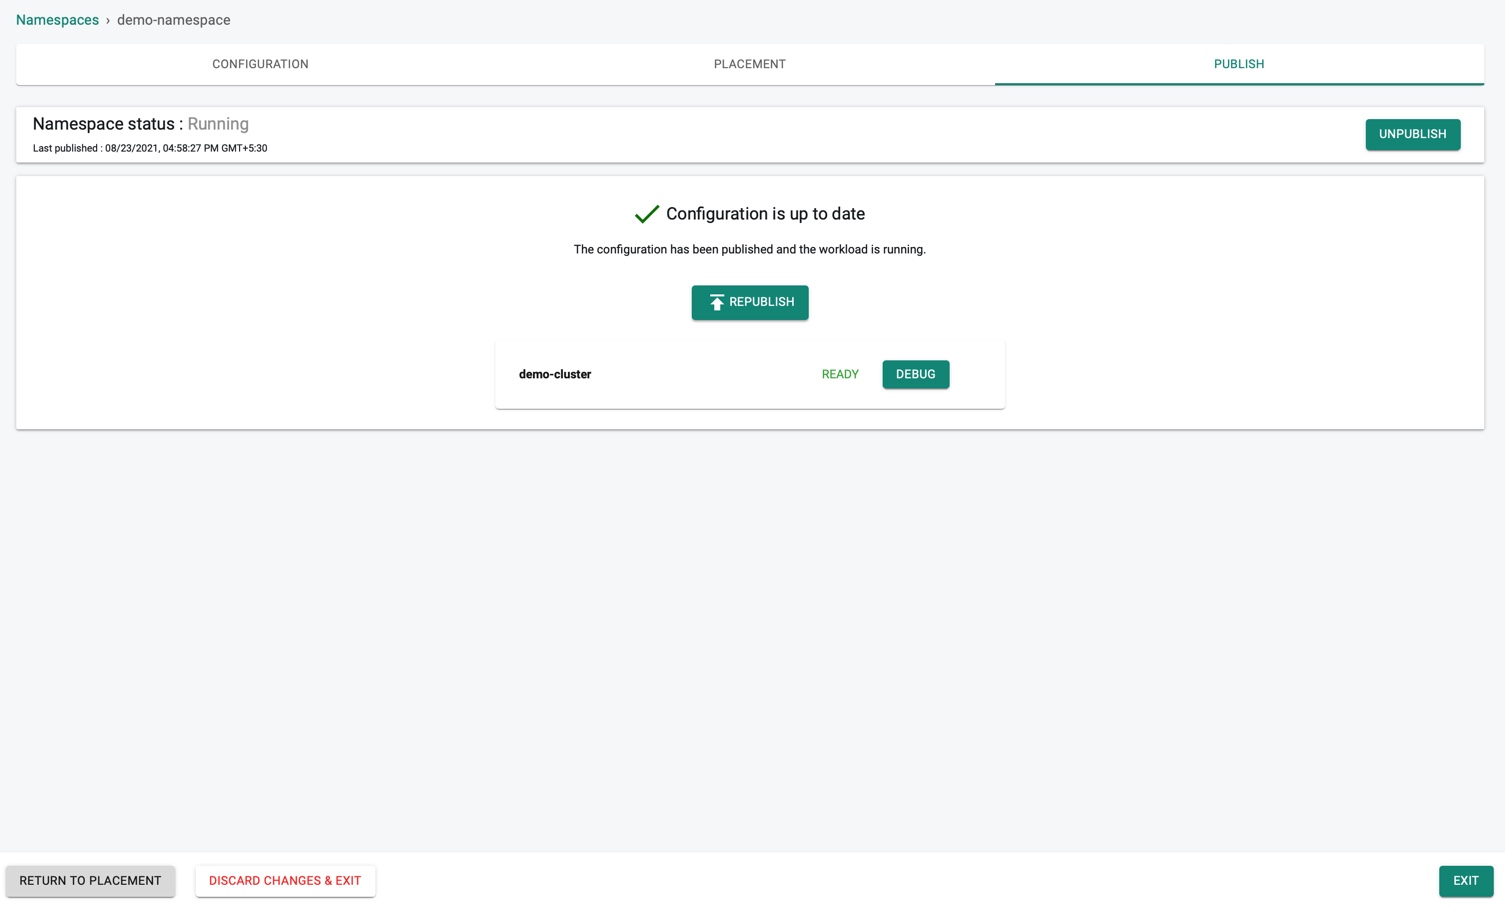
Click RETURN TO PLACEMENT to return to the placement and perform the required modifications (or) DISCARD CHANGES & EXIT to abort the process and exit the configuration page.
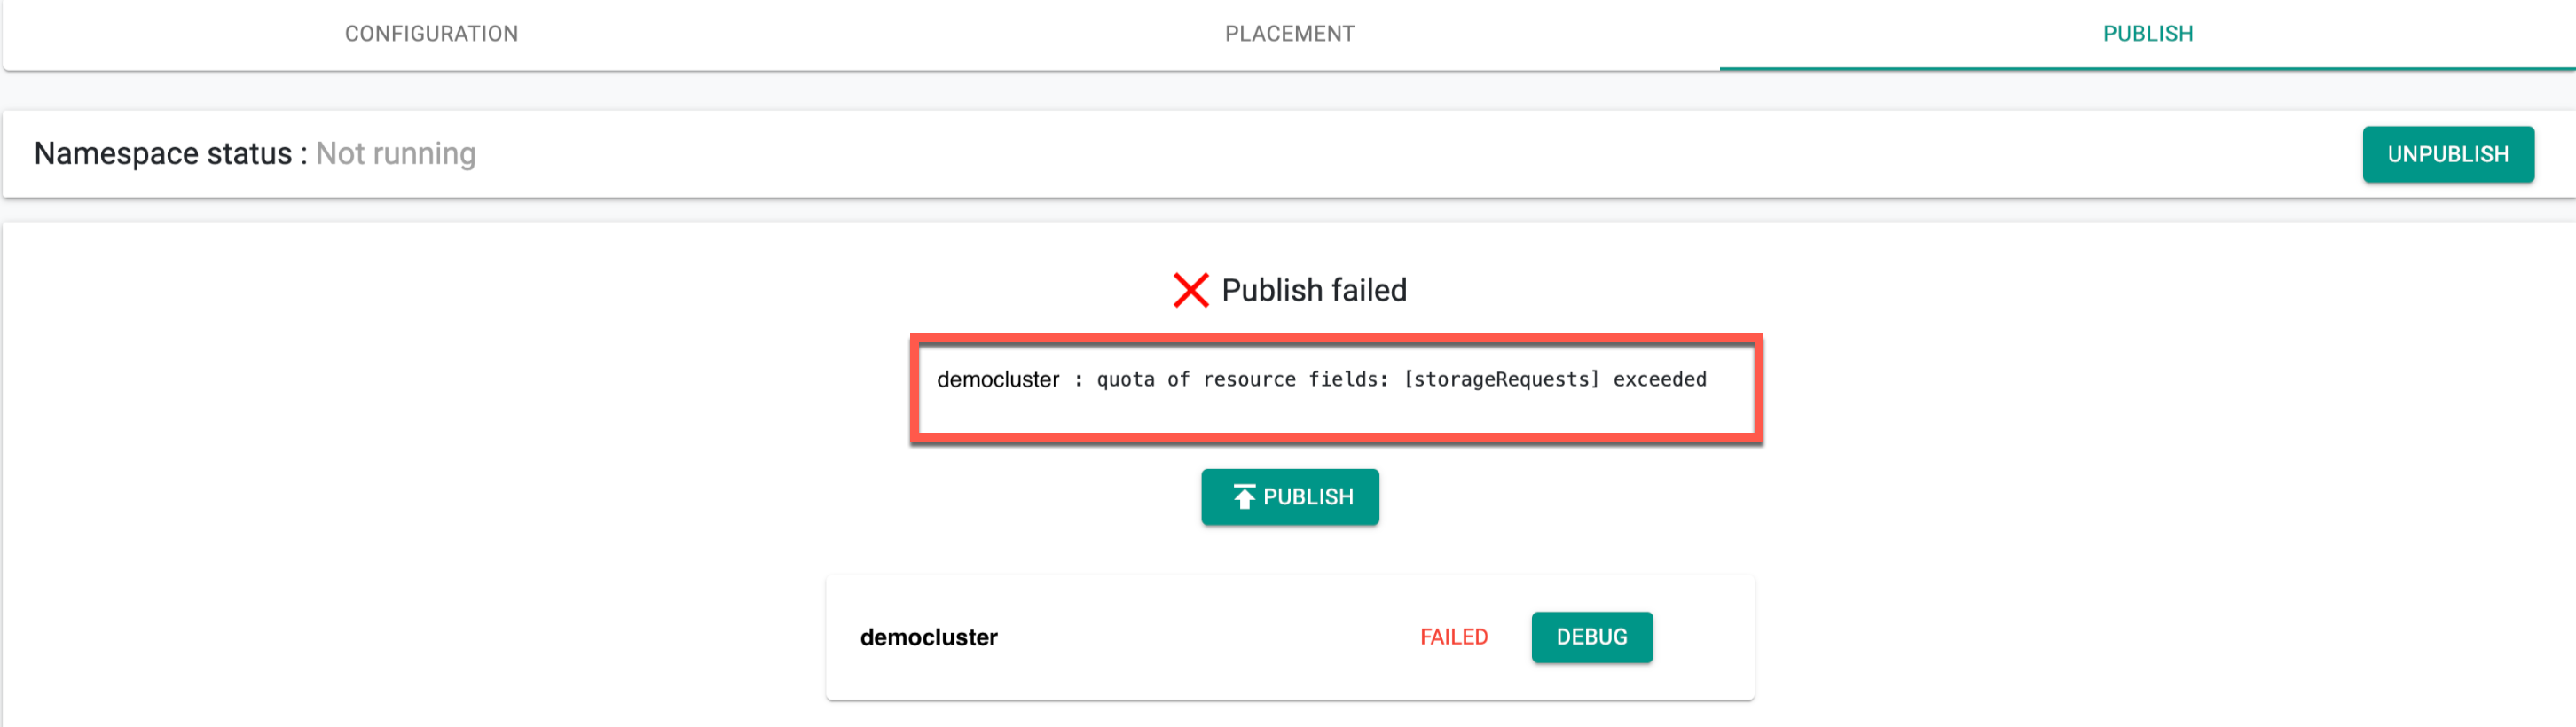
Failed Scenario
When attempting to publish a namespace, the following scenarios may cause the operation to fail:
When updating the namespace resource quota, users can enter custom values regardless of the Project Settings Resource Quota. Validation occurs only when the namespace is published and the project-level resource quota is configured. If the quota for any resource is exhausted at the time of publishing, an error is reported, and the namespace publish operation fails. The error message specifies which resources have exceeded their quota.
Assume the Storage Request Limit is set to 2Gi in the Project settings page and the Storage Request resource quota is set to 10Gi. An error message appears as shown in the below example.
Debugging/Troubleshooting
If there are any issues during deployment, both the application developer and/or the operations user will require RBAC secure facilities to remotely debug.
- Navigate to the Namespace publish screen
- Click Debug to view the deployed Namespace, Age (time in minutes since the deployment is complete), Message, Reason, Type, Involved Object, Source, and Count
- Use the gear icon to show/hide the required columns
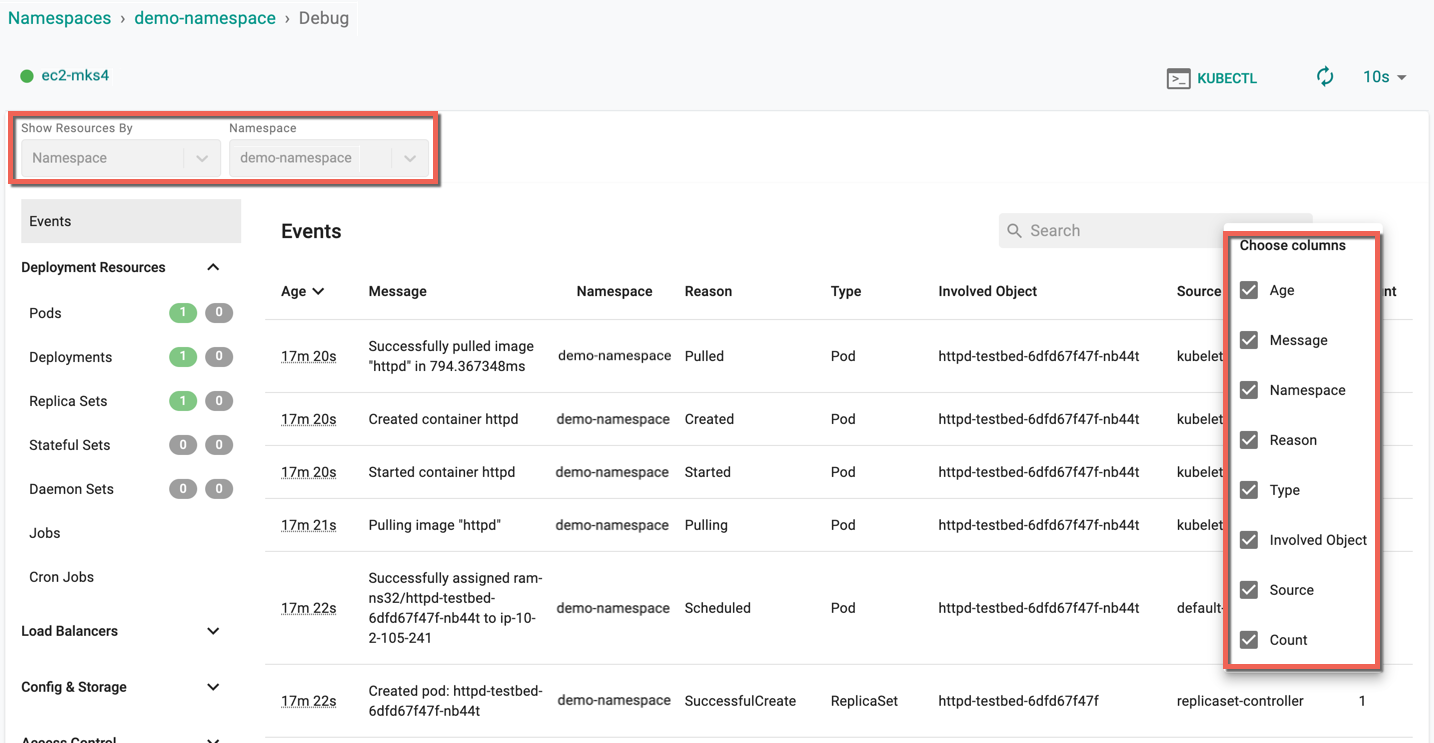
For more information on Debug, refer Debug
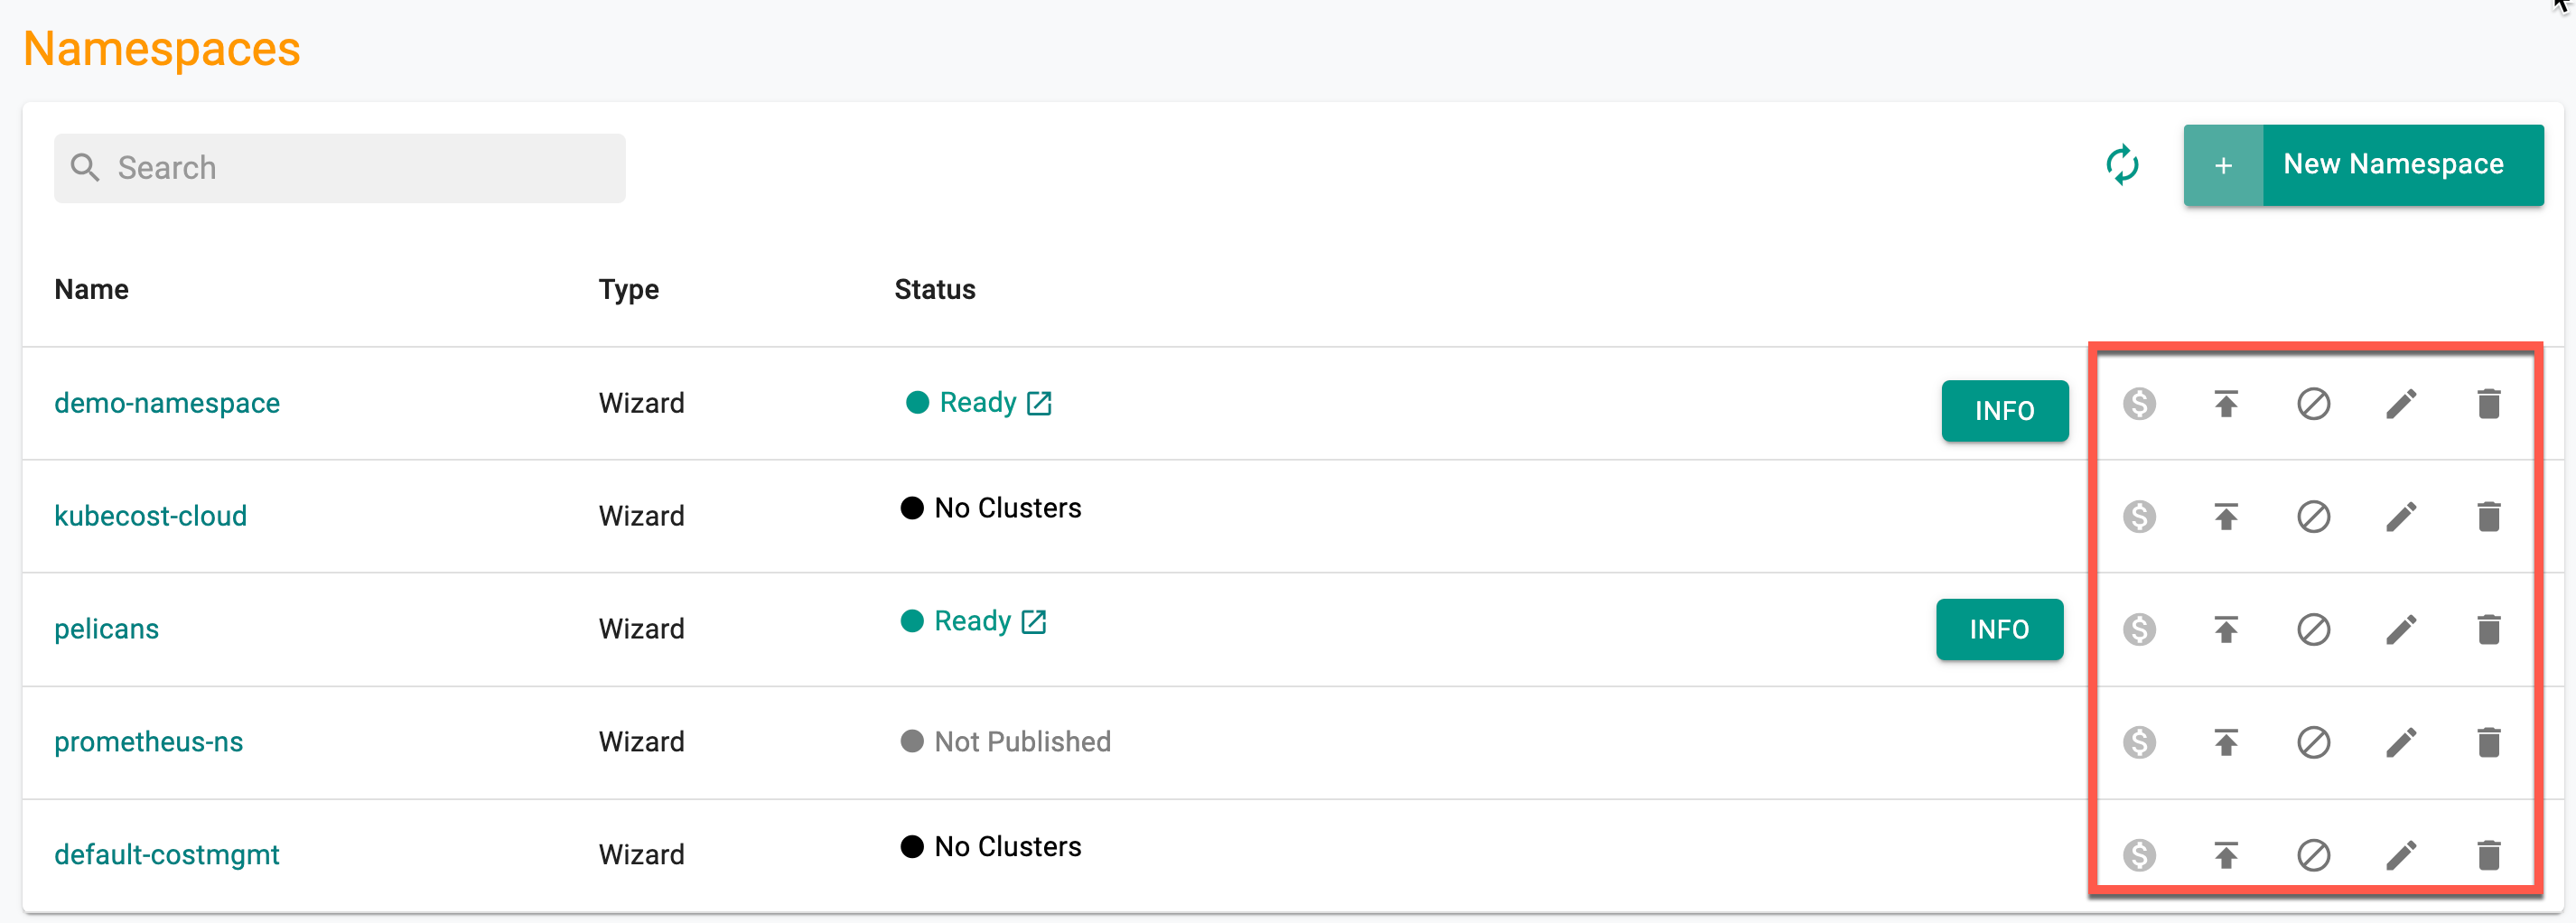
Actions
To view the cost details of this namespace, click on the $ icon. This will navigate you to the Cost Explorer page, where you can access detailed cost information for this specific namespace.
Users can publish/unpublish, edit or delete one (or) more namespace(s) from the main namespace list page. Follow the prompts to delete the namespace.
Important
The namespaces added to the exclusion list will not be displayed here. Only the namespaces synchronized with clusters and not added to the exclusion list will be listed on this namespace dashboard
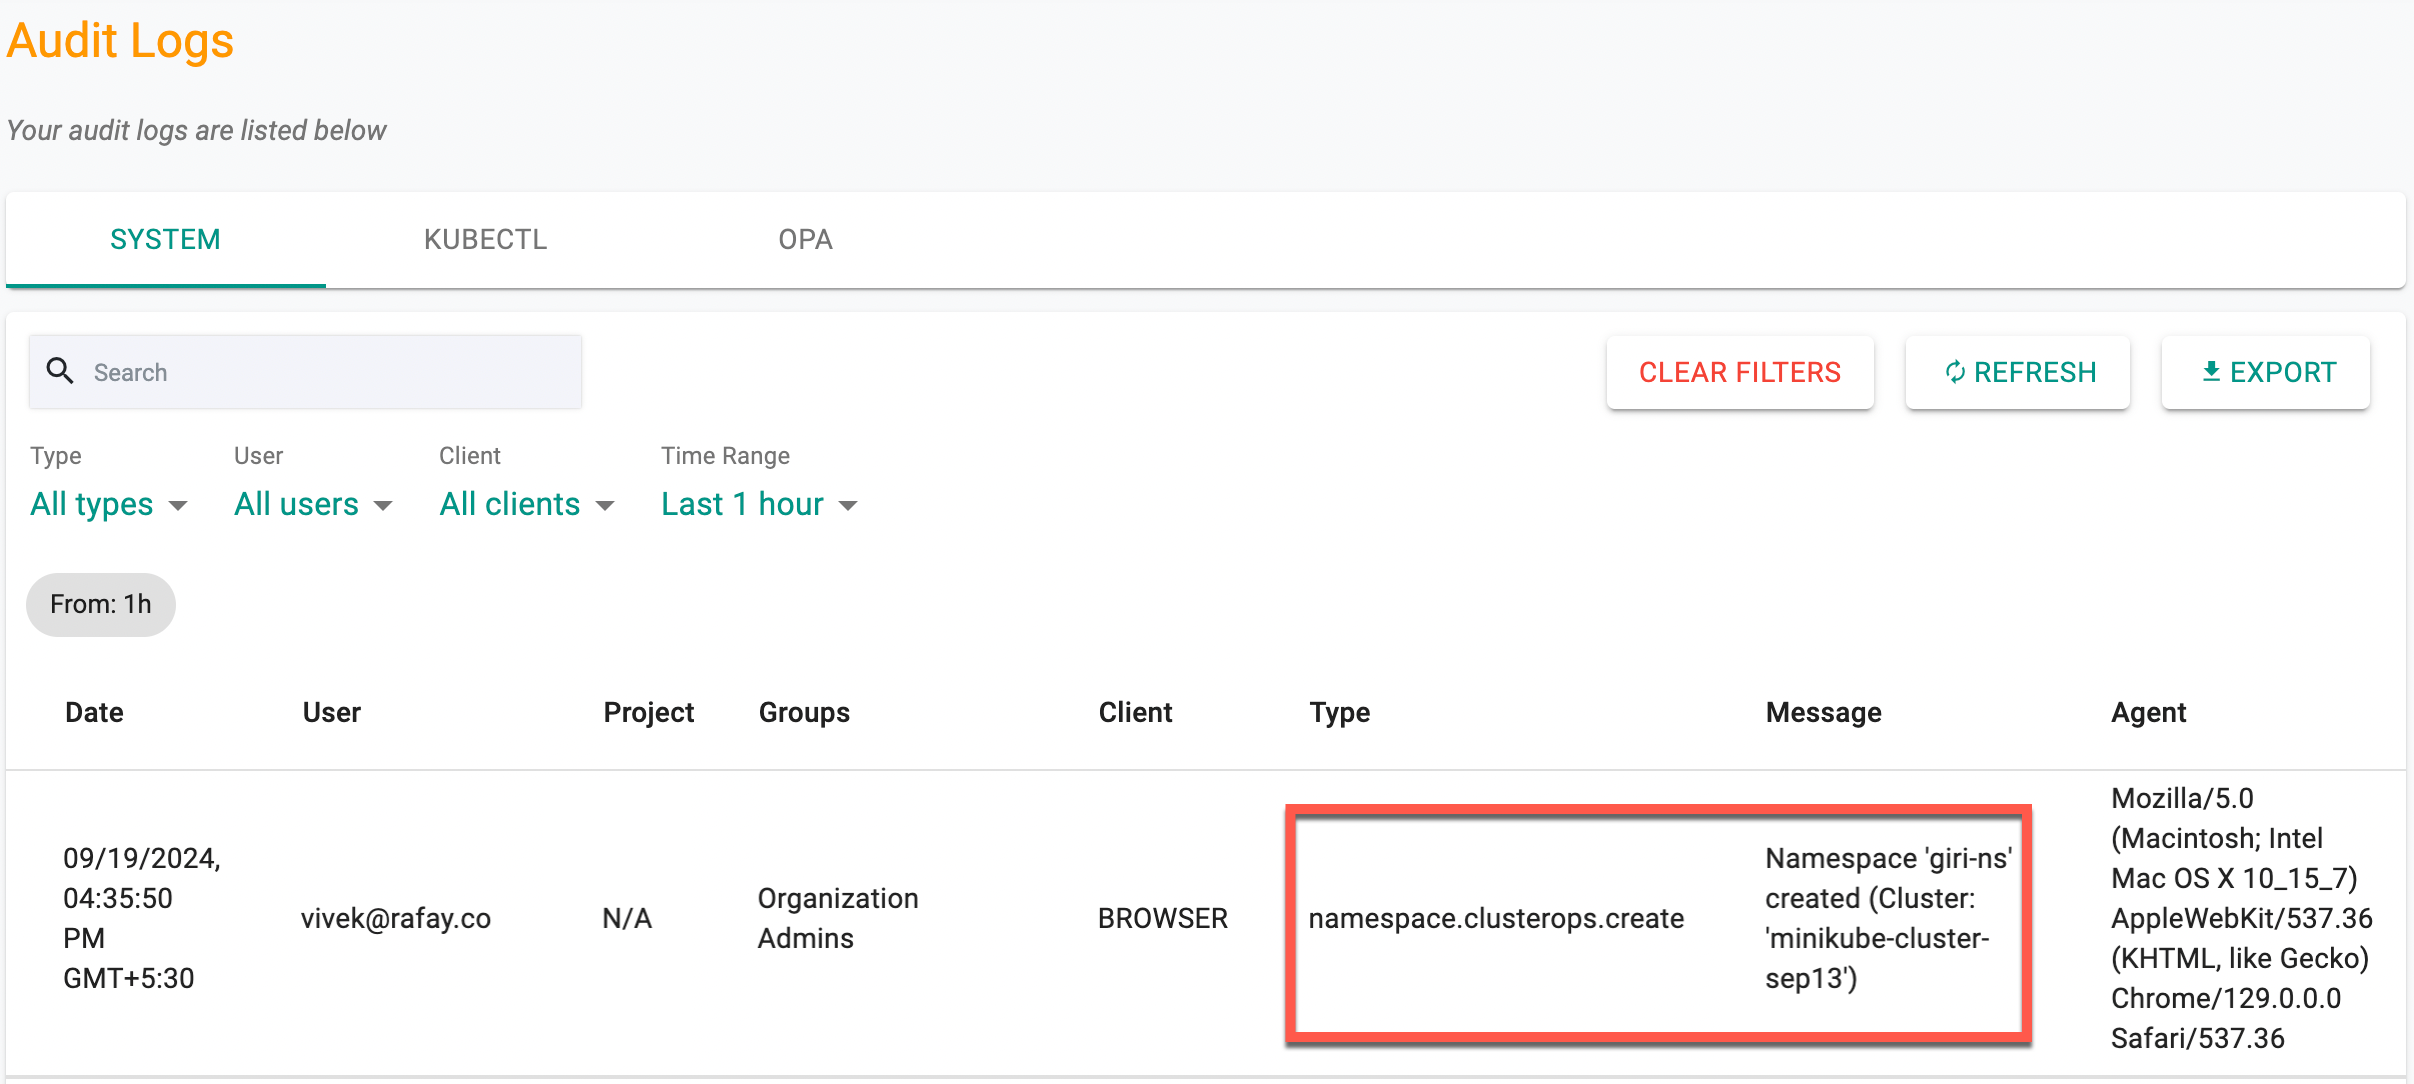
Audit Logs
- Namespace creation and deletion operations are tracked and available in the Audit Logs for all namespaces created implicitly or explicitly through the controller.
- When namespace sync is disabled during Blueprint creation, a namespace may still be created implicitly during workload or addon creation, and this operation is tracked in the Audit Logs. The deletion of such namespaces is also recorded in the audit log.
The following is an example of a namespace creation log: