Configure
In this section, you will create a standardized cluster blueprint with the k8sgpt add-on. You can then reuse this blueprint with all your clusters.
Step 1: Create Namespace
In this step, you will create a namespace for the K8sGPT Operator.
- Navigate to a project in your Org
- Select Infrastructure -> Namespaces
- Click New Namespace
- Enter the name kube-system
- Select wizard for the type
- Click Save
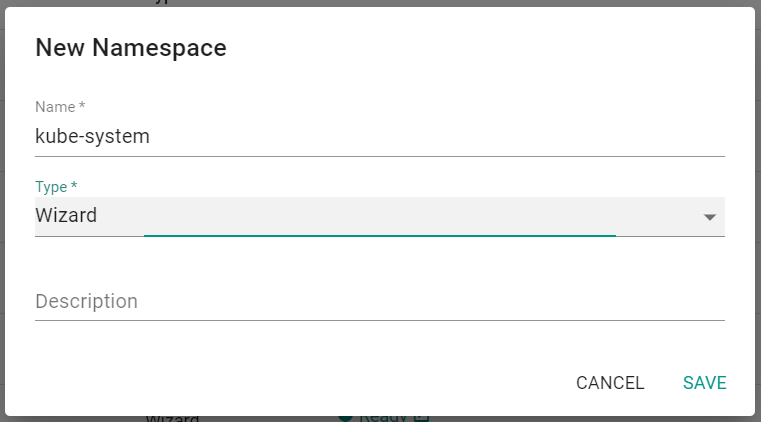
- Click Discard Changes & Exit
Note
The k8sgpt operator prefers to be deployed into the "kube-system" namespace. This namespace is a privileged namespace on Kubernetes clusters.
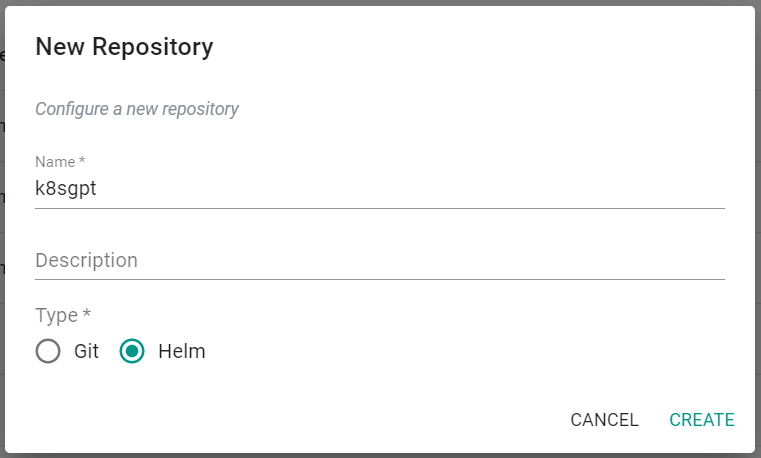
Step 2: Create Repository
In this step, you will create a repository in your project so that the controller can retrieve the K8sGPT Operator Helm chart automatically. This allows you to update the add-on to new versions of the K8sGPT operator as and when they are made available.
- Select Integrations -> Repositories
- Click New Repository
- Enter the name k8sgpt
- Select Helm for the type
- Click Create
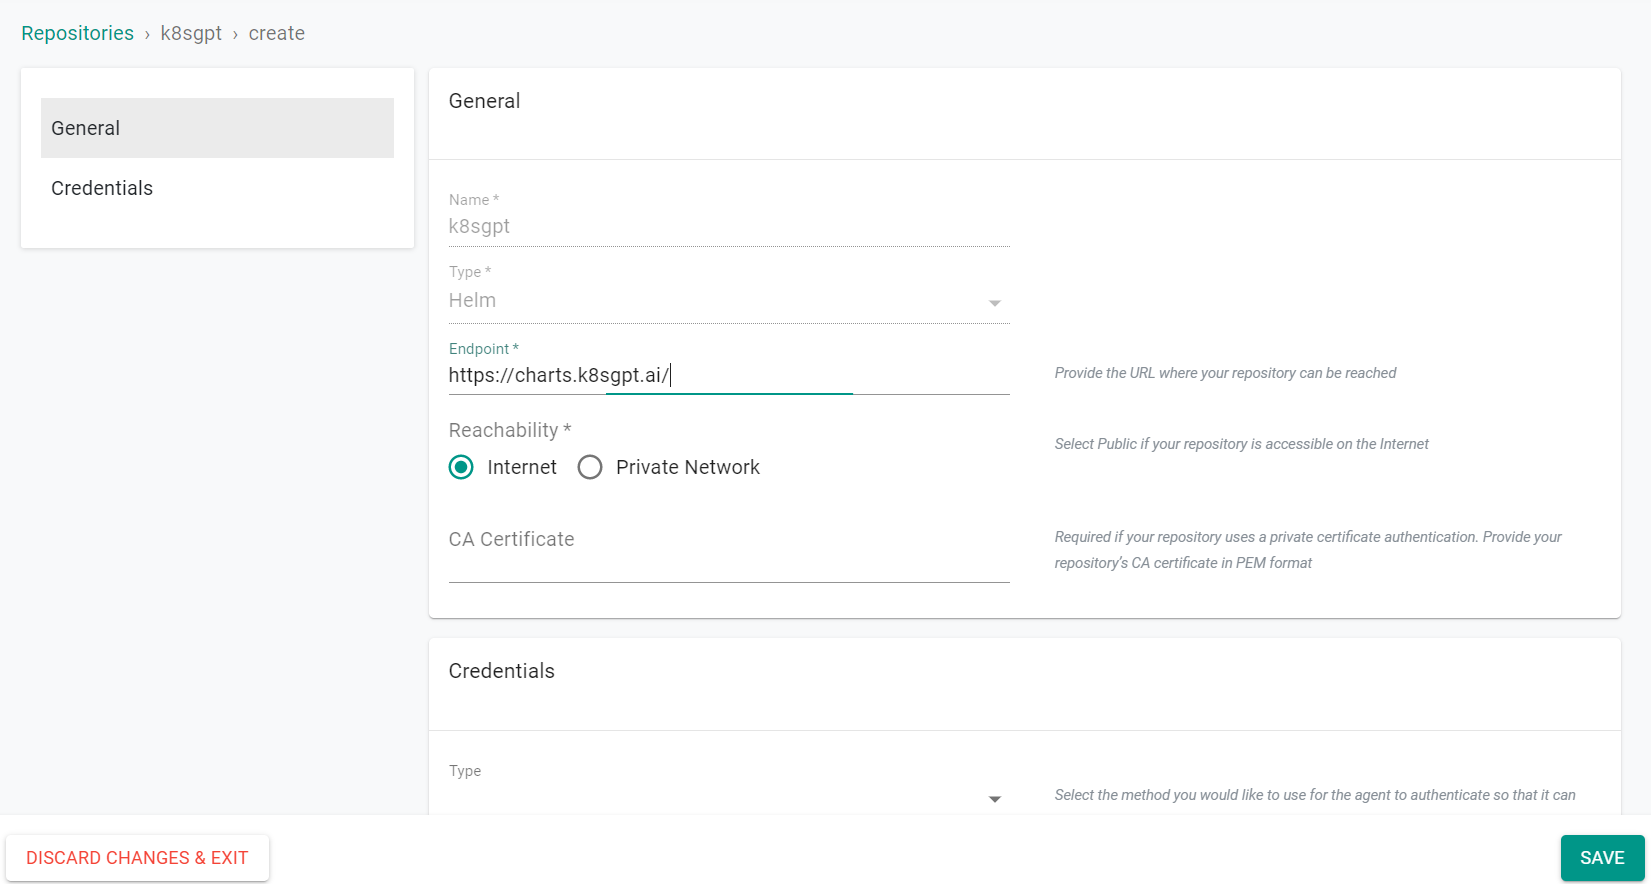
- Enter https://charts.k8sgpt.ai/ for the endpoint
- Click Save
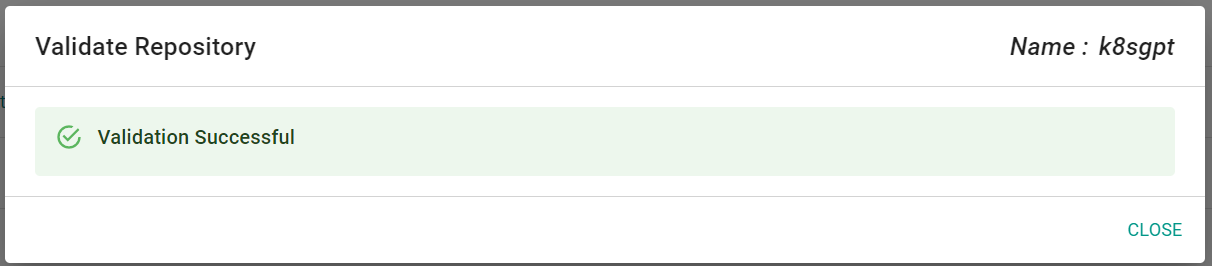
Optionally, you can click on the validate button on the repo to confirm connectivity.
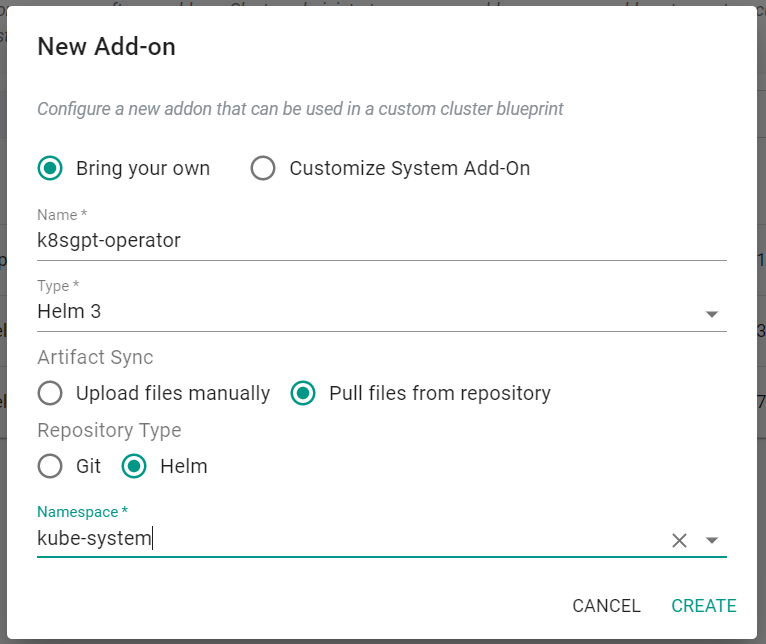
Step 3: Create K8sGPT Operator Addon
In this step, you will create a custom add-on for the K8sGPT Operator that will pull the Helm chart from the previously created repository. This add-on will be added to a custom cluster blueprint in a later step.
- Select Infrastructure -> Add-Ons
- Click New Add-On -> Create New Add-On
- Enter the name k8sgpt-operator
- Select Helm 3 for the type
- Select Pull files from repository
- Select Helm for the repository type
- Select kube-system for the namespace
- Click Create
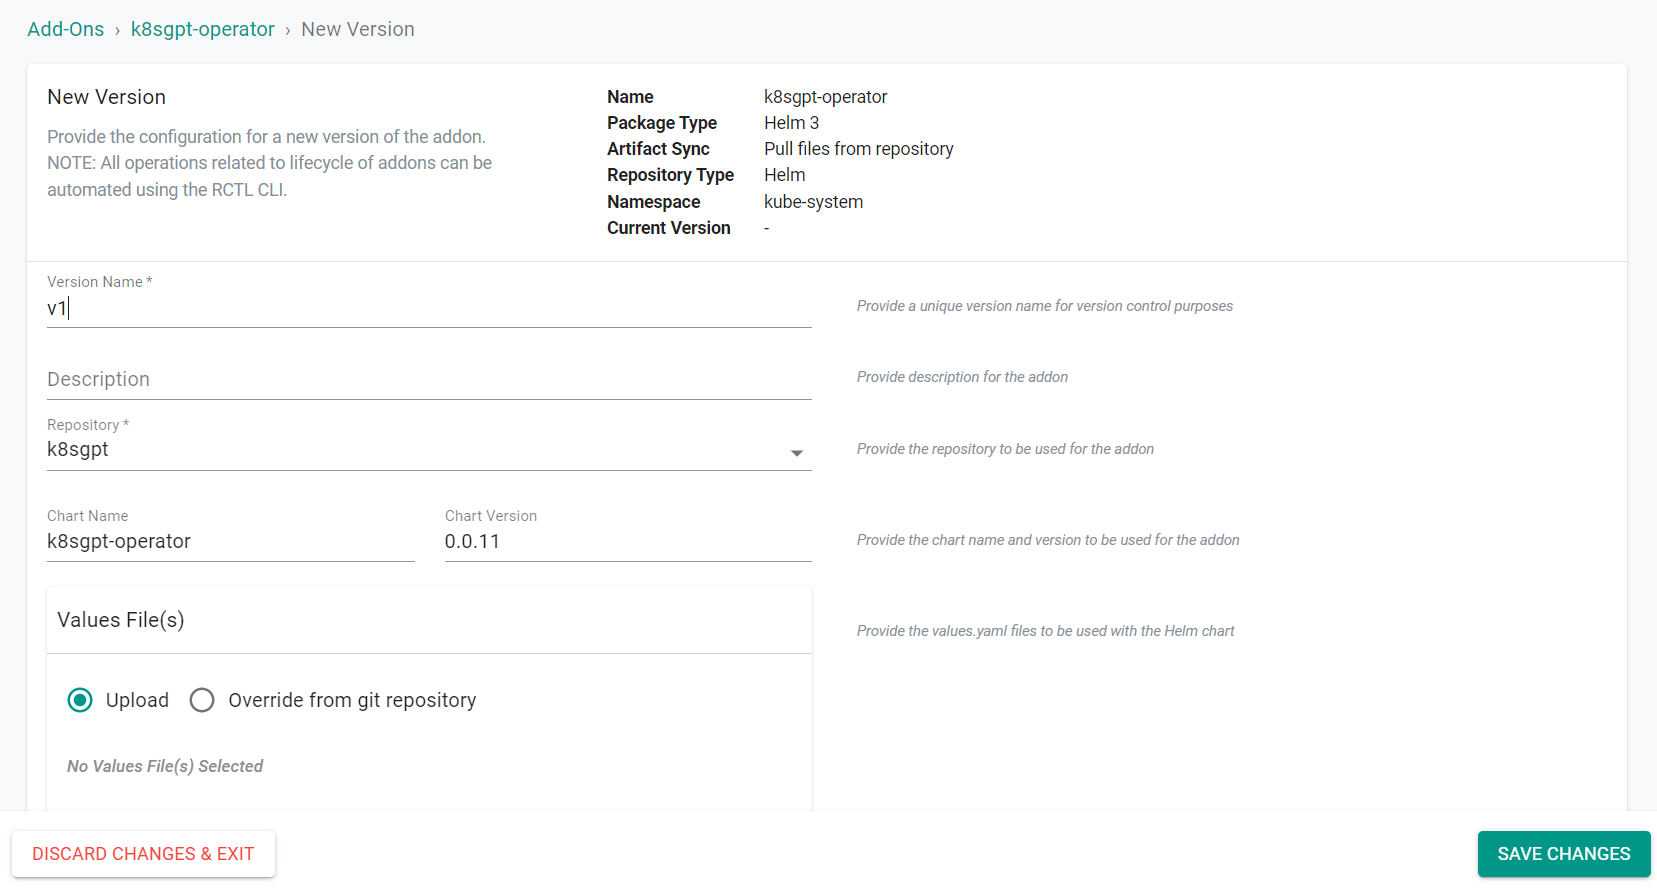
- Click New Version
- Enter a version name
- Select the previously created repository
- Enter k8sgpt-operator for the chart name
- Enter 0.0.11 for the chart version
- Click Save Changes
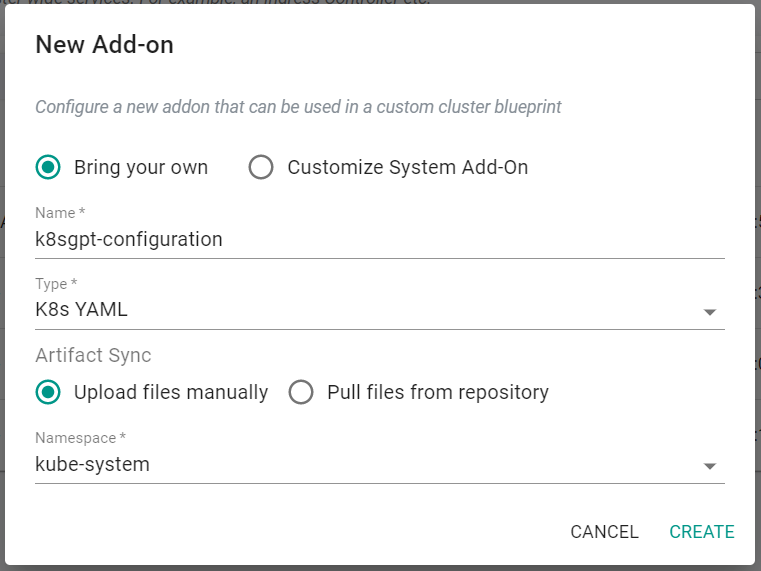
Step 4: Create K8sGPT Configuration Addon
In this step, you will create a custom add-on for the K8sGPT configuration. This add-on will be added to a custom cluster blueprint in a later step.
Note
This configuration contains setting such as the ML model type, whether you are using OpenAI or a local LLM etc.
- Save the below YAML to a file named k8sgpt-config.yaml
apiVersion: core.k8sgpt.ai/v1alpha1
kind: K8sGPT
metadata:
  name: k8sgpt-sample
  namespace: kube-system
spec:
  model: gpt-3.5-turbo
  backend: openai
  noCache: false
  version: v0.3.0
  enableAI: true
  secret:
    name: k8sgpt-sample-secret
    key: openai-api-key
- Select Infrastructure -> Add-Ons
- Click New Add-On -> Create New Add-On
- Enter the name k8sgpt-configuration
- Select K8s YAML for the type
- Select Upload files manually
- Select kube-system for the namespace
- Click Create
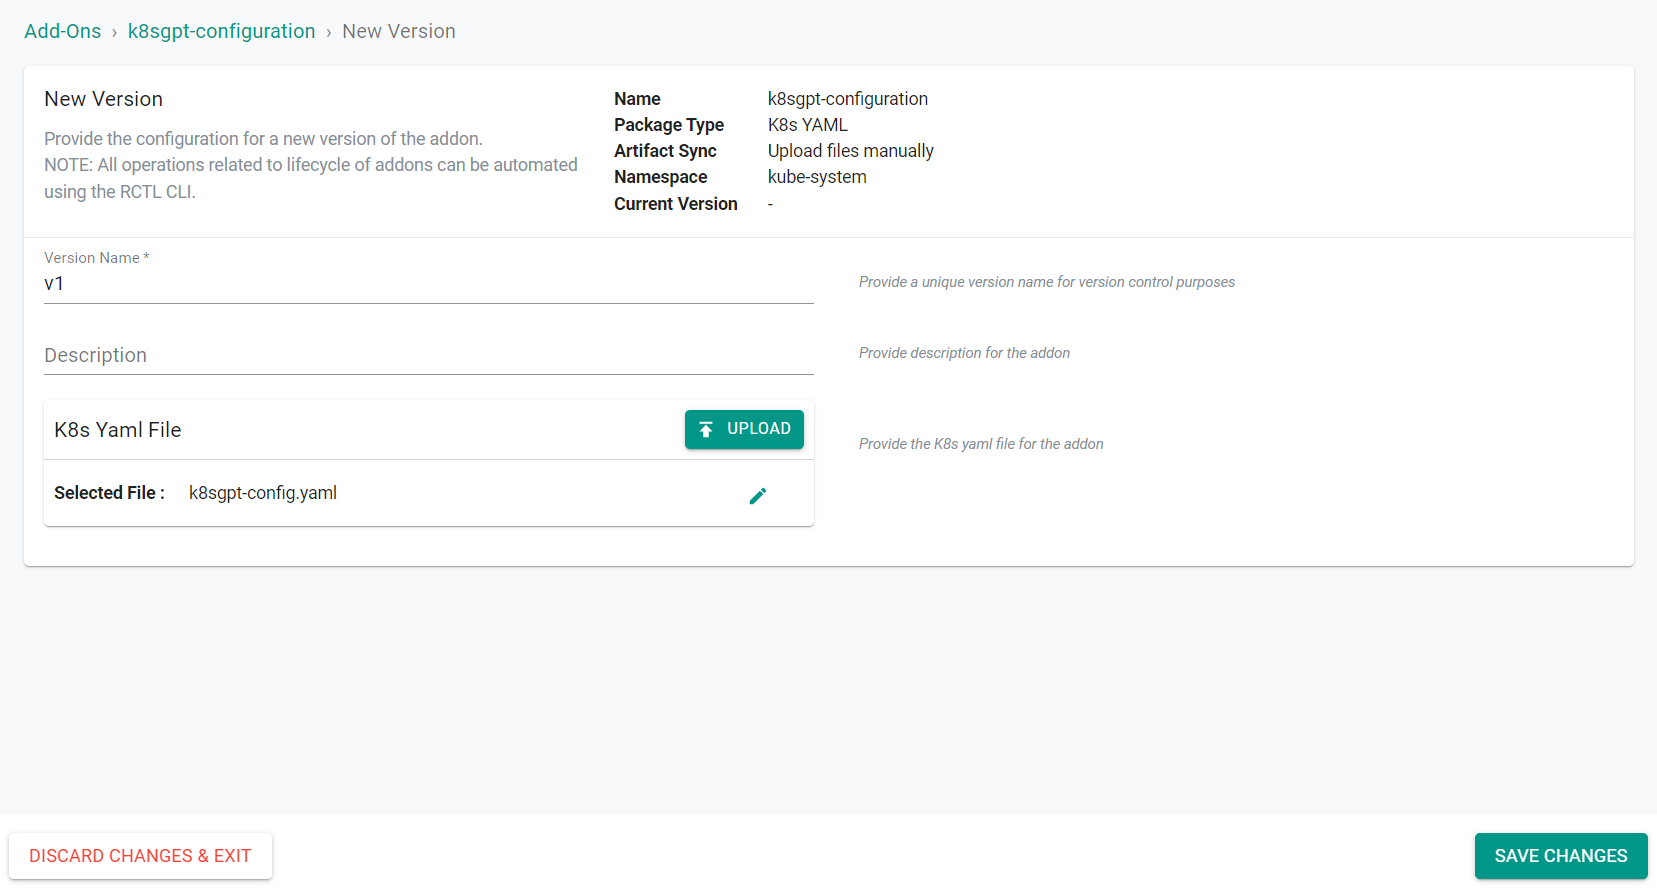
- Click New Version
- Enter a version name
- Click Upload and select the previously saved k8sgpt-config.yaml file
- Click Save Changes
Step 5: Create K8sGPT Secret
In this step, you will create a Kubernetes secret for K8sGPT which contains the OpenAI API token. This token allows K8sGPT to communicate with your OpenAI account.
- Update the below command with your OpenAI API token
kubectl create secret generic k8sgpt-sample-secret --from-literal=openai-api-key=<OPENAI_TOKEN> -n kube-system
- Execute the updated command on the cluster
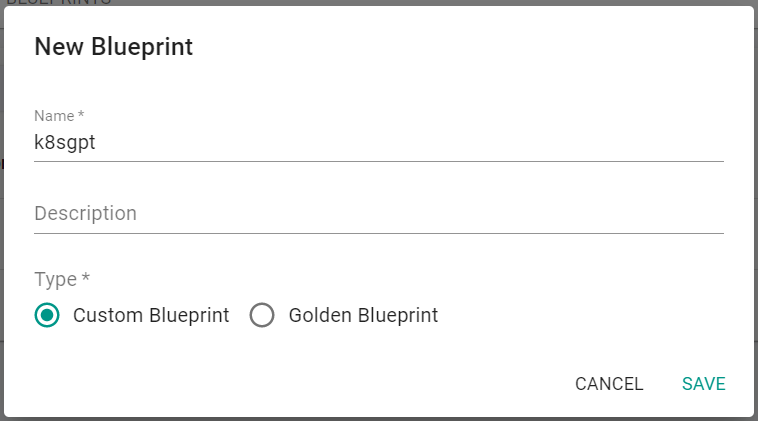
Step 6: Create Blueprint
In this step, you will create a custom cluster blueprint that contains the K8sGPT Operator add-on and the K8SGPT configuration add-on that were previously created. The cluster blueprint can be applied to one or multiple clusters.
- Select Infrastructure -> Blueprints
- Click New Blueprint
- Enter the name k8sgpt
- Click Save
- Enter a version name
- Select Minimal for the base blueprint
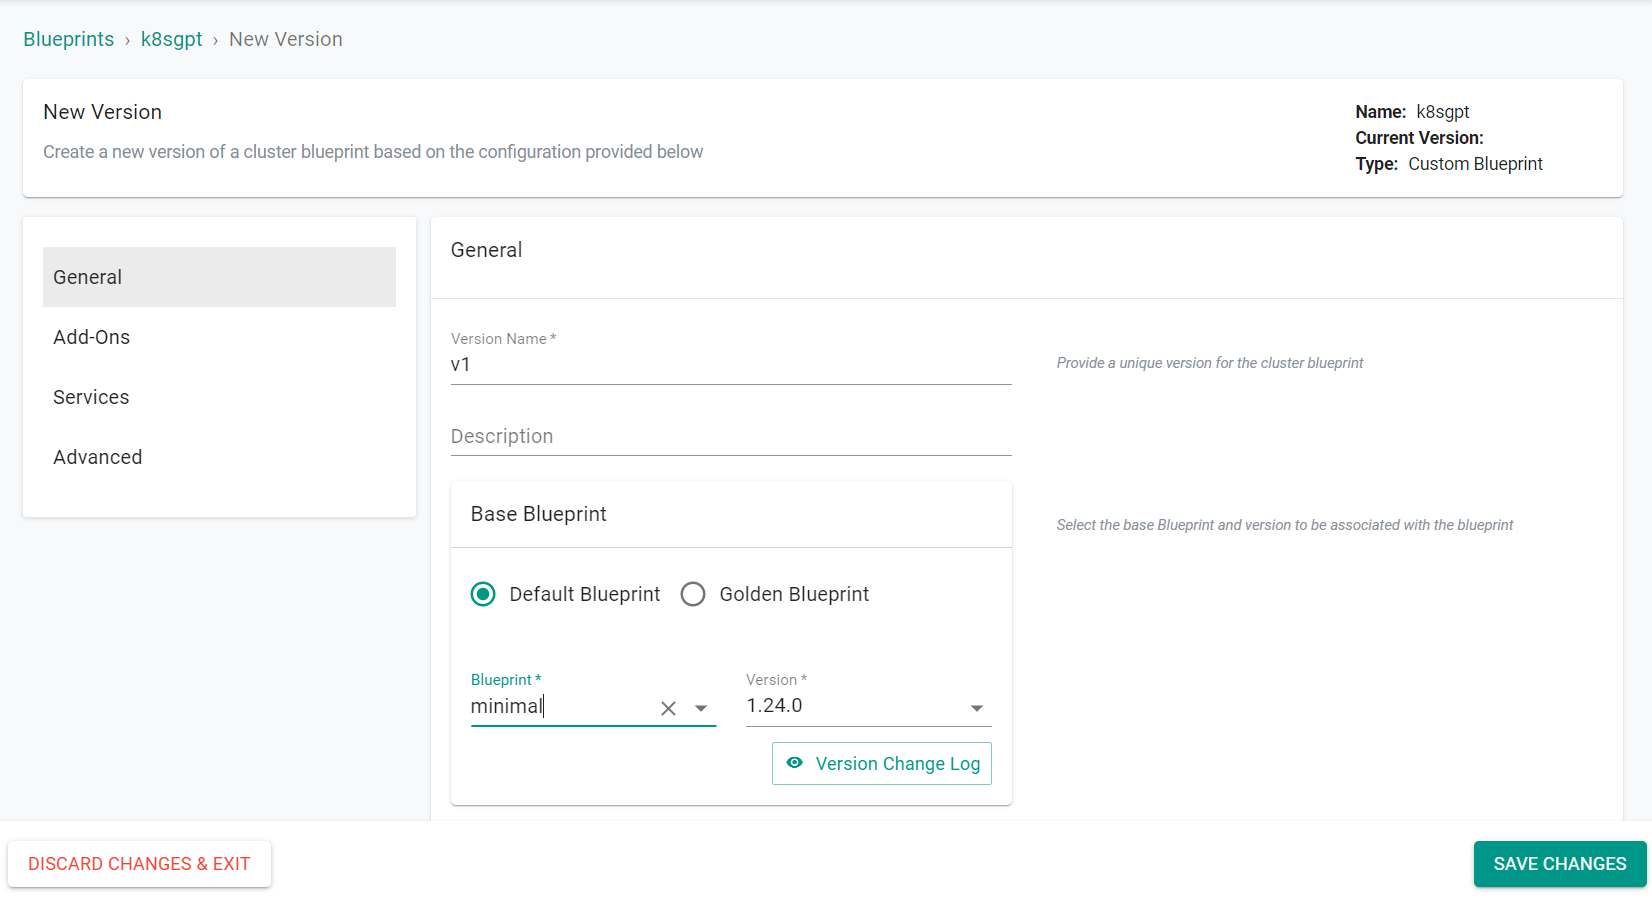
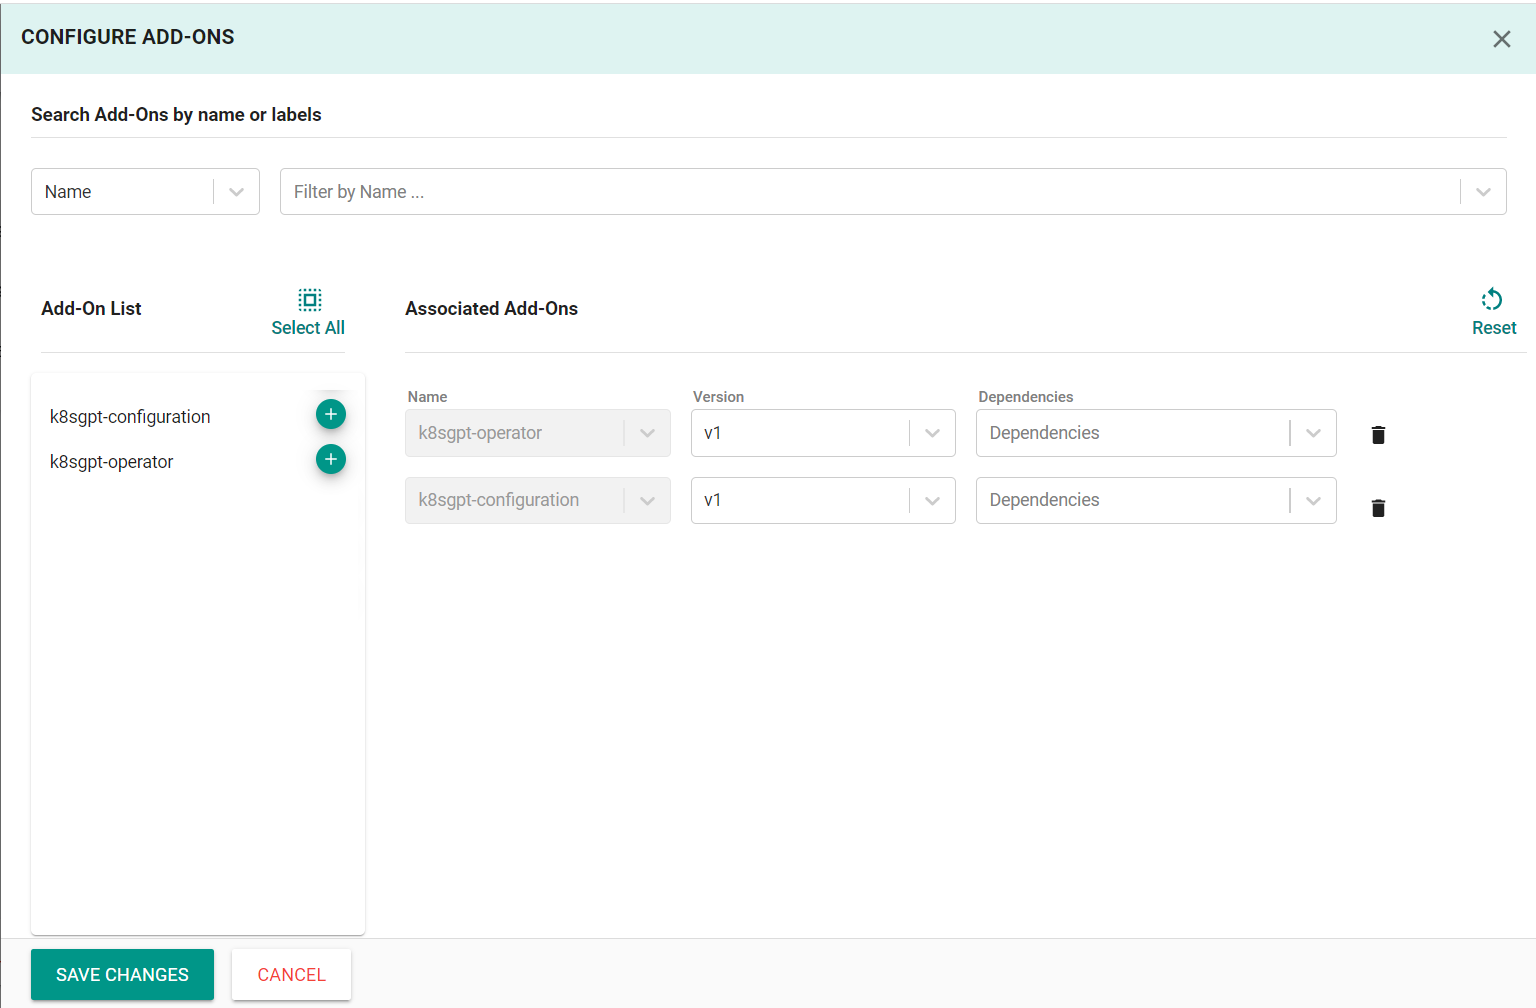
- In the add-ons section, click Configure Add-Ons
- Click the + symbol next to the previously created add-ons to add them to the blueprint
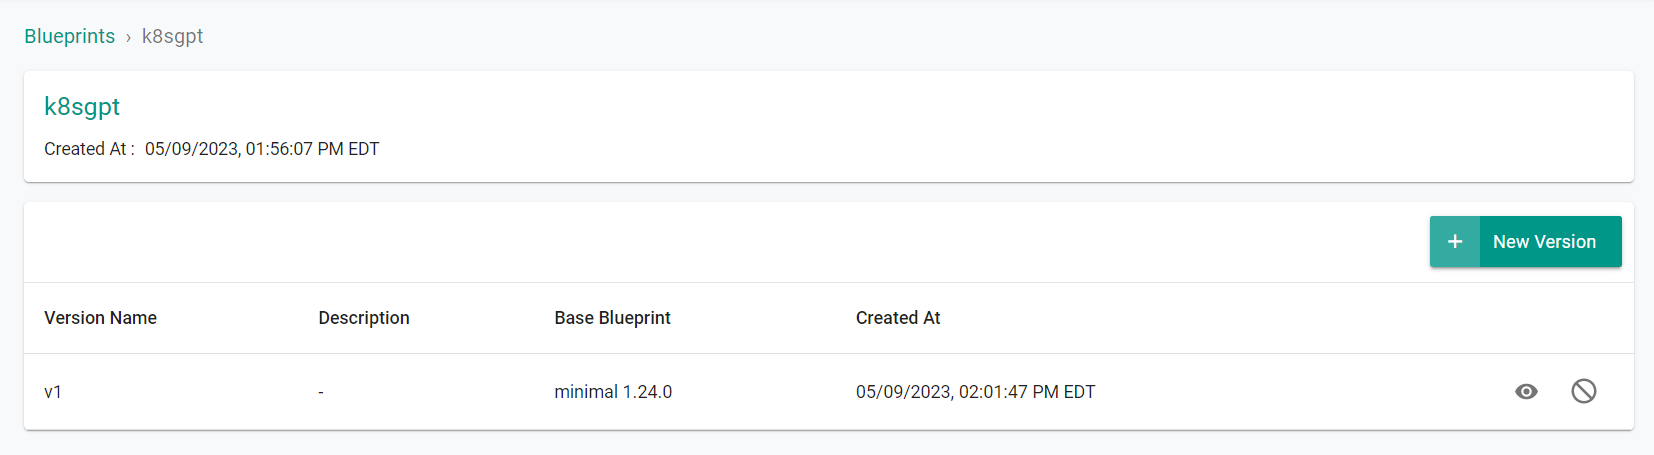
- Click Save Changes
- Click Save Changes
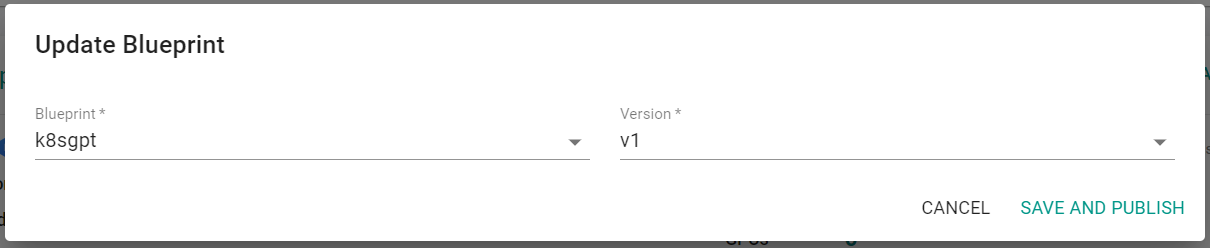
Step 7: Apply Blueprint
In this step, you will apply the previously created cluster blueprint to an existing cluster. The blueprint will deploy the K8sGPT add-ons to the cluster.
- Select Infrastructure -> Clusters
- Click the gear icon on the cluster card -> Update Blueprint
- Select the previously created K8sGPT blueprint and version
- Click Save and Publish
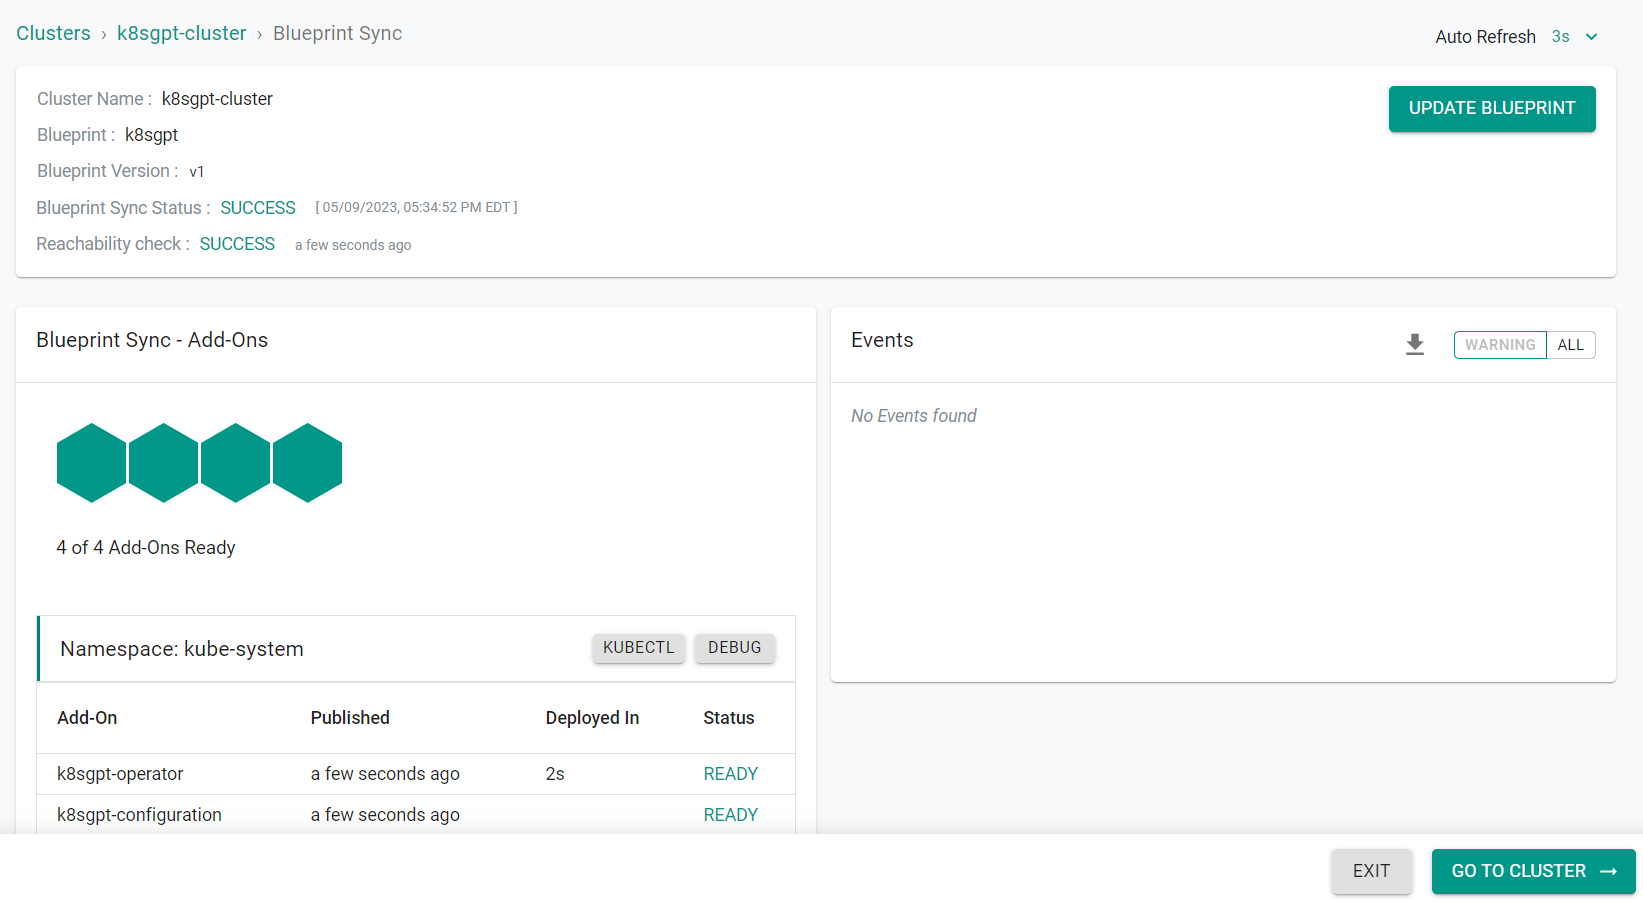
The controller will publish and reconcile the blueprint on the target cluster. This can take a few seconds to complete.
Next Step
At this point, you have done everything required to get K8sGPT configured and operational on your cluster. In the next step, we will test if K8sGPT can detect and identify issues with problematic workloads.