Part 3: Deploy VM
What Will You Do
In this part of the self-paced exercise, you will deploy a virtual machine workload to your cluster running KubeVirt.
Step 1: Create Workload Namespace
In this step, you will create a namespace for the virtual machine. The "namespace.yaml" file in the "/getstarted/kubevirt/workload" directory of the forked repository contains the declarative specification for the namespace resource.
- Open a Terminal (macOS/Linux) or Command Prompt (Windows) and navigate to the folder where you forked the Git repository
- Navigate to the folder "
/getstarted/kubevirt/workload" - Type the command
rctl create namespace -f namespace.yaml
If you did not encounter any errors, you can optionally verify if everything was created correctly on the controller.
- In your project, select Infrastructure -> Namespaces
- You should see a namespace called vm

Next, you will publish the namespace to the cluster.
- Type the command below
rctl publish namespace vm

Step 2: Deploy Virtual Machine Workload
In this step, you will create a workload resource for the virtual machine. The "vm-workload.yaml" file in the "/getstarted/kubevirt/workload" directory of the forked repository contains the declarative specification for the workload.
The following items may need to be updated/customized if you used alternate names.
- project: defaultproject
- clusters: kubevirt-cluster
name: vm
namespace: vm
project: defaultproject
type: NativeYaml
clusters: kubevirt-cluster
payload: ./vm.yaml
Note that the workload's name is "vm" and it is of type "k8s YAML". The actual k8s YAML file for the VM is in the payload "vm.yaml" file.
rctl create workload vm-workload.yaml
If there were no errors, you should see a message like below
Workload created successfully
Now, let us publish the newly created VM workload to the cluster. The workload can be deployed to multiple clusters as per the configured "placement policy". In this case, you are deploying to a single cluster with the name "kubevirt-cluster".
rctl publish workload vm
Step 3: Verify Workload
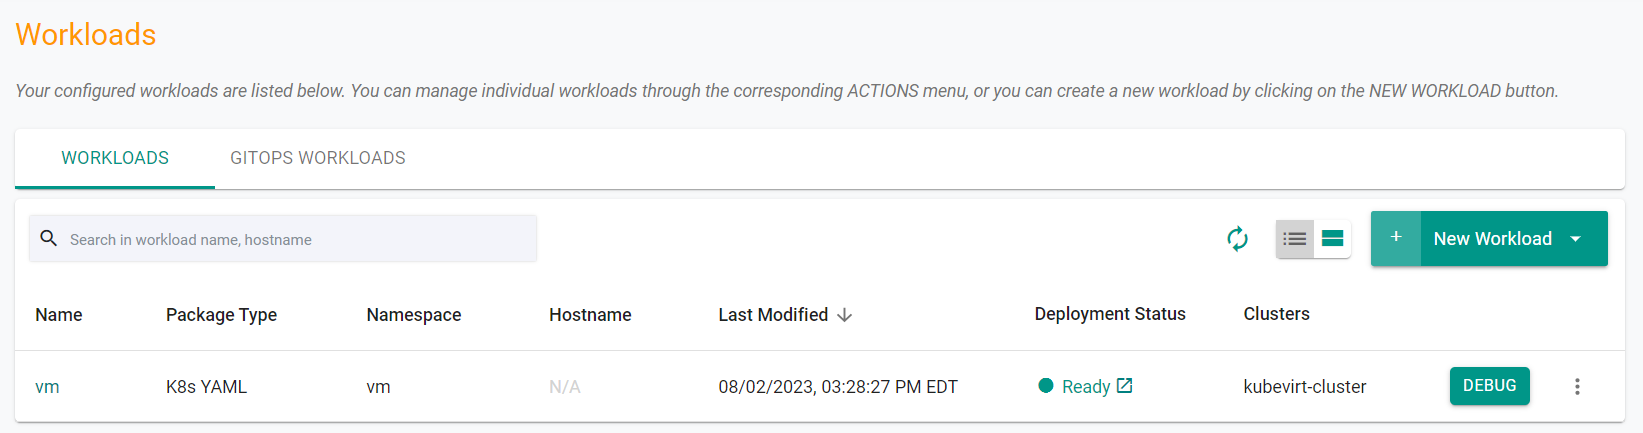
In the web console, click on Applications -> Workloads. You should see something like the following.
Now, let us verify the virtual machine is running
- Click on the kubectl link in the cluster card and type the following command
kubectl get vm -n vm
You should see something like the following showing the VM in a running state.
NAME     AGE   STATUS    READY
testvm   50s   Running   True
Step 4: Download KubeVirt's virtctl CLI
The virtctl CLI is needed for the use of advanced features to interact with virtual machines
- On your machine, run the following commands
VERSION=$(kubectl get kubevirt.kubevirt.io/kubevirt -n kubevirt -o=jsonpath="{.status.observedKubeVirtVersion}")
ARCH=$(uname -s | tr A-Z a-z)-$(uname -m | sed 's/x86_64/amd64/') || windows-amd64.exe
echo ${ARCH}
curl -L -o virtctl https://github.com/kubevirt/kubevirt/releases/download/${VERSION}/virtctl-${VERSION}-${ARCH}
chmod +x virtctl
sudo install virtctl /usr/local/bin
Step 5: Access Virtual Machine
In this step, you will access the virtual machine using the previously installed virtctl CLI.
- Run the below command to access the VM
virtctl console testvm -n vm
- Login to the VM using the onscreen credentials
You are now able to use the VM terminal.
Recap
Congratulations! At this point, you have successfuly deployed a virtual machine to the kubernetes cluster and accessed the VM's terminal.