Microsoft Teams
Although a turnkey integration is available for email based notifications, organizations may wish to send notifications to other platforms in use internally. This recipe documents how organizations can customize the "Alert Manager" system add-on configuration and send the alerts to Microsoft Teams
sequenceDiagram
    AlertManager->>+Proms2Team: Alert on cluster
    Proms2Team->>+MSFT Teams: Alert on Cluster
Note
View a video of the steps described below
Step 1: Configure Teams
The first step in setting up the integration is to configure a webhook which uses prom2teams to write messages.
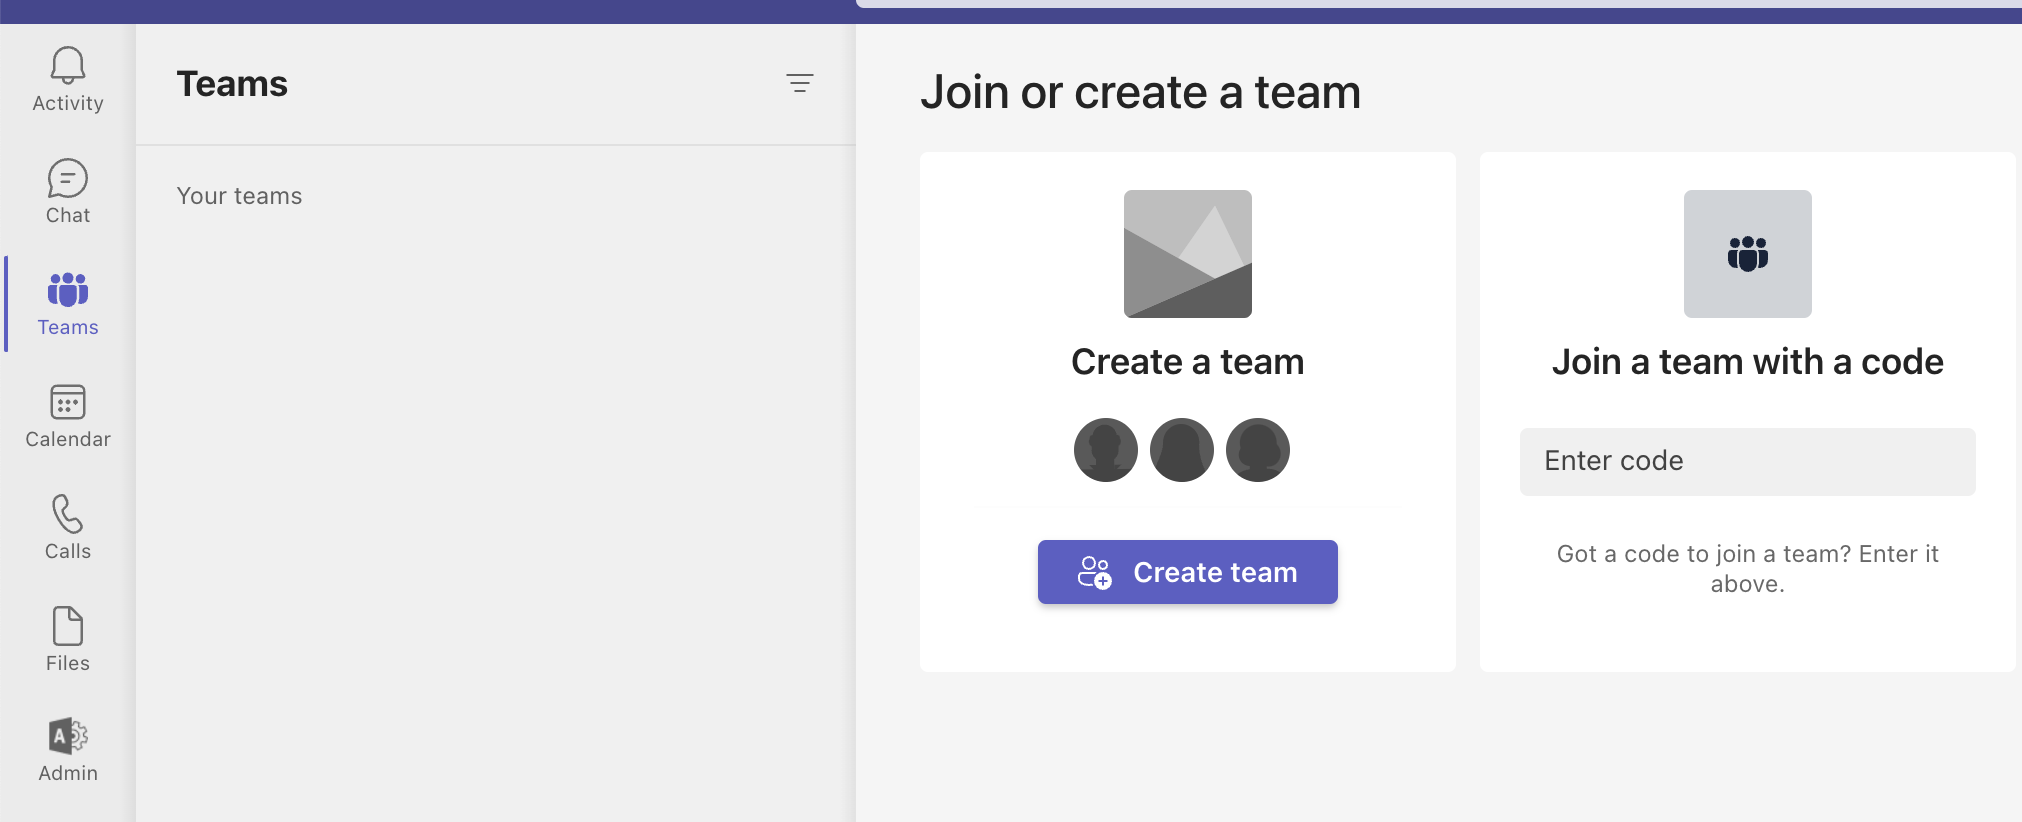
If you want to receive the notifications via Microsoft Teams, you will need an existing team and a channel within that team or you will have to create a new one for testing. You will need Administrator privileges for that.
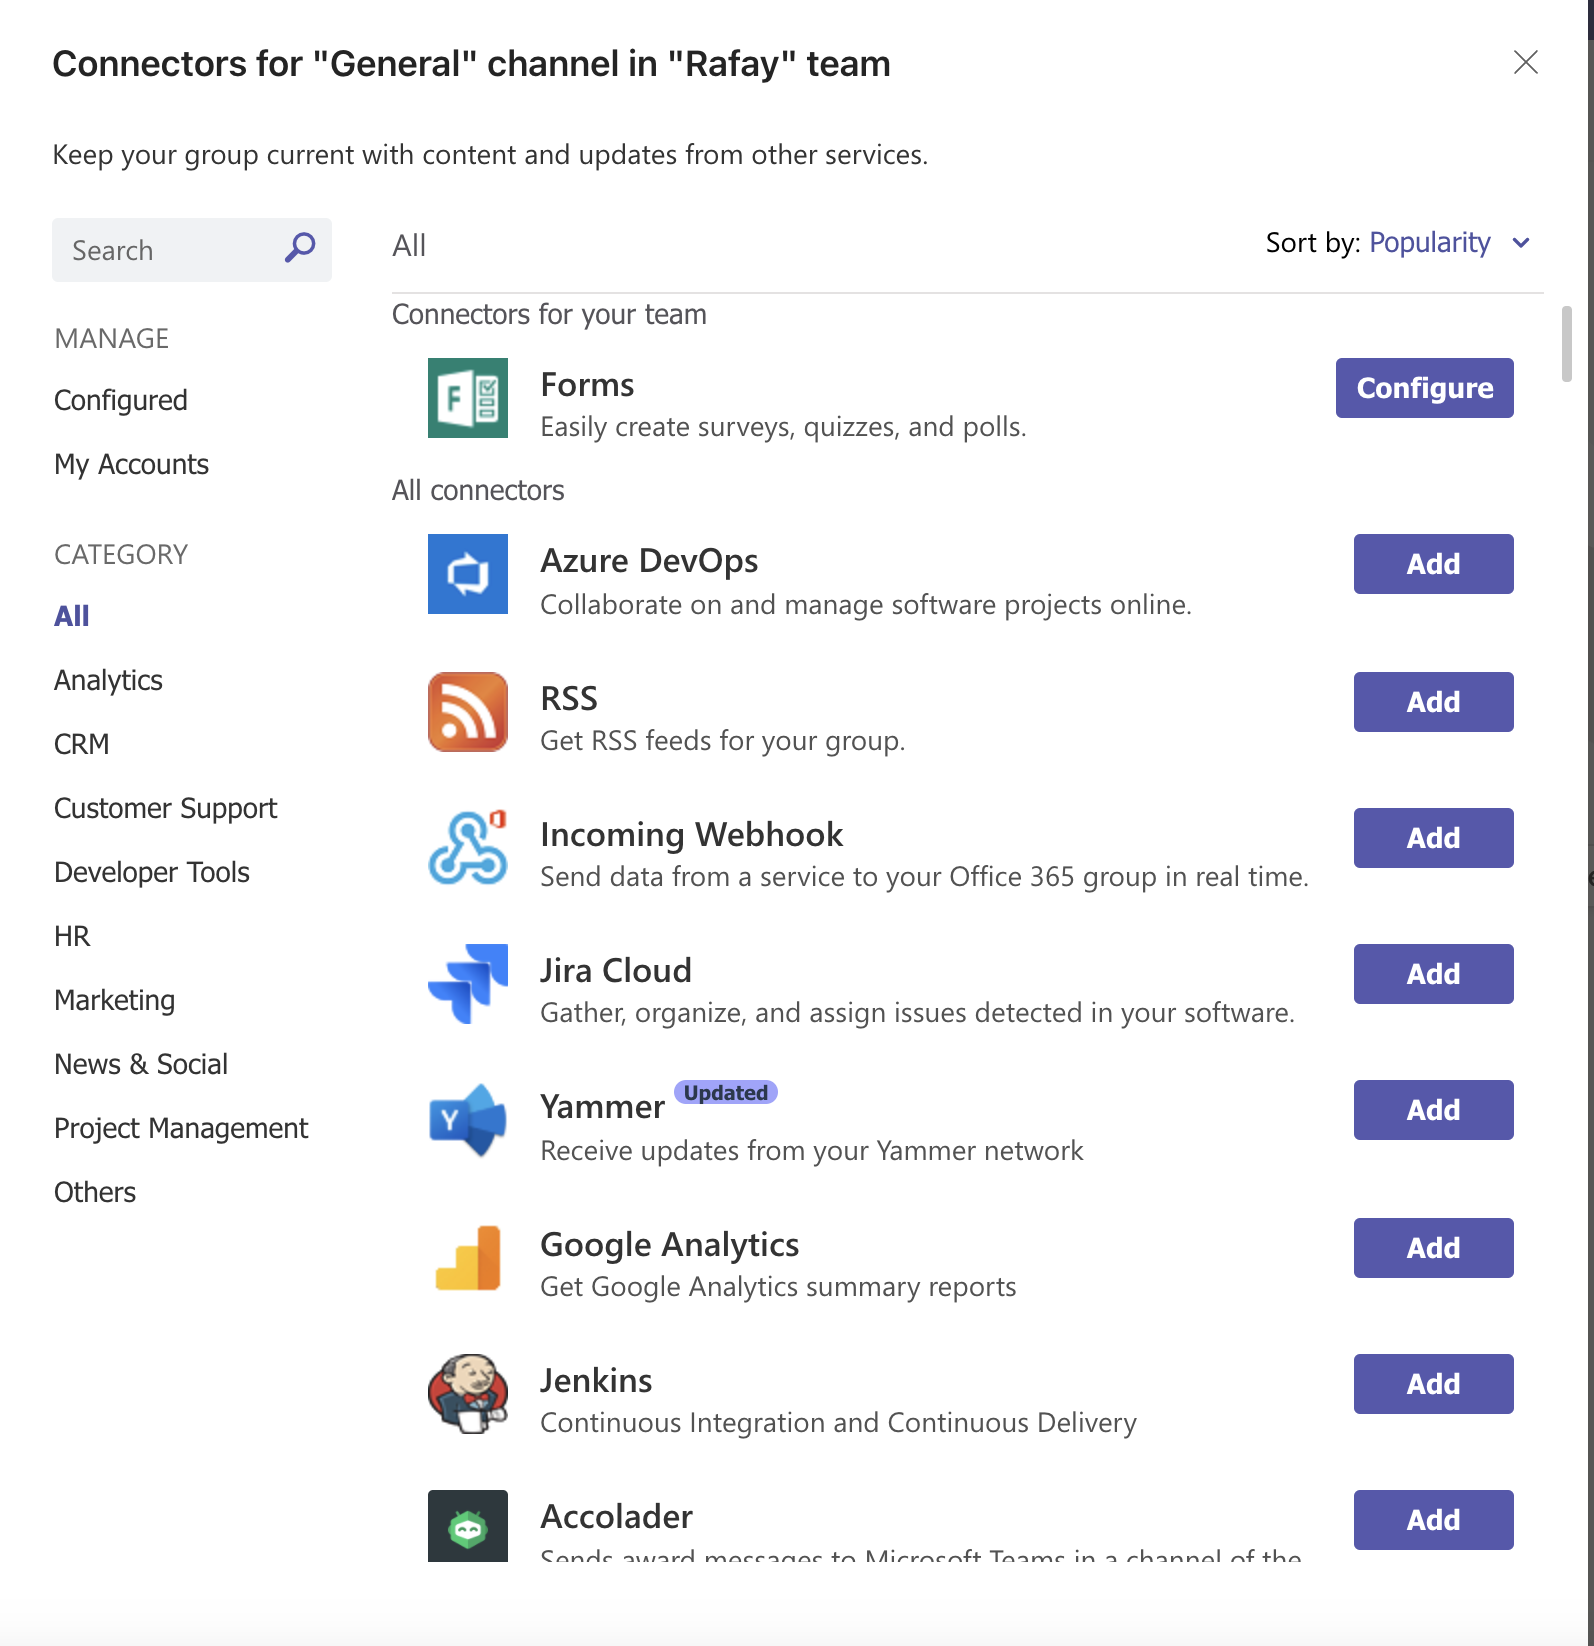
To setup the alerting to your Microsoft Teams channel, you will need a connector API URL:
- Go to Microsoft Teams, Join or create a team
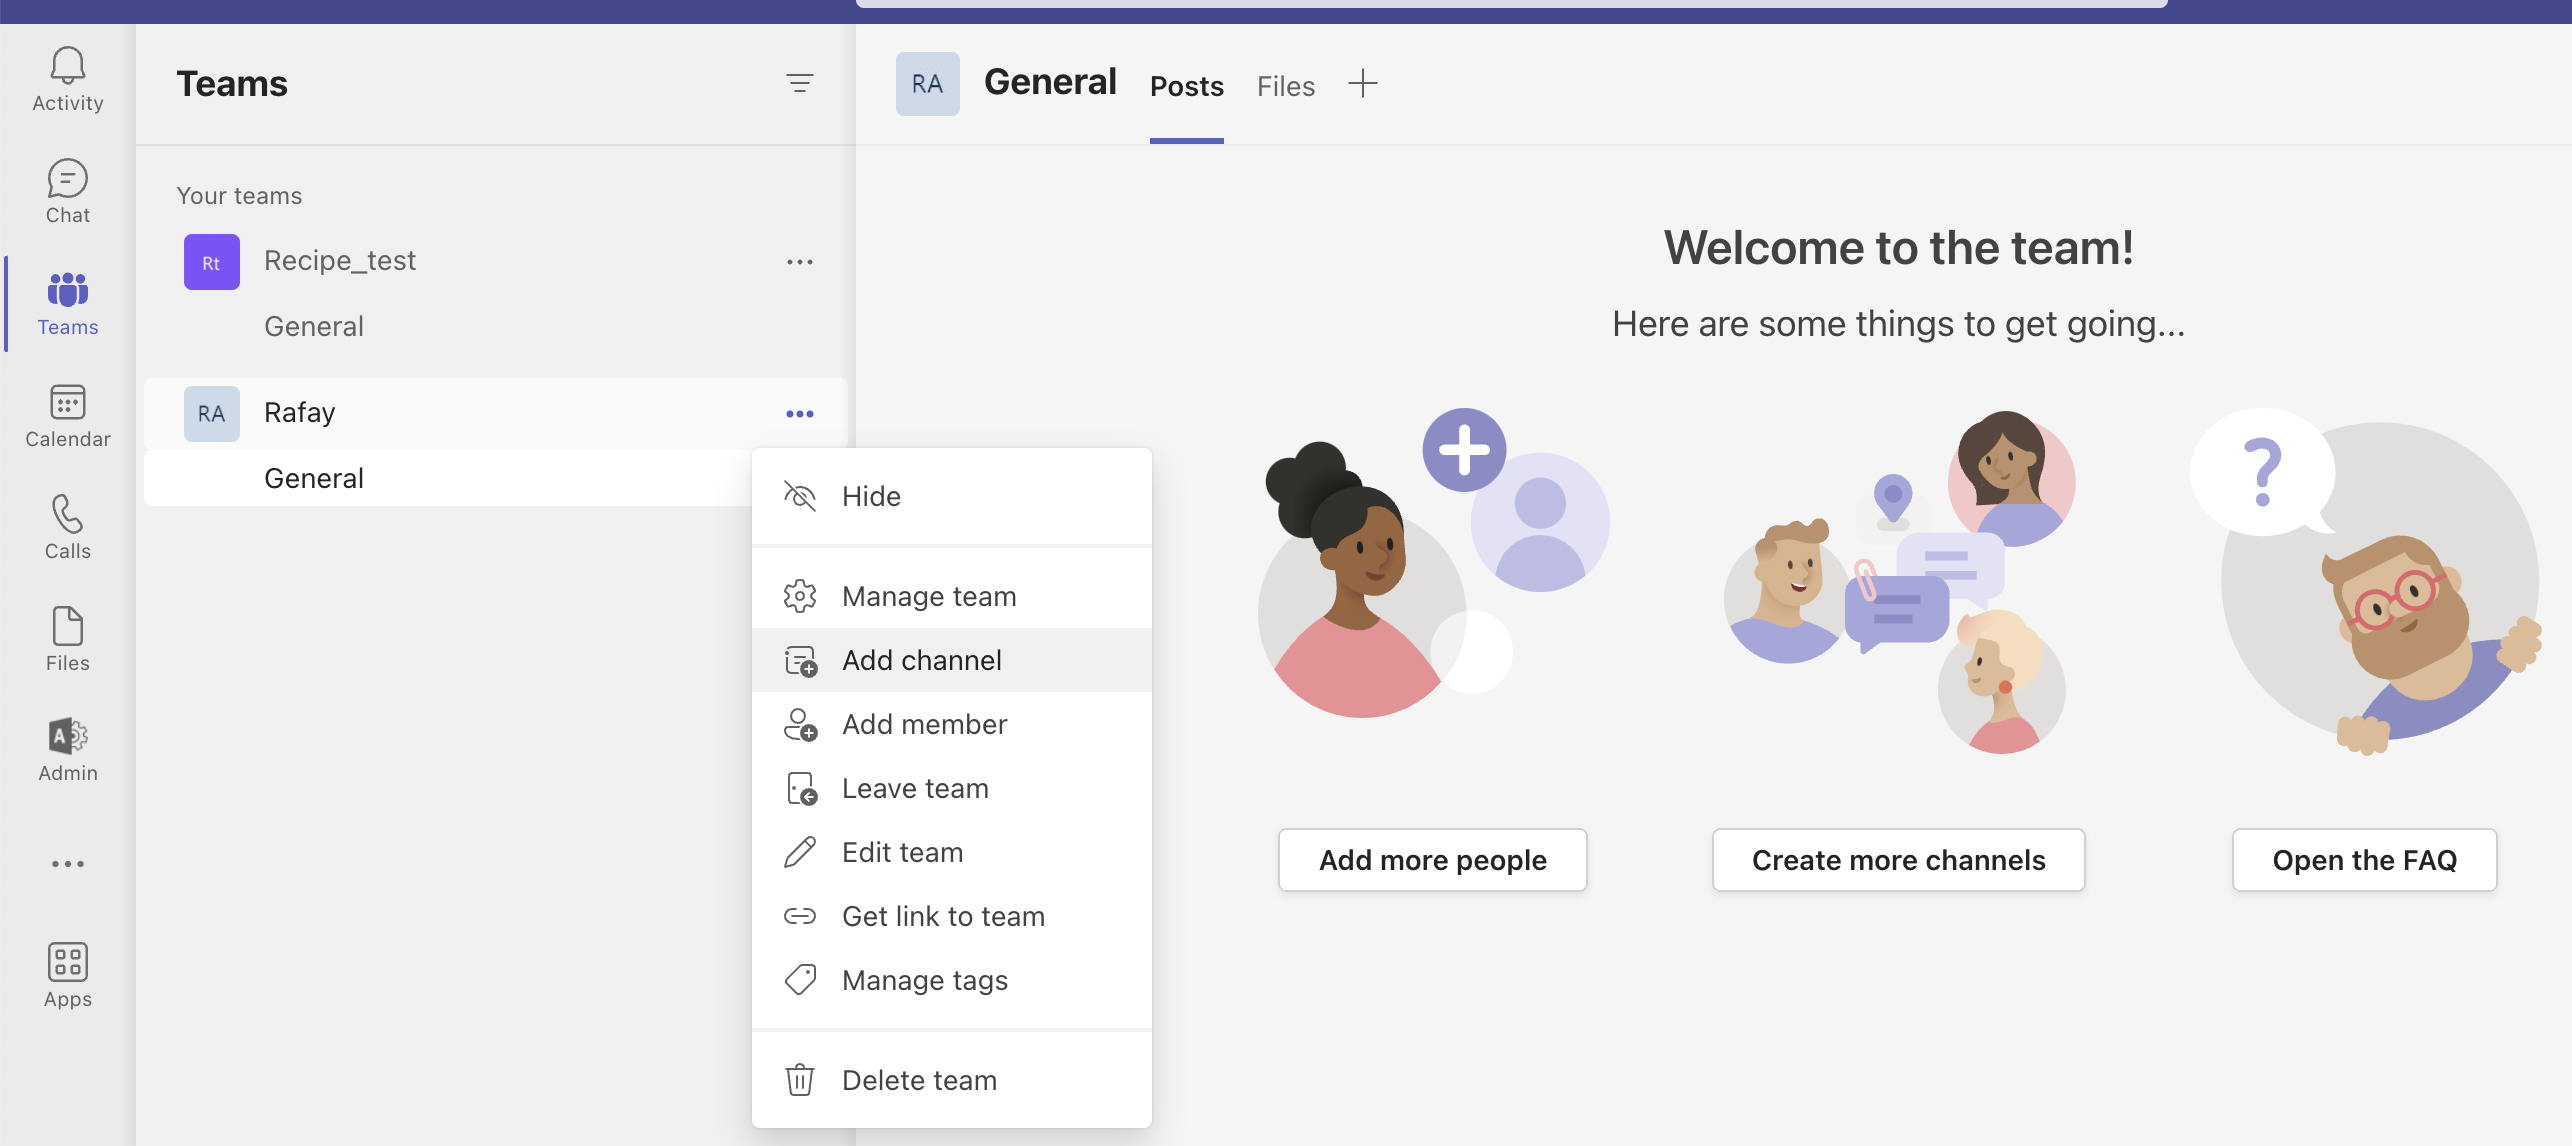
- Go to the Team and select Add channel (in case one is already not available)
- Go to the channel and select Connectors
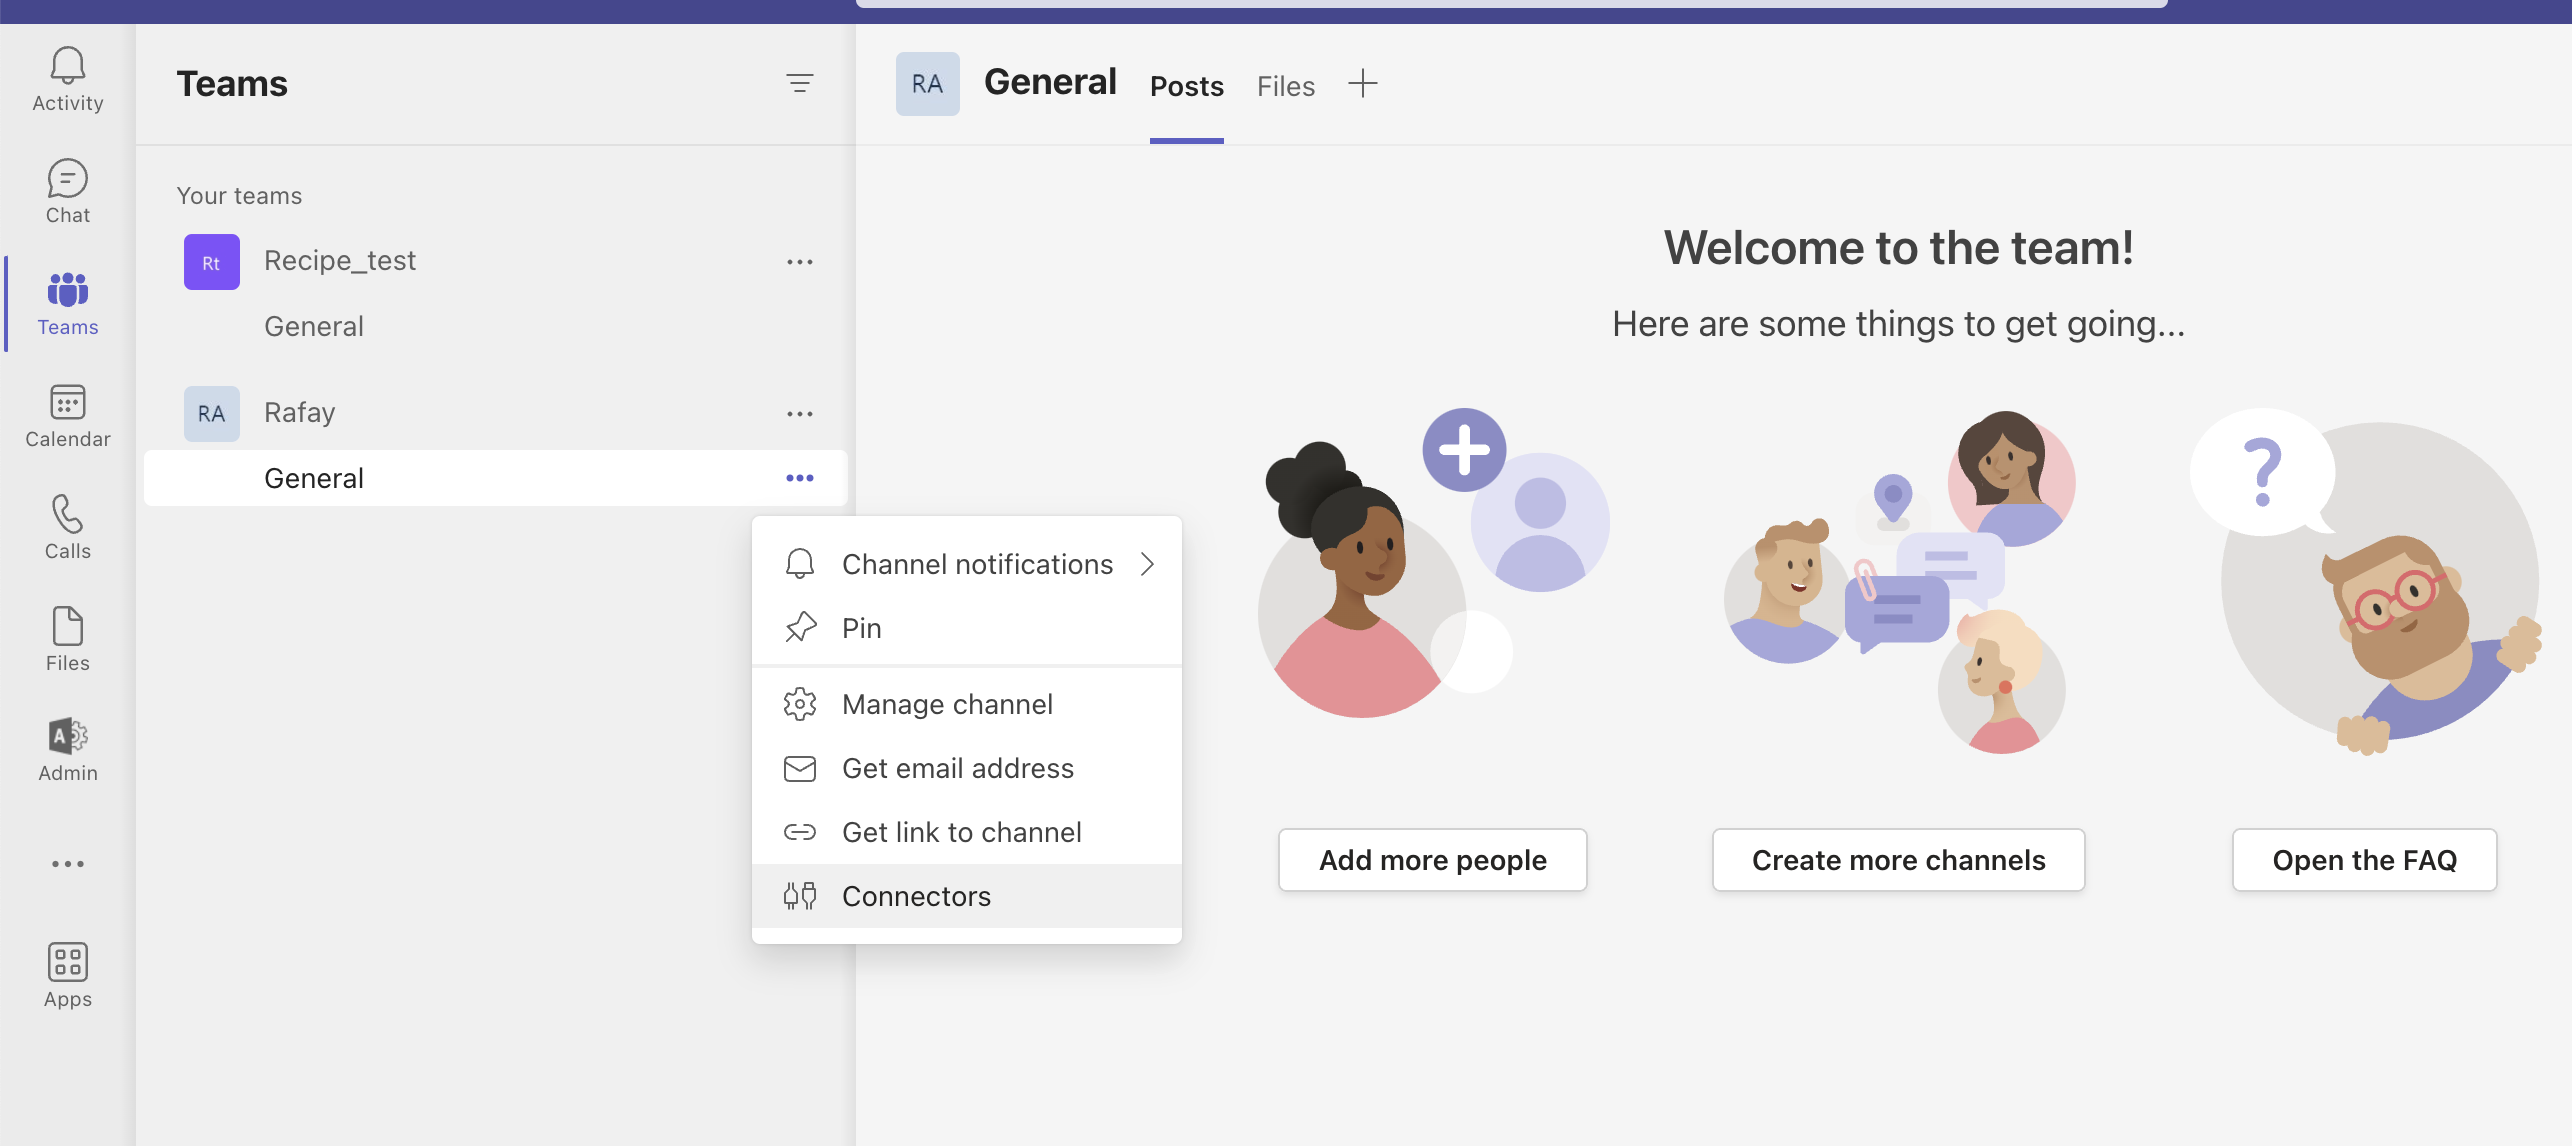
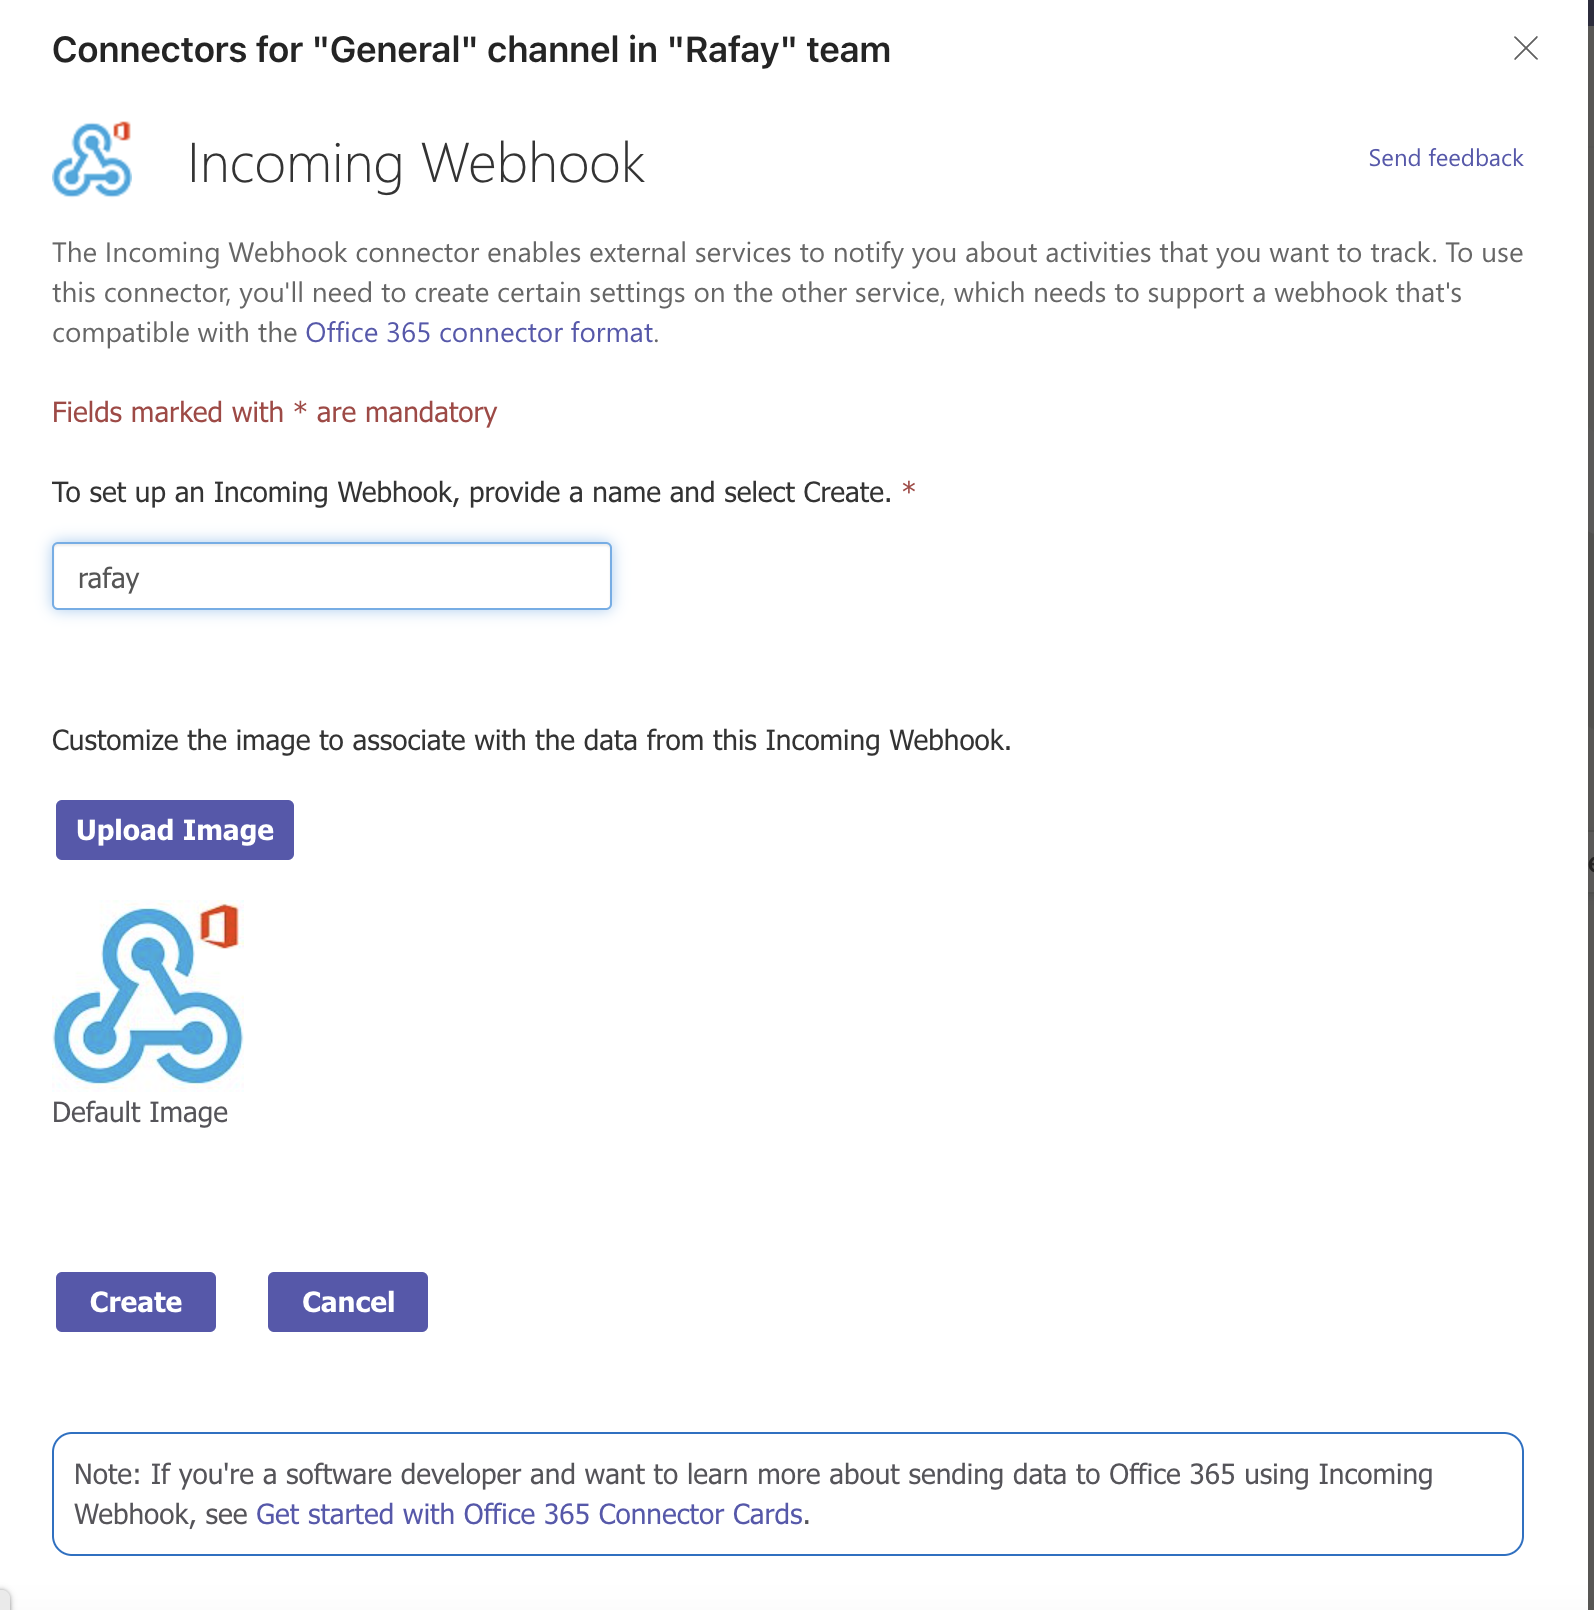
- Select Add for Incoming Webhook
- Select the Configure button of Incoming Webhook

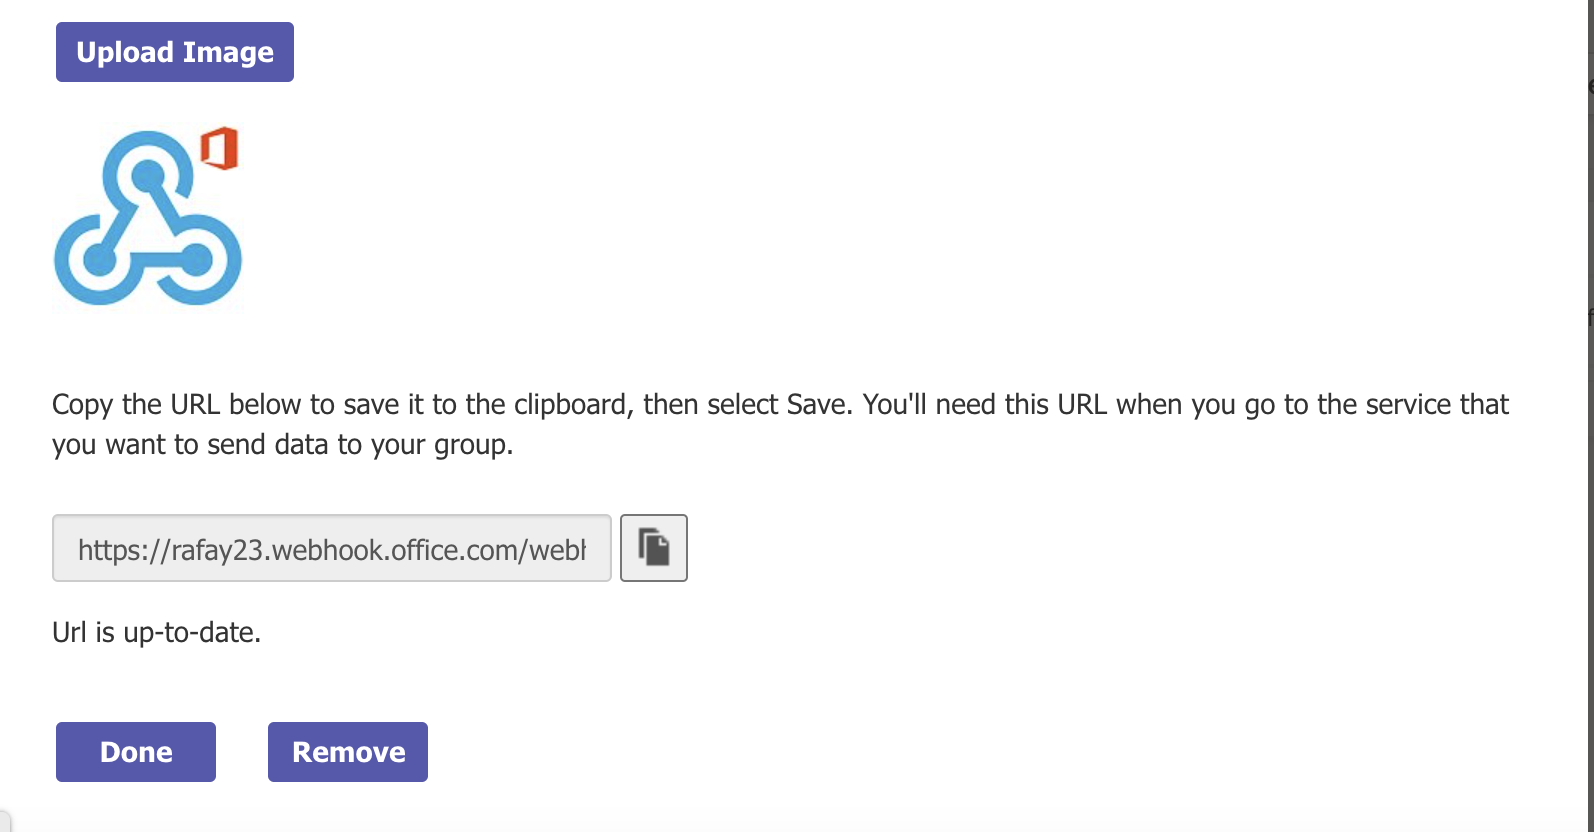
- Teams shows the Webhook URL once you click Create. Copy this URL to use in a subsequent step
Step 2: Configure prom2teams Add-on
Follow the below steps to create a customized "prom2teams" custom add-on:
- Modify the below values.yaml file and add the webhook URL copied while creating the MSFT Teams connector and save it
# Default values for prom2teams.
# This is a YAML-formatted file.
# Declare variables to be passed into your templates.
image:
repository: idealista/prom2teams
tag:
pullPolicy: IfNotPresent
resources:
requests:
cpu: 100m
memory: 128Mi
limits:
cpu: 200m
memory: 200Mi
service:
type: ClusterIP
port: 8089
monitoring_port: 9090
prom2teams:
host: 0.0.0.0
port: 8089
monitoring_port: 9090
connector: https://rafay23.webhook.office.com/webhookb2/00fc5e7c-9c4c-4f
connectors: {}
# group_alerts_by can be one of
# ("name" | "description" | "instance" | "severity" | "status" | "summary" | "fingerprint" | "runbook_url")
group_alerts_by:
# loglevel can be one of (DEBUG | INFO | WARNING | ERROR | CRITICAL)
loglevel: INFO
templatepath: /opt/prom2teams/helmconfig/teams.j2
config: /opt/prom2teams/helmconfig/config.ini
extraEnv: {}
# Security Context properties
securityContext:
# enabled is a flag to enable Security Context
enabled: true
# runAsUser is the user ID used to run the container
runAsUser: 101
# runAsGroup is the primary group ID used to run all processes within any container of the pod
runAsGroup: 101
# fsGroup is the group ID associated with the container
fsGroup: 101
# readOnlyRootFilesystem is a flag to enable readOnlyRootFilesystem for the Hazelcast security context
readOnlyRootFilesystem: true
- Create prom2teams-0.2.0.tgz
Clone the prom2 teams repo:
git clone https://github.com/idealista/prom2teams.git
Package into helm:
helm package <path_to_prom2teams_root>/helm
Output:
Successfully packaged chart and saved it to: <path_to_prom2teams_root>/prom2teams-0.2.0.tgz
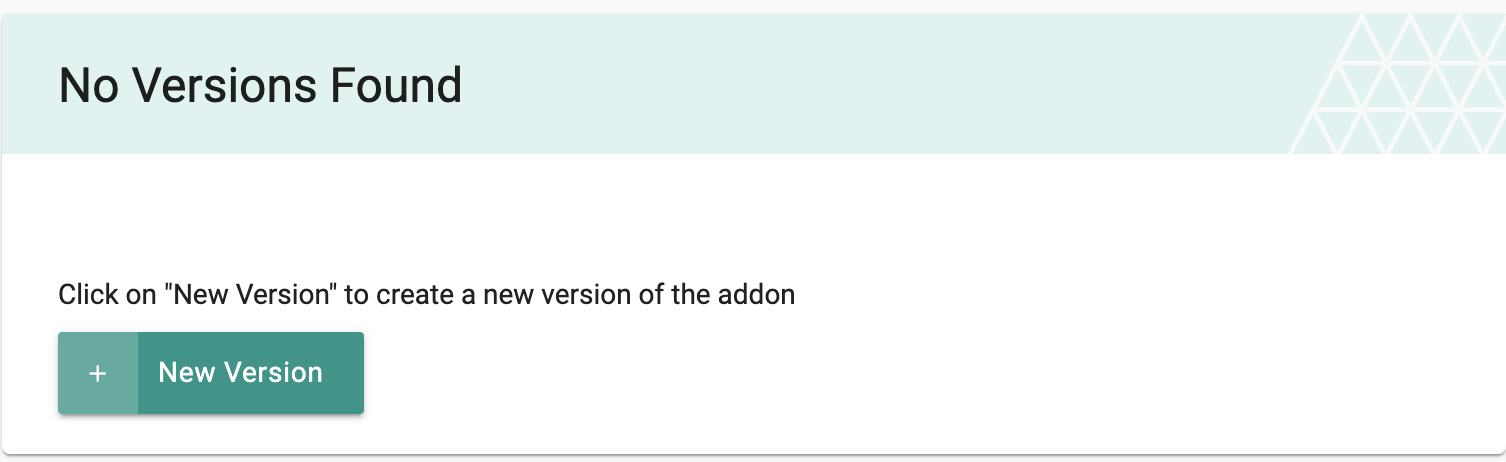
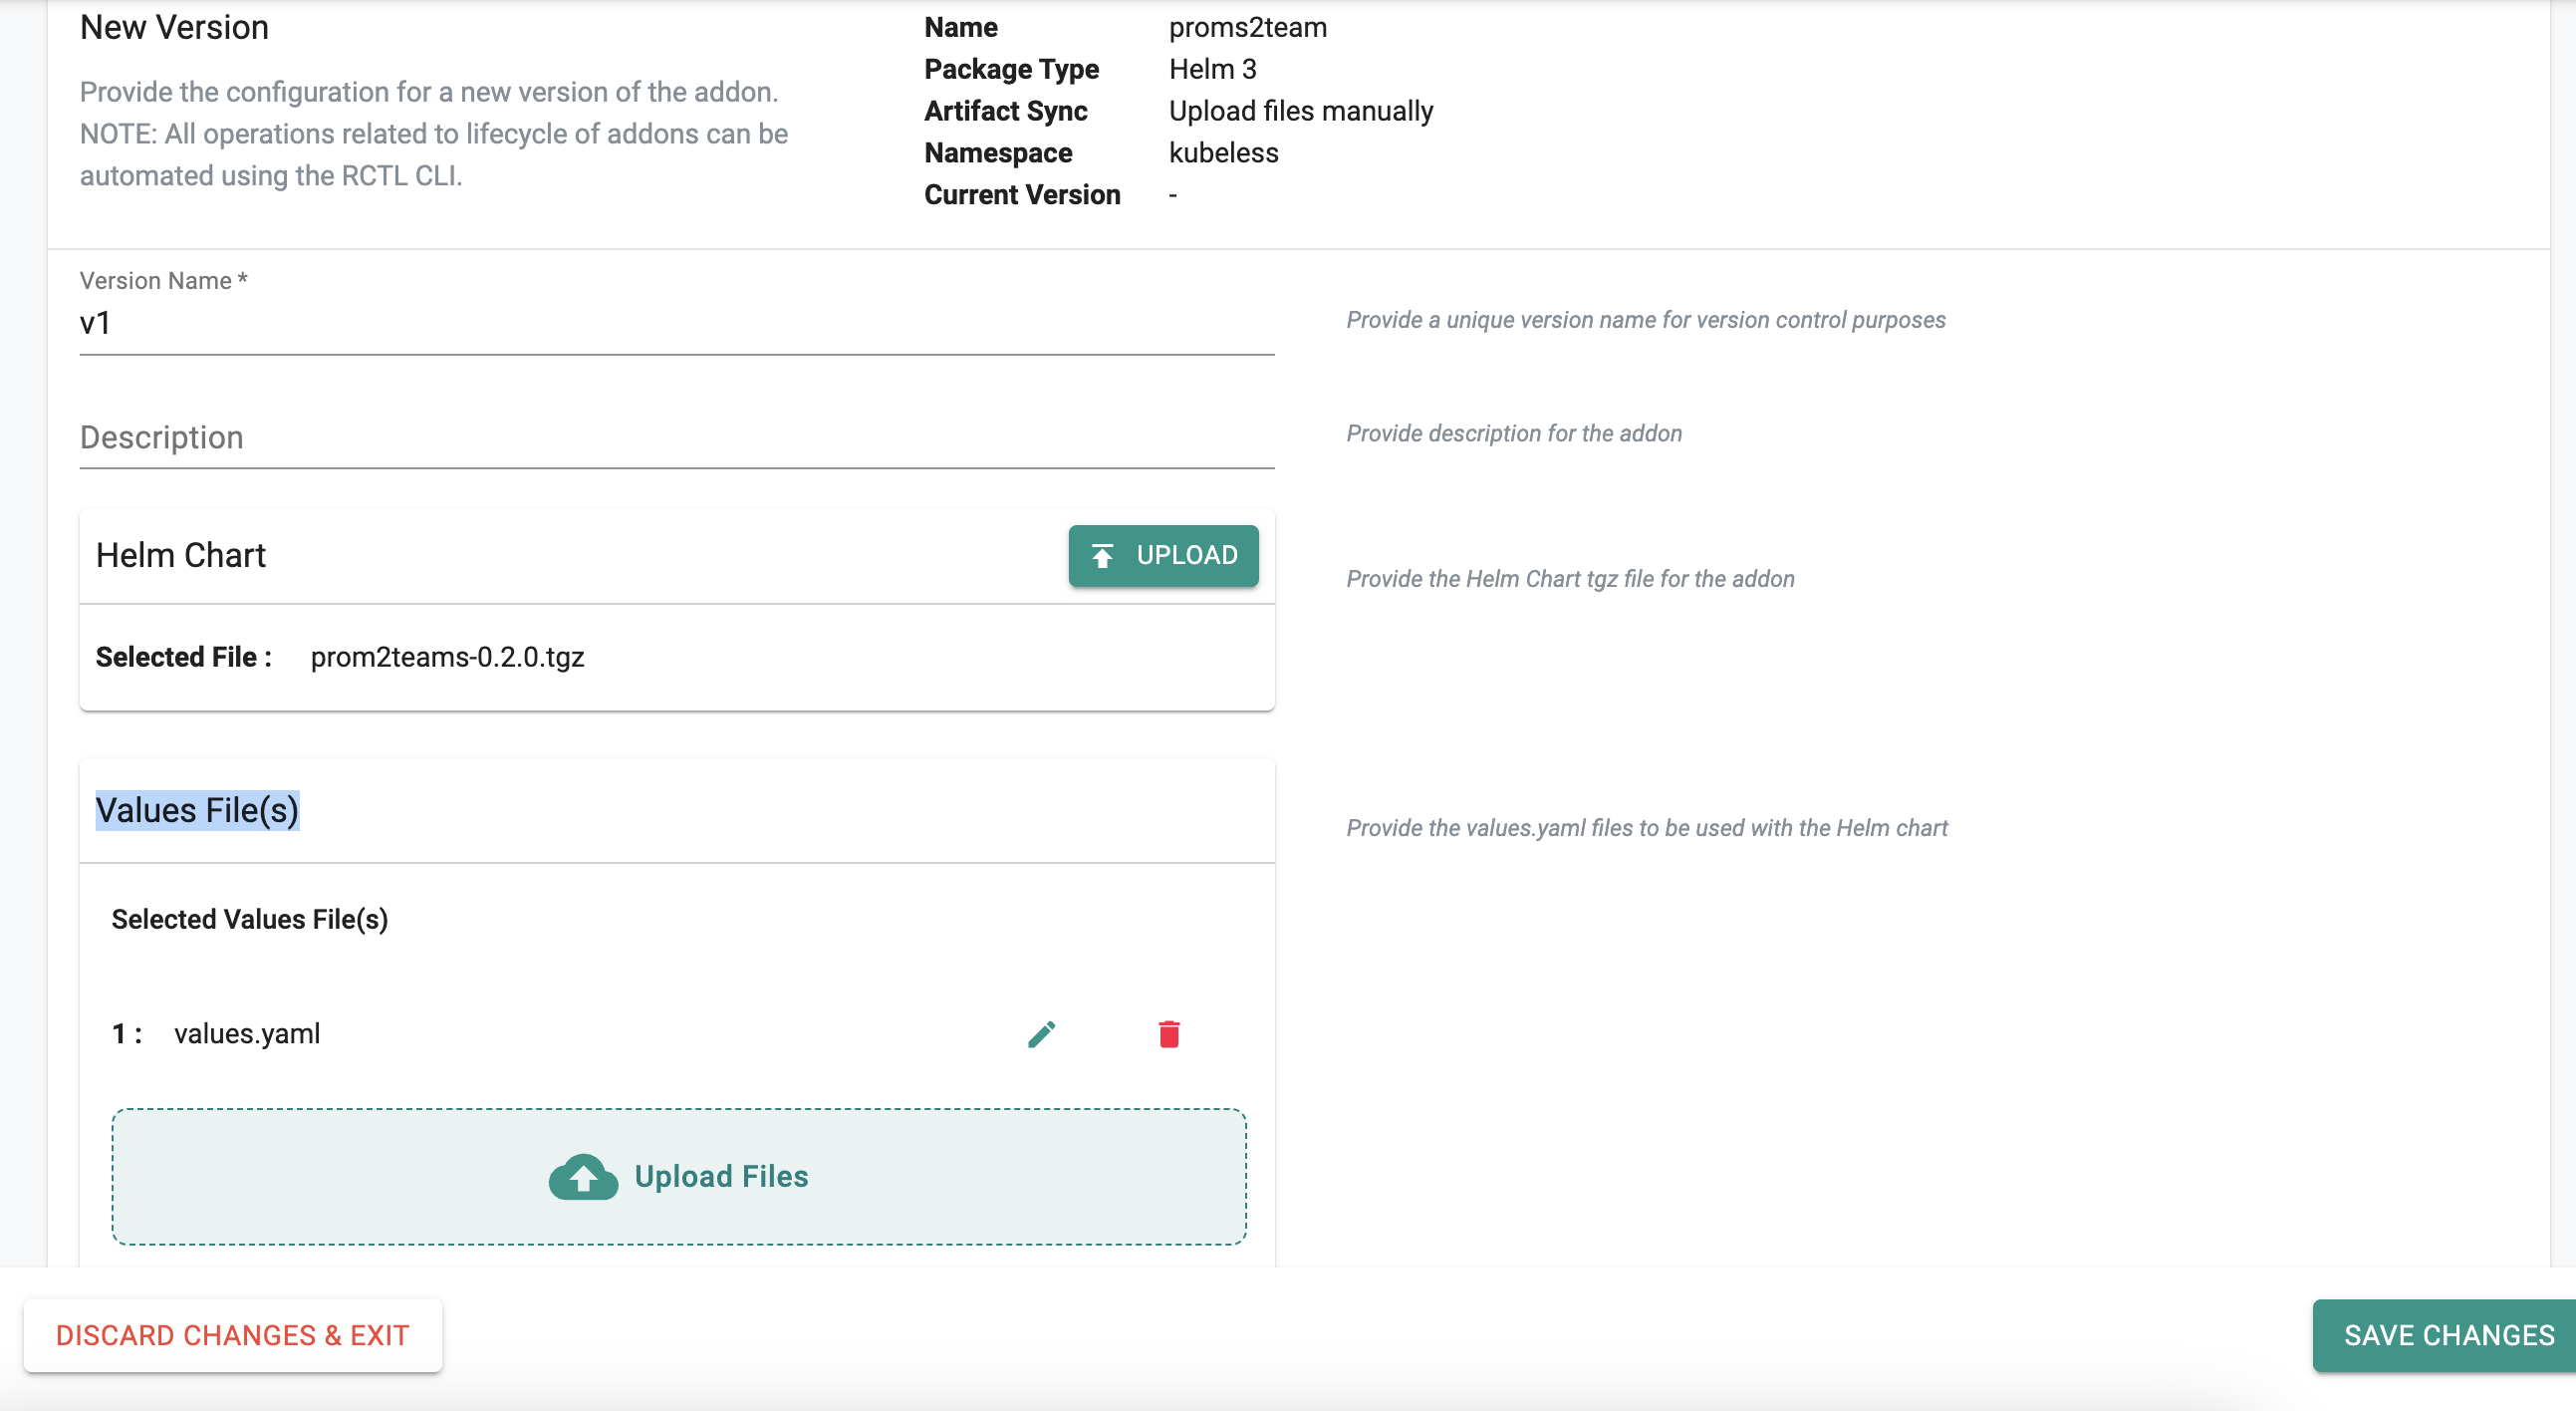
- Navigate to Infrastructure > Add-ons
- Create a new add-on using Bring your own, select Type as Helm 3, select Upload files manually option
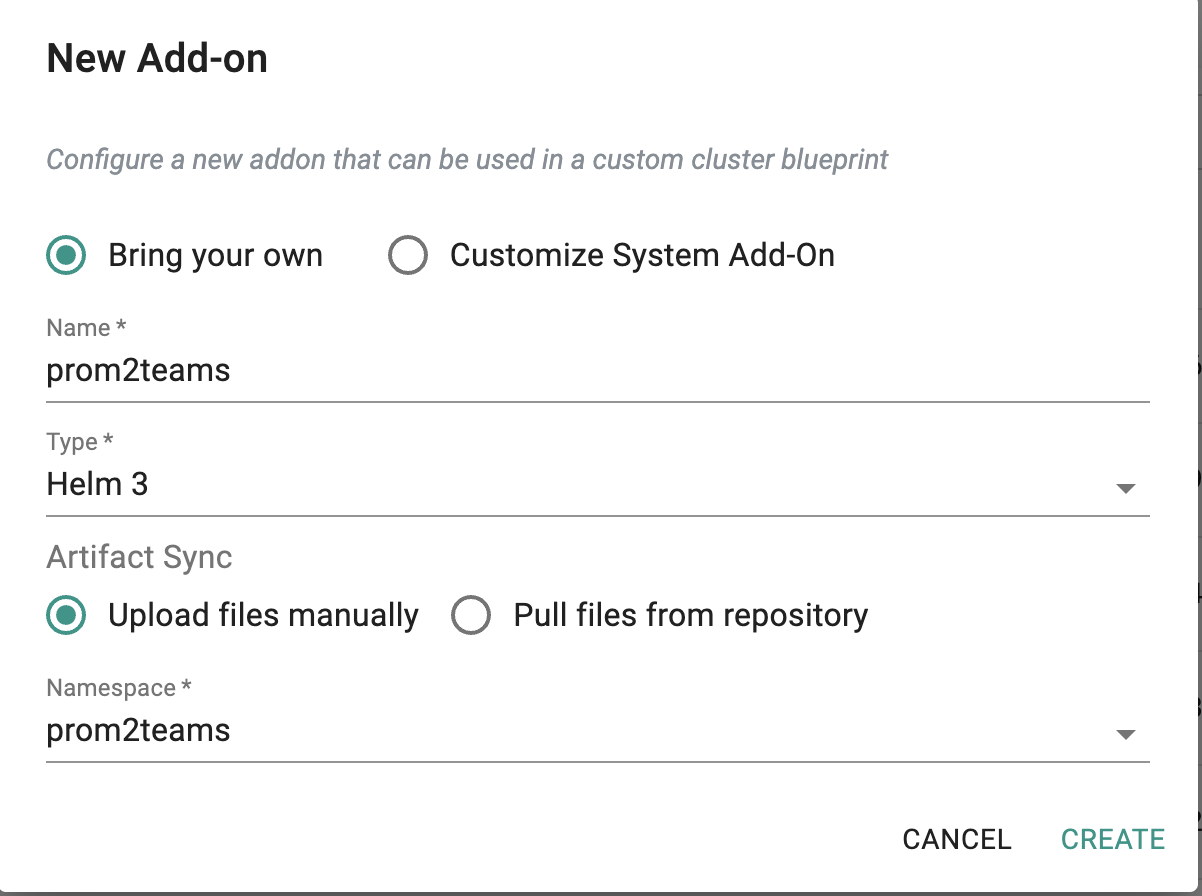
- Create a new version
- Provide an appropriate version name, upload the prom2teams-0.2.0.tgz in the Helm Chart and the modified values.yaml in the Values File(s) by choosing the upload files option
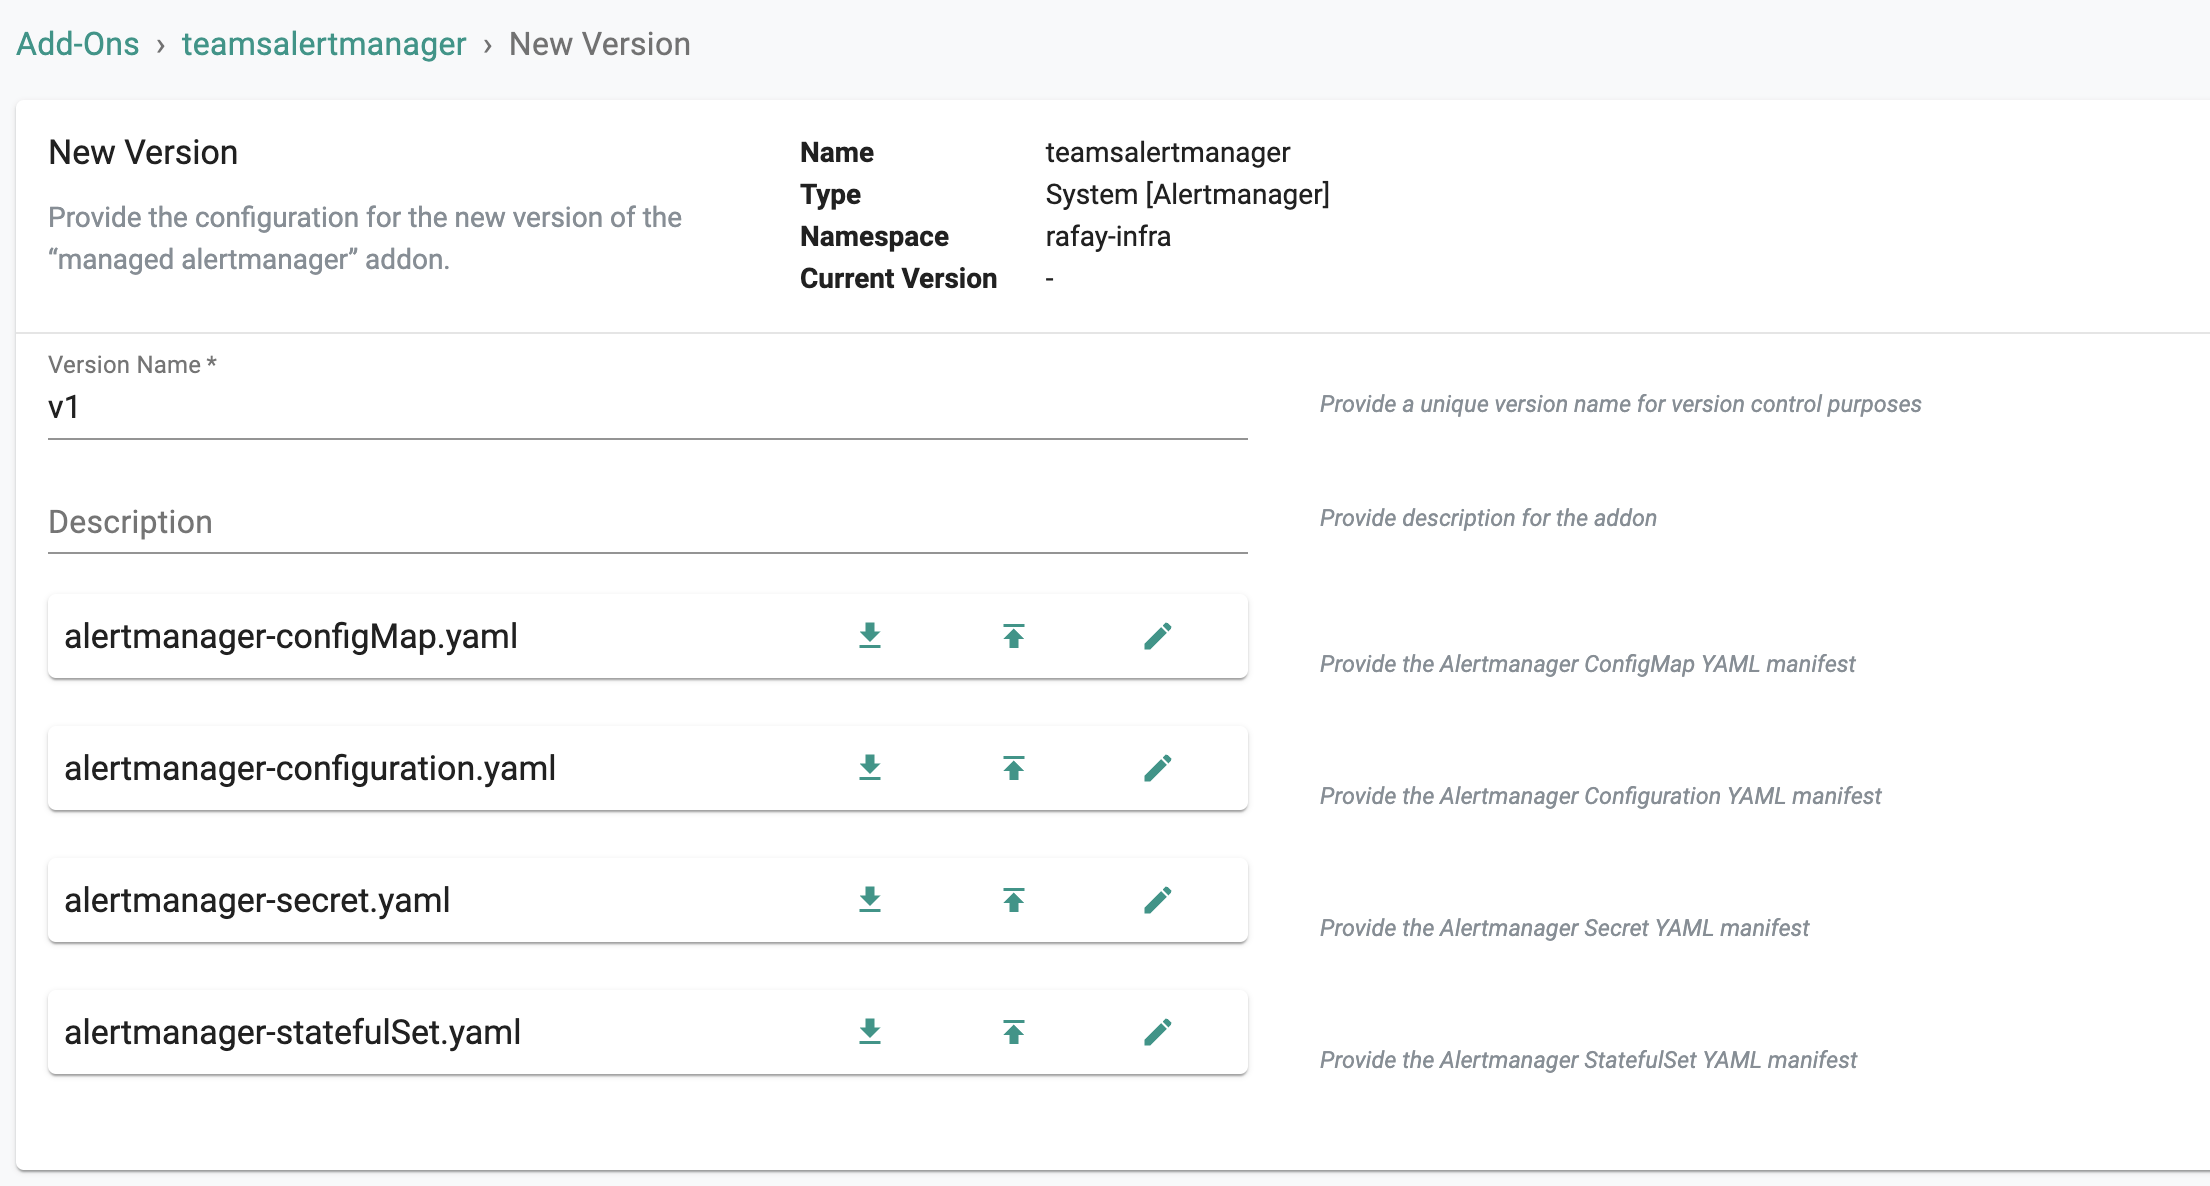
Step 3: Configure Alert Manager Add-on
Follow the below steps to create a customized "Alert Manager" System Add-on
- Navigate to Infrastructure -> Add-ons
- Create a new add-on using the Customize System Add-On option
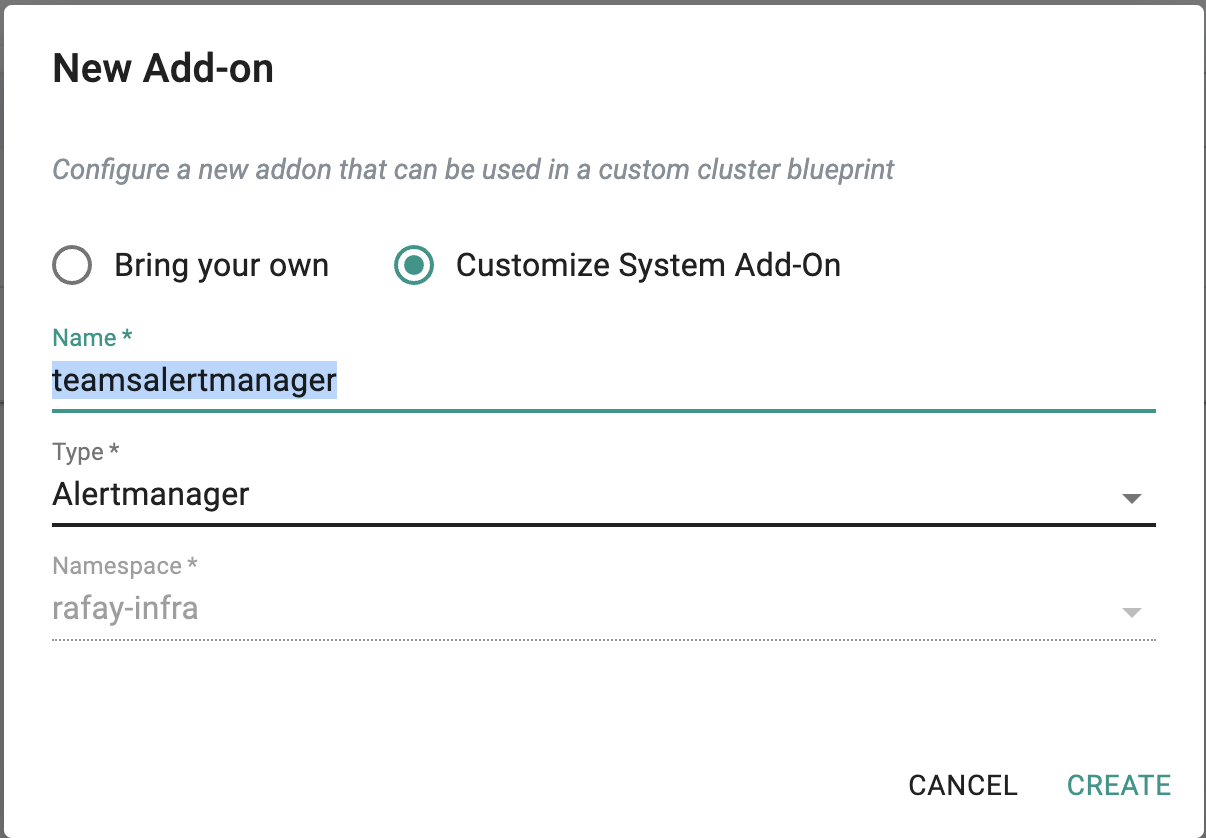
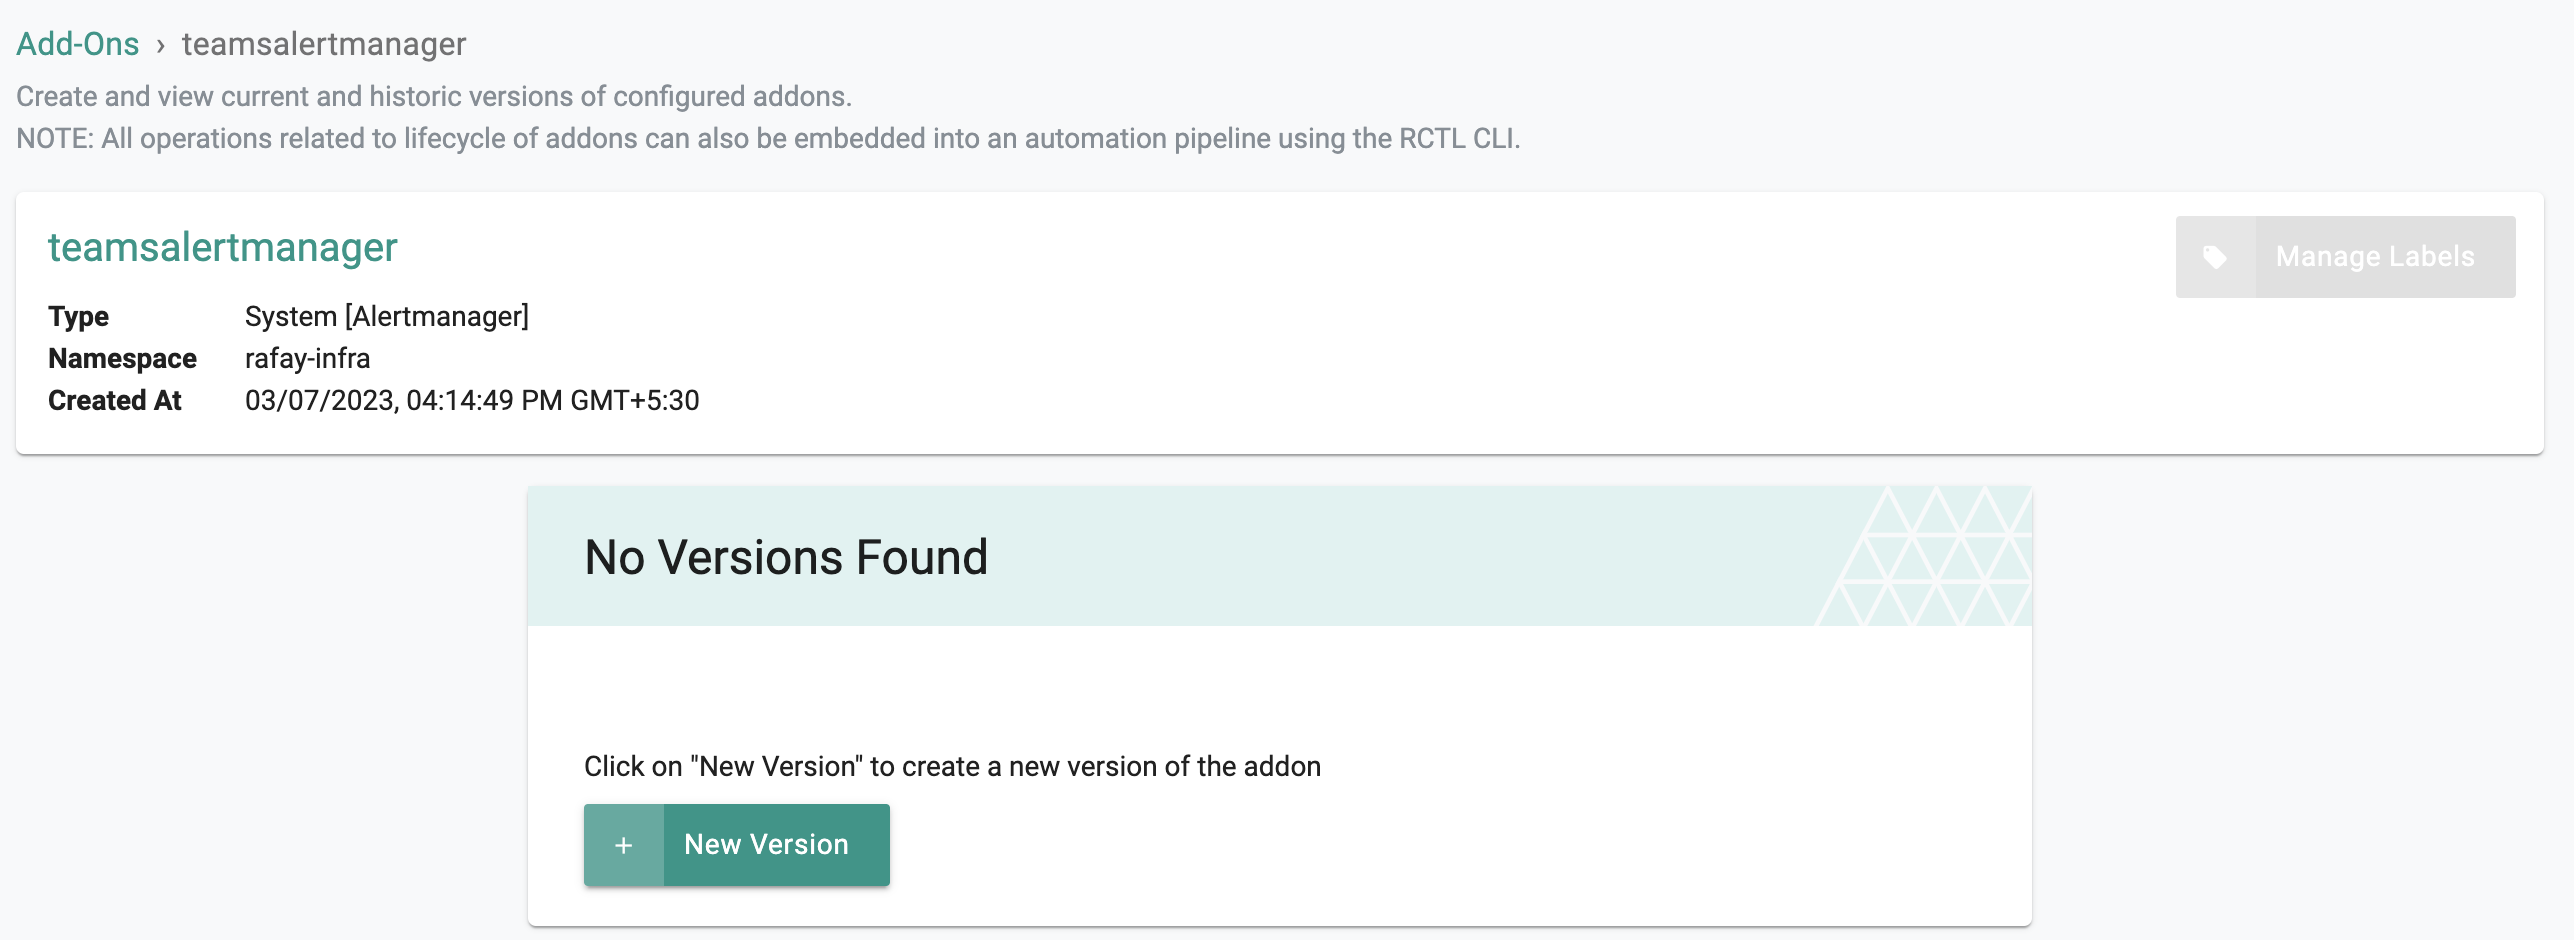
- Create a new version for the custom system Alert Manager add-on
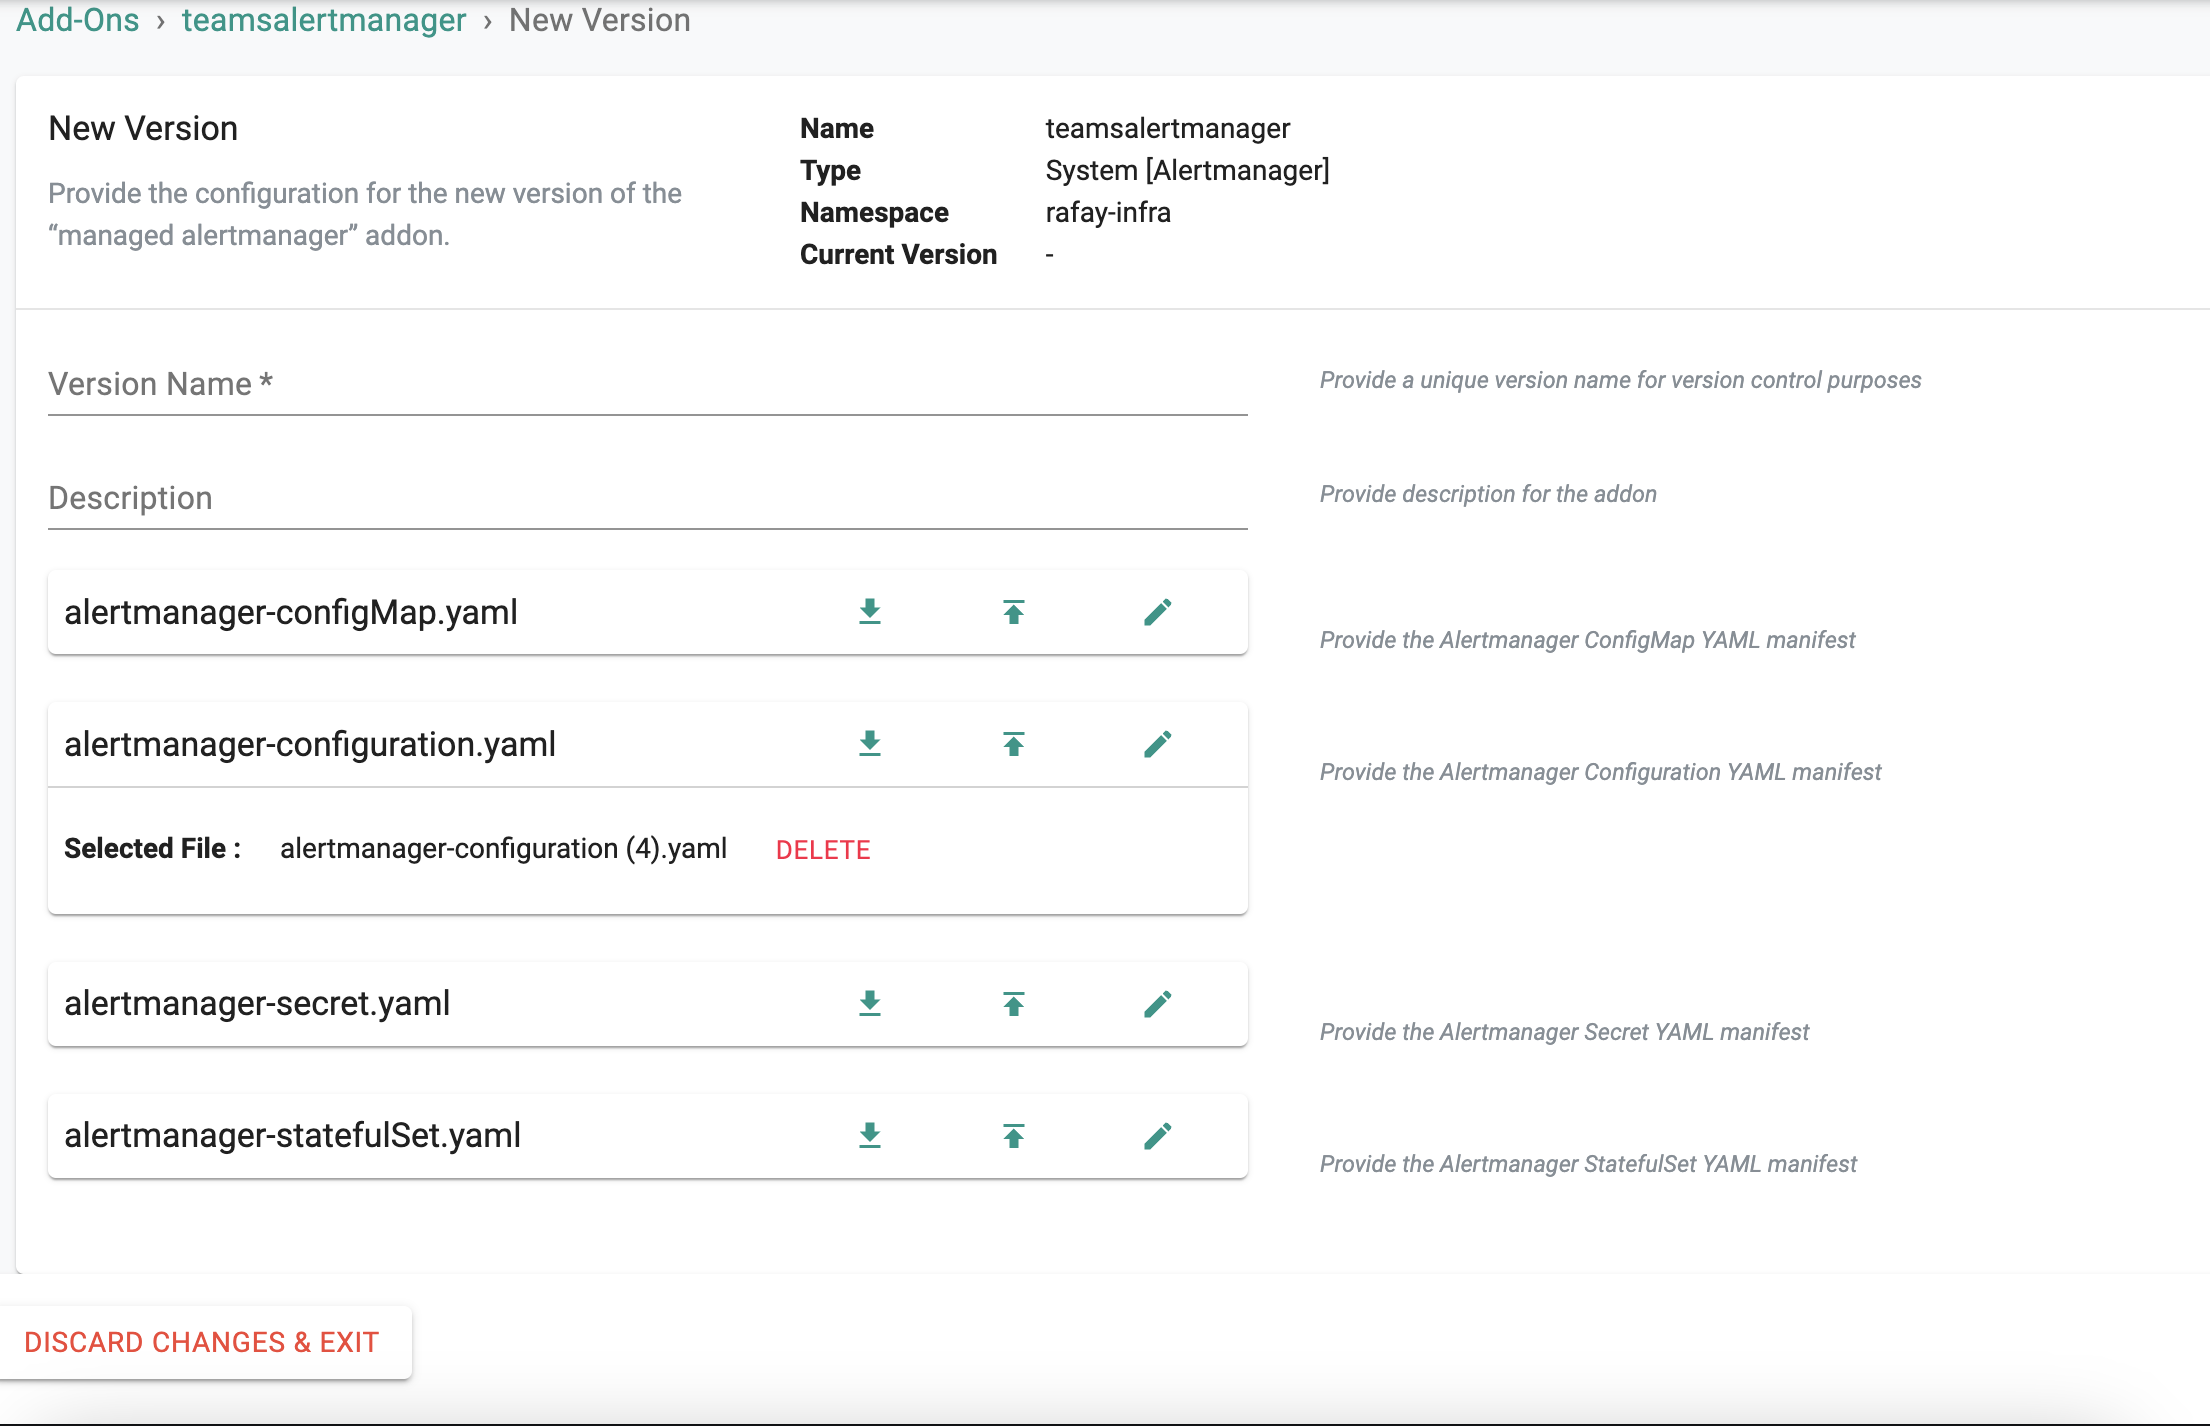
- Download the default configuration manifest (alertmanager-configuration.yaml)
- Add another webhook config under the receivers section of the downloaded configuration as shown below: The url format will be http://
. :8089. In this example, it is url: http://proms2team.proms2team:8089
receivers:
- name: default-receiver
- name: rafay-webhook
  webhook_configs:
  - http_config:
      tls_config:
        ca_file: /etc/config/certs/ca.crt
        cert_file: /etc/config/certs/client.crt
        insecure_skip_verify: true
        key_file: /etc/config/certs/client.key
        server_name: '{{{ .V2EventFrameworkFQDN }}}'
    url: https://{{{ .V2EventFrameworkFQDN }}}/event/v1/alert/raise
- name: prom2teams
  webhook_configs:
  - http_config:
    url: http://proms2team.prom2team:8089
- Next add the custom receiver for prom2teams notifications to the routes configuration in "route" section
route:
  group_interval: 5m
  group_wait: 10s
  receiver: rafay-webhook
  repeat_interval: 3h
  routes:
  - continue: true
    match_re:
      severity: .*
    receiver: rafay-webhook
  - continue: true
    match_re:
      severity: .*
    receiver: prom2teams
- Upload the modified configuration to the add-on
- Save the custom Alert Manager add-on version
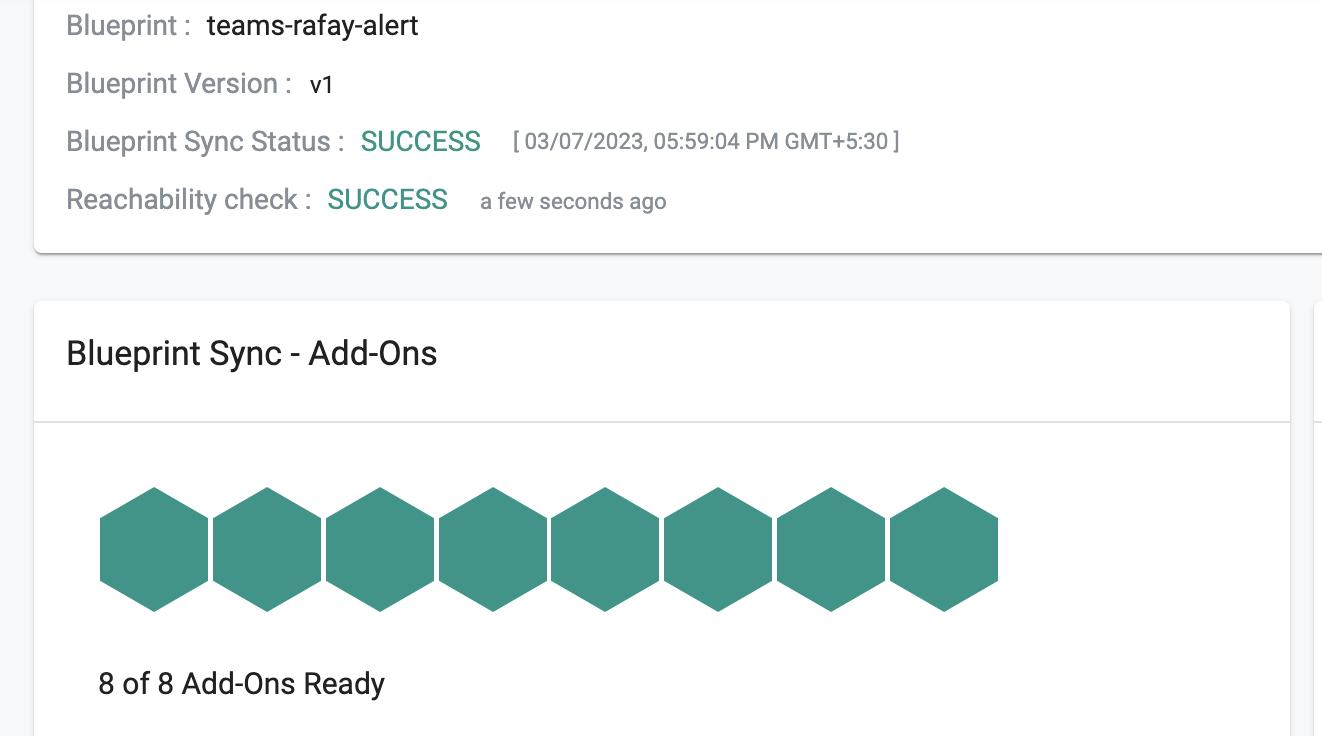
Step 4: Update Cluster Blueprint
Follow the below steps to deploy the customized Alert Manager configuration for Microsoft Teams notifications
- Go to Infrastructure > Blueprints
- Add the prom2team and custom Alert Manager add-ons to the custom blueprint and save changes
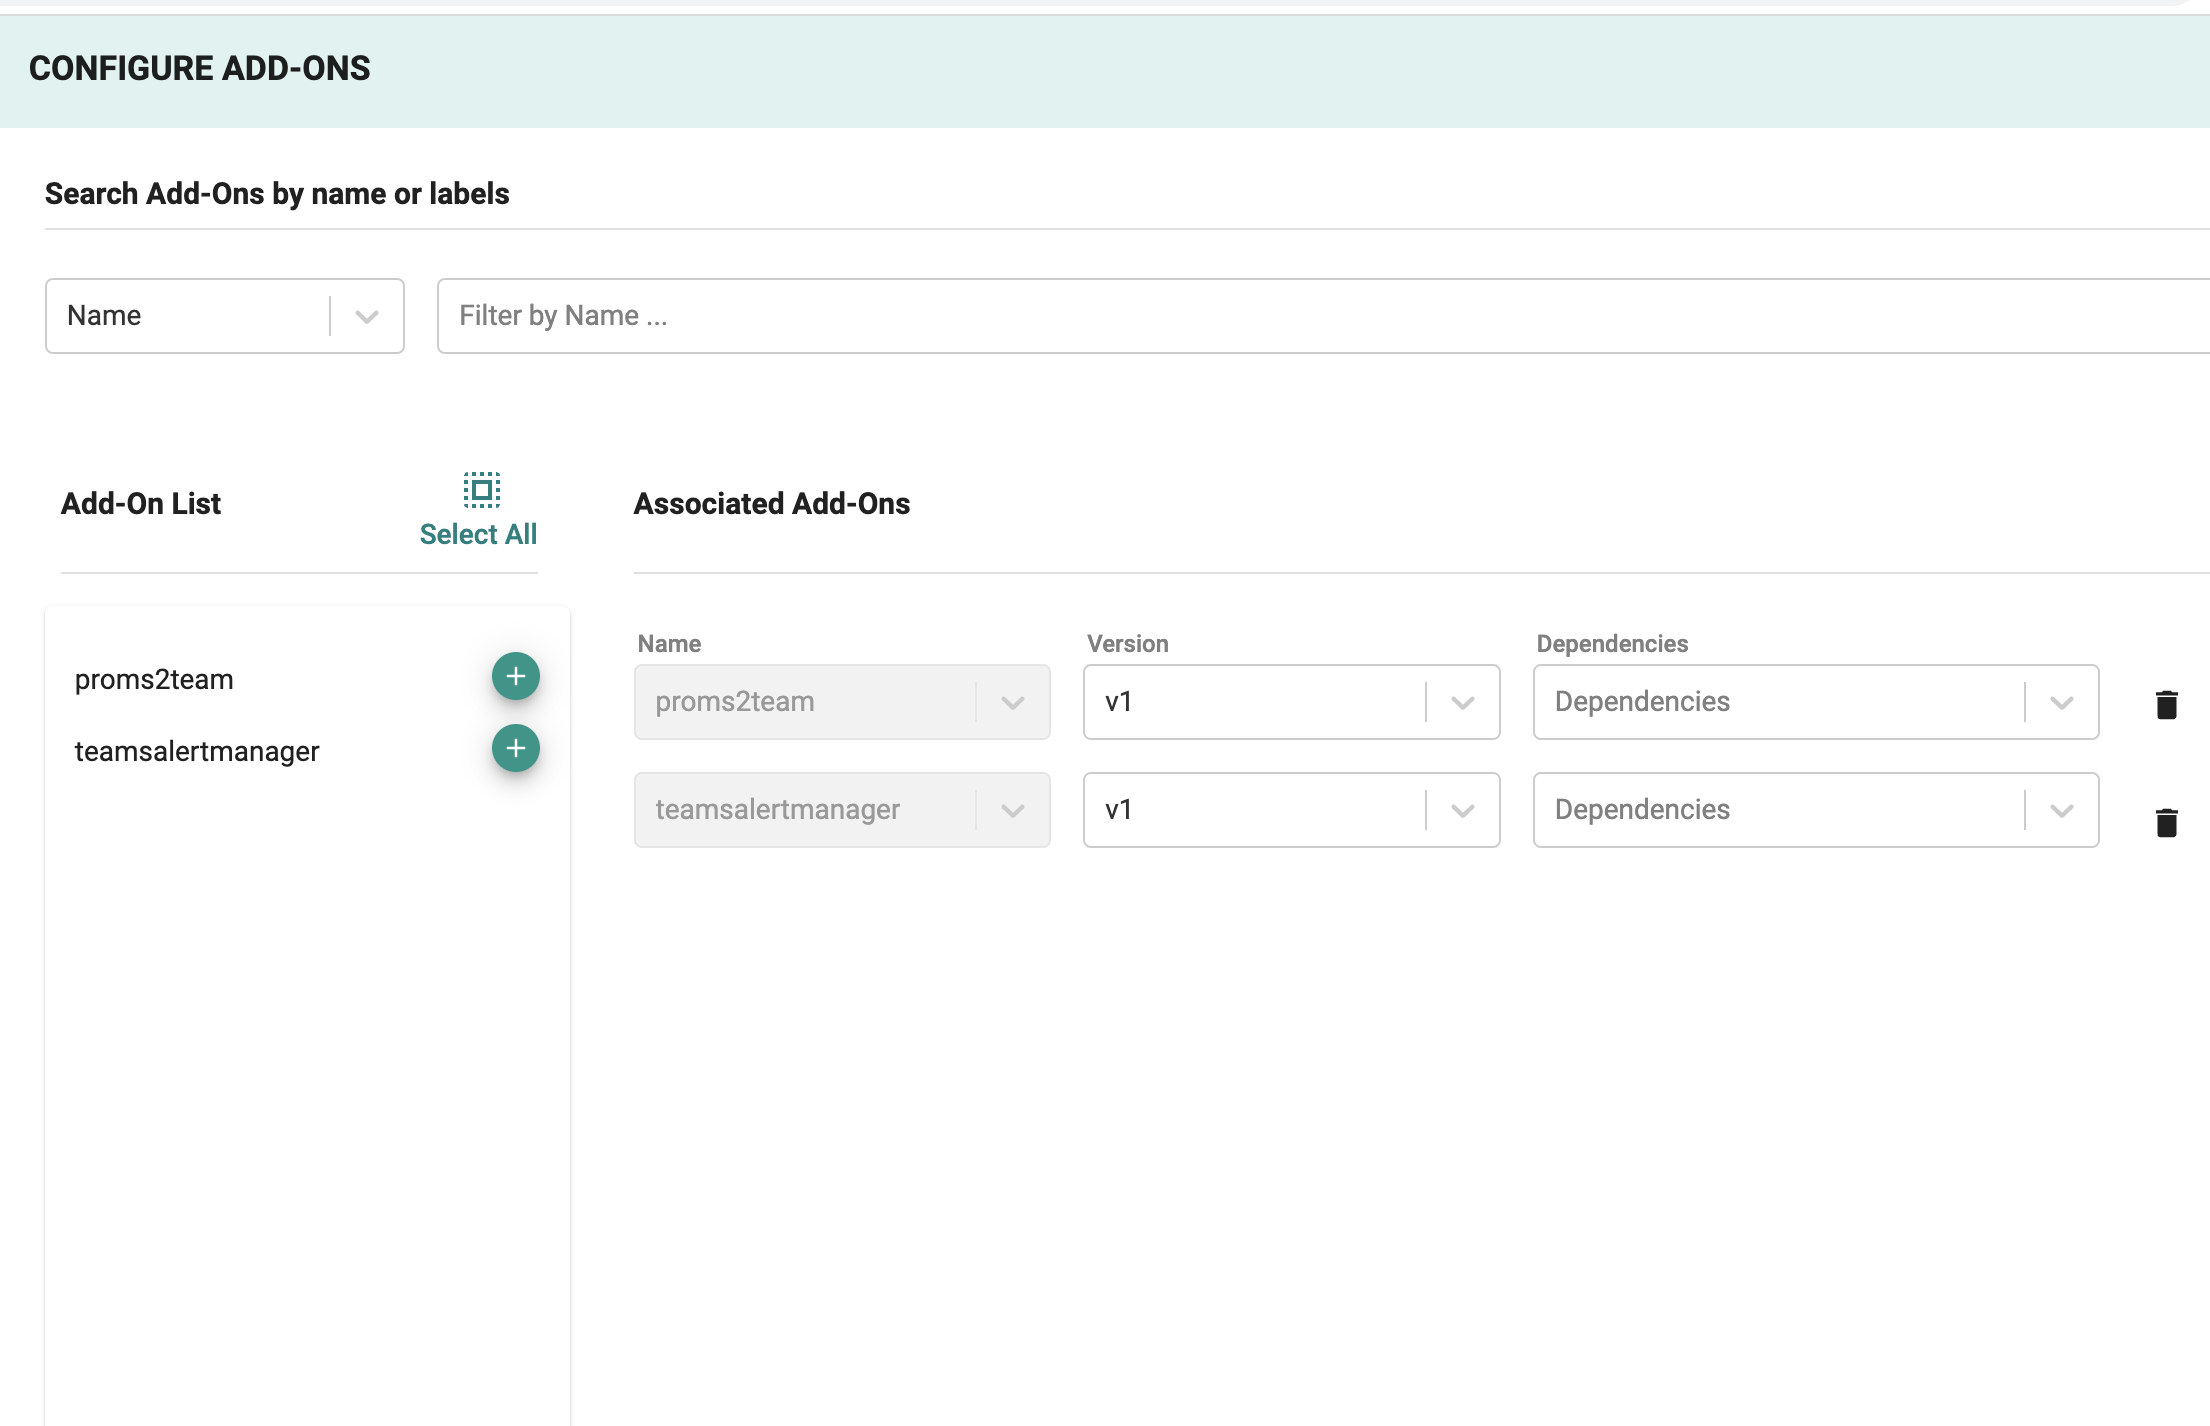
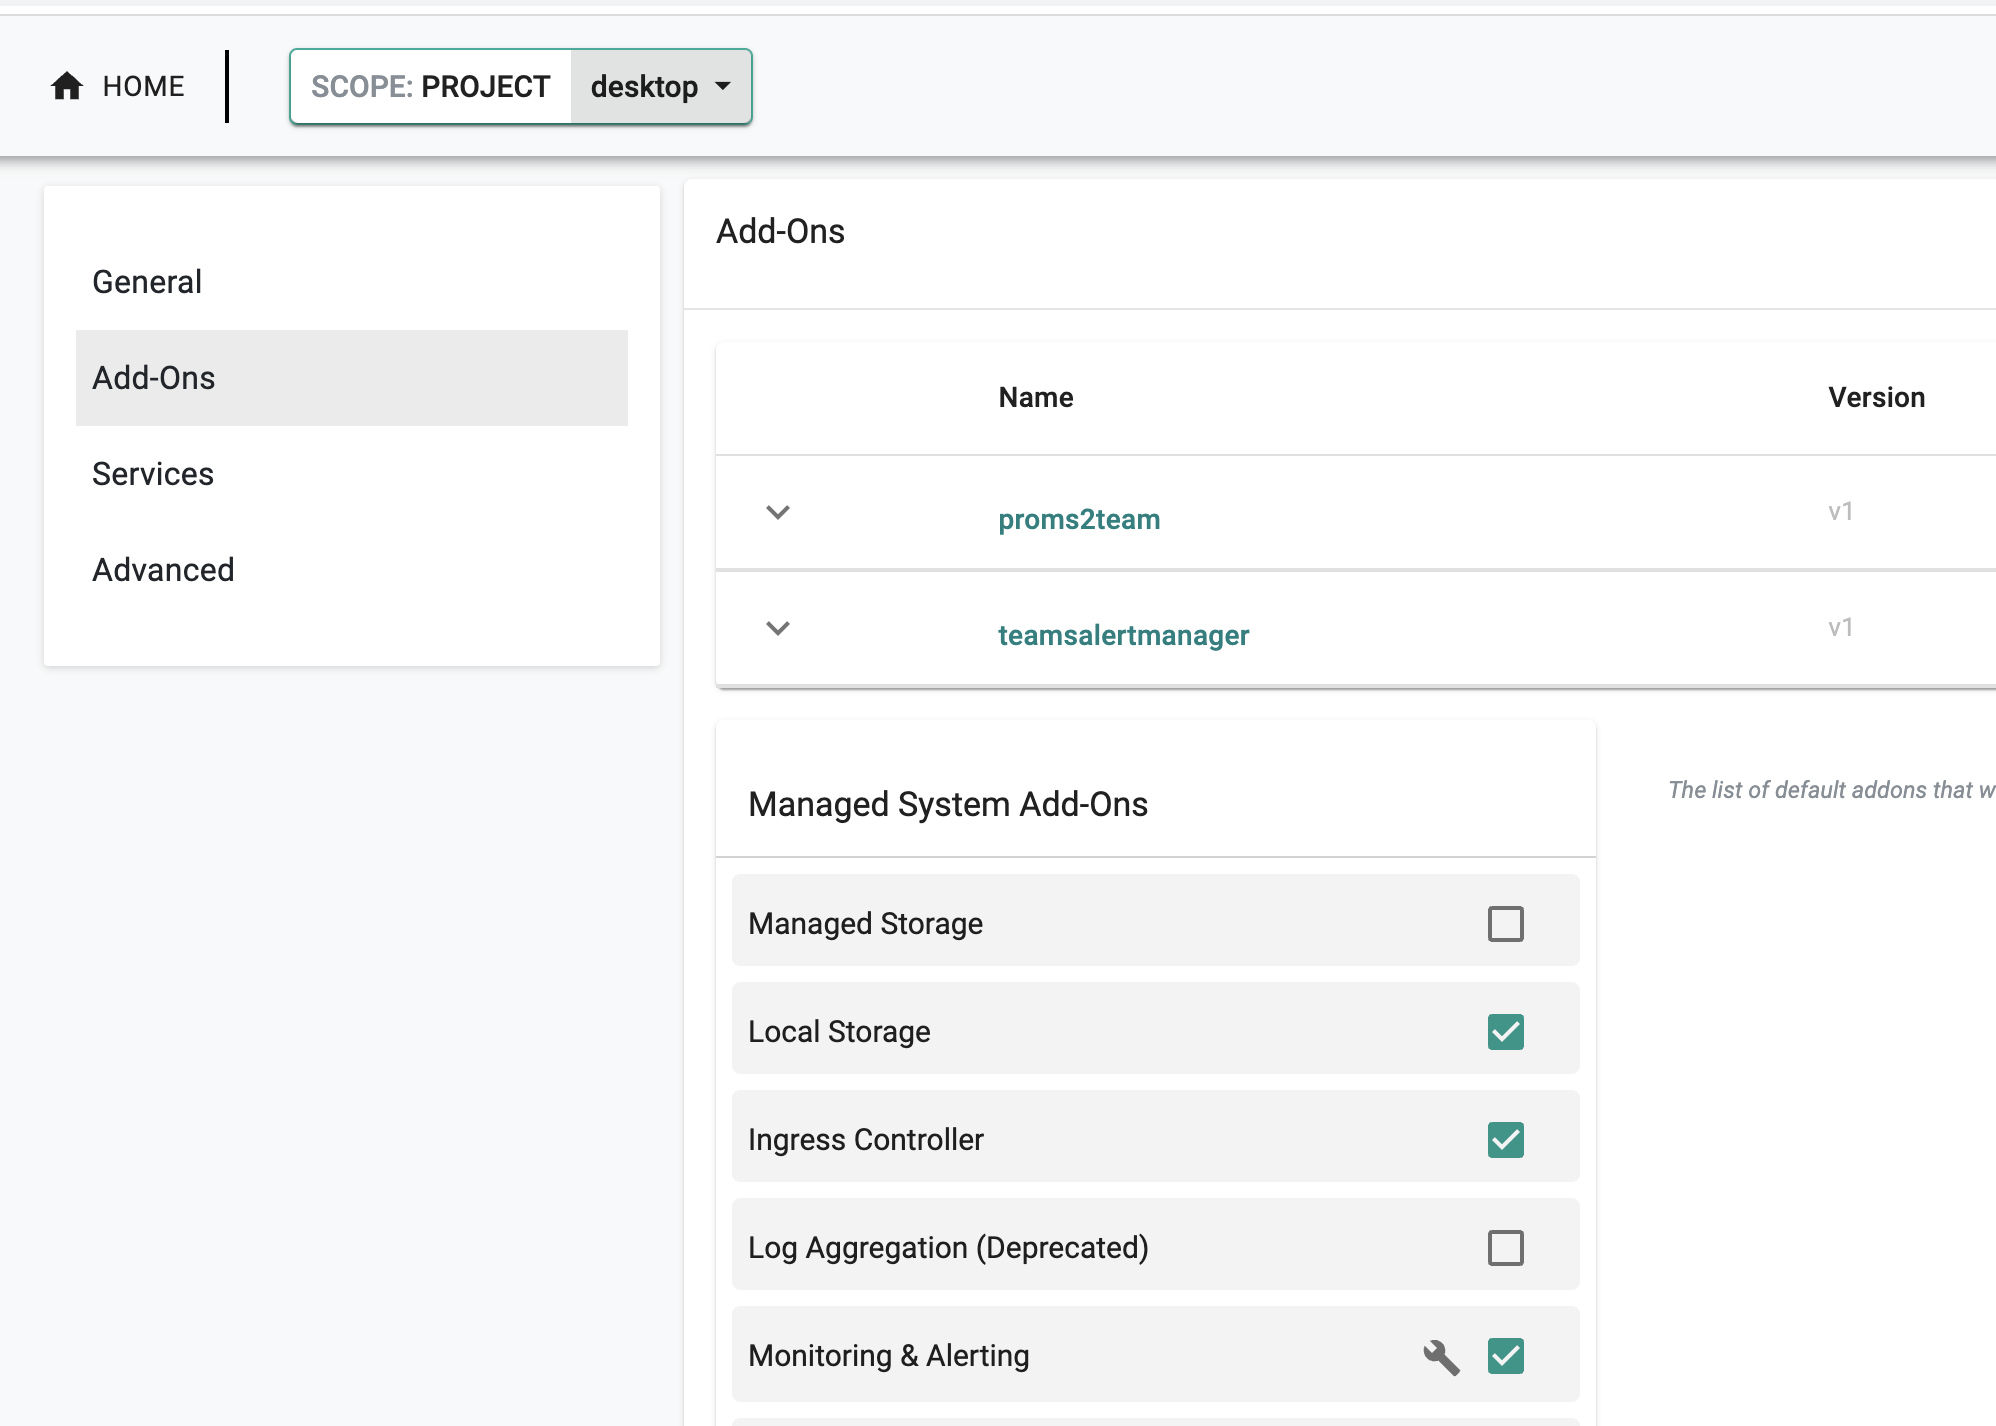
- Update the cluster with the new blueprint version that includes the prom2teams and alert manager add-ons
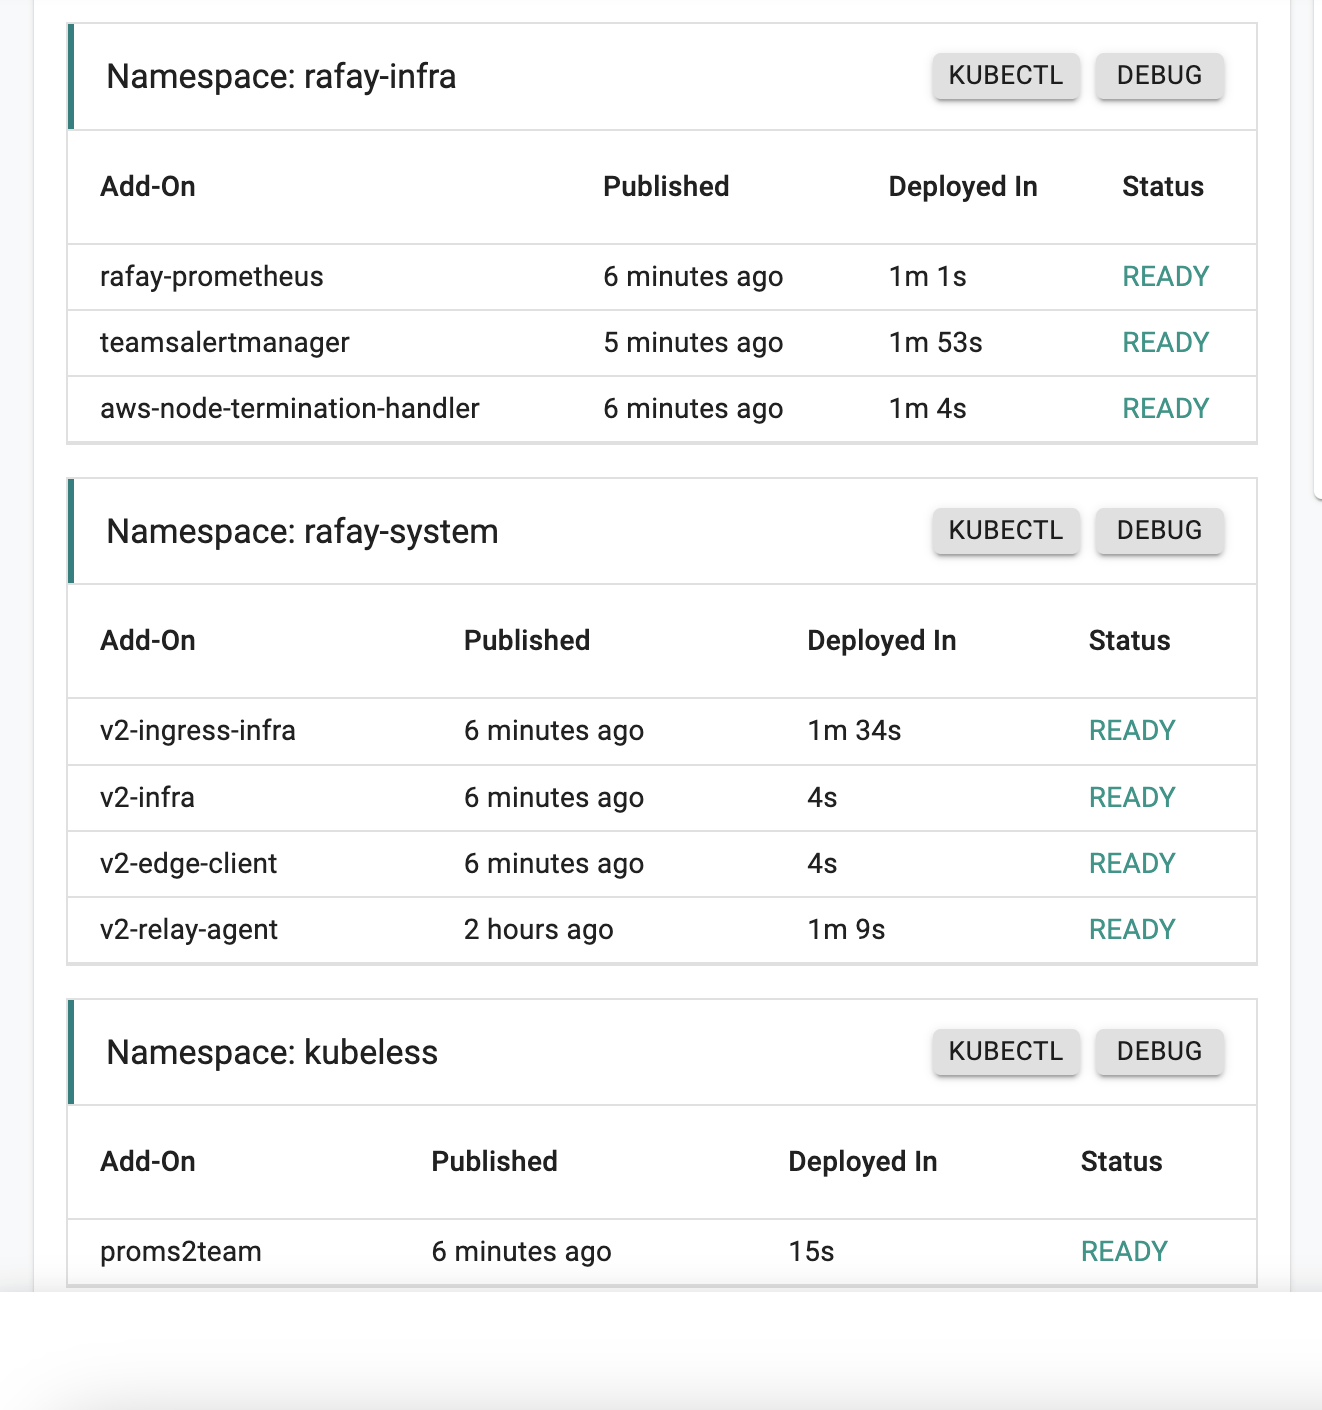
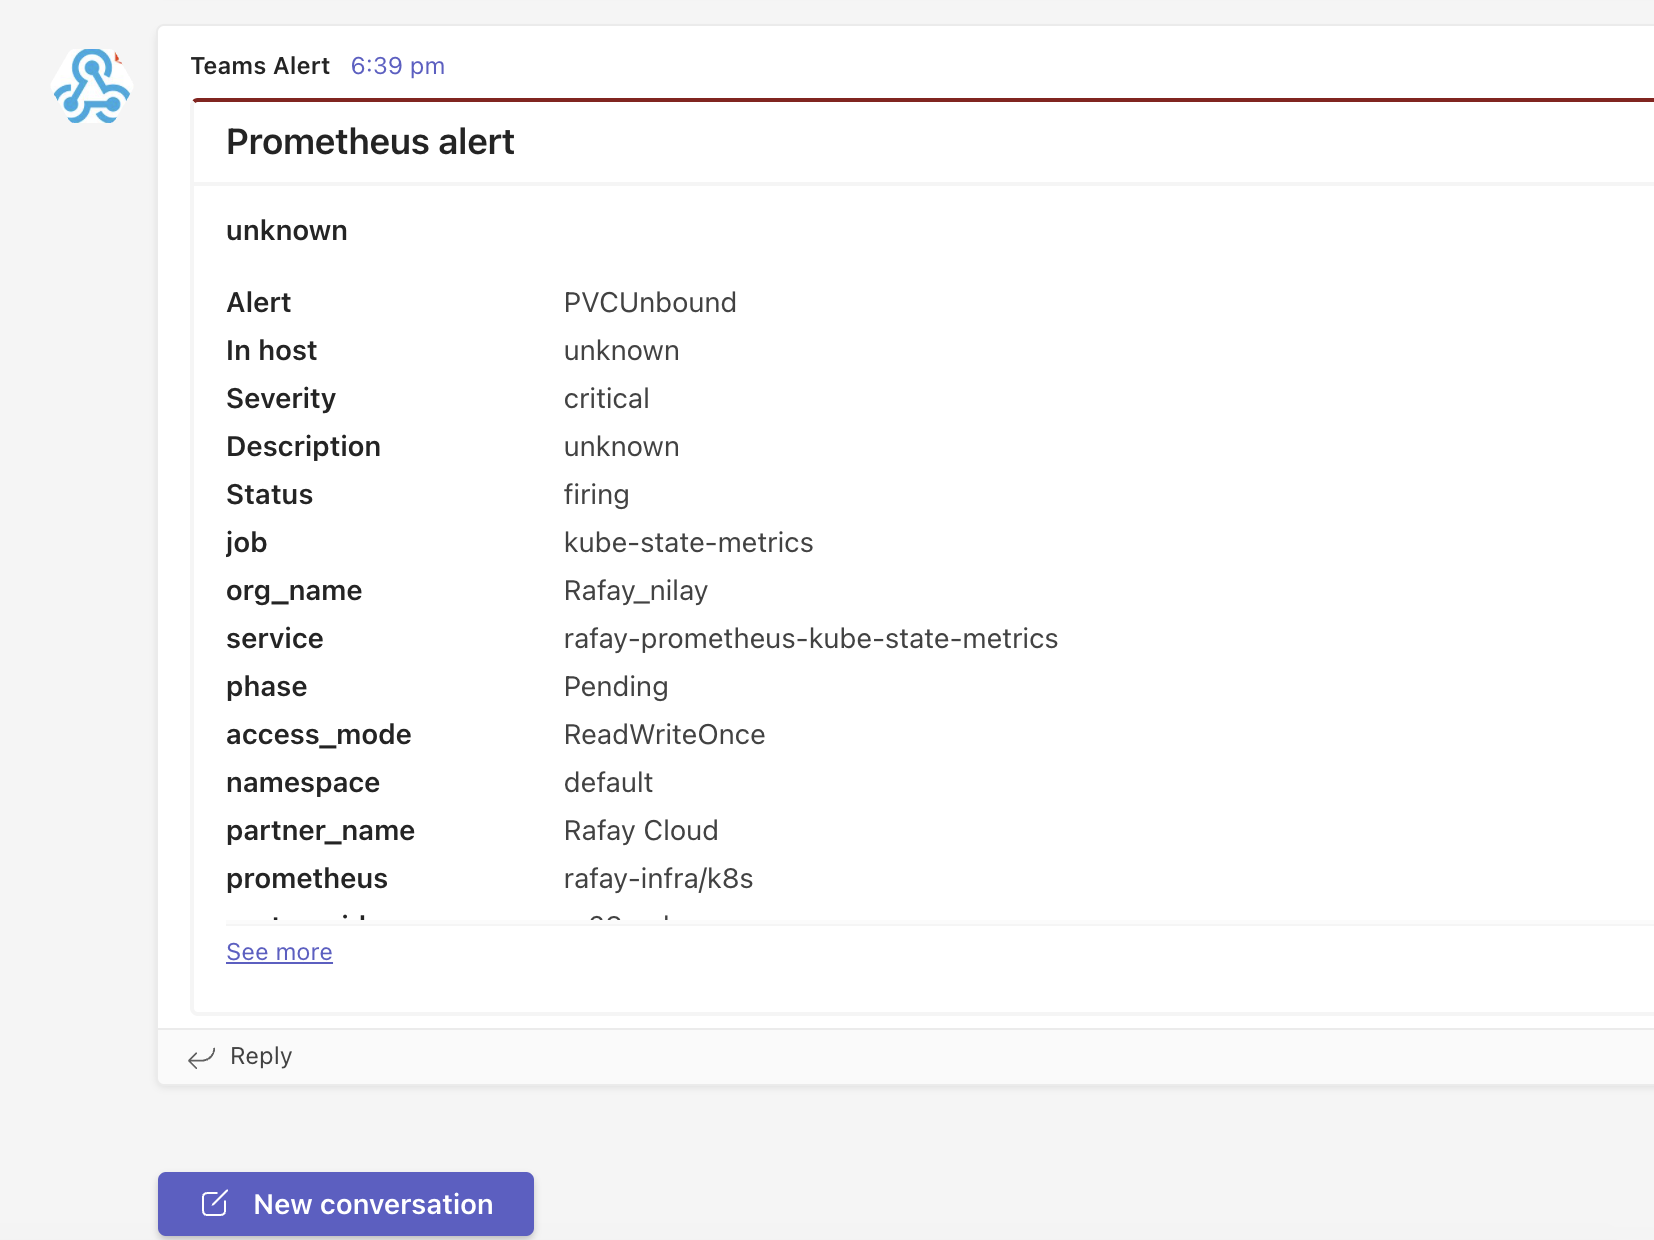
Step 5: Verify Configuration
Once the alerts are generated in the clusters, you will receive notifications in your Teams channel for the alerts. An illustrative example is shown below.