Private Kube API Proxy
Private Kube API Proxy allows customers to create their own dedicated and isolated Kube API Proxy networks (private or public) to provide kubectl access for their users. Users can create multiple Kube API Proxies based on the requirements and associate the clusters to one or more such proxies. The agents in the cluster connect to the configured custom Kube API Proxies. Also, the user’s kubeconfig points to the appropriate network address to reach the cluster.
Enable Kube API Proxies
Perform the below steps to enable the Kube API Proxies
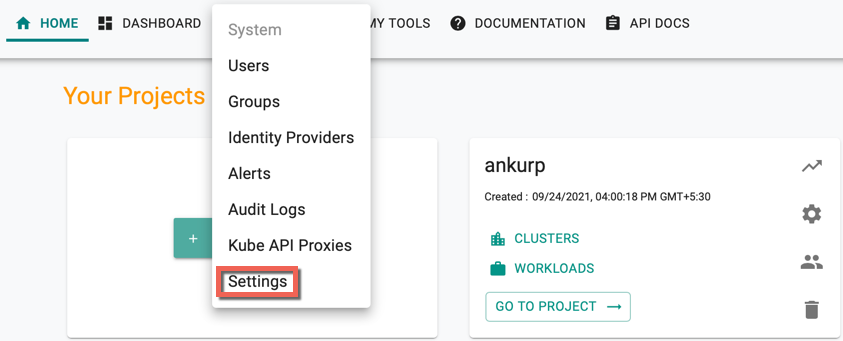
- Login to the controller and click System
- Click Settings
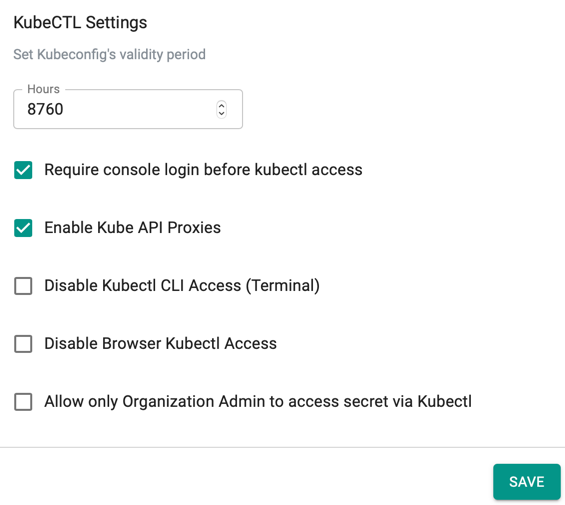
- Select Enable Kube API Proxies option under KubeCTL Settings and click Save
Create Kube API Proxy
To create a new Kube API Proxy, perform the below steps
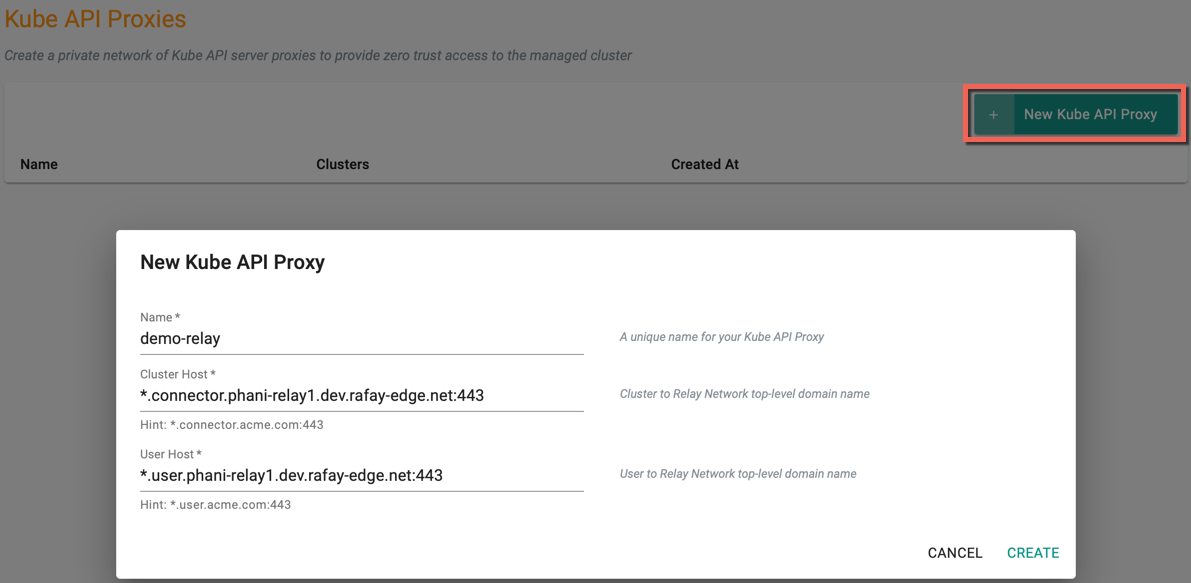
- Click System and select Kube API Proxies

Kube API Proxies page appears
- Click New Kube API Proxy and provide a name for the proxy
- Enter the Cluster Host. This should be a wild card hostname on the domain that you own. Ex: *.connector.example.com
- Enter the User Host. This should be a wild card hostname on the domain that you own. Ex: *.user.example.com
- Click Create
A success message appears once the Kube Proxy is created

Self signed certificates are automatically generated for both the above hostnames. But you have an option to modify the certificate for User Host. If you wish to update the certificate click on CONFIGURE CERTIFICATES
You will see the page as shown below.
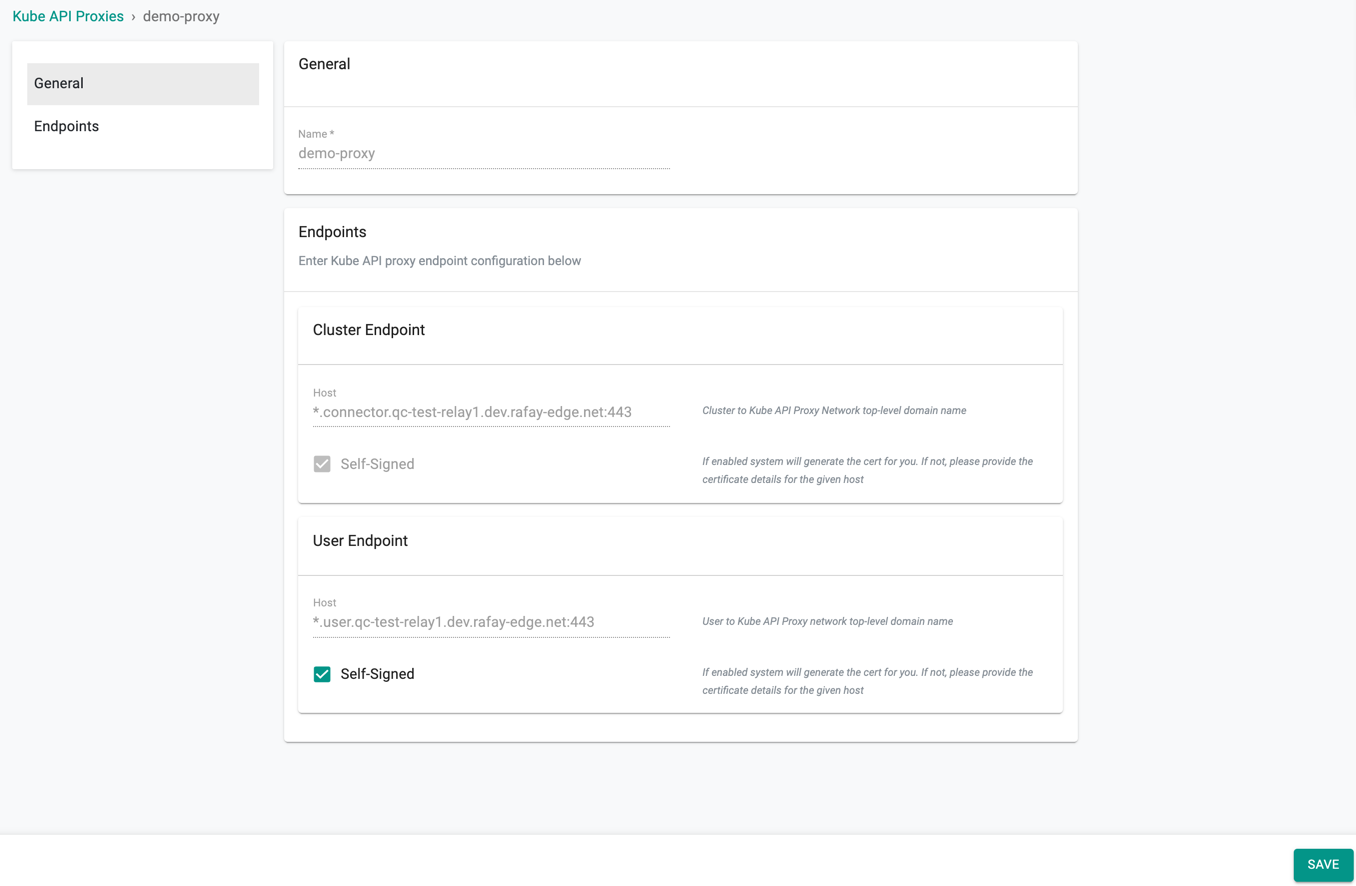
General Settings
The General settings show the name of the Kube API Proxy.
Endpoints
The End Point Settings shows the host details of both Cluster Endpoint and User Endpoint
- Cluster Endpoint: Cluster Endpoint Self-Signed option generates a certificate for the given host. Self-Signed Certificate is to authorise and provide a secured connection between the cluster and proxy
-
User Endpoint: By default, Kube API Proxies use the Self-Signed Certificate Authority (CA) provisioned in the Controller for secured connection. If the users do not require the system generated certificate for the User Endpoint and wish to provide their certificate, deselect the Self-Signed option and provide the below details:
-
Certificate Body
- Certificate Private Key
- Password (optional)
Endpoints
The Endpoints Settings shows the host details:
- Cluster Endpoint: Cluster Endpoint Self-Signed option generates a certificate for the given host. Self-Signed Certificate is to authorize and provide a secure connection between the cluster and the proxy
-
User Endpoint: Users are allowed to select or deselect the Self-Signed option. If users do not require the system generated certificate for the User Endpoint and wish to provide their CA/Intermediate CA certificate details, deselect the Self-Signed option and provide the below details:
- Certificate Body
- Certificate Private Key
- Password (optional)
- Click Save
On providing this information, the controller uses the customer-supplied Certificate Authority (CA) to generate certificates for the proxies and this secures the user's KubeCTL traffic
On providing this information, the controller uses the customer-supplied Certificate Authority (CA) to generate certificates for the proxies and this secures the user's KubeCTL traffic
- Click Save, if any changes made to the Kube API Proxy endpoint configuration
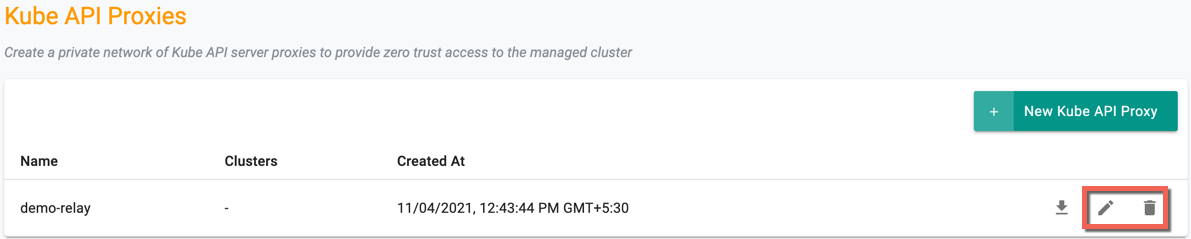
On successful creation, the new proxy is listed on the Kube API Proxies page. Use the Edit icon to modify the config details and Delete icon to delete the proxy
Download Deployment Configuration
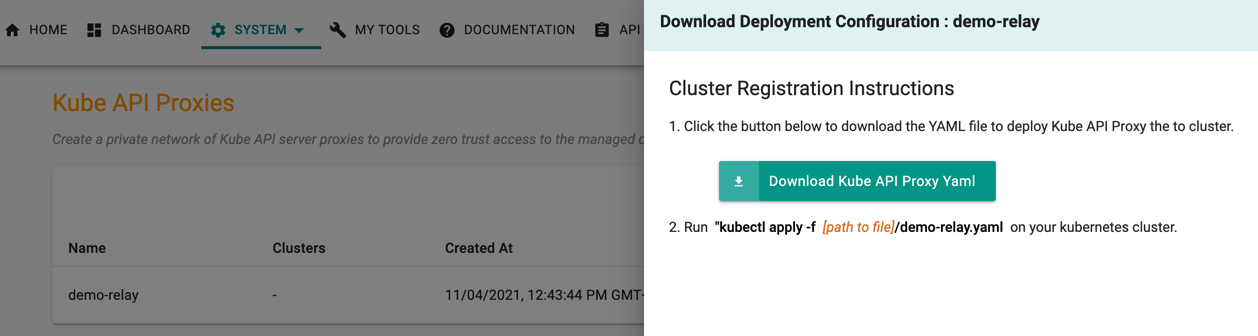
Once the proxy is created, the user must download the Kube Proxy deployment configuration
- Click Download icon of the required proxy. Cluster Registration Instructions pane appears at the right of the page
- Click Download Kube API Proxy Yaml to download the Yaml file to deploy the Kube API Proxy
Below is an example of the Kube Proxy Yaml file
apiVersion: apps/v1
kind: Deployment
metadata:
  labels:
    app: rafay-kube-proxy
  name: rafay-kube-proxy
  namespace: rafay-system
spec:
  replicas: 1
  progressDeadlineSeconds: 1800
  selector:
    matchLabels:
      app: rafay-kube-proxy
  template:
    metadata:
      labels:
        app: rafay-kube-proxy
    spec:
      containers:
      - args:
        - --mode=server
        - --log-level=3
        env:
        - name: POD_NAME
          valueFrom:
            fieldRef:
              apiVersion: v1
              fieldPath: metadata.name
The downloaded yaml files have services and objects to create the proxy instance. User must create an appropriate Ingress object and set up to expose the proxy as per the environment needs. Users can customise the yaml file configuration based on the requirement. Based on how you decide to expose the proxy, create the DNS entries for Cluster Host and User Host so that they resolve to the cluster that you are deploying the proxy.
- Run the below command to apply the Kube Proxy to the required Kubernetes Cluster
kubectl apply -f [path to file]/<proxy-name.yaml>
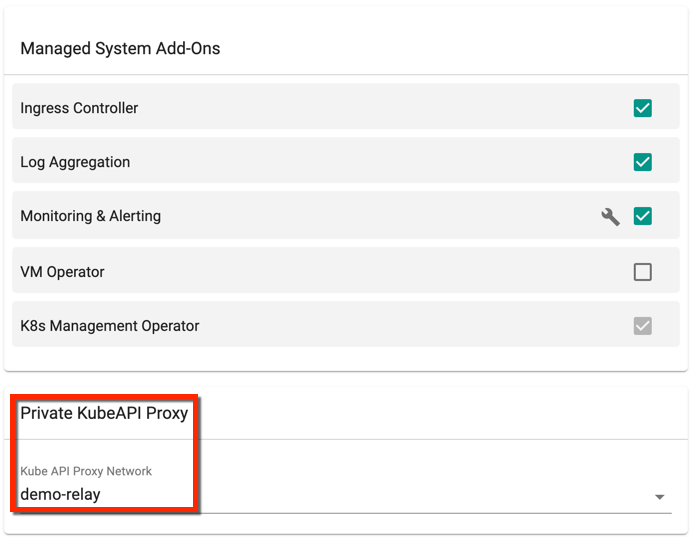
Private Kube API Proxy on Cluster
On successful Kube API Proxy creation, user can now associate a cluster to a Private Kube API Proxy using Blueprints. User can add one or more Kube API Proxies to the existing or new Blueprints as shown below
Note
If you select a private KubeAPI Proxy in a blueprint, make sure that the cluster where this blueprint is applied can talk to the Cluster Host created in previous step.