Add Storage
GlusterFS storage can be expanded for provisioned upstream k8s clusters. GlusterFS storage expansion can be done
- By Adding a new storage device to the existing storage node or
- By Adding a brand new node with a Storage Role.
Add New Node With Storage Role
- Create required VMs or instances with the raw/unformatted volume attached to it.
- Sign into the Web Console
- Select the cluster and click on nodes
- Click "Add Node" and Follow the Node Installation Instructions to install the bootstrap agent on the VM
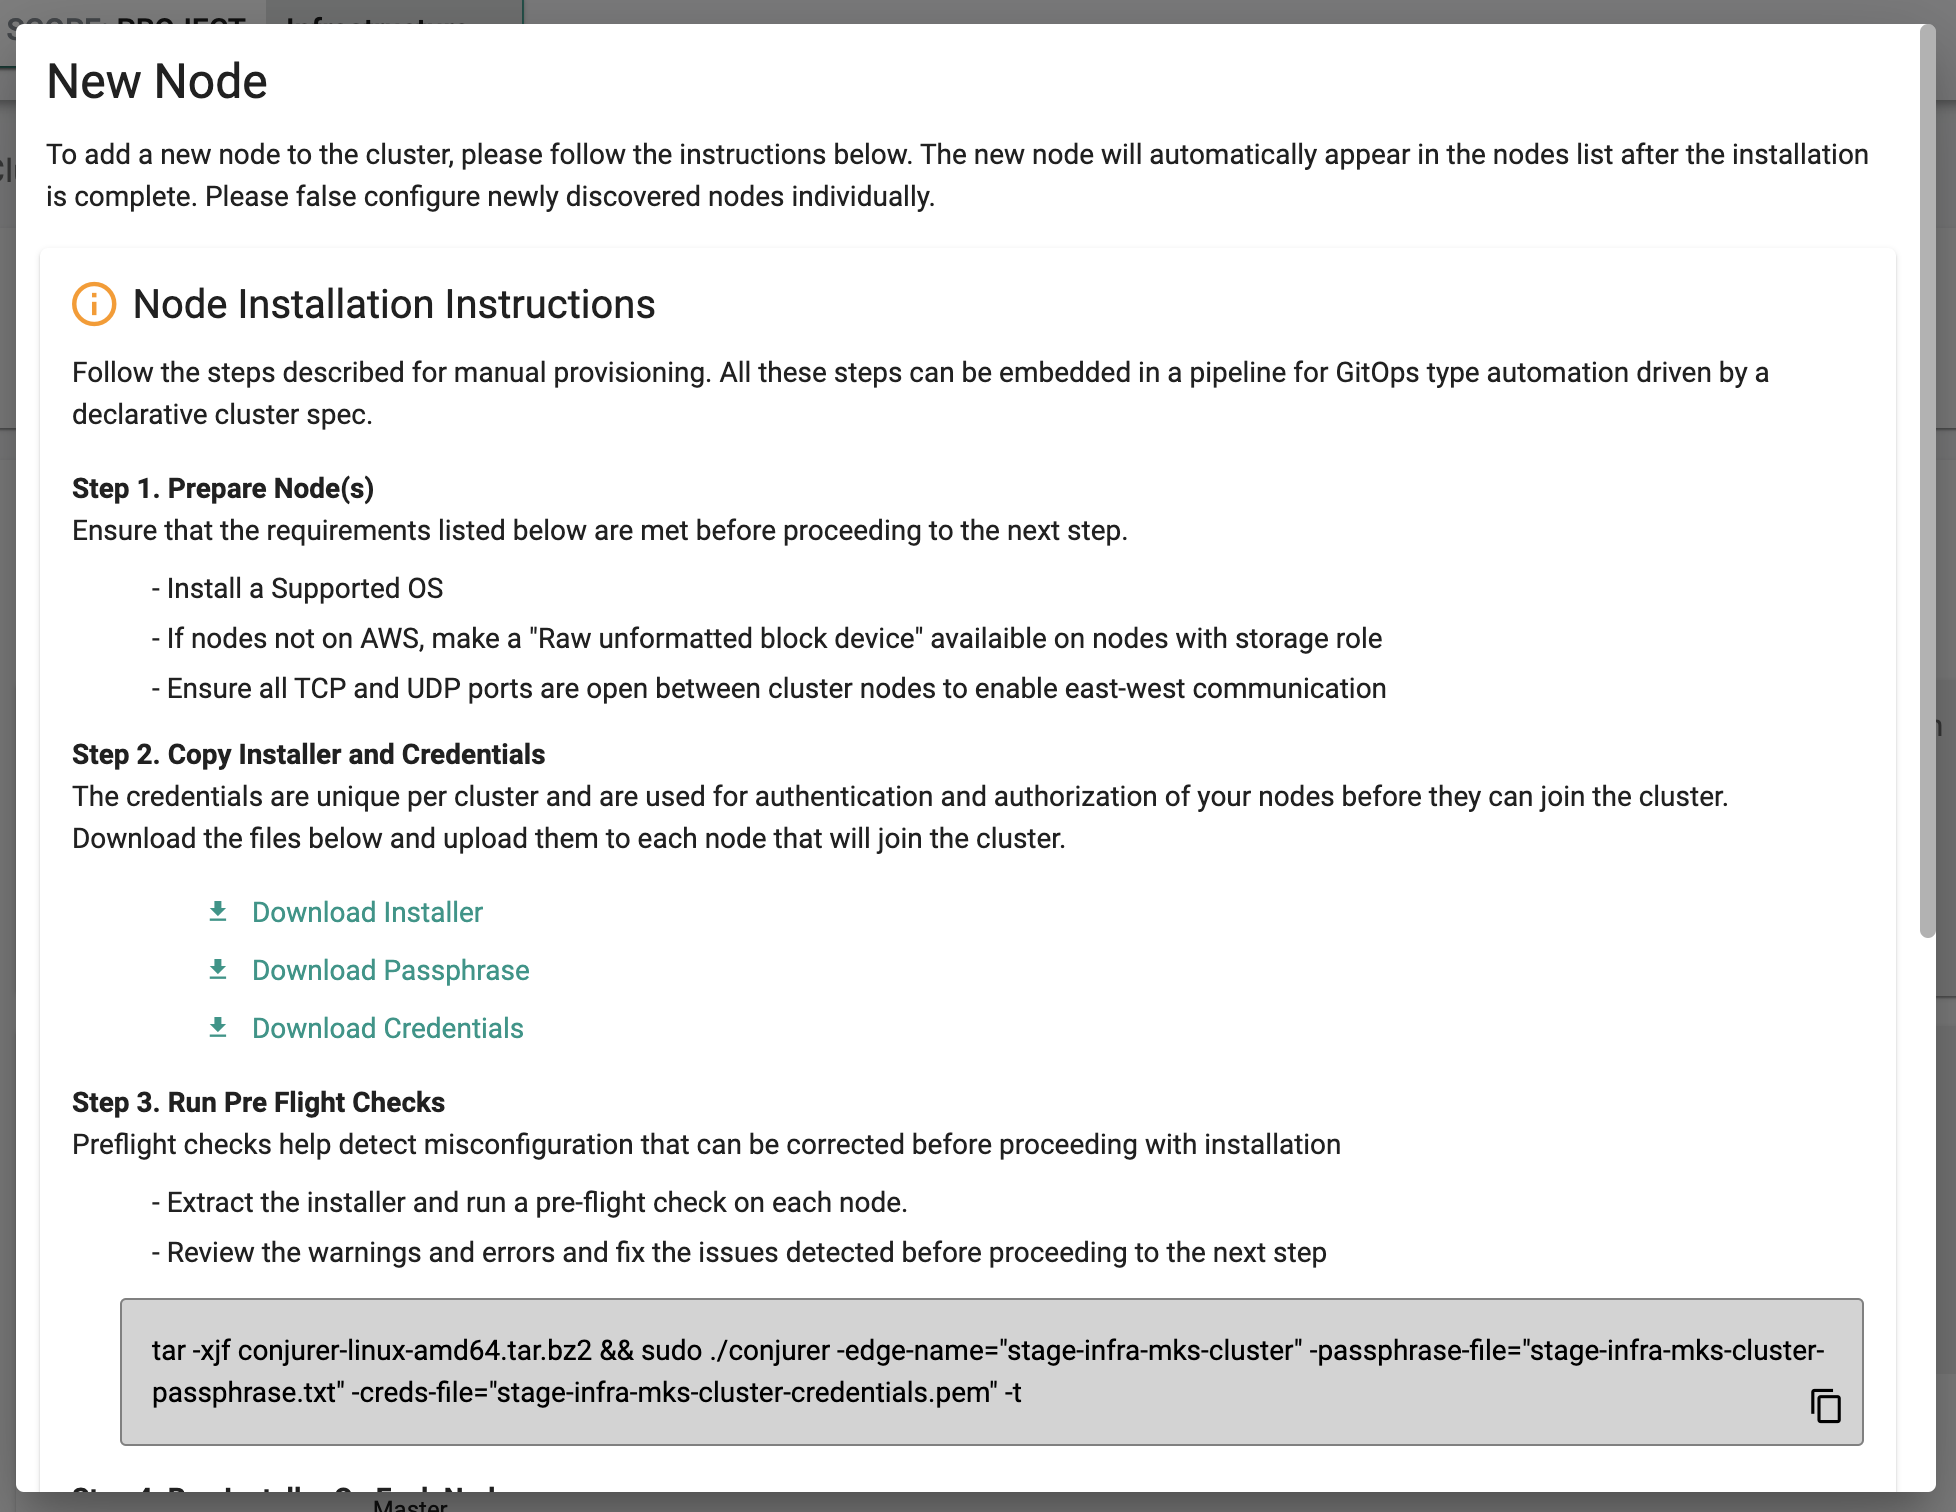
- Approve the node.
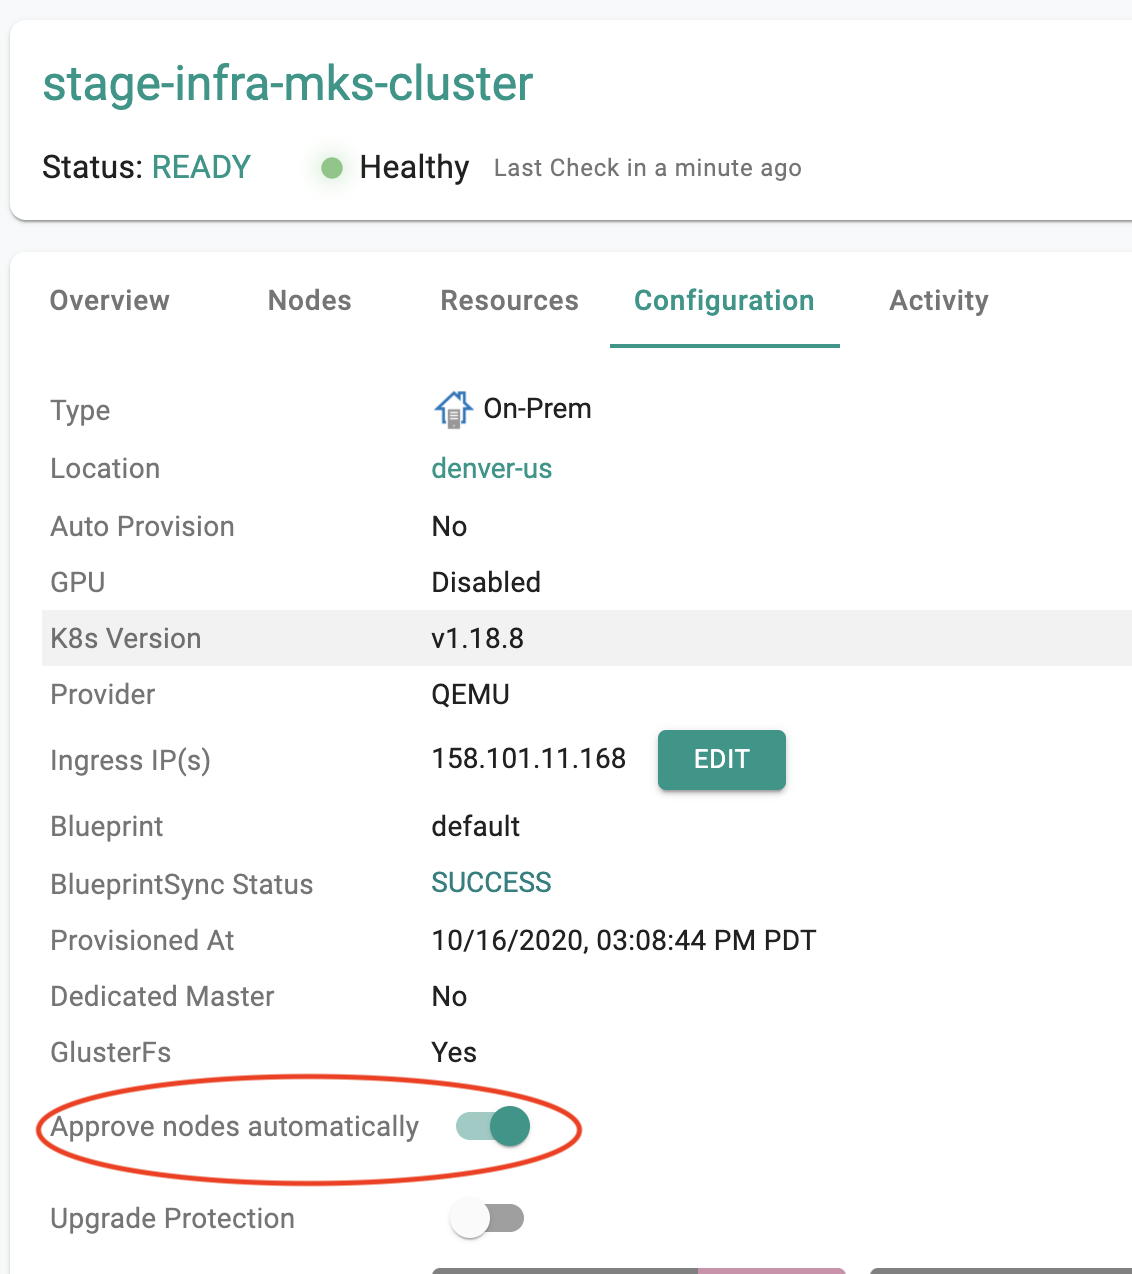
Users can optionally enable "auto approval" for new nodes to join the cluster. Enable the auto approval "toggle" in the cluster configuration page as shown in the screenshot below.
- Click on "Provision" and confirm to start adding this node as a new node with storage role to the existing cluster
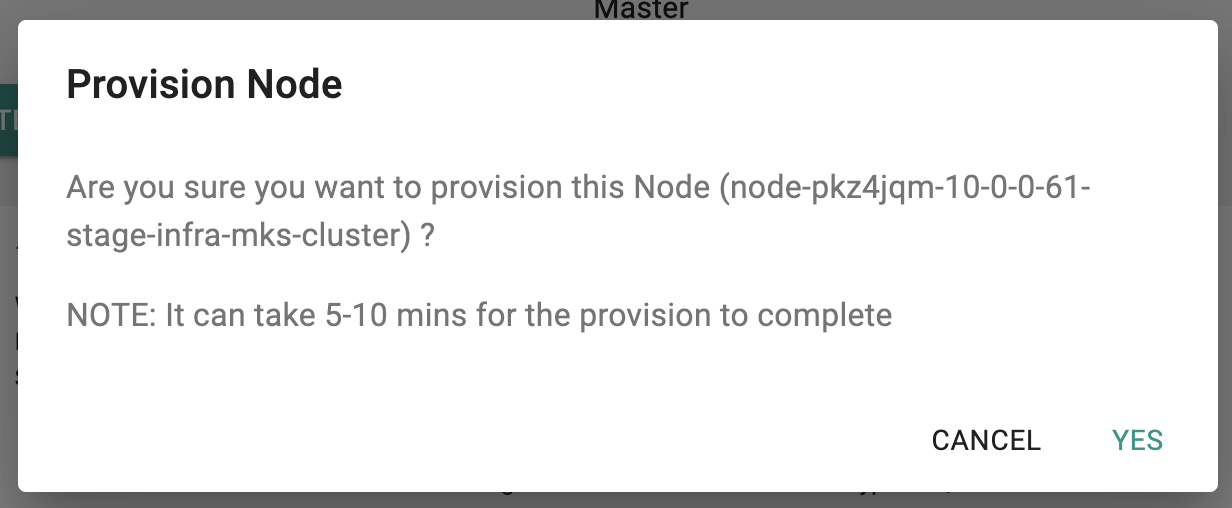
- It will take couple minutes for the additional node to be provisioned.
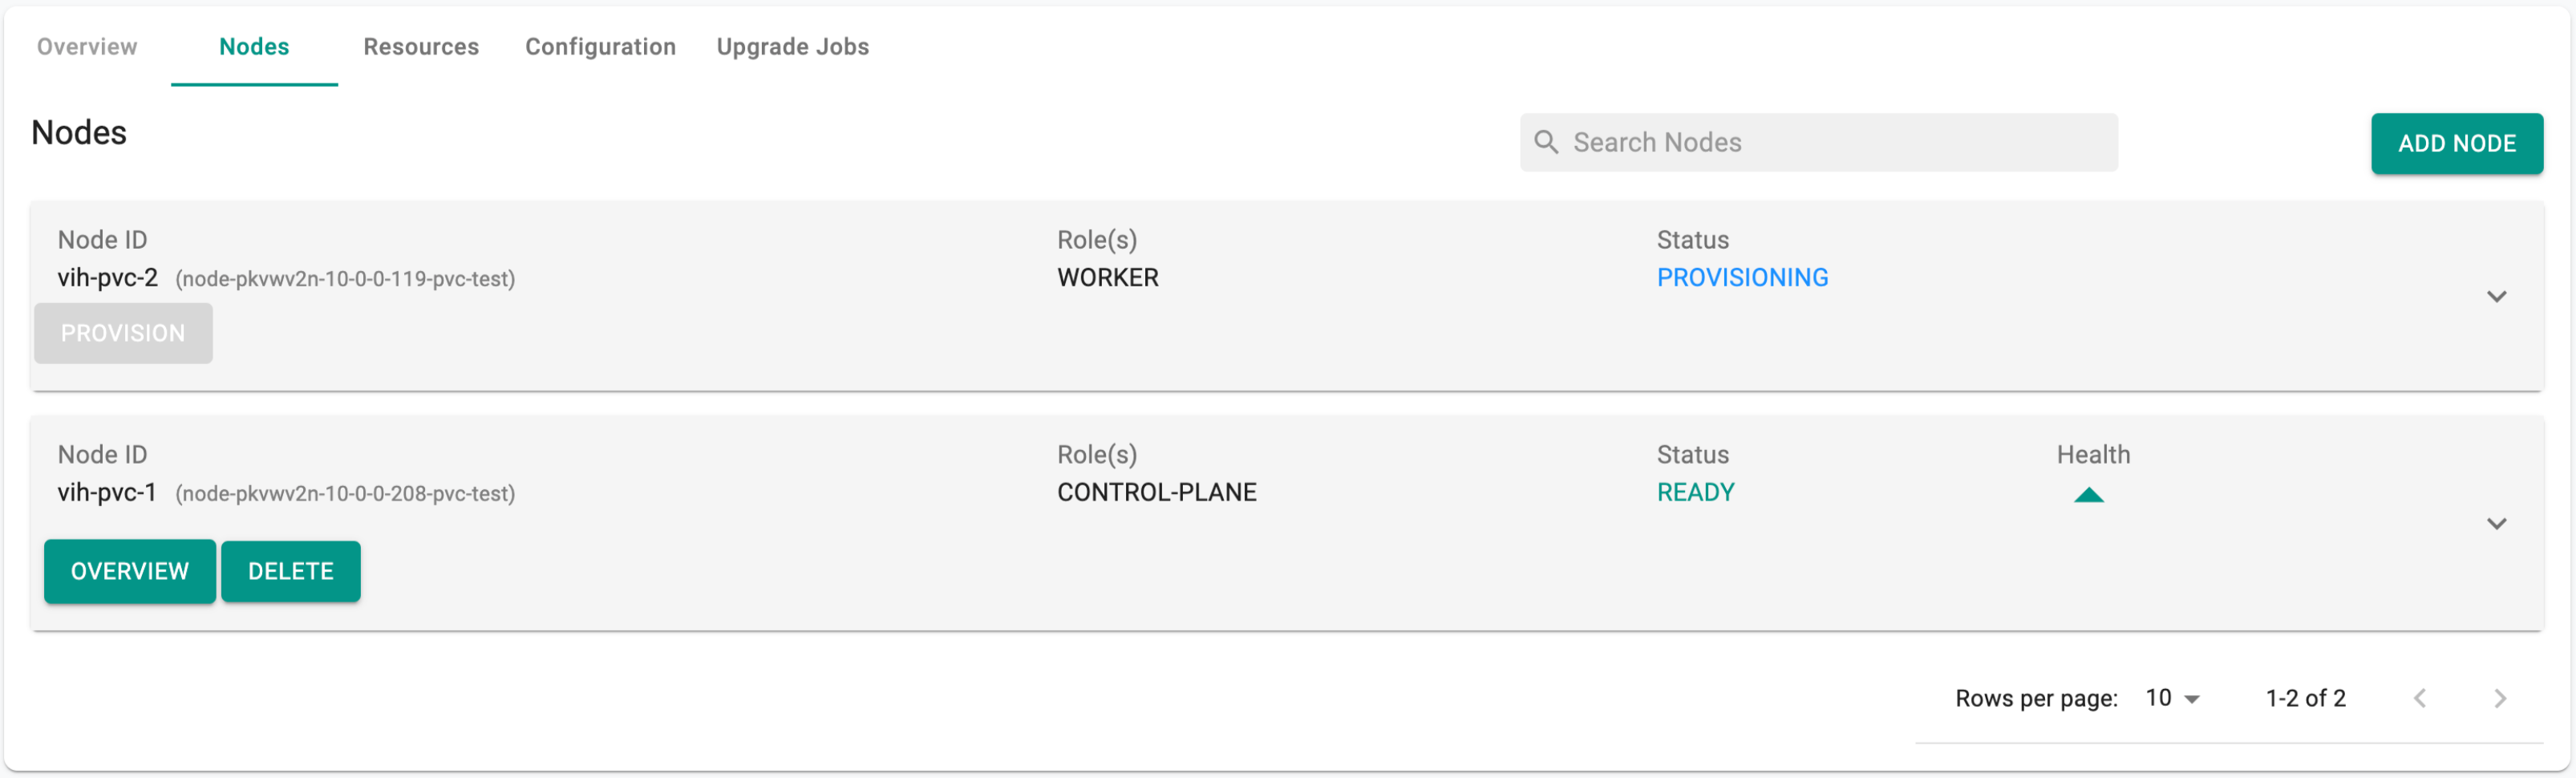
- Once the node is provisioned, it will join the cluster with the Storage role

Add rook/ceph Storage
Optionally, users can also add rook-ceph storage to the new nodes or the existing node by introducing a new device on Day 2, post upstream cluster provision. The rook-ceph version 1.8.1 is supported.
- Select the required upstream cluster and click Nodes tab
- Select the required node and click the down arrow to expand the Nodes section
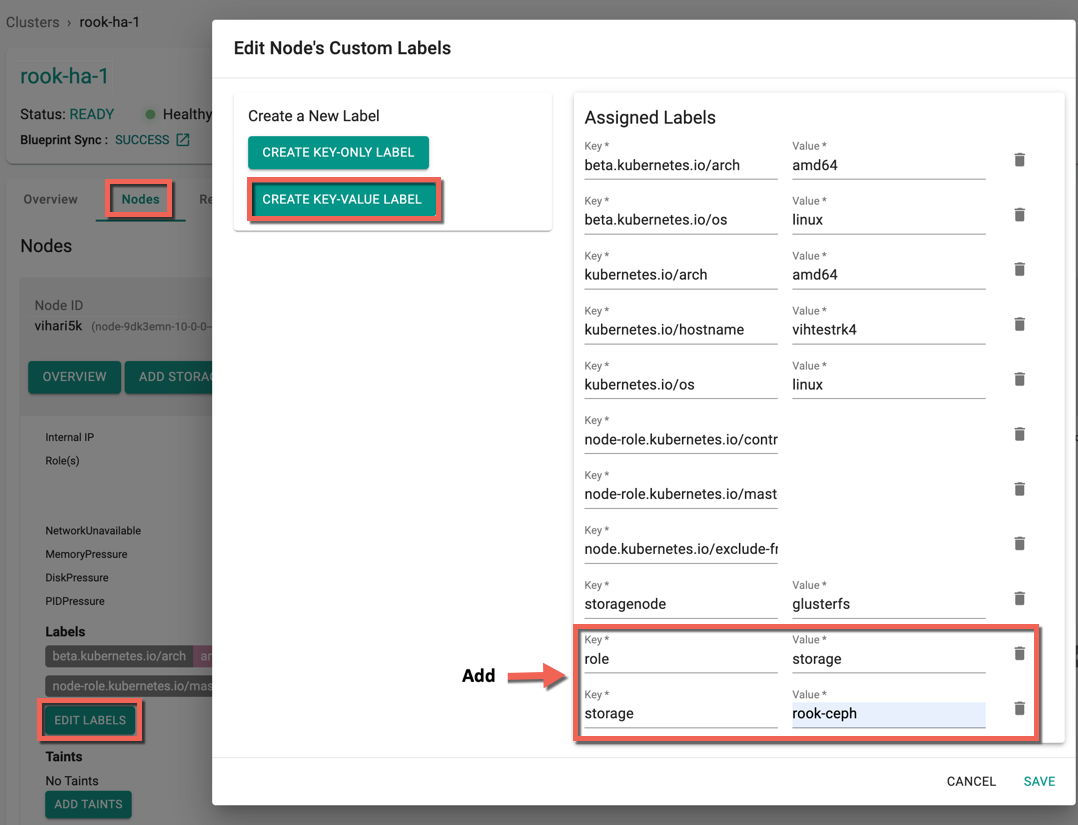
- Click Edit Labels button
- Click Create Key-Value Label to add two labels for rook-ceph storage as shown in the below image
- Key role and Value storage
- Key storage and Value rook-ceph
- Click Save
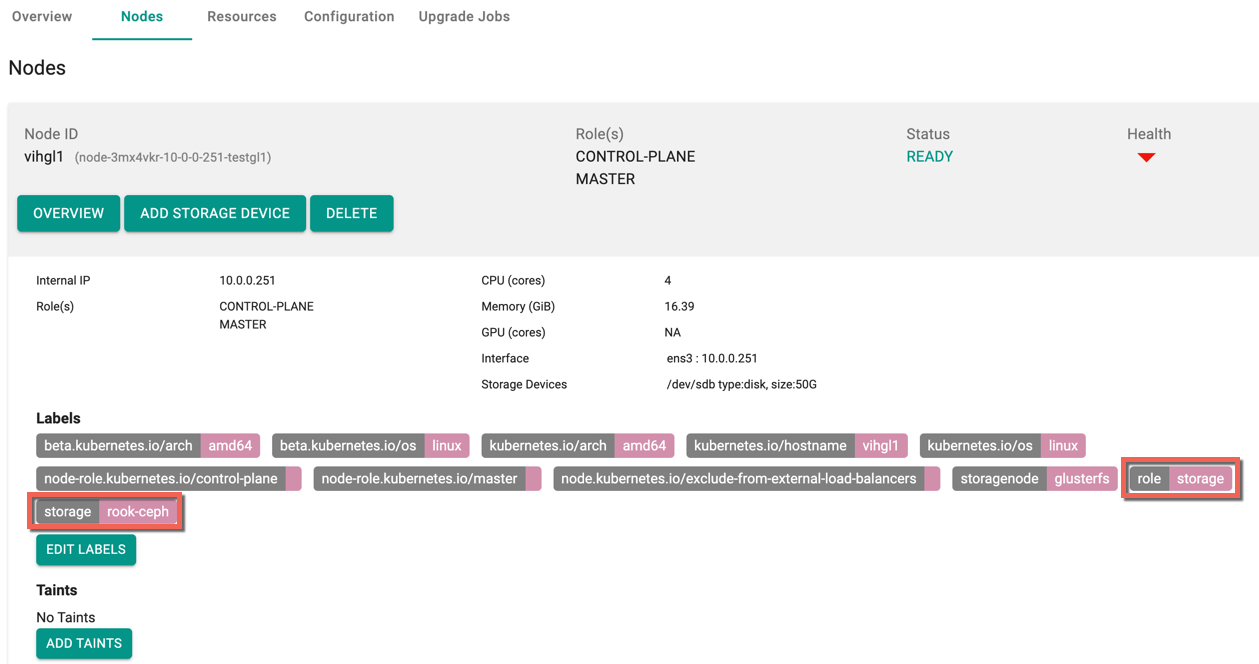
- The newly added storage labels appears as shown below
Once these labels are added, user must update the blueprint to default-upstream to deploy the rook-ceph storage to the cluster. Refer Update Blueprint to know more about update blueprint process
Delete rook/ceph Storage
To delete the rook/ceph storage node from the HA or No-HA rook storage cluster, perform the below steps:
- Run the below kubectl command
kubectl -n <ns-name> scale deployment rook-ceph-osd-<ID> --replicas=0
- Execute into the rook-ceph-tools pod and run the below command
ceph osd down osd.<ID>
Caution
Deleting the storage node from No HA cluster could lead to an un-operational ceph cluster
- To re-use the same node again in a different cluster, run the
./conjurer -don top of the node. This conjurer script will remove all the encrypted LVM’s under your disk and some ceph directories, which are created during provisioning
Recommendation
Reboot the node once you run the conjurer script
Cleanup rook/ceph
When a cluster is established using the default-upstream blueprint, the cluster automatically includes the rook storage add-on. To clean up this rook storage cluster using our console, users must perform a few steps based on the scenarios
By default, the "Storage Protection" switch is enabled to prevent accidental data loss. However, to perform the cleanup using the minimal or default blueprint, deactivate the "Storage Protection" and proceed accordingly.
Important
Primarily customer/user need to switch off the Storage Protection switch which is available in cluster configuration page.
Scenario 1: Rook-ceph with PVCs and Workloads
To clean up an active cluster with rook installed, along with the corresponding workload deployments and PVCs, switch the blueprint to either minimal or default.
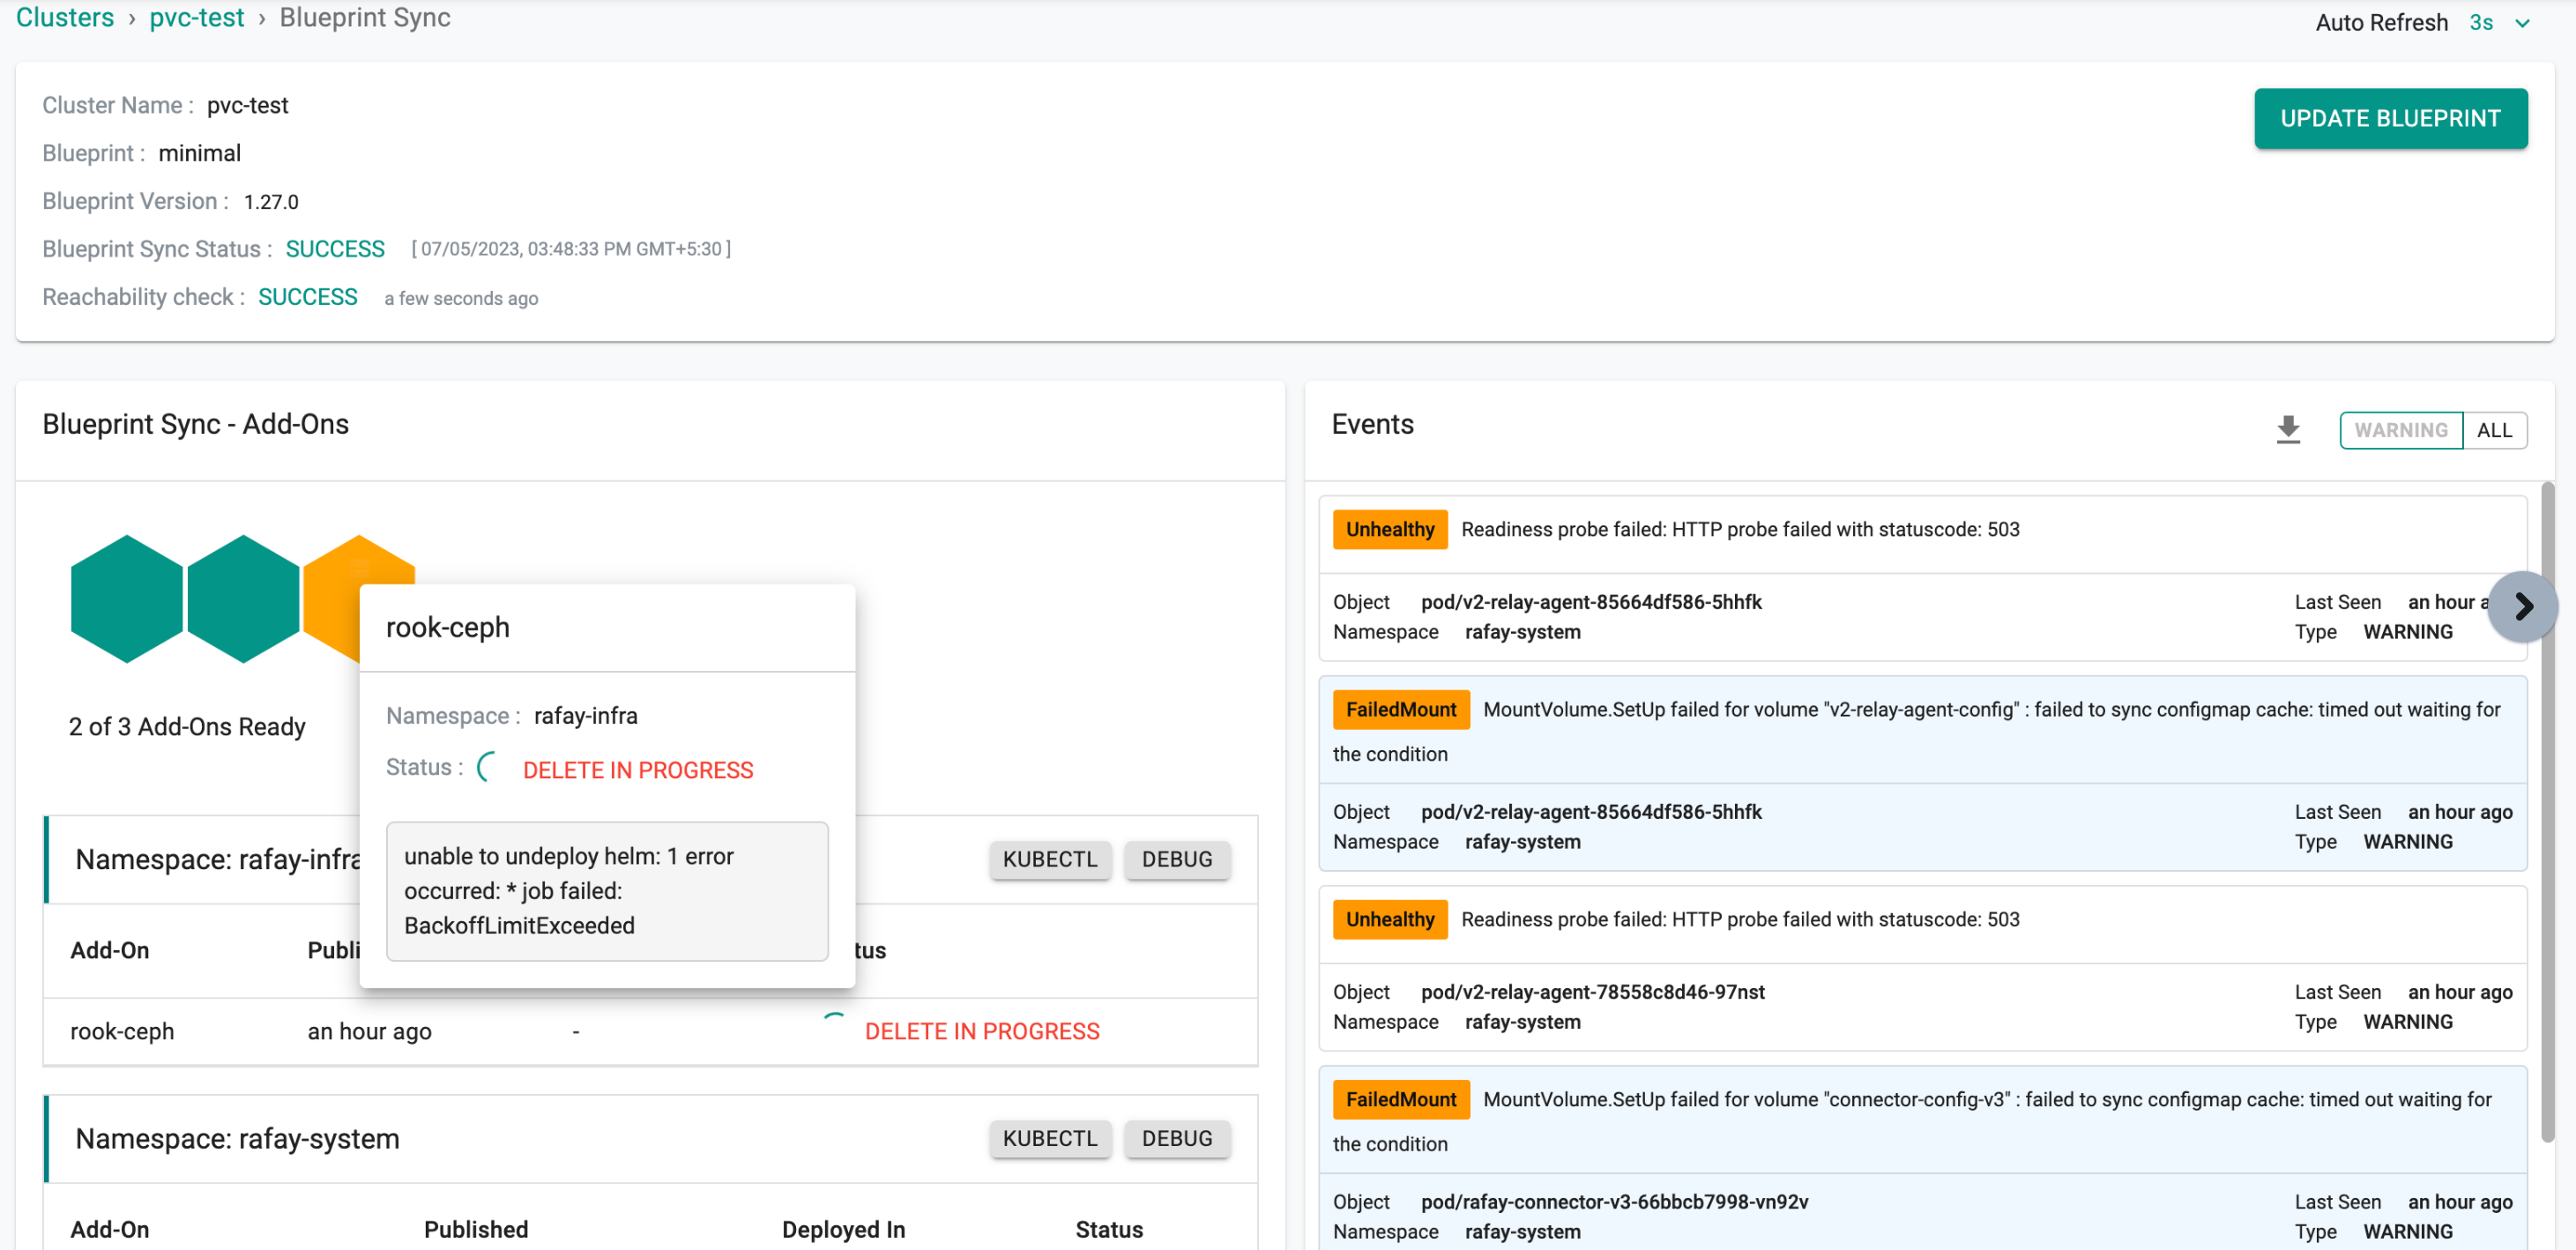
Now a Kubernetes job gets initiated to verify whether the PVCs are attached or not. In this particular scenario, as the PVCs have been attached, a validation message is generated stating, "Please clean up your PVCs," which can be observed in the log of the rook-cleanup-predelete-hook pod.
root@vih-pvc-1:~# kubectl logs -f -n rafay-infra     rook-cleanup-predelete-hook-b99lg
Please cleanup your PVCs
The cluster status is displayed in the provided image when switching the blueprint that includes attached PVCs or workloads.
Resolution
Switch the blueprint back to default-upstream and clean up your workload deployments and PVCs to ensure successful cluster cleanup. Then, switch to either the minimal or default blueprint, triggering the cleanup job and achieving a clean cluster state.
Scenario 2: Switching blueprint
Assuming there is an operational cluster with rook installed, if a cluster cleanup is desired, switching the blueprint to either minimal or default is sufficient. This action will initiate a cleanup process that takes approximately 3 to 5 minutes to remove all data related to rook storage. After the cleanup, to revert to the default-upstream blueprint, proceed by updating the blueprint as usual.
Important
To have the existing raw disk discovered by the operator or discover pod, the customer must reboot the node before switching to the default-upstream blueprint.
To add a new node to the cluster or attach a new raw disk to an existing node, wait for an hour for the automatic discovery process to take place. However, if they require immediate discovery of the node or raw disk, restarting the operator pod will facilitate the discovery.
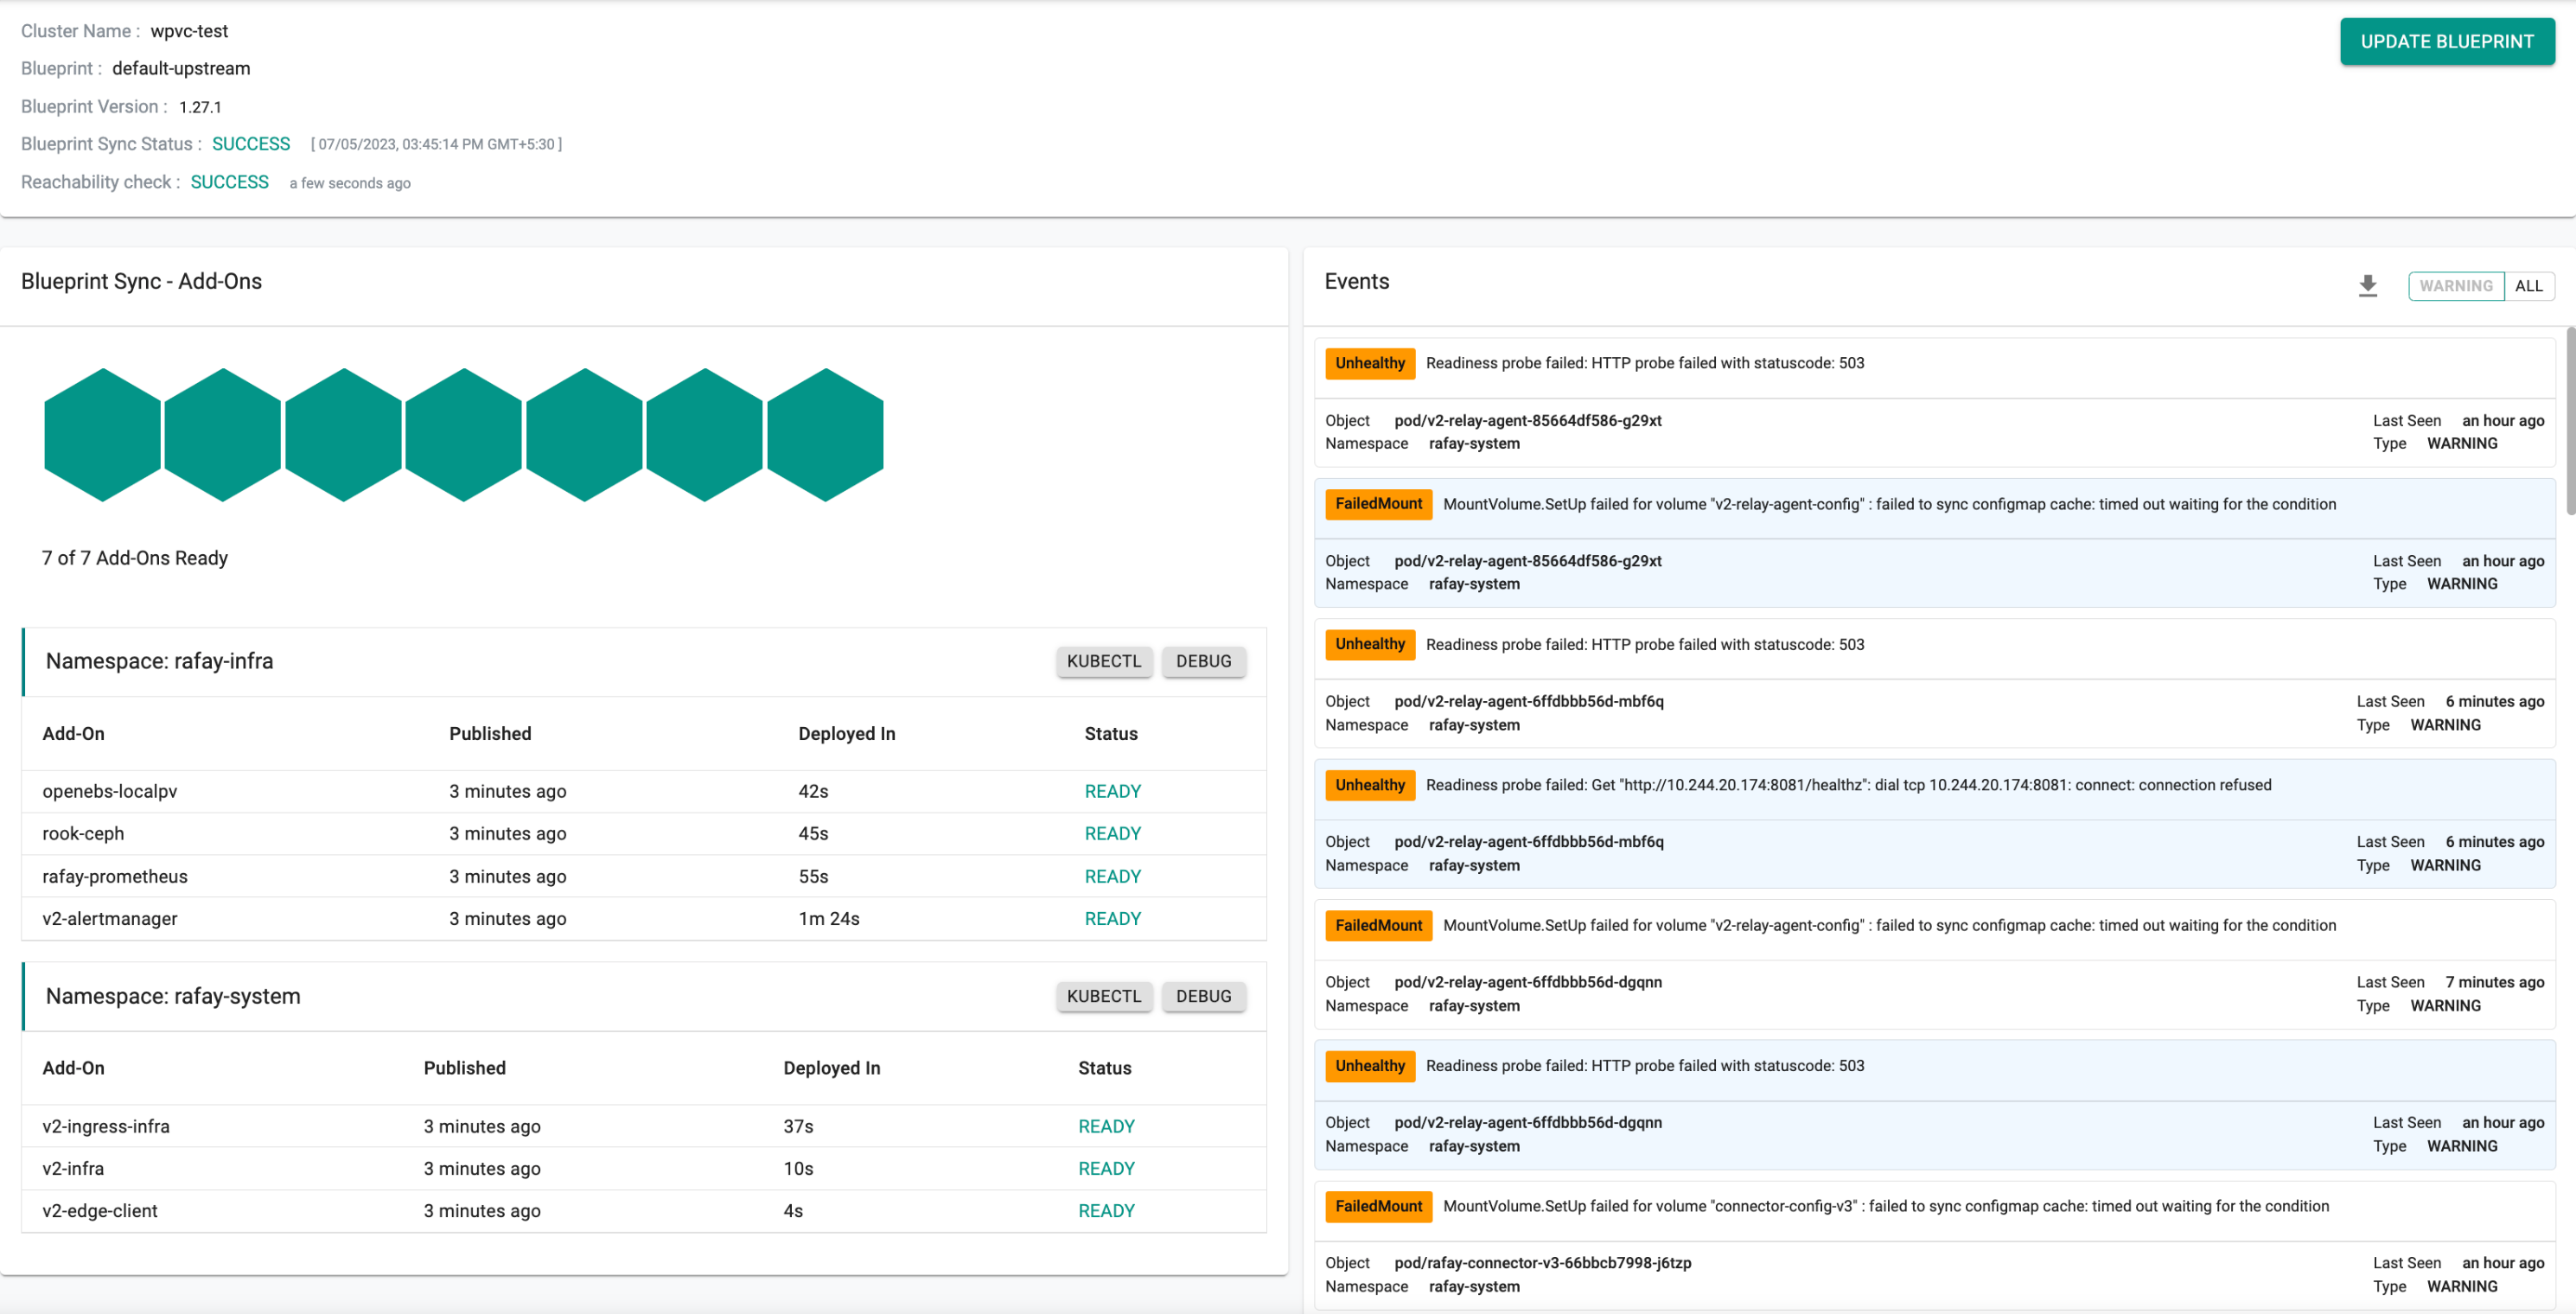
The resulting cluster state, following the reboot of the node and re-application of the default-upstream blueprint, is depicted in the provided image.
Add OpenEBS Storage
OpenEBS local storage can be added using a Blueprint Add-On.
Create an OpenEBS Add-On
- In the console, select a cluster.
- In the menu, select Infrastructure > Add-Ons.
- Select New Add-On, then select Create New Add-On from Catalog.
- In the search field, enter OpenEBS, then select OpenEBS.
- Click Create Add-On.
- Enter a name for the Add-On, then select a Namespace.
- Click Create.
- Enter a version number. Optionally, enter a description.
- Optionally, upload a values YAML file or select to override from a git repository.
- Click Save Changes.
Add OpenEBS to a Blueprint
- In the menu, select Infrastructure > Blueprints.
- Create a new blueprint or select an existing blueprint. For an existing blueprint, you can create a new version.
- Enter a version name. Optionally, enter a description.
- To add OpenEBS, go to Add-Ons and click Add more.
- Select the OpenEBS add-on from the drop-down list.
- Select the OpenEBS version from the drop-down list.
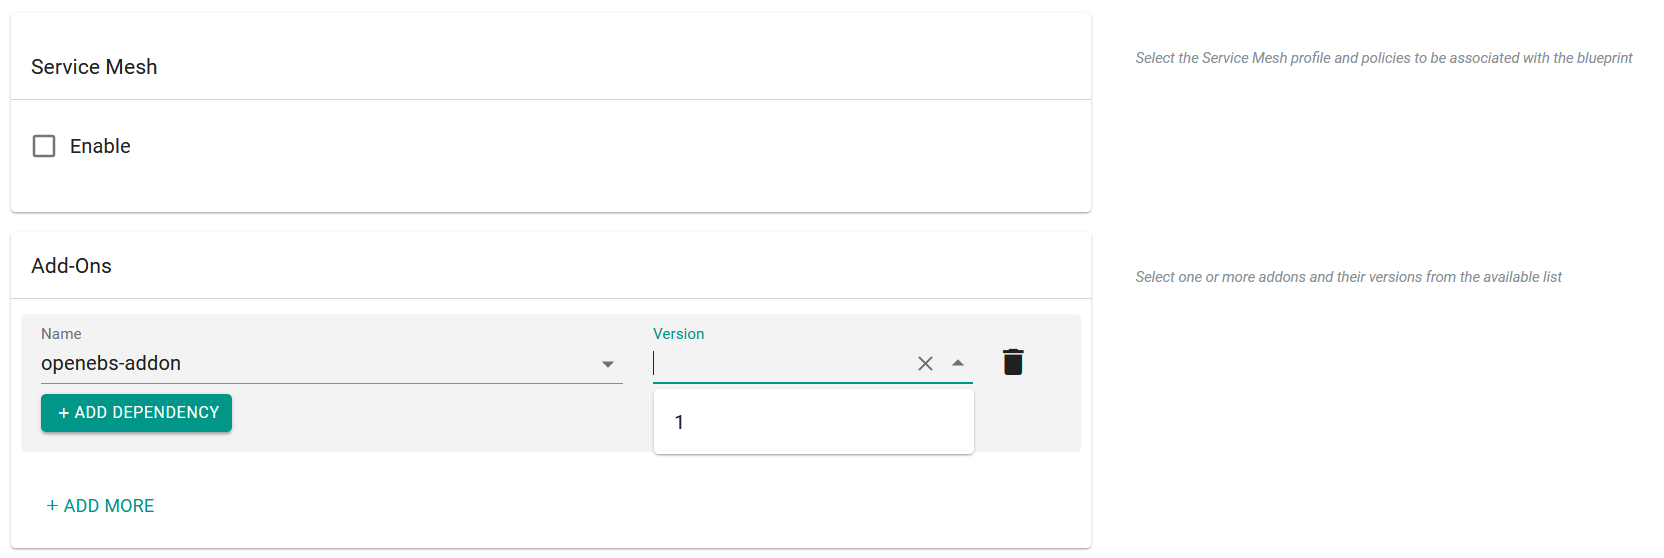
- Click Save Changes.
- Update the cluster blueprint.