Setup
What Will You Do
This is Part 1 of a multi-part, self-paced quick start exercise. In this part, you will use the Infra Admin persona to setup and configure the needed resources to use Environment Manager.
Step 1: Import Template
In this step, you will use the Loader Utility to import the Environment Manager templates needed for this environment.
- Follow the instructions here to use the loader utility
- When using the loader utility, be sure to uncomment the following template - ../terraform/aws/101-caas-eks in the templates section of the values.yaml file
Once Complete, you will see the new environment card in your organization under Environments -> Environments
Step 2: Configure Environment Contexts
In this step, you will configure the environment contexts in the controller with your AWS and Rafay account details. These account details will be used by Environment Manager to interact with your accounts.
Configure AWS Context
Make sure you have the following information. You may need to create these in your AWS environment or in the console.
- AWS Role ARN
-
Log into the controller and select your project
- Navigate to Environments -> Contexts
- Click on the existing AWS context name
- Select Input Variables
- Populate the values of the variables with the role ARN and external ID in your AWS account
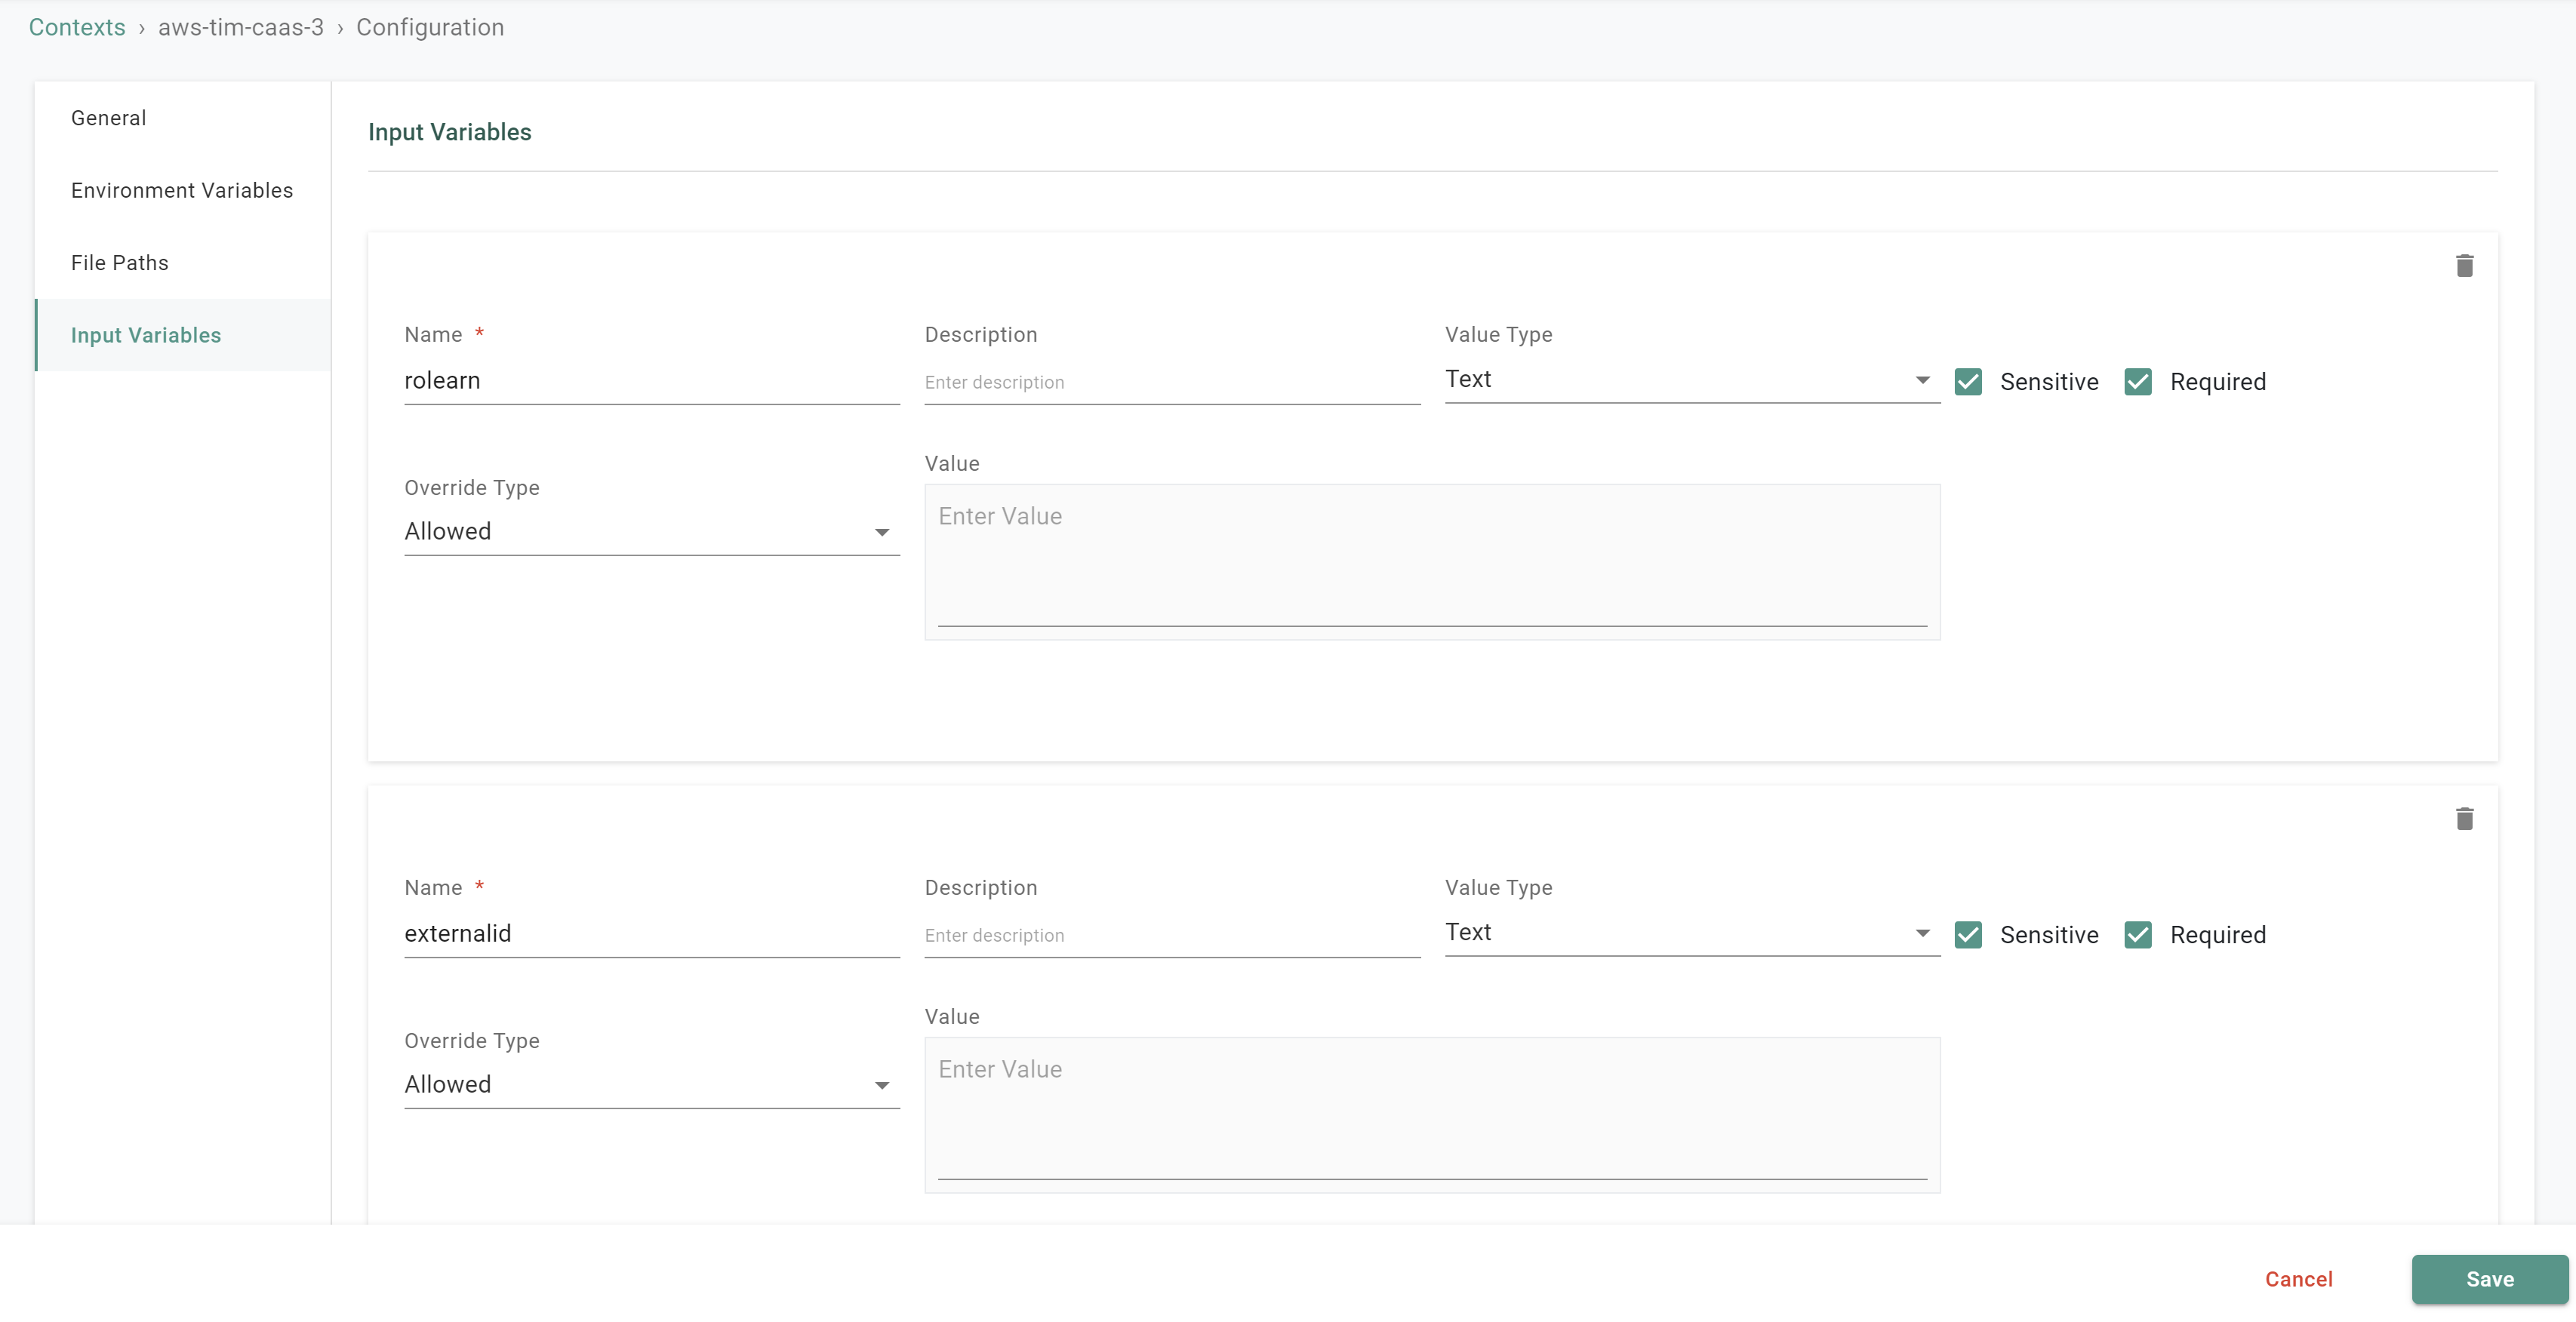
- Click Save
Configure Rafay Context
You will use the CLI config details of your Rafay account to populate this context. The values needed can be found in a CLI config file. To obtain a CLI config file, navigate to Home -> My Tools -> Download CLI Config
- Navigate to Environments -> Contexts
- Click on the existing Rafay context name
- Select Environment Variables -- Populate the API key, secret and endpoint variables (Note, the project variable is pre-populated for you)
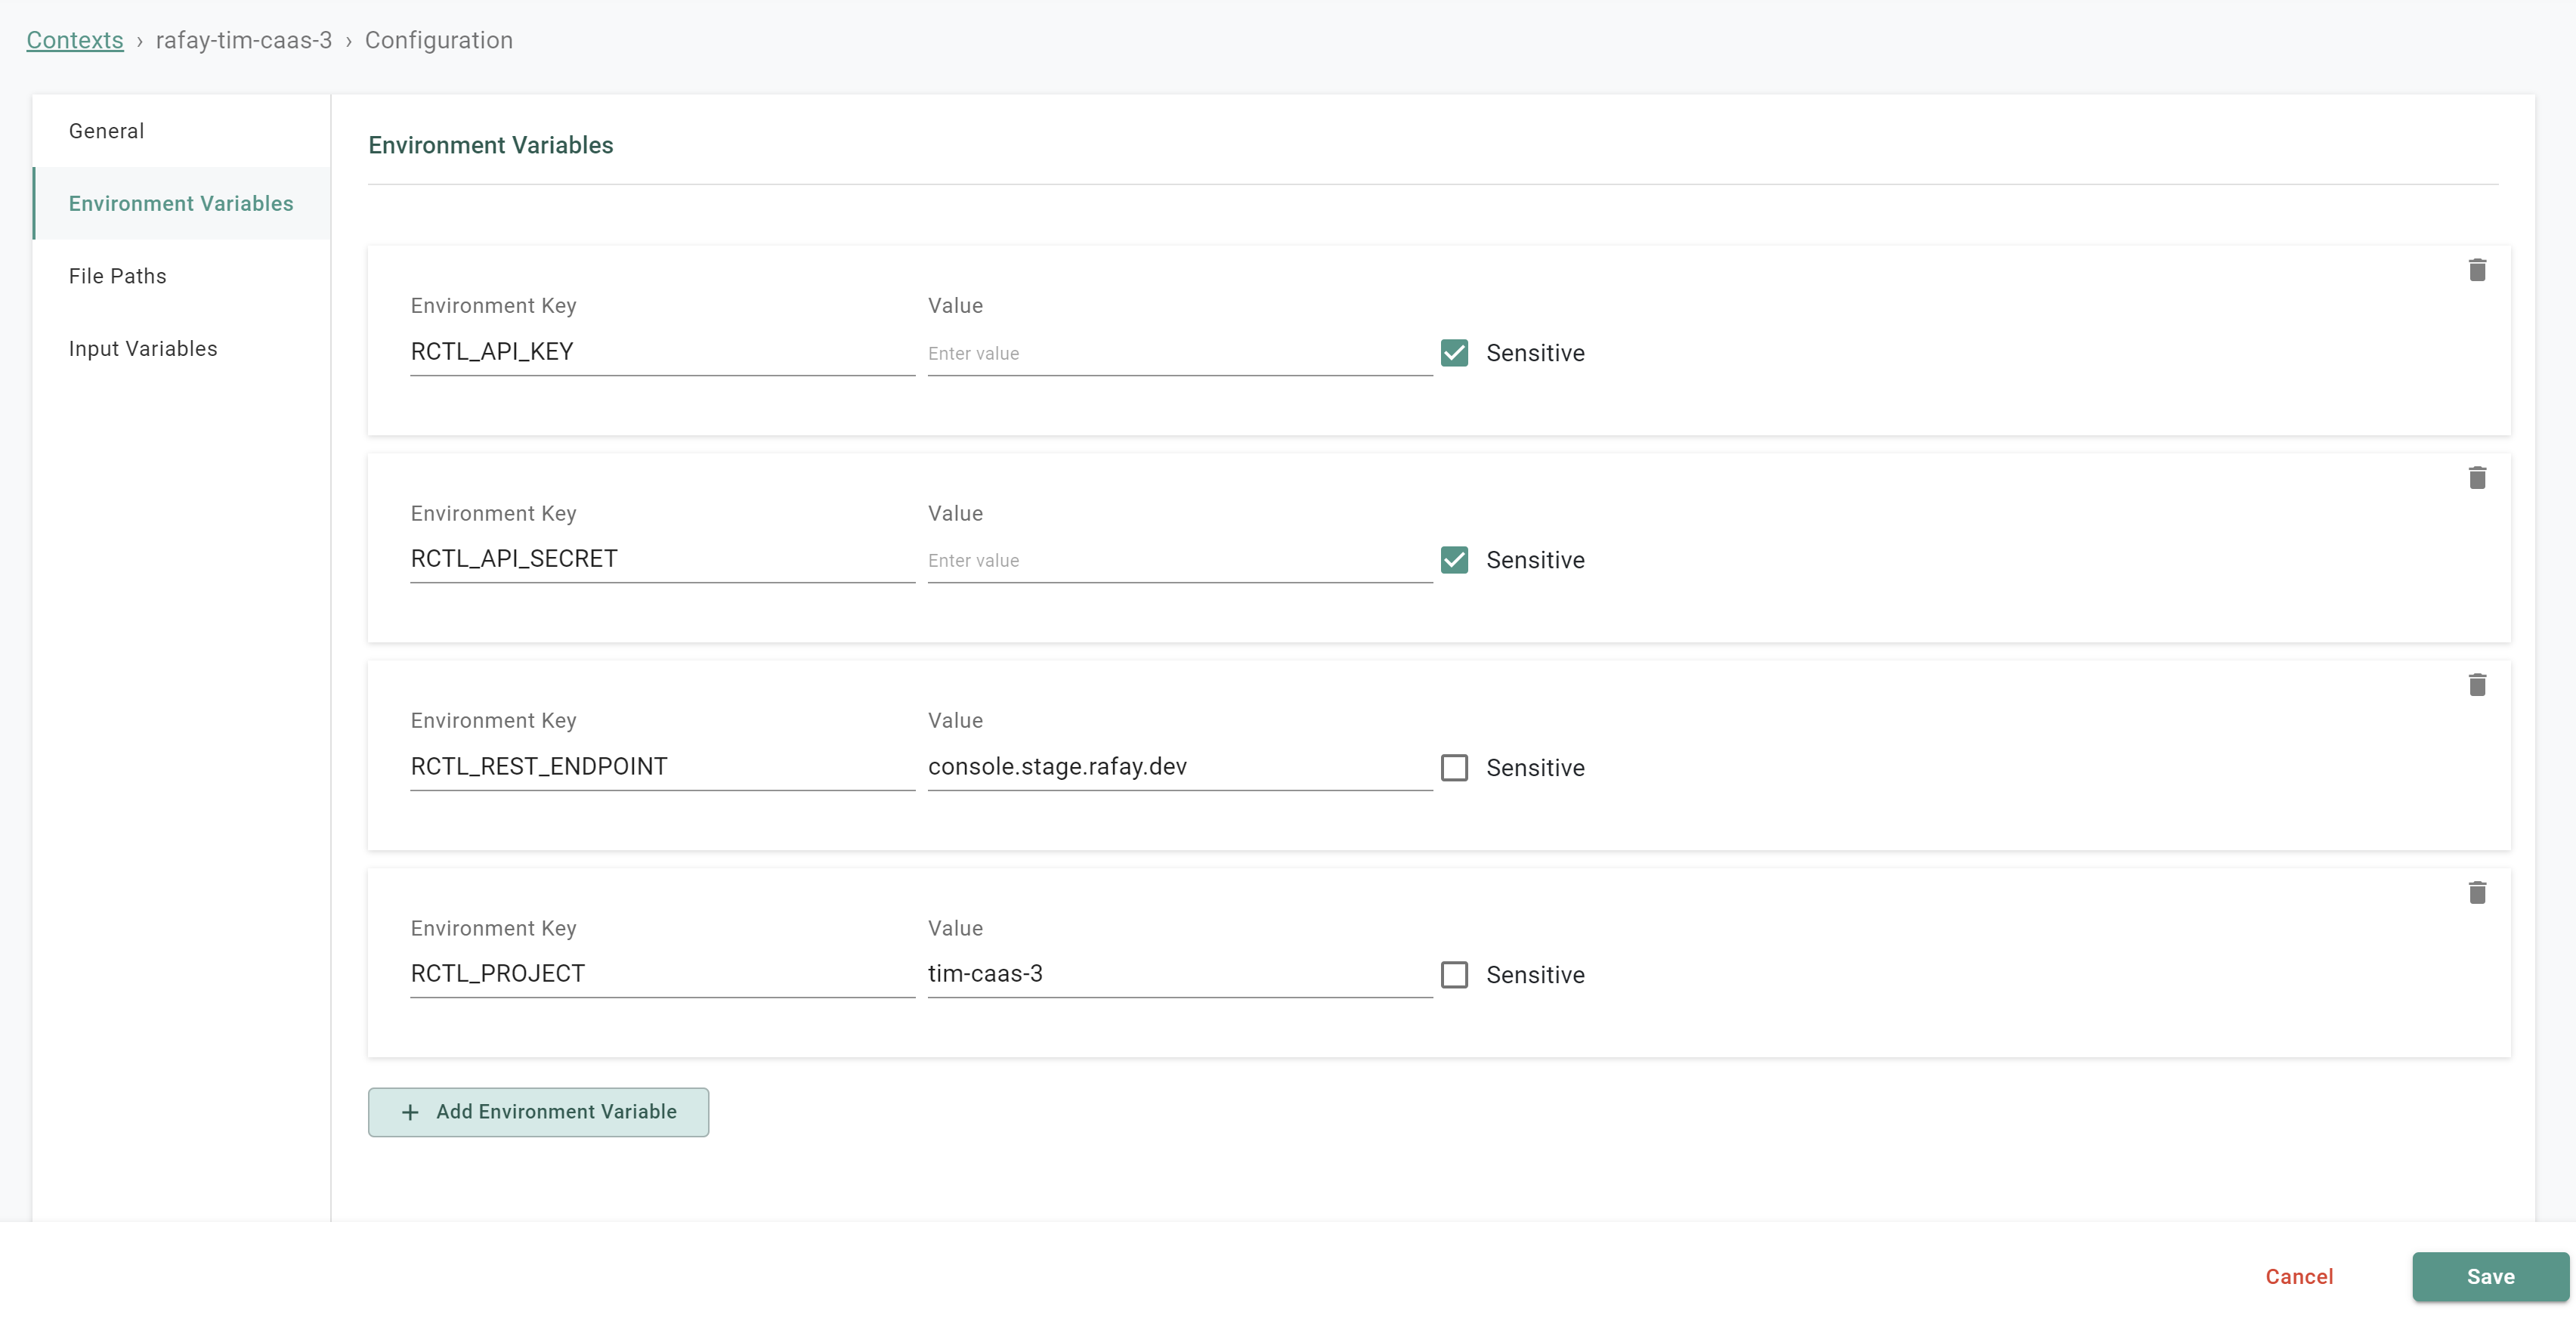
- Click Save
Step 3: Configure Template Variables
In this step, you will review the resource templates and environment templates to ensure that all variables are updated for your environment.
- Navigate to Environments -> Resource Templates
- Click on the resource templates that were created
- Click the view icon of the template version
- Verify all Input Variables
If any Input variables need to be modified, create a new version of the template with the modified variables. If a new version is created, be sure to update the Environment Template with any updated resource template versions.
- Navigate to Environments -> Environment Templates
- Click on the environment template that was created
- Click the view icon of the template version
- Verify all Input Variables
If any input variables need to be modified, create a new version of the template with the modified variables.
Step 4: Create Environment Resource
In this step, you will create an environment resource in the controller which will use the previously created environment template. This environment resource will be used to control the lifecycle of the environment.
- Log into the controller and select your project
- Navigate to Environments -> Environments
- Click Launch on the newly created environment card
- Enter an environment name
- Select the environment template version
- Click Save & Deploy
Recap
At this point, you have everything setup and configured to manage environments through Environment Manager.