Use
At this point, the developer will have the ability to develop and test Generative AI applications in the Amazon EKS based Kubernetes cluster. To get access to the environment, note that the developer
- Did not need to have any knowledge of Terraform or other IaC frameworks
- Did not need access to privileged credentials for AWS
- Did not need any help from the Platform team to deploy their environment
Use Gen AI Environment
When a developer requests for a Gen AI environment (based on Kubernetes, specifically Amazon EKS), a series of automated workflows will need to be performed to fulfil this request. The sequence diagram below describes the high level steps.
Important
Although the recommended workflow assumes and recommends using an Integration with an Identity Provider (IdP) to provide a Single Sign On (SSO) experience, organizations can also use locally managed users.
sequenceDiagram
    participant dev as Developer
    participant rafay as Rafay Platform
    participant csp as EKS Cluster
    participant idp as Identity Provider
    participant app as Gen AI App

    dev->>rafay: Login (Opt. SSO)
    dev->>rafay: New Environment
    rect rgba(0, 0, 255, .1)
    rafay-->>csp: Create k8s namespace w/ Resource Quota
    rafay-->>csp: Create IRSA <br>(API Access to Bedrock)
    opt SSO via Identity Provider
        rafay-->>idp: Create Group for k8s namespace
        rafay-->>idp: Add developer to Group
    end
    rafay->>rafay: Create Group in Rafay
    rafay->>rafay: Add NS Admin <br>RBAC to Group
    end
    rafay-->>csp: Deploy example app1 k8s manifest <br>to EKS Cluster
    rafay->>csp: Deploy example app2 as workload to EKS cluster
    rafay->>csp: Deploy RAG example app3 to EKS cluster
    rafay-->>dev: Gen AI apps deployed
    dev-->>app: Developer uses Gen AI example app
Once the developer logs into the Rafay Org after the the environment is created (SSO using Identity Provider recommended), they will automatically have access to their specific Namespaces they have been authorized to use. The necessary RBAC to the assigned Kubernetes namespace is orchestrated automatically by Rafay Kubernetes Manager.
Step 1: Create Application Environment Resource
In this step, a second user, such as a developer, will create an environment resource in the controller which will use the second previously created environment template. The environment resource will be used to create the namespace and Generative AI applications. This environment resource will be used to control the lifecycle of the application environment.
- Log into the controller and select your project
- Navigate to Environments -> Environments
- Click New Environment
- Enter genai-app for the name
- Select the existing application environment template
- Select the environment template version
- Click Create
- Navigate to Input Variables
- Click Add Variable
- Enter username for the variable name
- Select Text for the value type
- Enter the username of the developer user for the value
- Click Add Variable
- Enter secret_value for the variable name
- Select Text for the value type
- Enter the Open AI API Key
- Ensure the variable is set to Sensitive
Step 2: Deploy Application Environment
In this step, the developer user will now deploy the previously created application environment. Deploying the environment will create a namespace on a shared EKS cluster, deploy three example GenAI applications through three different methods to the namespace which is controlled by RBAC.
- Log into the controller and select your project
- Navigate to Environments -> Environments
- Click on the genai-app environment
- Click Publish
The environment will begin to publish and could take ~5 minutes to complete.
Step 3: Access Applications
We have provided three Gen AI example applications. The environment template will automatically deploy all three Gen AI example applications as part of the environment creation.
Once the environment has finished deploying, the user can use the environment output to find the application endpoints. These endpoints can be entered into a browser to test the applications.
- Log into the controller and select your project
- Navigate to Environments -> Environments
- Click on the genai-app environment
- Click Resource
- Expand the GenAI and RAG App resources to see the public endpoints of the applications
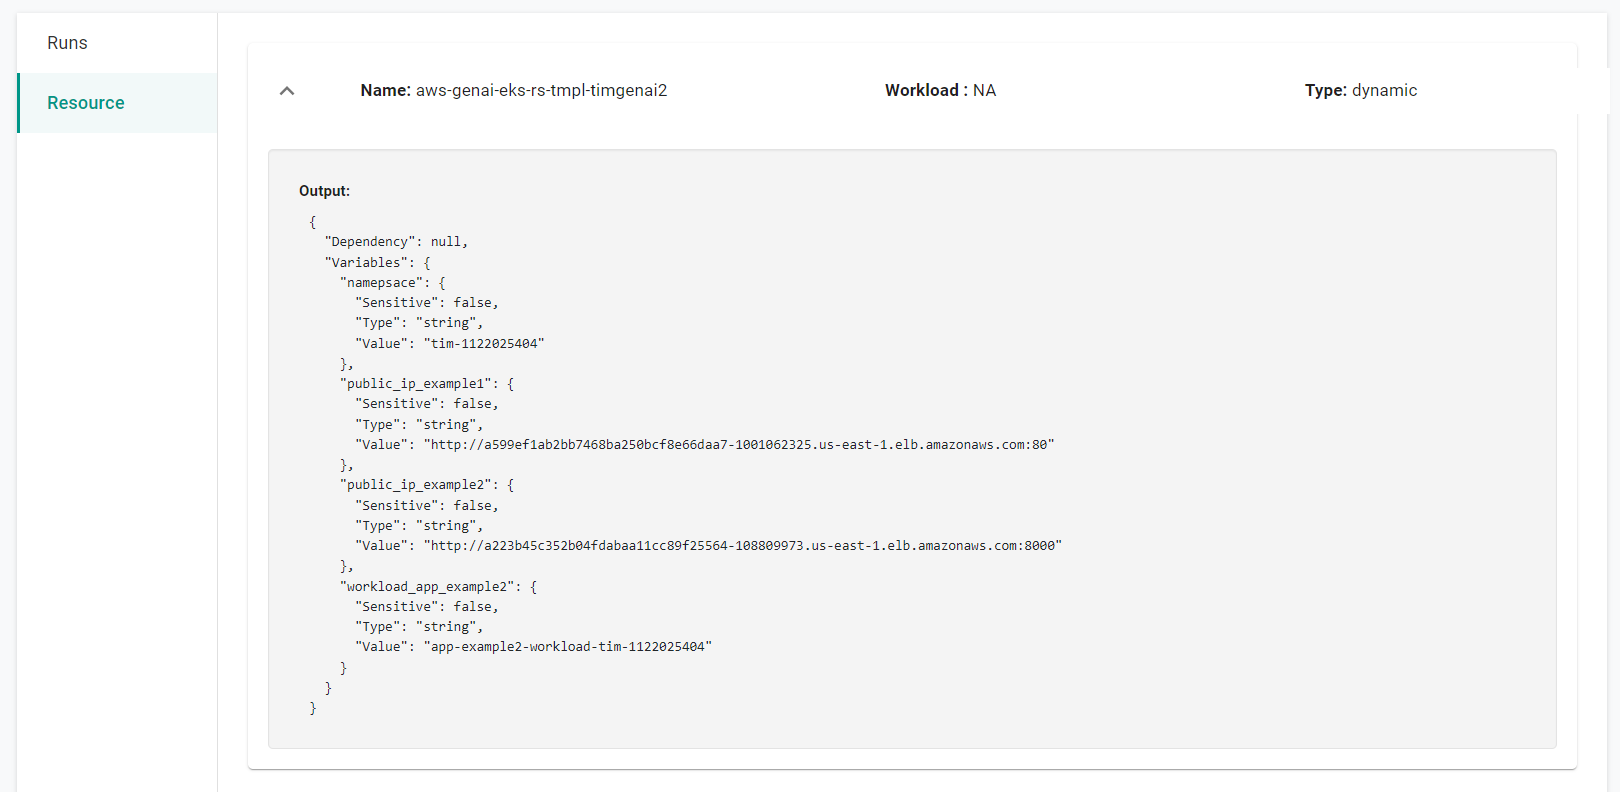

GenAI App-1
- Copy the first endpoint and enter it into a browser
You will now access the first application. This application takes a text file as input and summarizes the content. The application uses Bedrock to produce a summary of the text file.
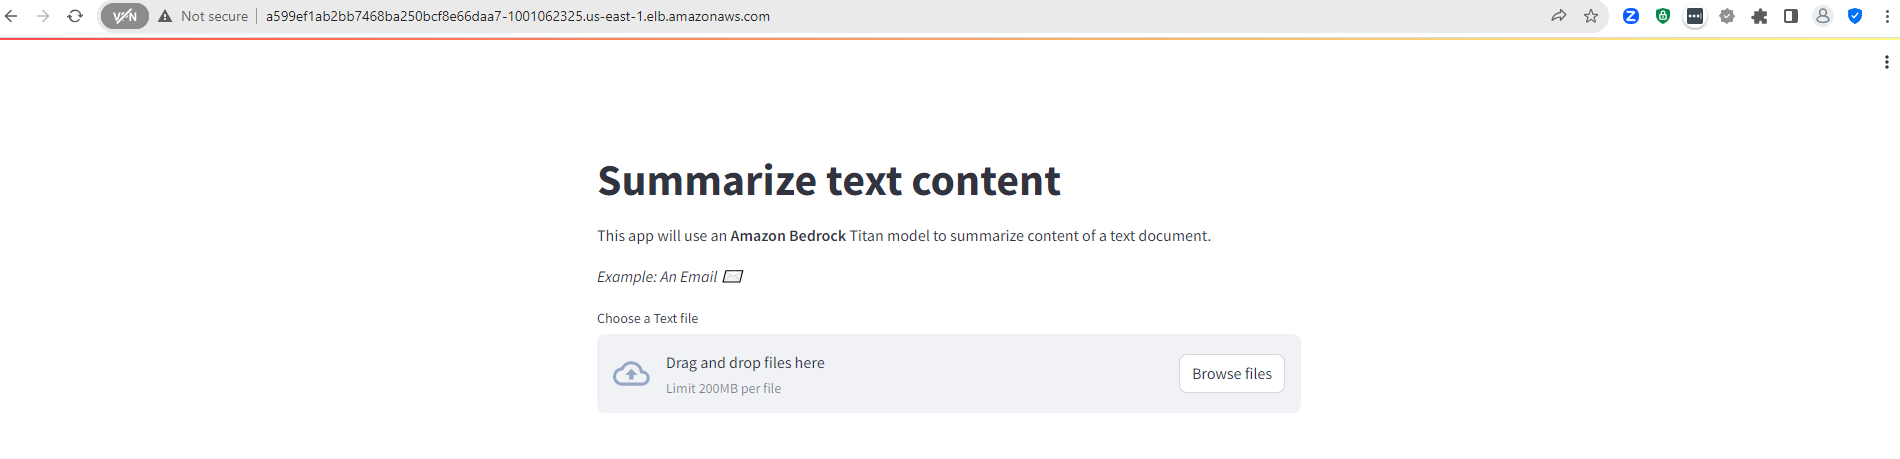
GenAI App-2
- Copy the second endpoint and enter it into a browser
You will now access the second application. This application uses Bedrock to act as an intelligent chat bot. You can enter text into the chat and the engine will respond.
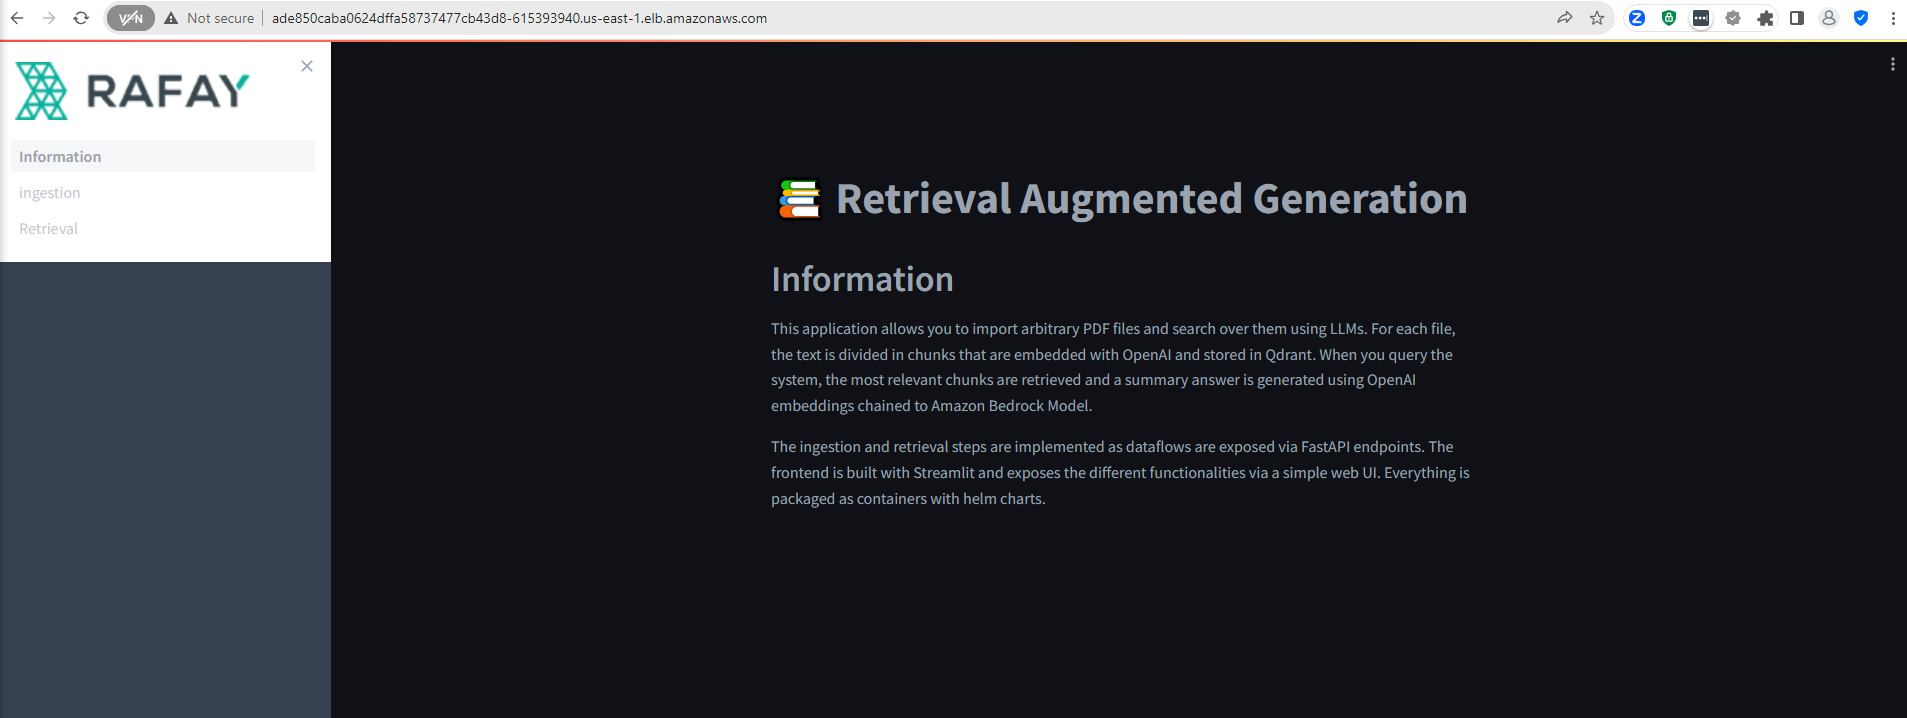
GenAI App-3
You will now access the third application. This application uses Bedrock with Retrieval Augmented Generation (RAG) to take in a PDF file and use the PDF content to help answer questions.
Step 4: Develop & Deploy Your Containers
At this point, the developer is ready to go ahead with the development and testing of their own Gen AI containerized applications. They are welcome to use the source code for the example applications as the starting point. The typical steps are as follows
- Build the new GenAI container image
- Upload the container image to a container registry such as ECR
- Create Kubernetes YAML for their container image
- Deploy their Gen AI application to their namespace using either Kubectl or Helm or Rafay workloads.
In summary, with Rafay, developers can now develop, deploy and validate their Generative AI applications on Amazon EKS Clusters using Amazon Bedrock for the foundational models.