Provision
This is Part 1 of a multi-part, self-paced quick start exercise that will focus on provisioning a PaaS environment in Azure using Terraform.
What Will You Do
In part 1, you will:
- Create the following resources using Rafay's Terraform provider
- Project
- Group
- Group Association
- Cloud Credential
- Custom Blueprint
- Custom OPA Policy
- Custom OPA Installation Profile
- Add-ons
- nginx
- cert-manager
- Cluster Override
- nginx
- cert-manager
- Repositories
- nginx
- cert-manager
- rafay-gs
- OPA Constraints / Constraint Templates
- allow-privilege-escalation-container-custom
- allowed-users-custom
- app-armor-custom
- flex-volumes-custom
- forbidden-sysctls-custom
- host-filesystem-custom
- host-namespace-custom
- host-network-ports-custom
- linux-capabilities-custom
- privileged-container-custom
- proc-mount-custom
- read-only-root-filesystem-custom
- se-linux-custom
- seccomp-custom
- volume-types-custom
- disallowed-tags-custom
- replica-limits-custom
- required-annotations-custom
- required-labels-custom
- required-probes-custom
- allowed-repos-custom
- block-nodeport-services-custom
- https-only-custom
- image-digests-custom
- container-limits-custom
- container-resource-ratios-custom
- AKS Cluster
- Verify cluster health
- Review available dashboards
Step 1: Configure & Provision Rafay Resources
In this step, you will configure and customize your Azure AKS Cluster using Terraform with some configuration files.
Make sure the following are installed or available.
- Terraform
- Text editor (or ability to update files using a terminal)
Make sure you have the following information. Follow the step-by-step instructions to setup Azure and obtain the required credentials.
- Azure Subscription ID
- Add a Contributor Role to the Subscription
- Azure Application ID and Azure Tenant ID
- The Application ID is also known as the Client ID.
- Azure Client Secret
- Azure Resource Group
To provision a the infrastructure using Terraform:
- Download and decompress the Get Started package. Navigate to the
terraform/pas_terraformfolder. - Download the CLI config from the "MY TOOLS" section in the console.
- Edit the
config.jsonfile. The file location is terraform/pas_terraform/artifacts/credentials/config.json. For this exercise, just change the following.api_keyapi_secretproject_id
- Edit the
terraform.tfvarsfile. The file location is terraform/pas_terraform/aks/terraform.tfvars. For this exercise, just update the following.
Important
Azure periodically updates the k8s version so it is possible you will need to check which versions are available in your region.
projectsubscription_idtenant_idclient_idclient_secretcluster_namecluster_locationcluster_resource_groupk8s_versionlocation
- Open the terminal or command line.
- Navigate to the
terraform/pas_terraform/aksfolder. - Run
terraform init.- Initializes the directory containing the Terraform configuration files, preparing the directory for use with Terraform.
- Run
terraform validate.- Validates the configuration files in the directory, without accessing any remote services.
- Run
terraform apply. Enteryeswhen prompted.- Provisions the cluster.
It can take 30 minutes to provision the cluster. Check the console for the provisioning status.
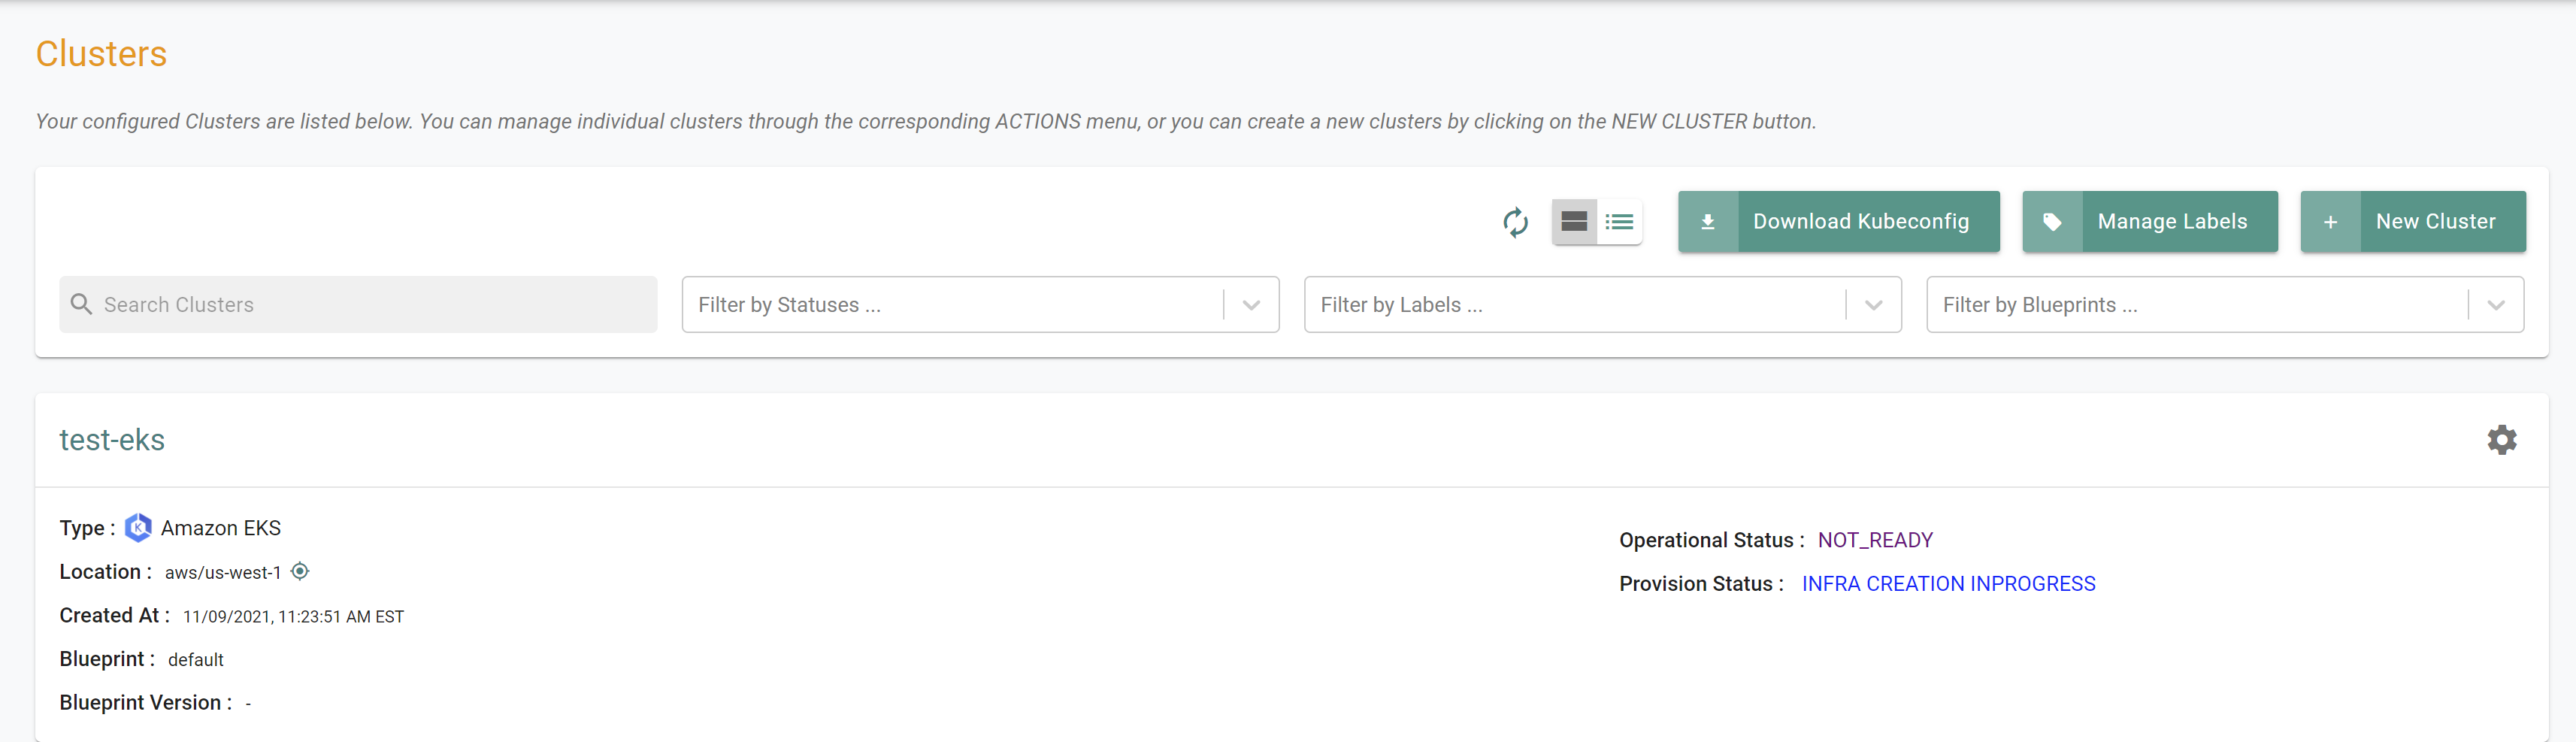
Step 2: Verify Cluster
Once provisioning is complete, you should have a ready to use AWS EKS Cluster. We will verify the cluster by checking its health and status.
Step 3: Cluster Status & Health
The Kubernetes management operator automatically deployed on the cluster by the controller will "maintain a heartbeat" with the controller and will "proactively monitor" the status of the components on the worker node required for communication with the control plane and the controller.
- Cluster reachability should be not more than 1 minute
- Control plane should report as Healthy

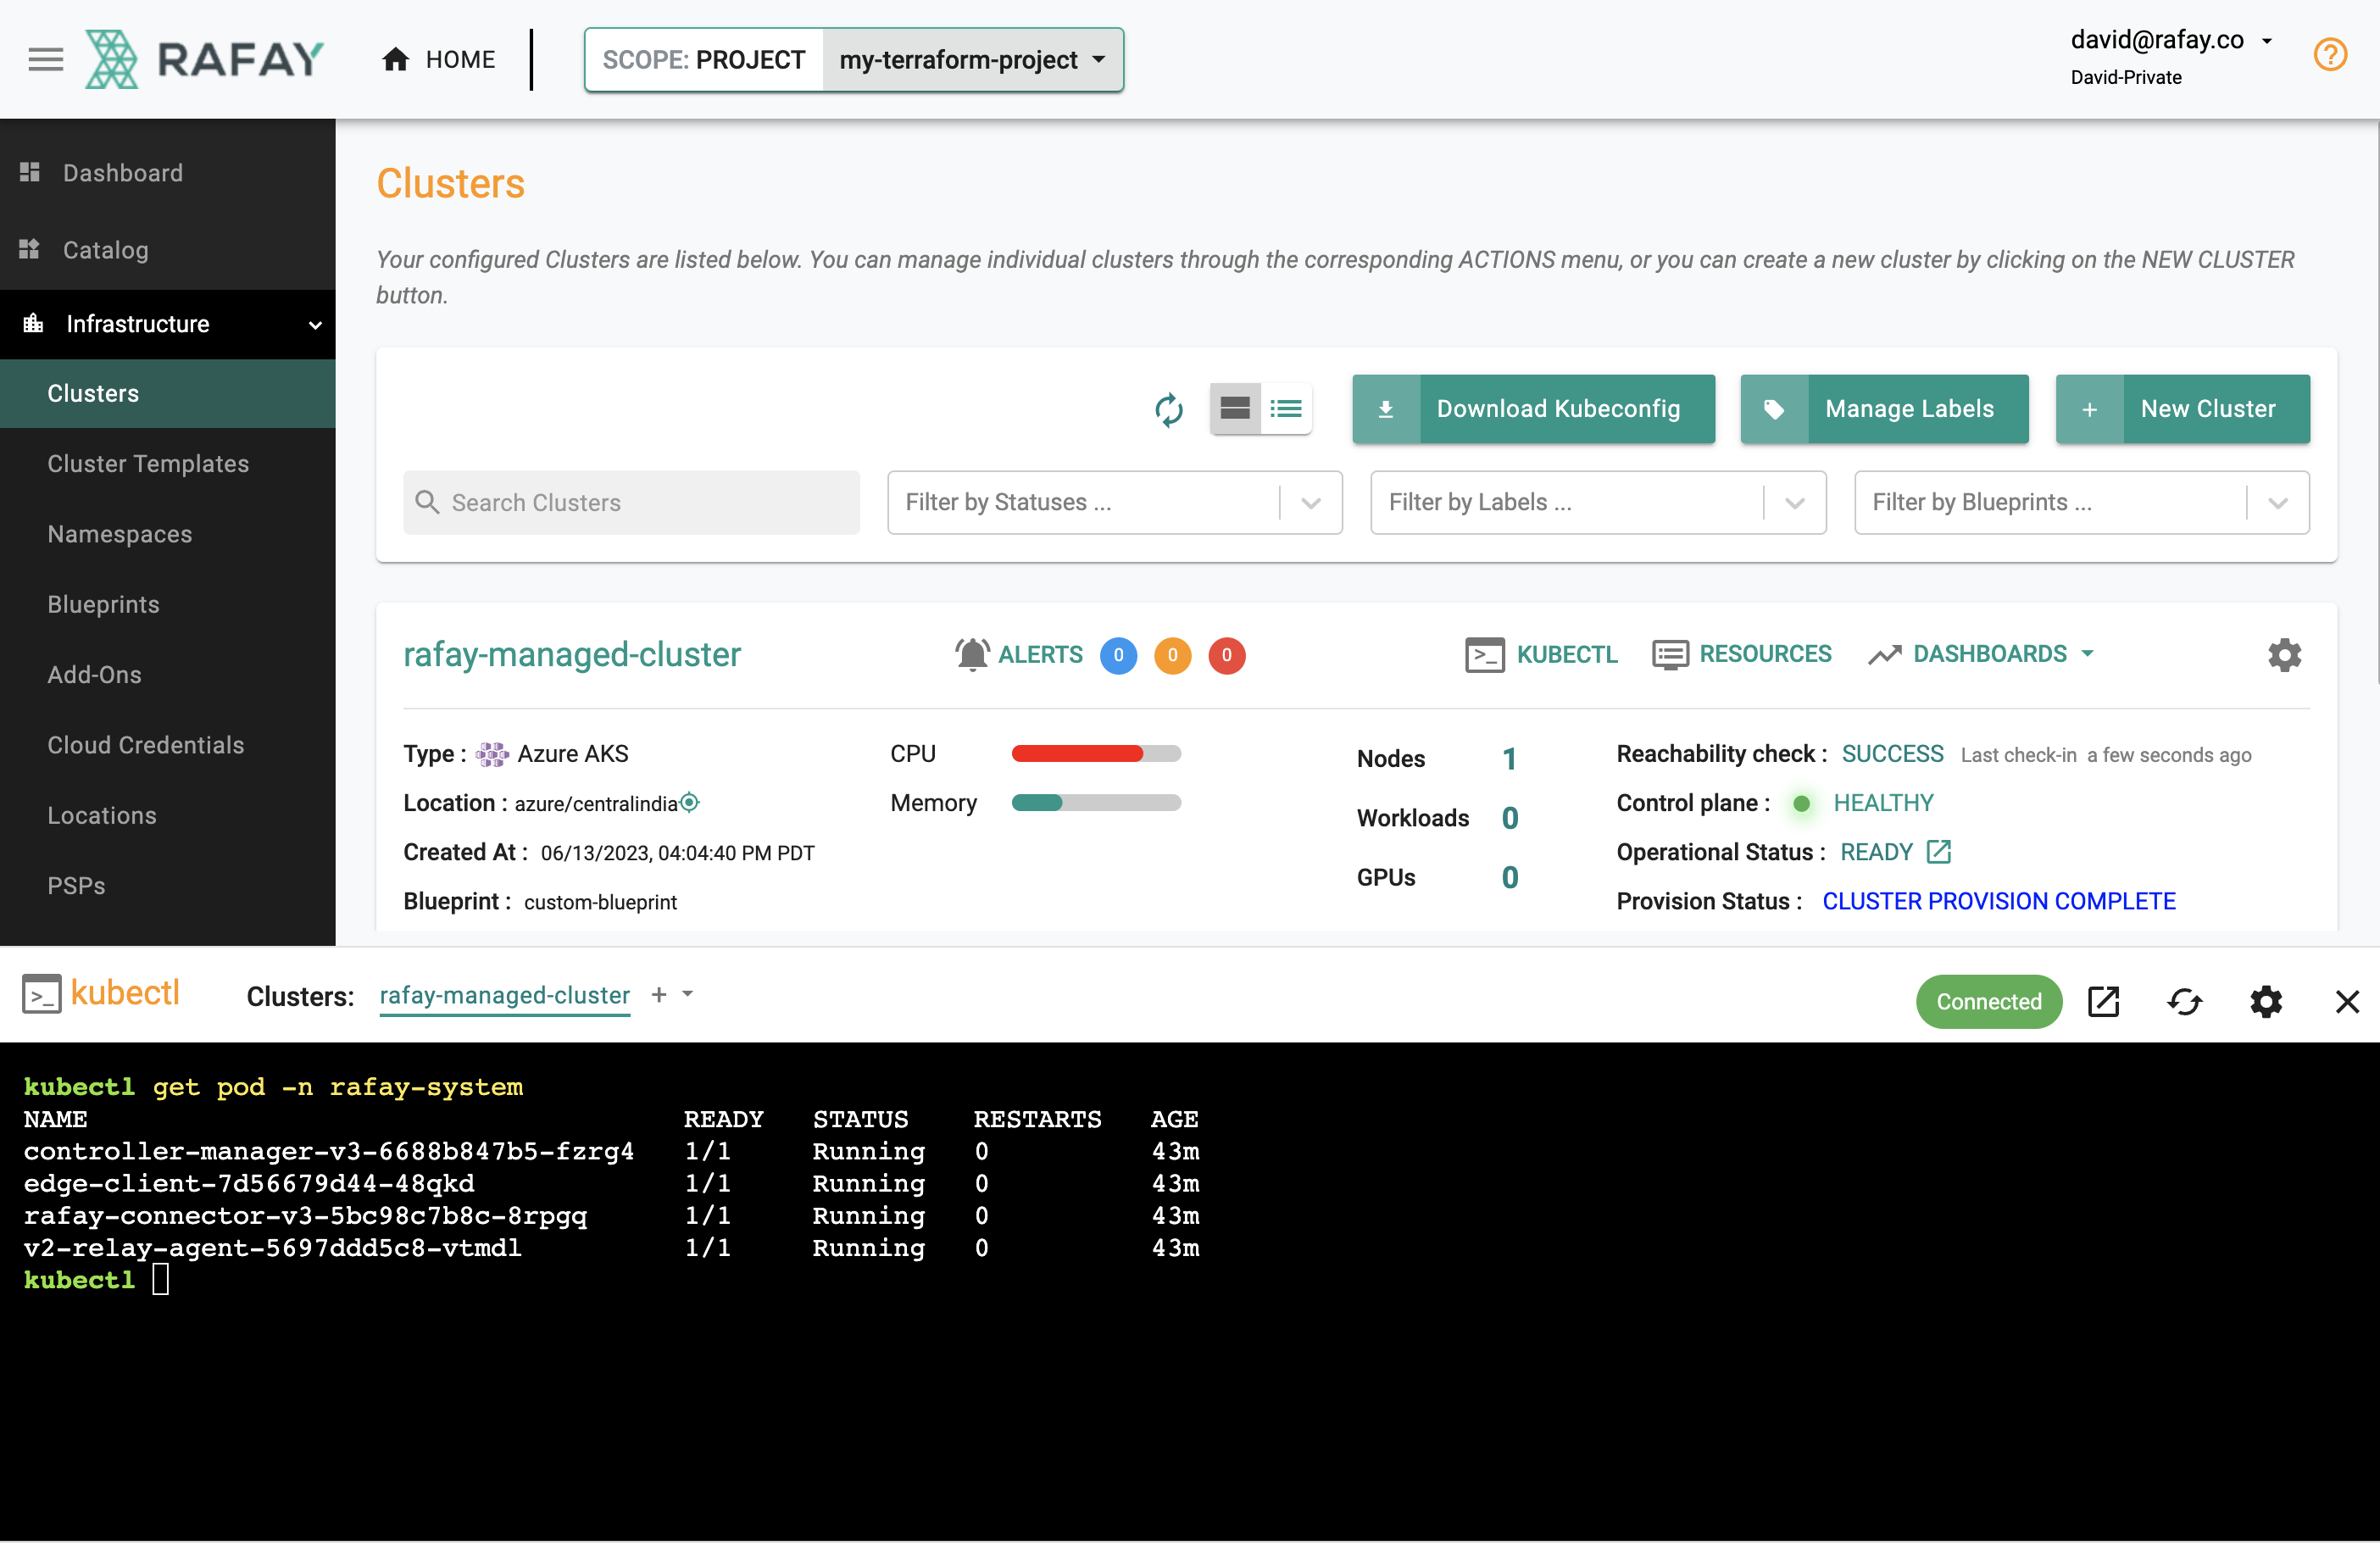
Step 4: Zero Trust Kubectl
Your EKS Cluster's API Server is private and secure (i.e. cloaked and not directly reachable on the Internet). The controller provides a zero trust kubectl channel for authorized users.
- Click the "Kubectl" button on the cluster card.
- This will launch a web based kubectl shell for you to securely interact with the API server over a zero trust channel
- Type something like "kubectl get pod -n rafay-system"
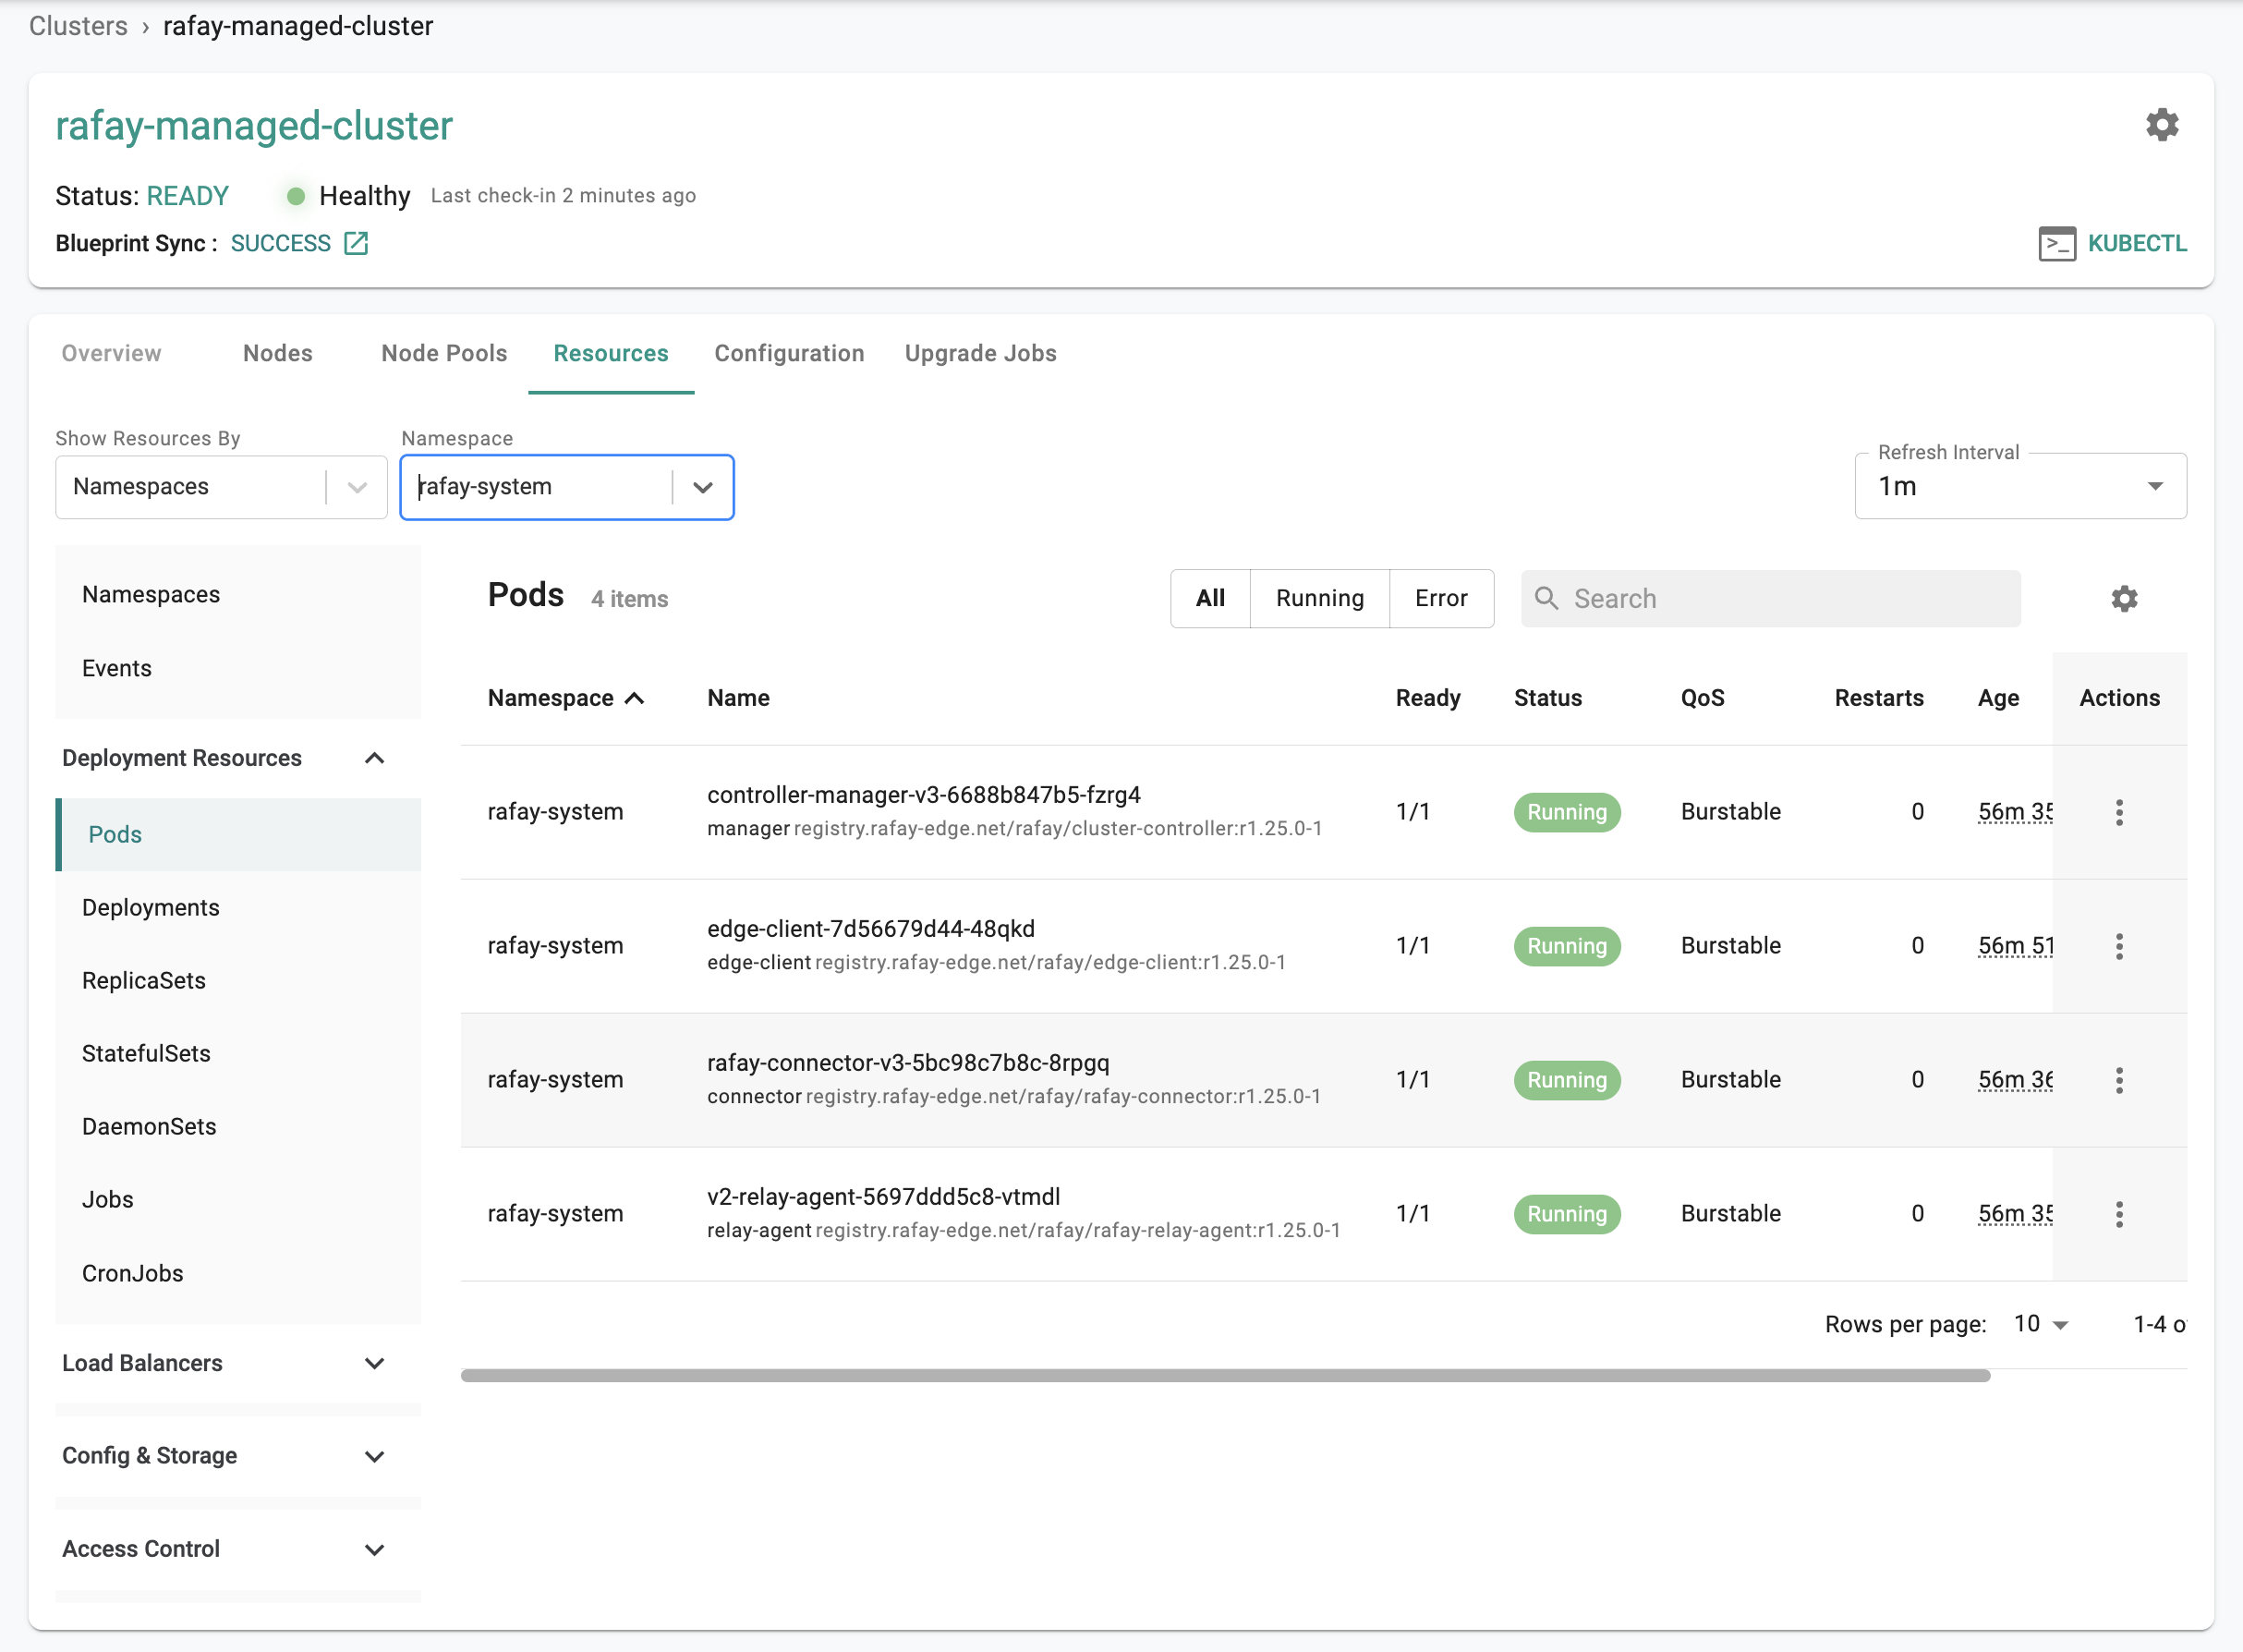
Step 5: Kubernetes Resources
The dashboard also comes with an integrated Kubernetes dashboard. Click on "Resources" and you will be presented with all the Kubernetes resources organized using a number of filters.
Recap
Congratulations! At this point, you have
- Successfully configured and provisioned an Azure AKS cluster
- Used zero trust kubectl to securely access the AKS cluster's API server
- Used the integrated k8s dashboards to monitor and view details about the cluster