Part 4: Utilize
What Will You Do
In this part of the self-paced exercise, you will use the previously created GitOps pipeline to create, update and delete a cluster by adding and removing cluster spec files from the GitHub repository.
Step 1: Create GitOps Cluster
In this step, you will update the Terraform variables file and add a cluster spec file to your repository. Once the changes are commited to the repository, this will create a webhook through GitHub which will be received by the pipeline trigger. When the trigger receives the webhook, the pipeline will begin and create the cluster from the committed cluster spec file. Note, the pipeline trigger was configured to only monitoring the "
- Open Terminal (on macOS/Linux) or Command Prompt (Windows) and navigate to the folder where you cloned the Git repository
- Navigate to the folder "
/getstarted/eks-gitops" - Update the "terraform.tfvars" file to reflect the new cluster
The file should look like this once updated
clusters = {
  eks-gitops-cluster2= {
    cluster_name = "eks-gitops-cluster2"
    project_name  = "defaultproject"
    cluster_spec_version = "v1"
    cluster_spec_path = "./specfiles/eks-gitops-cluster2.yaml"
  }
 }
- Copy the file "gitops-eks-cluster2.yaml" to the "
/getstarted/eks-gitops/specfiles" directory - Commit the changes to the repository
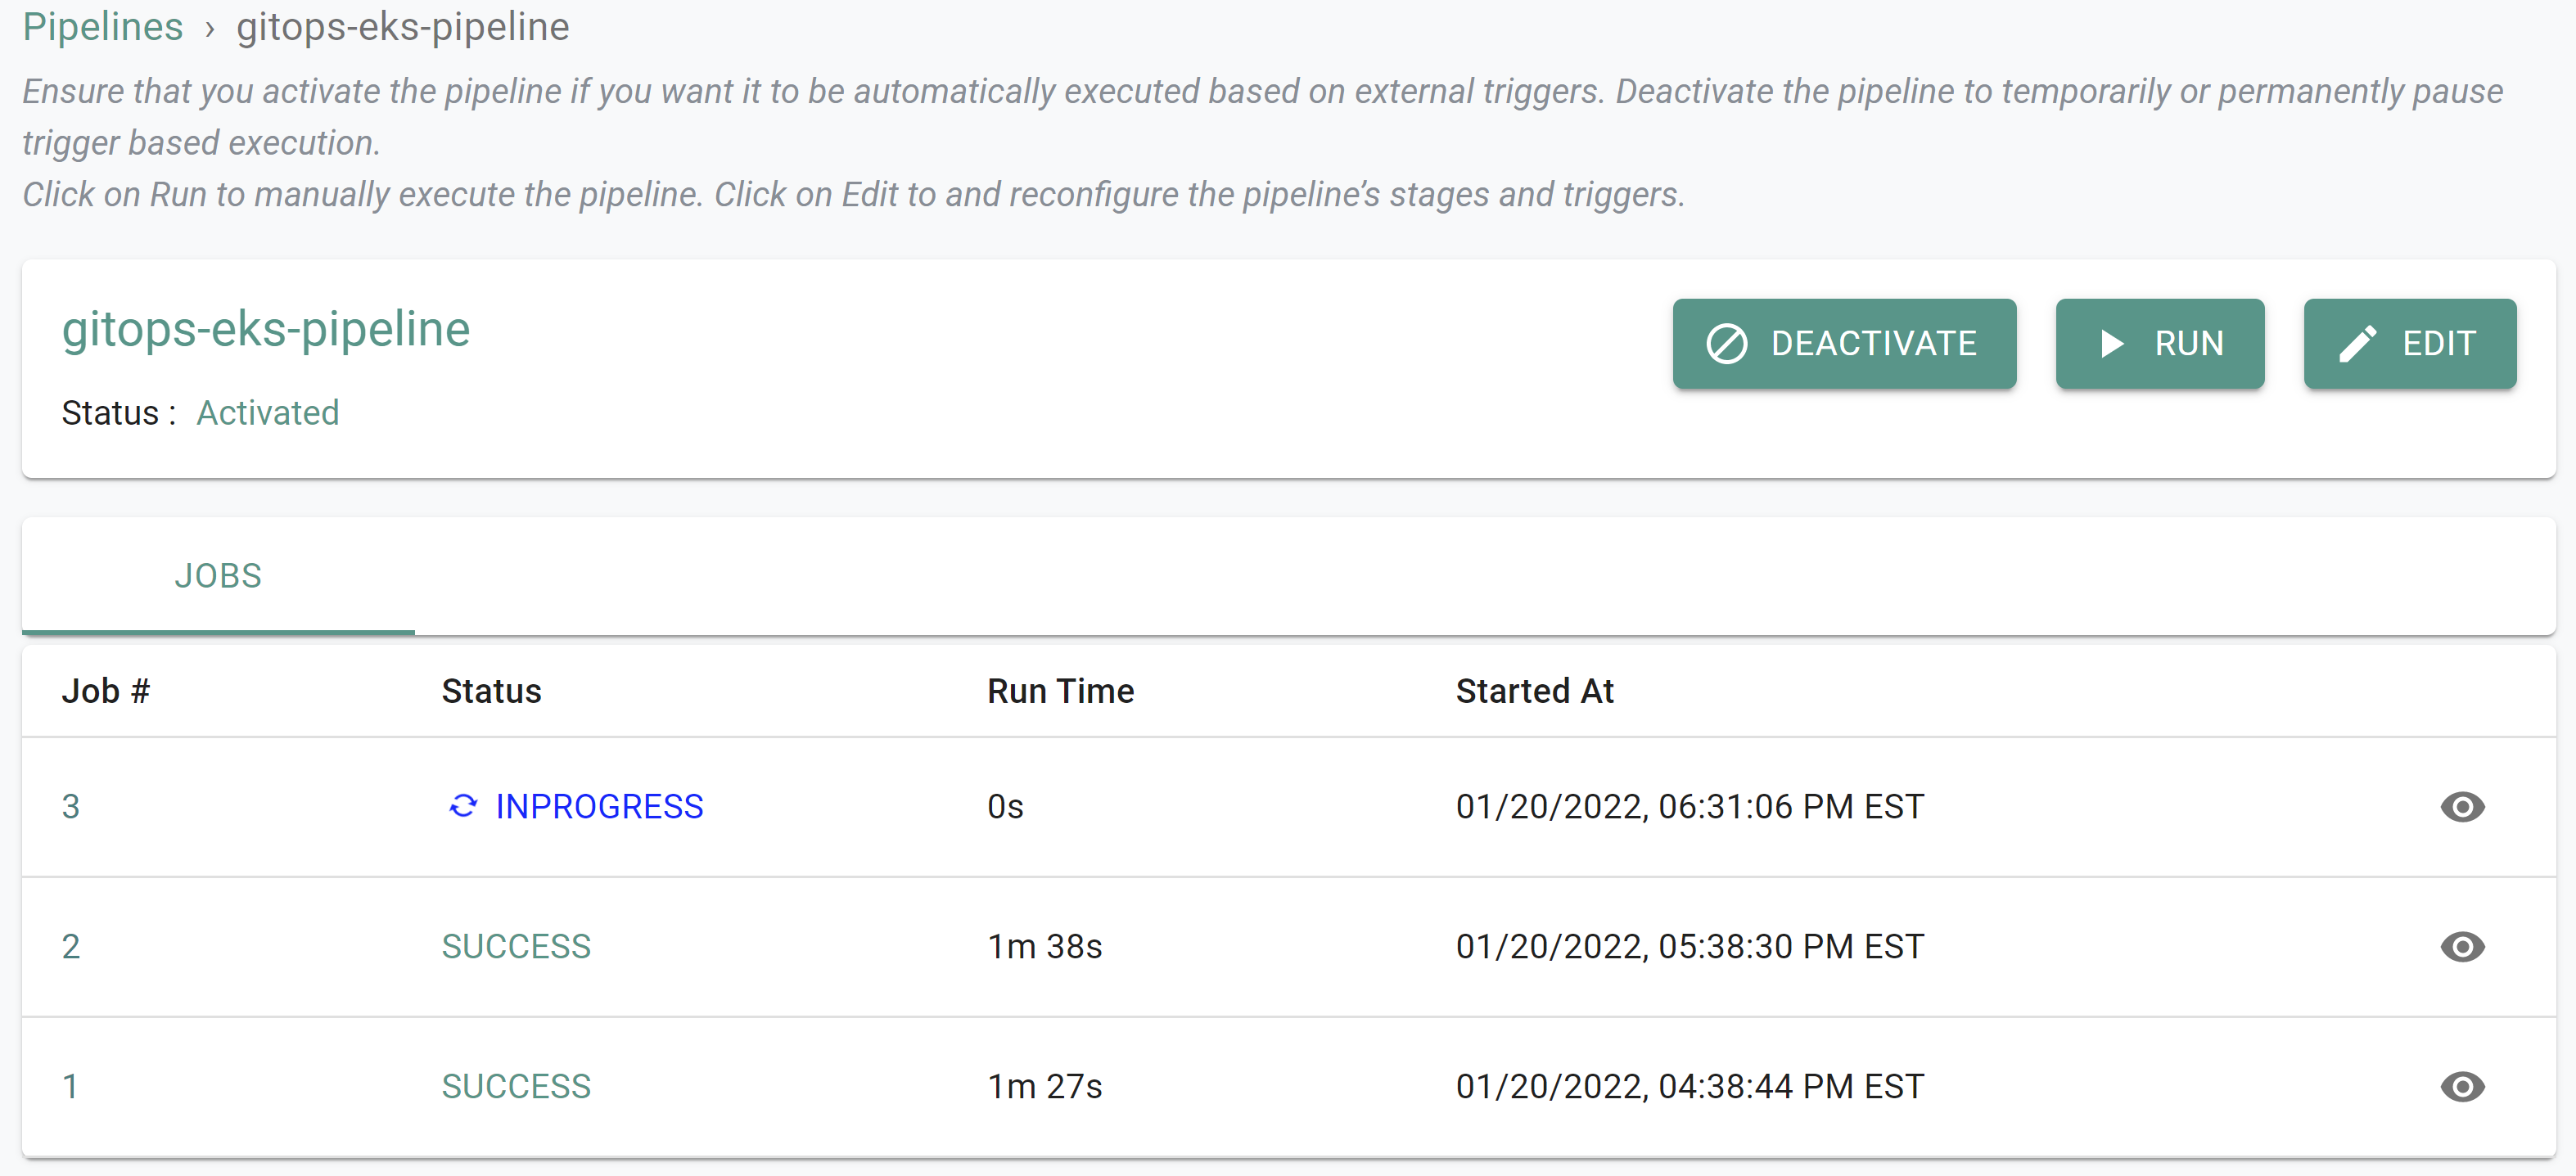
- In the Rafay console, navigate to the pipeline and click on the pipeline to see that a job has been created
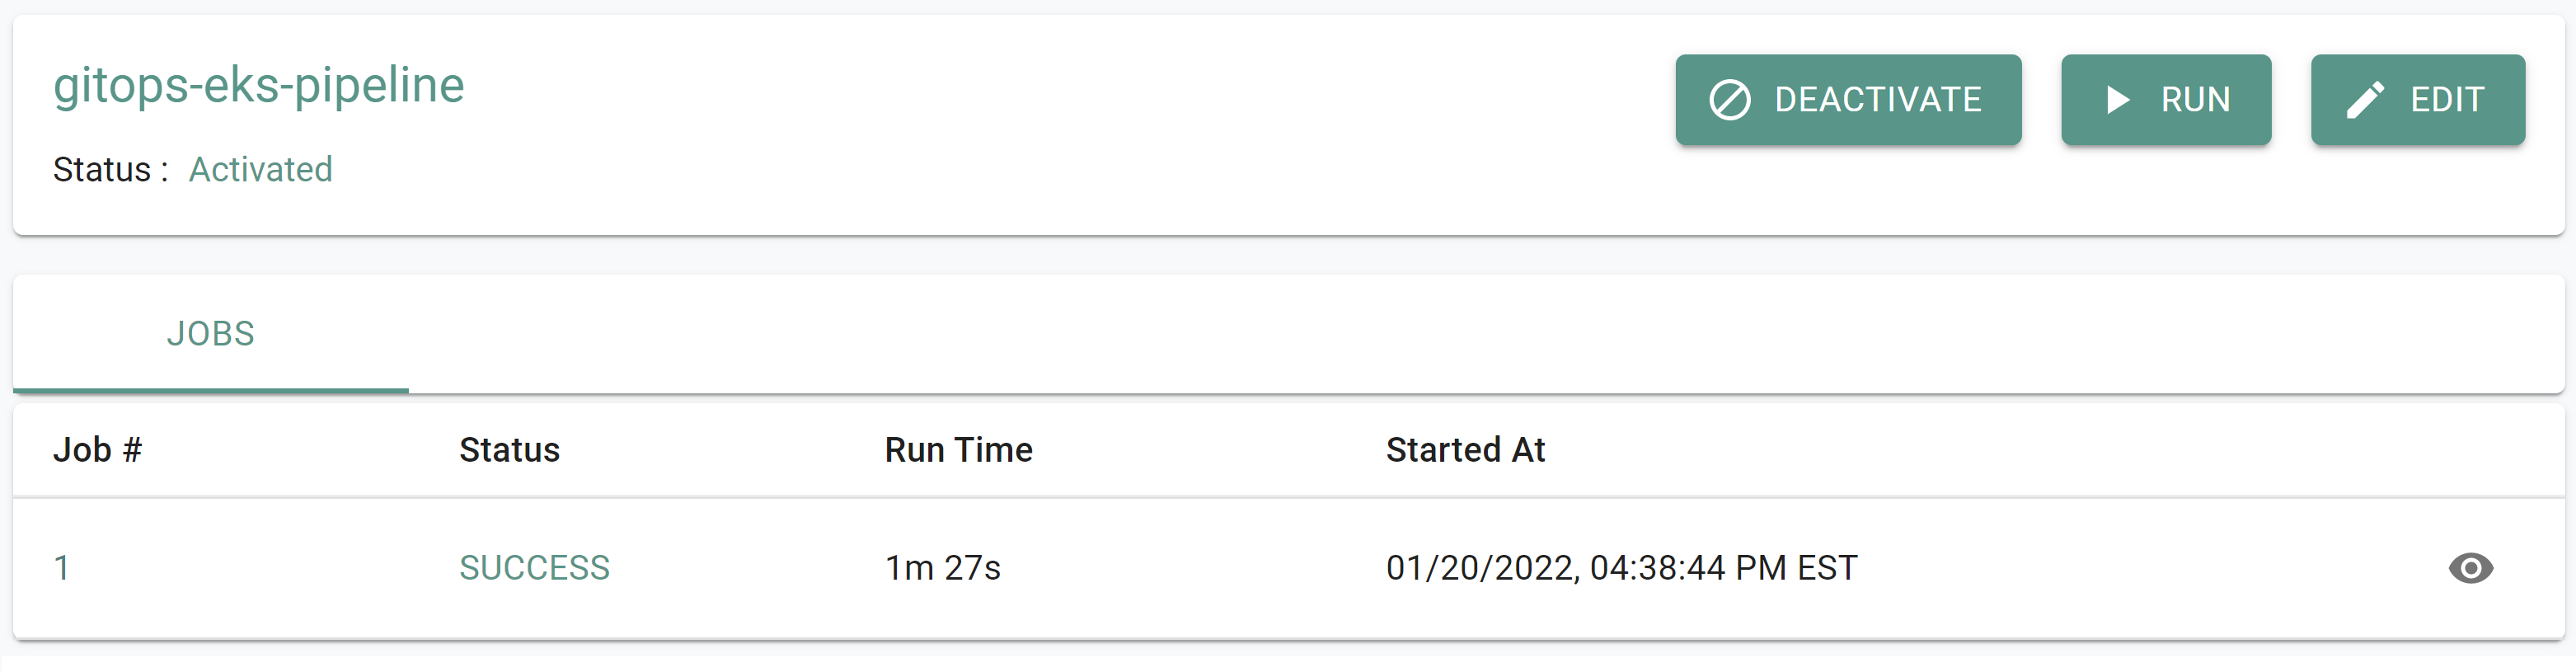
- Click on the job to see additional details
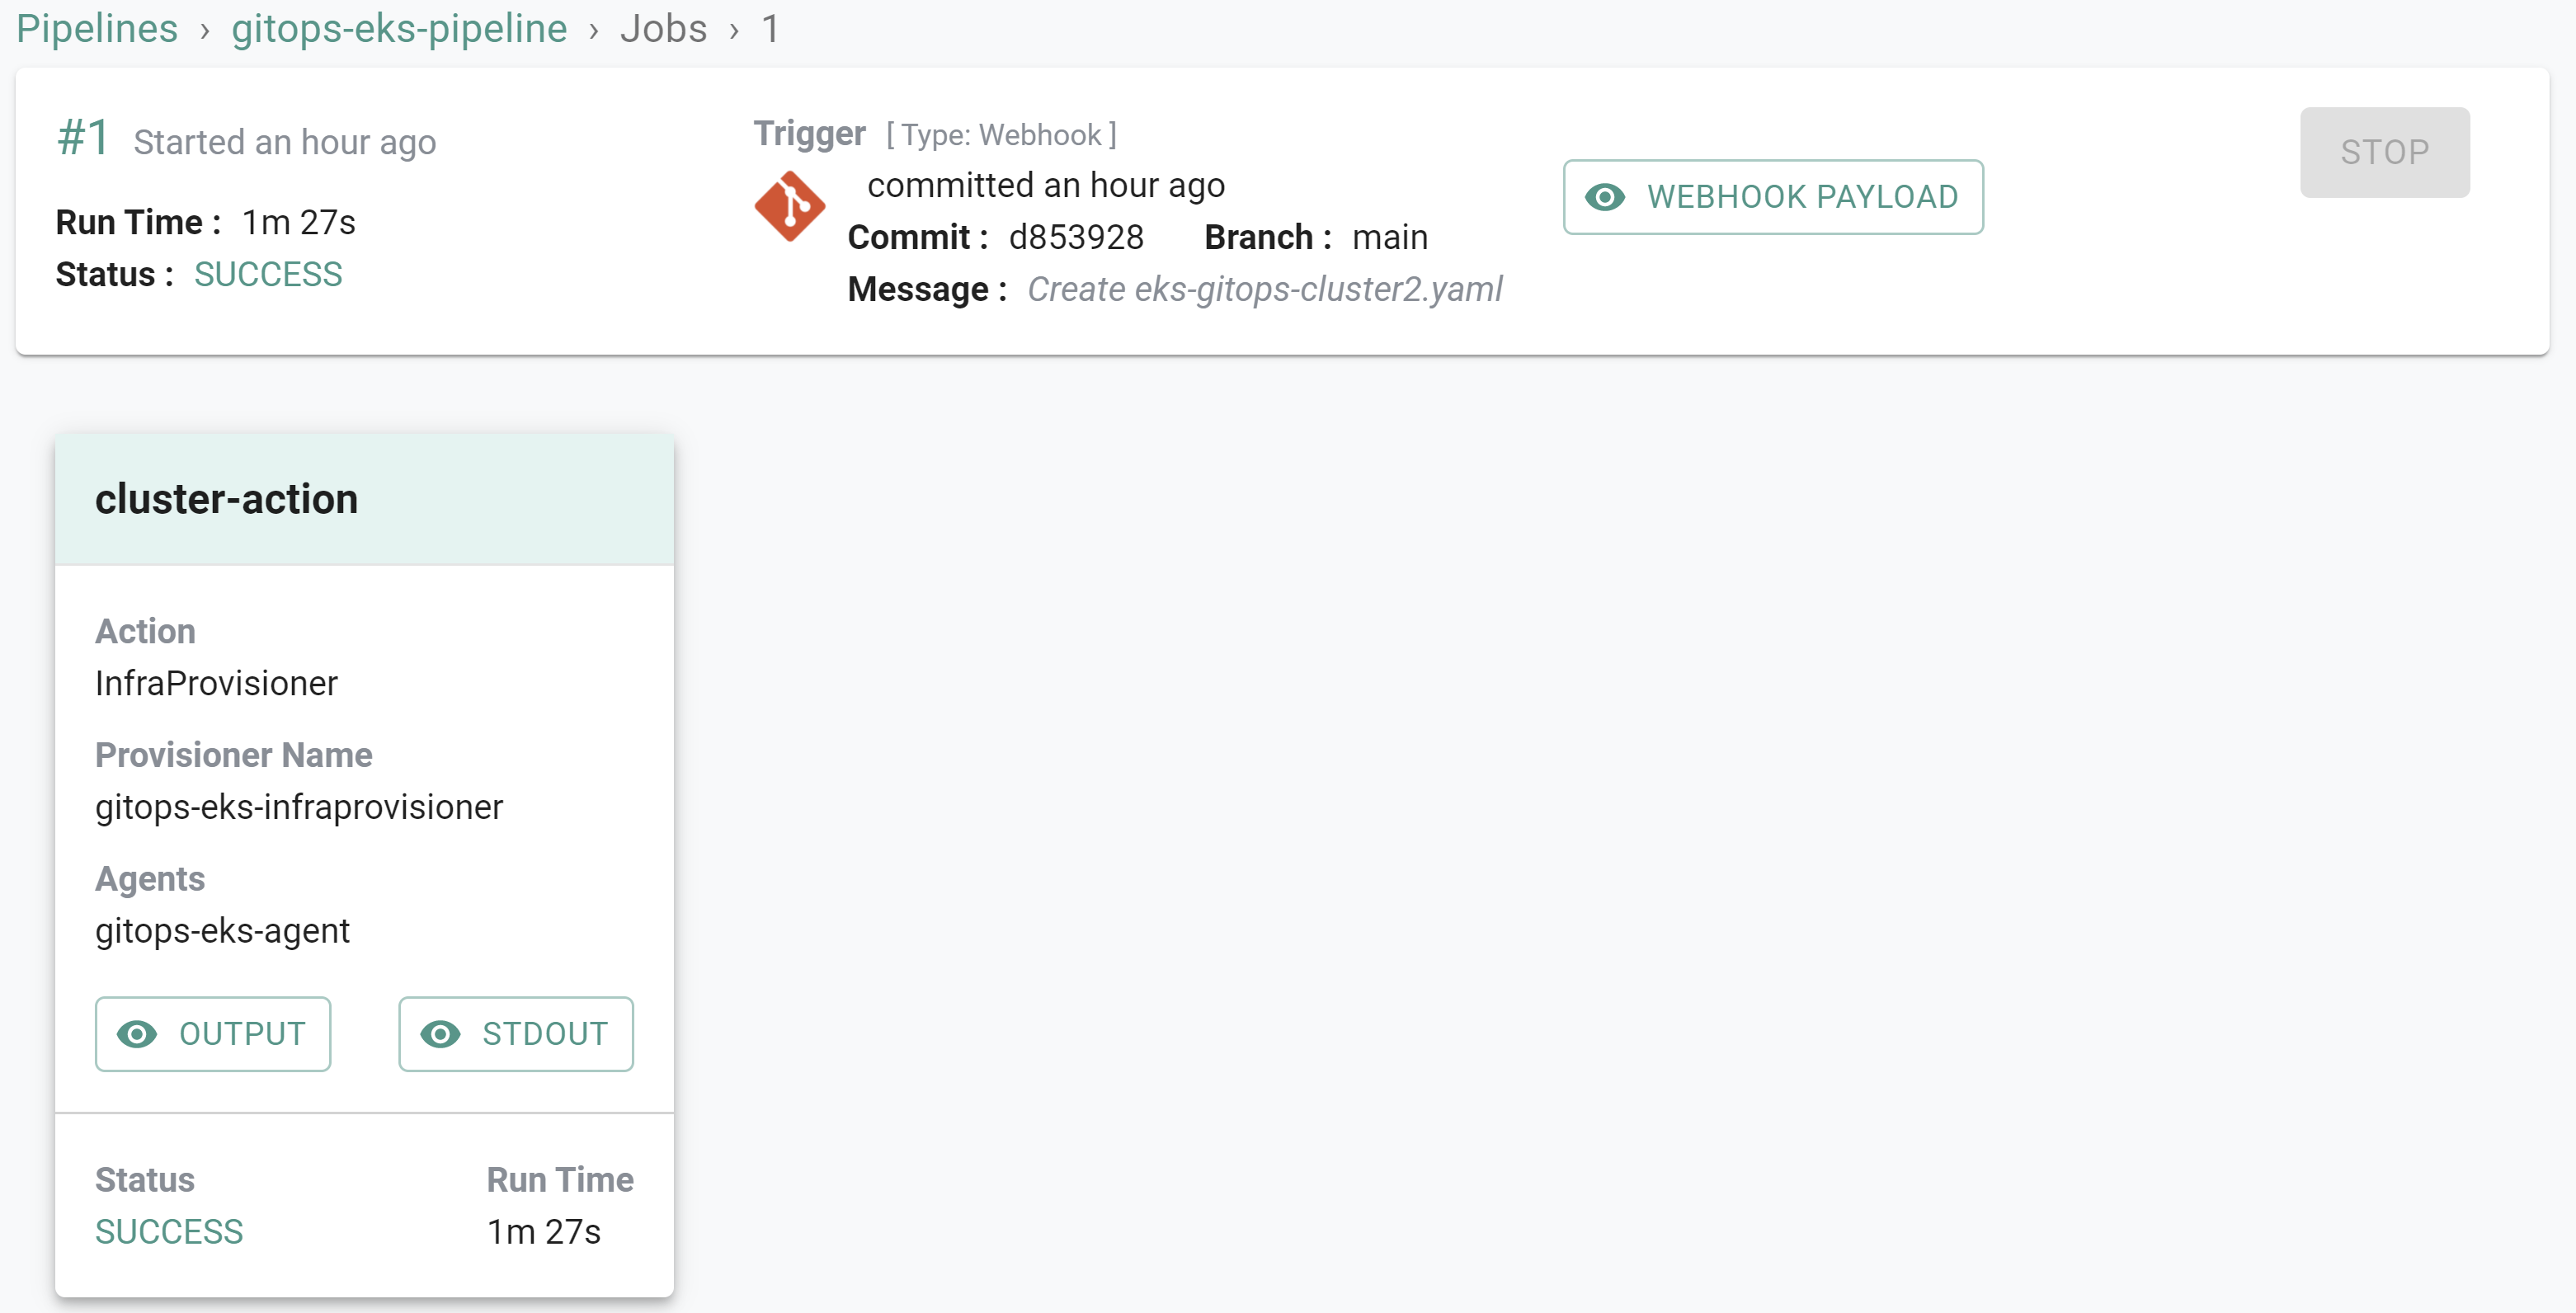
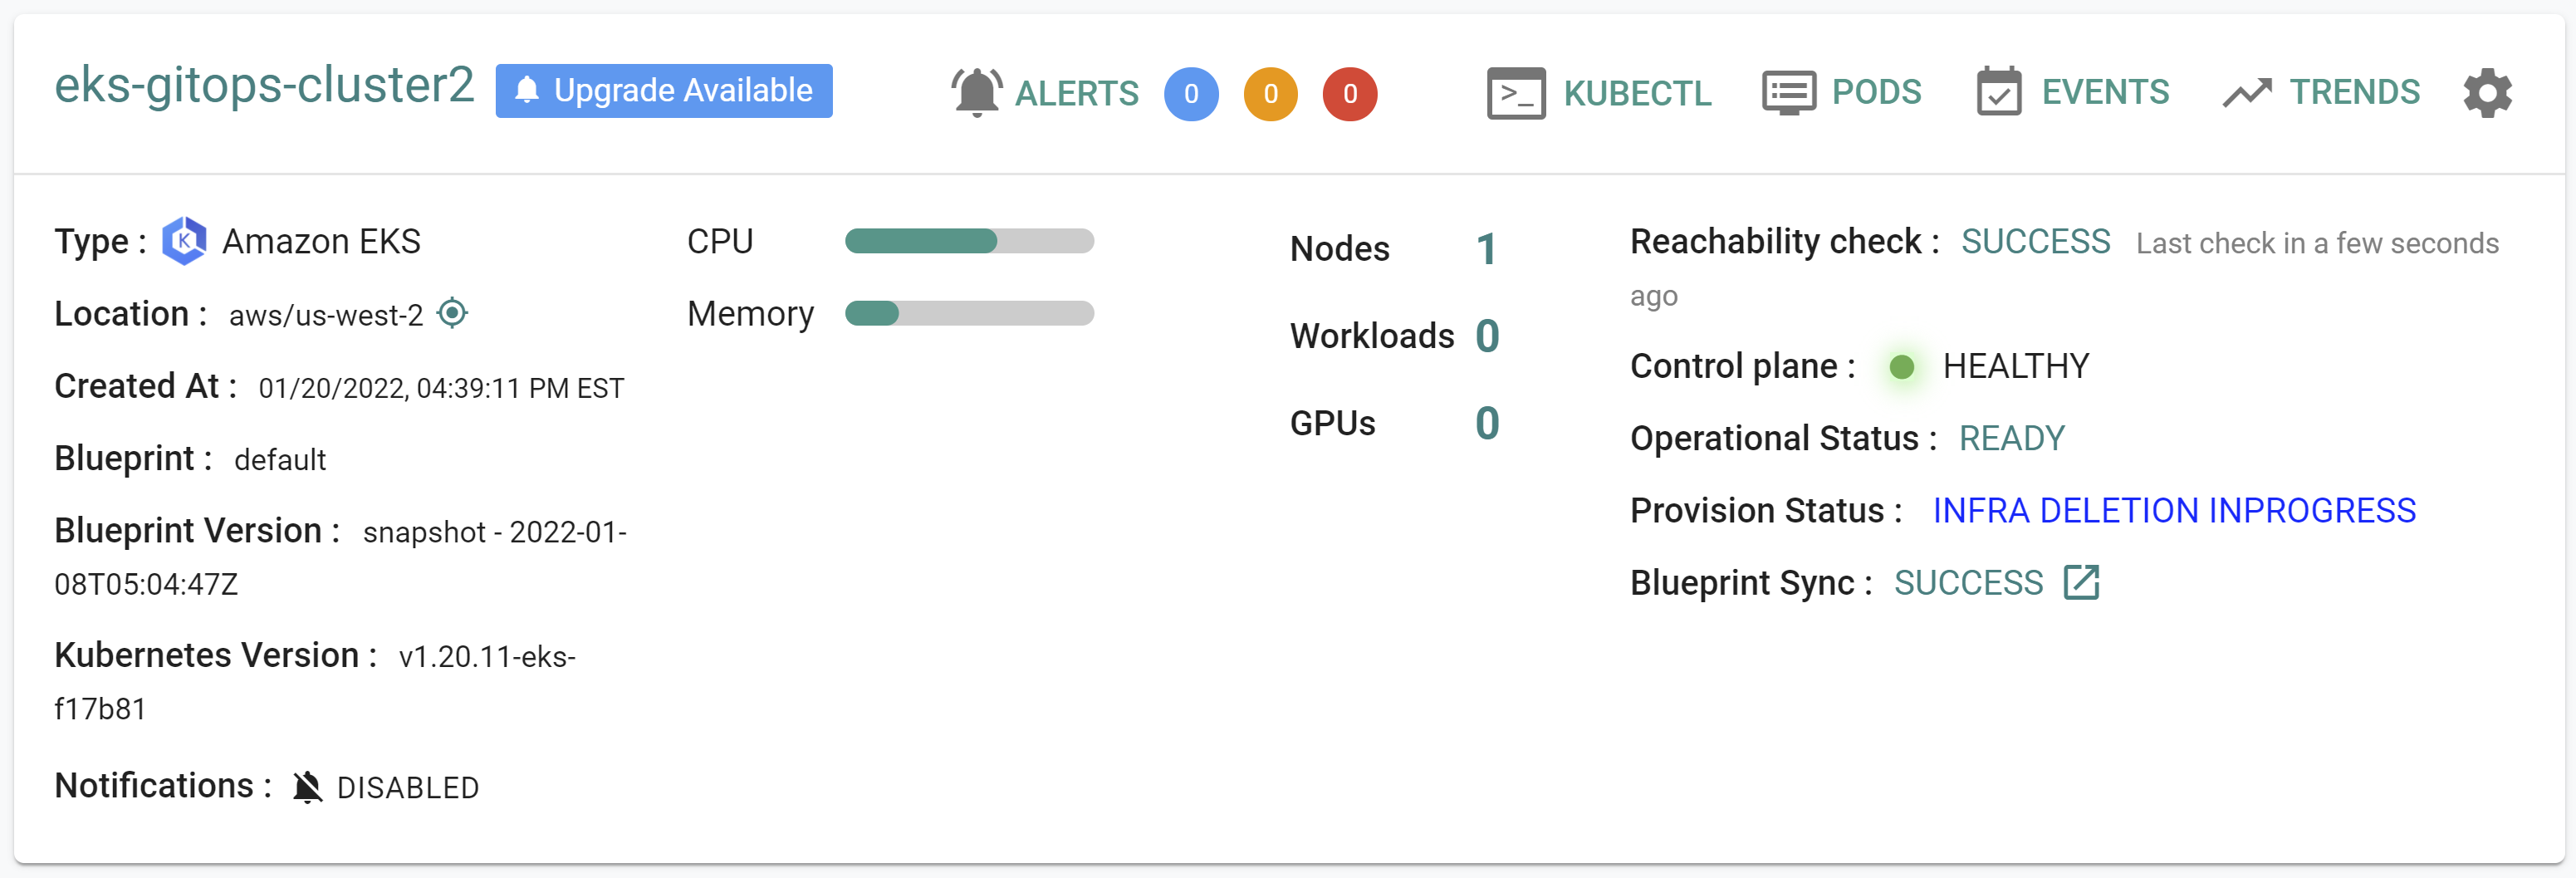
- Click on Infrastructure -> Clusters. You should see the cluster being created

Step 2: Update GitOps Cluster
In this step, you will update the Terraform variables file to reflect a new version and you will update the cluster spec file to increase the maximum number of nodes in the cluster. Once the changes are commited to the repository, the pipeline will begin updating the cluster.
Note: Ensure the previosuly created cluster named "gitops-eks-cluster2" is fully created and healthy before proceeding
- Open Terminal (on macOS/Linux) or Command Prompt (Windows) and navigate to the folder where you cloned the Git repository
- Navigate to the folder "
/getstarted/eks-gitops" - Update the "terraform.tfvars" file with a new version. In this case we are using "v2"
The file should look like this once updated
clusters = {
  eks-gitops-cluster2= {
    cluster_name = "eks-gitops-cluster2"
    project_name  = "defaultproject"
    cluster_spec_version = "v2"
    cluster_spec_path = "./specfiles/eks-gitops-cluster2.yaml"
  }
 }
- Navigate to the folder "
/getstarted/eks-gitops/specfiles" - Update the maximum node count in the "gitops-eks-cluster2.yaml" file
The file should look like this once updated
kind: Cluster
metadata:
  name: eks-gitops-cluster2
  project: defaultproject
spec:
  blueprint: default
  cloudprovider: aws-cloud-credential
  clusterConfig: null
  cniprovider: aws-cni
  proxyconfig: {}
  type: eks
---
apiVersion: rafay.io/v1alpha5
availabilityZones:
- us-west-2a
- us-west-2b
kind: ClusterConfig
metadata:
  name: eks-gitops-cluster2
  region: us-west-2
  version: "1.20"
managedNodeGroups:
- amiFamily: AmazonLinux2
  availabilityZones:
  - us-west-2a
  - us-west-2b
  desiredCapacity: 1
  iam:
    withAddonPolicies:
      albIngress: true
      autoScaler: true
  instanceType: t3.large
  maxSize: 2
  minSize: 1
  name: managed-ng1
  version: "1.20"
  privateNetworking: true
  volumeSize: 80
  volumeType: gp3
vpc:
  cidr: 192.168.0.0/16
  clusterEndpoints:
    privateAccess: true
    publicAccess: true
  nat:
    gateway: Single
- Commit the changes to the repository
- In the Rafay console, navigate to the pipeline and click on the pipeline to see that a job has been created
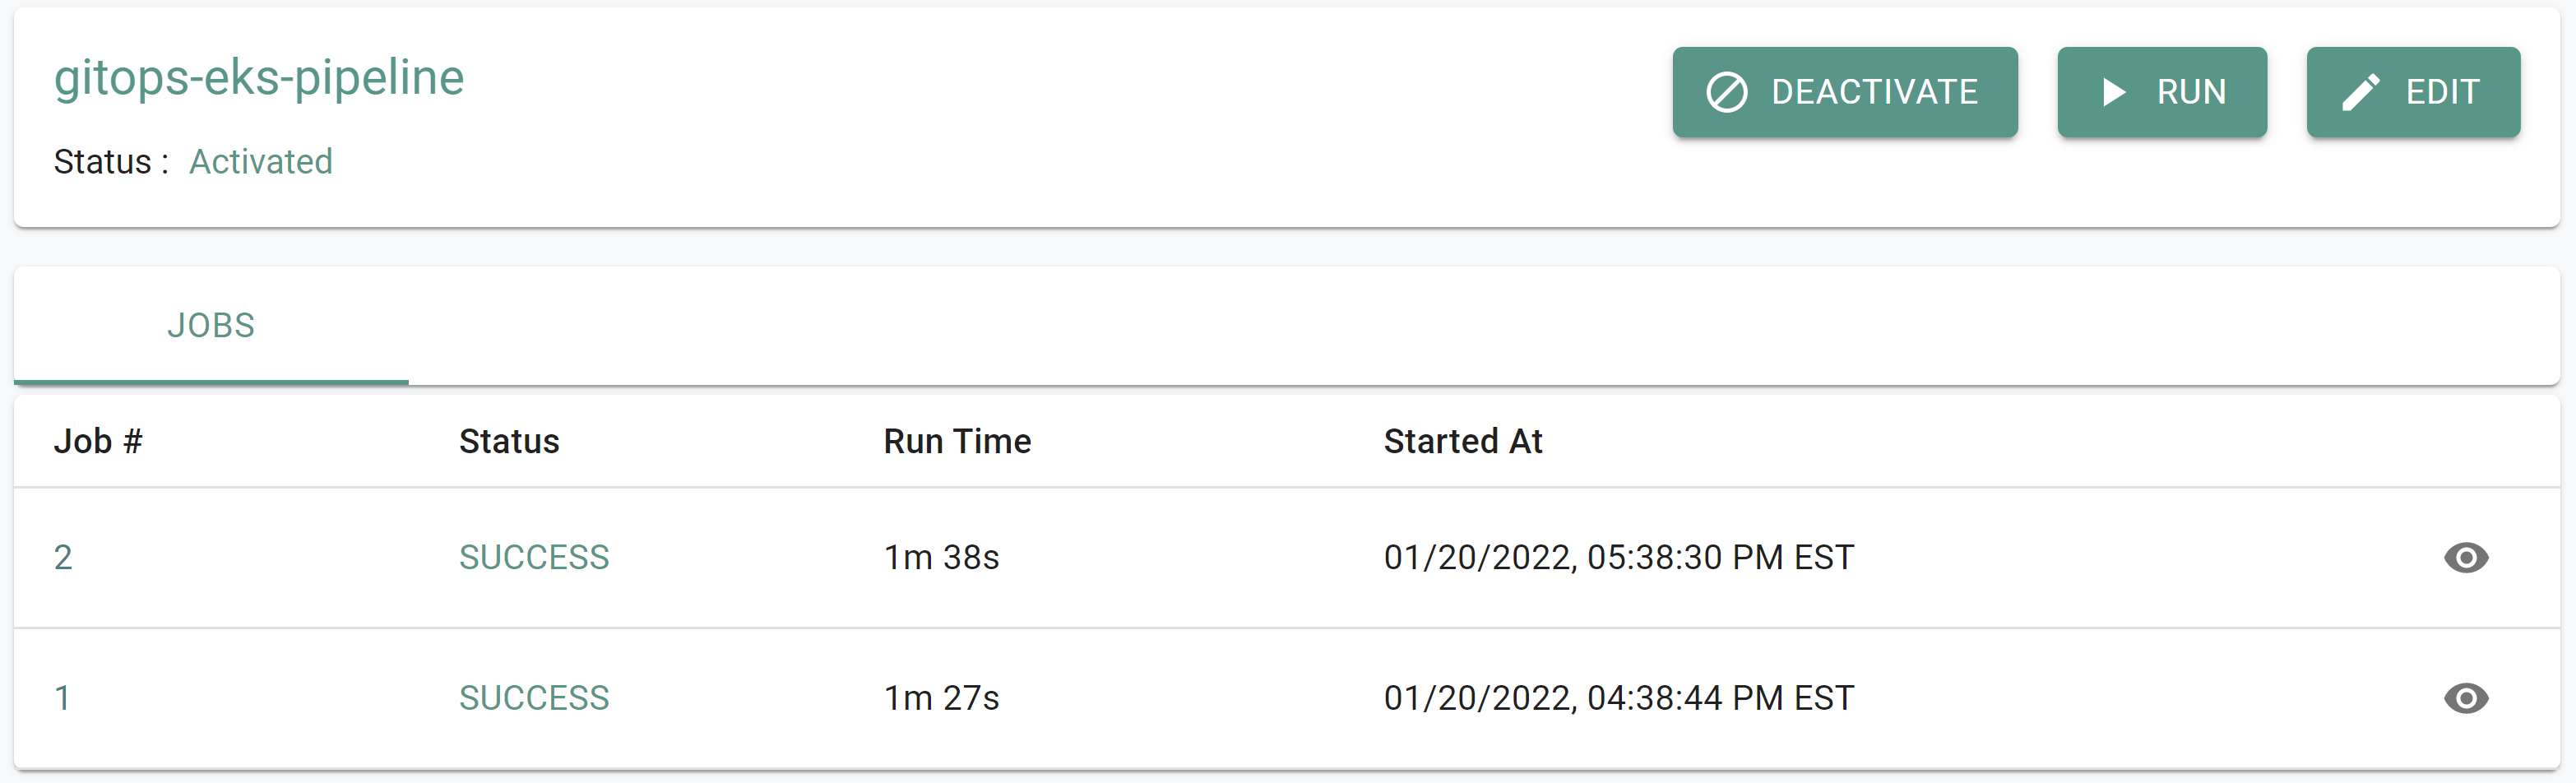
- Click on the job to see additional details
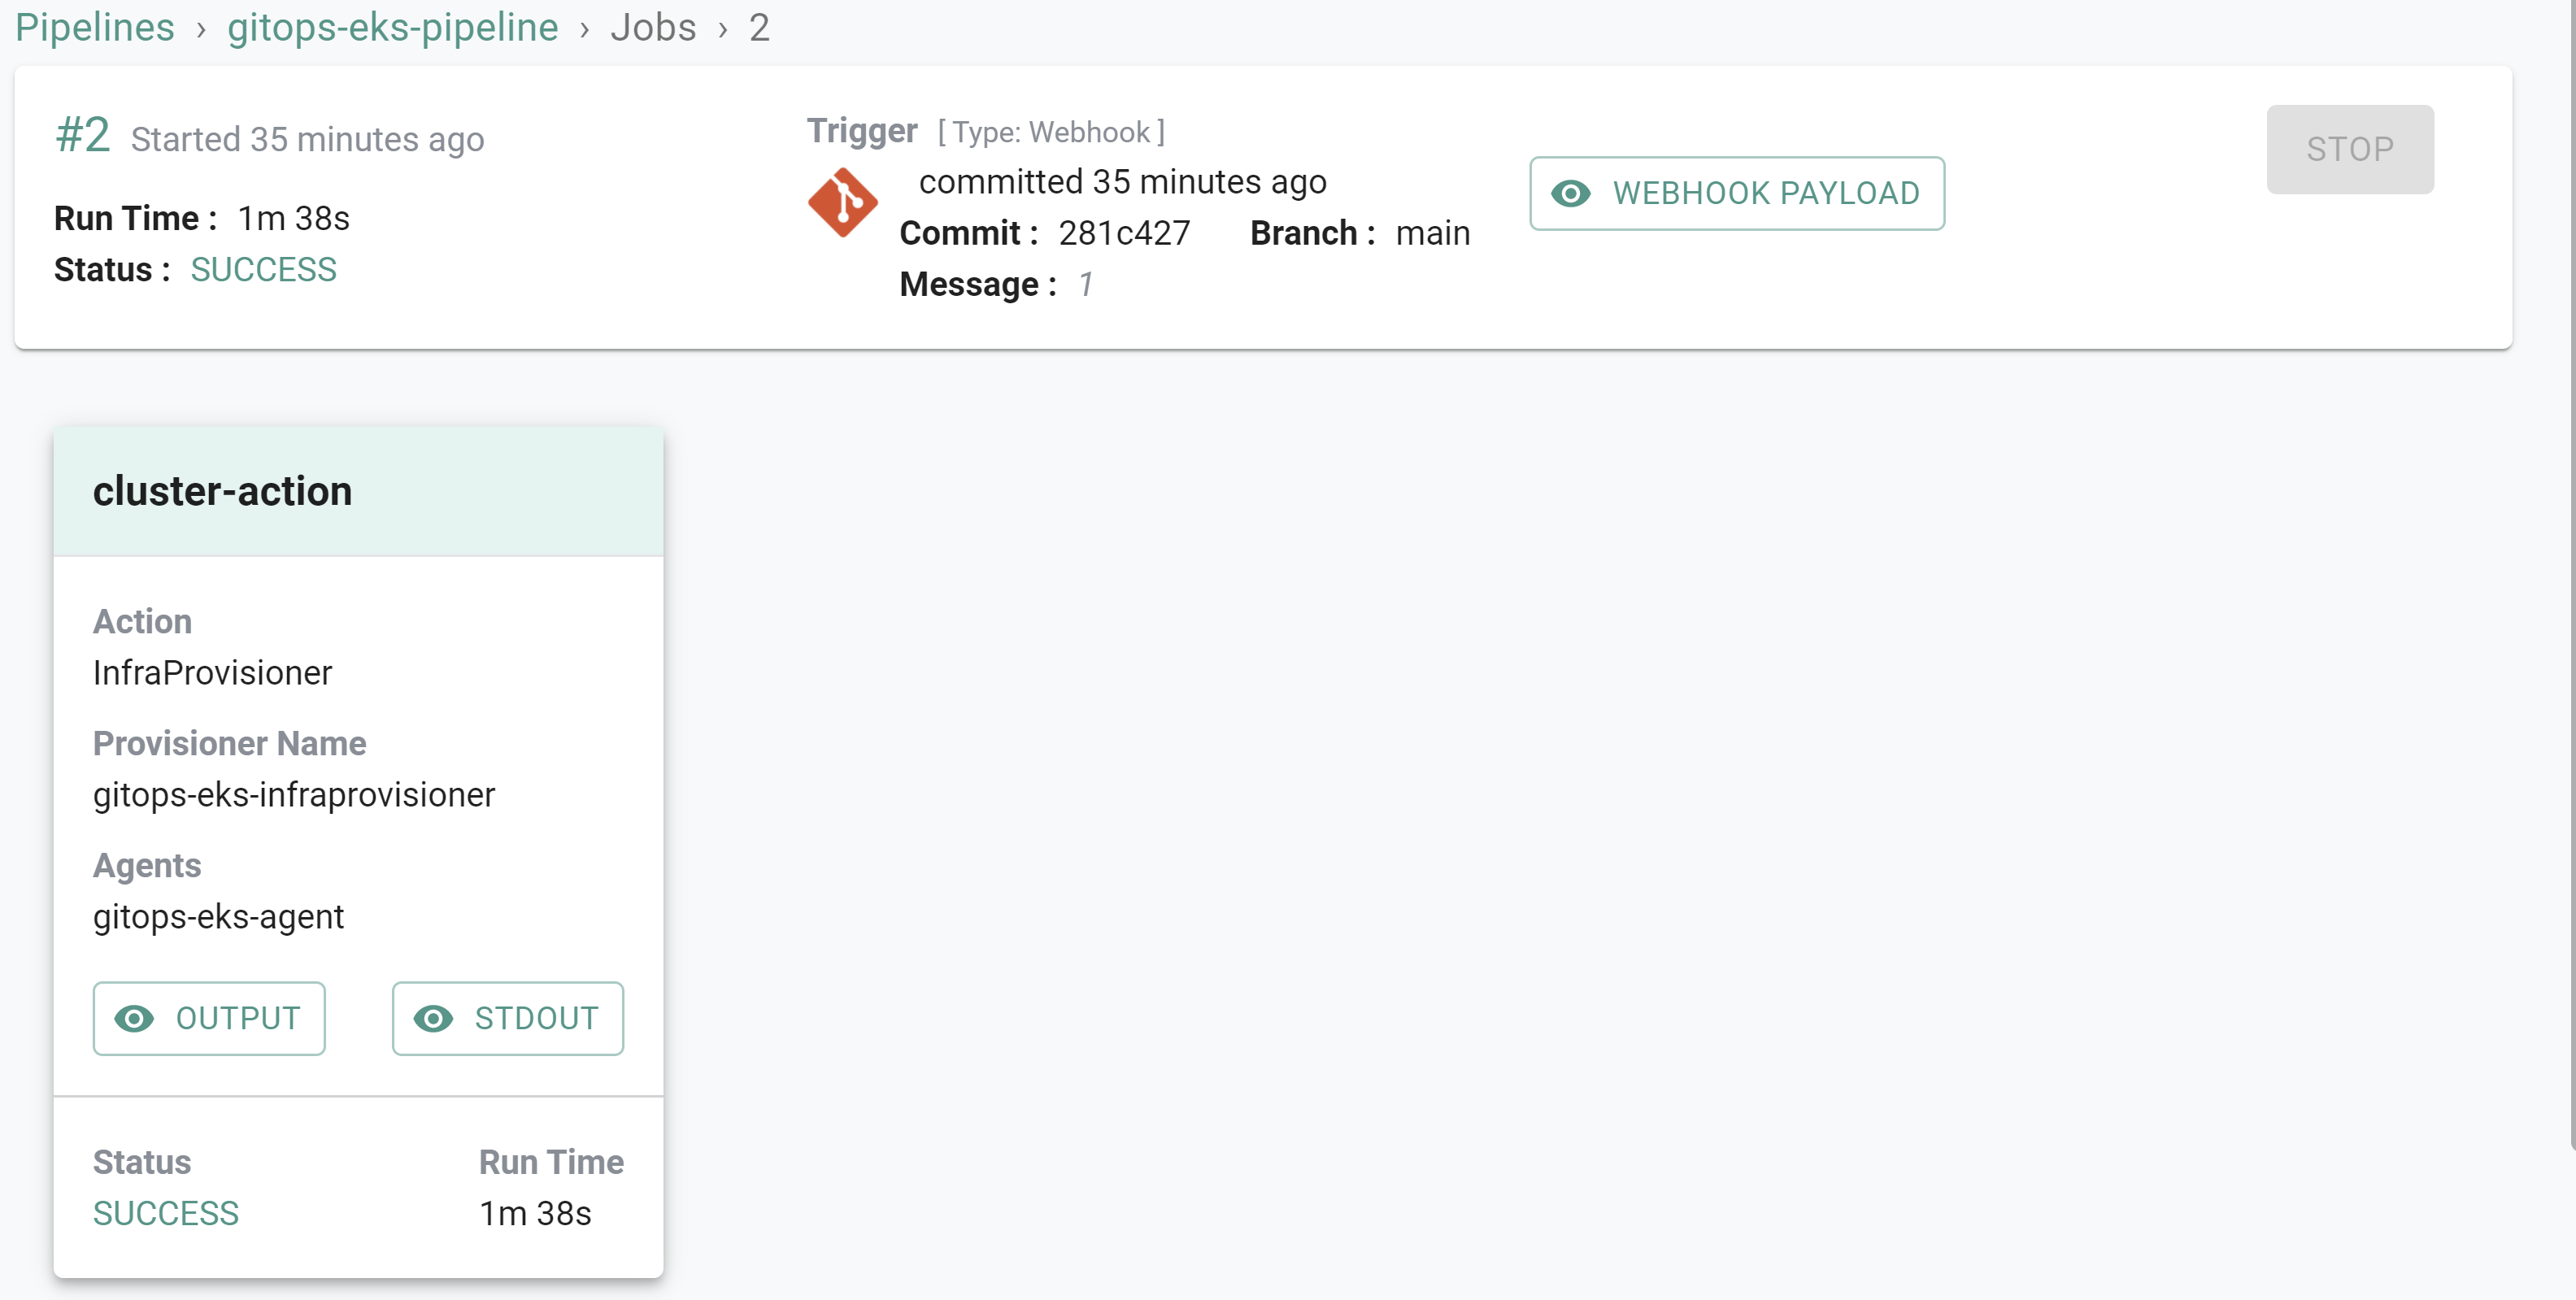
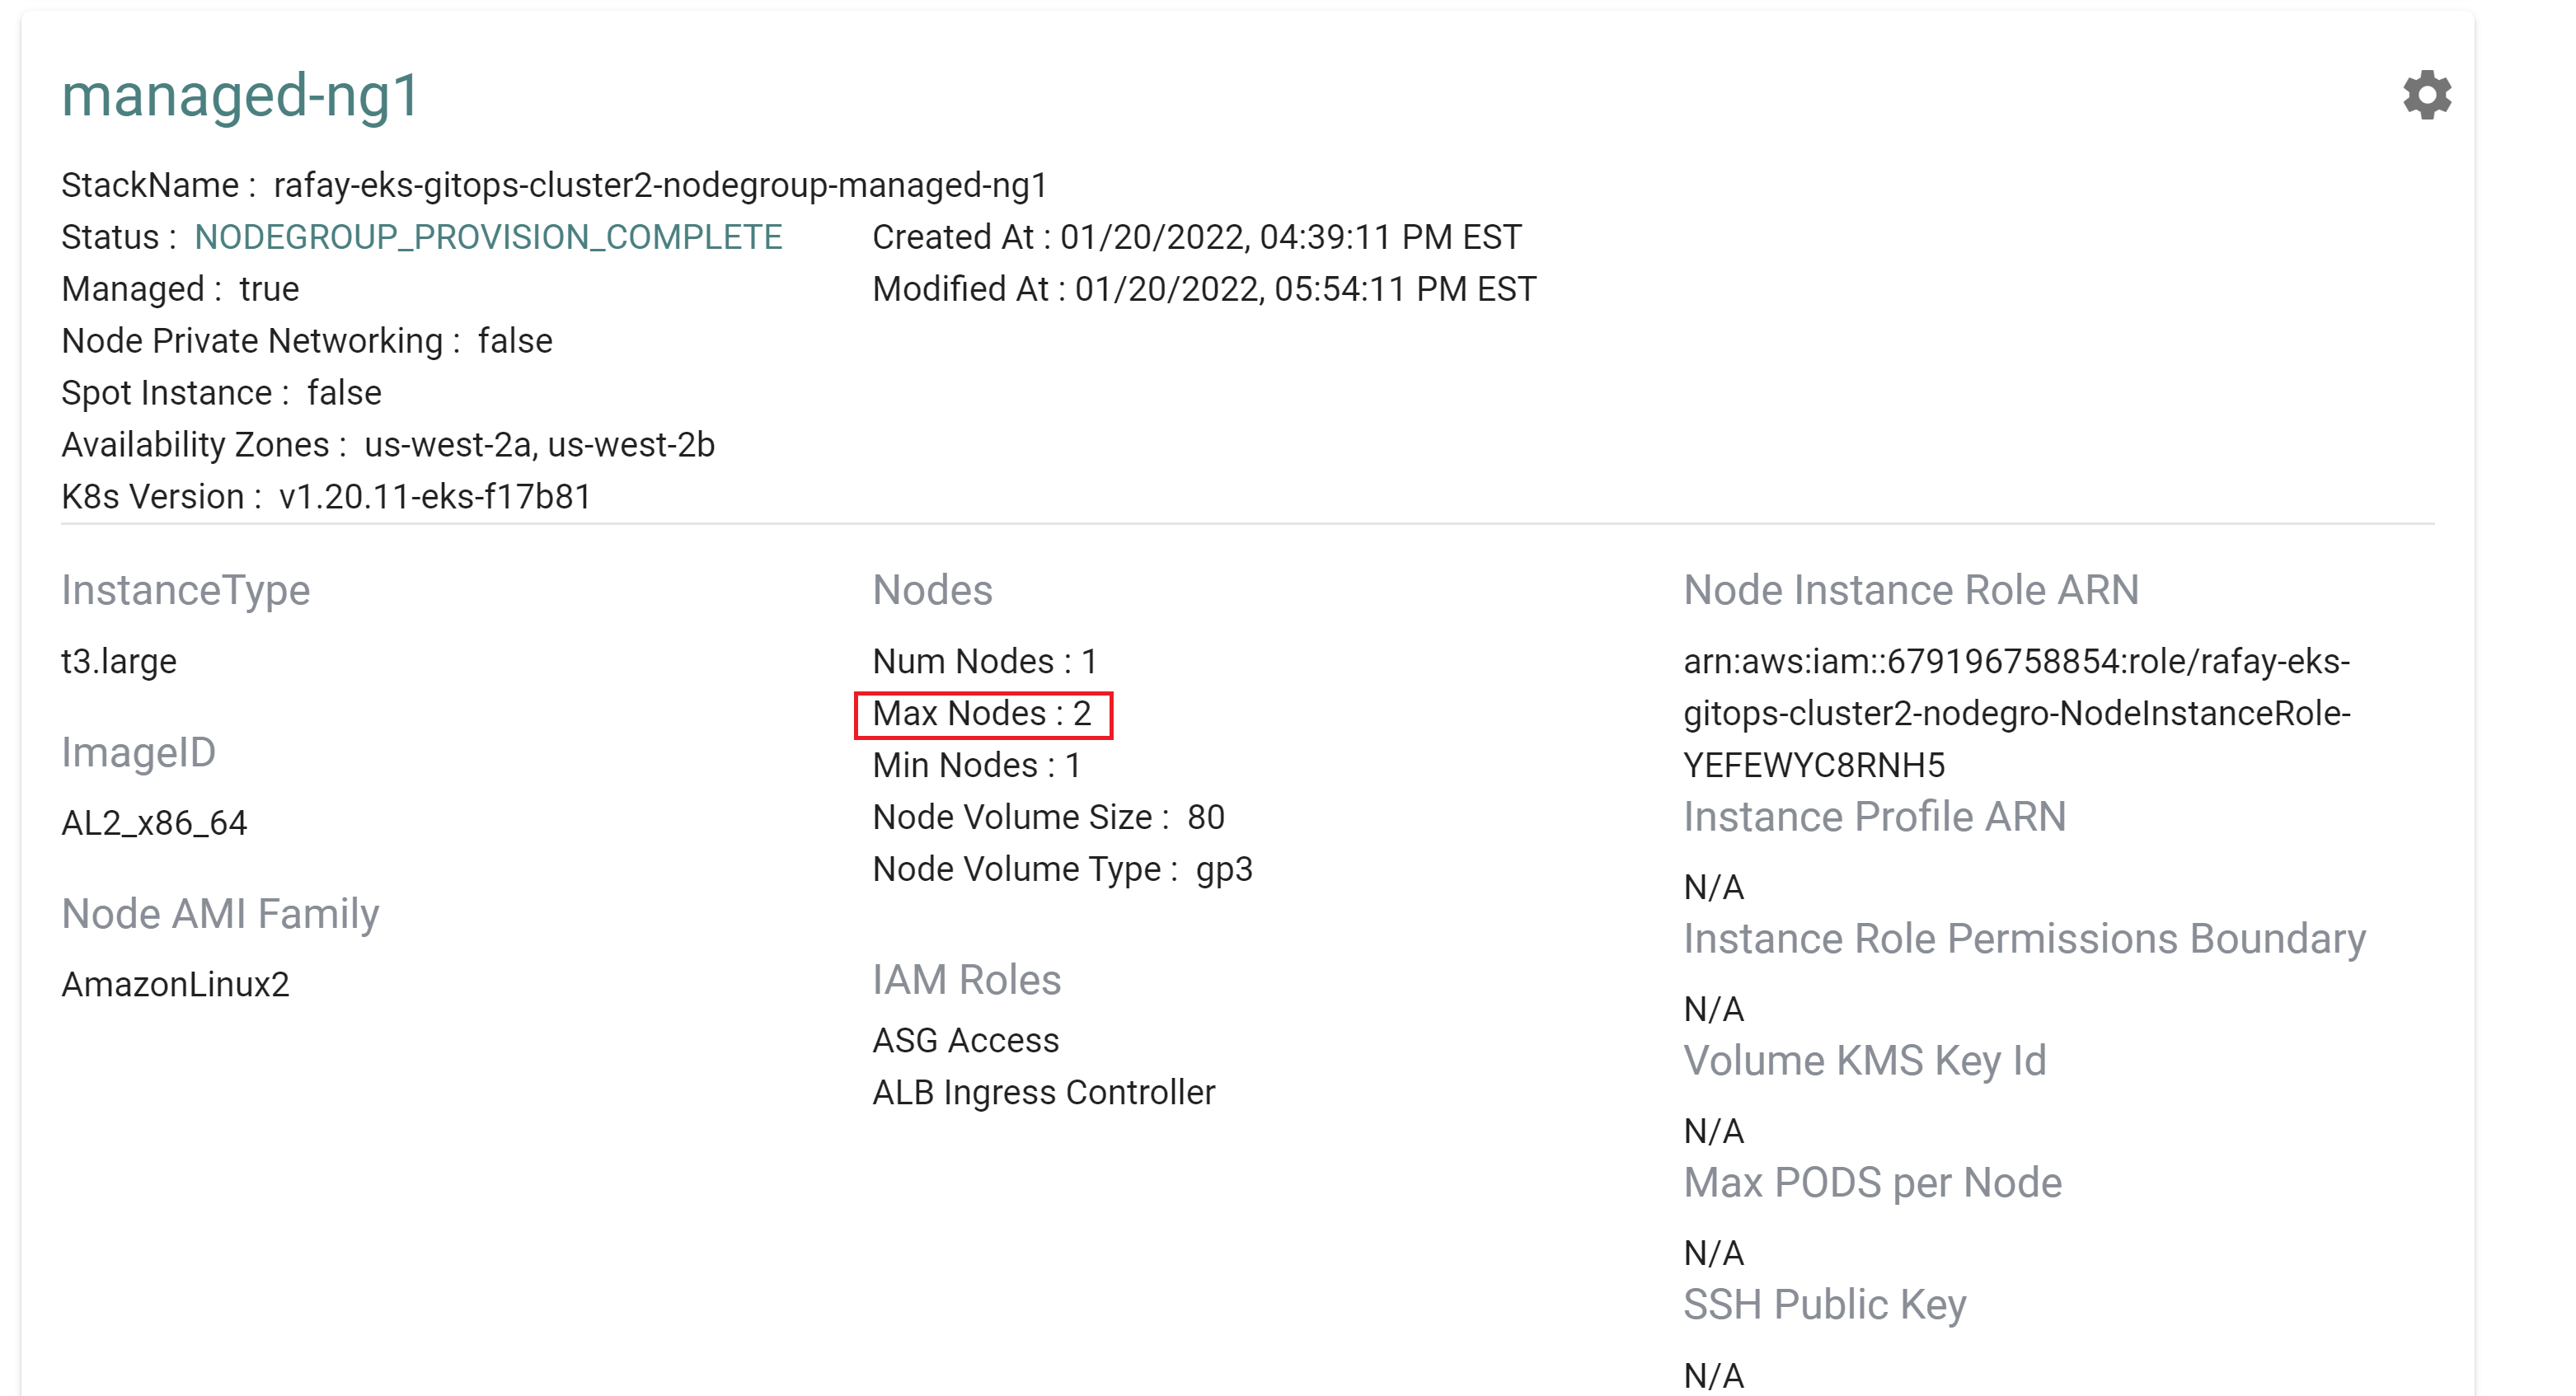
- Click on Infrastructure -> Clusters -> eks-gitops-cluster2 -> Node Group. You should see something like the following showing a maximim of 2 nodes
Step 3: Delete GitOps Cluster
In this step, you will remove the cluster from the Terraform variables file and remove the cluster spec file from your repository. These actions will delete the cluster.
- Open Terminal (on macOS/Linux) or Command Prompt (Windows) and navigate to the folder where you cloned the Git repository
- Navigate to the folder "
/getstarted/eks-gitops" - Update the "terraform.tfvars" file
The file should look like this once updated
clusters = {}
- Delete the file "gitops-eks-cluster2.yaml" from the "
/getstarted/eks-gitops/specfiles" directory - Commit the changes to the repository
- In the Rafay console, navigate to the pipeline to see that a job has been created and is in progress to delete the previsouly created cluster
- Click on Infrastructure -> Clusters. You should see the cluster being deleted
Recap
As of this step, you have created, update and deleted an EKS cluster using a GitOps pipeline.