Part 3: Pipeline
What Will You Do
In this part of the self-paced exercise, you will create a custom GitOps pipeline using declarative specifications.
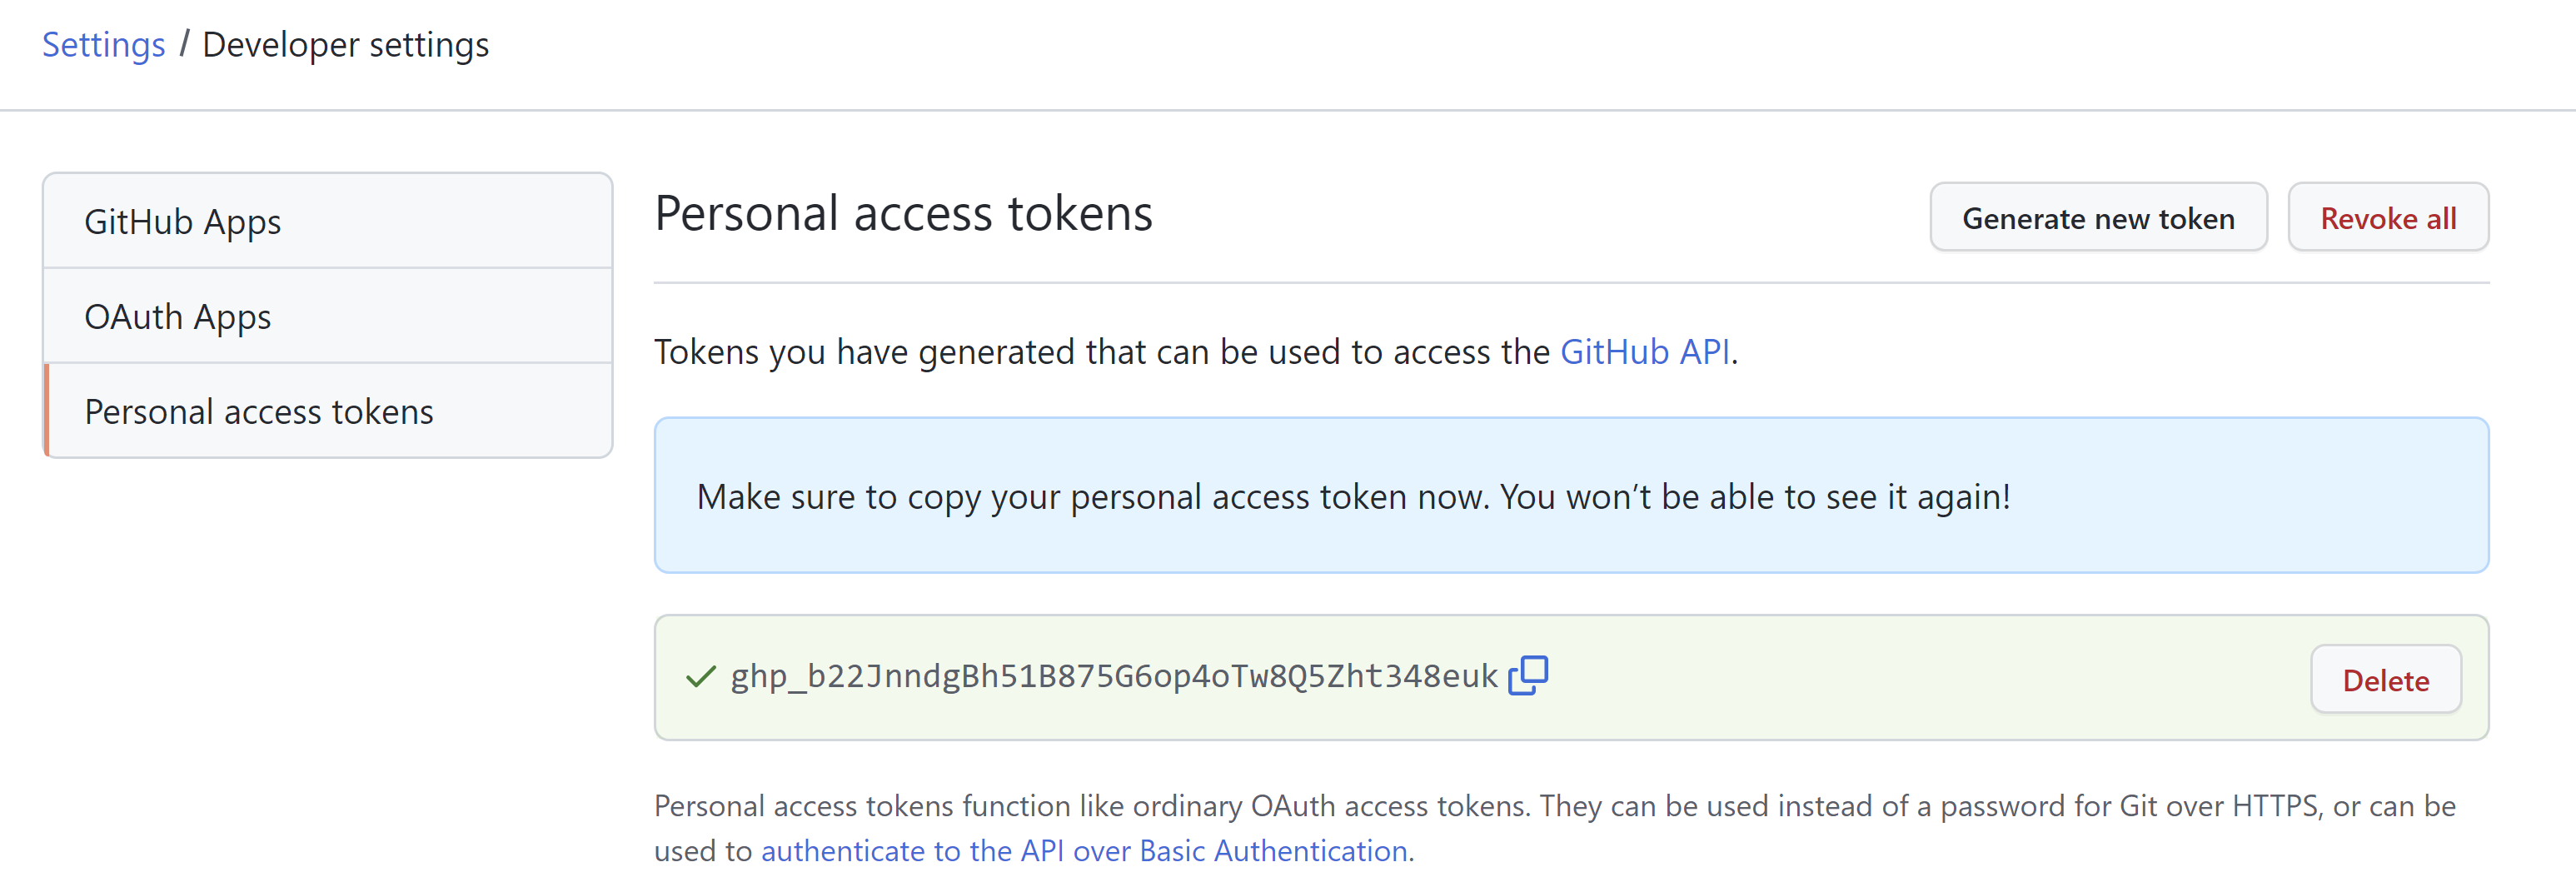
Step 1: Create GitHub Token
In this step, you will create a Personal Access Token in Github to allow access the GitHub repository.
- Ensure you are logged into your GitHub.com account
- Go to the GitHub Account Settings
- Click "Generate new token"
- Provide a note for the token, select all scopes and then generate the token
- Copy and save the access token for use later
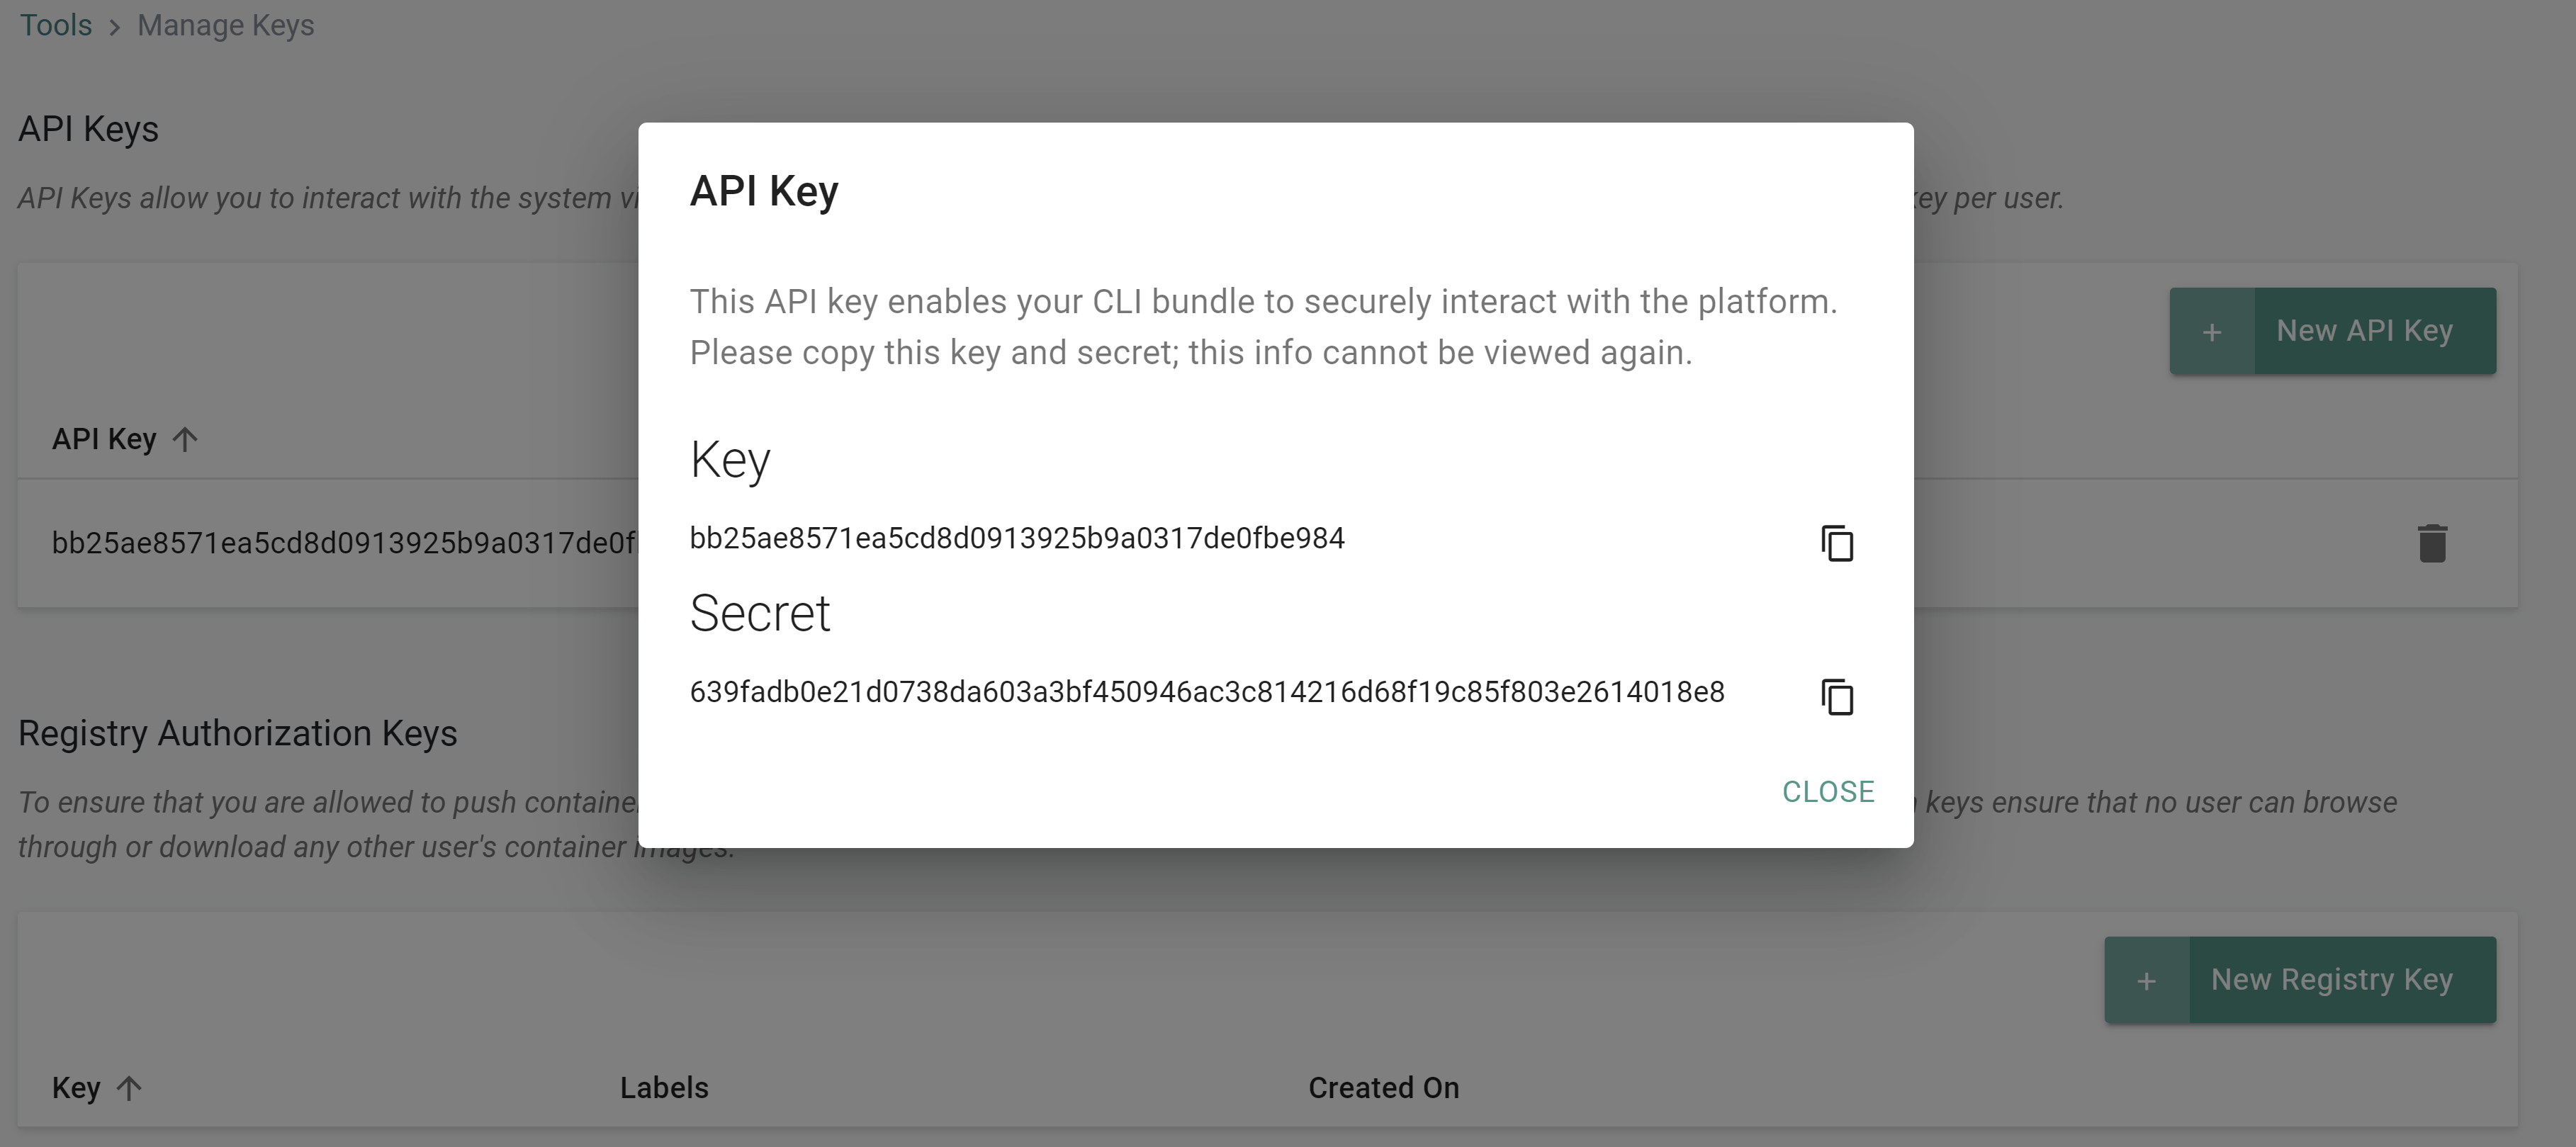
Step 2: Create API Key
In this step, you will create an API key to allow the infrastructure provisioner to interact with the RCTL CLI in your Org.
- Ensure you are logged into the web console
- Click "Home" -> "My Tools"
- Click "Manage Keys"
- Click "New API Key"
- Copy and save the Key and Secret for later use
Step 3: Create Pipeline
In this step, you will create the GitOps pipeline using a declarative specification.
First, we will create an Infra Provisioner using a specification file.
- Save the below YAML to a file named "infraprovisioner.yaml". Be sure to save this file outside of your repository as the secrets values are in plain text.
Important
DO NOT store your keys and secrets in plain text format in a public Git repository. It is recommended to use the secret sealer integration to secure sensitive data stored in Git repos.
The following values will need to be updated. The RCTL API key and secret obtained in the previous step should be used. You can obtain an AWS access key and secret from your AWS account settings.
- value: "rctl_api_key"
- value: "rctl_api_secret"
- value: "aws_access_key"
- value: "aws_secret_key"
apiVersion: infra.provisioner.rafay.dev/v2
kind: InfraProvisioner
metadata:
  name: gitops-eks-infraprovisioner
spec:
  type: Terraform
  gitRepository: gitops-eks-repo
  gitRevision: main
  directoryPath: /
  config:
    terraform:
      version: 0.15.0
      inputVars: []
      tfvarsFile: ""
      envVars:
      - key: RCTL_REST_ENDPOINT
        value: console.rafay.dev
        type: PlainText
      - key: RCTL_API_KEY
        value: "rctl_api_key"
        type: SecureText
      - key: RCTL_API_SECRET
        value: "rctl_api_secret"
        type: SecureText
      - key: RCTL_OPS_ENDPOINT
        value: console.rafay.dev
        type: PlainText
      - key: RCTL_PROJECT
        value: defaultproject
        type: PlainText
      - key: AWS_ACCESS_KEY_ID
        value: "aws_access_key"
        type: SecureText
      - key: AWS_SECRET_ACCESS_KEY
        value: "aws_secret_key"
        type: SecureText
      backendconfig: null
- Open Terminal (on macOS/Linux) or Command Prompt (Windows)
- Navigate to the folder where you created the "infraprovisioner.yaml" file
- Type the command below
rctl create infraprovisioner -f infraprovisioner.yaml
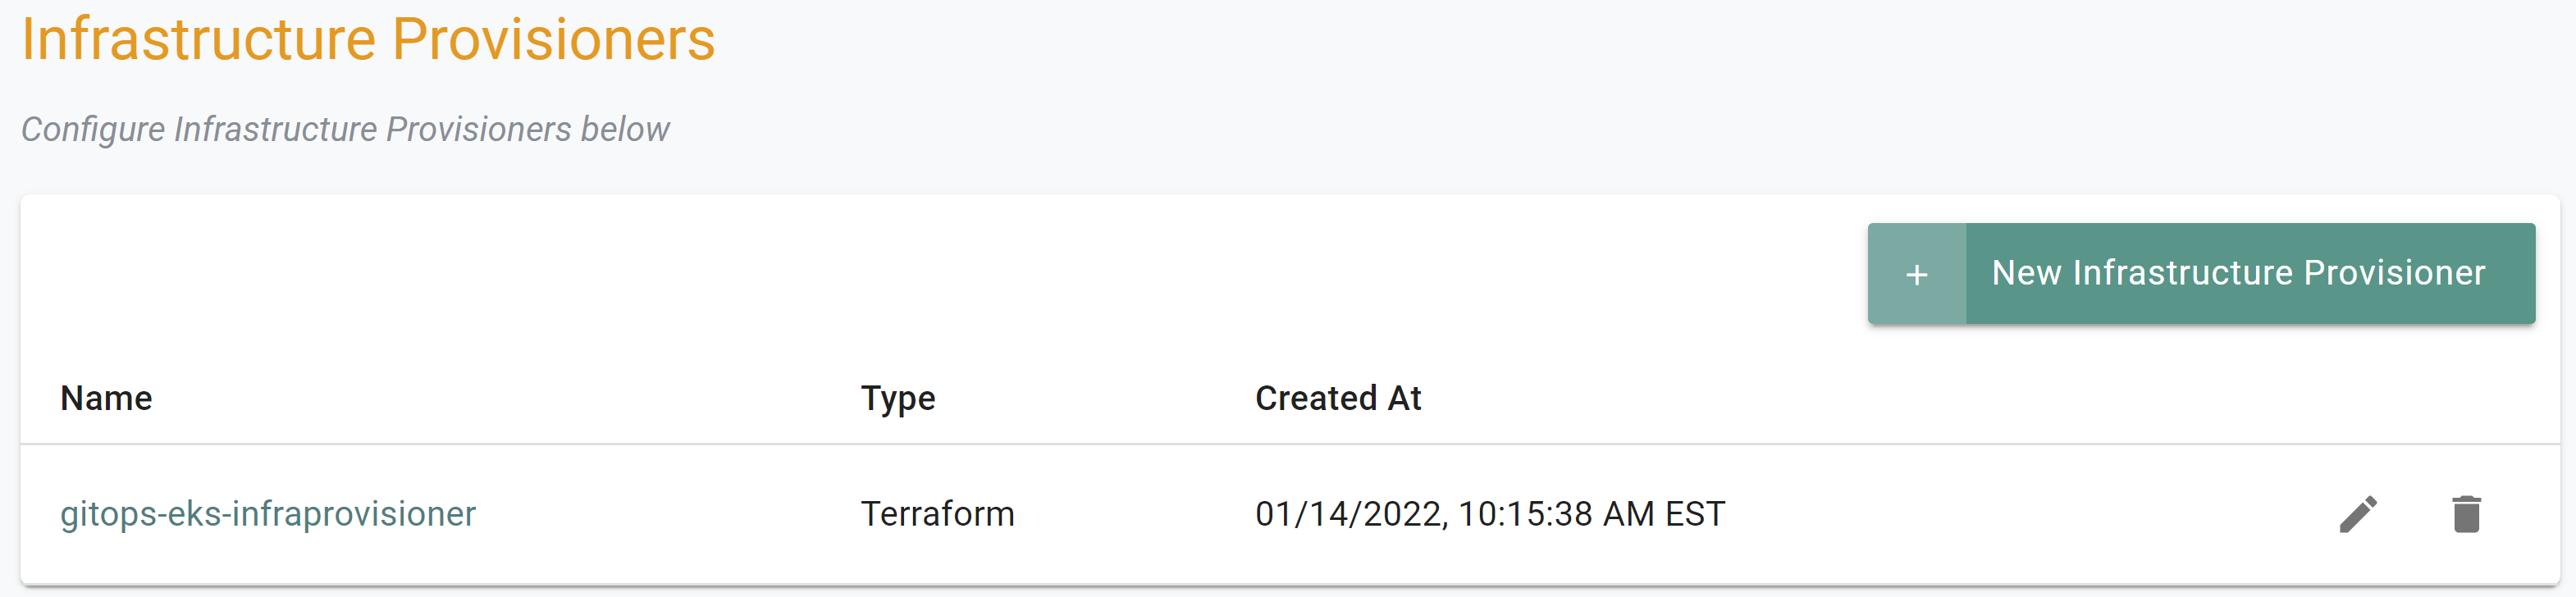
If you did not encounter any errors, you can optionally verify if everything was created correctly on the controller.
- Navigate to the "defaultproject" project in your Org
- Select GitOps -> Infrastructure Provisioners
- You should see a infra provisioner named "gitops-eks-infraprovisioner"
Next, we will create a repository, agent, pipeline and trigger using a single specification file named "pipeline.yaml".
- Open Terminal (on macOS/Linux) or Command Prompt (Windows) and navigate to the folder where you cloned the Git repository
- Navigate to the folder "
/getstarted/eks-gitops/specfiles" - Update the "pipeline.yaml" file with your GitHub repository endpoint and the Github token created previously
The following values will need to be updated.
- endpoint: https://github.com/timrafay/gitops.git
- username: git-user-name
- password: git-token
apiVersion: pipeline.rafay.dev/v2
kind: Pipeline
metadata:
  name: gitops-eks-pipeline
spec:
  edges: []
  stages:
  - name: cluster-action
    stageType: InfraProvisionerStage
    stageConfig:
      approval: null
      deployment: null
      onFailure: Stop
      workdloadTemplate: null
      infraProvisioner:
        infraProvisionerName: gitops-eks-infraprovisioner
        actionConfig:
          terraform:
            type: TerraformActionApply
            norefresh: false
            targets: []
            destroy: false
        config:
          terraform:
            version: 0.15.0
            inputVars: []
            tfvarsFile: ""
            envVars: null
            backendConfig: null
        gitRevision: main
        useWorkingDirFrom: ""
        persistWorkingDir: false
        agentNames:
        - gitops-eks-agent
    variables: []
    preConditions:
    - conditionType: EvaluateExpression
      config:
        parentname: ""
        parents: []
---
apiVersion: pipeline.rafay.dev/v2
kind: Trigger
metadata:
  name: gitops-eks-trigger
spec:
  triggerType: WebhookTrigger
  pipelineRef: gitops-eks-pipeline
  repositoryRef: gitops-eks-repo
  triggerConfig:
    webhook:
      configType: Github
  repositoryConfig:
    git:
      revision: main
      paths:
      - specfiles/
    helm: null
  variables: []
---
apiVersion: config.rafay.dev/v2
kind: Repository
metadata:
  name: gitops-eks-repo
spec:
  repositoryType: GitRepository
  endpoint: https://github.com/timrafay/eks-gitops.git
  insecure: false
  caCert: ""
  credentialType: UserPassCredential
  credentials:
    userPass:
      username: git-user-name
      password: git-token
  agentNames:
  - "gitops-eks-agent"
---
apiVersion: config.rafay.dev/v2
kind: Agent
metadata:
  name: gitops-eks-agent
spec:
  template:
    type: ClusterAgent
    clusterName: gitops-eks-cluster
- Type the command below
rctl apply -f pipeline.yaml
If you did not encounter any errors, you can optionally verify if everything was created correctly on the controller.
- Navigate to the "defaultproject" project in your Org
- Select GitOps -> Pipeline
- You should see a pipeline named "gitops-eks-pipeline"
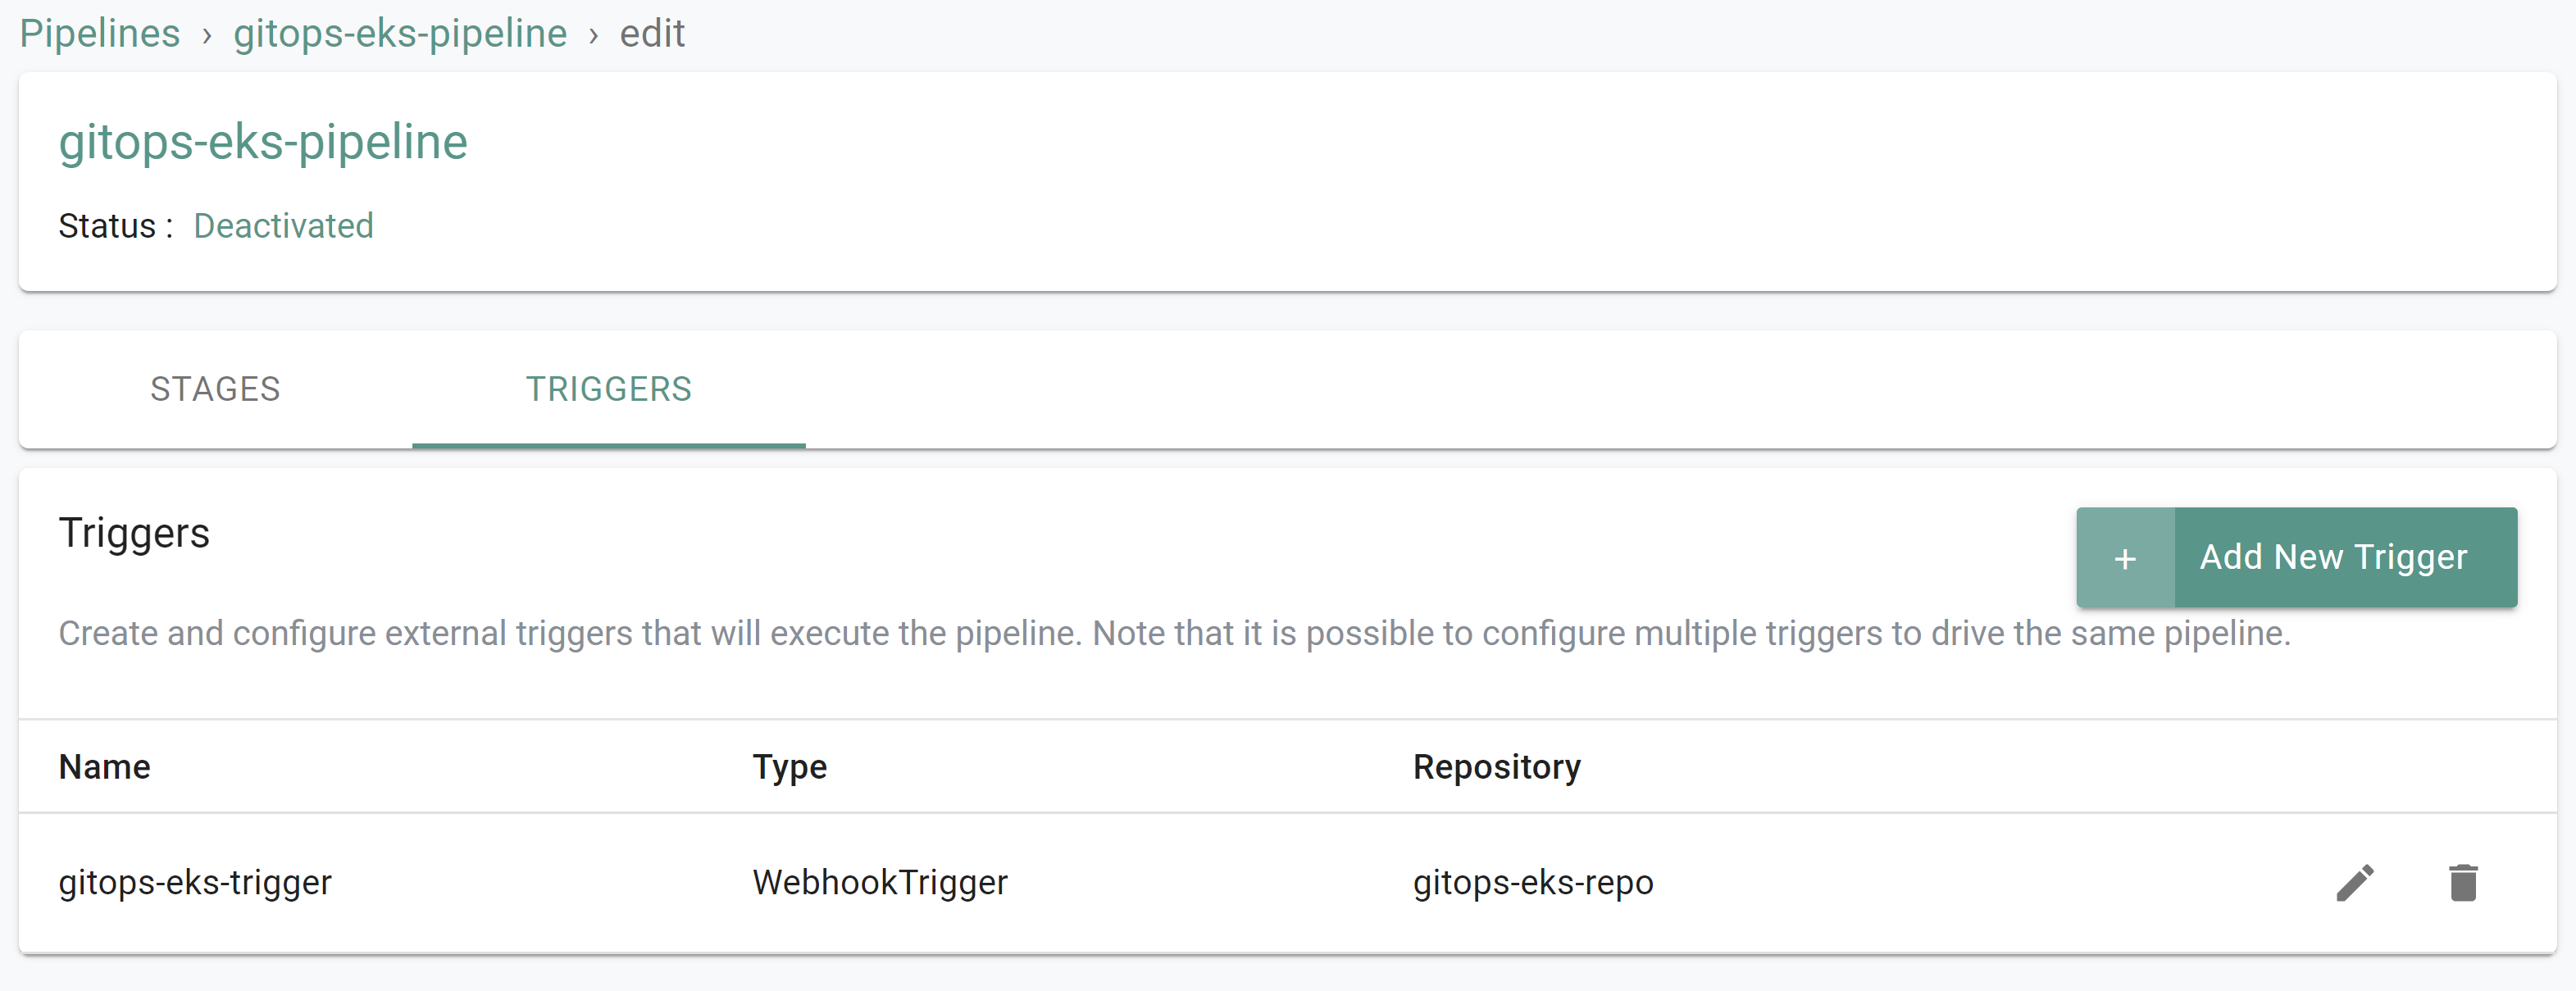
- Click on the "gitops-eks-pipeline" pipeline
- Click "Edit"
- Click "Triggers"
- You should see a trigger named "gitops-eks-trigger"
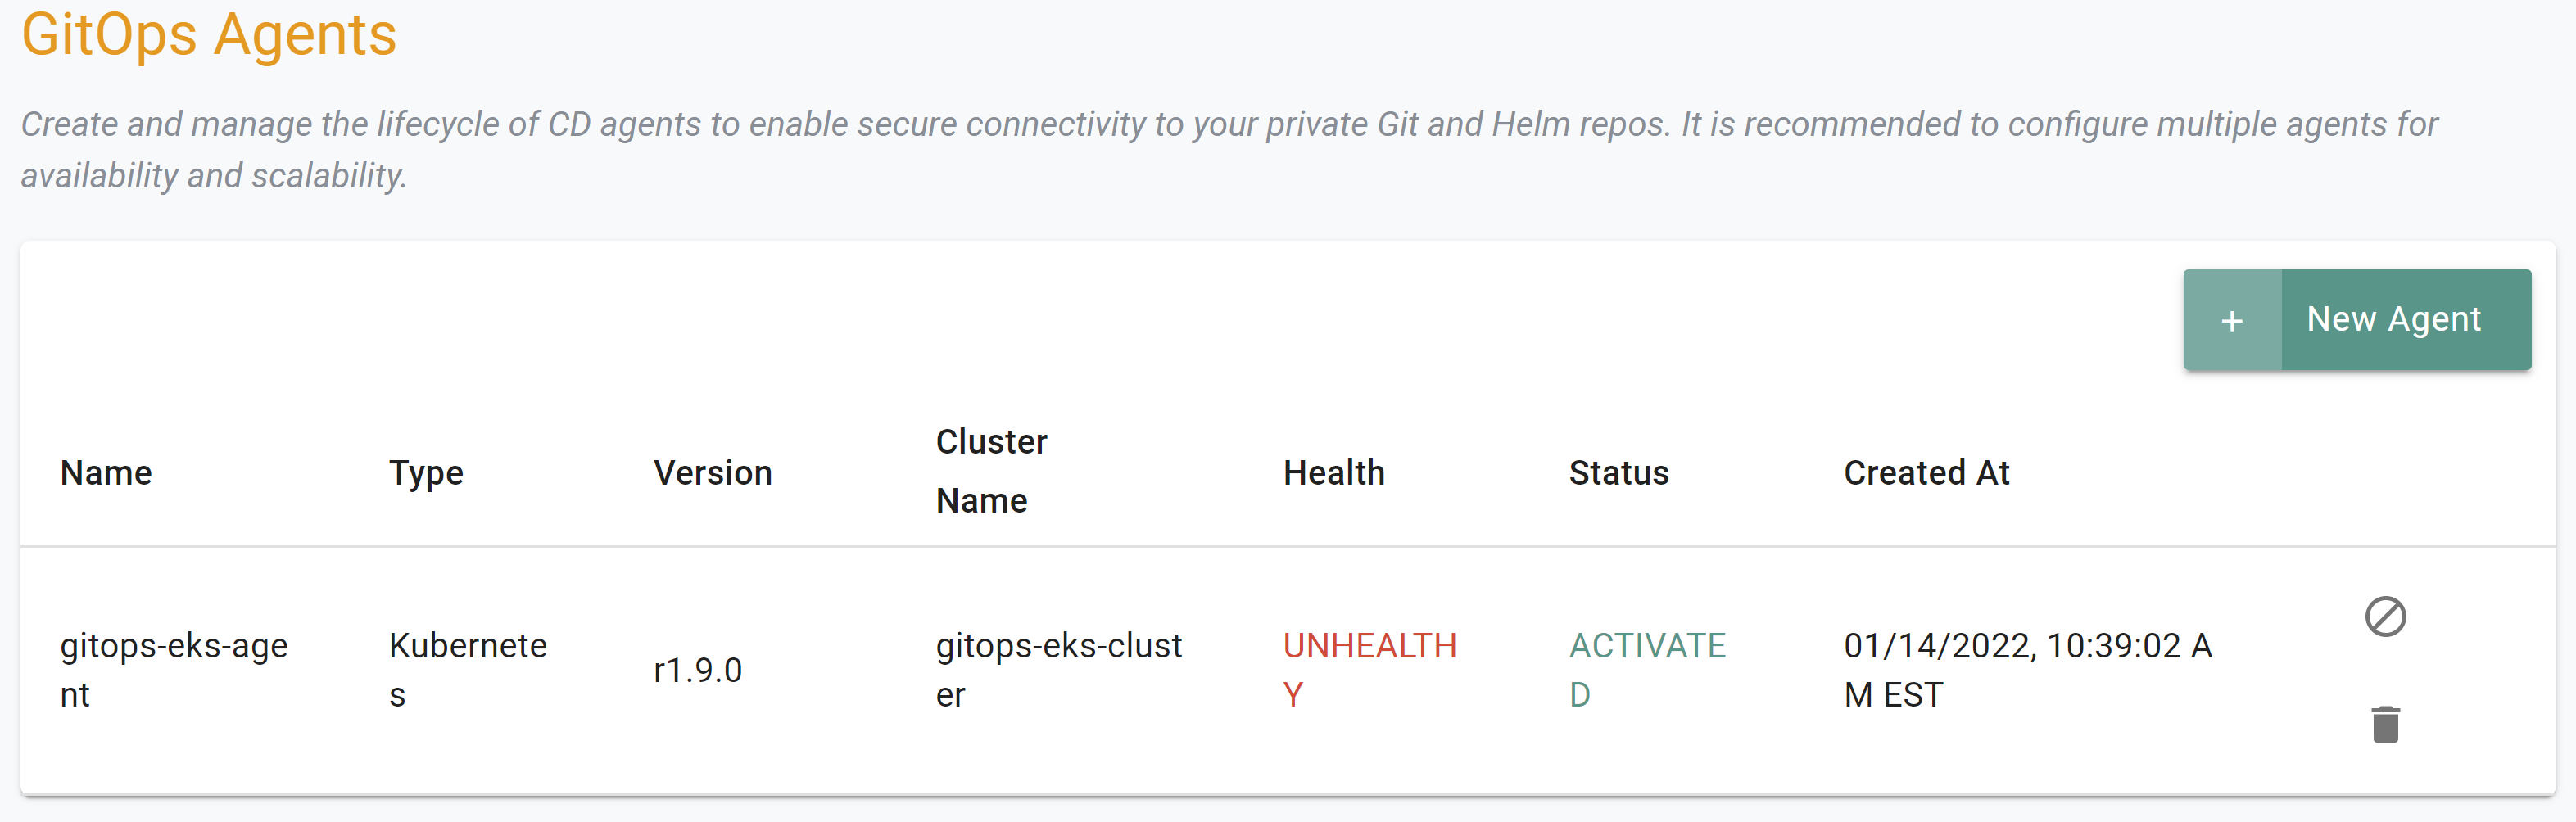
- Select GitOps -> GitOps Agents
- You should see a agent named "gitops-eks-agent"
- Select Integrations -> Repositories
- You should see a repository named "gitops-eks-repo"

Finally, we will activate the pipeline for use.
- Type the command below
rctl activate pipeline gitops-eks-pipeline
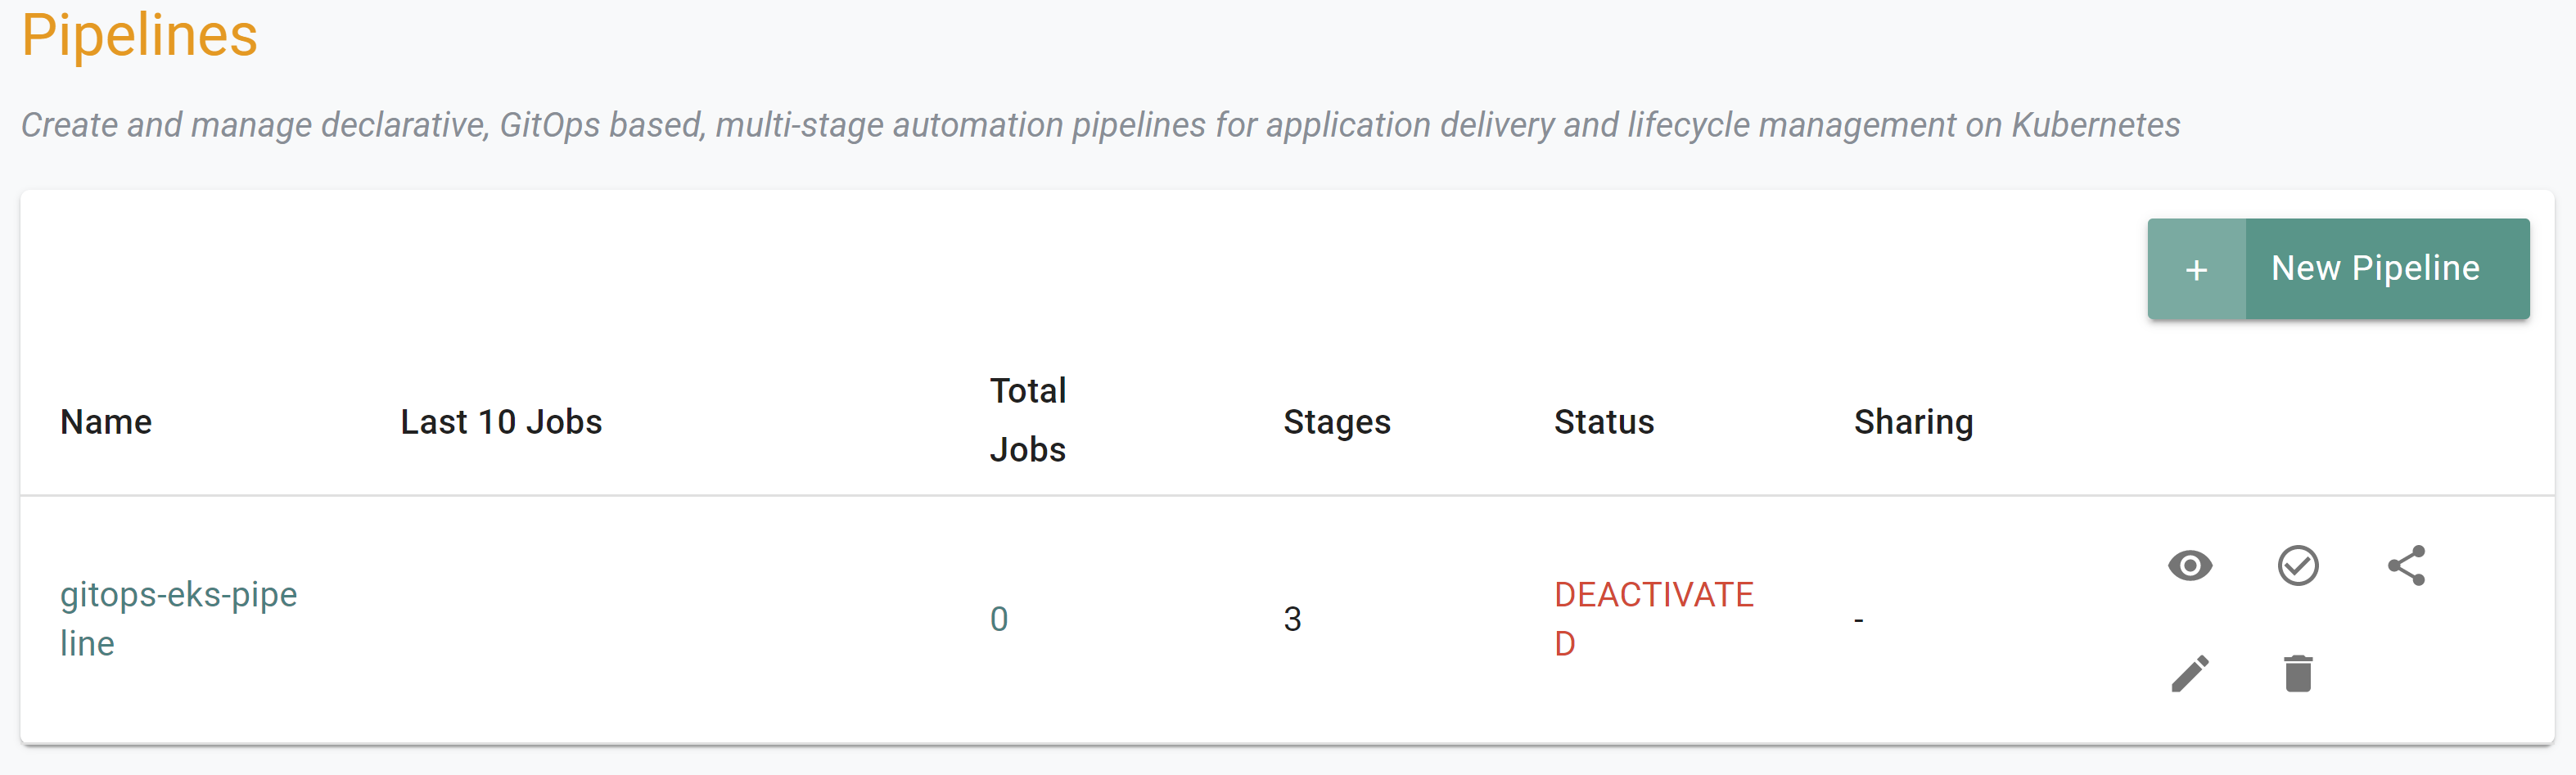
If you did not encounter any errors, you can optionally verify the pipeline was activated.
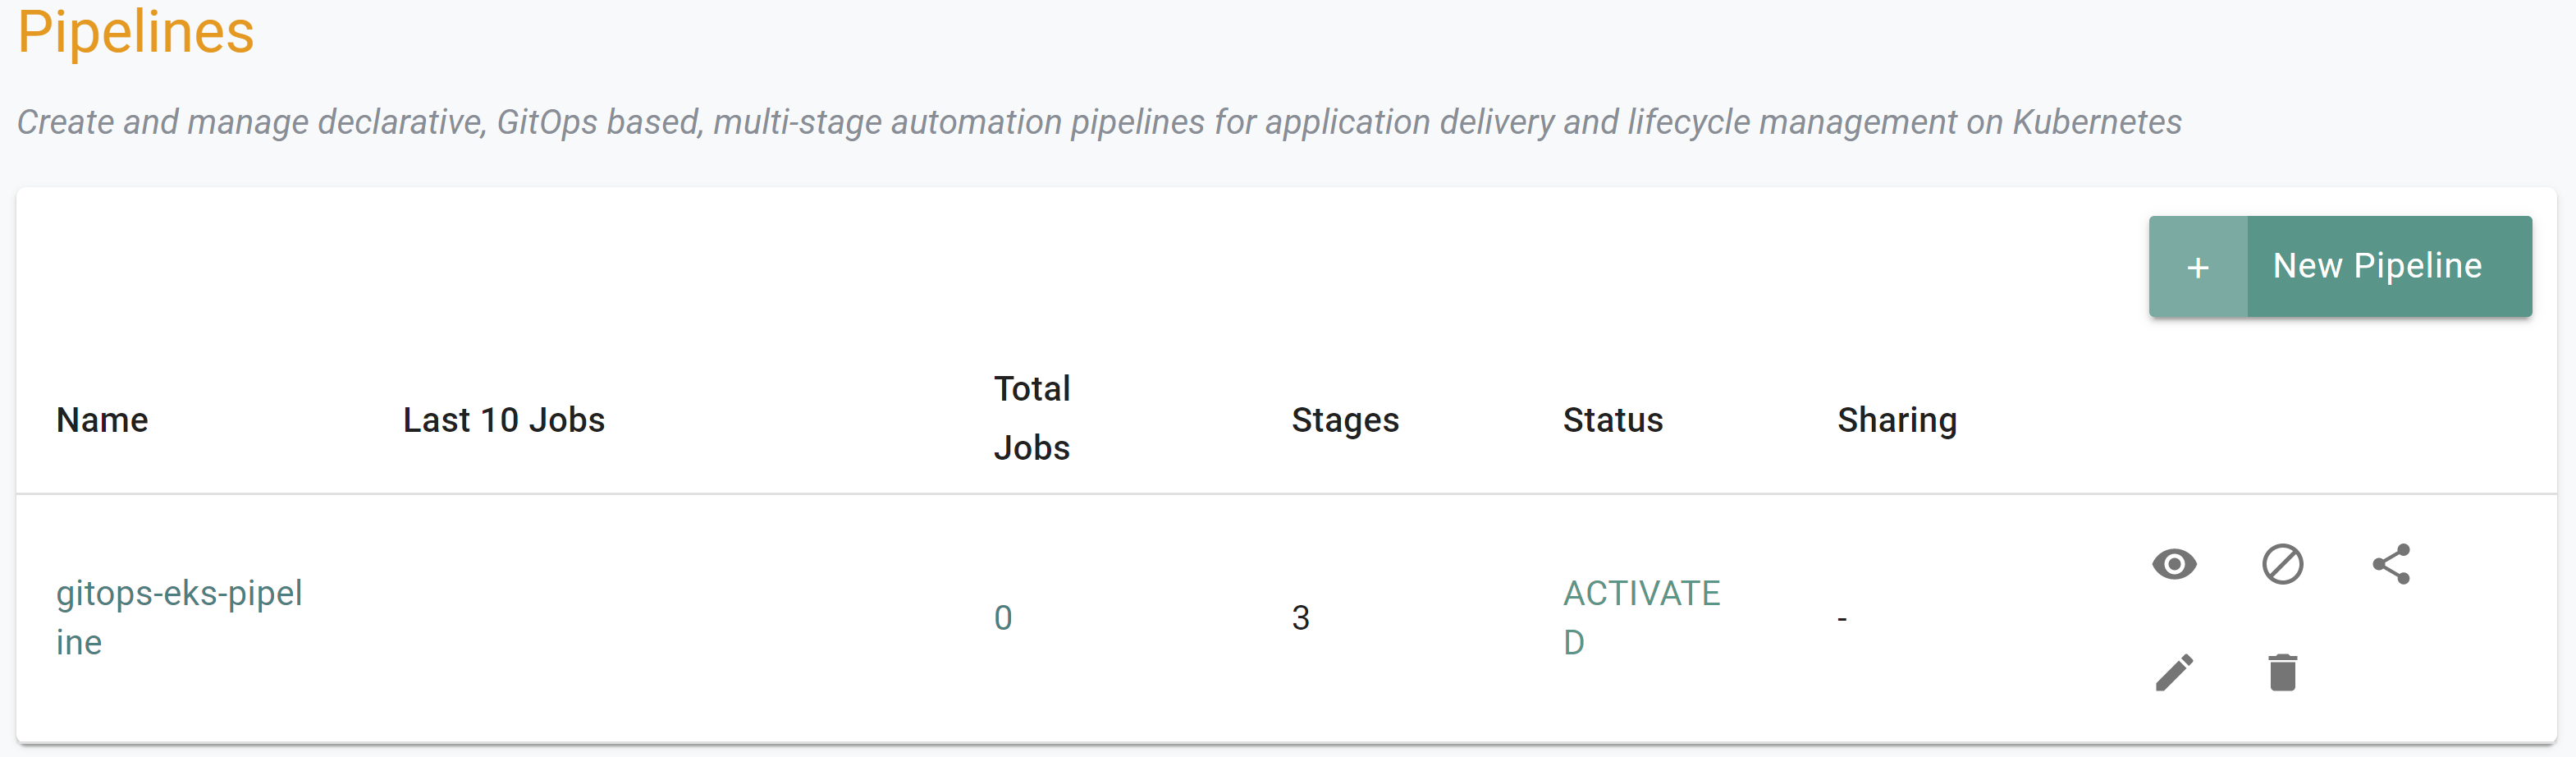
- Navigate to the "defaultproject" project in your Org
- Select GitOps -> Pipelines
- View the pipeline status to ensure it is activated
Step 4: GitHub Webhooks
In this step, you will configure your repository in GitHub to send webhooks to the pipeline trigger whenever an update is made on the repository.
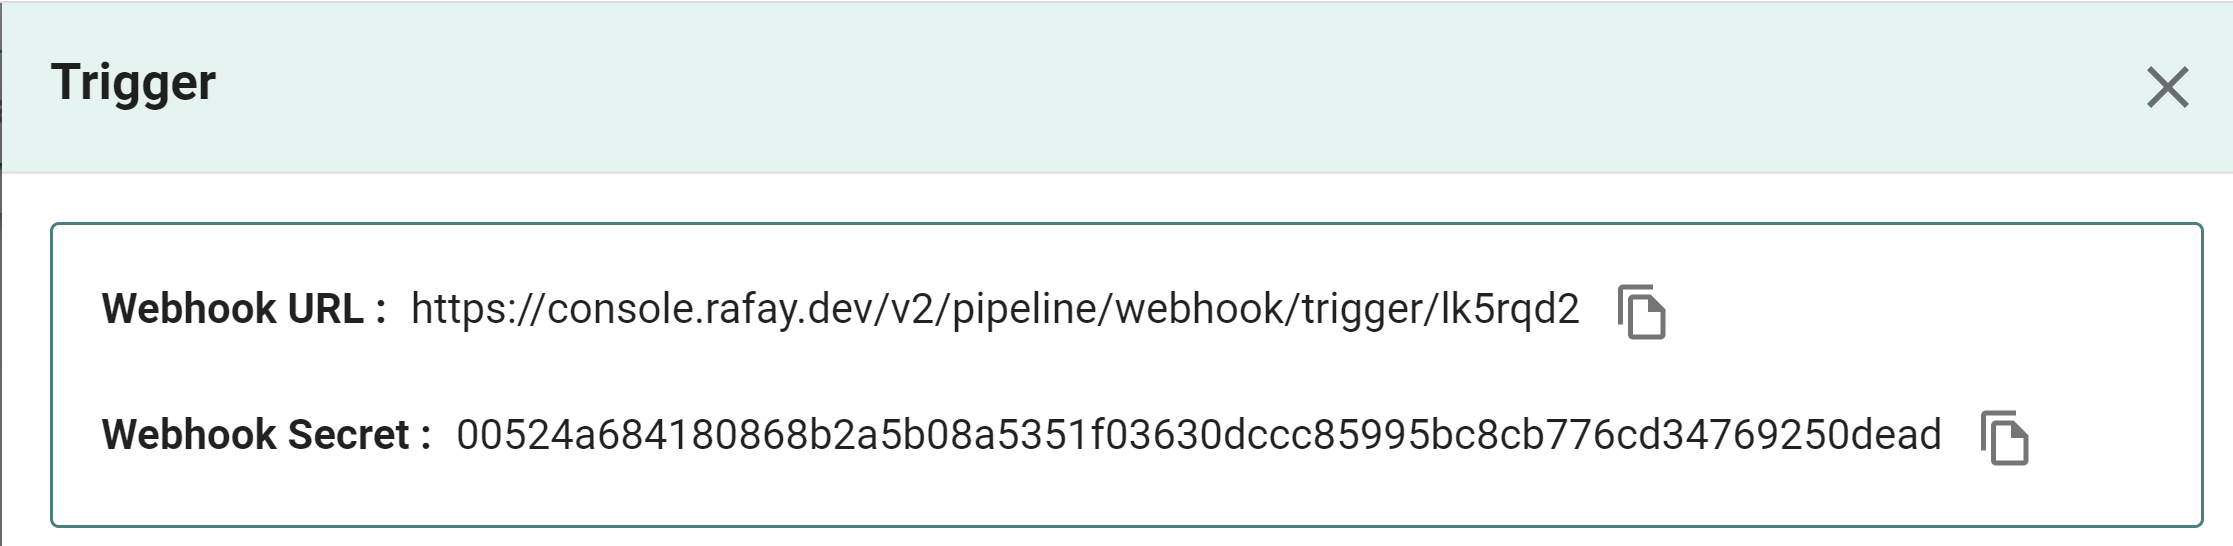
First, we must get the webhook and webhook secret from the trigger.
- Navigate to the "defaultproject" project in your Org
- Select GitOps -> Pipeline
- Click on the "gitops-eks-pipeline" pipeline
- Click "Edit"
- Click "Triggers"
- Edit the trigger to view the webhook information
- Copy and save the webhook and secret for later use
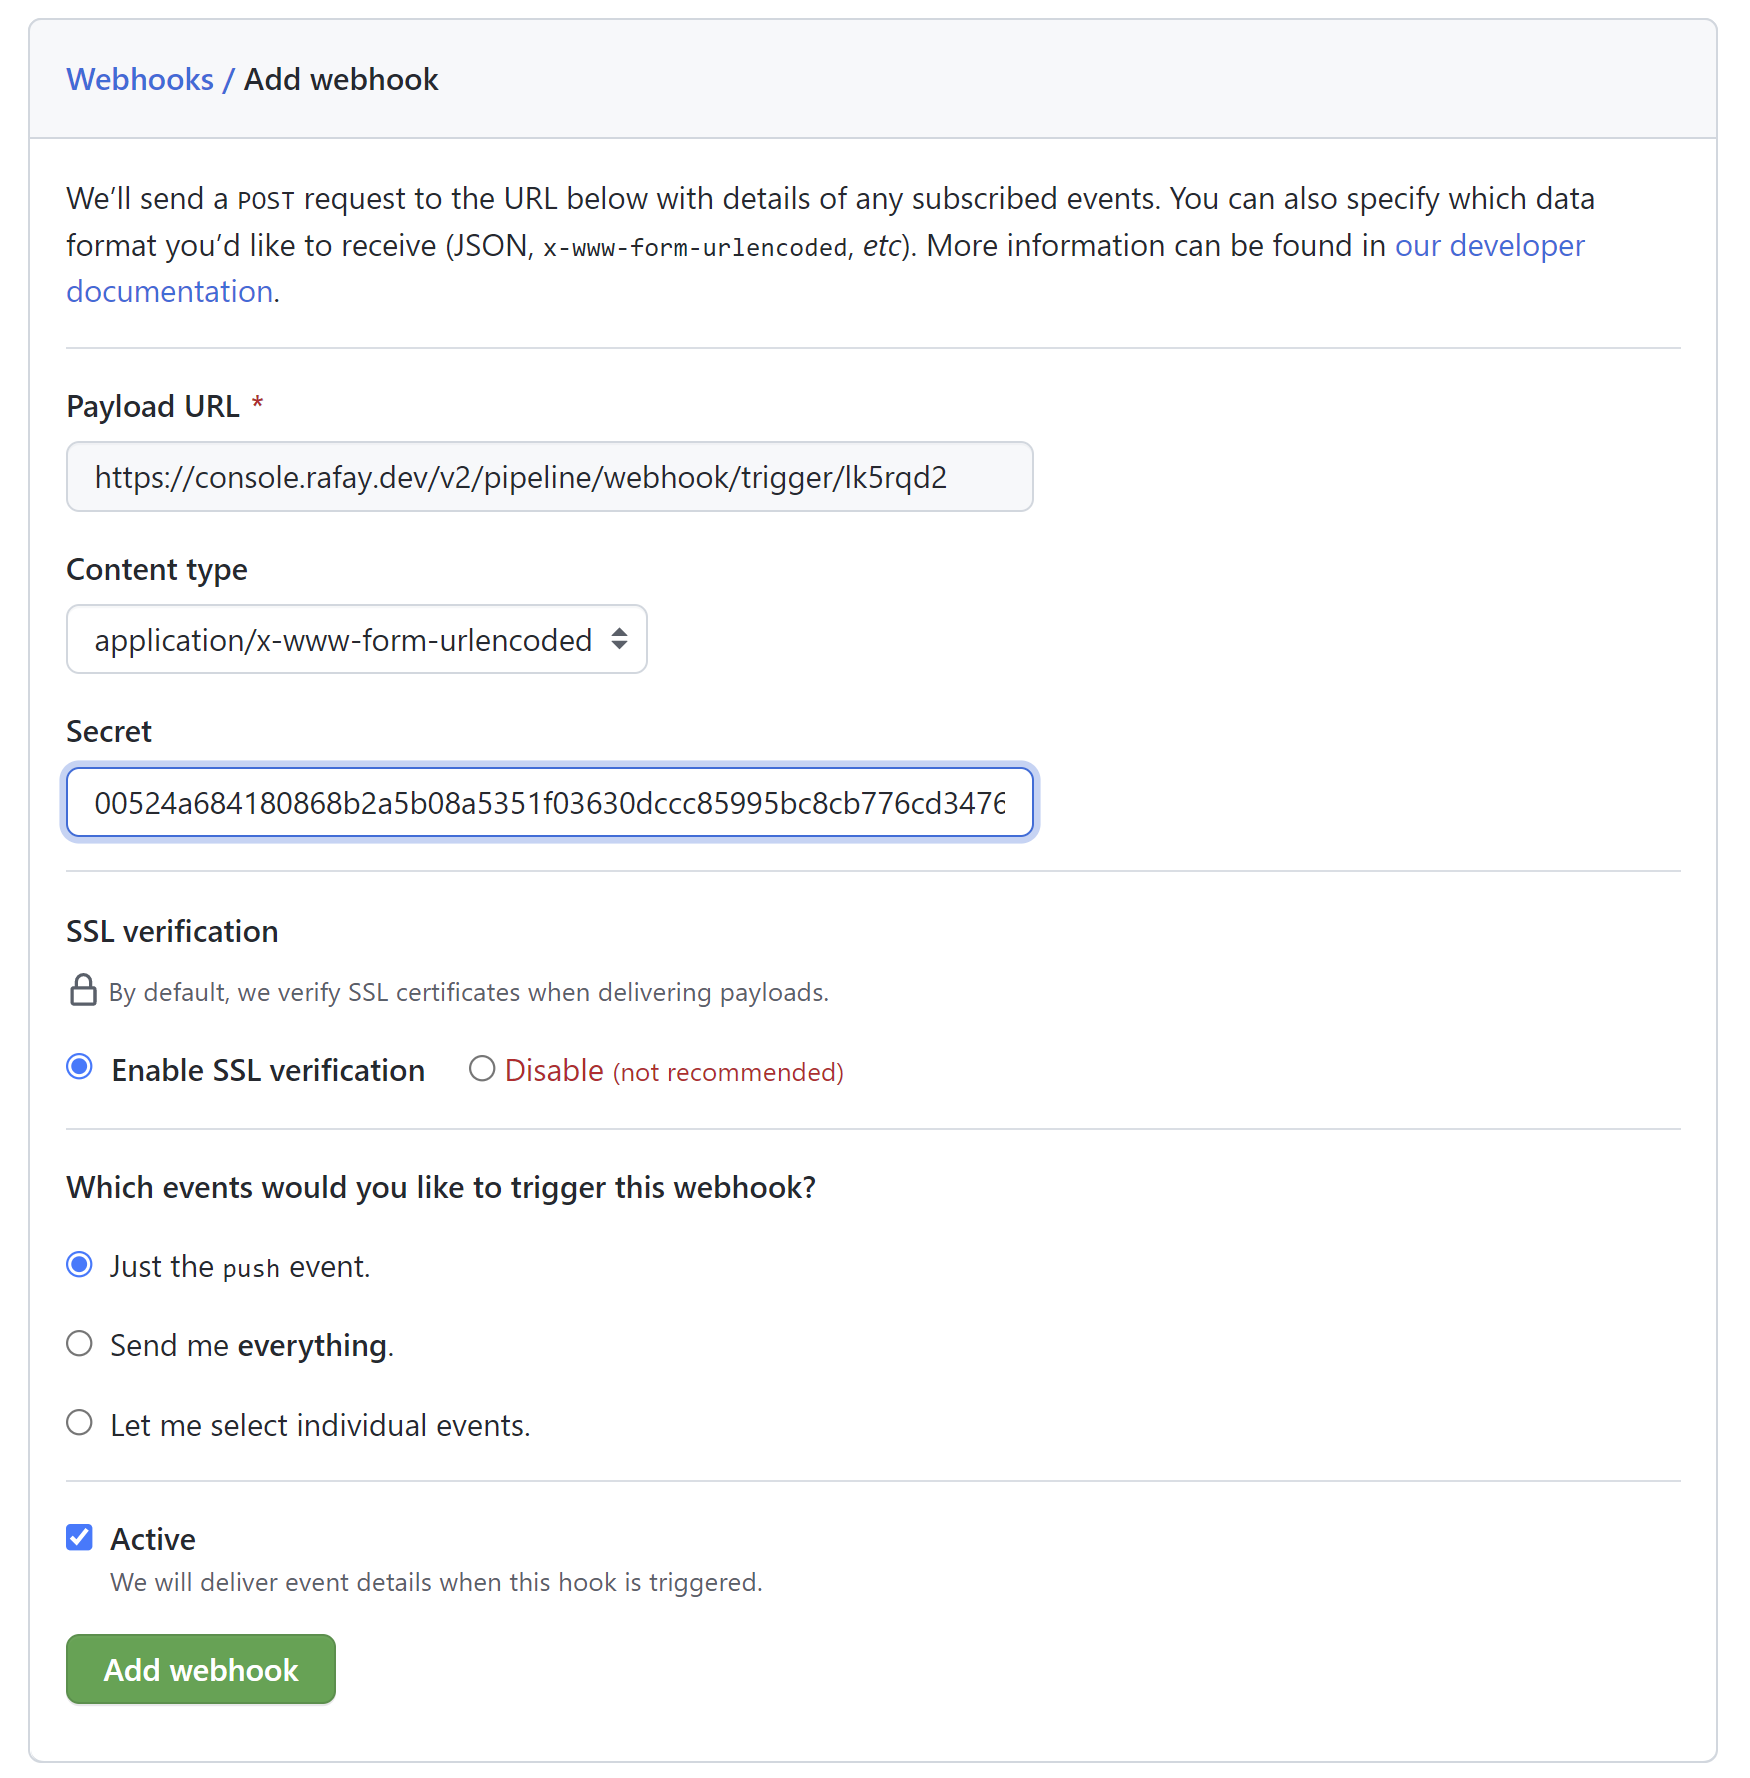
Next, we will configure the GitHub repository with the webhook information obtained in the previous step.
- Ensure you are logged into your GitHub.com account
- Go to the GitHub repository
- Click Settings -> Webhooks
- Click "Add Webhook"
- Enter the webhook URL and secret obtained in the previous step
- Click "Add webhook"
Recap
As of this step, you have created a GitOps pipeline tied to your GitHub repository. You are now ready to move onto the next step where you will use the pipeline to create and delete a cluster by adding and removing a spec file from the repository.